Today I went snap hunting.
Took a walk yesterday morning. Today I resumed work on the wallet.
This morning I sewed all the red tapes to the shingled pockets, then picked the stitching out again because the machine hadn't been adjusted properly.
Well, I only picked out the stitching of the pocket that I hadn't picked the basting out of yet.
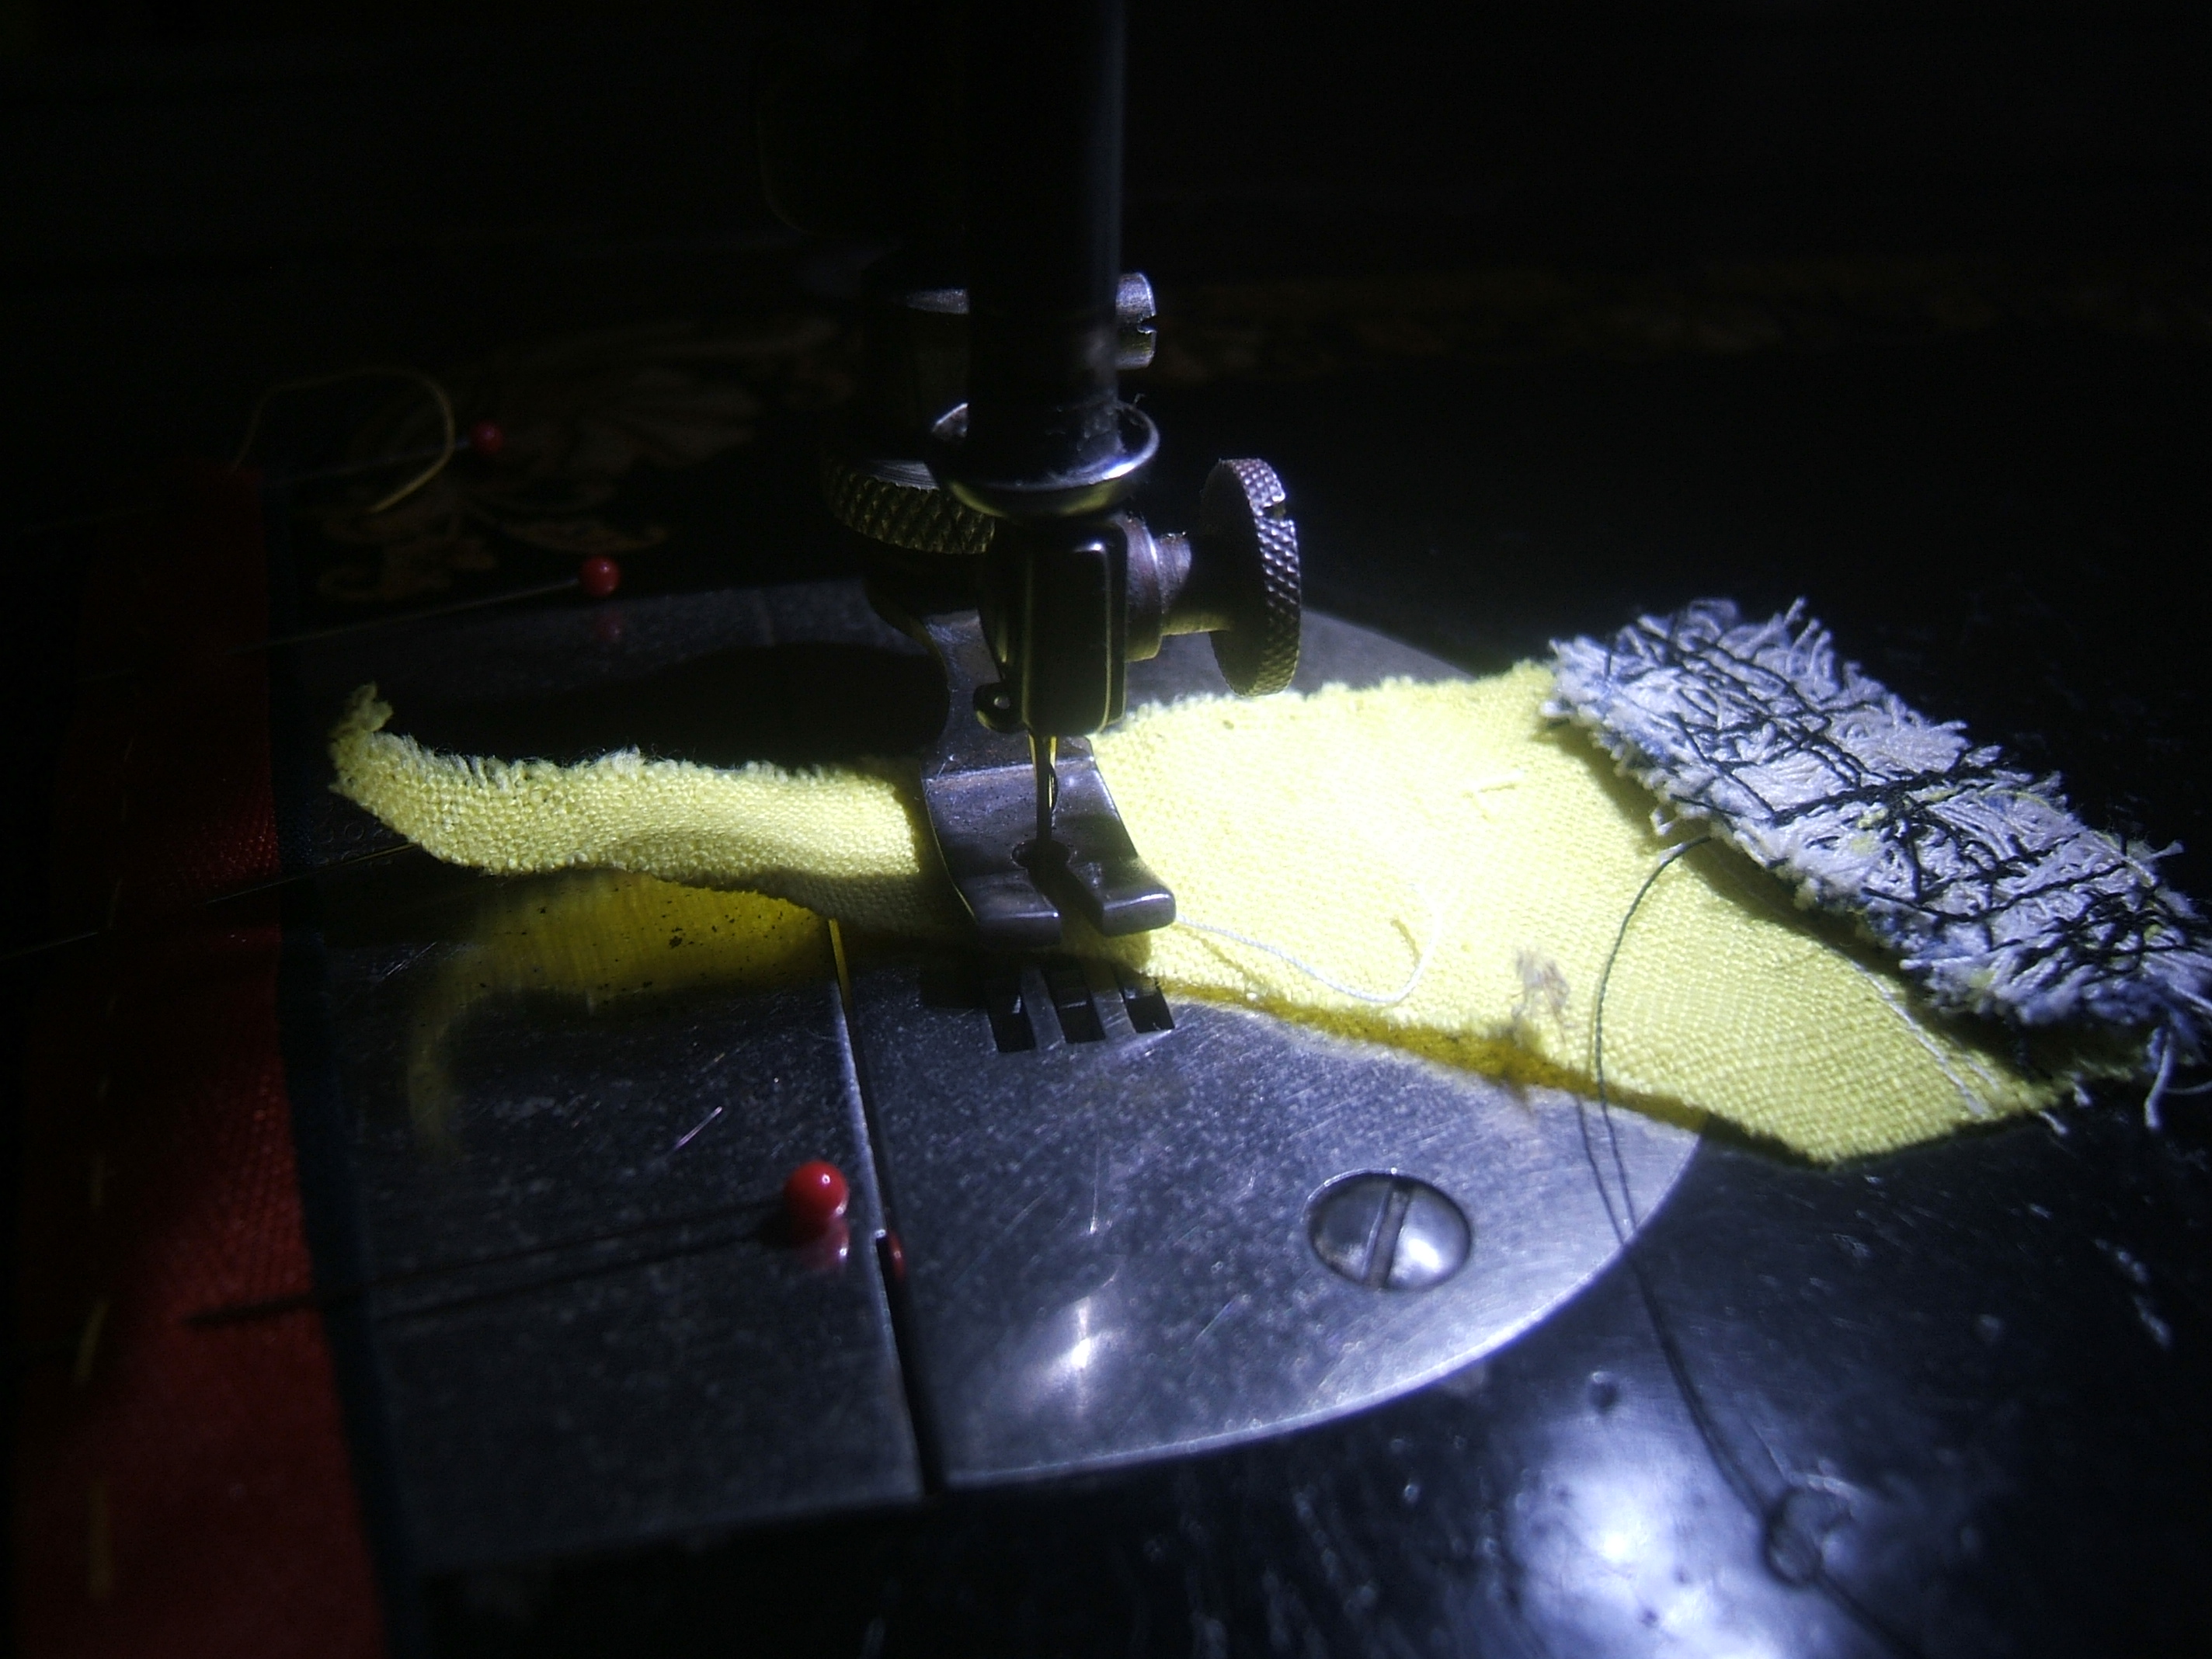
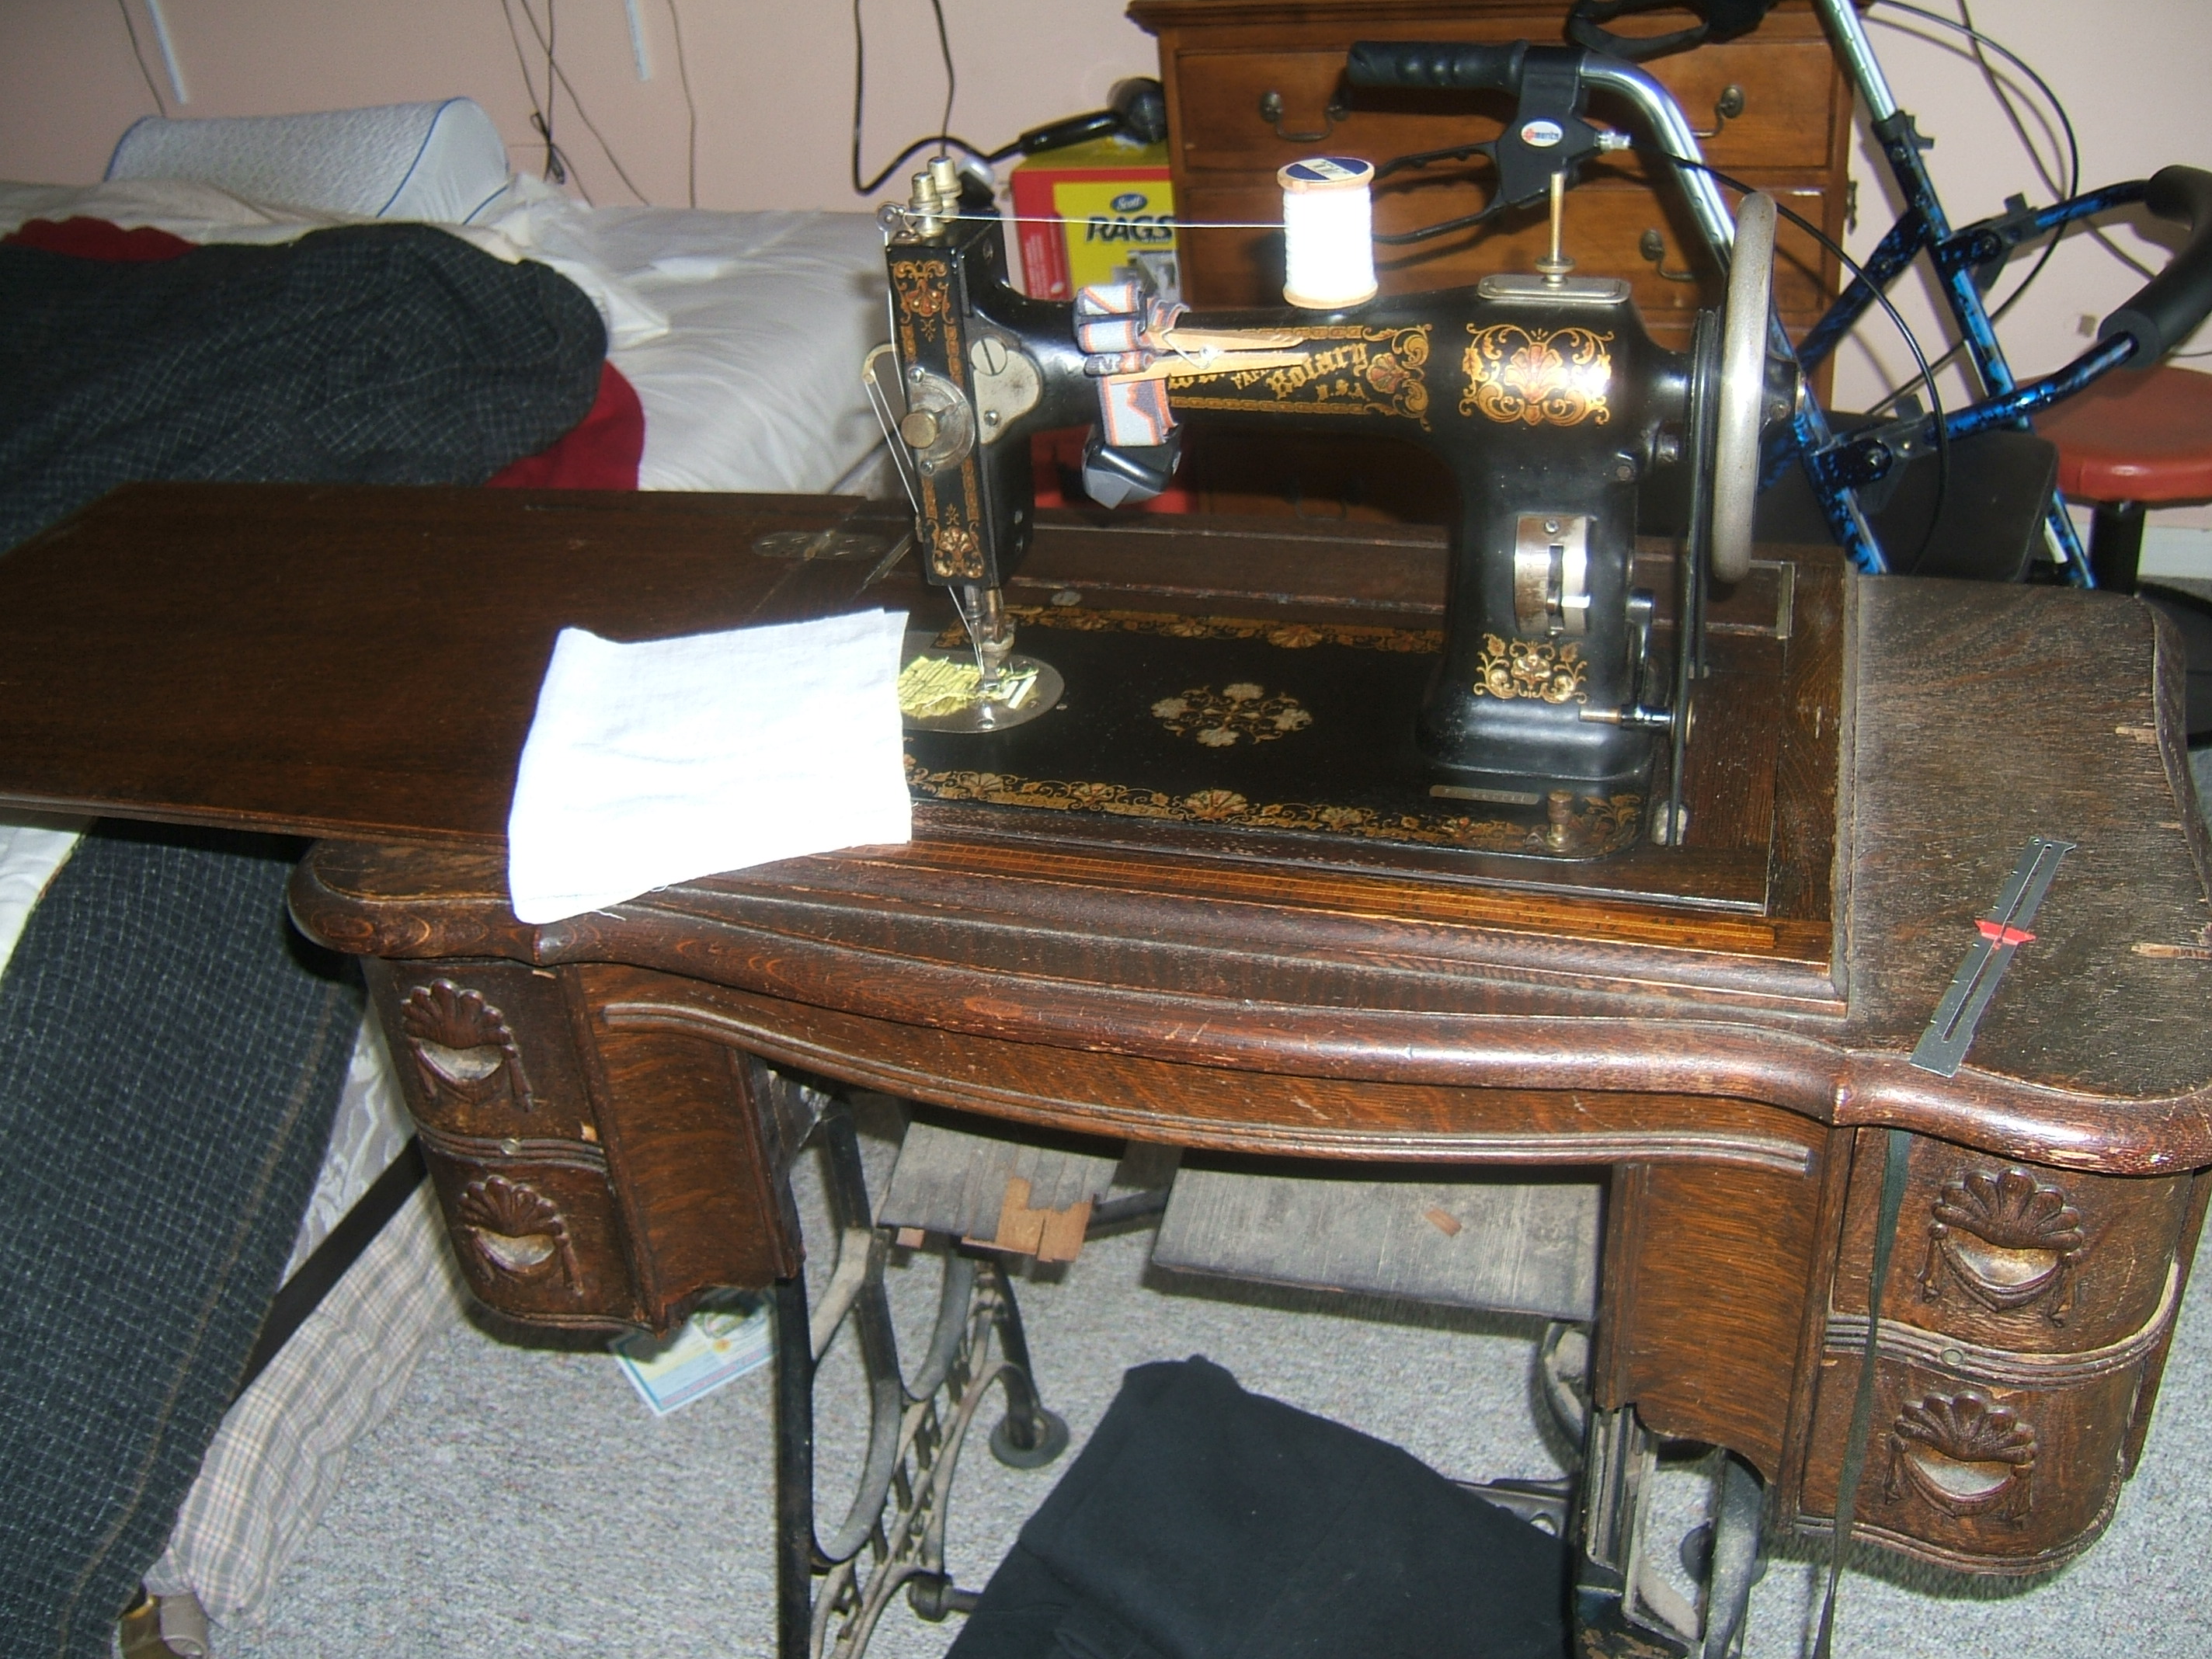
The scrap I keep under the needle of the White had gotten too thick for sewing broadcloth, so I found a scrap of yellow linen in the drawer and swapped.
Washed clothes, helped fetch the Tacoma from the Toyota dealer, did a little basting.
I finished basting the fourth pocket, folded the clothes that were on the rack where I wanted to put my chair, and adjusted the sewing machine. After fiddling a while, I noticed a shiny spot in the tension device — Duh! The thread is supposed to run over that.
Then several passes over the needle scrap getting the tension right.
⁂
I scrutinized each pocket on both sides when it came out from under the needle!
I rather reluctantly took out the basting; those gold flecks looked quite pretty with the red and black.
⁂
More than a year after the operation, I have realized that I no longer need to keep my prescription glasses on when I put my magnifying glasses on.
Not when working next to a table or chair with hand-sewing tools on it anyway. I expect to continue keeping my glasses on when reading ingredient lists in grocery stores.
Sweeping day in the sewing room. DH reminded me that I could use the indoor leaf blower to get spots that are out of reach. Now there's a tag that says "woven jersey" dangling in a partly dislodged spider web. I'm going to leave it until I bring the ladder in to replace the small patch from the cycling-knickers pattern, and the other two yellow tags that I have temporarily stashed on top of my cannister of flash drives.
Basted ribbons to my wallet in the morning; plan to do more hand sewing in the afternoon.
I forgot to plug the light in after unplugging my iron while working on my wallet and couldn't find the outlet when I came back to the sewing room after dark. I can usually feel the round hole and anchor the ground connector, after which simply rocking the plug connects the live wires, but today the outlet wasn't having any. DH came in with a flashlight just before I thought of using the optical mouse as a flashlight.
There doesn't appear to be a thimble in the drawer of the White. Now I have an excuse to buy a new one if I see one that I like.
Never mind that I found one that fits me nicely in the thimble box in the embroidery-gig backpack, and it seems unlikely that I'll ever get to do the gig again, what with the church dying.
The thimble sticks firmly to the magnetic pin cushion, and I think I'll just leave it there.
I like the way it fits; it's small and light and covers only where I need it. And just my size; it's barely tight enough to stay on and not rattle around.
⁂
And the magnet is strong enough to jerk it off my finger when I want to put it down.
No brand name on it, just "8 China".
I must check to see whether the light bulbs in here really are incandescent. Though the light seems quite bright, the eye of the needle doesn't quite focus. That sort of thing can happen when there are holes in the spectrum.
Things usually turn up the instant you no longer want them, but this morning I decided that I was going to have to look for my spool of yellow basting thread. It was in the second place I looked: I had dropped it into the drawer where I keep my magnetic pincushion. Which is, at the moment, on the ironing board, where I basted my wallet yesterday.
I wanted to compare my Caradice wallet to the current iteration. Months ago I'd dumped a blanket on the pattern trunk intending to resume hemming it in a few hours, and there it still sat. I carried it to the rocking chair; it will be my next project.
And there is good light coming in the living-room patio door, but I have yet again to do some unpicking on the wallet, so the light may not be good when I get the time to resume basting.
⁂
Today's light is gone, but the light probably will be good when I get time to sew — not before tomorrow afternoon.
I noticed, upon seeing the Caradice wallet for the first time in years, that my plans for the coin purse have evolved into a miniature of it.
The wallet is done, dunnity done done done!
So that's why there's an appointment card in the snack bag of essential tools I keep in the arm of the futon!
I needed to slip something inside the pocket I'm darning to keep the stitches in the top layer only, and there it was.
Details when I have a wool underjersey to wear tomorrow.
⁂
Jersey hung in closet.
I suspect that the appointment card had silk thread wound around it when I put it into the snack bag. The kit wasn't assembled on purpose, but developed from my habit of collecting the tools currently in use in a snack bag. Which is probably the best way to decide which tools to put in.
⁂
Now I've put the tools away, and had another look for the alpaca tights. In the blanket box, I found a machine-knit hat Dave would like to wear, he found a snag, I had yet another look for the roll of crochet hooks I used to keep in the wooden cigar box. (Looks again: still nuttin' but tatting stuff.) I found an afghan hook in the knitting-supply box, too coarse, but there's a package of upholstery needles. Threaded snag into upholstery needle, pushed the eye between the layers of the hat, done! I'd forgotten to turn off the light by the rocking chair when I finished darning — but I'd put my magnifiers away. I have a couple of pairs that are not in a snack bag in the other arm of the futon.
The tights have to be in the cedar chest, but I'm not going to move that printer any time soon. It's too late at night to darn them anyway.
I just realized where the picture I took of the wallet went: I'd clicked on "history" while uploading it from the camera, noted that it was the correct subfolder, but hadn't noted that it was on the back-up drive.
To the story:
It's going to be very cold tomorrow, so I decided to darn the small hole in my alpaca tights so I could wear them. They were not in either of the darning baskets, maybe on the to-do hook?
I found a wool jersey and reflected that I need that more than I need the tights. Inspection showed only two small holes where the back pockets were tearing away from the side seams — and in the pocket of the jersey was a cough-drop box with a sticker that said "wool jersey". In the box were darning supplies, including a duplicate of the newly-found #8 "china" thimble that I like so much.
There was a "pill pouch" filled with skeins of Medici just long enough to thread into a needle. I emptied it, except for putting a threaded needle back in.
I noted, while baseball-stitching the first runner with Medici , that when I'd cut out the exhausted elastic I'd left a stub long enough to sew fresh elastic to next spring, when I'll want to wear the jersey without two other jerseys over it.
When I turned to the larger hole, I found that on this end the elastic was much too short to sew anything to, and I might not have wanted to darn around it anyhow.
I unpicked just enough side seam to release the elastic and sewed in a short piece of polyester twill tape. That was a small adventure in itself, which led to transferring a bunch of Wright's tapes from the misc.-tape box to the synthetic-tape box.
There was some silk-tights silk on a buttonhole-silk spool in the "wool jersey" box, but I used a piece from an appointment card in a snack bag in the futon arm.
Then I re-sewed the seam with reclaimed silk, and buttonhole-stitched the hole and runner with Medici, which required me to push the needle through the fabric and continue on the other side at one point. This is where the appointment card came into play.
Today I put priority on getting the blanket off the futon. After moving it out of my way a few times, I had to open it up completely to find where I'd left off.
So I basted the last four or five inches of the hem, then flipped the blanket and basted the other one too. On this end, the cut had been halfway between dotted lines, so I folded it to make the squares square, and that pretty much kept the fold halfway between the lines.
Next to set up the zig-zag machine. I have only one spool of black #50 silk left, and I don't think it will do even one hem. Do I finish with gray thread, finish with #100+ thread, or put the project on hold until I can order more thread?
Or do the whole job with gray and say "I meant to do that."?
I could use that blanket on the bed!
I decided to use up the black silk — though it's obvious that the amount left won't even do one pass on one end, it would be *so aggravating to wait for the new thread and find that I'd had enough!
Before threading the Necchi, I rounded up all the silk thread, and that led to visiting the Superior website, and there went the morning. I'd intended to buy some "titanium coated" (coated with titanium nitride) needles while I was at it, but a negligible proportion of their customers aren't making patchwork quilts — the seam-sewing thread is called MasterPiece, the heavy-duty thread is "quilting" and so on — so there are no Superior ball-point or stretch needles. I'm tempted to get a packet of the very fine needles anyway.
What do you know — there was enough thread to do the job. But now I think the spool really is on its last wrap, because there is naked spool at both ends. And spool shows thorough between two of the wraps.
hem gray blanket
It helped that when I was setting up to do the first pass, I looked at the hem and decided that the basting was an adequate first pass, and stitched over the edge the first time through. The first pass is just to hold it in place while the actual hemming is done, after all, and a narrow hem with permanent basting isn't going to move around. I think the flannel blanket hems were all pinned instead of basted.
Still need to order thread. About fifty-four dollars worth. I'm not about to put my debit-card number into an easily-hacked database, so I have no idea how I'm going to pay. The Tour des Lakes had a print-and-fill-out option that I could send a check with, but those are getting rare on business sites.
The website has pages on shipping etc., but no explanation of how one pays. I guess I'll just place the order, then cancel if there is no way to pay for it.
Yesterday I washed one of the three yellowed pillowcases. Well, Sunday and yesterday, since I soaked the hot whites overnight. Today I tore a sixteen-inch sweat rag out of it and tore the scraps into skillet wipes. Perhaps I should tear up the other two before washing them, so that the tears don't propagate.
Then I began darning the run in one of my pairs of silk tights. The runner is longer than I thought, and I'm not half done at nap time.
I wish I could buy thicker silk tights. Might as well wish wool tights were available while I'm at it. And spun-silk T-shirts. And wool T-shirts.
Resumed darning, at the far end so I wouldn't feel that the run is getting longer while I work on it. Despite multiple waxings, the thread snarled and tangled so that I realized that I need to wet and dry all the salvaged thread.
I usually hold a kinked thread under the high arching kitchen faucet (and why were those invented so late? They have been possible ever since the invention of valves.) so that the running water can help to straighten it, but all the remaining pieces are a couple of yards long, so I let the water run over my fingers and pulled the thread through my fingers. Belatedly, I realized that I could have used a small bowl of water.
Then I pulled it through a pinch of hand towel a few times, then took it out to the garage and blew air from the compressor on it. I feared that wind would tangle it, but a narrow jet of wind pulls it out straight. The last of the four threads is so long that it was hard to carry it out to the garage without dragging it on the floor, and holding it by the middle didn't blow the ends.
After drying, I wound each thread on an appointment card and secured the end in a snip cut into the card.
I really should have started with the very short runner in the other tights; I'd have had tights to wear weeks ago.
I've draped a pair of polyester tights over the rocking chair. A couple of inches of baseball stitch should repair the hole in it. The other pair of polyester tights is warmer, so I haven't been in a rush — but I would like to get it off the to-do list.
⁂
I'm definitely going to have to take the wallet apart and do it over. But not until after I've processed the pictures taken the first time through, and after I've taken pictures of the three wallets in the pattern trunk. (Well, they are on the ironing board at the moment.)
Today I threw a couple of pillowcases and a sheet into the bin to be washed tomorrow. Removing the case on the body pillow revealed a long rip in the tick, so I re-stitched the seam with 30/6 Cordonnet. After fiddling around a bit — I started out with baseball stitch — I held the case with one hand to stretch the edges straight, away from the stuffing, and close to one another while I overcast the edges together. Once in while I'd take two stitches in the same place, and pass the needle through the second loop once or twice before pulling it tight, which tied a knot and will limit the distance it can unravel if the thread breaks. I secured the end by working a few buttonhole stitches, then running the thread under the tick.
The madras I made the body-pillow case from is wonderfully soft. It's a pity that I don't make shirts any more, because I have more madras in prettier colors.
My goal for this week is to wear my silk gown next Sunday. To this end, I have begun picking out the hem of the under-dress that is two inches too long.
Yesterday I picked some more, and noticed that neither the stitches nor the fold were leaving the slightest trace, so I rubbed a wash-out marker on the fold near one seam.
This morning I worked red bar tacks to mark the backs of my new brown knee hose, then finished picking out the hem.
Measuring by the mark on the fold, I calculate that I want to fold the hem up to meet a line drawn eight inches from the edge. It happens that there is a card already cut to eight inches in the drawer under the Necchi; I forget why, but do remember thinking that it might come in handy again.
And at the last minute, I remembered that I want the line on the wrong side of the fabric!
Which revealed a line of lint in the fold. I was over halfway through marking before I realized that I should have been brushing the lint off as I went along, so I had to rotate the slip an extra time.
And so to pin — or maybe lunch and a nap.
⁂
Lunch it was, but I found time to finish the job in the afternoon. Only Wednesday, and I can wear the silk gown. Surely I can darn an inch and a half of runner in three days, even if I go riding on Friday, and wear silk tights under it.
darn run on other silk tights
I began by working a patch of interlocking buttonhole stitch — "point de Venise darning" — well beyond the end of the runner, then baseball stitched the run. I tied off with another row of buttonhole stitch.
hole in poly under-tights
I decided to begin the morning by getting the black tights with a small hole off the rocking chair. Baseball stitching the broken seam wouldn't take long. Of course it turned out that the seam was weak for inches on each side of the hole, and I ended up putting a more work into it than the tights were worth — particularly when one considers that it is sure to give way on the other side before too long.
This morning I put black bar tacks on the backs of the white gloves I bought at Stock and Field last Saturday. I've been calling this style "mystery fiber" ever since "fifty-cent gloves" became ridiculous, but these had a contents tag: 89% acrylic, 10% polyester, 2% spandex.
It was attached with a single bar tack, clearly intended to be easy to remove. Sure beats the fused-to-the-fabric tags on "tagless" clothing.
They were marked ".99" and were on clearance at .78: not much more than when they were two for a dollar — less, if you consider that I usually didn't want the other pair in the package.
There were no yellow gloves in the display, but I have three yellow pairs; one is thick, and the other two aren't much worn. But all three have the ugly, useless, and expensive conductive fingertips that were in style a few years ago.
I guess I should call the style "cheap stretch gloves", though that isn't as specific as I would like.
A few days ago I pulled the sheet blank off the bolt of muslin, yesterday I pressed creases in both ends and pinned one, today I finished the job and put the new sheet into the linen closet. The hardest part was folding it — ten feet wide and three yards long, and stiff.
patch flannel nightshirt
Sometime
in there, I patched a hole in a flannel nightshirt
I sometimes put on over my clothes to keep warm in
the evenings. Being used only at the
computer, it wore through in the back.
I didn't go very deep into the flannel-scraps shoebox before I found a scrap of the right size and shape that was in the right position when matched to the plaid, but the color is much brighter, so the patch isn't exactly inconspicuous.
The worn fabric had stretched, but the plaid lines are close enough together to make it fairly easy to ease in when pinning.
Iron not used. I basted the turn-under, then basted the patch on after pinning.
⁂
Pocket elastic in ragged wool
jersey
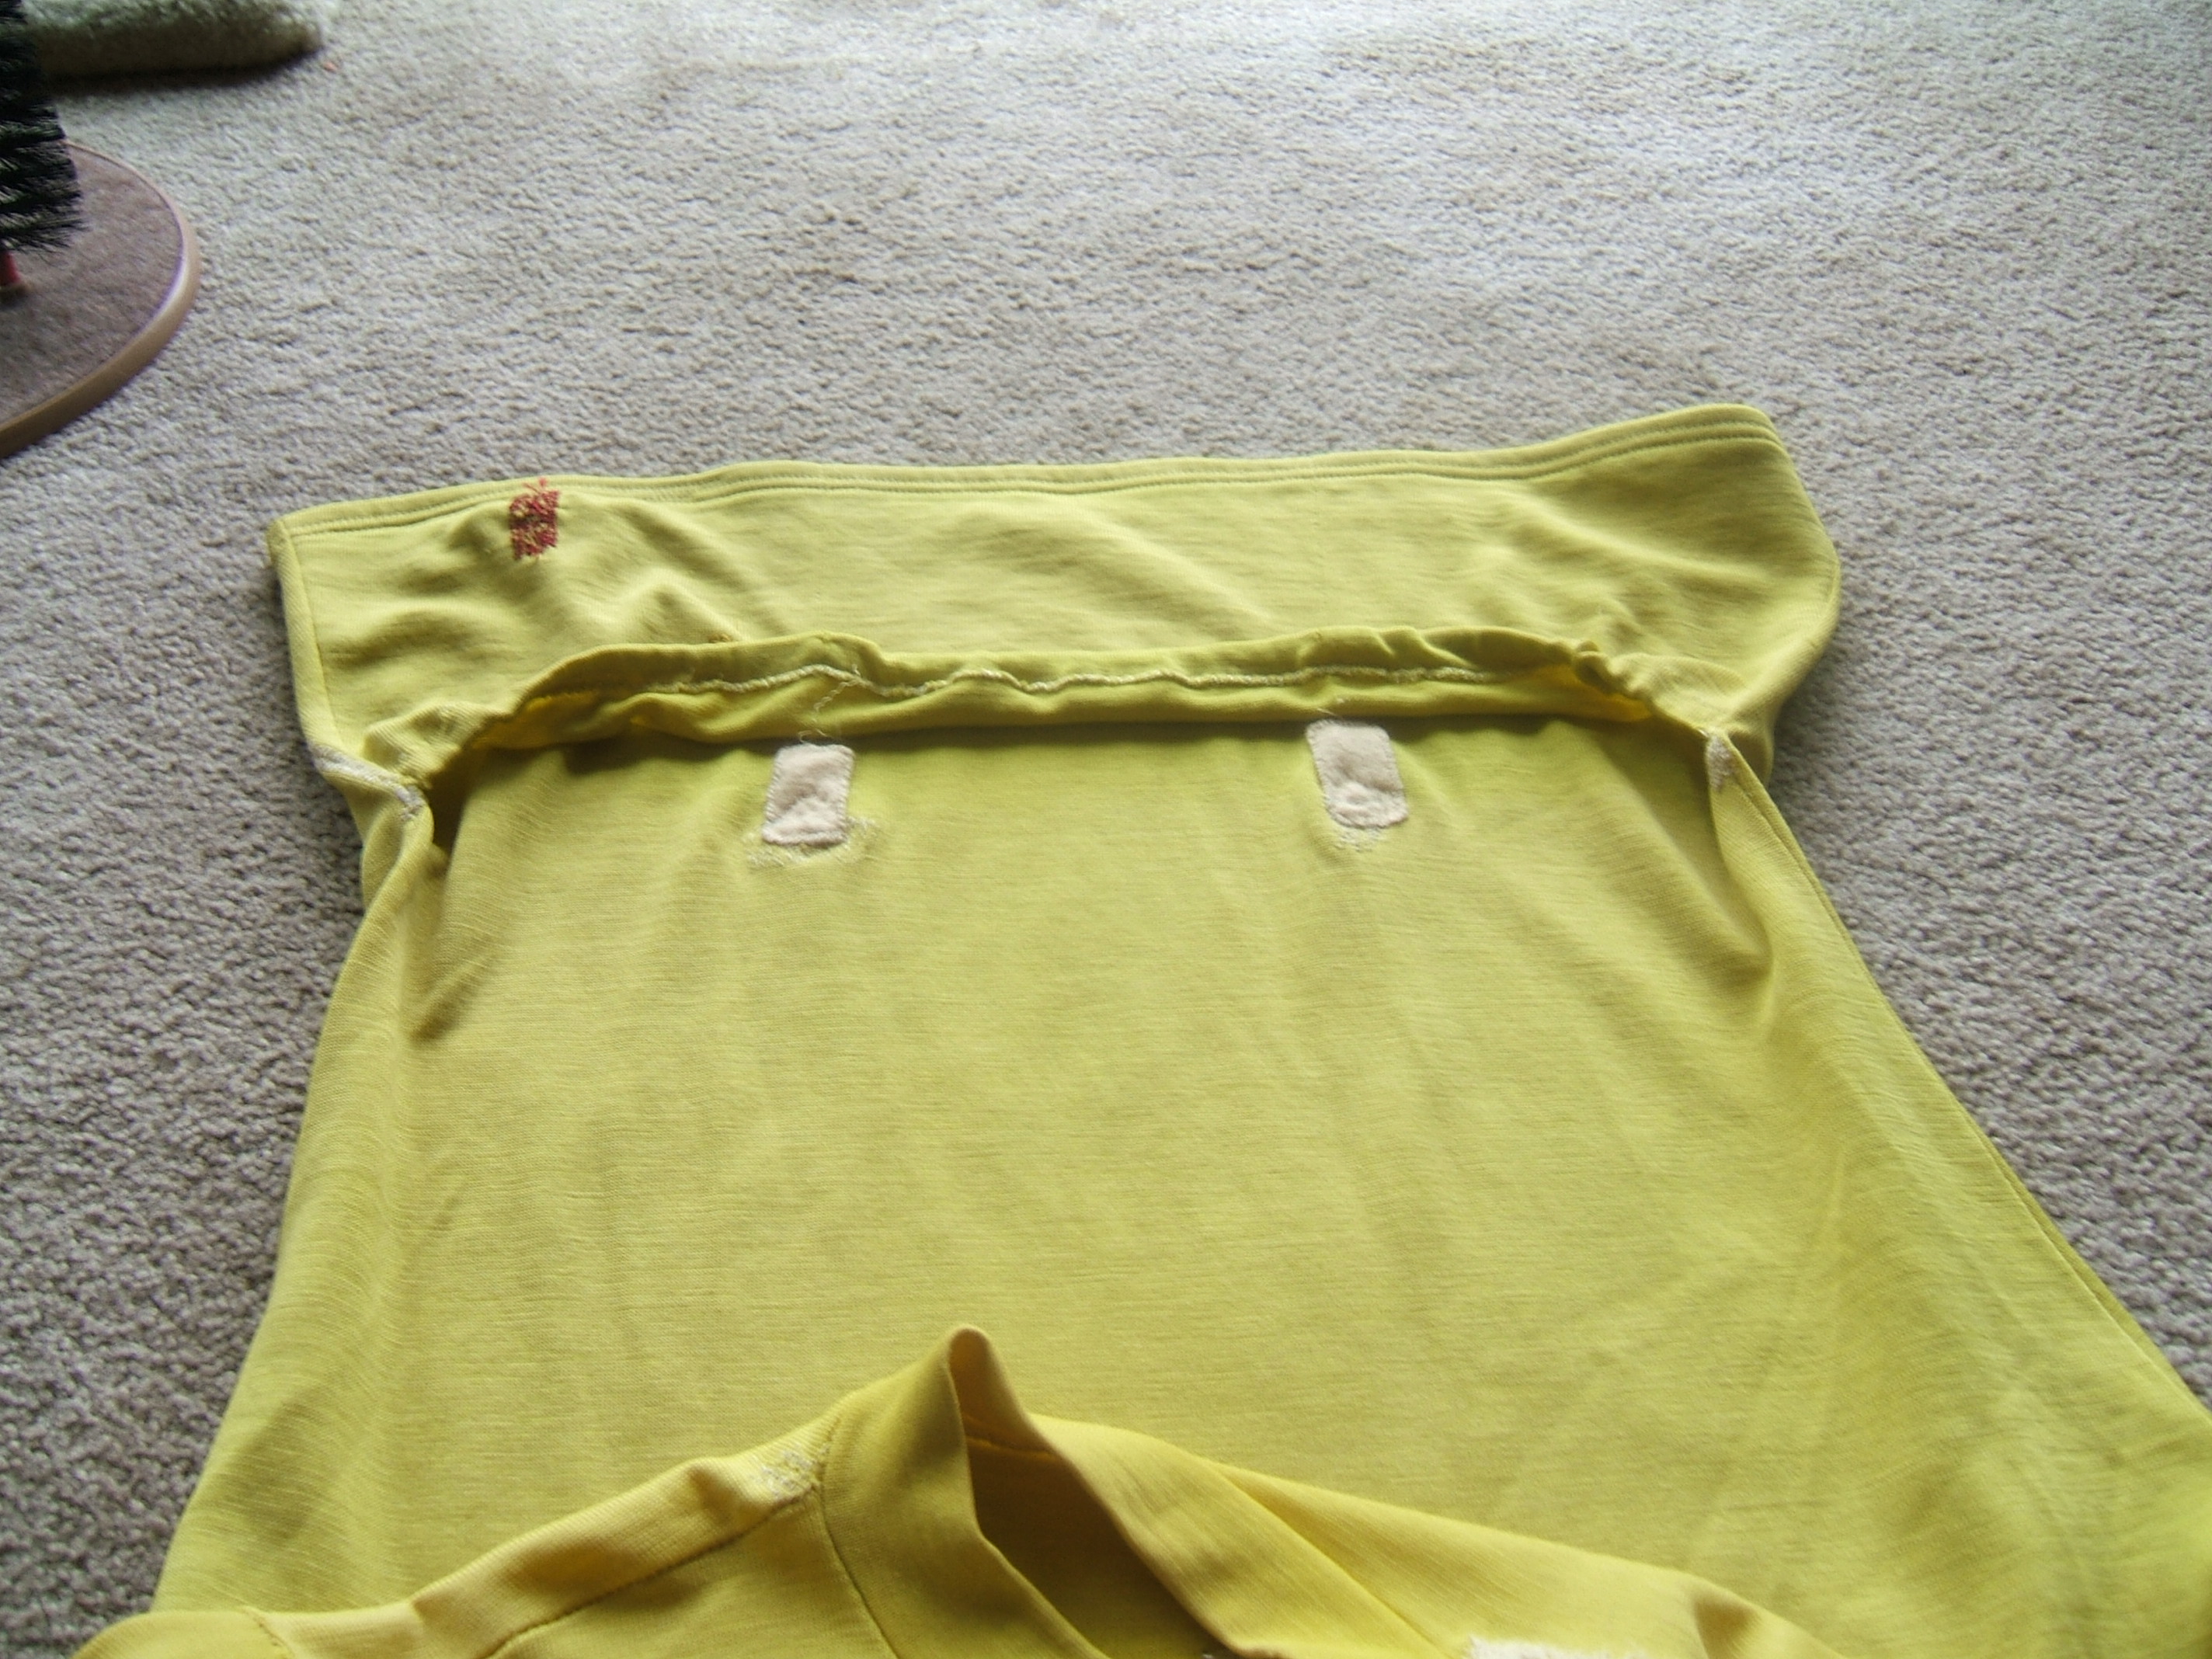
Well, the elastic is in. I still have to put on patches to re-enforce the bar tacks.
Sewing the elastic in was as easy as expected — I didn't even need a bodkin to thread it through the hem because only short stretches remained intact — but taking out the tops of the pocket dividers so that I could thread the elastic was amazingly difficult. Most of the time I couldn't tell the stitches from the fabric or the darn, and didn't dare snip them.
But I finally got them loose. When I started studying how to patch the spots, I realized that I'd worked the darns from the back without removing the divider stitches. This left little ridges on the right side of the fabric, one of them quite pronounced. Those must have been the original stitches; I would have worked a bar tack.
I'm considering a patch on the right side to flatten these ridges, and haven't any yellow silk. I do have some banana-colored knit wool; I'm thinking of using it with the raw edges overcast down, and some silk inside to take the strain.
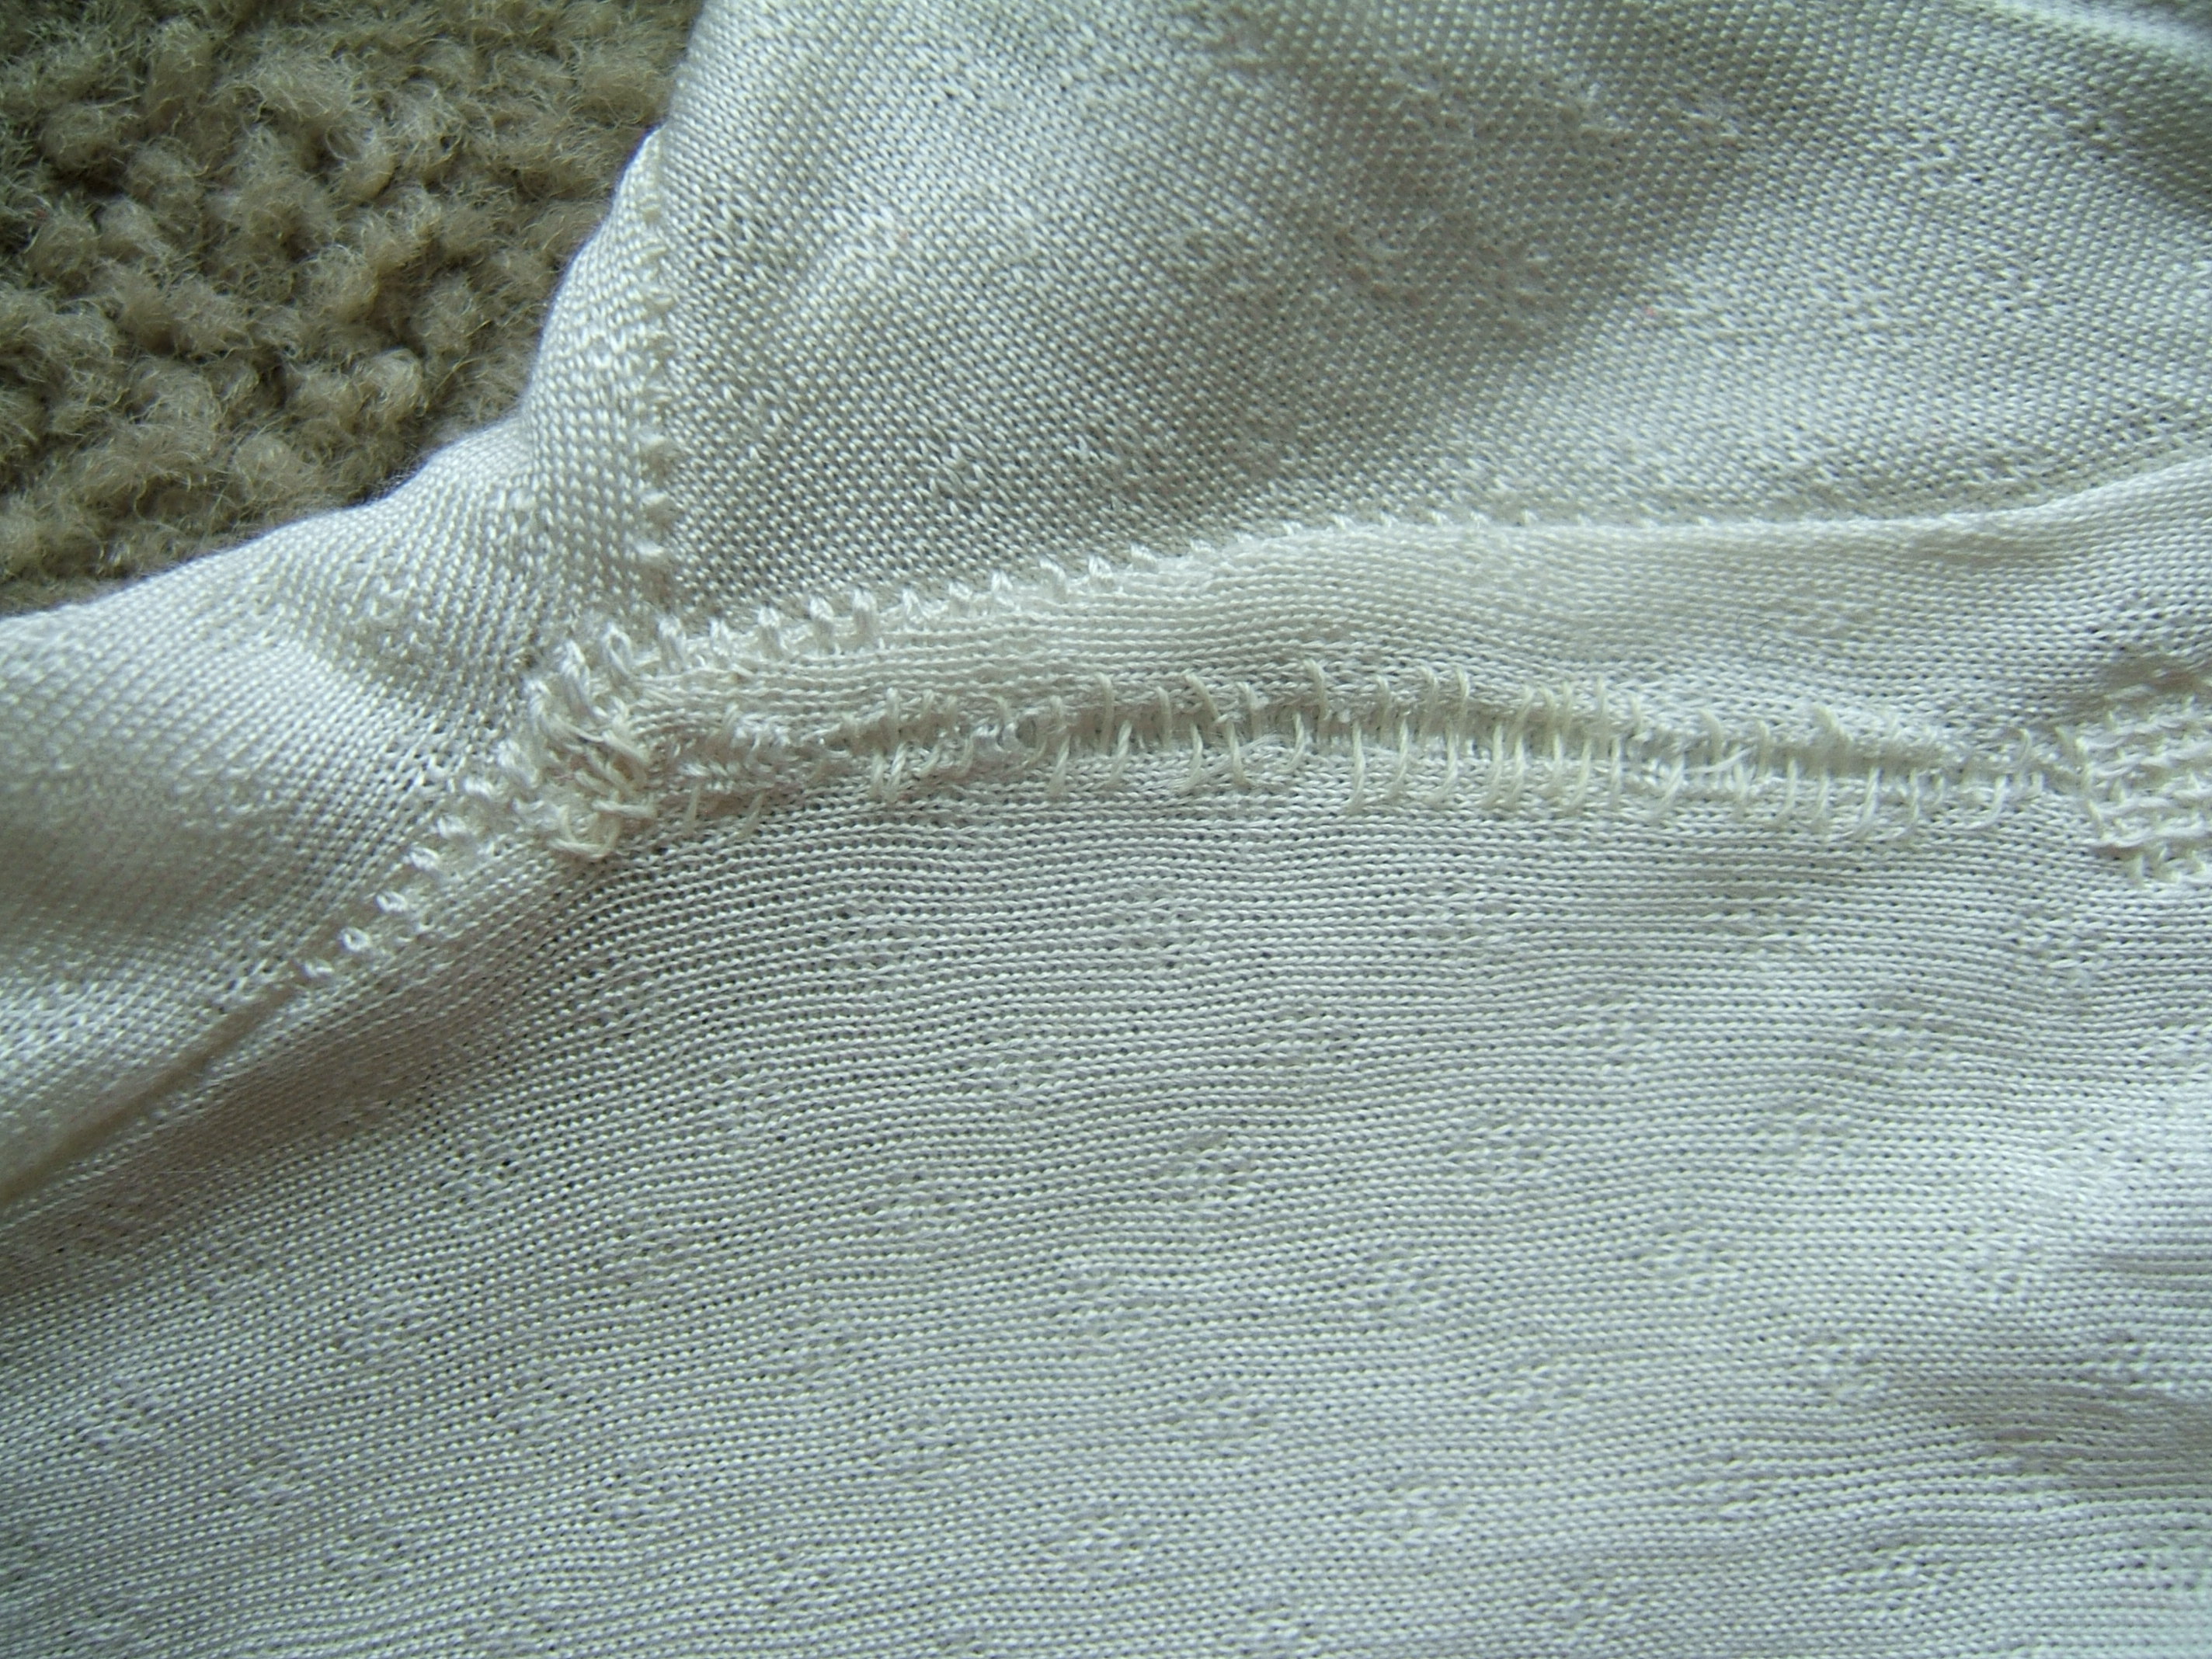
The edge of the original hem had been overlocked before it was sewn down, and this overlocking was still in place. Much of the free edge had gotten curled during the years the hem had been left flopping, so I used overcast stitches to re-sew the hem. I tried to keep the stitches a quarter inch apart. The stitches sank into the overlocking, so I don't think they will wear away as overcast hems usually do. But if the thread breaks, the hem will undo the full length of the thread.
But I used buttonhole silk to sew the hem, so it's not likely to break. When I was about half done, I realized that overcasting will give when the fabric stretches, which further reduces the odds of a break.
There is some elastic in my elastics box that would have worked better than the quarter-inch elastic that I did use, but it was too wide to go through the hem.
Neatening my silk (and wool tape) box gave me a turn. I found a selvage torn off banana-colored wool flannel. I was *sure* that my banana wool was jersey!
Then I got down the wool box, and it *is* jersey. So I carried the selvage to the wool box: not quite the same color.
I vaguely remember making a flannel scarf that was too thick to tie in a knot, and giving it to the cat.
I'm pretty sure that I've never seen a banana the color of these wools.
I've about decided to put a square of silk faille selvage, set bias, under the weak spot and a piece of banana wool jersey on the outside. Both with raw edges overcast down, perhaps with white medici.
⁂
Patches cut, and pinned to shirt so they don't get lost.
⁂
My first thought was to baste with 100+ silk so that I wouldn't have to take the basting out, but invisible thread is hard to work with, so I used reclaimed silk, working off the spool in the "wool jersey" cough-drop box because a spool takes up more space than an appointment card, so I want that silk used up first.
I drew a wash-out line a tad more than a quarter inch from the top of each wool patch and pinned the patch to the pocket with the edge of the pocket on that line and the center of the patch on the divider stitches — or, rather, the holes where I'd taken them out. Then I folded the pocket into position and re-pinned to the body of the shirt.
I basted around the patch using rather short stitches; the only difference from sewing was that I didn't secure the thread in any way. Once I'd basted the edge, I basted across the wash-out line so that I could use it as a guide when pinning on the silk patch, but when I turned the work over, the basting didn't show at all, owing to the thickness of the point d'venise medici darn, so I went back over the line with huge stitches.
When I basted the second wool patch, I began by stitching along the wash-out line, and ended by going across it with huge stitches.
On the inside, I basted the silk squares with two corners on the wash-out lines and two lined up with the pocket stitching. Again, I made small stitches close to the edge.
There was one needle of white Medici in the "Wool Jersey" box, left over from the darning. When that was gone, I broke five or six more off the skein of Medici, but have not yet used up the one I threaded into the needle. I wound the others into skeins and put them into the pill pouch where I found the threaded needle.
It was a blunt needle, for darning, so I found a suitable embroidery needle in the needle book and stuck the darning needle into the wool scrap I added to the box yesterday. Today, I put one of Dave's coin-size magnets into the lid to hold pins, but when I went to put stuff away, I found that the powerful magnet insisted on snuggling up to the edge of the lid so that I couldn't close it, so I put it into the bottom of the box. This also kept the razor blade from jumping up whenever I tried to close the box.
I overcast the edges of one wool patch, making the stitches straight below and slanted above. I tried to stitch beyond the edge of the patch, but the stitches always ended up exactly at it. When I rounded the first corner of the wool patch, I realized that this sharp point would be a stress riser, so I used my teeny thread snips (so neat, and so cheap! So small I could put them into the "wool jersey" box instead of the razor blade. I *do* have a spare pair. I should buy two more pairs on my next trip to Lowery's, if they have any left.) to trim a bit of lint from each corner. I didn't trim the corners of the silk squares, but sewed them as if I had.
Just as I finished attaching the first silk patch, it was time to set the table. After supper, I put everything into the pockets of the jersey, draped it over the back of the rocking chair, put the rocking chair back into the parlor, and put the stool I'd been using as a table back into the kitchen.
All done!
While sewing on the wool patch, I realized that I was working buttonhole stitch without catching the loops. But if I'd wanted to catch the loops, I'd have worked up to down instead of down to up. I put the needle into the patch and brought it out through the jersey.
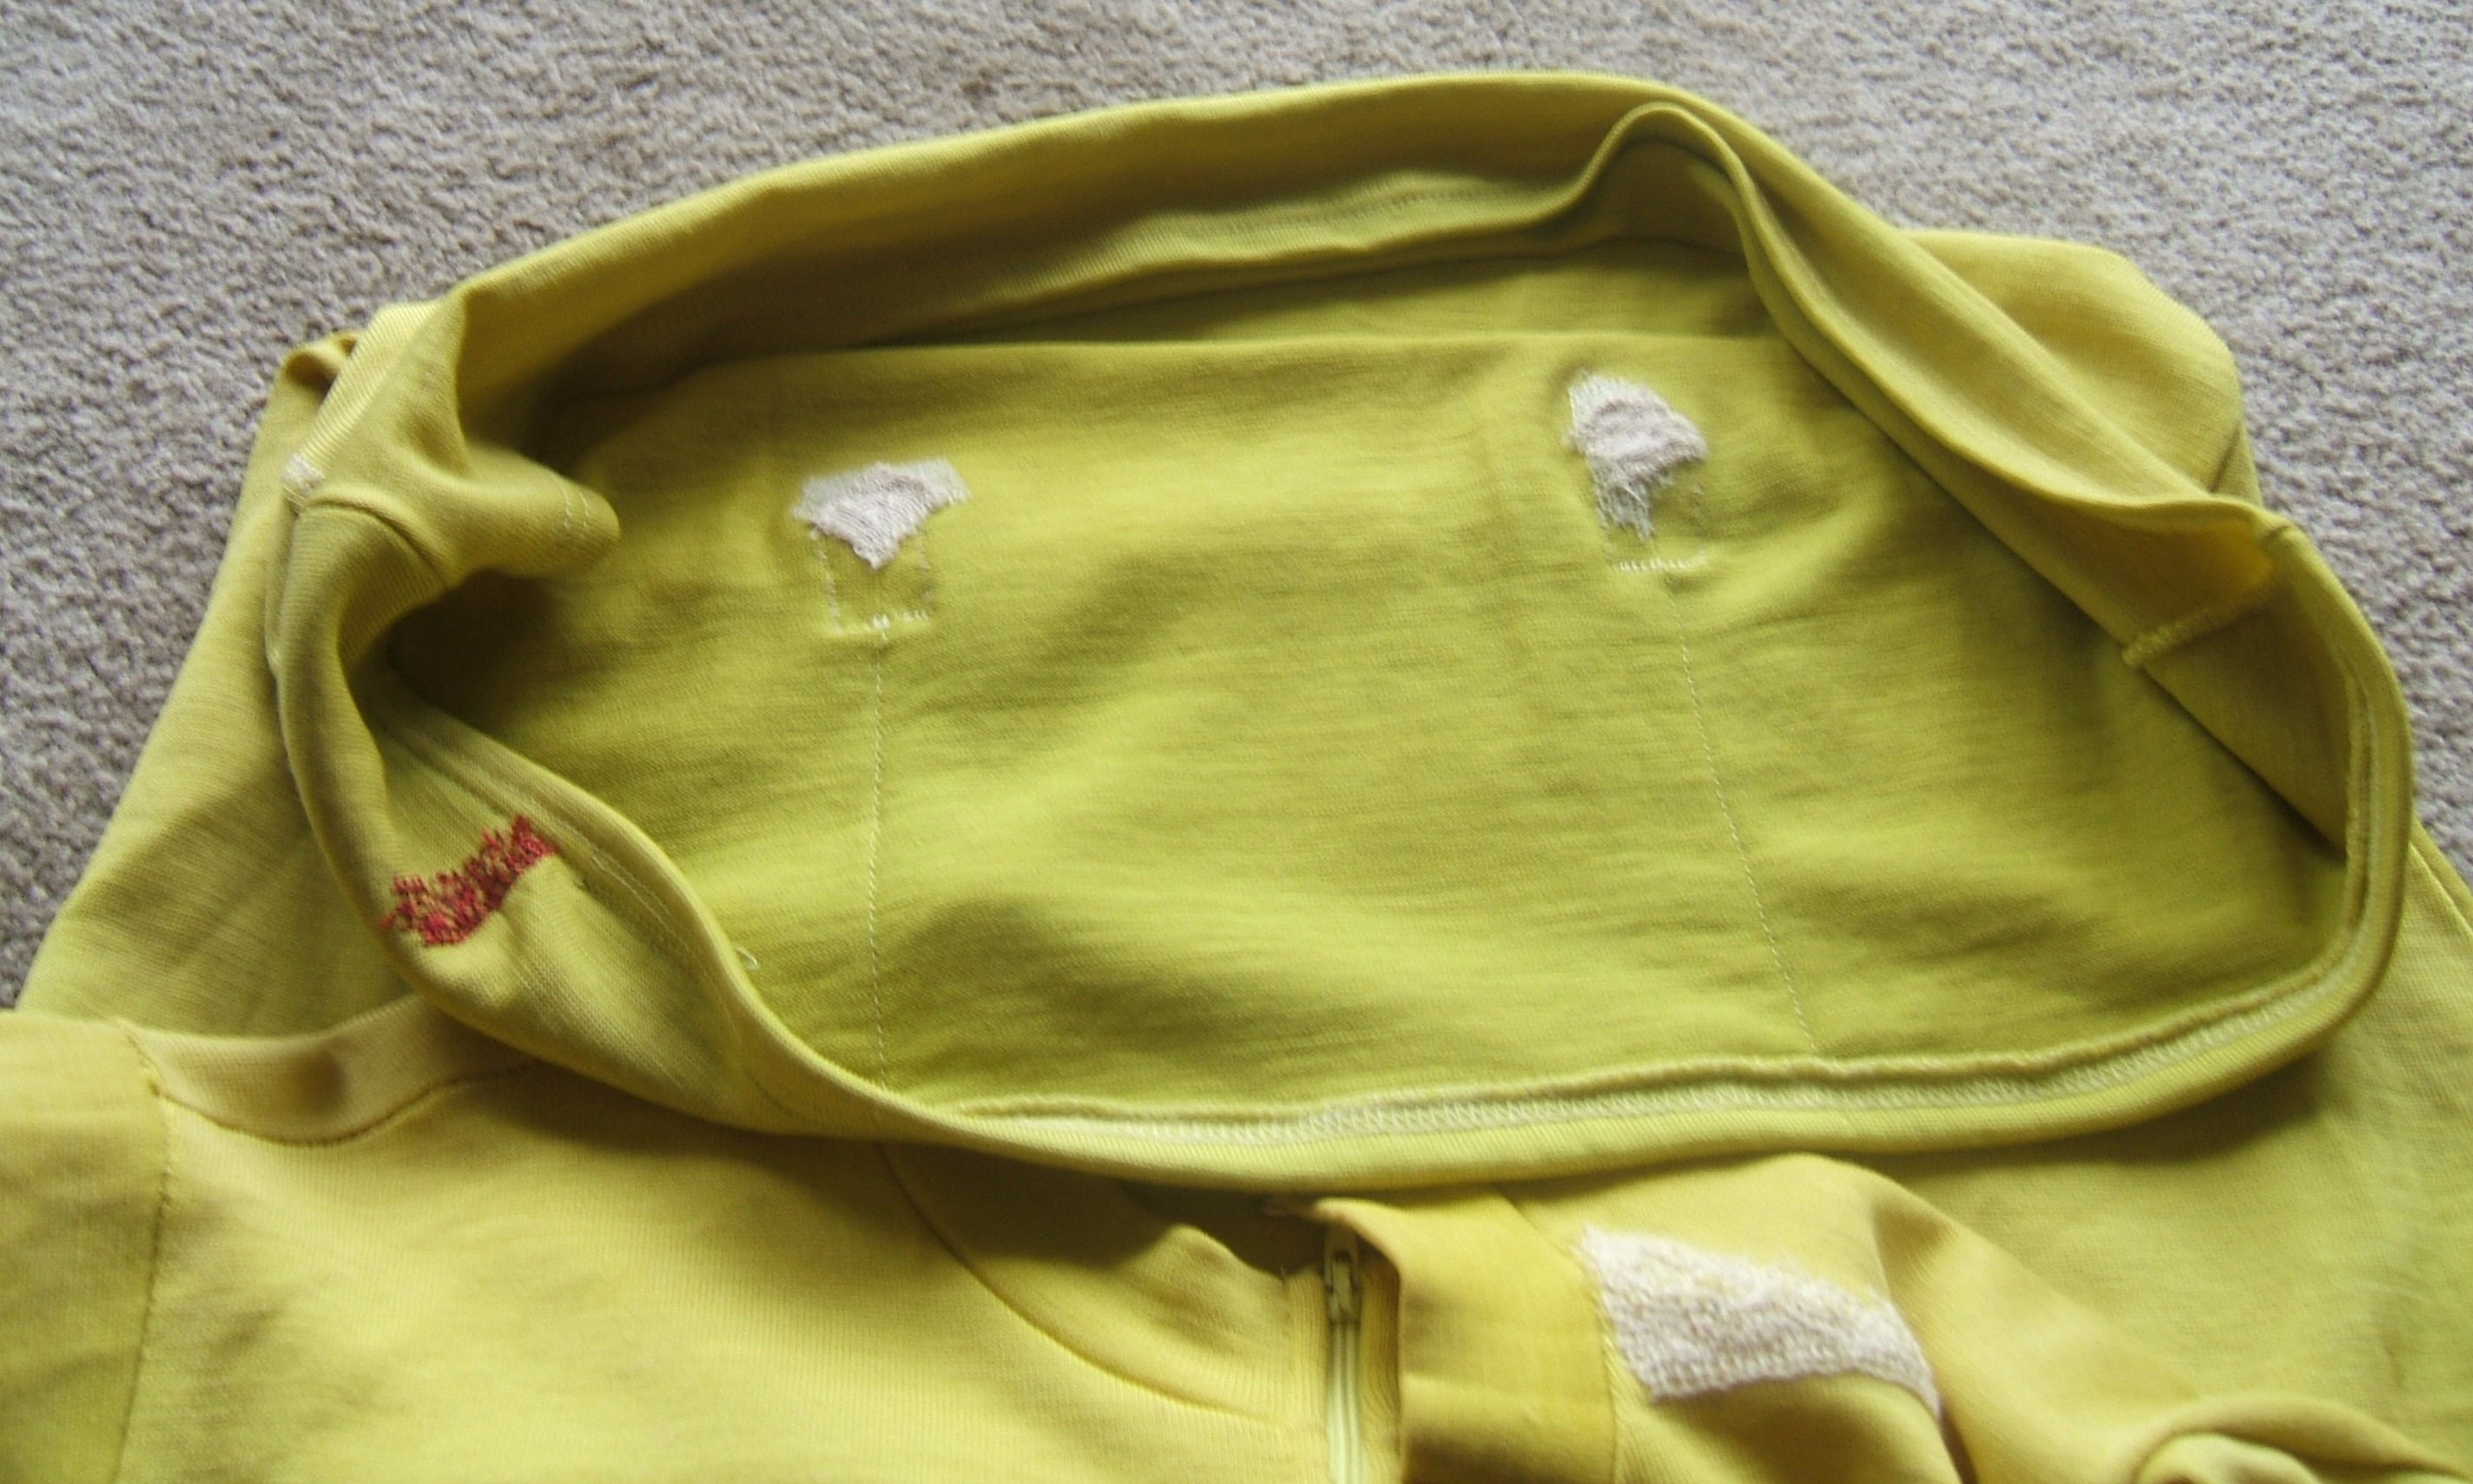
It was hard to see what I was doing on the silk patch because of the fuzzy edges; I had to look very close to see whether or not I'd completed the round. The stitches don't even show up very well in the magnified picture, being the exact color of the slubs in the silk.
When I sewed yesterday, I fastened off when I'd finished the wool, turned to the silk side, and started over. I began work today keenly aware that I should have pushed the needle through to the other side instead — but this time the needleful of thread exactly finished the patch.
Now to nail the jersey to the ironing board and tack the elastic.
But the cat just reminded me that it's time for lunch.
⁂
By the time I found the board, I'd forgotten that I wanted to put it inside the shirt, and did a very neat job of basting the back to the front. Silk basting stitches, fortunately, are easy to take out.
The right buckle on my raggedy old sandals has been wonky for some time, and ever since I cut off the expired elastic in the strap, the strap has been just barely long enough and it takes a mighty heave to buckle it.
So I wasn't much surprised that the buckle came off while I was getting ready to scrub my bicycle wheels. (I'm glad I have two pairs of raggedy old sweat pants, because the pair I wore to scrub the wheels is still damp around the ankles.)
I had sewn the buckle to the stub of the elastic, which had worn into ribbon. The ribbon wore into fringe and released the buckle with all its stitches intact. I cut the stitches off the buckle and trimmed off the fringe.
I remembered a large leather needle in the book-shaped needlebook I started making back when one could buy felt and darning wool, and thought that I'd use it to punch holes in the strap and lace through the holes with a regular needle, but right next to the large needle in the book there was a leather needle just the right size for polyester upholstery thread.
So I checked several times that the buckle was on the right way and overcast it into place. Rather awkwardly, since I never sew leather. I did remember that when sewing with a leather needle one must never use the same hole twice, because a leather needle cuts thread even more easily than it cuts leather.
I left a tail at the beginning to thread into a needle and tie off by working buttonhole stitches over a couple of the overcast stitches, but just barely enough.
With my awkward start, there are a couple of stitches too few at the side I began on, so I may get a chance to do it again while I remember how.
Or if my new cycling sandals work, I might salvage the buckles, throw out the sandals, and appoint my current cycling sandals as the old raggedy pair.
broken stitch PFD #2
Well, that was quick and easy, even though it turned out that #2 was the pair I had on. The hardest part was assembling the tools: moving the rocking chair into the light, moving the kitchen stool next to the chair, taking a ball of white 100/6 into the living room, and pulling the snack bag out of the arm of the futon.
And it turned out that one of the needles in the snack bag is threaded with white 100/6.
I started trying to back-stitch the break, but the needle got so stuck I had to wrap a rubber band around my forefinger to pull it out, and the stitches were too long, so I overcast-hemmed down both sides, making the stitches straight and short on the outside, and slanting among the layers.
And now I'm sleepy. I think my body is saying, "Hey, we're under quarantine, we must be sick."
I get to go out next Thursday, when Martin's is having a special hour for seniors.
⁂
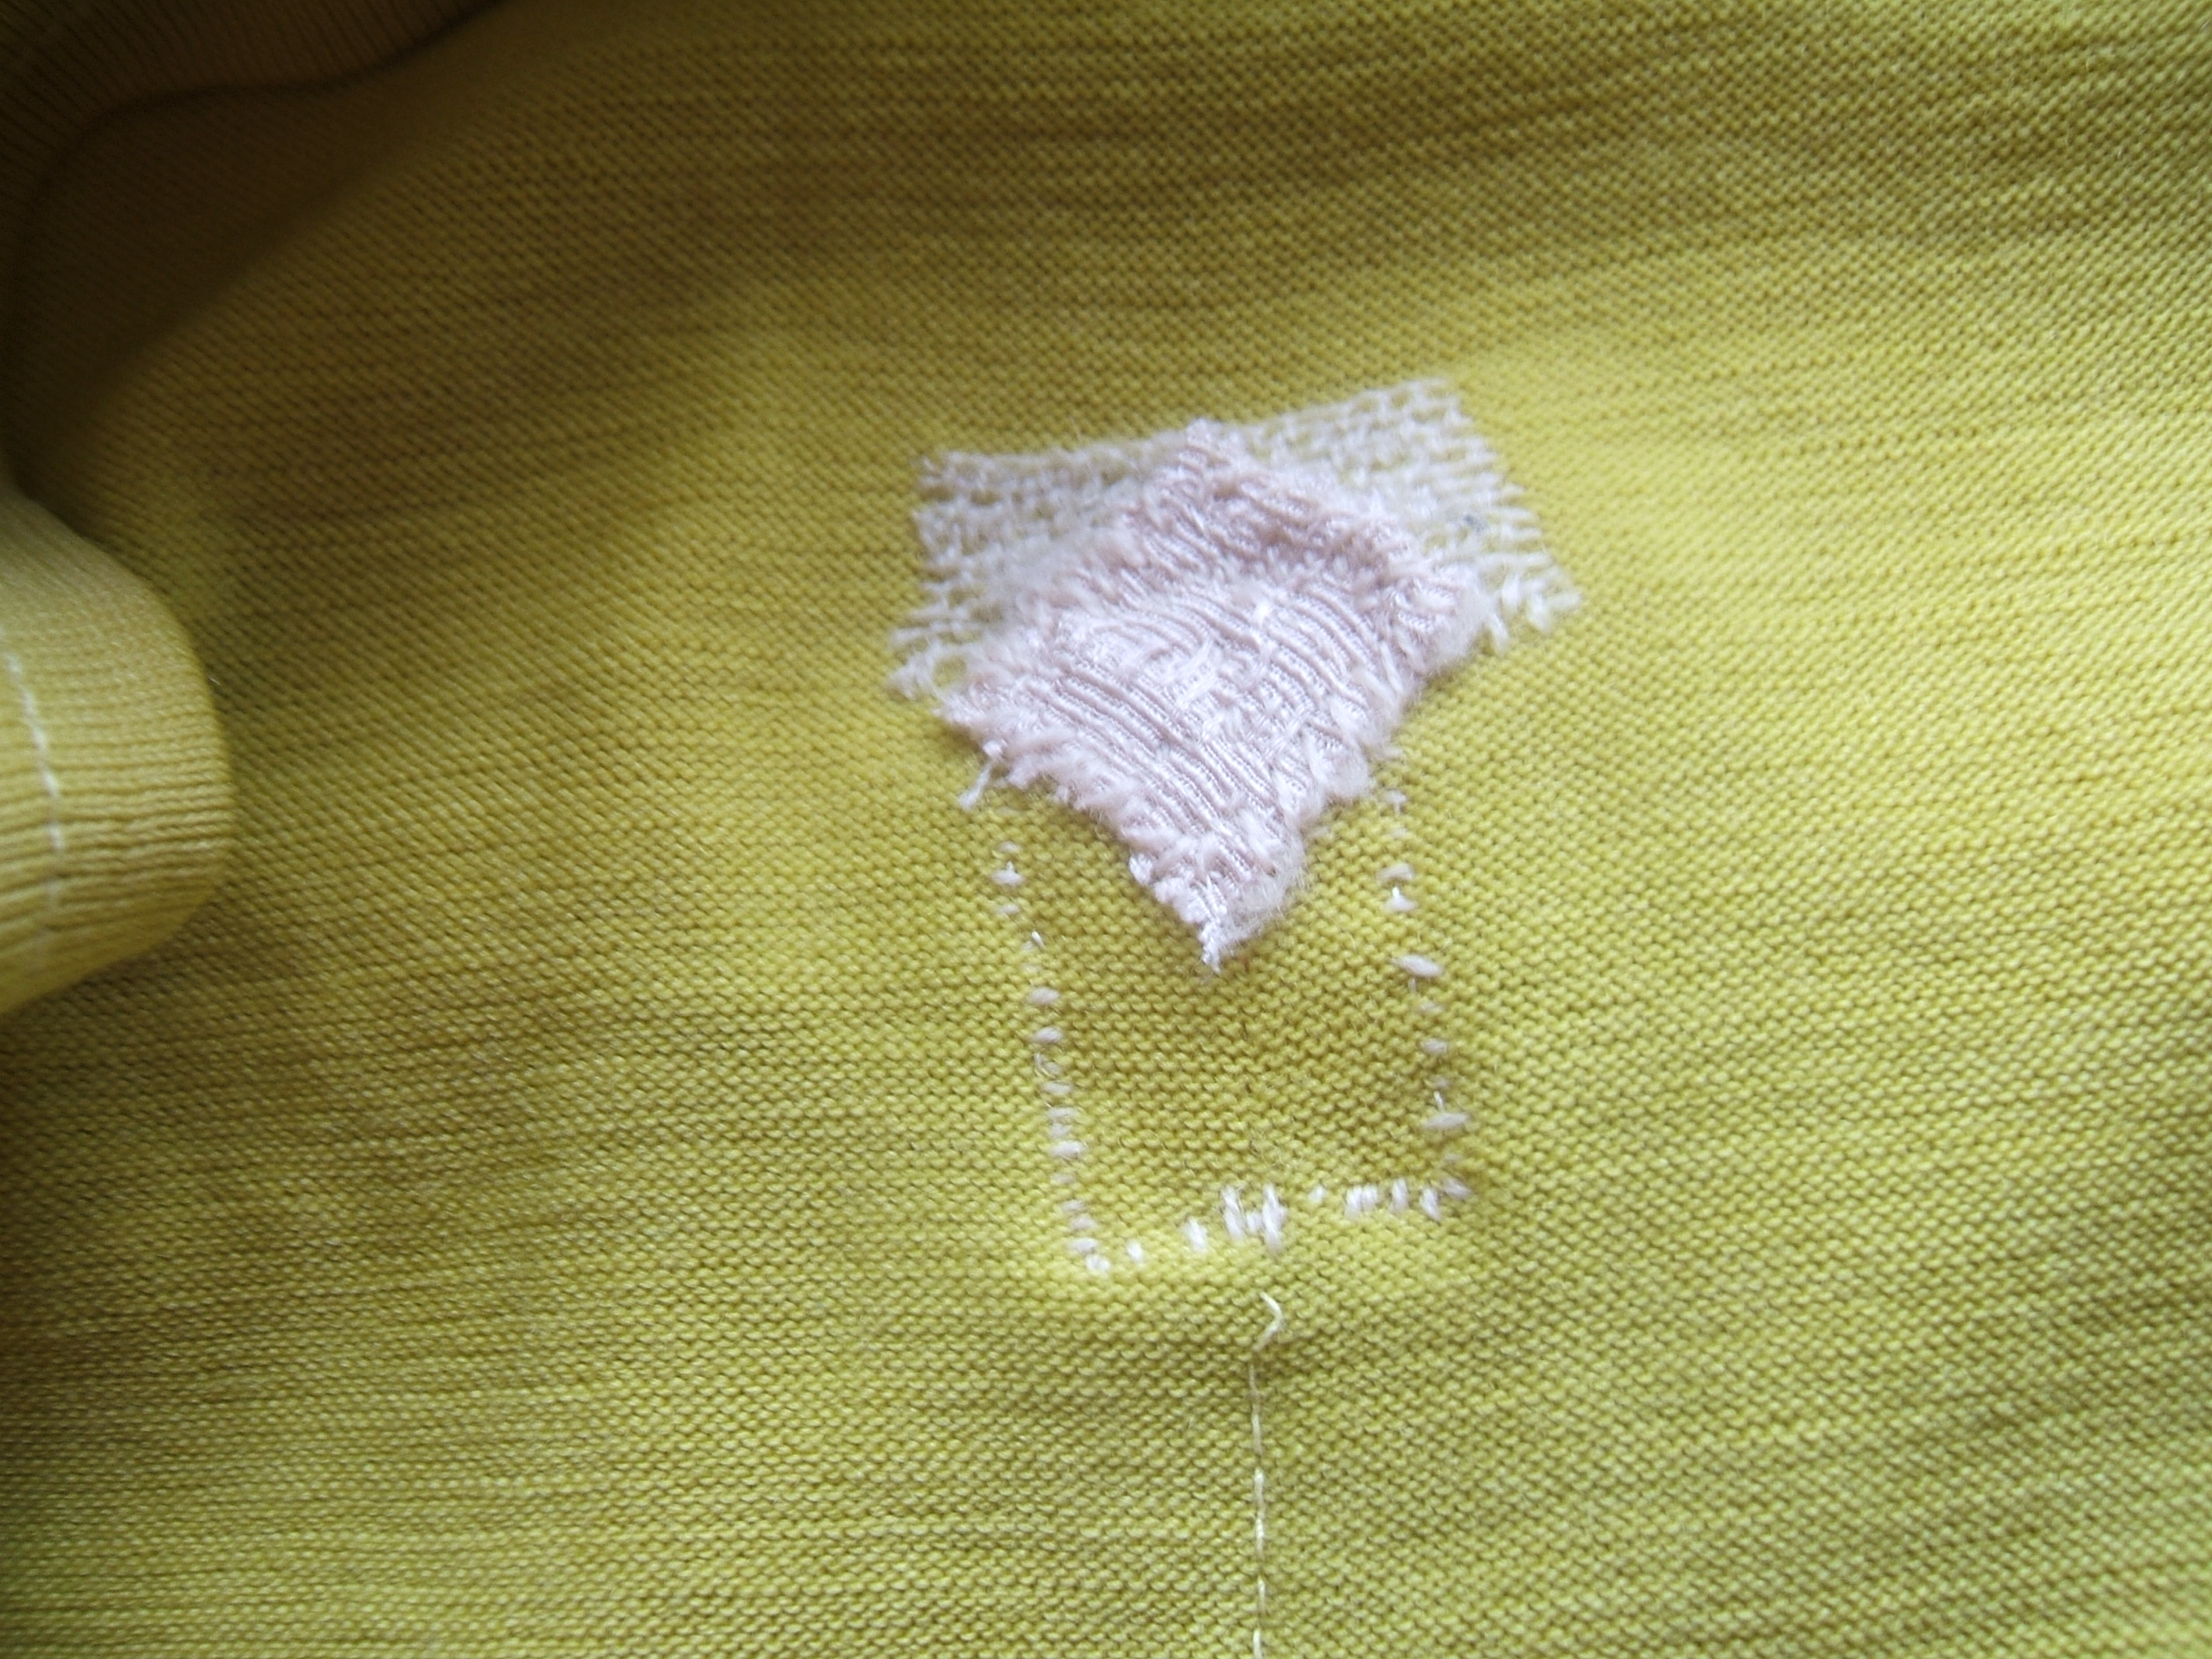
darn pocket in curry jersey
Not honestly worth doing, but the job could be done with a minimum of intellect. It was a three-cornered tear, with one side right along the stitches securing the pocket in the side seam. I began with a few rows of interlocking buttonhole in the sound fabric at the end of the horizontal leg, then baseball stitched the tear, then worked buttonhole over the vertical baseball stitching, since that is where the pull will be when I put stuff into the pocket. I wished several times that I'd changed thread color for this stage. The buttonholing went firmly into the side seam.
The whole shirt is worn thin and soft. I should have cut it into spectacle-cleaning handkerchiefs instead.
I'm saving the silk-tights darn for my dental appointment next Tuesday. Probably won't need it, since I'll probably be the only patient. But it folds up small, and the tools fit into a cough-drop box. Except the glasses, but I always have a pair of magnifiers in my pocket when I go out.
It was the magnifier-pocket of the curry jersey that I just darned.
On Creative Machine, I just read a neat tip for printing name labels on a laser printer: Print a sheet of paper, then tape ribbon to the paper so that it covers the text, then print again.
One must watch where the printer's rollers grab the paper.
I think I'd draw an arrow on the paper before printing the first time, to be sure it's put in the same way the second time.
dump and sort underpants drawer
I found, much to my surprise, a number of bandaids, including several of the itty-bitty strips that I've been searching stores for for years. This led to a certain amount of neatening in the first-aid drawer. I found a box that I could empty into another box, and put a label on it that said "assorted".
Also found a quantity of stuff that had fallen off a dried bunch of lavender that I once put into the drawer. I belatedly realized that I should have upended the drawer on the half blanket, which is easy to shake. I got lavender all over trying to carry the king-size blanket to the door to shake it, and didn't get all of it with the Roomba. Partly because the bits blow away from Roomba as it approaches.
⁂
Broken thread in silk turtleneck
The next time I do a darning job that fine, I'll pull the thread over my wash-out marker first, so I can see what I'm doing.
The white reclaimed silk blended beautifully into the ecru shirt.
A high of 38° tomorrow, I'm going to need that shirt.
"leg elastic in PDF underpants" finally came to the top of my to-do list — and I've got only five feet of 1/8" elastic.
I've decided to do one pair. My note on the pattern says I need 19" per leg, and that feels about right when I wrap it around my leg.
I'm collecting a long shopping list for when I'm finally allowed out of here. No confirmed cases in the county — so far.
I'm pretty sure that I left my linen furoshiki in the dentist's office yesterday. I *liked* that furoshiki even though the print was ugly; it was a very high quality of linen.
I was lying in bed wishing nap time were over, when I remembered that working in the garden makes me feel better, so I got up, dressed — and found that it was raining.
So I finished changing the elastic in PDF #1. I mended the gap where I took the elastic out with pale blue thread even though there is little chance the elastic will expire before the pants finish wearing out. I used Sans Serif Chevron Stitch; I should add a comment to Hand Sewing Stitches that this stitch is good for replacing zig-zag stitches, and for hemming raw edges.
The I cut some filters for Dave, and while the table was up, I used it to sort my black half-inch twill tape and cut two pieces.
&& garter story [utterly forgotten before I got around to writing it]
two inches wide
straight for six inches
line from there to point 21 1/2" from hem and 1/4" from fold
to 24 1/2" from hem on the fold
Oop, aren't these the pants that drag on the floor if not pinned at the ankle?
Naptime; deal with it later. I think I'll sew the dart before trying them on, rather than pulling out all those pins; I meant to only baste it anyway.
I basted the dart before trying the pants on to see how much to cut off, and thereby verified that the width and length of the dart are correct. I'll try the pants on after basting and before zig-zagging to be sure.
Then I picked the dart out — easy at five stitches to the inch — and cut three and a half inches off the bottom. That is enough that I could make matching knife pockets, but I'd have to pick the hems out and piece, and it's better to have the slopping pants easy to pick out from among the cycling pants anyhow, so I marked the offcuts for the offcut box — which I can't find at the moment; I think it's the one with the label turned to the back.
While pinning the hems, I found a pin on my Grabbit that I've never seen before. It looks just like the other pins except that the head is blue and, on close inspection, a little bigger than the glass-head pins. I suspect it of being plastic, but it does have a deep shine.
Took another look: it's a couple of millimeters longer than the other pins, and a tad thicker.
Pinned a one-inch hem, using (gasp!) the hem gage.
⁂
Basting the hem on the treadle was wise; Zig-zagging went zzzip once I got the Necchi threaded.
Sweat pants renovation now on hold. Dave saw in the Times-Union that one can download a mask pattern from parkview.com/homemademasks, and he wanted one.
Longest time spent was selecting fabric. I finally remembered that I have white cotton gauze, and used two layers.
Mask works great! (But fogs up my glasses.) Tomorrow or the next day, I'll make me one to wear to my appointment on Monday.
The close-up picture in the paper clearly showed that the top of the mask is overlocked and the bottom is hemmed, but the instructions don't say a word about finishing edges. Perhaps the fabric in the kits was serged into 9" by 7" pieces.
I have only enough boiled half-inch twill tape to make one string, so I cut both strings off the reel. Since it's going to shrink, I cut 34" pieces instead of 32" pieces.
I found the instructions for attaching the strings awkward and confusing, so I sewed the tape to the mask with a tad less than a quarter inch sticking out, then turned it to the right side and sewed down the free edge.
Second mask completed. We were in the bedroom together and the almost-completed mask was on the sewing machine, and I realized that I didn't have to sew one end before trying it on, I could pin both ends.
So I pinned in some elastic, after fumbling in the elastic box a while. I have no half-inch elastic; I thought I did. No use attempting to buy some even if I could go to the store!
Much to my surprise, it fit pretty well on the first try; I moved the pin on the upper elastic just a tad, not enough to need to trim off excess. (I'd found scraps of about the right length in a sandwich bag in the elastic box.)
And then I said, "Why sew at all?". It's better this way because he can change it himself if he wants it tighter or looser.
So is done. I put the first one in the pocket of my jeans so I'd be sure to remember to take it for walking through the waiting room at the dermatologist on Monday.
I'll also have it for the walk to the church tomorrow. Purely symbolic, as I don't plan to go near anyone.
Maybe sometime I'll get time and mental energy to comment on what I've done. I need to make a third one to get the pleat-placing right.
United Way is collecting remnants for a mask-making project. I'm not sure that I can sort my stash and get it to the Key Bank by the tenth, but a plausible riding day is predicted for the eighth. But the e-mail said that one has to go in to leave stuff in the bin. Considering that we had the ambulance out for Dave today (false alarm, thank goodness!), I'm very interested in not setting foot in any occupied buildings.
Yesterday I tore two old pillowcases into four sweat rags, and one of them might survive its first trip through the washing machine.
I also cut a 9" x 14" piece of gauze and sewed the 9" edges together, seam allowance the width of the toe on the treadle.
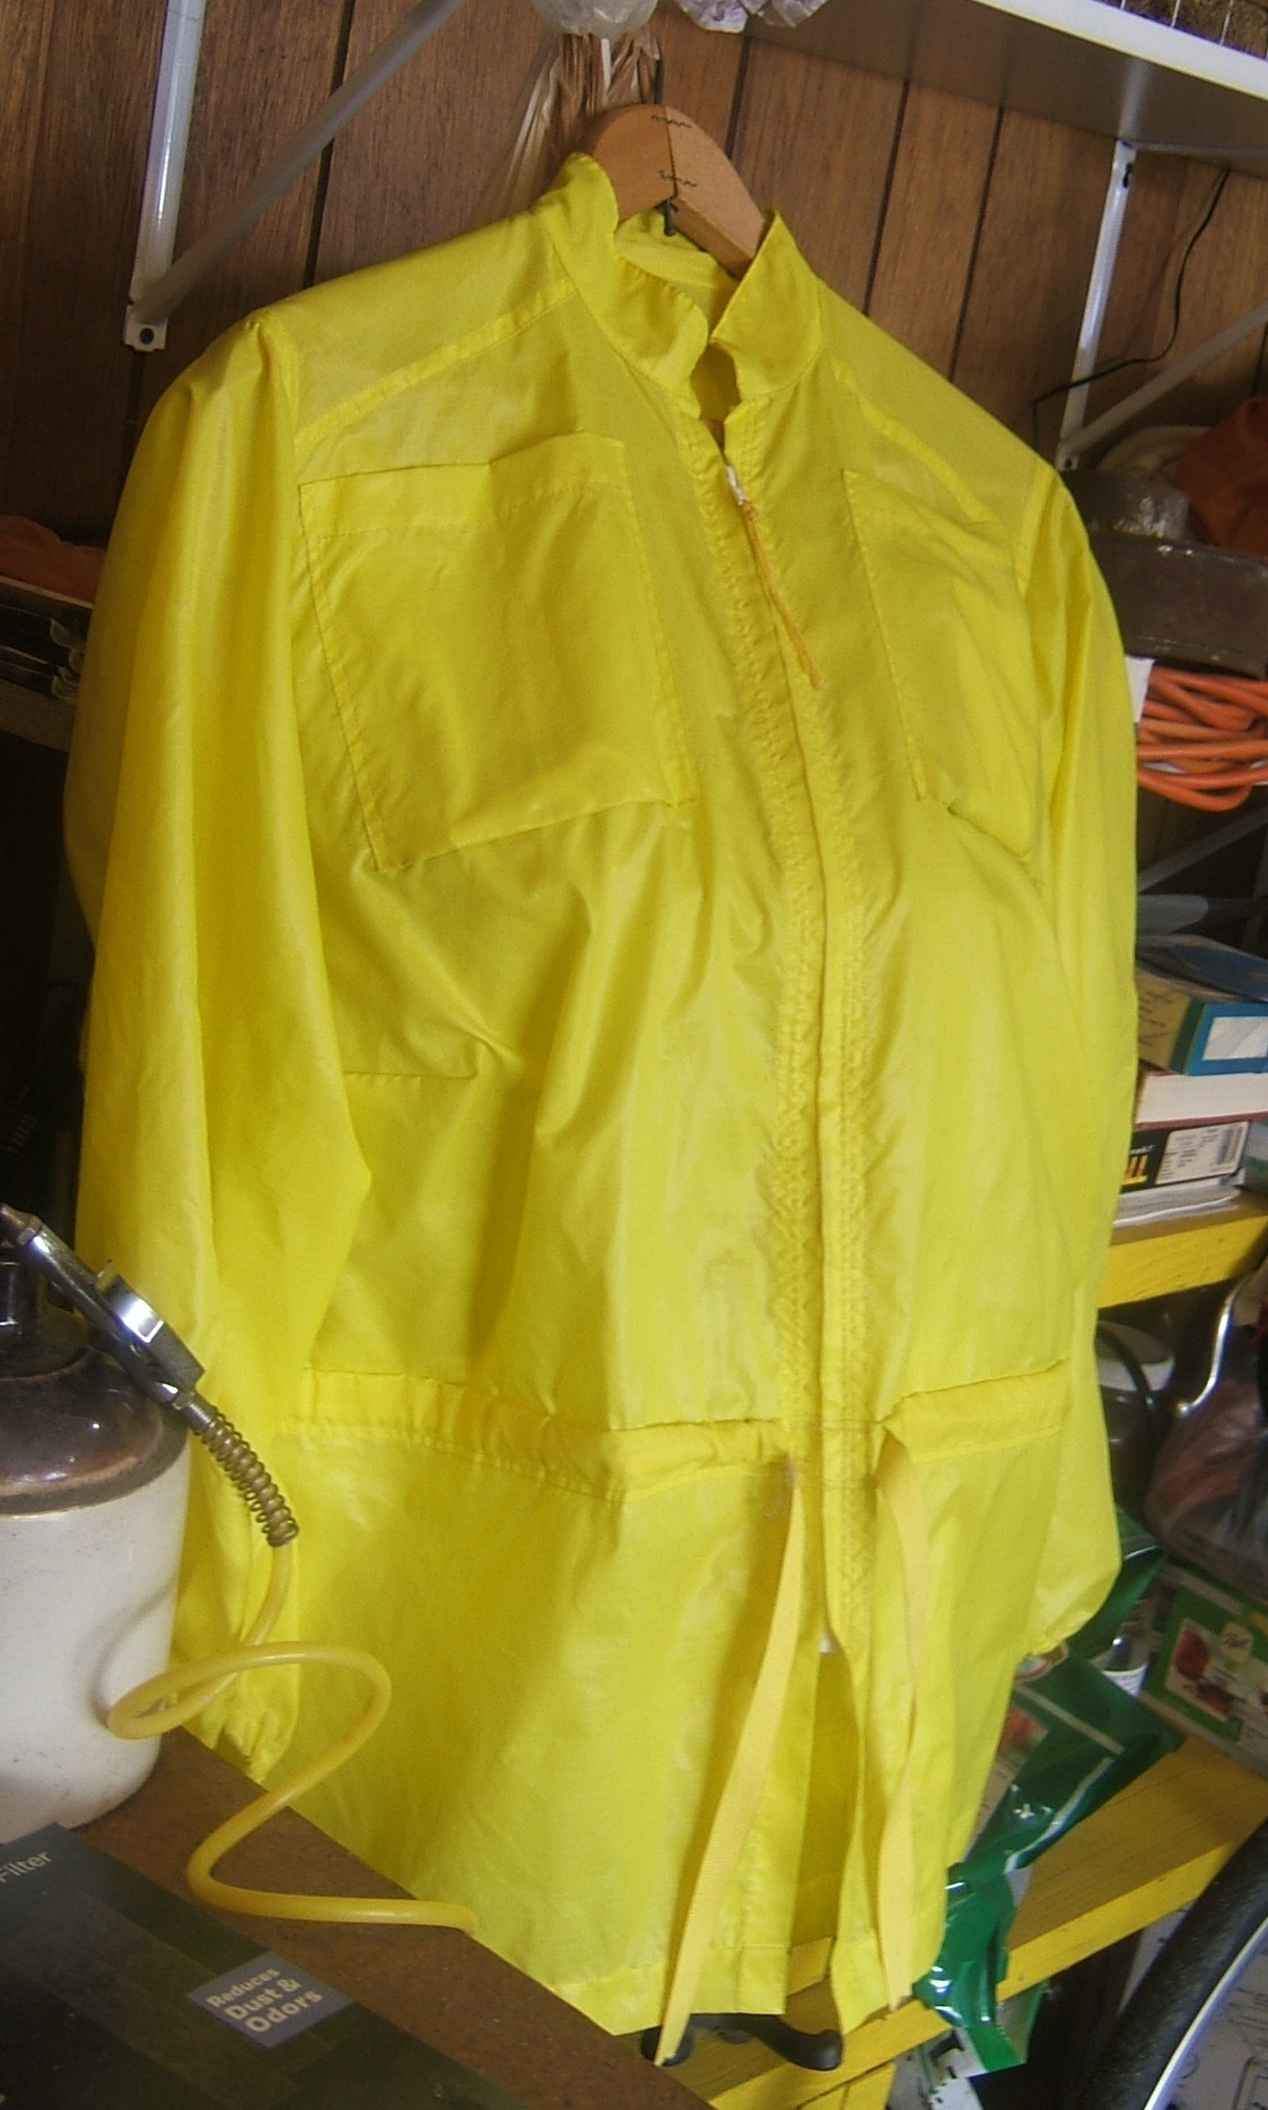
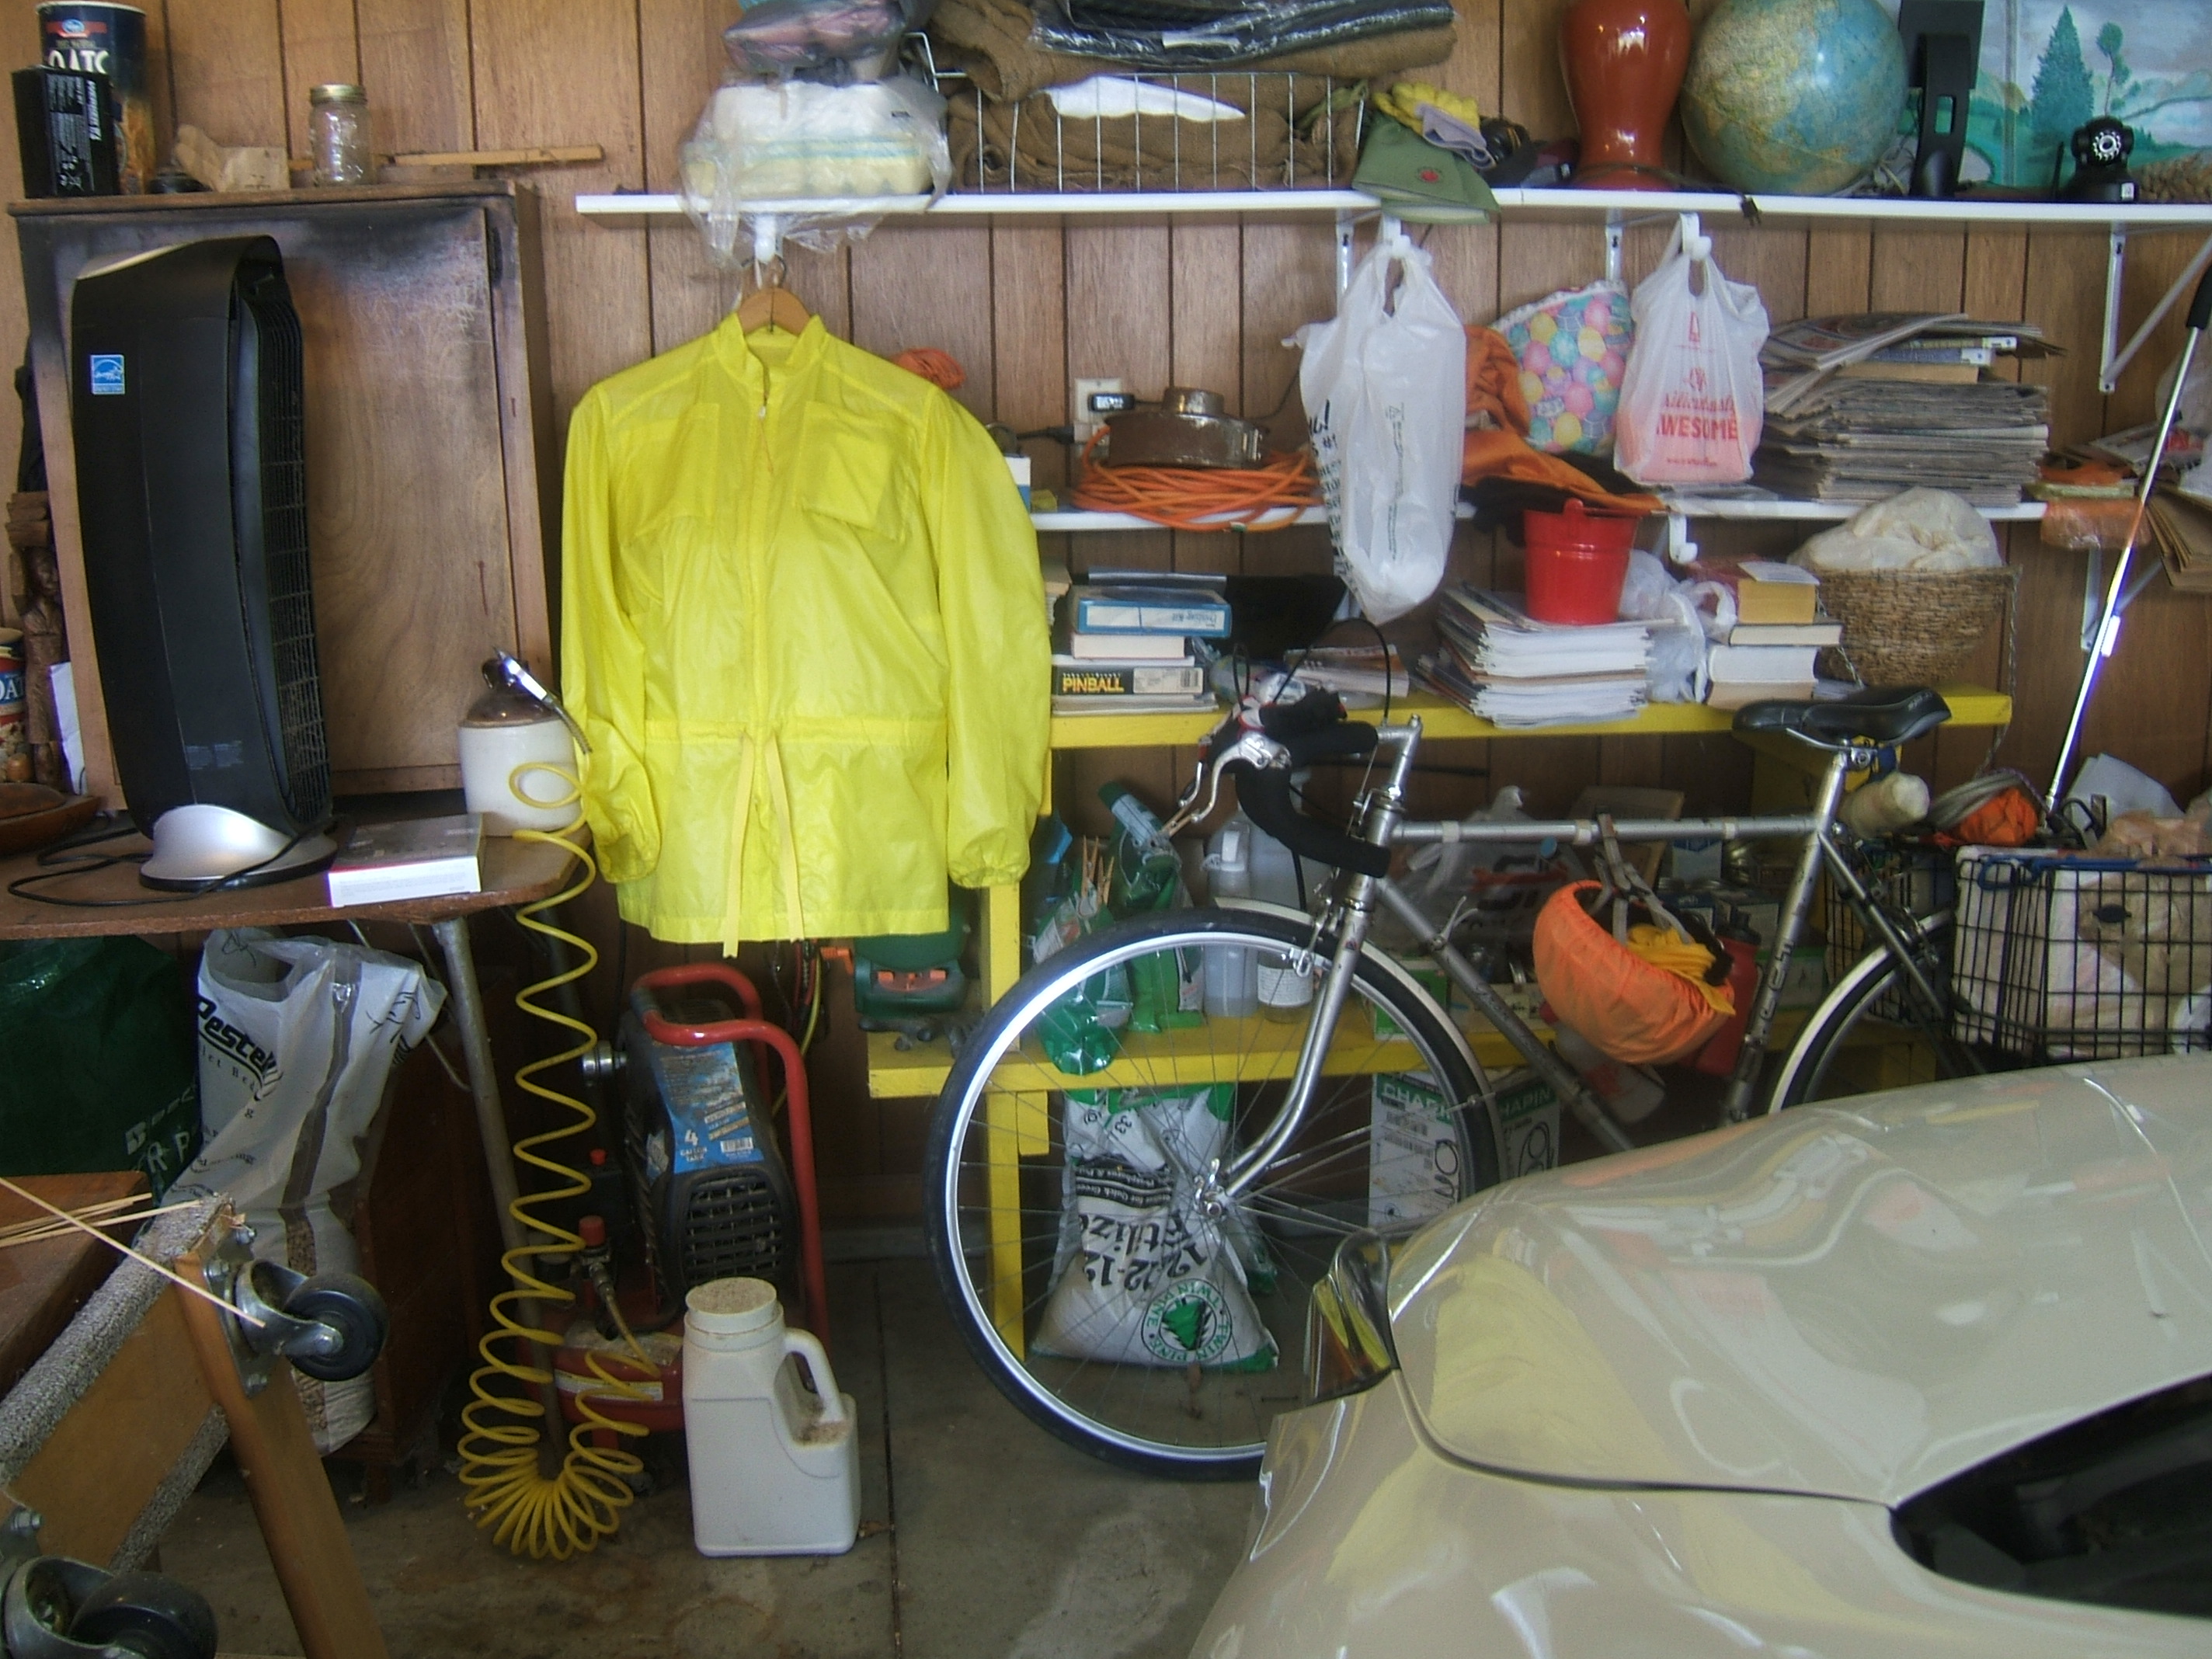
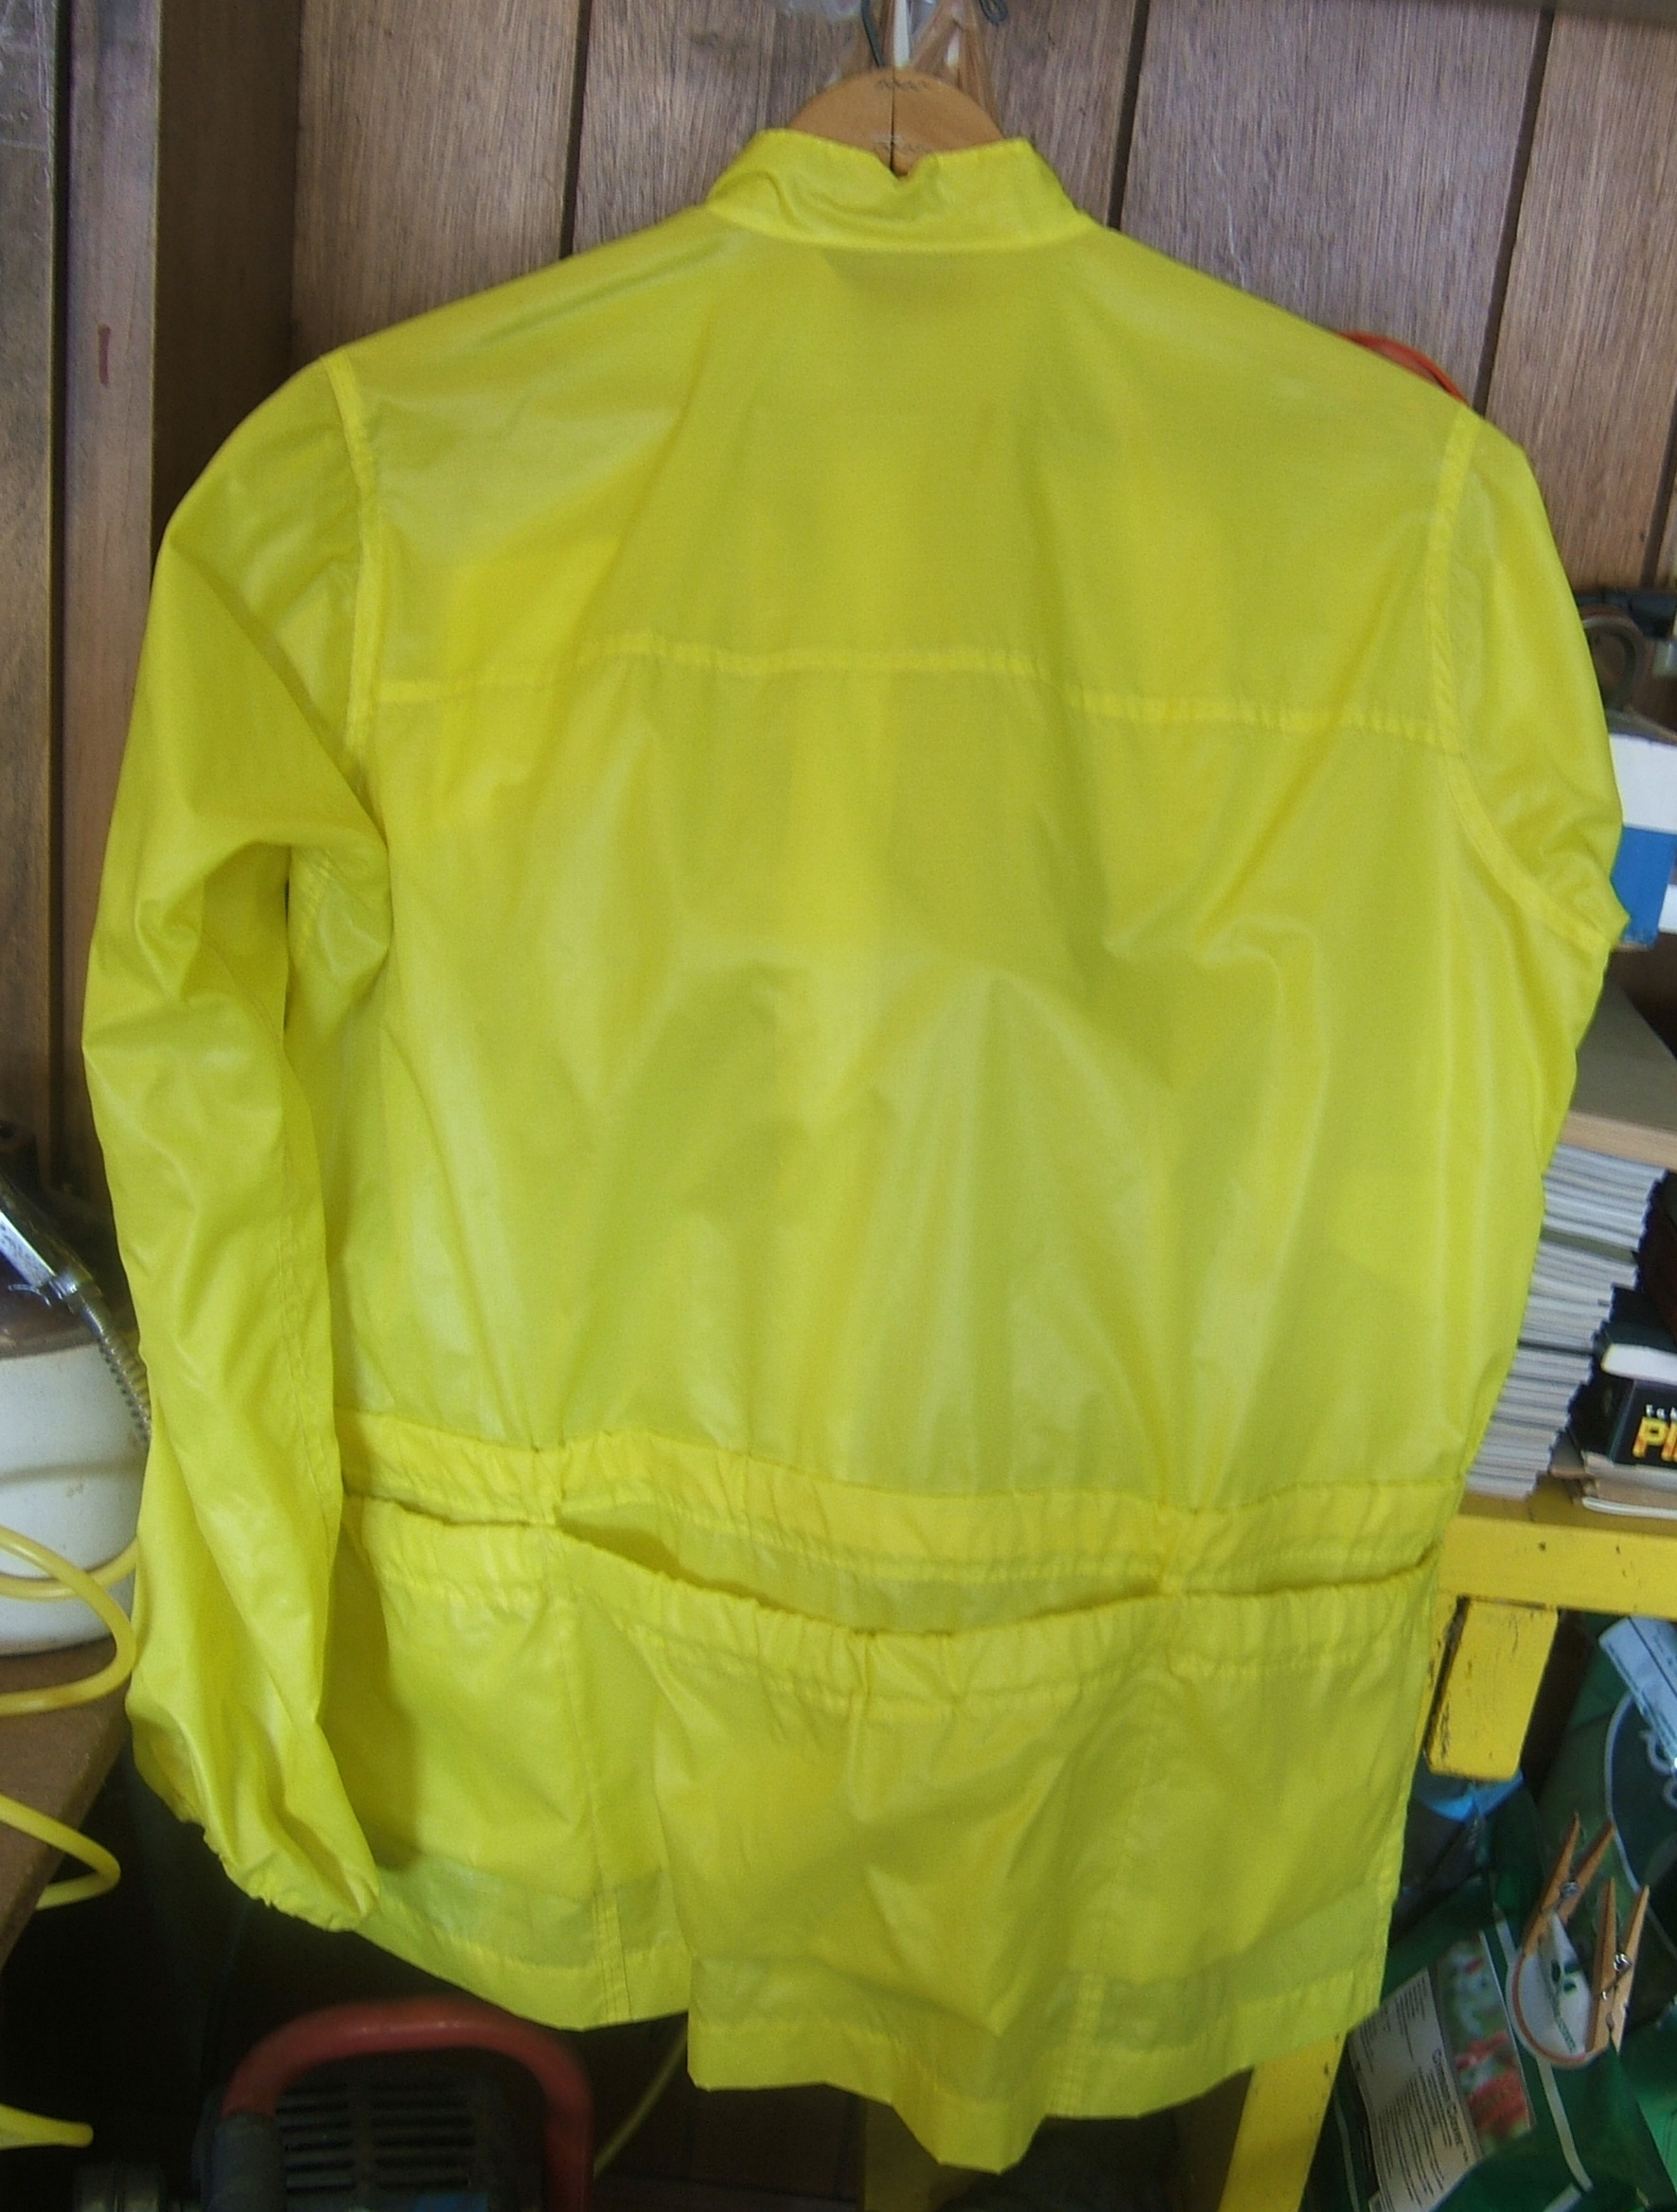
A while back I had occasion to consult 2015SEW, and discovered that I'd never photographed the completed ripstop overjersey. Or if I did, I couldn't find it.
So I went out into the garage and took three shots:

Mask with ear loops, continued:
After I got the wash in the machine, and after I ironed some cash, one of my calling-card sewing kits, and an important card that can't be washed, I pressed the seam of the mask open, then pressed the cylinder flat with the edge of the seam allowance in one of the creases.
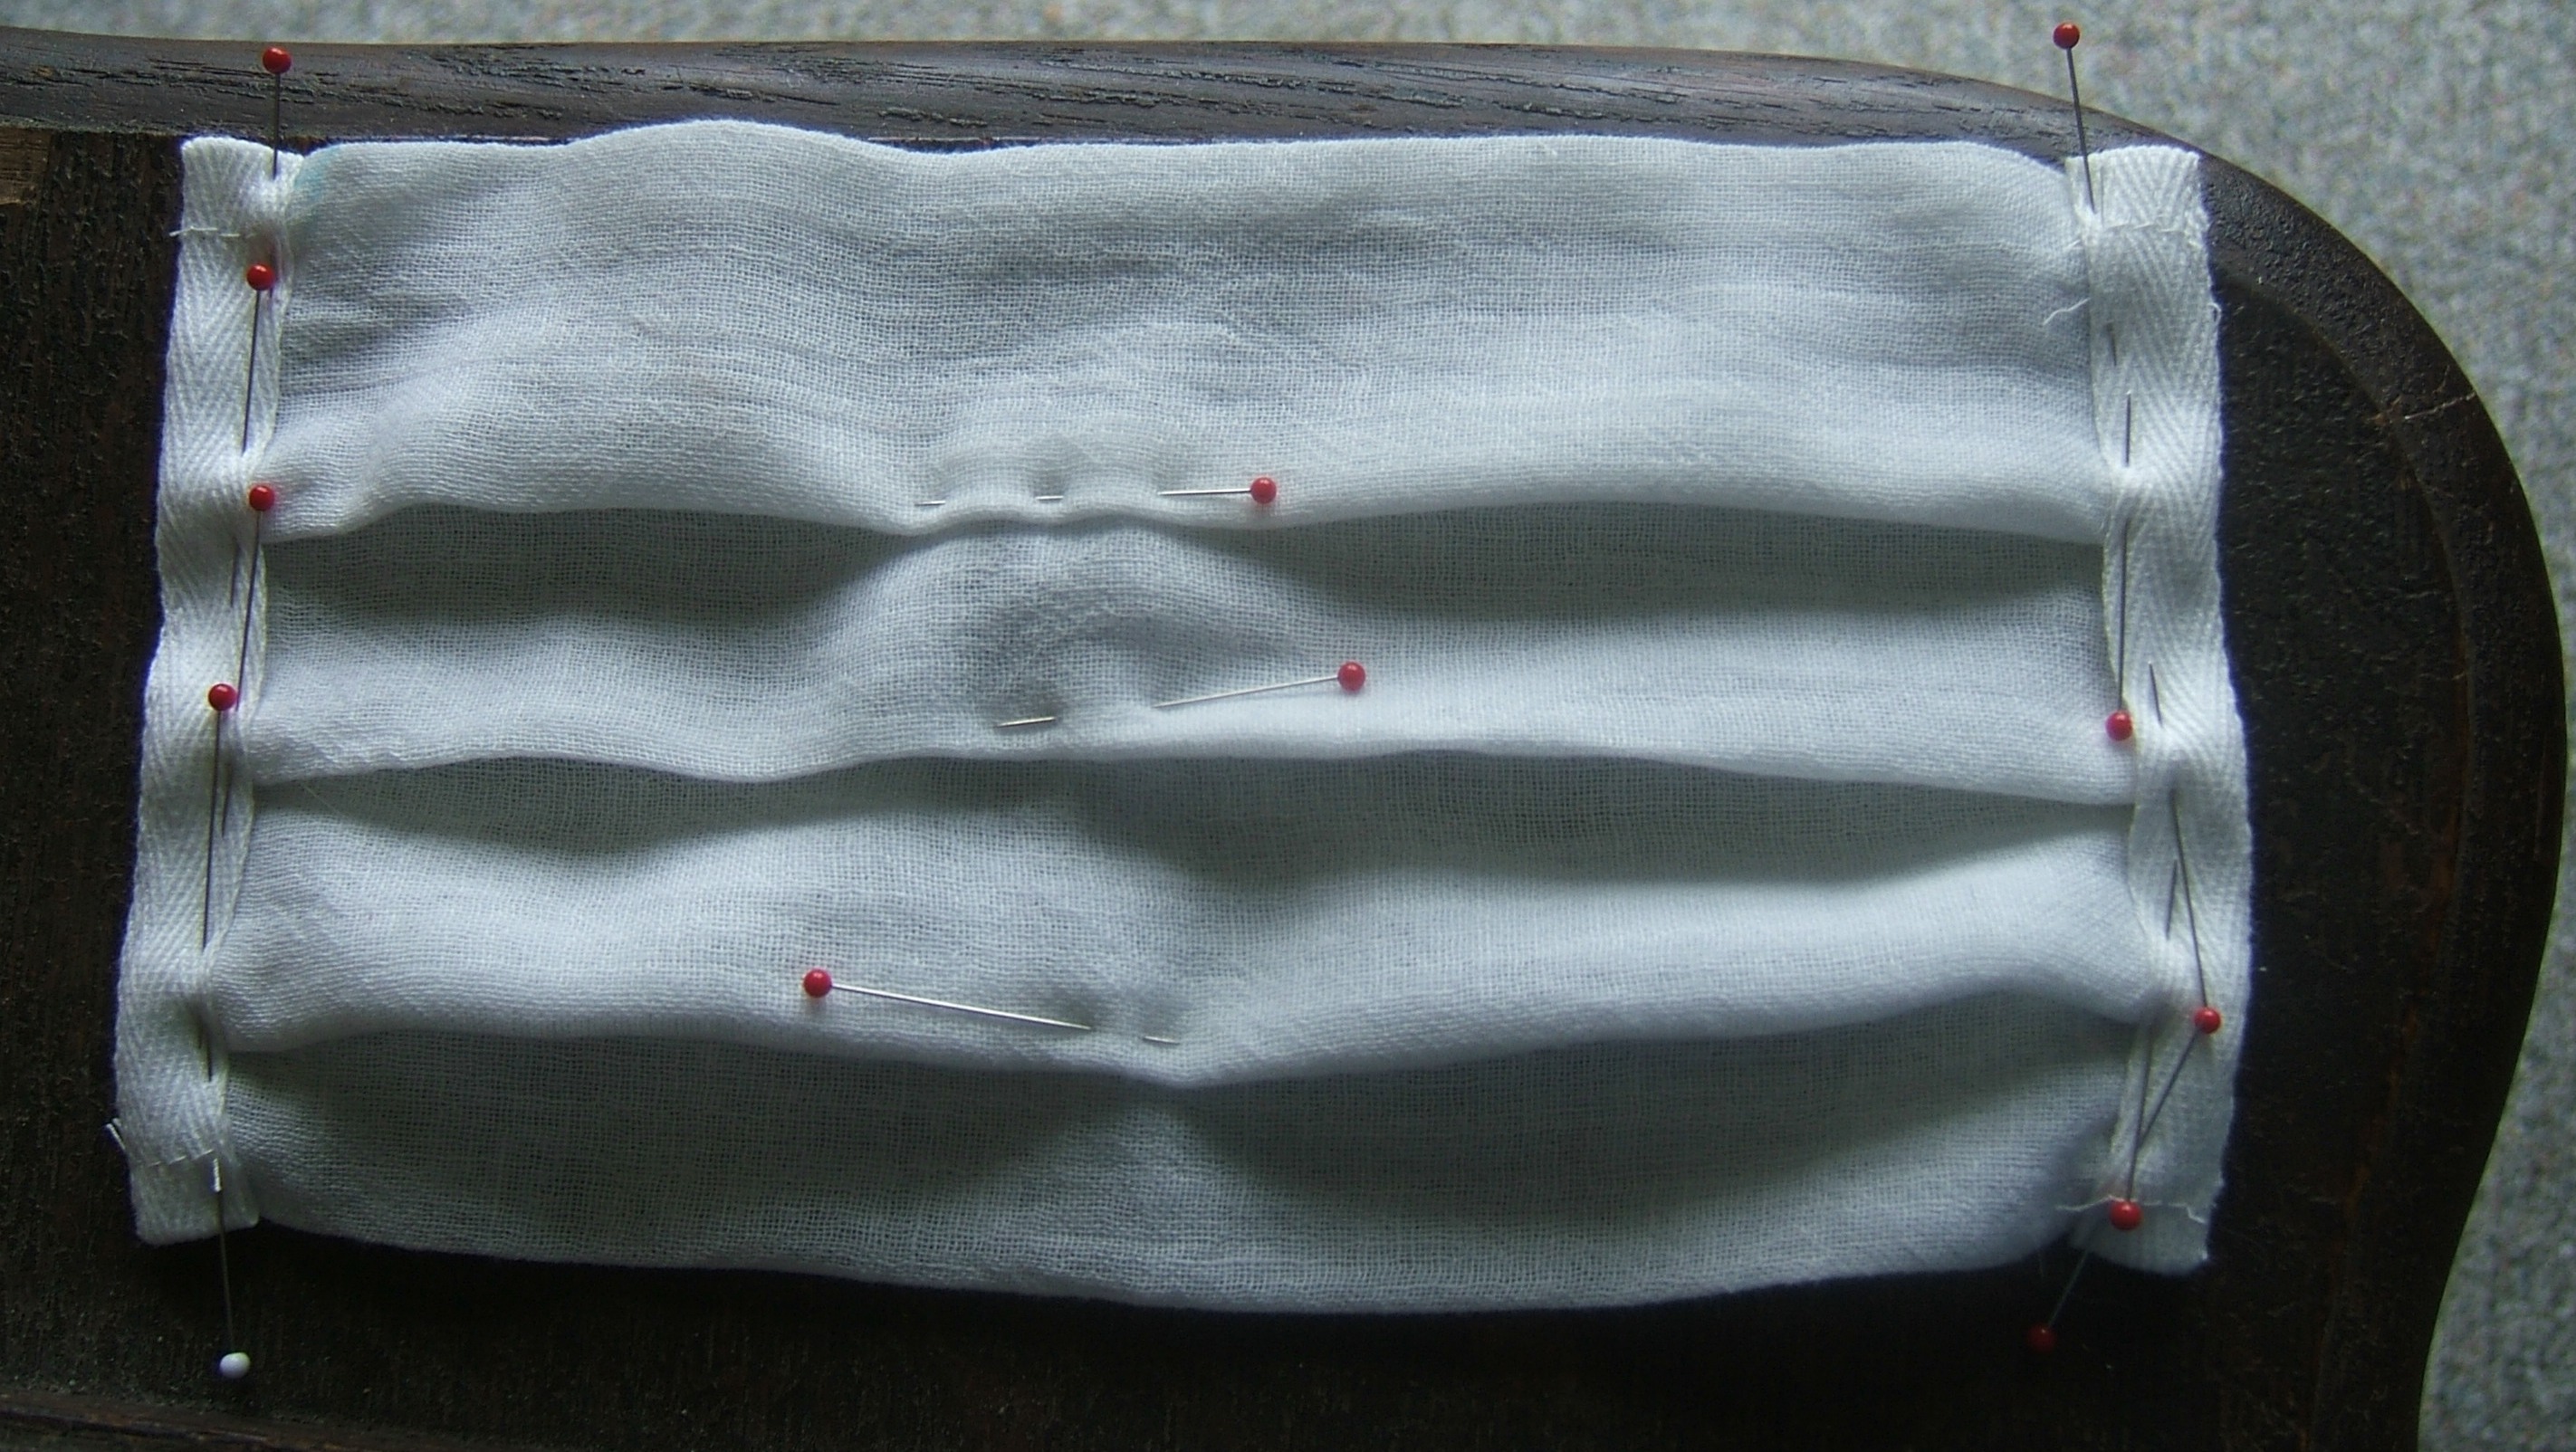
Then, following a tip from Creative Machine, I pressed the mask in half with the wrong sides together, then opened it out and pressed the top and bottom to meet the center crease, then used these creases to form the pleats.
Then I thought long and hard about how to finish the ends of the tapes. I didn't want lumps, and I did want a point where I'd sew the eighth-inch elastic. After fiddling with the end of the tape for a while, I decided that there was nothing for it but to hand-sew miters, as I do for handkerchief hems.
The pleated mask is four and a half inches high. I cut two seven-inch pieces from the pre-shrunk half-inch white twill tape, and there the matter stood when it was time — past time — for my nap.
About ten minutes before it was time to get up, I had a "well, duh!" moment. What I need to do is to make the tape just as long as the height of the pleated mask, then run small-cord elastic through the channel and let DH tie it to fit over his ears.
That also obviates the need to pin darts into each of the four corners while he is wearing it to smooth away the rumple where the tapes change direction. Ah, that step was so couture!
And so fussy.
The ties for the first mask were unshrunk tape, cut 34" long. After a few washings, they are now 32" long. The part sewn to the mask hasn't puckered it, so I shall use unshrunk tape to make my channels.
I put the seven-inch tapes back on the tape winder and cut two 5 1/2" tapes with pinking shears.
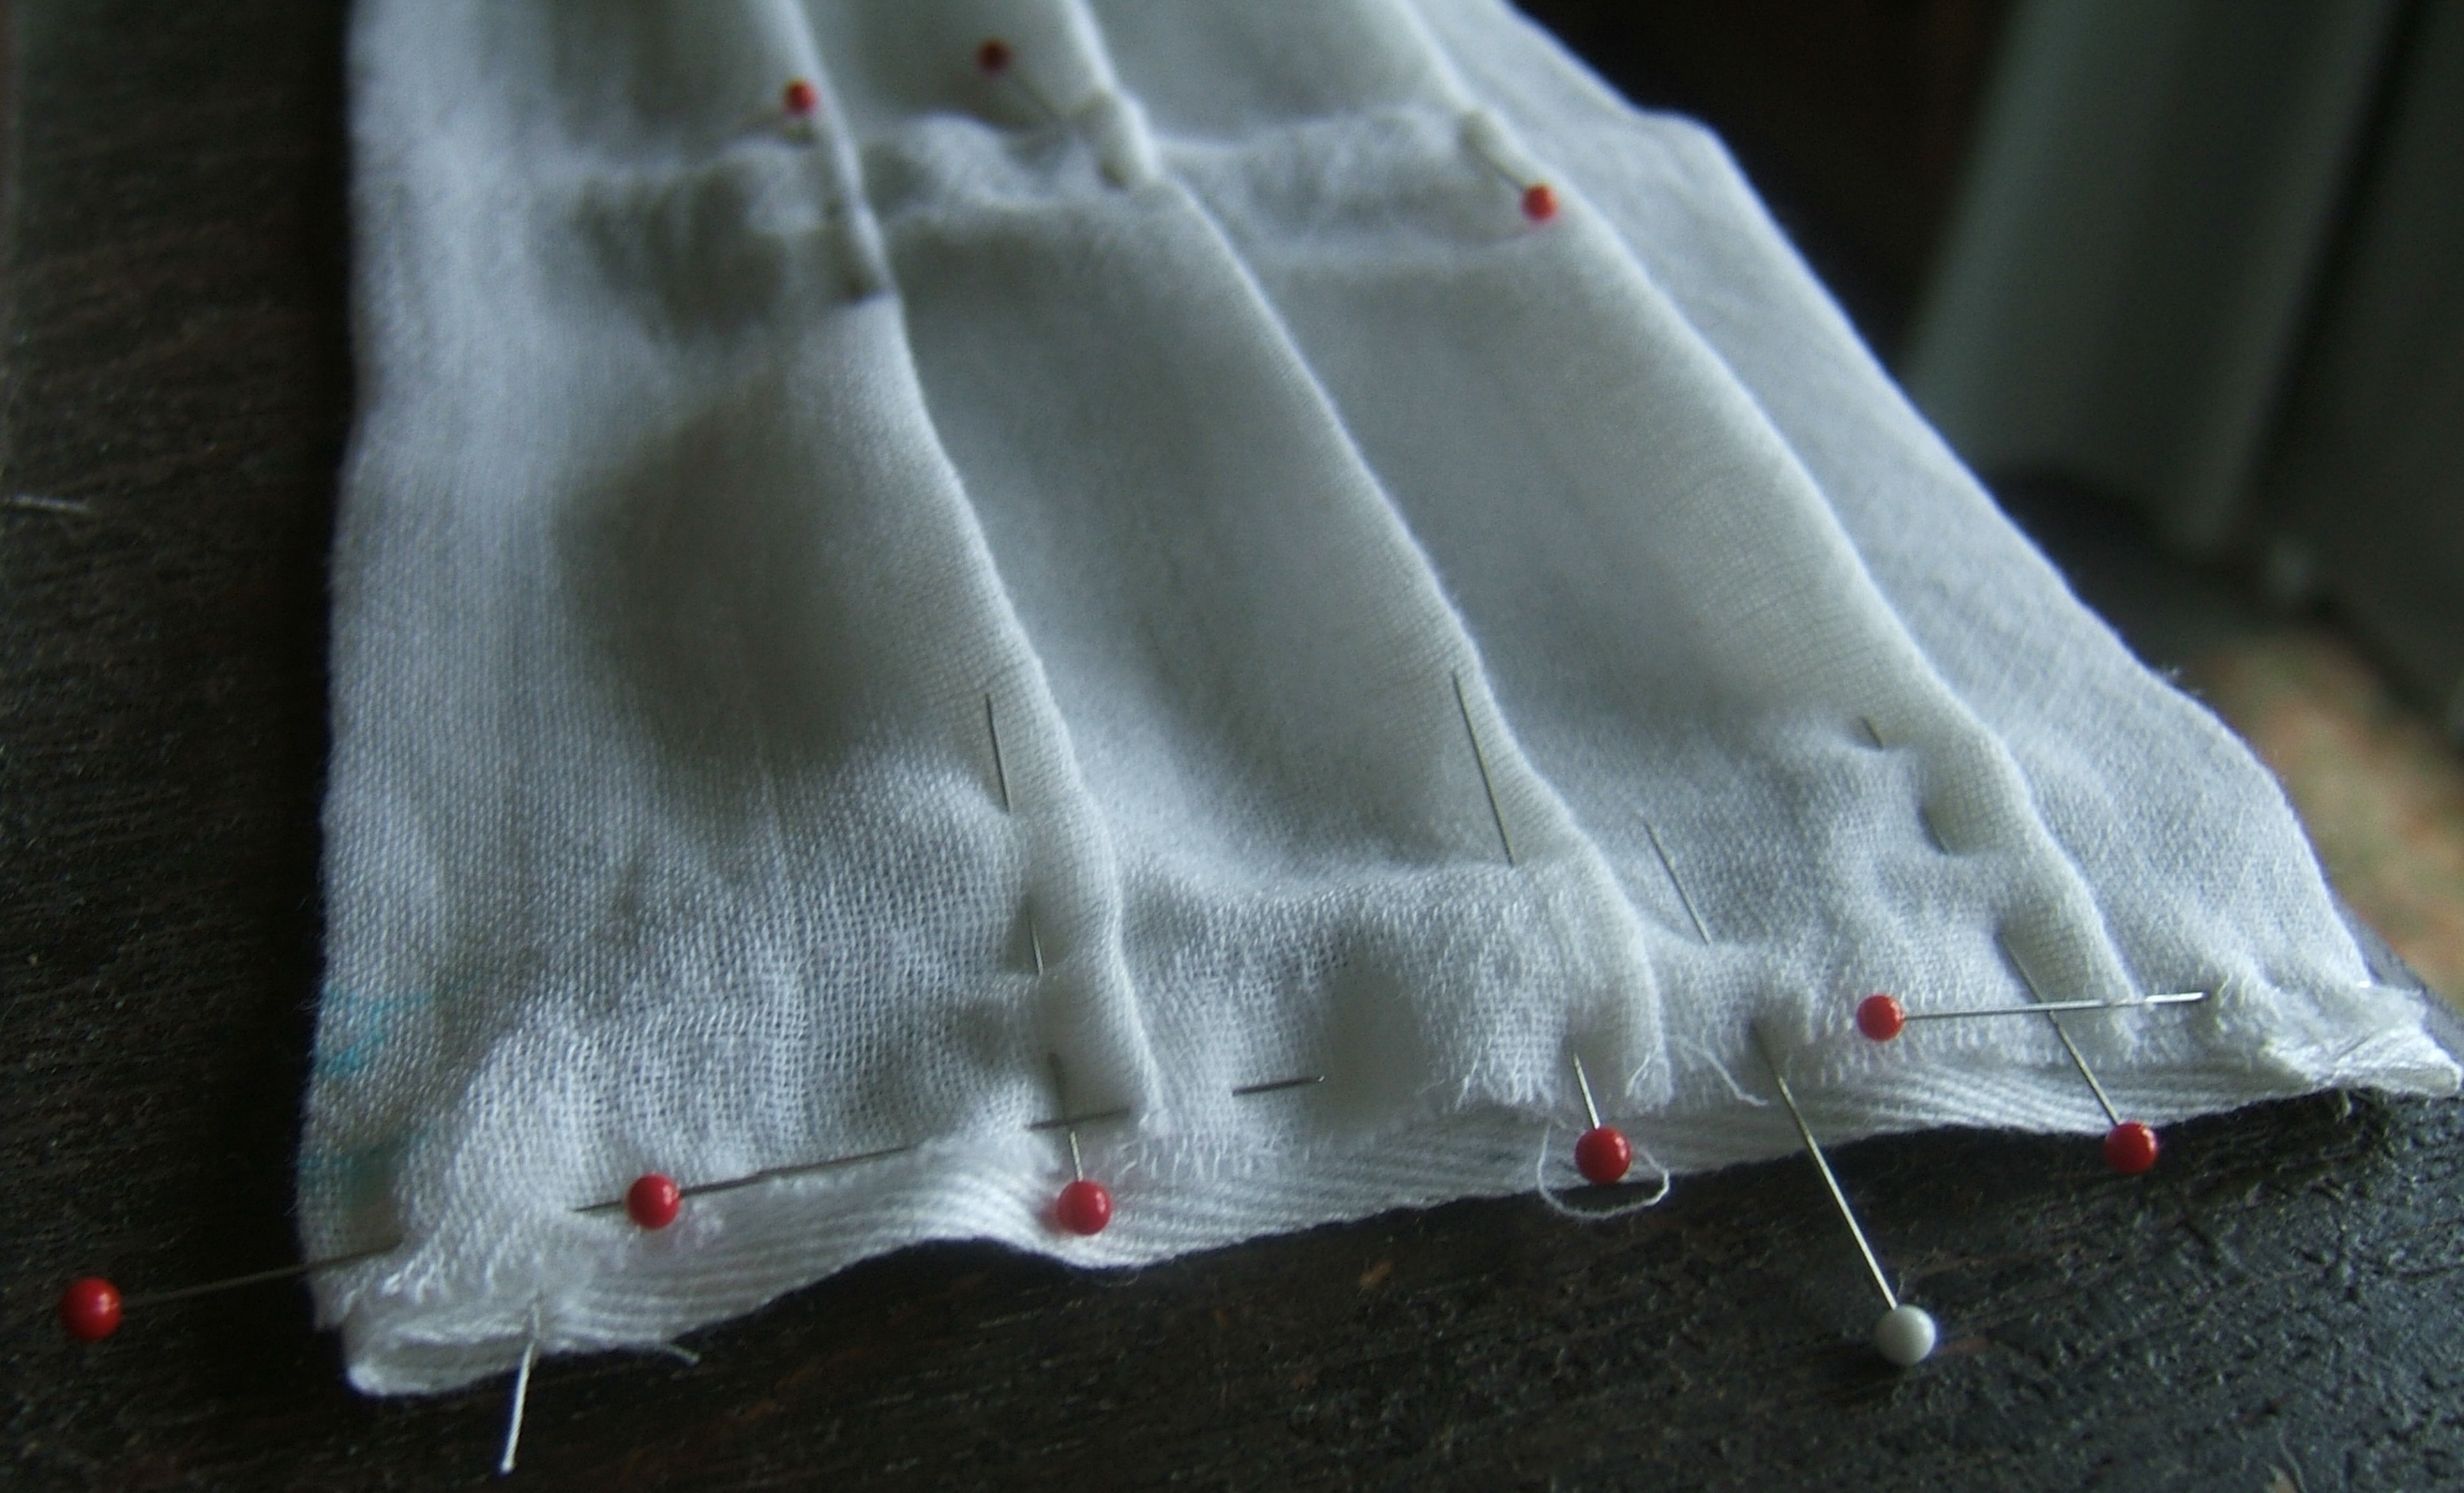
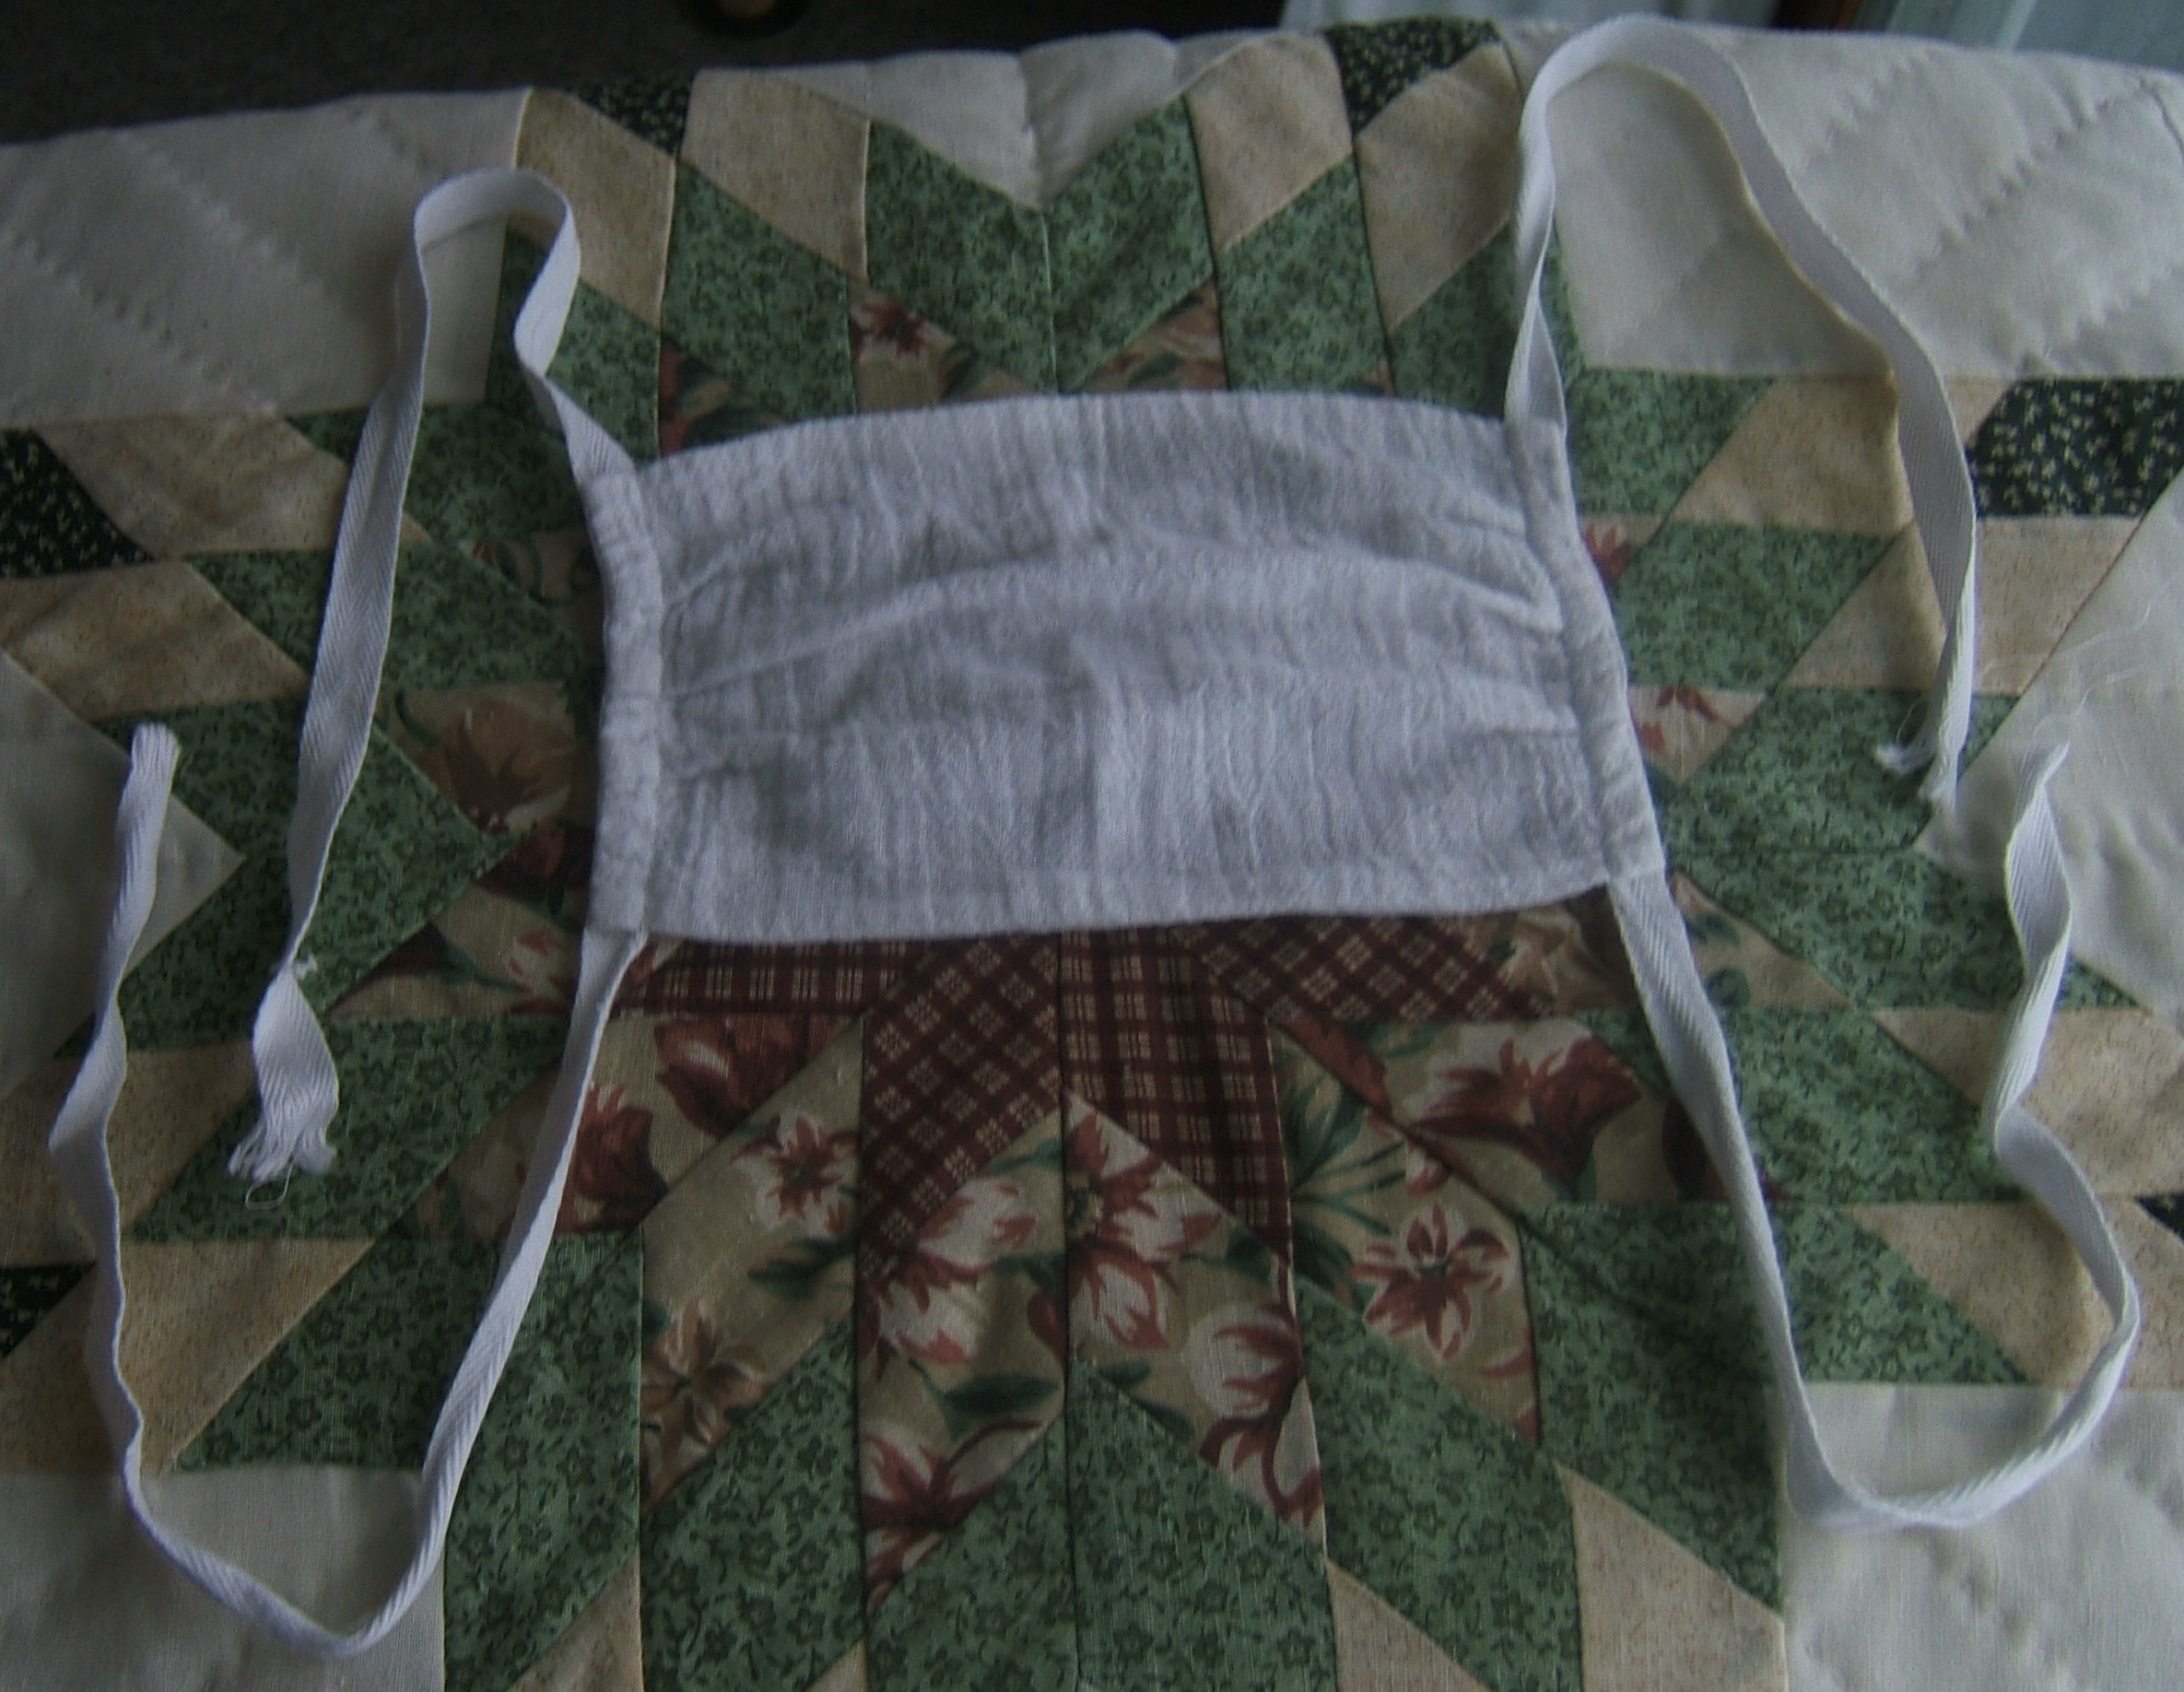
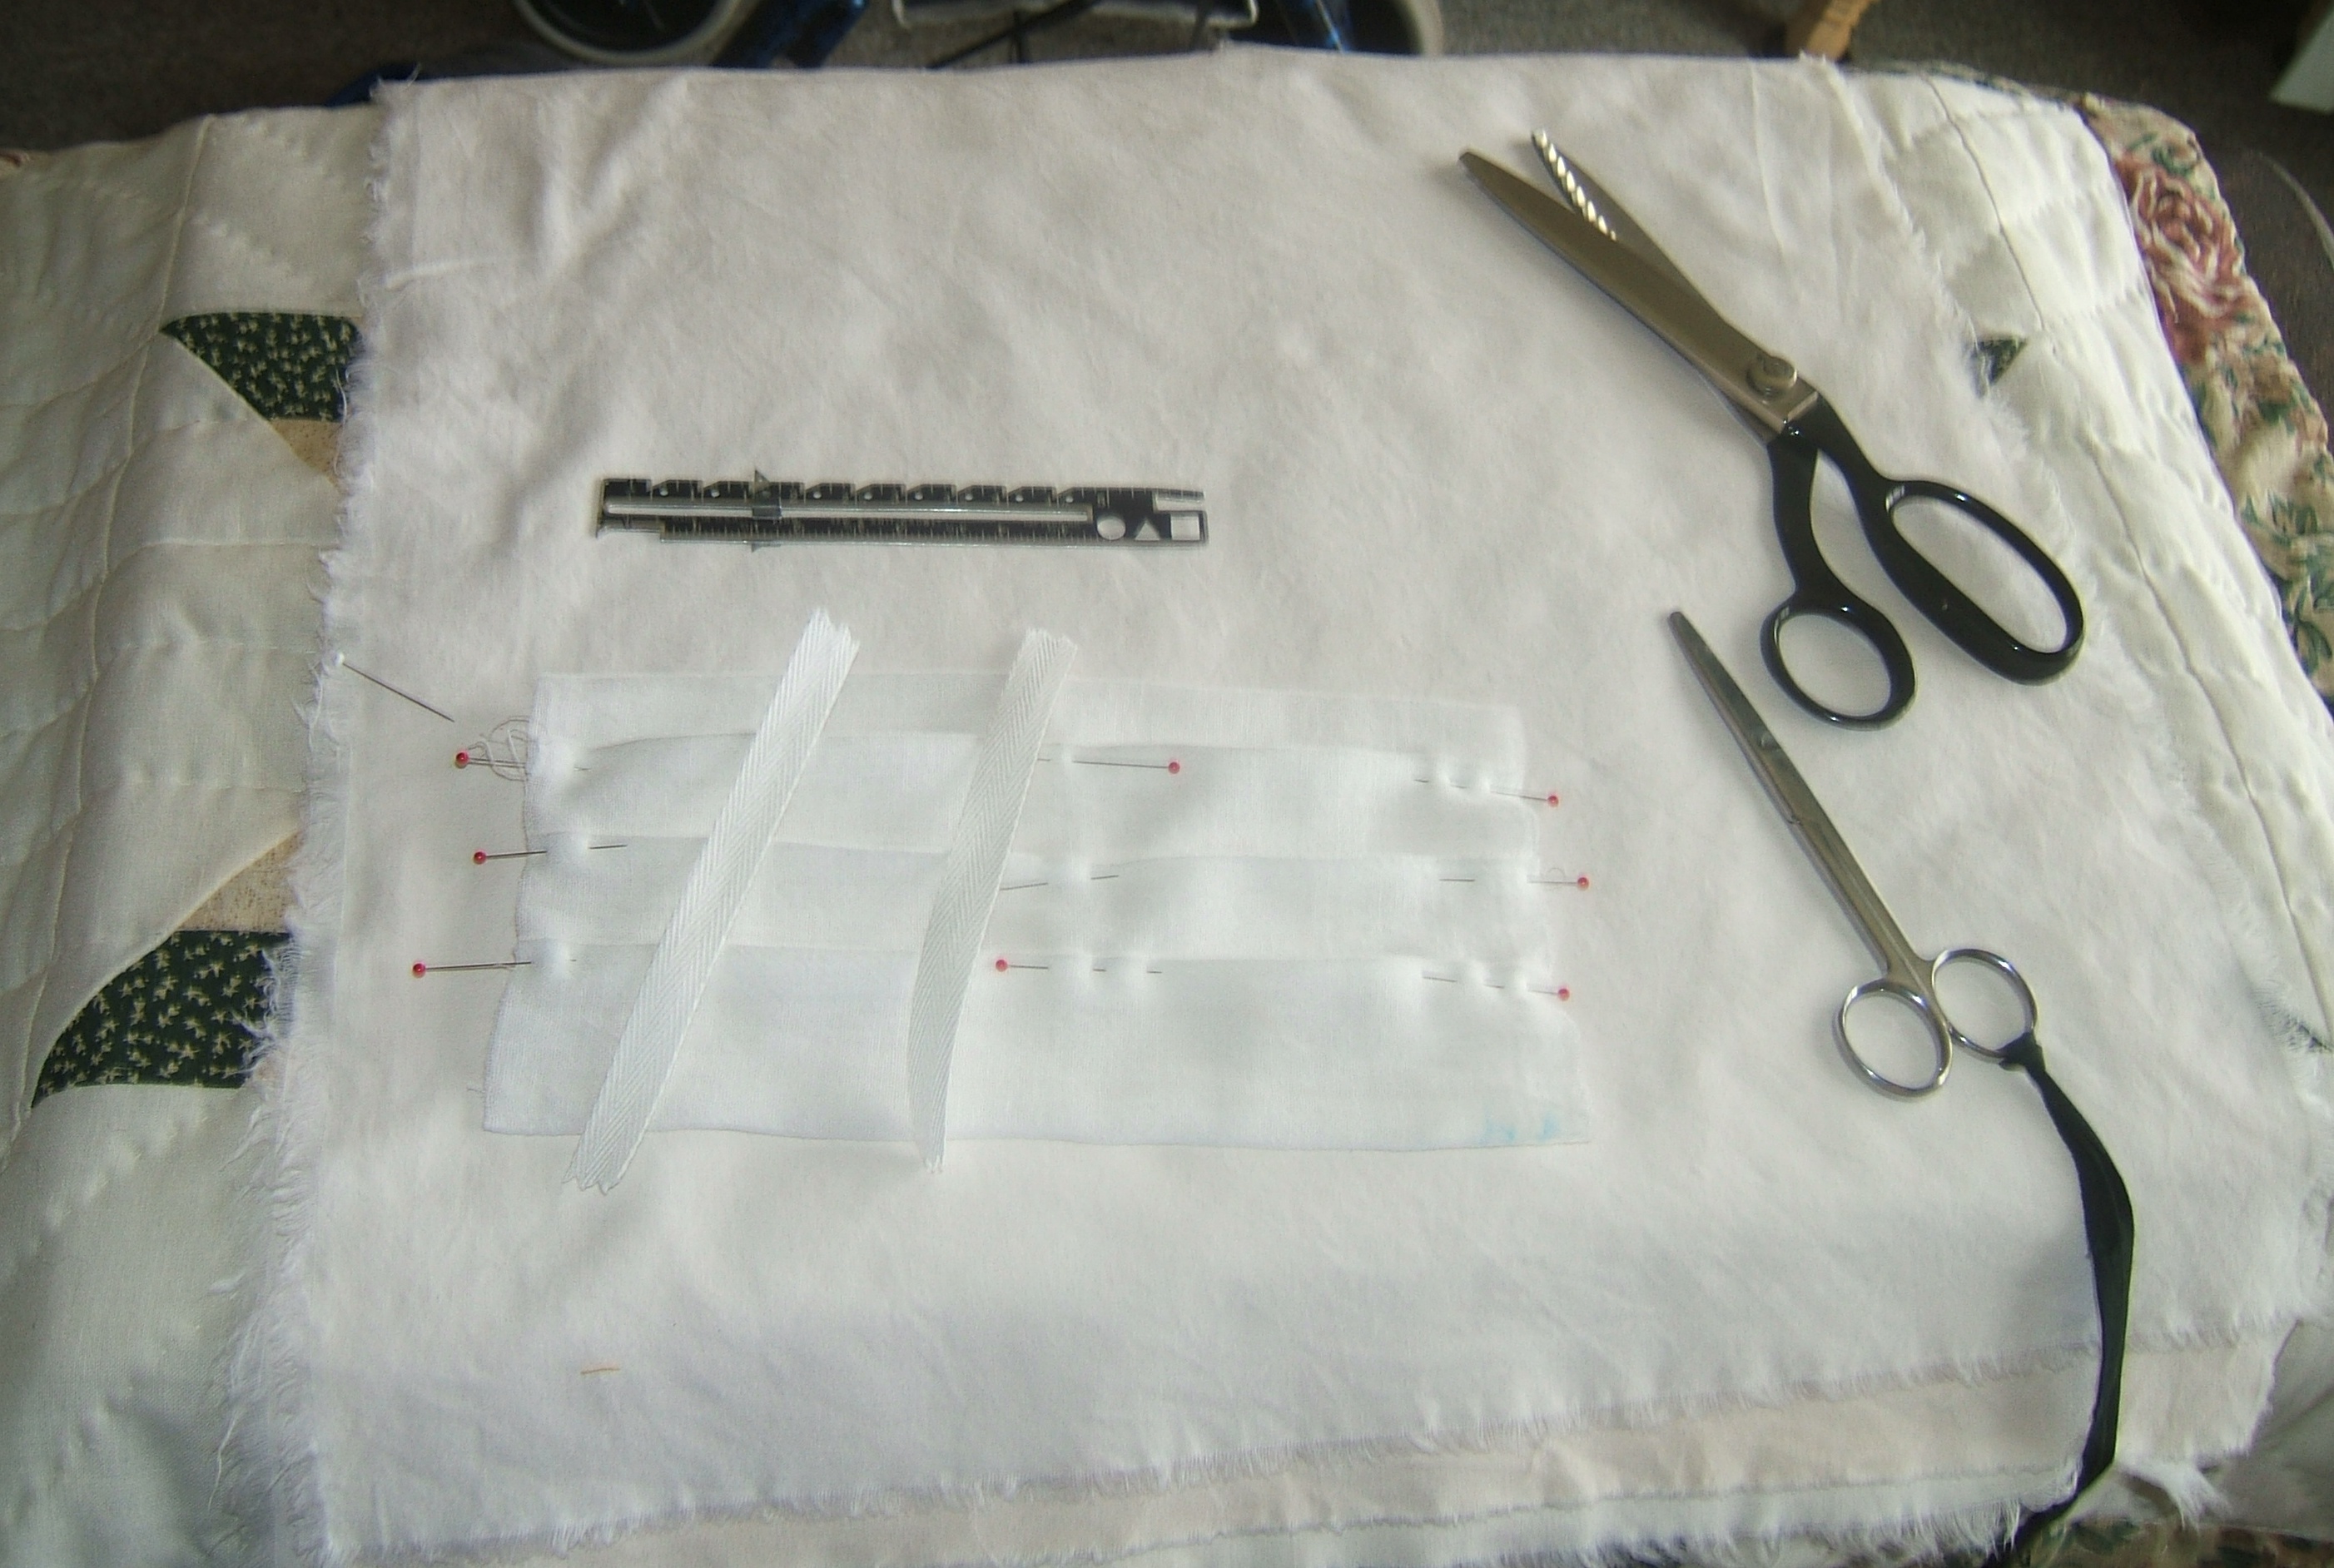
Then I folded the ends of the tapes to make them fit the 4 1/2" mask, machine basted the hems, and pinned one to the wrong side of the mask with about an eighth of an inch sticking out.

While pinning the first side, I realized that it would be easier and neater to shift the pins that secured the pleats to holding both the pleats and the tape.
Then I turned the work over and pinned for stitching. Note the backward pin at the beginning of each seam line. I seldom back tack, but I couldn't think of any way to secure the ends of the lines of stitches except to stitch an inch backward at each beginning and end.
I appear to have forgotten to photograph the tape pinned to the front side for the final stitching, also back-tacked at beginning and end. I simply folded it on the first row of stitches, smoothed it with my fingers, and made sure the pins also secured the pleats — pretty much like the first stitching.
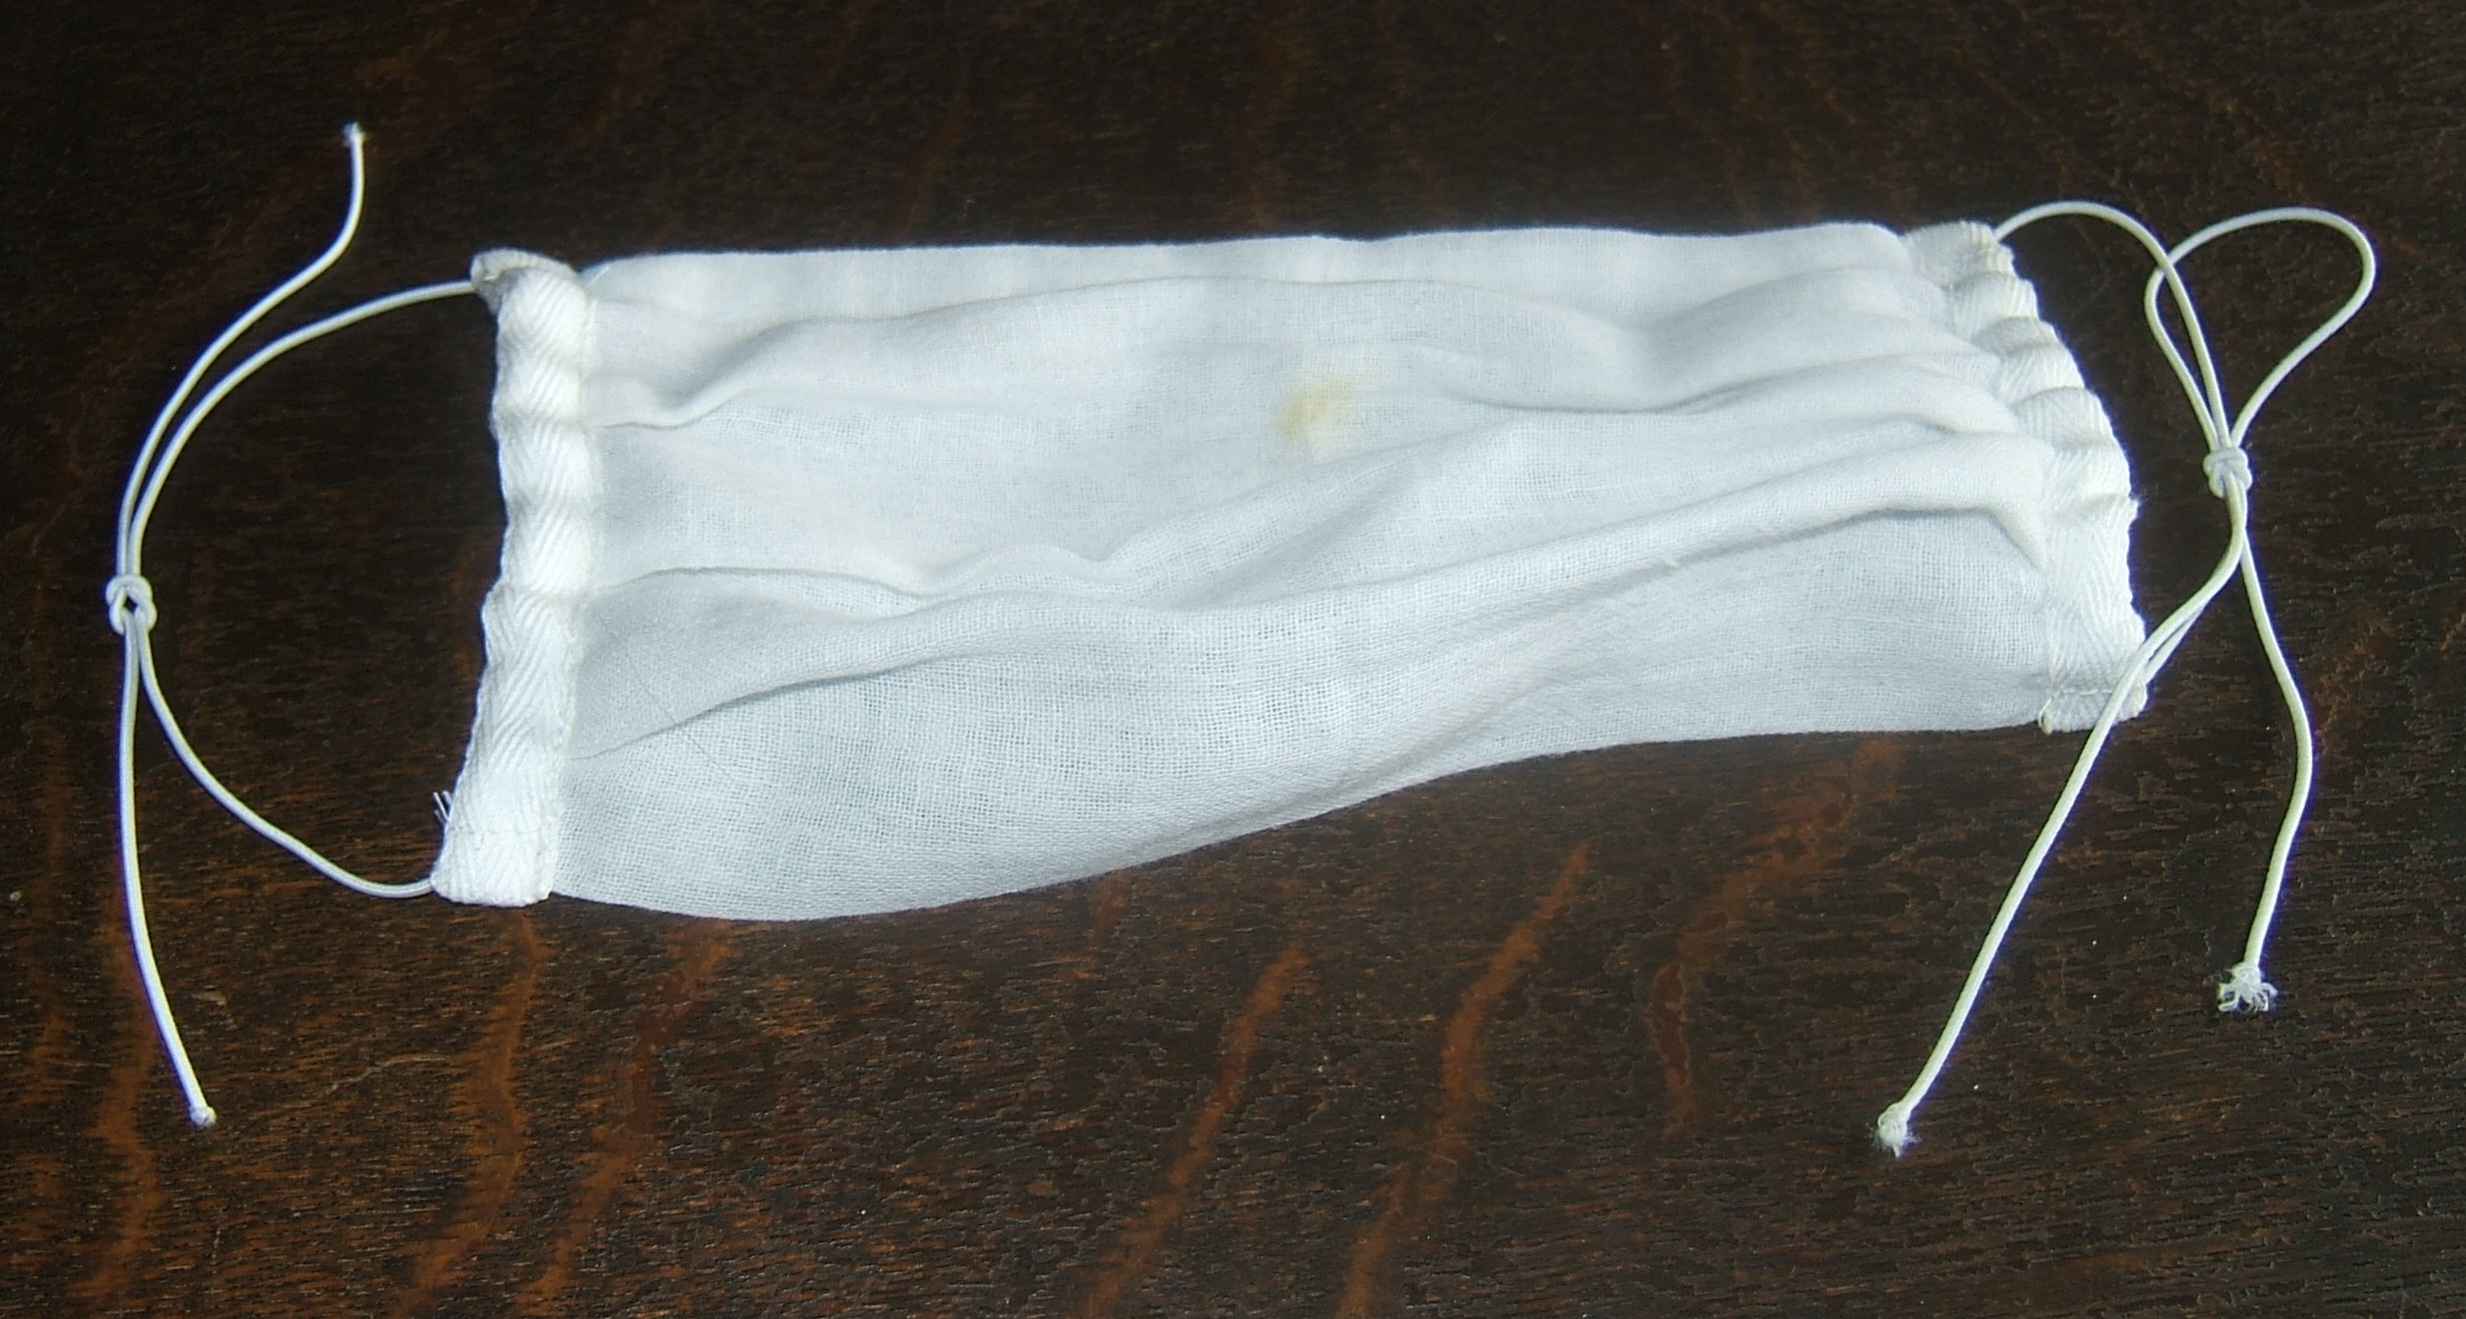
finish Dave's mask
I left the surplus elastic in case of further adjustment. Note bow knot on one ear loop.
I used cord elastic instead of baby elastic because of the knots.

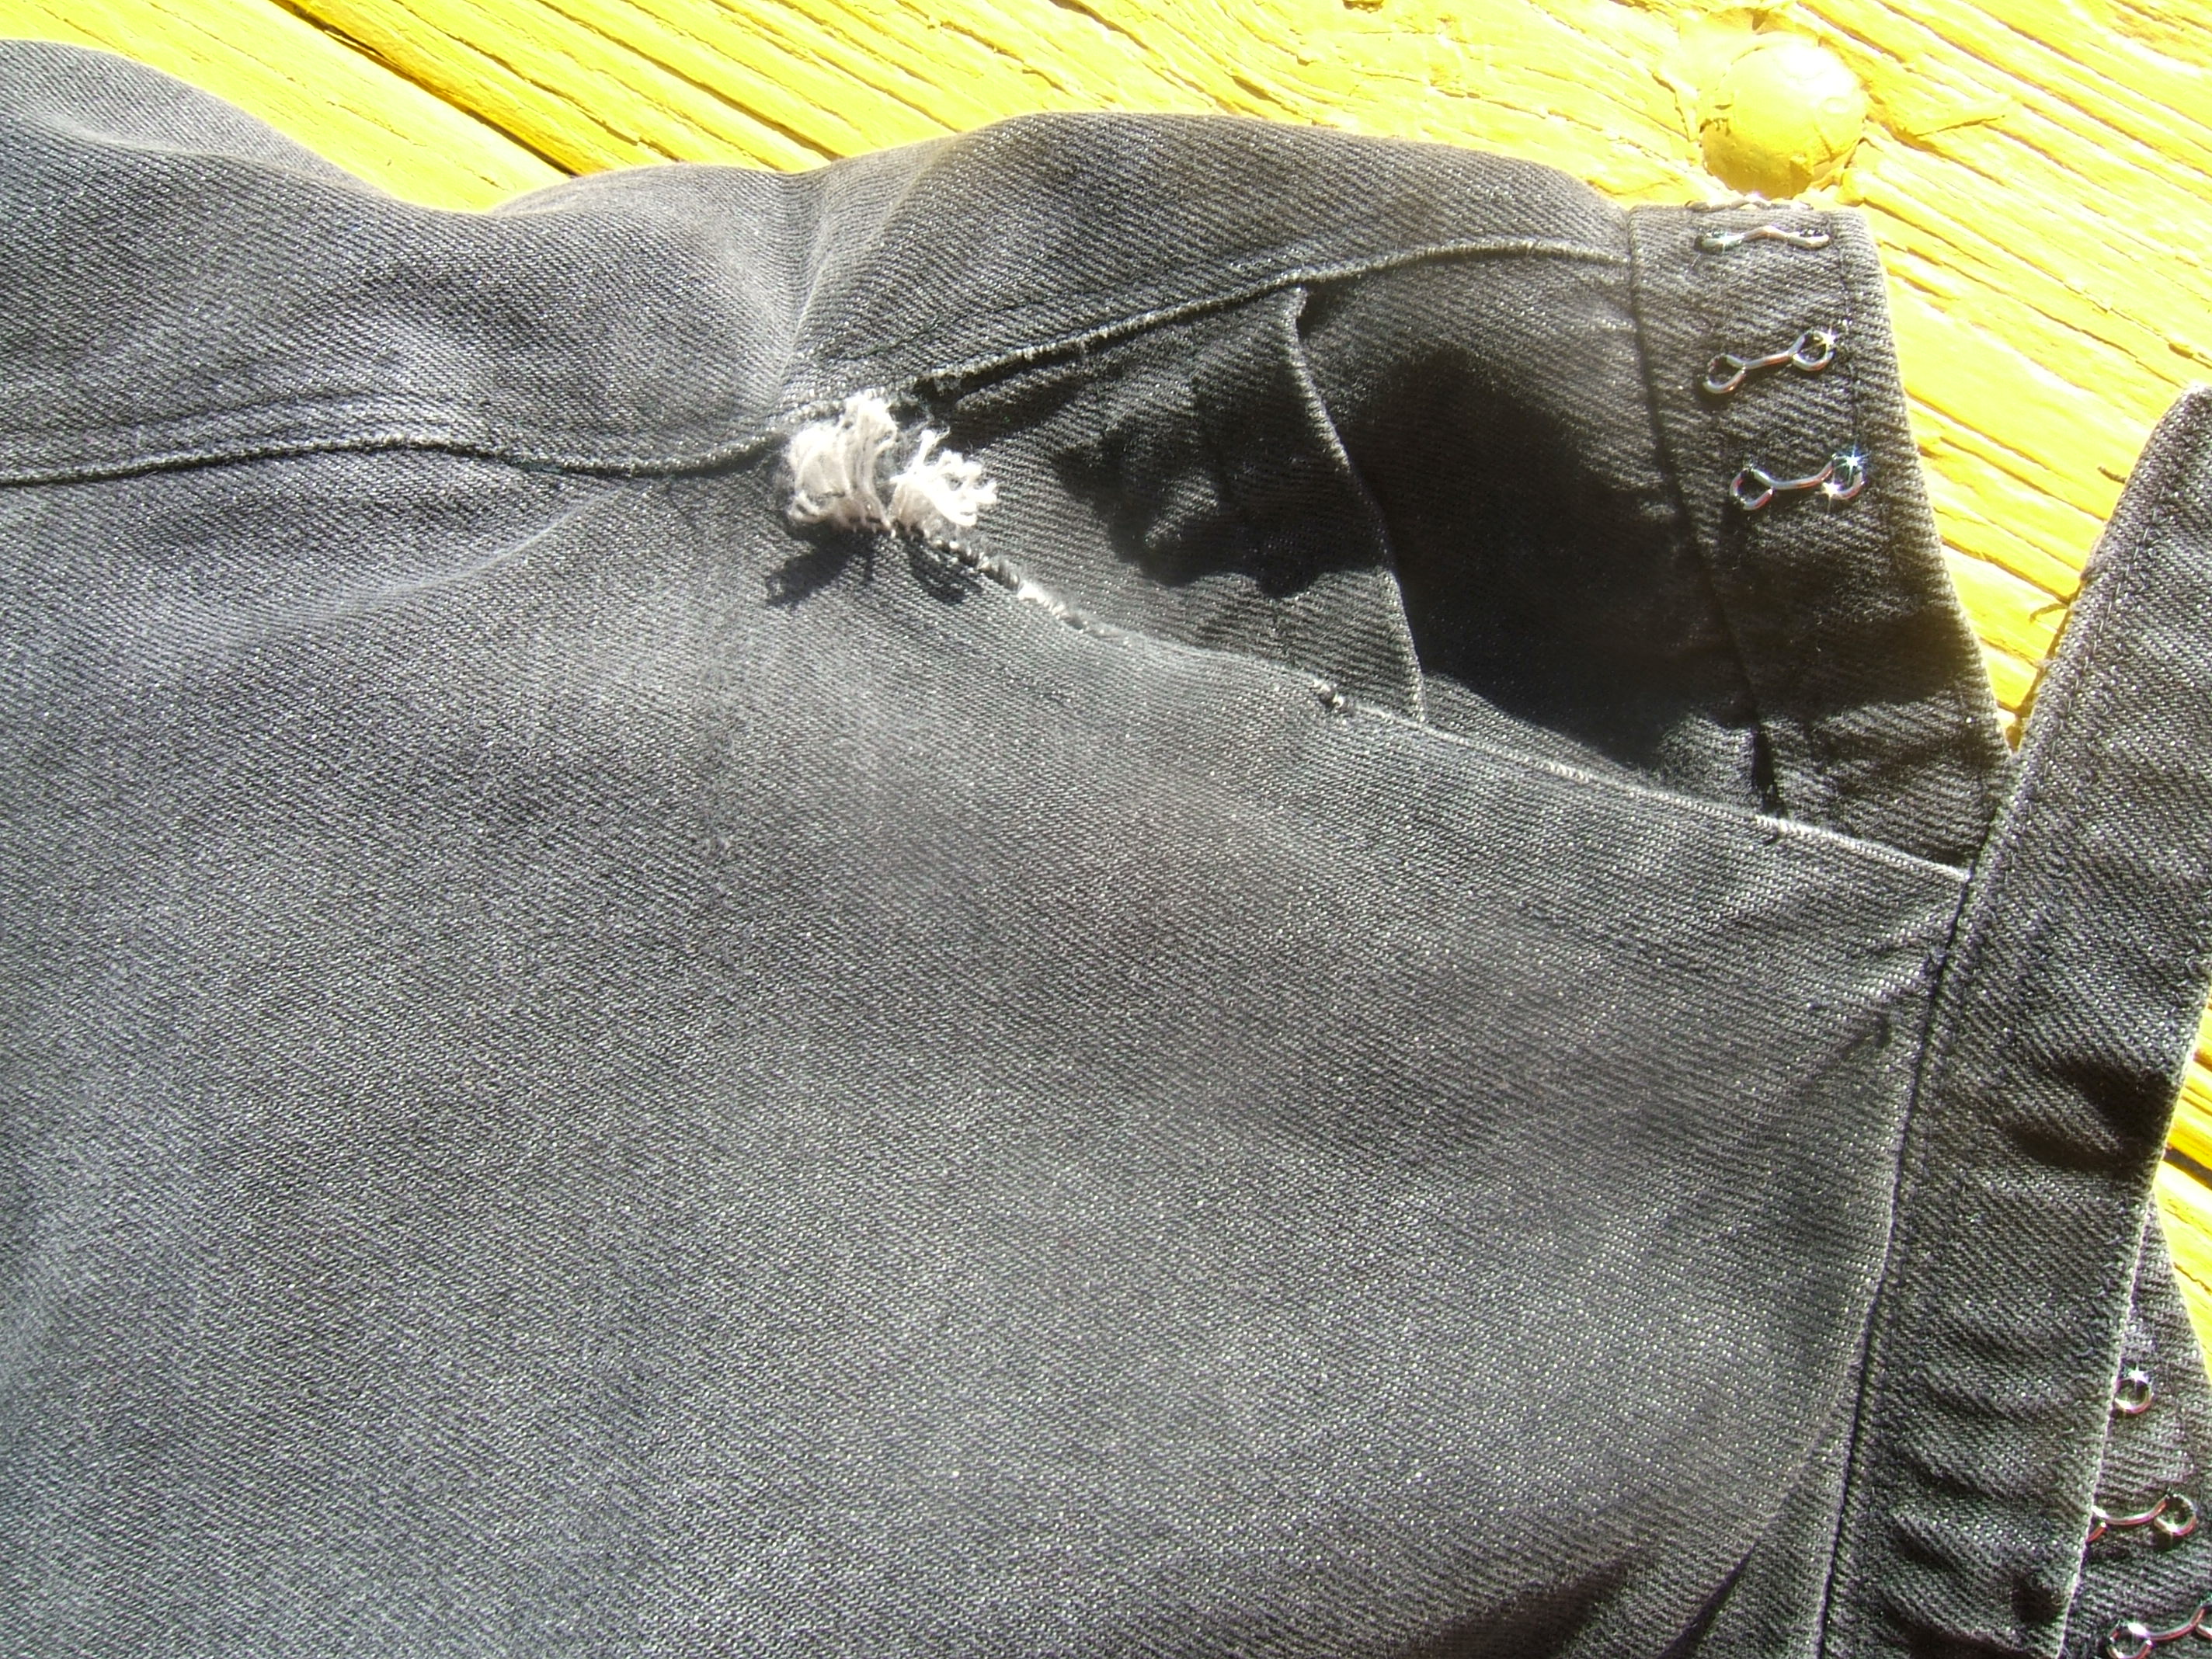
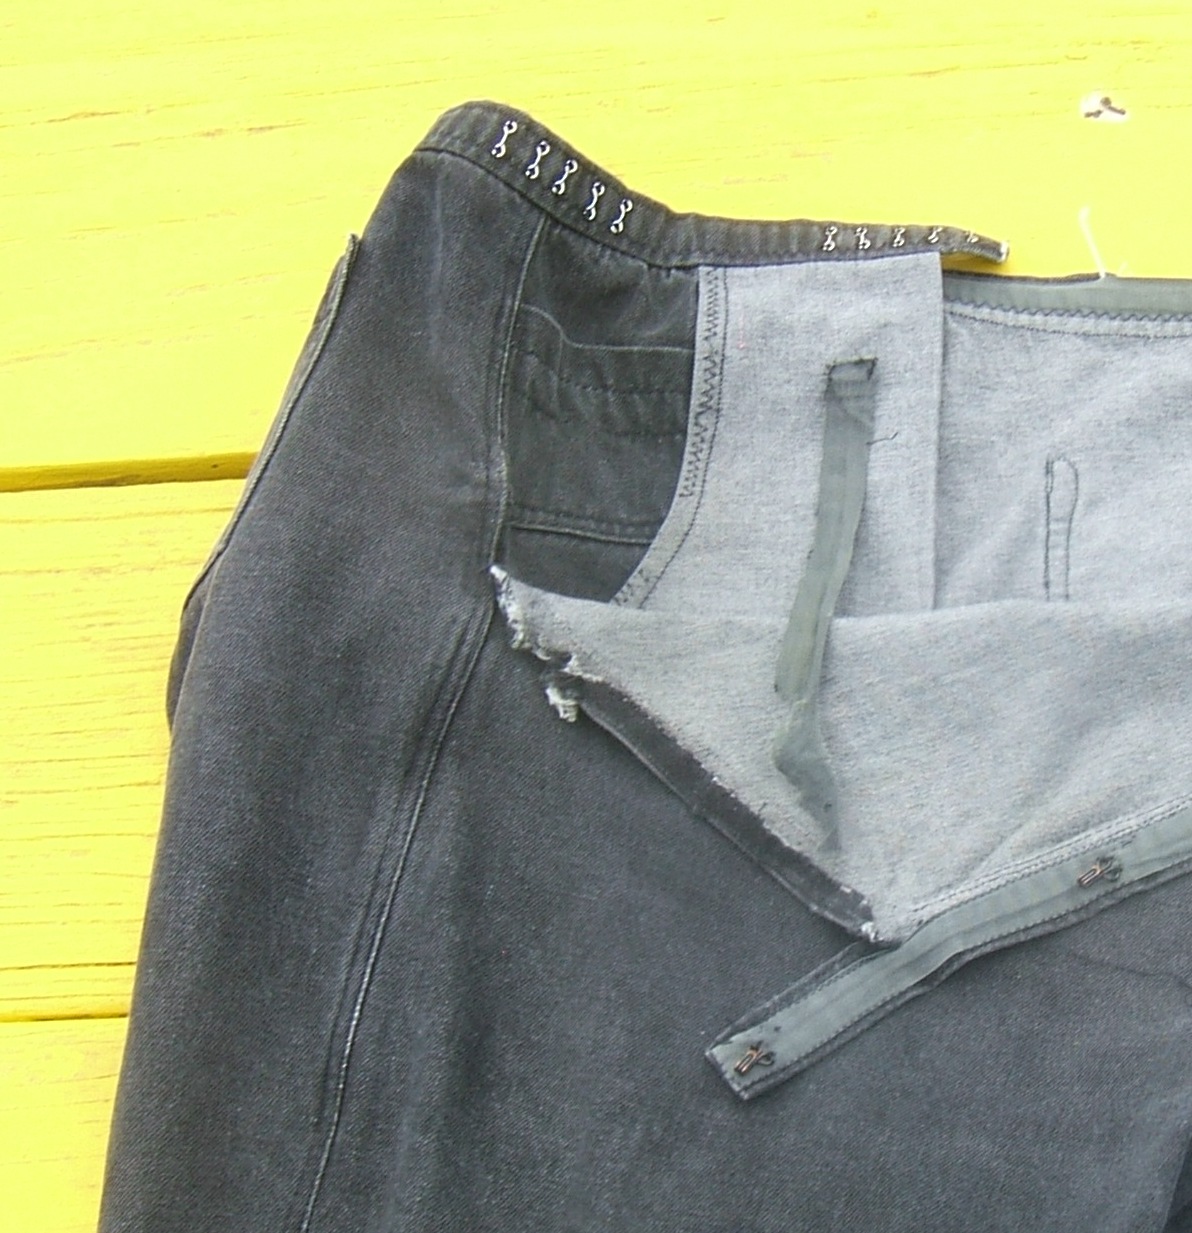
firm up hooks on everyday jeans
A brass hook with the black paint worn off is so pretty that I had to photograph one. Unfortunately, a picture doesn't do it justice.
You'll notice that the thread is shinier than the hook. It's polyester upholstery thread, and should hold until the pants finish wearing out.
The hooks had been dangling from one ring so long that they had bent. I straightened one with my fingers; the other required the judicious application of pliers, followed by the even-more judicious insertion of a flat-blade screwdriver.
I did this repair yesterday or the day before.
Today I began work on the frayed hem of bra #2. I considered zig-zagging or binding the frayed spot. Inspection showed that my best plan would be to pick out the front half of the hem, press it open, shear off the ragged bits, and re-hem.
The hem is so narrow that I couldn't stretch the stitches much, so unpicking it took all morning. (Which began after ten and ended well before noon.)
Today, I pressed open the hem I'd unpicked, then pressed the black shirt I'd worn to the dentist's office. Since I have few occasions to wear a low-necked, short-sleeved black shirt, that wasn't a rush job.
In the afternoon and evening, I trimmed along the frayed line with shears, smoothing into the original edge at the shoulder seams with the aid of the "SuperSnips" when I went into the living room to pin it. Then I didn't feel bright enough to sew the hem, but I have enough bras to last through washday, so there's no rush. Tomorrow is scheduled for frantic cooking. We ordered two pounds of ground beef and got ten.
darn other glove
Some time or the other I went into the living room to do some handwork in the light of the patio door, and found a pair of yellow gloves in the arm of the futon and a piece of Medici in the needle I wanted to use.
So I ran yarn up and down the columns of stitches in the weak spot before beginning work. (I forget what work; it might have been firming up the hooks on the service opening of my shabby default pants.)
I began in the middle of the weak spot, which was a mistake because I had to buttonhole back to do the other side, which left a slight lump. When I'd finished the other job, I worked interlocking buttonhole (Point d' Venise) over the run-preventing stitches.
I may make one more mask. I want to try out the idea of making just one tie and running it through channels like the ear elastic.
I'm also planning to ask Spouse whether the ear loops on his mask are just right, mark the knot with washout, and measure the space between the blue marks to decide how long to cut the cord elastic.
The bow knot had come undone. I marked the other elastic on each side of the square knot, cut the bow-knot elastic by the blue marks, plus a generous allowance for the knot, folded that piece in half and folded the marked elastic with marks matched, marked the knot space, then cut and marked the marked elastic by the piece of bow-knot elastic.
It was a bit fiddley to make the knots settle neatly between the marks, but the hard part was persuading the knot of the second elastic that I inserted to enter the casing. The dime finally dropped and I pulled it into the other end of the casing.
I use a large blunt tapestry needle to thread cord elastic into a casing.
While hanging the wash yesterday, I noticed that bra #1 needs re-hemming. Oddly, #6 is just fine even though that one was the first to be put into service and I've been wearing them in strict rotation ever since all were finished. Except for #5, which was mislaid before being worn, and looked so much nicer than the others when I found it that I decided to save it back for good. So far, there hasn't been a sufficiently-special occasion.
Bra 2 is still lying on the ironing board waiting for me to unfold the White and stitch it. I'm going to need it on Monday.
frayed hem on bra red 2
Finally did that five-minute chore — but I won't need it on Monday because I went for a short ride on Tuesday and undressed into the washing machine when I got back. I marked the repaired bra "Wednesday".
Sigh. It will be really cool when I undress into the machine because my clothes are soaked in sweat.
This would probably be a good time to take my wallet apart and shorten the shopping-list pocket.
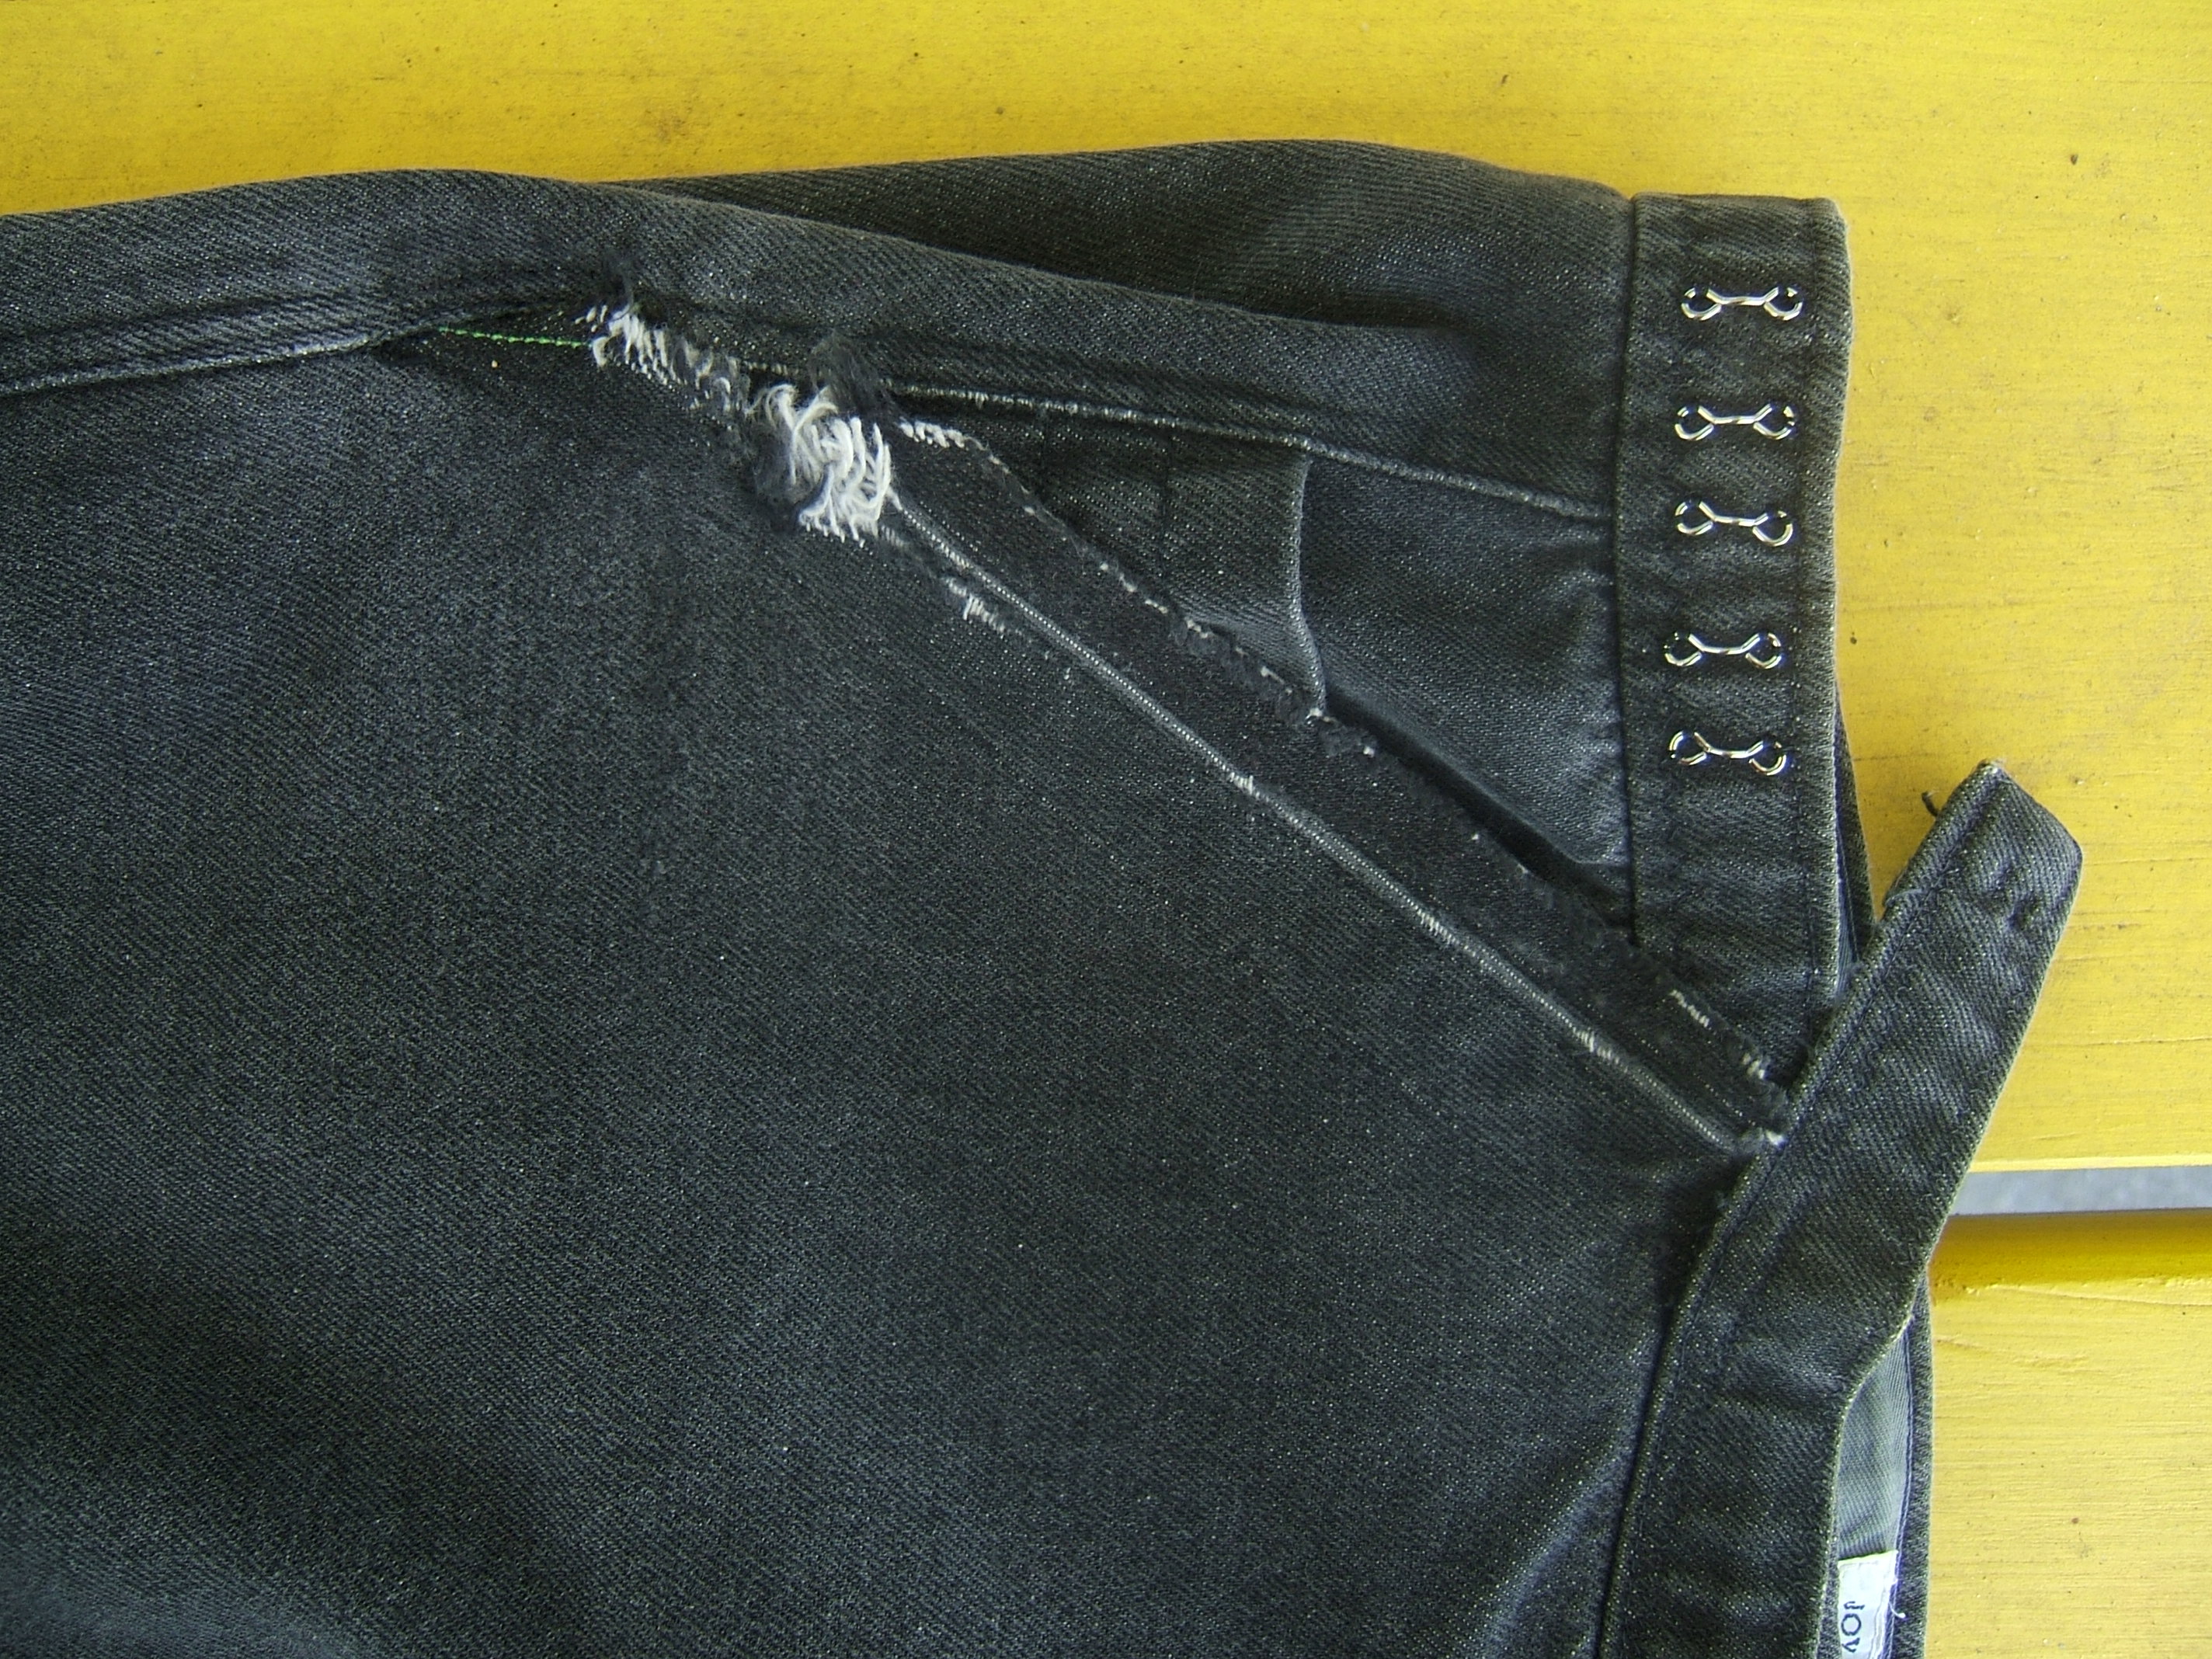
I've been putting a low priority on the frayed pocket opening because there is twill tape underneath to keep it from getting worse, and I never tuck my shirt in.
Then I noticed that the tape is torn almost to the stitching. If I don't get the wallet finished before I'm allowed out of the house, I can use one of the old wallets; the tear in my only pair of everyday pants (neither grubby nor being saved for good) is now urgent.
On inspection, I need to free both ends from the seams and repair the entire edge. Since part of the fraying is from forcing my hand through an opening that is too small when the waistband is on its smallest setting, I can easily afford to remove the worn edge and make a new hem in sound fabric. I think that I will free both ends, remove the old tape, cut along the former edge, then sew tape to the right side with half of it hanging over, as I do for the face masks, then fold to the wrong side with the edge of the tape exactly along the fold or even sticking out a hairsbreadth.
And then repair both seams.
Ripping black-on-black isn't easy even when the fabric has faded to gray and the thread hasn't. It got a lot easier once I'd undone enough to separate the layers.
I need to press the crease out before cutting along it, and ease back the stretched part. Won't take long, but I don't feel like heating up the iron.
I originally intended to use black cotton twill tape to mend it, but have decided to use the gray mystery tape that I used when making the pants.
The roll of mystery tape has a much smaller diameter than it used to.
The other pocket should have the same treatment before too awful long.
Washed clothes and baked bread today. Also changed the batteries in the camera.
I cropped and scaled some pictures for the wallet diary today.
This morning I picked the hems out of the pair of pants Dave bought yesterday, then heated up the iron and pressed out the creases in the pants, pressed out the crease in the frayed pocket, and pressed some Federal Reserve Notes and other papers that had been on the floor of the laundry room ever since I undressed into the washing machine on Tuesday.
I washed the coins inside the coin purse.
I should continue the habit of sanitizing my money; lucre is filthy at the best of times: you never know where that dollar has been.
Once the hem has been pressed open, the line to cut along is plain to see.
Yesterday, I cut along the line, then marked a line about three-eighths of an inch from the cut. Tape pinned to it hung over a quarter inch.
Duh! I'm using five-eighths inch mystery tape, not half-inch black cotton tape. I drew a line half an inch from the cut: another reason to use the mystery tape — the three-eighths line barely cleared the frayed notch.
At this point, I realized that unpicking enough seam to let the hem out is far from enough unpicking to tuck the hem back in — particularly when I'm going to move the hem five-eighths inch plus a turn of the cloth.
At last it's dry and also warm enough to sit outside, so I could let the bits of thread fly in every direction. The unpicking would have gone easier if I'd remembered to bring tweezers as well as a seam ripper, but not enough easier that I would get up and come back in for it.
Then I pinned tape to the upper end and folded on the nonce-pencil line to make sure that I'd left enough excess to tuck under the waistband. (Since the opening is slanted, tape matched to the edge at the fold slants down away from the cut edge.)
⁂
This morning I finished pinning the tape to the hem and opened the White to find that it was threaded with white 100/6, so I stitched across the bottom of a pillowcase that I had mended by tearing off the torn part. The case is soft and worn, but long enough that I can do this repair again.
Then I changed to black poly thread and stitched as close to the edge of the tape as I could. After folding the tape to the wrong side, it was quicker to sew the crease in than to heat up the iron. Upon pinning to sew down the free edge of the tape, I discovered that I needed to unpick some more of the side seam to leave room for the wider tape and the presser foot
It was too cold to work at the picnic table — at least it was too cold to sit outside with my bare feet on concrete, and thanks to the stickypods, my feet are too dirty to put shoes on. Scrubbing off stickypods isn't a chore lightly undertaken. (But I'll have to do it before going to bed tonight.)
I didn't need to unpick much seam, but it was black-on-black and tiny little stitches. And there seemed to be more rows of stitches than is reasonable. By the time I finished, I was ready for a nap.
(No I don't sew quite *that* slow; I read a few chapters of River of Ghosts before starting work.
⁂

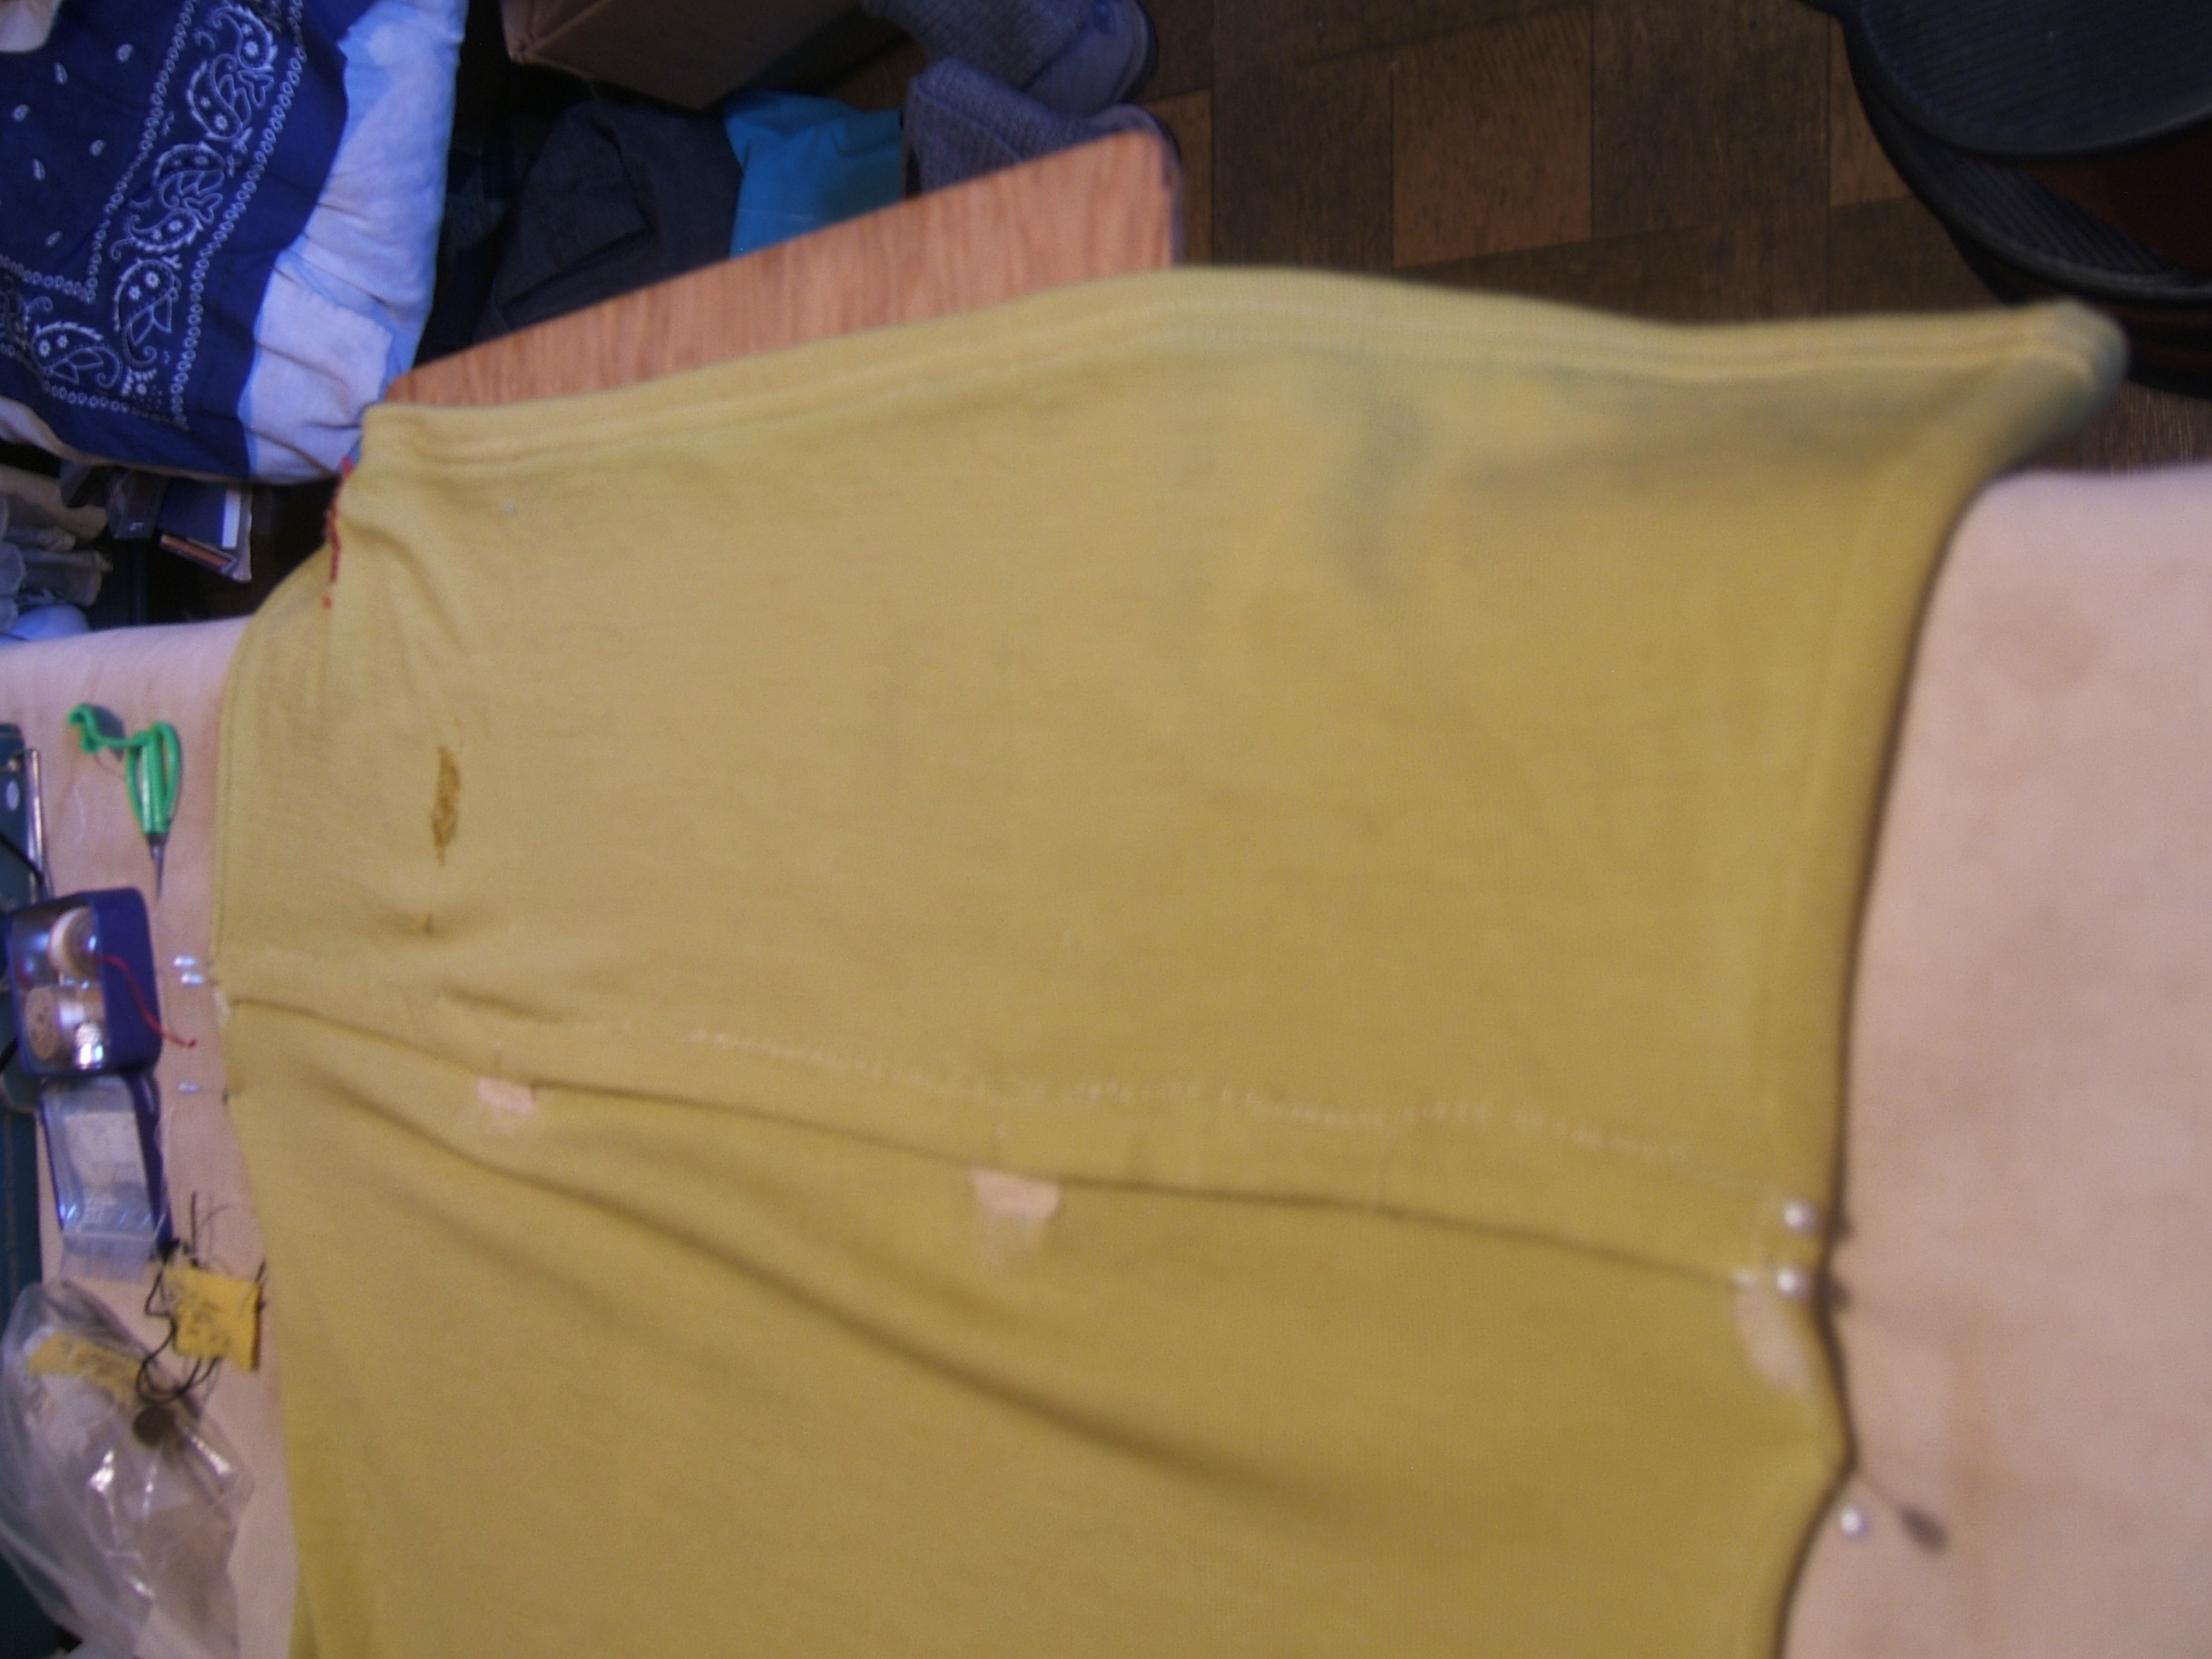
You can almost see that the repair lowered the pocket opening quite a bit, if you use the largest magnification and compare the pockets. I'll take another photograph when it isn't raining.
I finally got at the pants Dave bought several days ago. He had tried them on and I stuck a pin to show where he wanted them to end, then I pinched the crease and rubbed a wash-out marker on it before removing the old hem, taking the pin out, and pressing the hem open. Then it hung on the rocking chair for a while.
A thin dowel that I stuck into a pencil sharpener is a useful fid when unpicking chain stitch. I should add a picture of that to "tools".
This morning, I measured the old hem; it had used about two inches. Then I measured two inches from the wash-out line — after finding it; I'd forgotten that it was on the inside of the pants — and found that the line I wanted to cut along was very close to the crease left by the old hem, so I cut along it. The Fiskars "Two-sided mat craft mat" I found in the neighbor's trash came in handy; I mostly use it as a two-dimensional ruler, but it's a cutting mat on one side and just small enough that I can put it inside a pants leg.
I'd intended to fold the cut edge to meet the marked line, then fold the hem with three layers, but that would have required me to mark the cutting line all around and folding on the old stitching line didn't make the hem unacceptably wider.
Since the stitching line is hard to see (and impossible when it's on the peak of a fold), I basted the fold instead of pressing it. Basting takes little longer, sometimes less time on small jobs, and there's no risk of burning my fingers.
Then I measured from the fold to the line and used a (gasp!) store-bought hem gauge to pin the hem. I pinned the crease first, then stretched the hem to flatten it before sticking in each stitching-line pin.
Now to thread the White with beige and turn the pants inside out so I can stitch "inside the teacup".
I wanted a picture of the stitching, but though the viewfinder said "worlds of light", the film-equivalent said "coal mine at midnight".
Now that the wallet has been picked apart, finishing that job has a certain amount of urgency, but I can use the old worn-out wallet, and it's already too warm to wear my new sandals with three pairs of socks.
A cursory Web search suggests that I wouldn't be able to buy suitable insoles even if I could go shopping. While thinking about pattern paper, I noticed an ad printed on light card just big enough to trace around my right sandal.
Then I alternately trimmed off bits and taped them back on until I got a fairly-good fit inside the sandal. Using an ad proved wise, because I could line up the printing while taping bits back on.
Next step is to find an old file folder to make the working pattern.
This morning I sorted out the wool and selected black flannel. I'd like to use scraps from the old wool mattress pad I used to make my ironing-board pad, but I can't find any and I vaguely recall piecing and patching to use up every square inch.
Then, reflecting that the inner layers shouldn't go all the way into the push fit around the edges, I put the working pattern on the file folder I'd cut it from, traced around it, then used a finger on my seam gauge that looks to be about an eighth of an inch wide to mark a line inside the tracing. I left only part of this line on the scrap when I cut around it.
Then I decided that four layers aren't quite enough, and traced around the working pattern again, then used the slot in the seam gauge to mark a line inside the tracing. That was a smidge less than three eighths of an inch, so I left all the line on the pattern when I cut it out.
Now how do I mark cutting lines on fuzzy black? I already knew the nonce pencil doesn't work on fuzz. I tried the silver pencil on a worthless sliver. One could sort of see the mark, but I had to press pretty hard to make it.
How about my metallic Sharpies? They aren't much harder to get out than the silver pencil, and later I realized that permanent didn't matter because I'm leaving the entire line on the scrap — but I wrote a letter in the middle of each piece to make it easier to count how many I cut.
The silver Sharpie didn't write as well as the silver pencil; I couldn't see the mark at all, and wrote on a scrap of paper to see whether it was still working before I put it away.
Gold and copper were plain to see; I thought the gold was maybe a smidge plainer.
My camera is still in midnight in a coal mine mode. It used to hold the shutter open longer when the light wasn't good, which meant that I had to hold the camera really steady, but I can't figure out how to get back into that mode. And I did so want a picture of those gold lines on the black flannel!
Well, the cutting mat and the cutter are on the card table. Back to work.
Today I posted the following on the Creative Machine mailing list:
<quote>
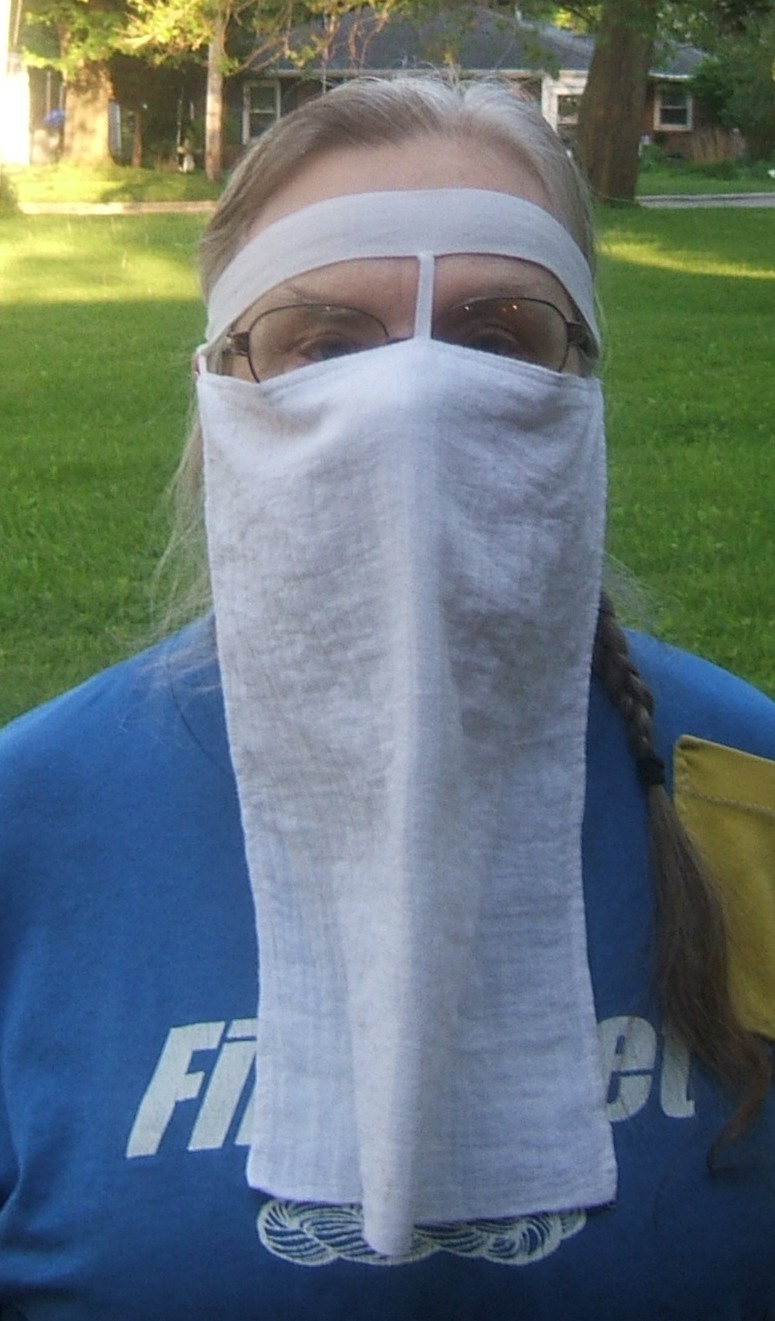
The original purpose of a niqab was to keep desert sand out of the wearer's lungs, so it seemed logical that some styles would be pretty good filters — and it would be ever so much more comfortable to be able to get a handkerchief inside one's mask on short notice.
So I went pattern hunting. A few years ago, the Web was crawling with "make your own modest clothing" sites, but this time all I could find was "How to deal with people who persecute you for not displaying yourself" pages, and one very badly-written pattern that made constant reference to pictures that didn't exist.
But I did see lots and lots of pictures of niqabs, which revealed that the quarter of a handkerchief that Barbara Eden wore in "I dream of Jeanie" just doesn't cut it. A niqab is a voluminous garment that extends at least from ear to ear, and often reaches below the waist. With a filter area that large, you don't need to worry about leakage around the edges.
And I not only could use a handkerchief and not have to sneeze on my mask, I could eat and, with the aid of a straw, take a sip of water without exposing anything.
So I kept hunting.
The fourth or fifth time that the pattern turned up, it was revealed that it was a transcript of a video. I seldom can get useful information out of a video, and this one was not an exception. I did manage to learn that the veil hangs from the sash by three pieces of elastic, one at each corner and one in the middle. And that black cord would do nicely.
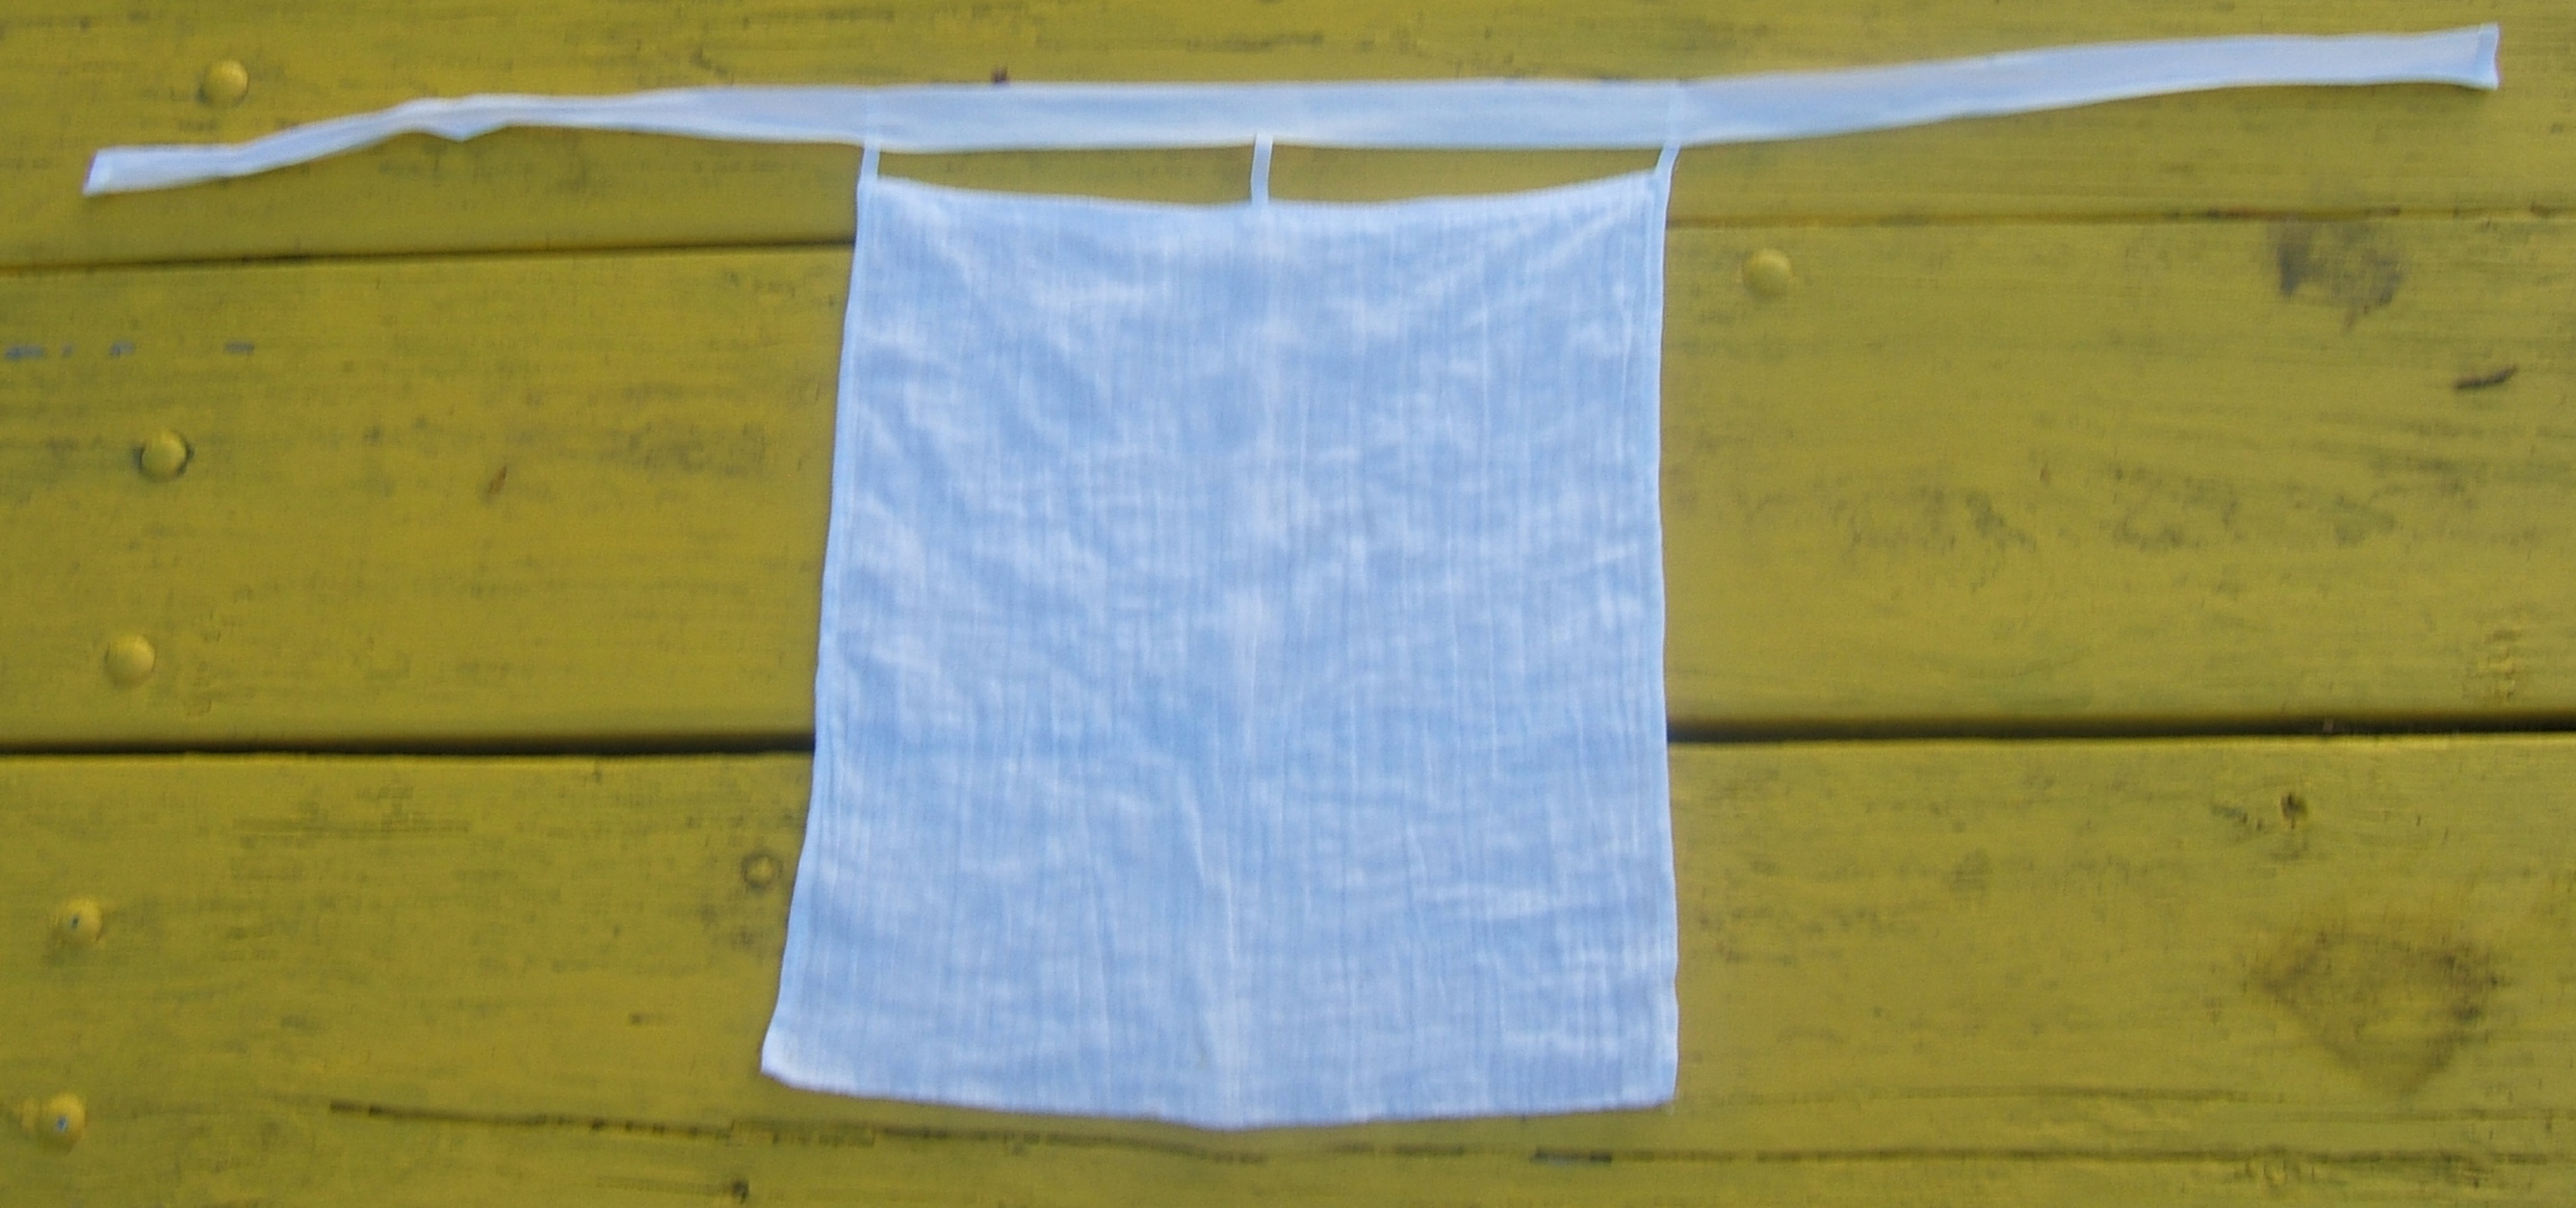
From the transcript, I learned that the veil is made of two 13"x15" rectangles, sewn together like a pillow case by way of finishing the edges, and the sash is 35"x5", folded in half lengthwise.
From the length, I deduce that the sash is tied behind the head. This was not clear in the photograph.
If I were using quilting cotton, I'd make just one layer and hem all around the edges, a handkerchief hem with mitered corners. I've been making masks of white gauze, so I think I'll begin by cutting a piece thirteen inches wide and thirty inches long, turn the ends in half an inch, sew up like a pillow case, then put in tabs of quarter-inch white twill tape. For the prototype, wide twill tape will do for a sash. I can make the tabs too long and baste them to the sash, then try on and adjust.
ooo, er. Does this go over or under the glasses?
I put my Parkview mask
<https://www.parkview.com/community/dashboard/homemade-mask-instructions>
<http://wlweather.net/PAGESEW/BLOG_XX/MASK98h6.JPG>
on over my glasses, then pull it down under each
lens and let it pop back up underneath; I think
the same would work for a niqab.
</quote>
I was going to write "now to cut the gauze" here, but instead I threw socks, sandals and my pants into the go-bag, then remembered that my mask is in the pocket of my shirt and threw the shirt in too, and drove DH to the emergency room again. Supper, by good luck, was at a stage that could be shoved into the fridge and saved for tomorrow.
When it was over, I added a spare hat to the go bag. And removed one of the four paperbacks, having finally finished reading the story.
And made DH a fried-cheese sandwich.
I cut the 13" x 30" piece of gauze this morning, then cut the buckles off my old sandals.
I didn't like those sandals before the soles started falling apart, because the holes in the strap close up and they were hard to buckle even before the right buckle started hanging wonky. But the buckles at the toe had been sewn directly to the straps, and the joins were in such good condition that I hated to cut the strap.
And then I couldn't cut the strap with my seam ripper and had to fetch scissors. But now the sandals are in the trash can and the buckles are in my "buckles and misc." box, pinned together with a scrap of white selvage I found lying on the Necchi table; I must have torn it off or saved it intending to use it under the needle.
Which brings my padded insoles back to the top of the priority list. When I stopped working, I thought I'd resume in a few minutes, so I simply stabbed the needle into the insole instead of securing it properly. The work has been shoved hither and thither for a few weeks, and the needle is nowhere to be found. I've run our pick-up magnet over the carpet several times, partly for fear of stepping on it barefoot and partly because it was one of my extra-fine needles that I no longer know where to buy.
And the bandage on my nose is making my glasses itch. AAAAAArrrrrgggghhhh.
Yesterday I found a suitable needle and stabbed it firmly into the wool stuffed into the hole of the 100+ spool. It isn't one of my wee little ones, but when basting —and re-threading the needle frequently— that is all to the good.
After supper today, I resumed work on whipping the edges of the insole together. It took a while to remember that I was basting and lengthen my stitches.
First I remembered that when taking huge stitches it's a good idea to cut the thread long enough that the first few stitches are a bit awkward, then I remembered that when you are working with thread that is impossible to untangle, you really don't want the first few stitches to be a lot awkward.
I finished basting that insole, basted the liners to the outer layers of the other, and pinned the padding in place.
And yes, I won't need the insoles until after my appointment next Tuesday (and possibly not then), and I want to wear the niquab to the appointment, but I felt like hand sewing.
And, famous last words, I've got nearly a week. How long can attaching a veil to a headband take?
The phone rang while I was basting the insoles. I made quite certain the needle was firmly in the fabric before I switched glasses and stood up.
Turned out to be a politician "taking a survey". I told him to get lost. But politely.
I had left off after pinning the inmost layer, the "padding". I started by basting down the middle; I'd put the pins at right angles to this planned stitching. I was surprised that not only was it no problem to stitch all three layers of wool flannel, I was often able to take two stitches at once. Then I stitched back between this stitching and one edge, then began working around a quarter inch from the edge of the padding.
Now I'm pinning the edges of the two assemblies, and plan to overcast them together. I put the needle through to the outside instead of breaking off.
basting finished yesterday, zig-zagging done today, and insoles are installed in the sandals.
Now all I need is a dry warm day and permission to ride. I'm hoping that on Tuesday he will take the bandage off and say "Graft is great; do anything you want, and go to my assistant in Warsaw to get the stitches taken out."
Well, it isn't unreasonable to hope that he'll tell me to change the bandage every day, as I do for the donor site. That will do wonders for the itching!
I'm not sure the PDF underpants will last until elastic is available again; perhaps I should do the job with black elastic so that they will be comfortable while they are wearing out. Nobody is supposed to see them, after all!
scale shots of wool-jersey repair
I think that was done the day after the previous entry.
I completed my niquab before walking to church yesterday. I think it should be fifteen inches wide instead of thirteen.
I measured two of the elastics I took out of the three pairs of PDF underpants. One was twenty-five and a half inches, the other was twenty-seven. (The replacements are nineteen.)
I have learned three things: black elastic in a casing doesn't show at all.
The PDF underpants are even more worn than I thought they were.
When I come inside after working by sunlight, even when I was sitting in the shade, I'm pretty close to blind.
That last I learn again at frequent intervals.
Leg elastic in PFD underpants
I didn't need to use blue thread to mend the gap when I repaired the first pair; it was quite easy to find the place where stitches were piled up and pick out the top layer. Nonetheless, I used ecru thread to close the gap.
I wonder why I sewed the first pair by hand? Perhaps I didn't want to set up the machine for such a small job. Or maybe I just felt like working sans-serif chevron stitch.
The sun had moved onto my working space when I finished lunch, but I didn't want to pick up stuff to move to the other side of the house.
The black 1/8" elastic is in a skein that was folded in half and secured with a rubber band, and it's quite untidy below the rubber band. I soon realized that I could prevent an increase in entropy by putting a finger through all the loops above the band while pulling on a cut end. With the loops held taut, the loop I was pulling out was inclined to pull out of the band without trying to bring anything with it.
On Sunday morning, I made another niqab out of a rayon luncheon napkin I had found among my handkerchiefs, and a piece of quarter-inch twill tape.
⁂
I just looked up my 2018 diary, and found that the scenery muslin shrinks three inches per yard in both directions.
⁂
A thought struck me while making the bed, and I measured the sheet: after much washing, it is just three yards wide: 108".
This is a much better guide to how wide to tear my pillow cases.
120" x 33/36 = 120" x 11/12 = 110".
The notes say I got five pillow cases out of two yards of muslin, and used every square centimeter.
The pillow cases appear to have been torn 42" wide. Ah, yes, it does compute. Tear off 84", tear into four parts, make one pillow case of the narrow strip off the side.
The question is, was it 42" when I tore it? The cases are a tad loose; my notes say that I should have torn the selvages off before proceeding
The cases are 33" long, plus seams and hems. I think I tore the sample a bit more than two yards long, to be able to make measuring marks well away from the torn edges. The cases for the new pillows need to be a minimum of six inches longer than that, and a foot wouldn't be a bit too long.
Today's the day I heat up the iron and press the shirt I need to wear next Wednesday and the furoshiki I plan to make into a niquab.
But first, I need to get that mask off the ironing board. When I undressed into the washing machine last Thursday, I threw Dave's masks in too. He said he wears only the pair with the ear loops, and didn't want the one I made by substituting quarter-inch elastic for part of the ties. I told him I'd file it under spare parts.
Fiddling showed that I could pass a bodkin under the tape: all I need to do to convert it to the ear-loop style is to cut the tapes short, tuck them into the casing, stick the aluminum bodkin Grandfather made for Grandmother into the casing, and backstitch around a little.
So I gathered up my tools, put on my gauze Parkview mask wishing I already had the niqab I plan to make today, and went to the picnic table. At one point I put the needle into my mouth while reaching for another tool, and ended up with it clinging to my mask.
I did have sunscreen on my wound, but the doctor says that sunscreen isn't enough. Inspiration struck when I was reaching for the sunscreen bottle for the first time today — I had waited until I was sure the hole from the lingering stitch had closed up — and wishing that I had something greasy. I have SPF 45 lipstick! Much nicer than petrolatum, and it probably protects better even without considering the sunscreen, since it doesn't rub off. I haven't noticed the new skin today, and I was very aware that the skin is thin and sensitive yesterday.
The plan worked well for the first strap, but the end of the casing was narrowed a bit where I was trying to tuck in the first end of the other one, and it just purely wouldn't go. Finally the dime dropped, and I realized that taking out three and a half inches of stitches that had been made long for just such an emergency wasn't all that big a deal. The stitches were all out a few seconds after I fetched the seam ripper, sewing the tabs down was very easy when I could see what I was doing, and re-sewing the casing will be nothing at all. I should have done both sides that way.
But it isn't finished. I want to make the niqab before re-stitching because the machine is set up with ecru thread.
I don't think I measured the ear-loop elastic at any point.
⁂
Shirt ironed, niqab made. It fits very well, shades both wounds, and doesn't inhibit breathing in the least.
While pressing the shirt, I reflected that I was doing a lot of work to neaten up a shirt I meant to wear only once before washing it again.
And then I remembered that in the fifties, we had to do this every day — or, rather, once for every day in the week. A white blouse couldn't be worn more than once. And this, young children, accounts for the popularity of "sweaters" in the fifties. We weren't trying to look sexy for the boys: you could wear a sweater more than once, and when it did get dirty, you could hand-wash it in less time than it took to iron a white blouse, then lay it out flat to dry and wear it again with no further ado.
The shirt in question is my only plain white shirt, thus the only one I can wear with my "pajama pants". I did such good work making a pair of linen eight-pocket jeans, then realized that you could hear that print coming a block away.
But they don't look too bad with a plain white shirt — the matching shirt is quite impossible — and I don't mind wearing them out with frequent washing, so I've been wearing them to doctor's appointments ever since it got too warm to wear my old sweat pants.
I used to make underpants out of scraps from my T-shirts; this shirt was made with left-over PDF jersey I bought to make underpants — the same that are now wearing out, come to think of it. Putting a collar on instead of a neckband took it out of the underwear class, and I've gotten compliments on it. And (after much thought and simplification of a draped collar on, I think, Katherine Fascinella's blog), it' nothing but a wide neckband that is split in front, and installed the same way as a neckband after sewing a short piece of twill tape to the front where the split makes a stress riser.
Tearing a yard and a half off my bolt of 120" muslin was complicated. First I had to clear off the ironing board and put away most of the stuff that had accumulated. One stack I simply moved to the bed.
Then I adjusted the ironing board to match the height of the shelf, and moved the agricultural burlap, the 60" muslin, the blue-plaid cotton/linen blend, and two wads of blue plaid scraps.
Then I had to unwind enough to be sure I hadn't left a sheet blank on the stack.
Along the — the calculator has been behind this monitor all this time!!! I'd moved the monitor stand to look behind it and so forth, but when standing up I couldn't see between the monitor and tower, but thought that I could.
I put the calculator back onto the tower.
Along the way, I had to multiply 54" by 33/36 by hand, and I'm so out of practice that I didn't remember that 54 = 3 x 18, and had to count on my fingers to divide 24 by 3.
Anyhow, a yard and a half will shrink to a tad under fifty inches.
And now I have to put all that stuff back.
The piece I tore off is three yards, plus eleven inches.
I noted that I used every square millimeter of the shrinking sample to make five pillow cases. That means that I tore three strips, two equal to each other, and one half an inch wider than half the width of the first two.
The shrink-sample pillowcases measure forty-two inches wide, which is about right. (That is, when inside out so that I can include the seam allowance, they are twenty-one inches wide.)
So I want to tear off two strips the same width that I tore before.
Junior-High algebra:
1/2x + 1/2 inch + 2x = 3 yards + 11 inch = 119 inch
Well, the 120" is nominal; that's close enough, but I'm glad I measured.
Subtract half an inch from each side:
2.5 x = 118.5 inch
x = 47.4 inch
If I didn't have my handy-dandy solar calculator, I'd multiply both sides by four, then divide by ten.
Which I just did as a check on my arithmetic. Got the same answer.
The 42" cases are loose, but not all that loose. I shall round off to 48".
The half-pillowcase left over is unlikely to meet another half-pillowcase of the same size, so I plan to tear one selvage off and put it into the misc. tapes box before I measure for the two pillowcases.
⁂
Duh! While pinning, I realized that I could have torn forty-eight inches off the bolt. Tearing two yard-and-a-half pieces off that would have left a very small scrap.
I find that I haven't linked to my niqab tutorial anywhere.
I have started a project blog for my new gardening niqab.
Continue to Part Two of 2020
Back to Part One of 2019
Back to Part One of 2018
Back to Part One of 2017
Back to Part One of 2016
Back to Part One of 2015
Back to Part One of 2014
Back to Table of Contents
Back to cover page, which has a list of my
other sites