Begun 29 May 2020
Updated 14 April 2021
This page displays in the typeface and letter size that you have chosen.
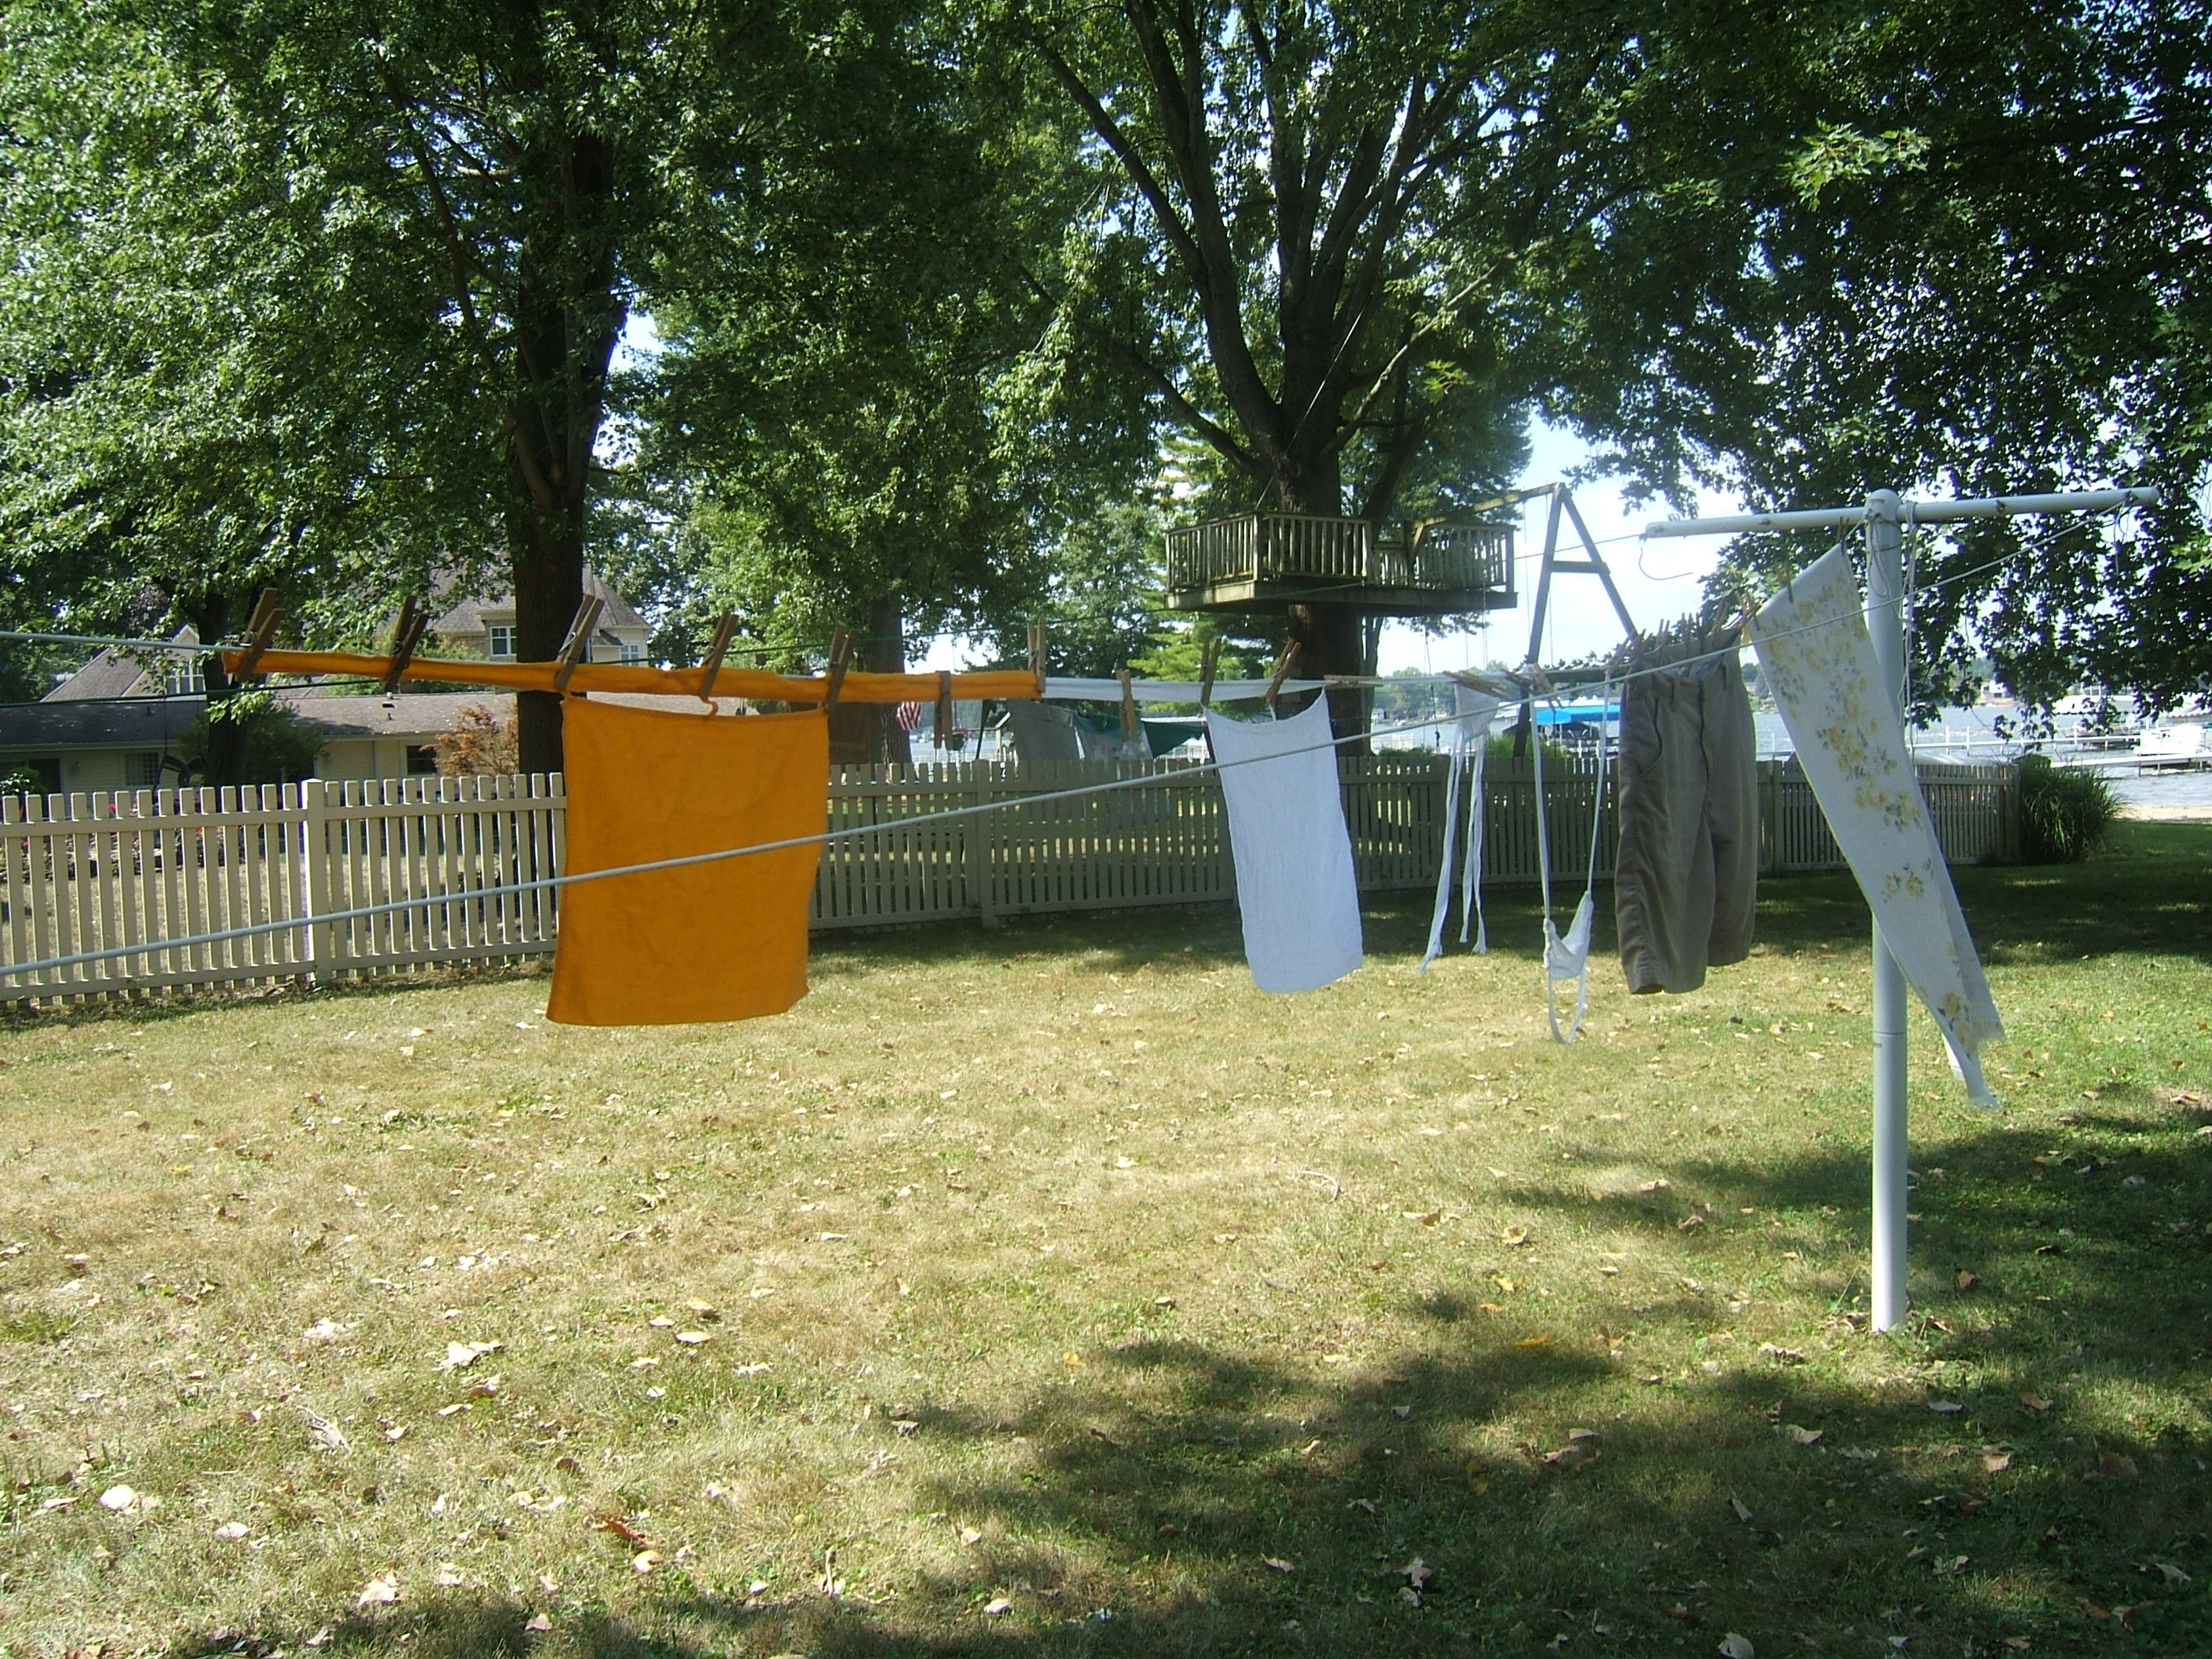
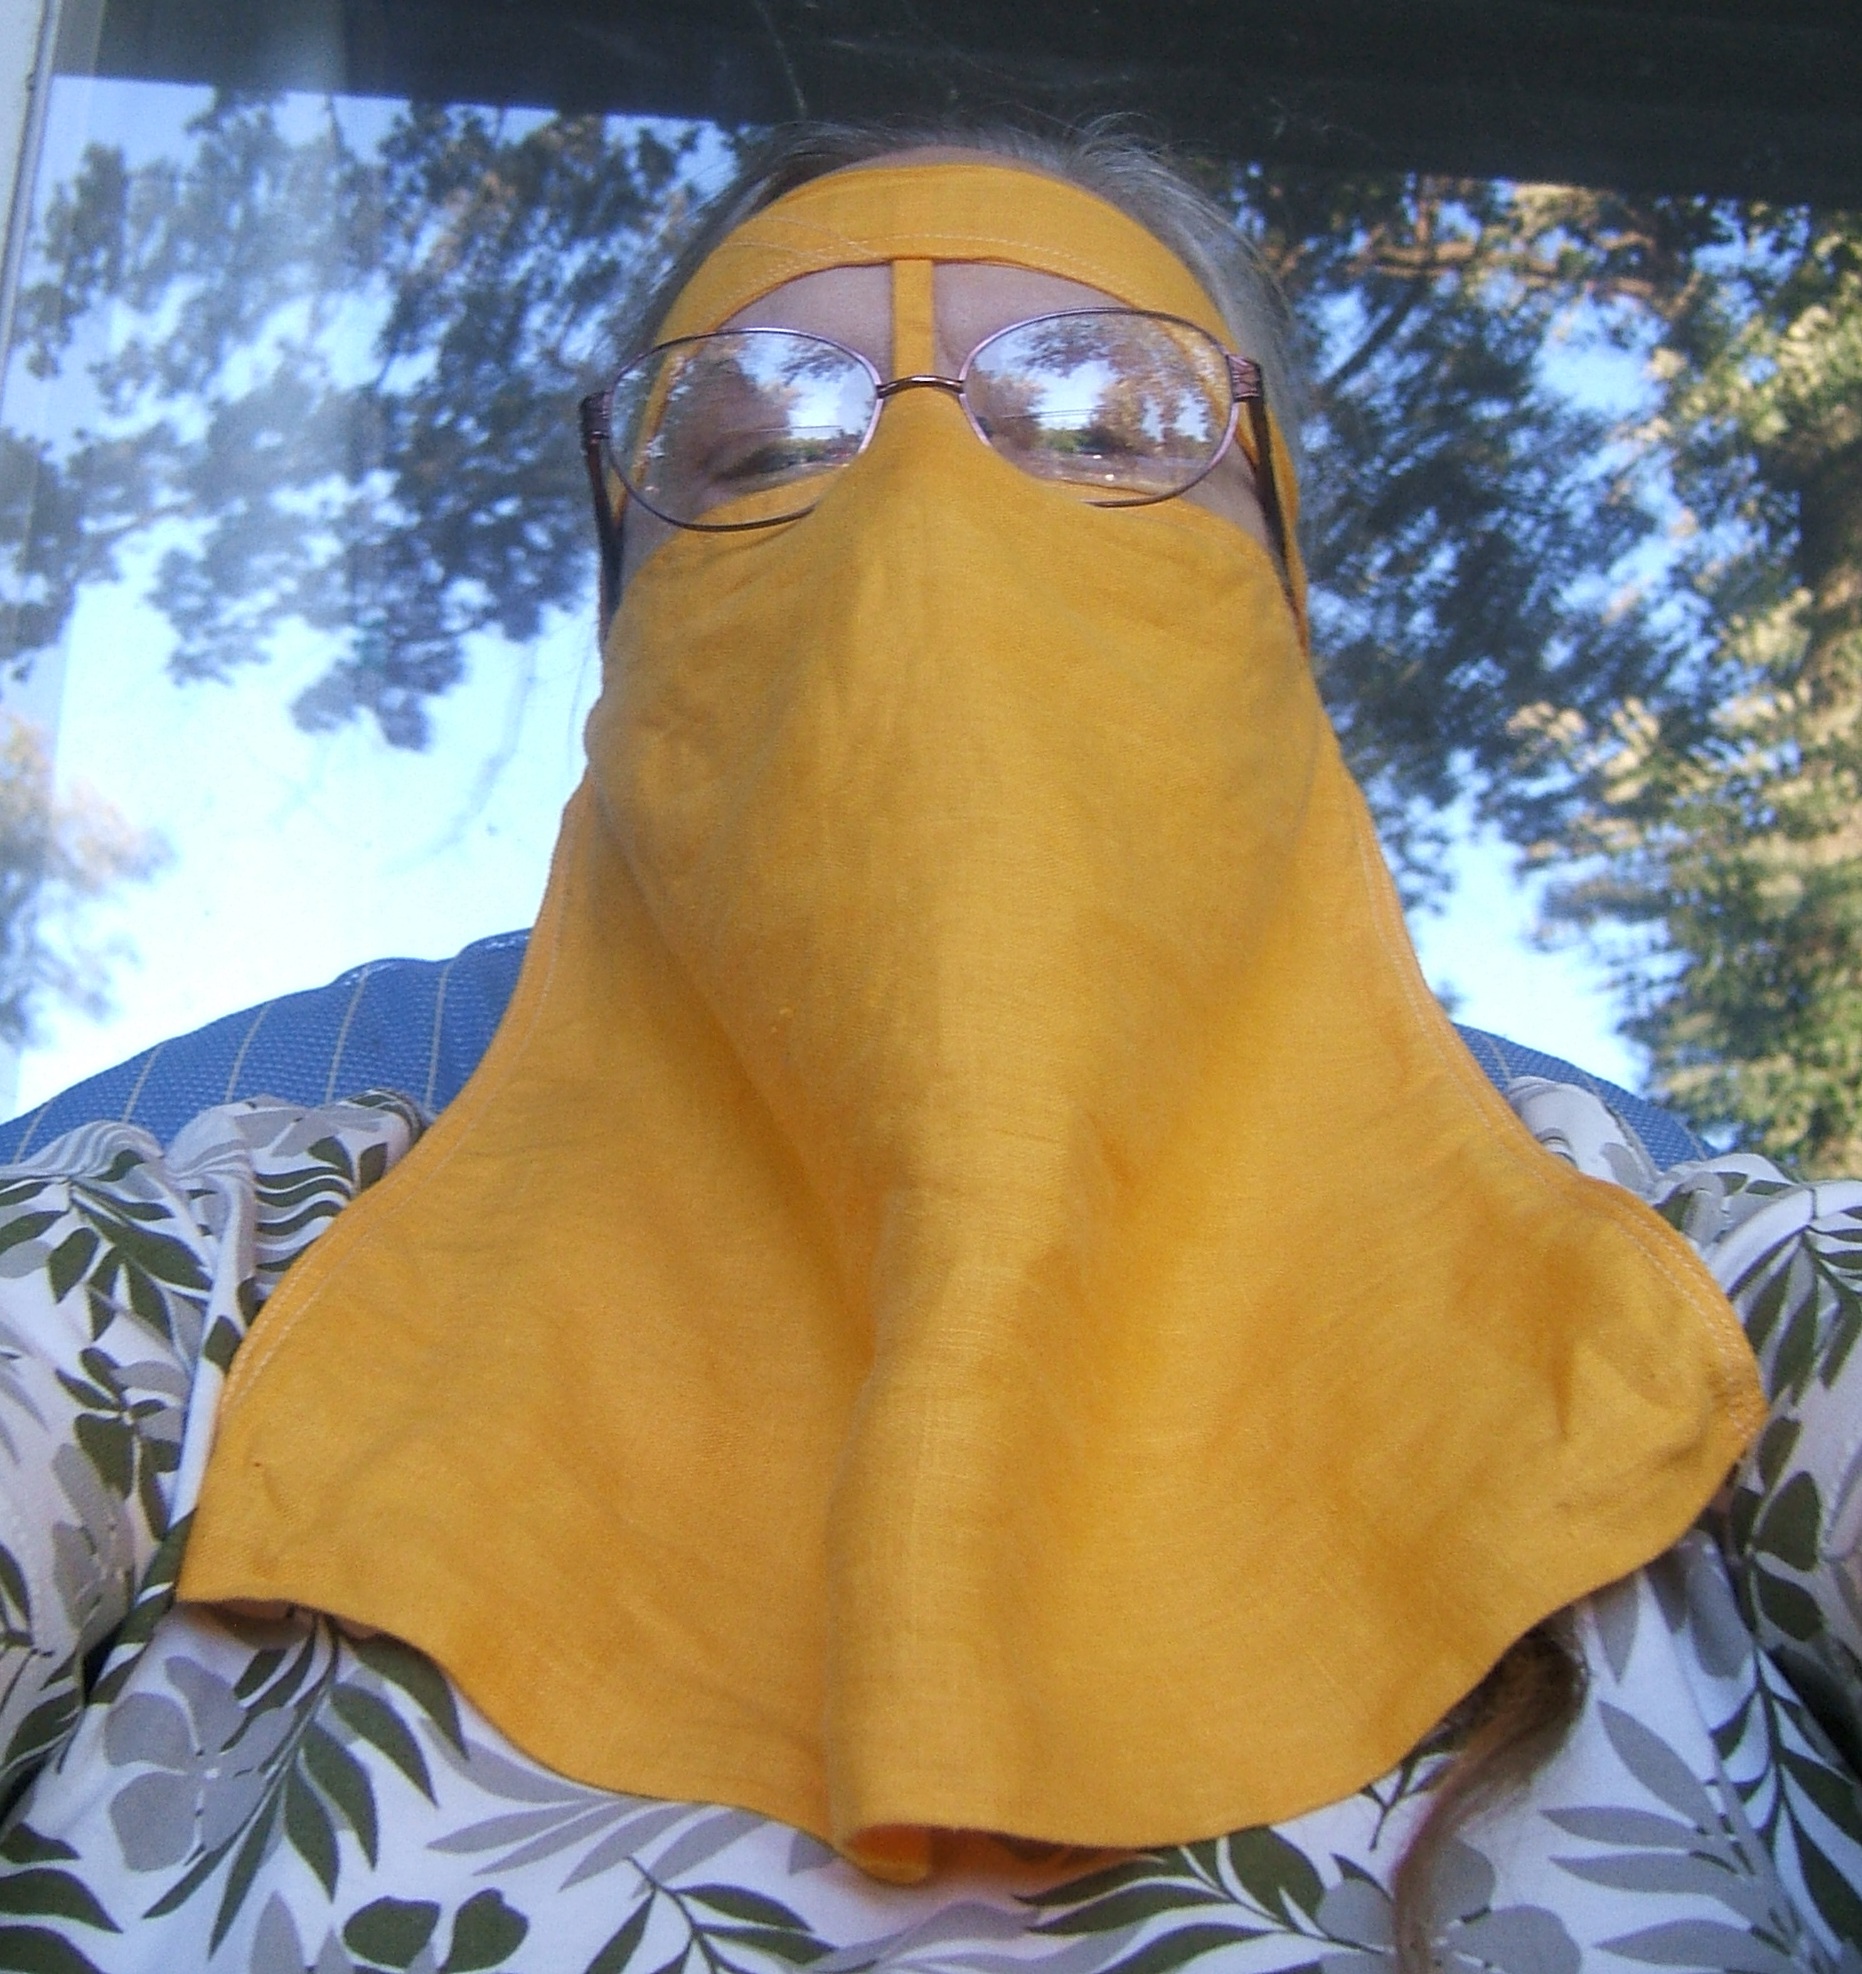
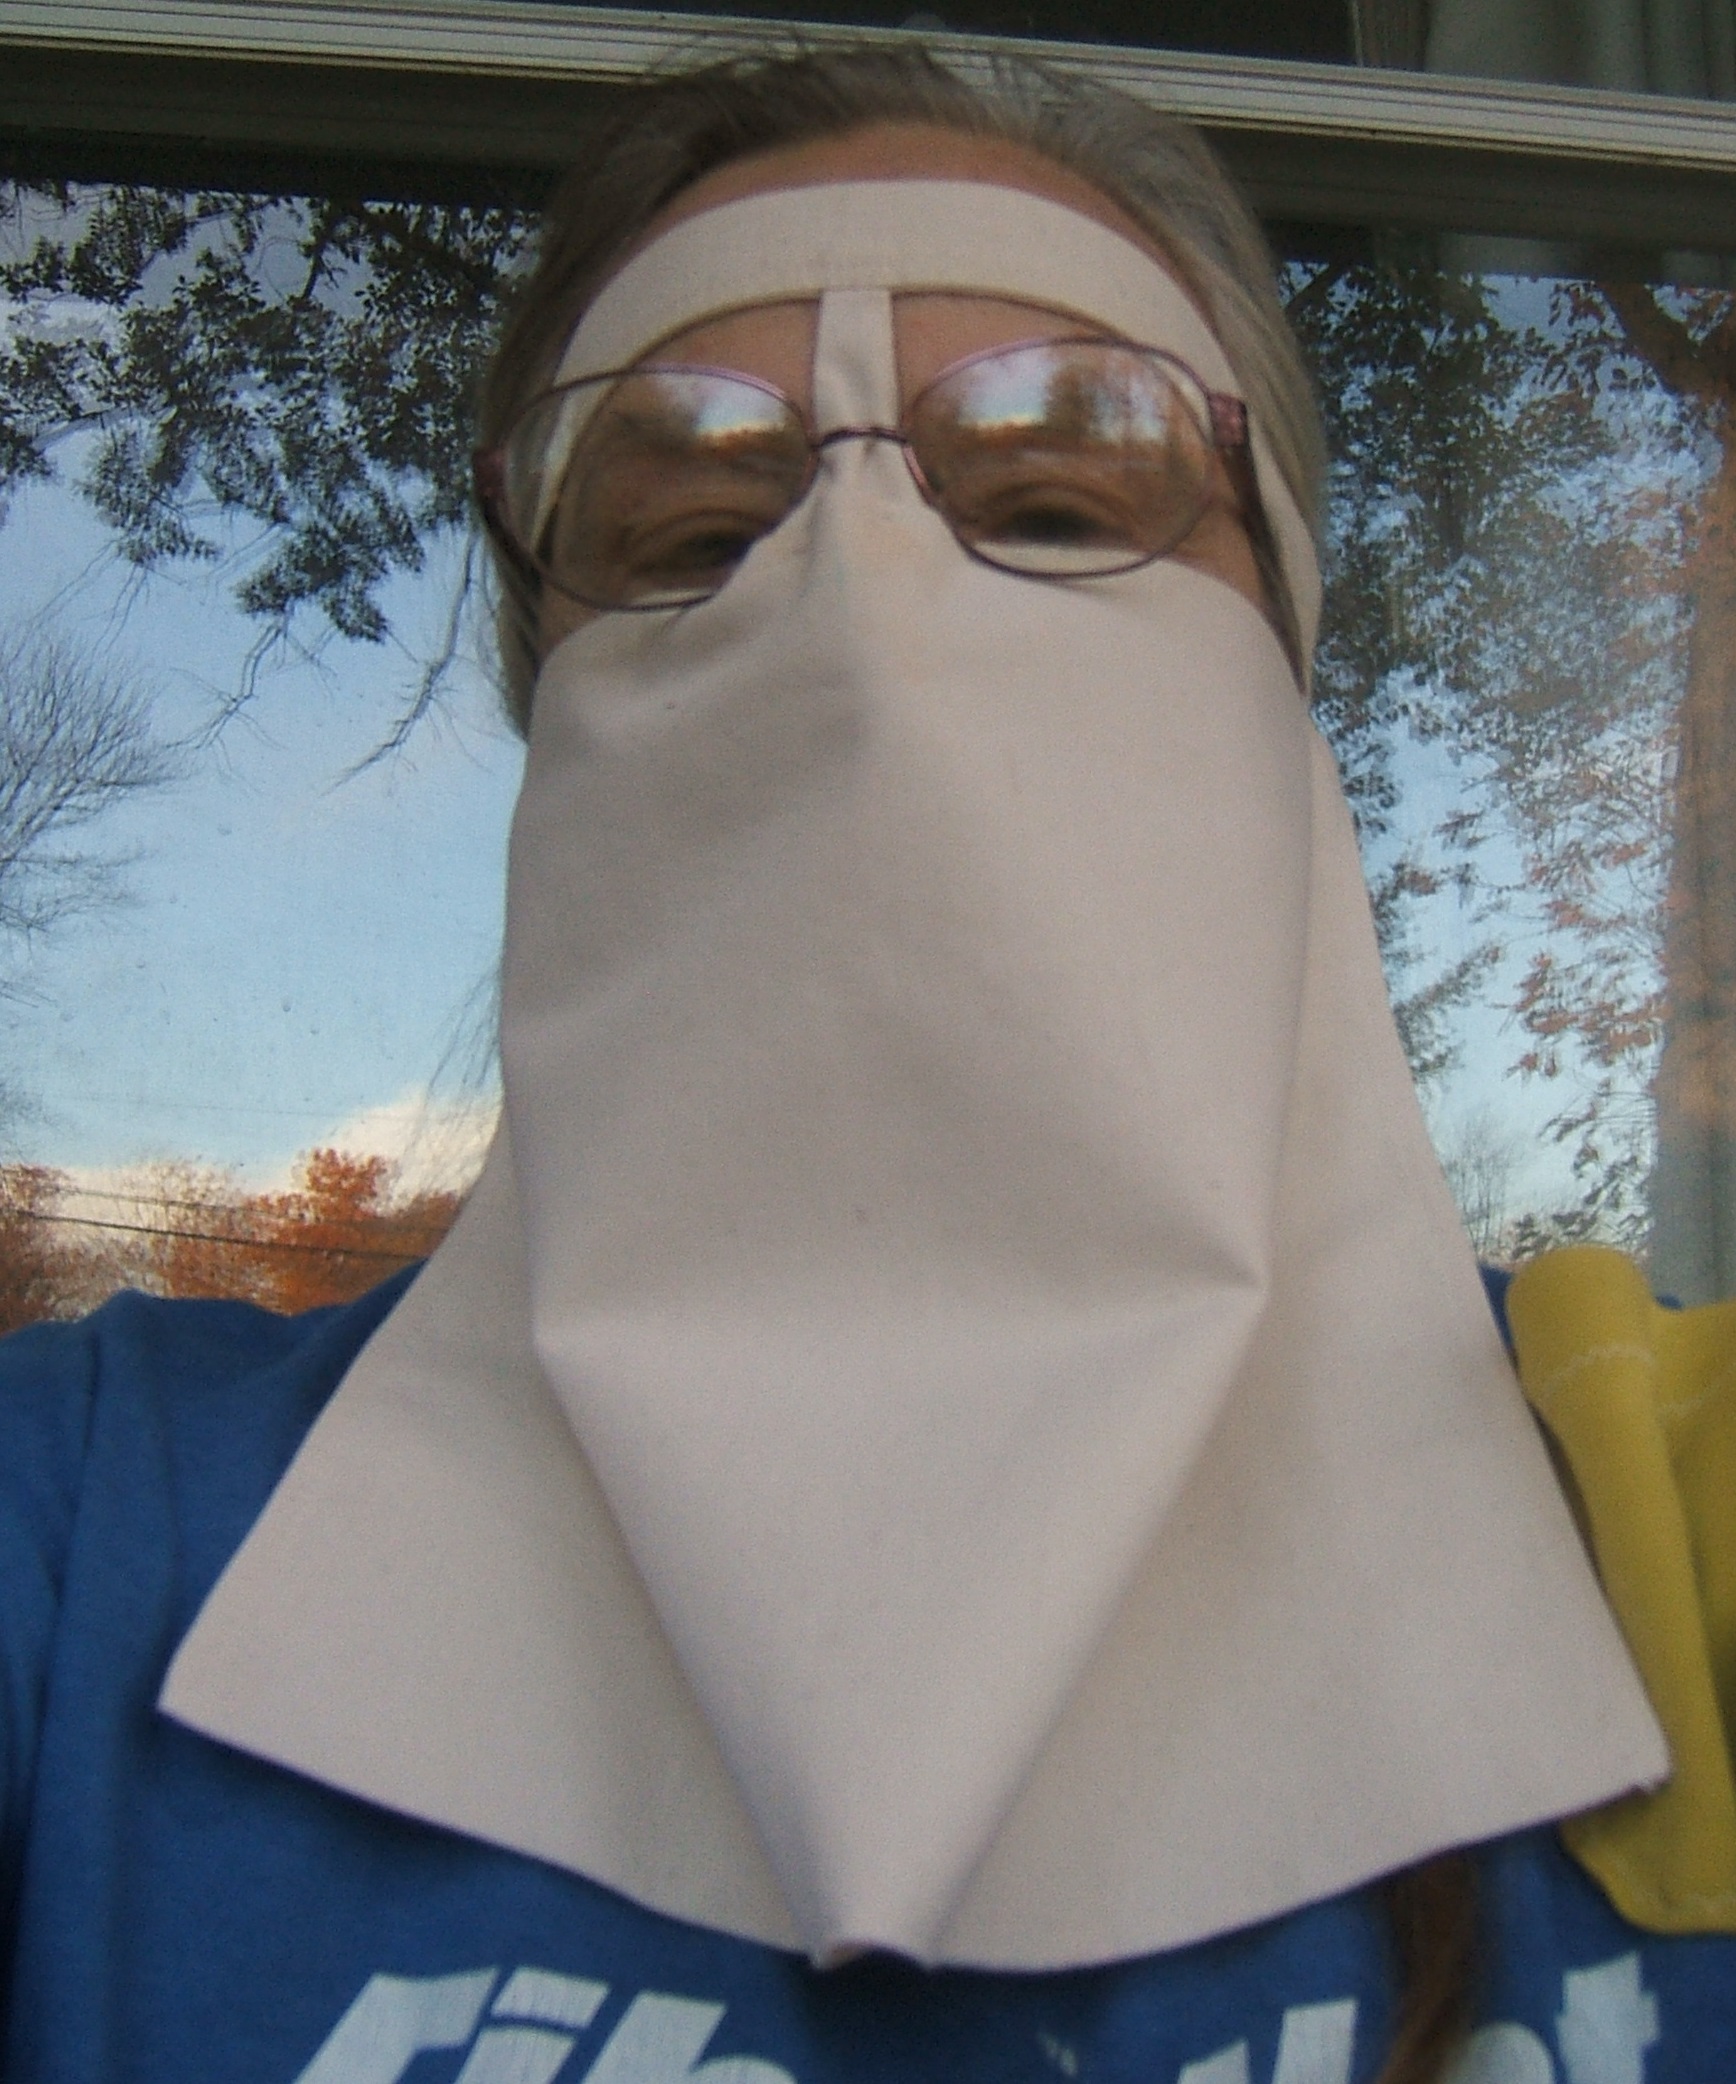
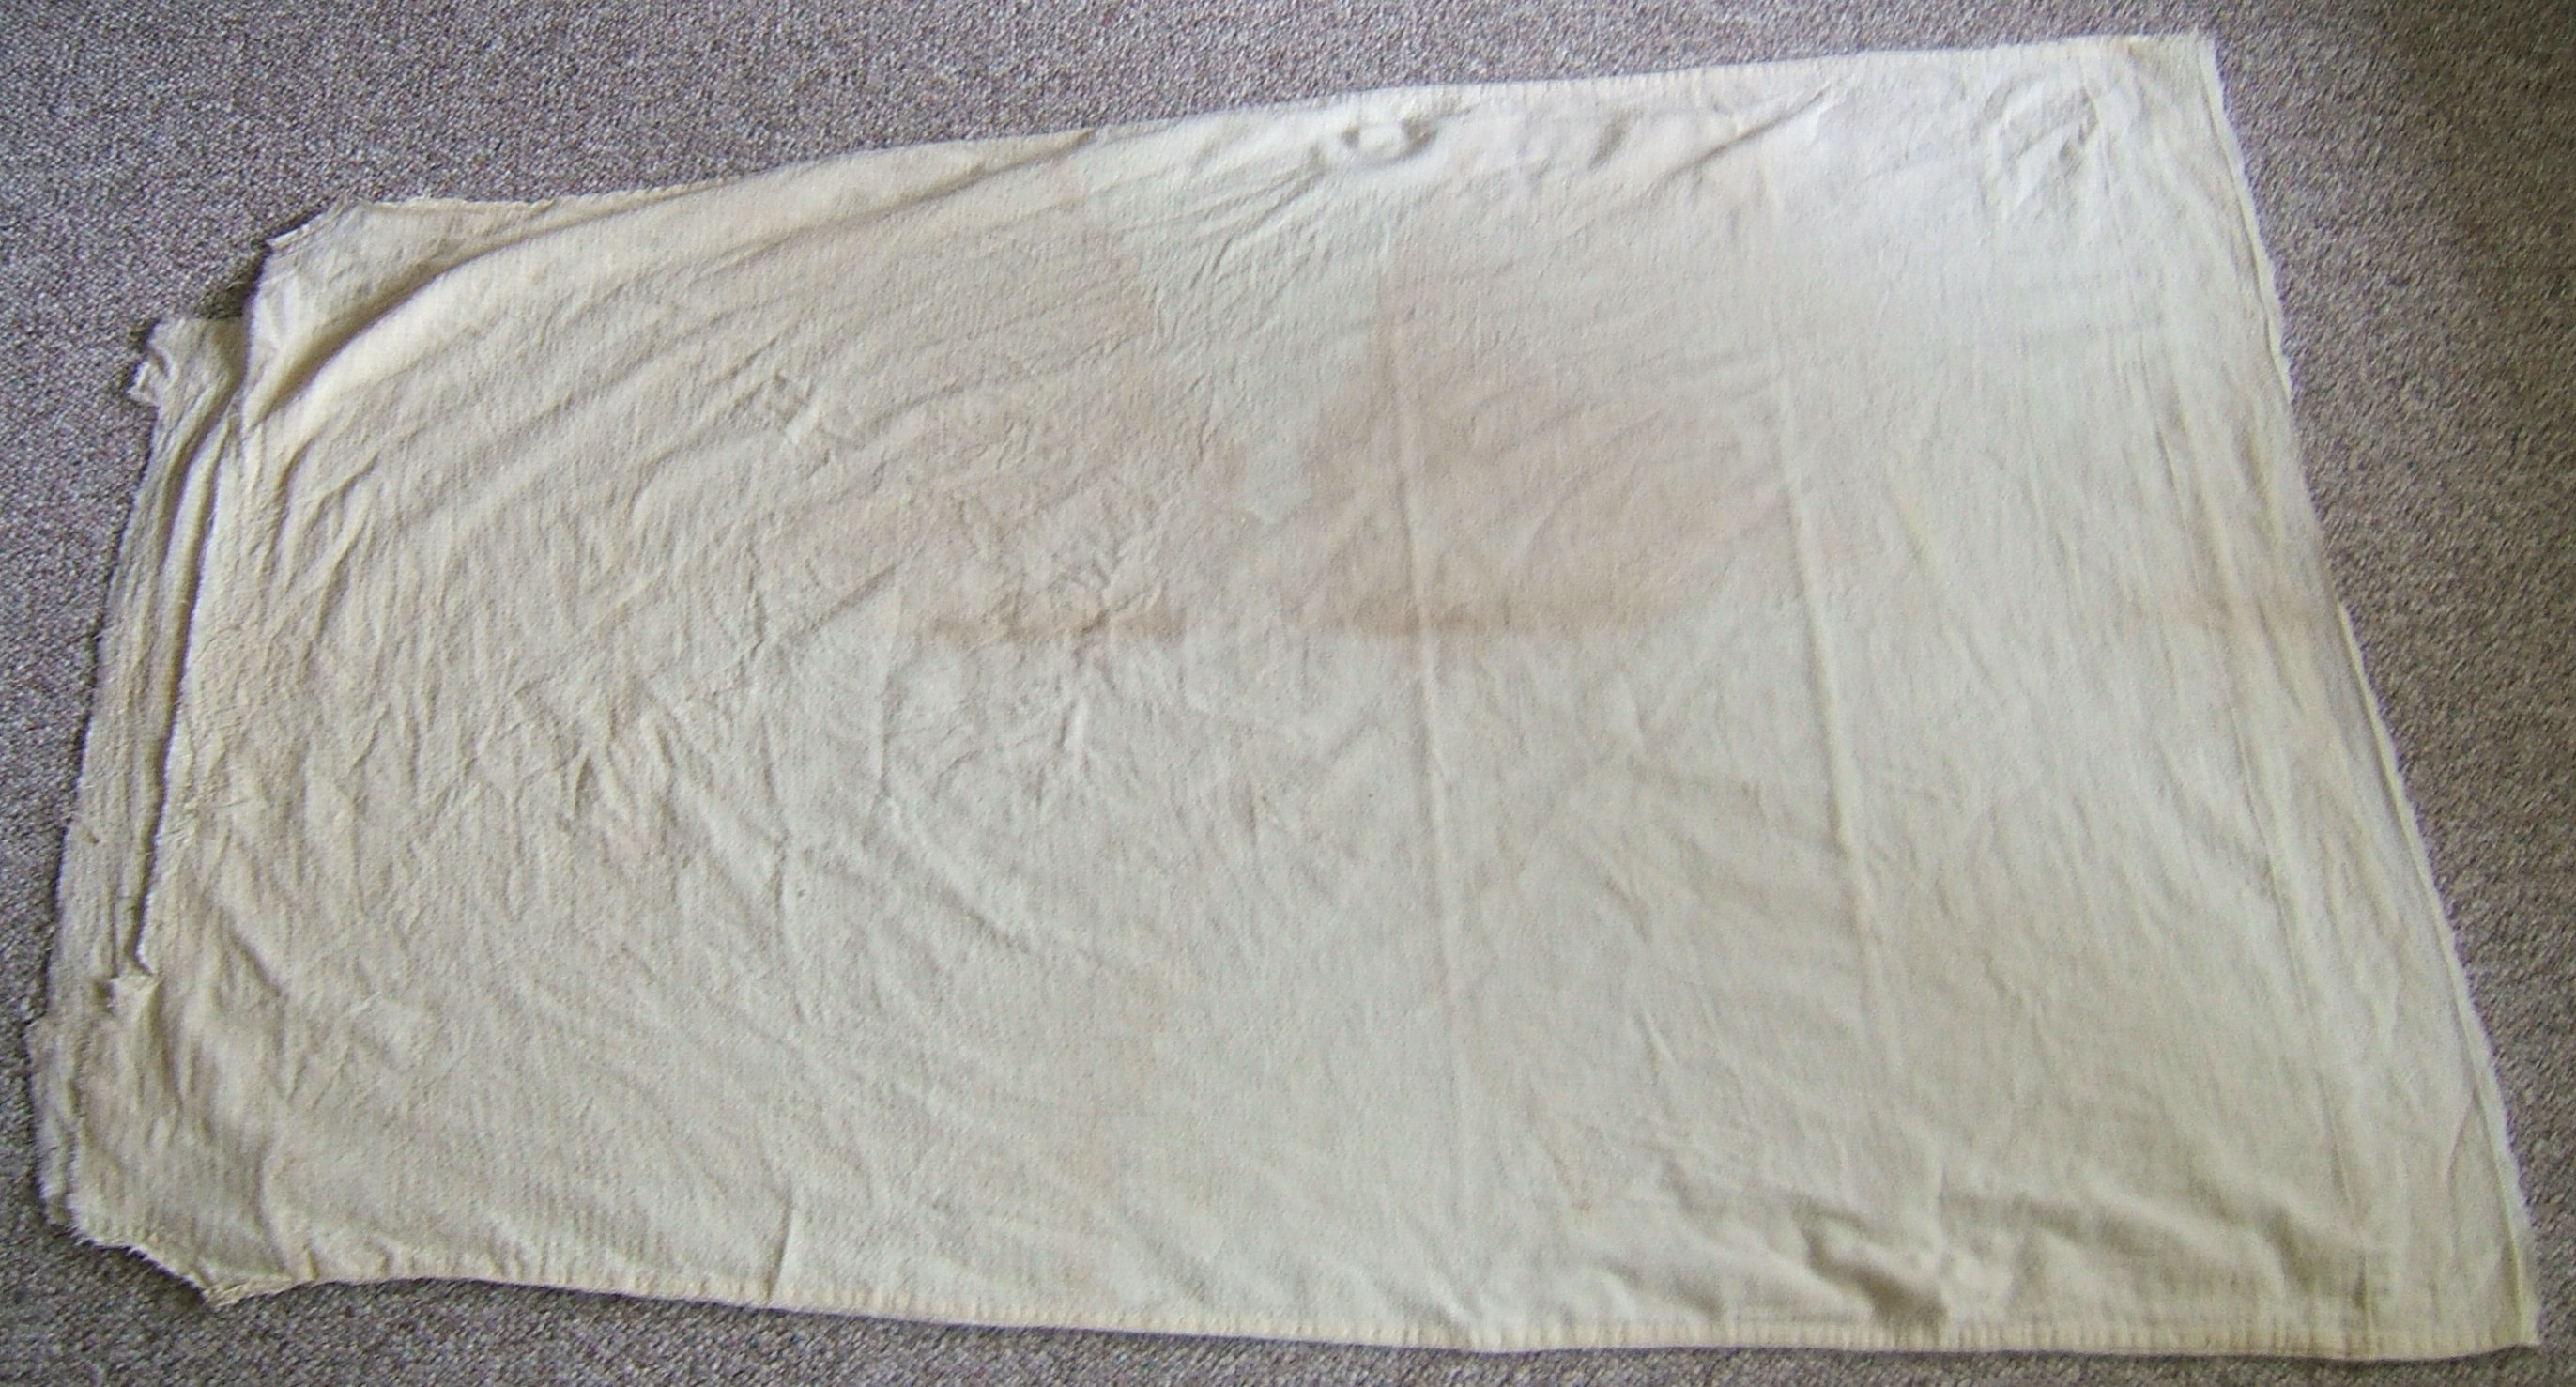
I paused to take a picture while hanging up the wash. Left to right, you see an orange niqab that I wear to keep the sun off my surgery, a white gauze niqab that I wear in waiting rooms, my first prototype mask, which I carry in a smock pocket when I don't think I'm going to need a mask, a one-tie pleated mask that I wear as a cravat when I ride my bike so I can put a mask on quickly when I stop, a pair of shorts, and a bath towel.
The
tutorial below aborted
when I got a
better idea that could
be expressed in fewer words,
so I'm using this
file as a place to dump assorted thoughts about
masks
and keep
project blogs.
Project Blog: orange headband niqab
Project Blog: I refine the headband niqab.
Project Blog: I revise the muslin niqab.
Project Blog: I play with the octagon mask.
Project Blog: Two-layer design inspired by the octagon mask.
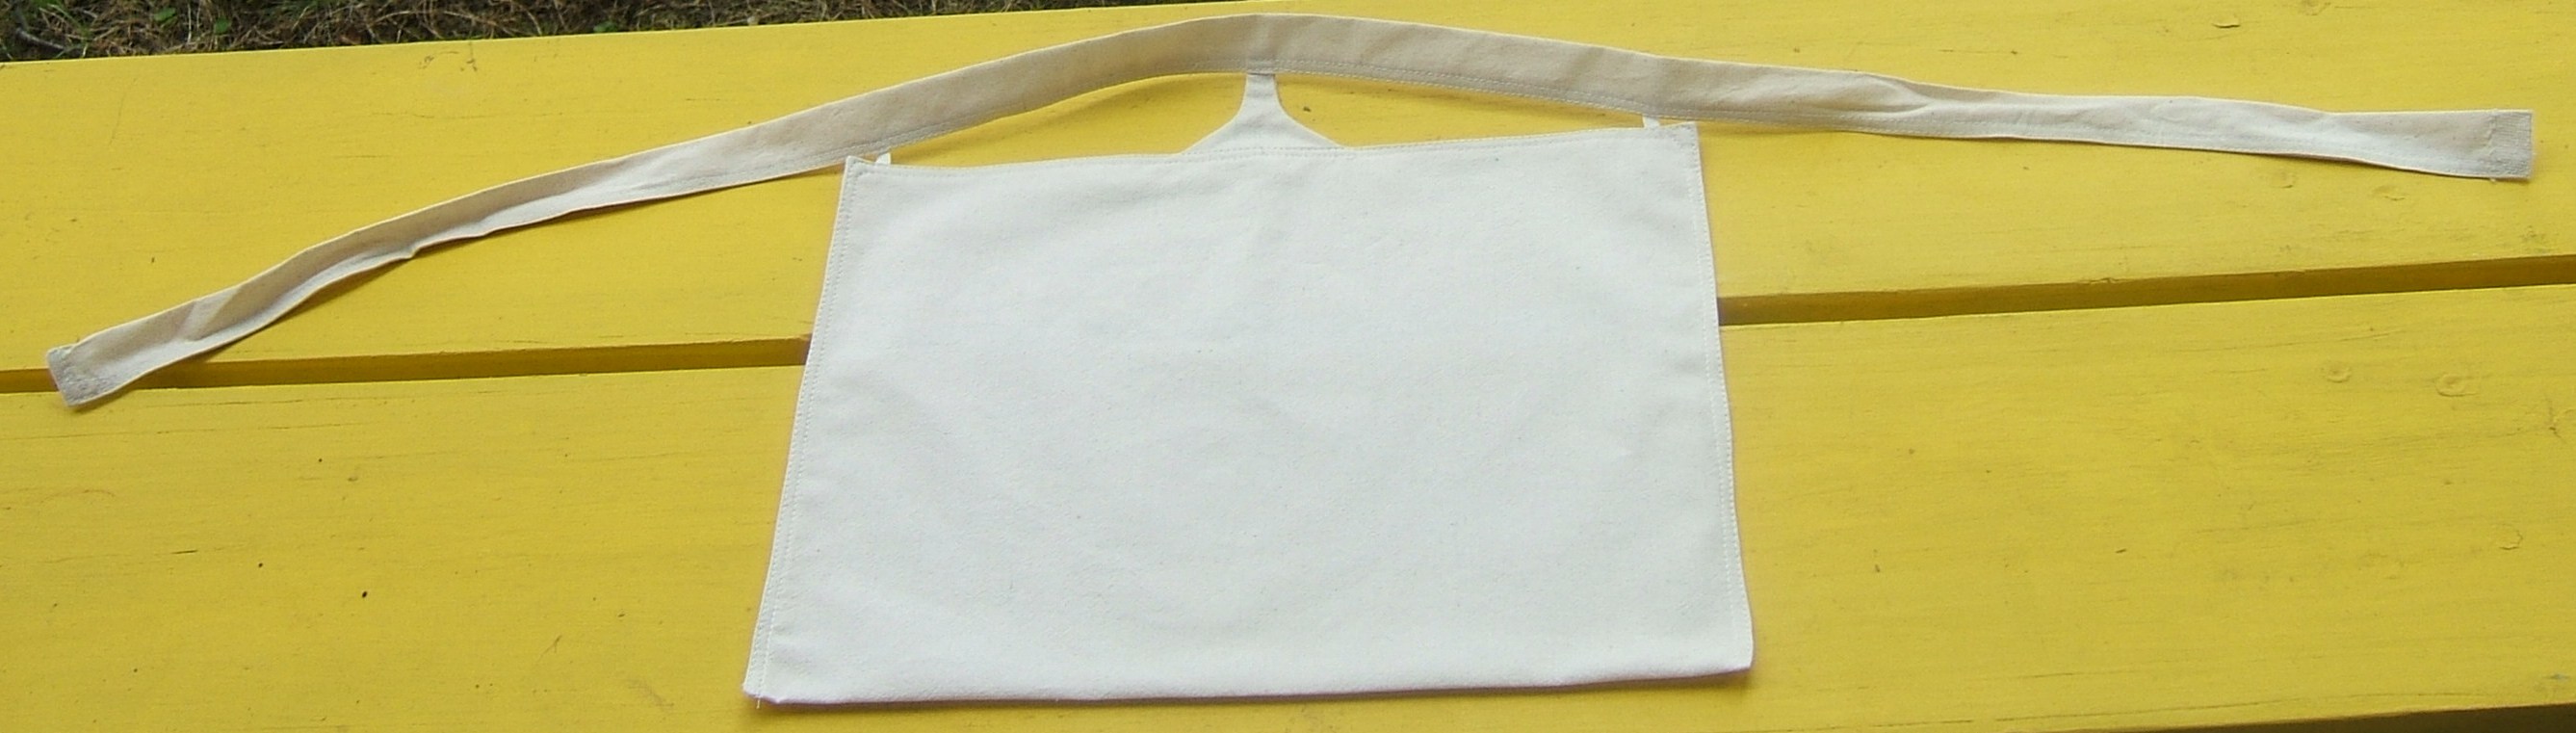
Niqab Summary: General discussion of the niqab
An external link to a fitted mask pattern that reminds me of my plans to widen the bottom of the nose tab on my next niqab. The nose piece on madebybarb's pattern extends only halfway up the nose, but resembles the extension that I intend to make to cause a niqab to cover my keratosis in addition to the skin graft.
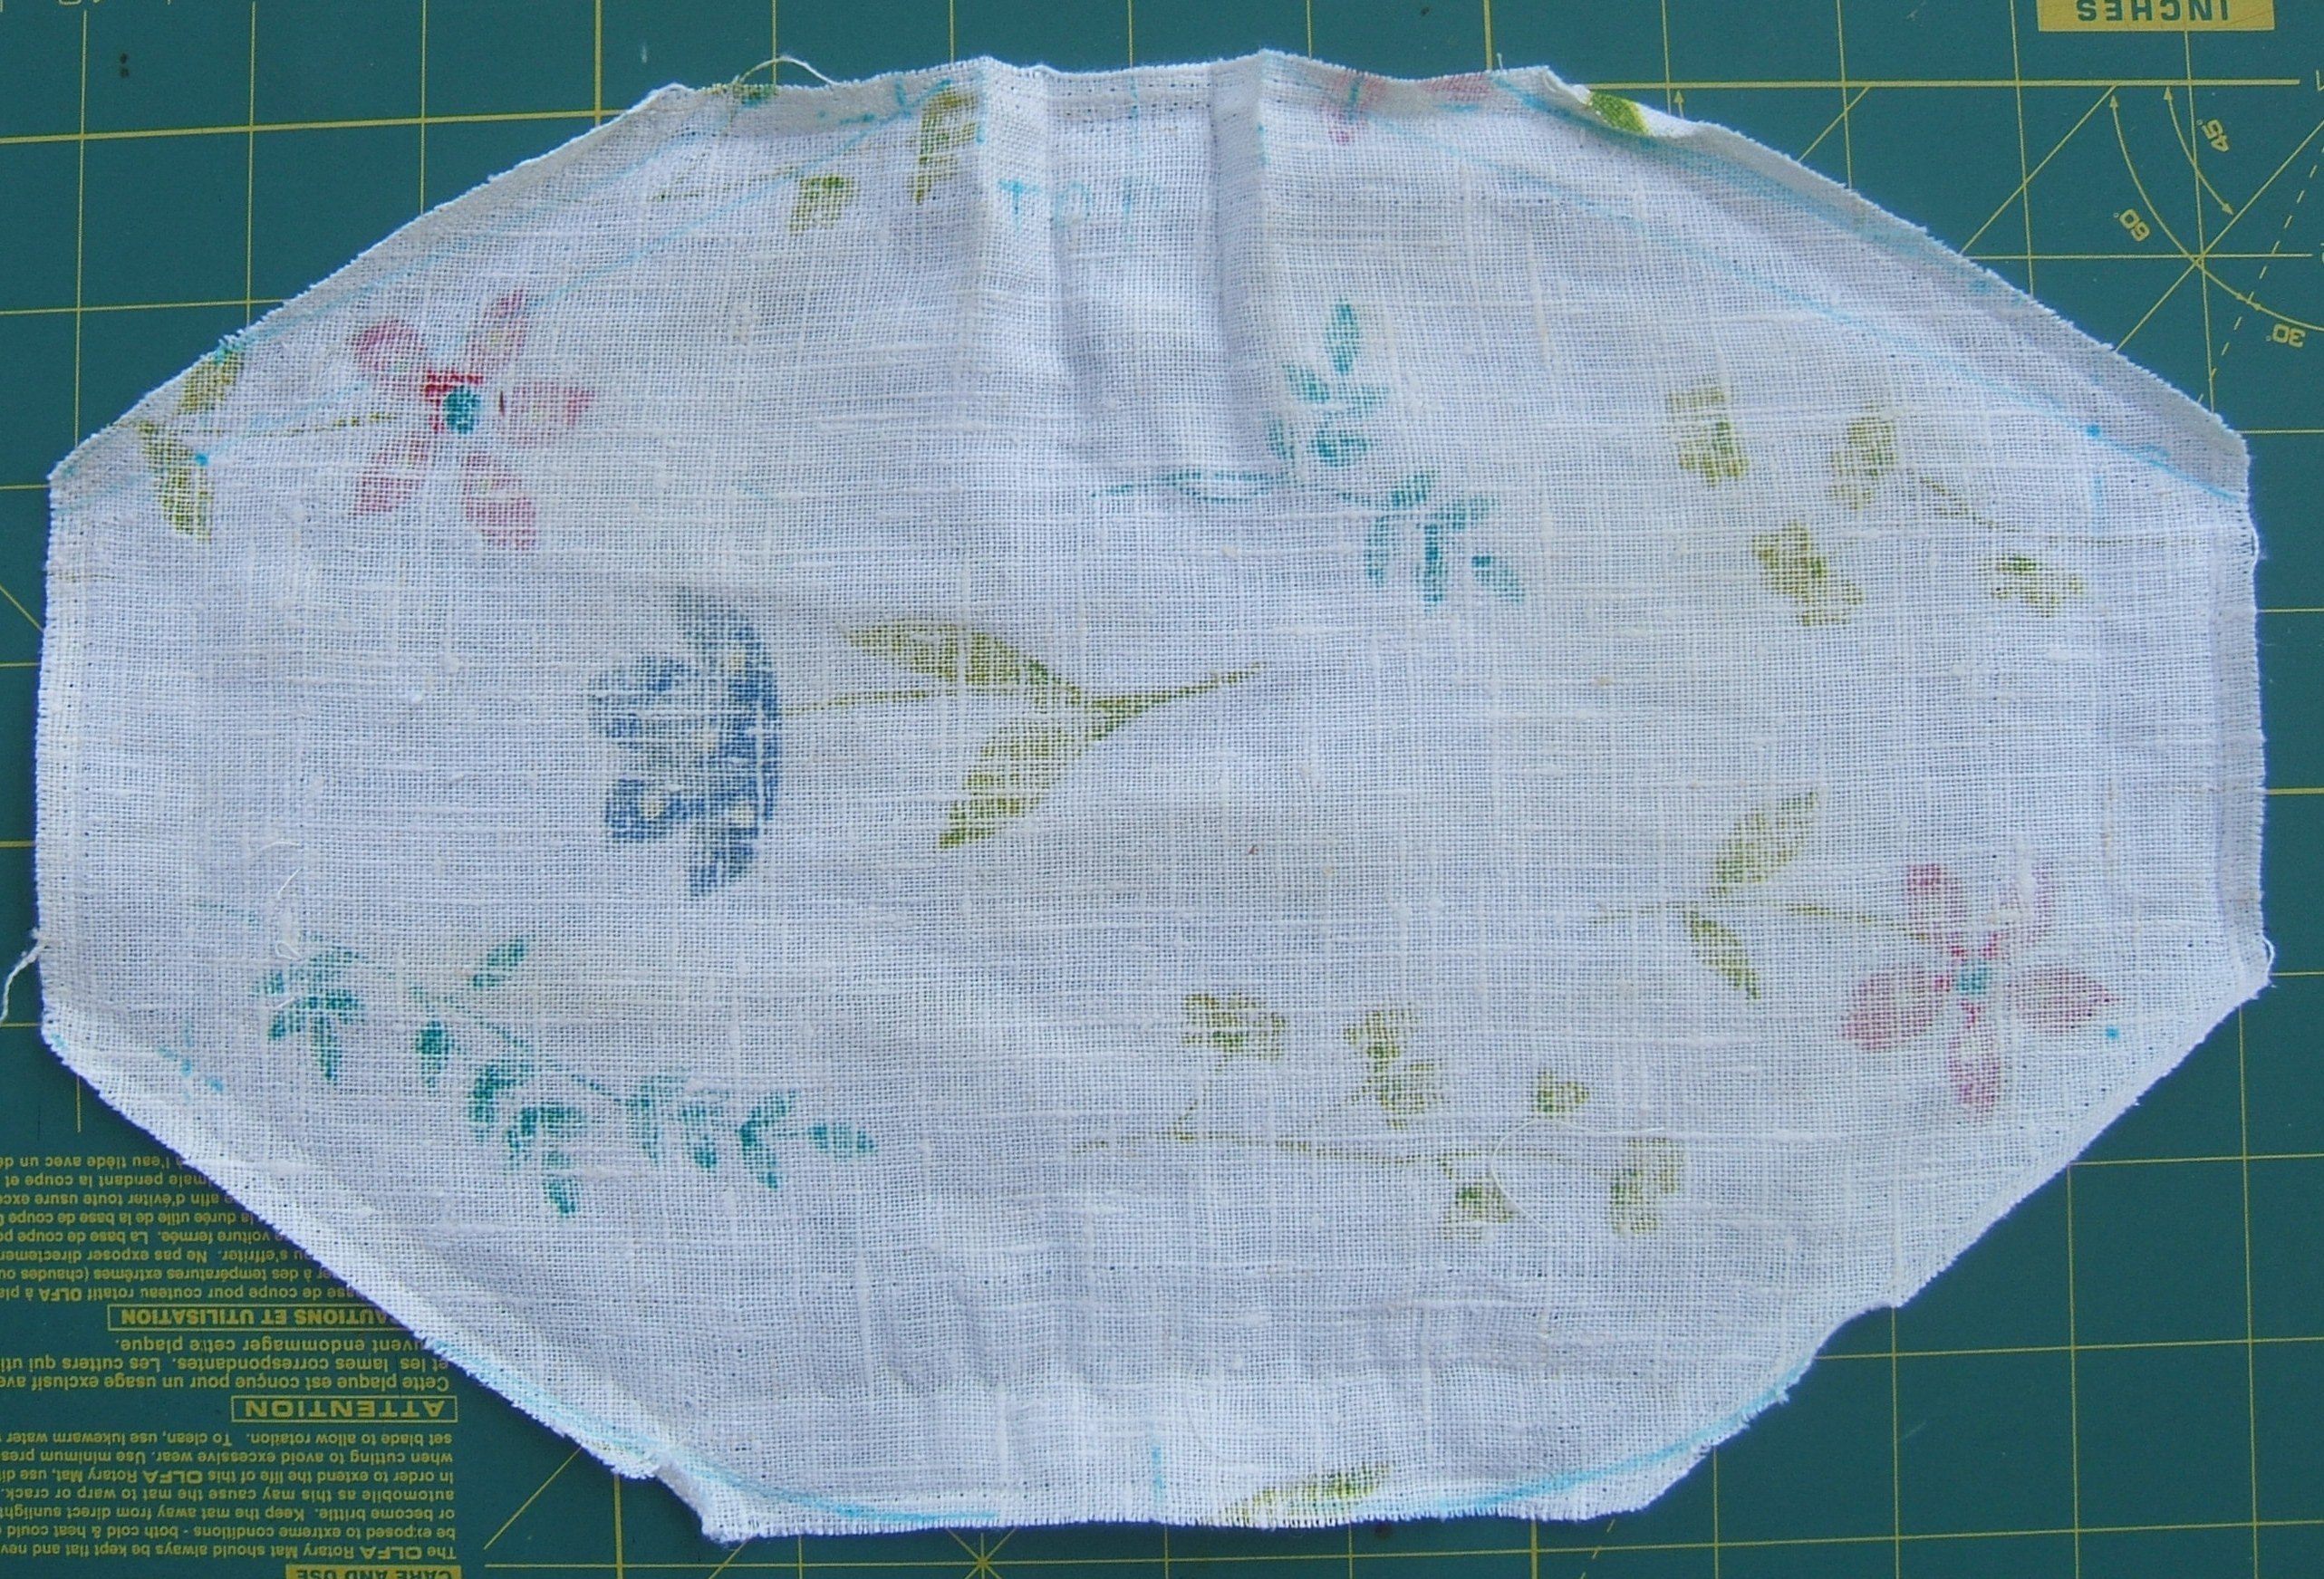
A cool idea a Creative Machine member found
on the Web: make an octagon-shaped mask --
the shape is got by putting a rectangle between
the corners of a regular hexagon -- and then put
two vertical pleats in the middle, so that it
bulges out over your nose.
(The picture showed two knife pleats. I
think I would use a box pleat or an inverted
pleat.)
Another way to think of the shape is that you
make a rectangle that is extra wide, then snip
off the corners at a shallow angle. The
corner-snipping makes the mask narrower where
horizontal pleats would have made it narrower.
I may
play with this.
Now that I've got it worked out, I intend to make a lined version.
Like most people who sew, I've been looking at a lot of mask patterns lately.
I have found one that I think an absolute beginner could make without using a sewing machine, if he uses a handkerchief, bandanna, or scarf instead of starting with yard goods.
The pattern calls for a piece thirteen inches wide and fifteen inches long, but one that I made from a bandanna twenty-two inches square fits well. It wraps around to the back of my head, but that just makes it filter better.
This mask deals with the leaks inevitable in home-made masks by pushing the edges out so far that it's easier for your breath to go through the cloth than to escape unfiltered. That makes this single layer a better filter than the double layer created by tying a handkerchief around your face, and it's *much* more comfortable.
The pattern calls for elastic, but any sort of ribbon, tape, or string that's long enough to tie around your head works at least as well. Shoestrings are good for this sort of thing.
Pins to keep things from shifting around while you are working on them are helpful. Straight pins are easiest to use, but you probably have safety pins, and those will work.
You do need a needle and thread. Most homes have a needle somewhere. If you can't find yours, grocery stores sell mending kits and threaded needles.
I would use a thimble, but you'll be taking so few stitches that there is little risk that your finger will get sore. If it does seem at risk, stick a piece of adhesive tape or a snip from a bandaid on the spot. If that isn't enough, stick a slightly-larger piece on top.
And you need something to cut the thread with.

Five items are all you need: Handkerchief, string or elastic, pins, threaded needle, and scissors or a very-sharp knife.
You will make a "casing" on one side of the handkerchief and put elastic or a tie in it.
I will give instructions for making a casing with elastic already in it, using a pre-threaded needle, then discuss variations.
Handkerchiefs are never perfectly square. Fold the handkerchief at a corner to determine which side is shorter, then form the casing in the shorter side.
Lay the elastic parallel to the shorter side with both ends sticking out. If it refuses to stay put, stick a couple of pins in it.
Fold the shorter side down over the elastic. Use pins to make the elastic stay put inside the fold. If there are pins already in the elastic, pull them out and re-stick them through the folded cloth. Make sure the elastic is in the crease of the fold.
Now to sew. It takes skill to sew a secure seam by hand, but all we want is to keep the fold folded, so basting will do fine. Try to keep your stitches not more than a quarter inch long.
Use the hem to guide your stitches, but don't try to push through six layers -- stitch just inside the hem, where there are only two layers of fabric.
Begin by sticking the needle straight down in the corner where two hems meet, near-missing the hem in the fabric underneath.
(If you are left handed, read "left" where-ever I say "right".)
Move the eye-end of the needle to the right, so that it rotates around the point where it pierces the cloth. Keep rotating until you can see a bump where the point of the needle touches the handkerchief. This bump should be close to the hem. If the bump is more than a quarter inch from the place where you first stuck the needle, pull the needle back a little. Now push down slightly with the thumb of the hand holding the fabric, and push forward with the needle to make the point come through.
Push the needle through the cloth until there is enough needle sticking out to take hold of, then shift your grip to the point end of the needle and pull it out of the fabric. When all of the needle is out of the fabric, shift your grip again so that the eye and the thread are pinched between your thumb and fingers. Gripping the thread will keep it from pulling out of the needle while you draw it through.
Pull until only a short piece of thread is sticking out where you first stuck the needle. I would leave half an inch; you will want two or three inches. Advanced students may leave enough thread to thread a needle and hide the end inside the hem. *Really* advanced students have already hidden the end inside the hem, and they have secured the thread with a couple of back stitches instead of the "bar tack" I am about to describe.
Now stick the needle in where you stuck it the first time and take another stitch in the same place. (This makes a "bar tack".) Pull through until you see the end of the thread that you left sticking out move, or the cloth puckers to show that the end isn't going to move.
Thread loves to tie itself into knots while being drawn through. Keep a sharp eye on the shrinking loop, and if it twists, pause to pull it straight. If a snarl is too small for your fingers, put the needle through the loop and use it as a handle. You can use the needle as a pulley to keep the thread straight while you pull the loop in with your other hand.
If thread is twisted, it is more likely to snarl. Pause now and again to let the needle dangle while the thread untwists itself.
Advanced: drawing thread over a candle stub or other bit of hard wax before you start to sew will untwist the thread and make it inclined to stay untwisted.
Take a third stitch. This time it should be impossible to move the end. You have secured the thread. Take one more stitch just to be sure, then put the needle in one-eighth of an inch from the place where you have been coming up.
Make more stitches close to the hem, each one to the left (right, if left-handed) of the stitch before, until you get to the other side. (This is called "running stitch".)
Check to be sure all stitches are tight but not puckered, then make another bar tack like the one you began with, and the mask is finished. Well, you probably want to trim the dangling ends of the thread to a quarter inch long. If you are using a knife or a razor blade for this purpose, fold the thread over the edge and saw slightly. Thread is easier to cut when it is under a little tension.
If you have used elastic, pin the ends together with a small safety pin and try the mask on. Loosen or tighten as required. Leave the elastic secured only with a pin in case you need to adjust it again.
If you have used string, ribbon, or tape, tie the string around your head just above the ears. If you have trouble reaching back, pull the string so that the ends are unequal and the knot falls in a more-convenient place.
It's easier to make an empty casing and thread the elastic or string into it afterward -- particularly when you want a tape to fill the entire casing or squish to fit it.
If you have no bodkin or tape threader, a large safety pin will work.
First secure the pin to the thing to be pulled through the casing. The obvious way is to stick the pin into it. If it's elastic, stick the pin through about the width of the elastic from the cut end. If it's tape or ribbon, fold a couple of inches back and stick the pin through the fold.
If it's a shoestring, poke it through the hole in the hinge of the pin. Tapes and ribbons can also be threaded through the hinge. If rolling the end of a ribbon up doesn't make it small enough to go through, you can put a loop of string through the hole and use the loop to pull the ribbon through.
Poke the safety pin into the casing, then use your other hand to push gathers onto the pin. Grasp the head of the pin through the fabric with your other hand, and use your first hand to pull the gathers off the hinge end of the pin onto the string. Repeat until the pin comes out the other end.
The coarser a needle is, the easier it is to thread and the harder it is to to push through cloth. Choose the finest needle that you can thread easily -- or the coarsest among the few you have.
Put on the strongest reading glasses you have. (If myopic and young, take off your glasses and hold the needle close to your eyes.)
Hold the needle in your favored hand and pinch the thread between the thumb and index finger of the other hand. Let only a very short bit extend, so that the thread will be stiff and unable to dodge away from the needle. Bring the eye of the needle and the thread together. When the thread is inside the needle's eye, push the eye between your forefinger and thumb so that you can get hold of what's sticking out and pull the thread into the eye.
If the thread hits the eye and accordions up, the end of the thread is bushed out. If it approaches the eye, then dodges around, there is a invisible fiber sticking out of it. In either case, snipping a bit off the end of the thread should correct it.
If the thread is bent, put the needle down, lick your index finger, pinch the end of the thread, then pull the thread out of the firm pinch. This will straighten the thread.
If you substitute a bit of wax for the damp index finger, the fibers will also be glued together to prevent bushing out.
When the thread is long, keep the free end and the working end of the thread as near to equal as you can without risk of catching the free end in a stitch. If the free end does get caught, pull it out, then shift the needle to keep it from happening again.
When the thread is long, you can speed up stitching by taking two or more stitches before pulling through. At each stitch, pull through a stitch-length of thread. If you feel resistance, it's time to pull the rest of the loop through. Watch the loop carefully; if it starts to twist, put the needle through it and use the needle as a handle to pull it straight. When the loop is pulled through, let the needle dangle to remove twist.
With practice, you can make two or more stitches at a time. When the point of the needle comes up out of the cloth, angle it down again to make another stitch. The guys on 18th Century Woman used to call this "rocker stitch" because the needle rocks up and down. I call it "pleating the cloth up onto the needle".
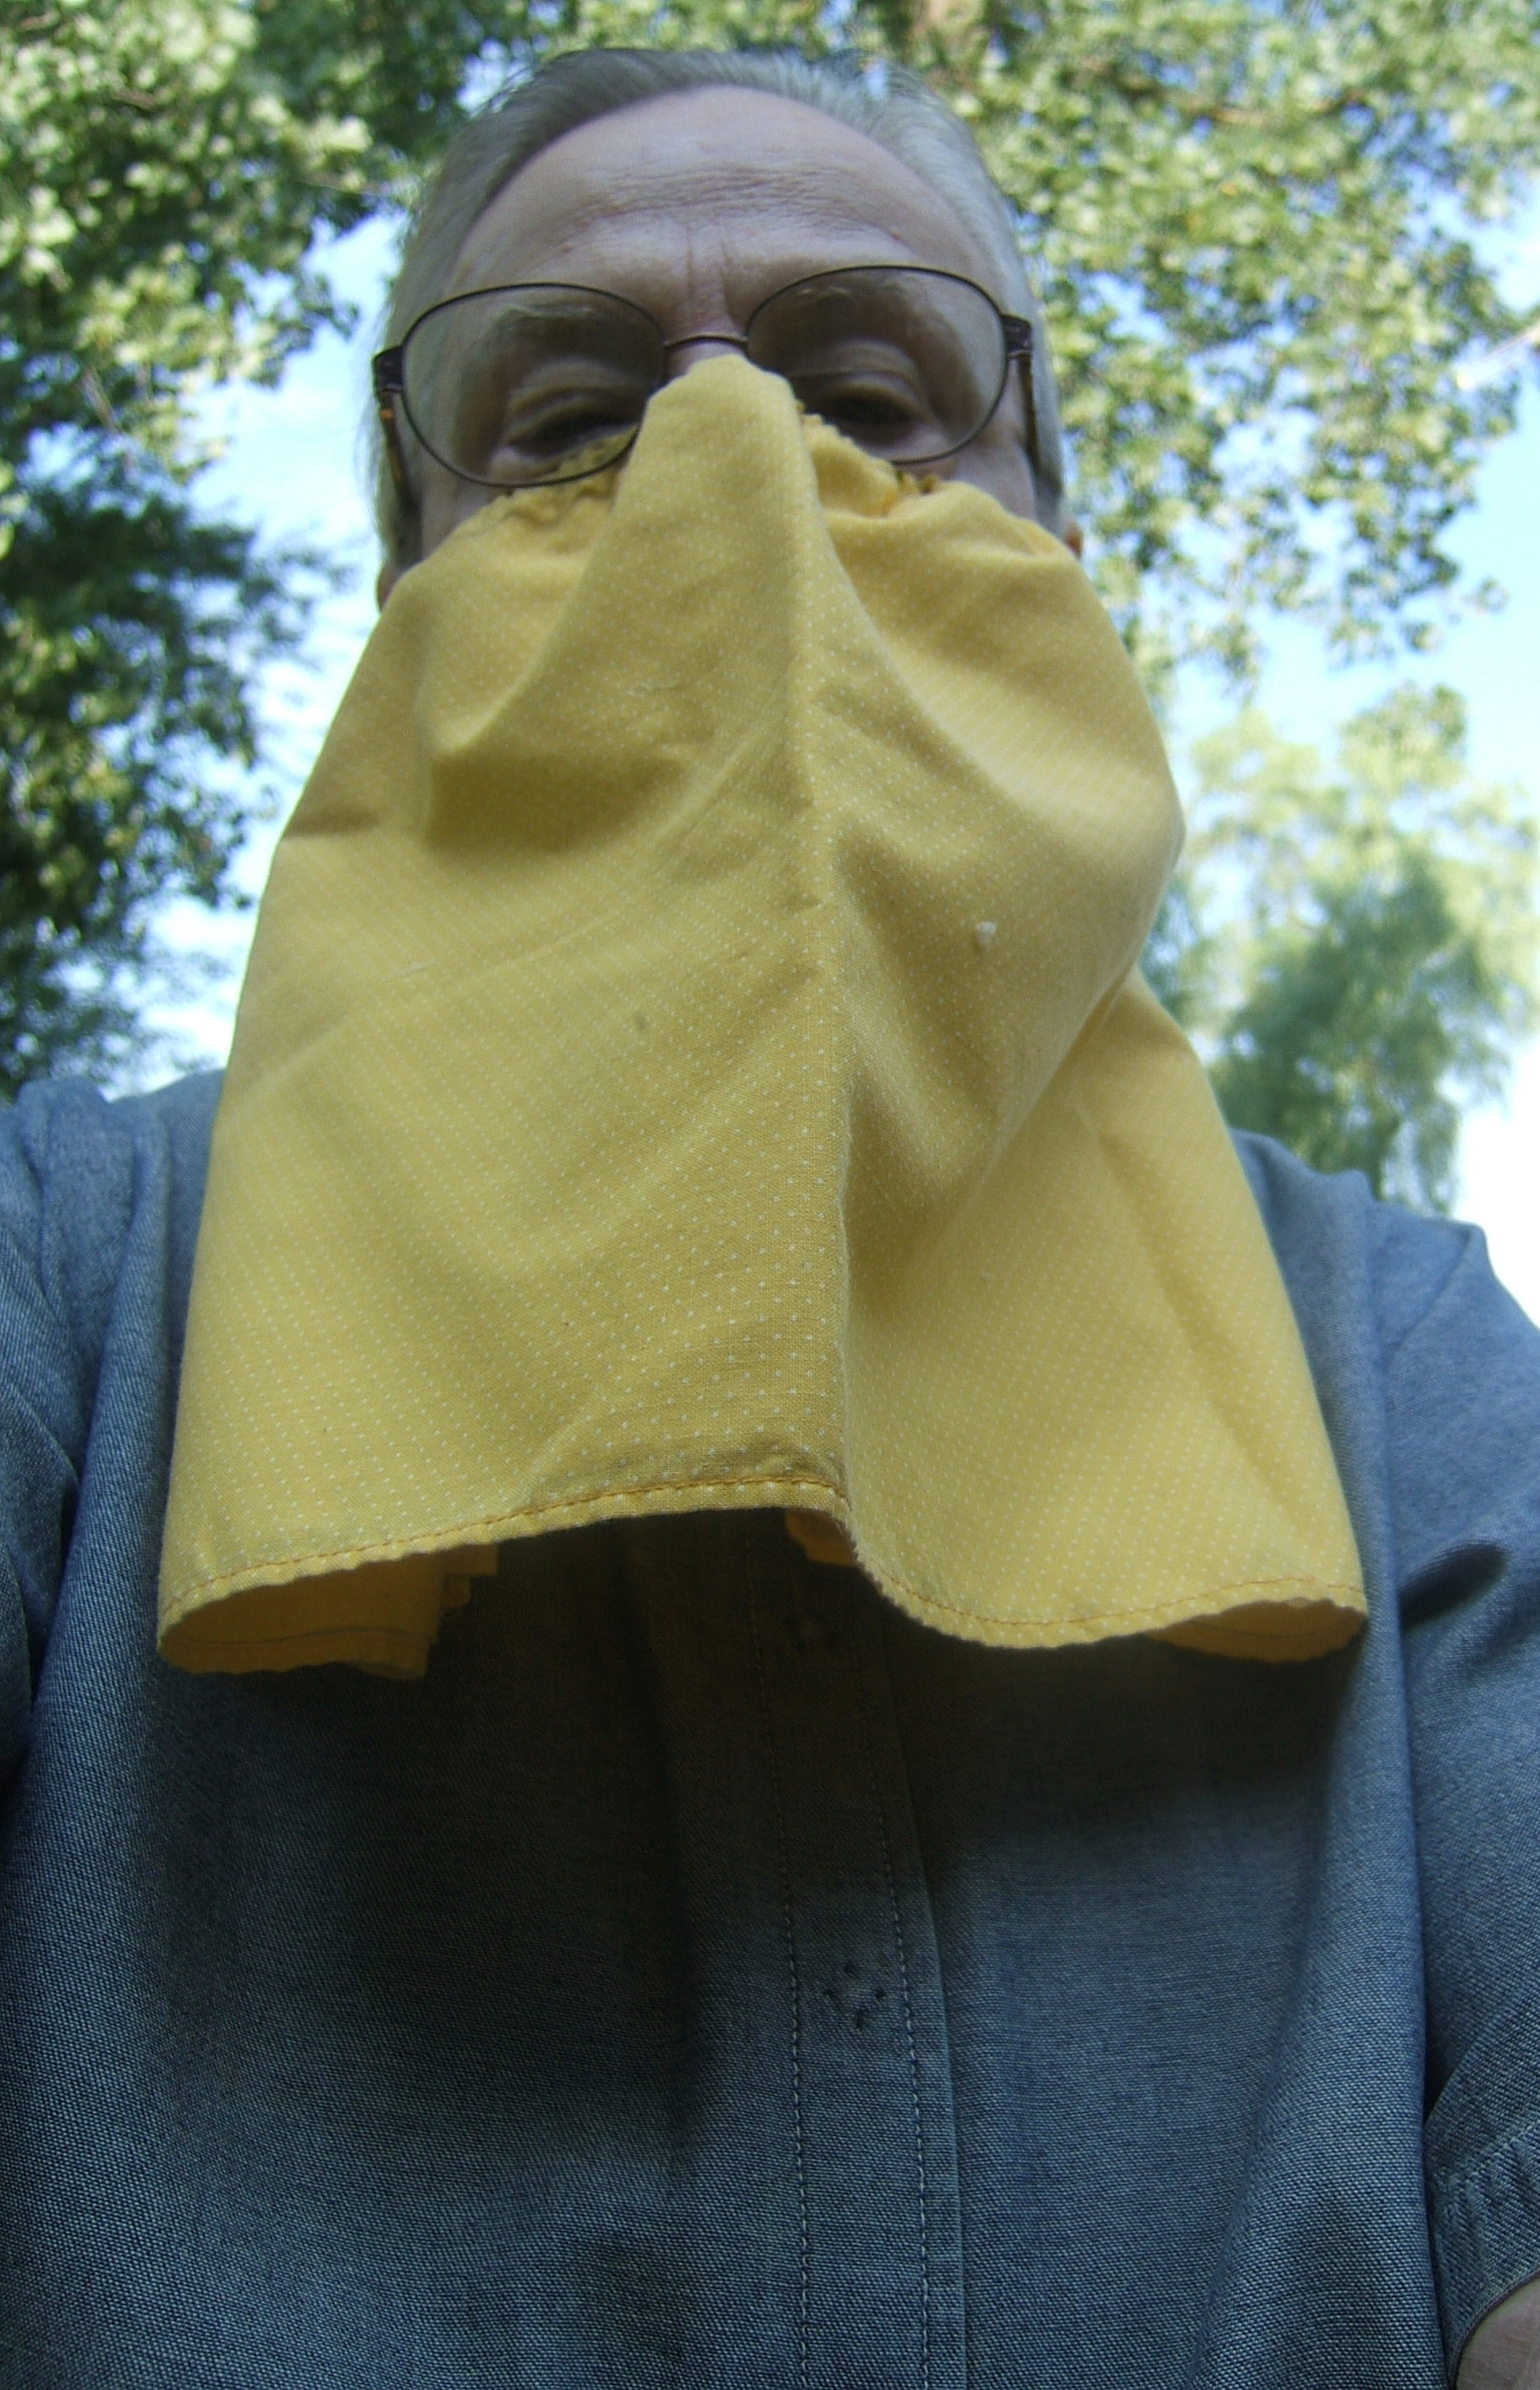
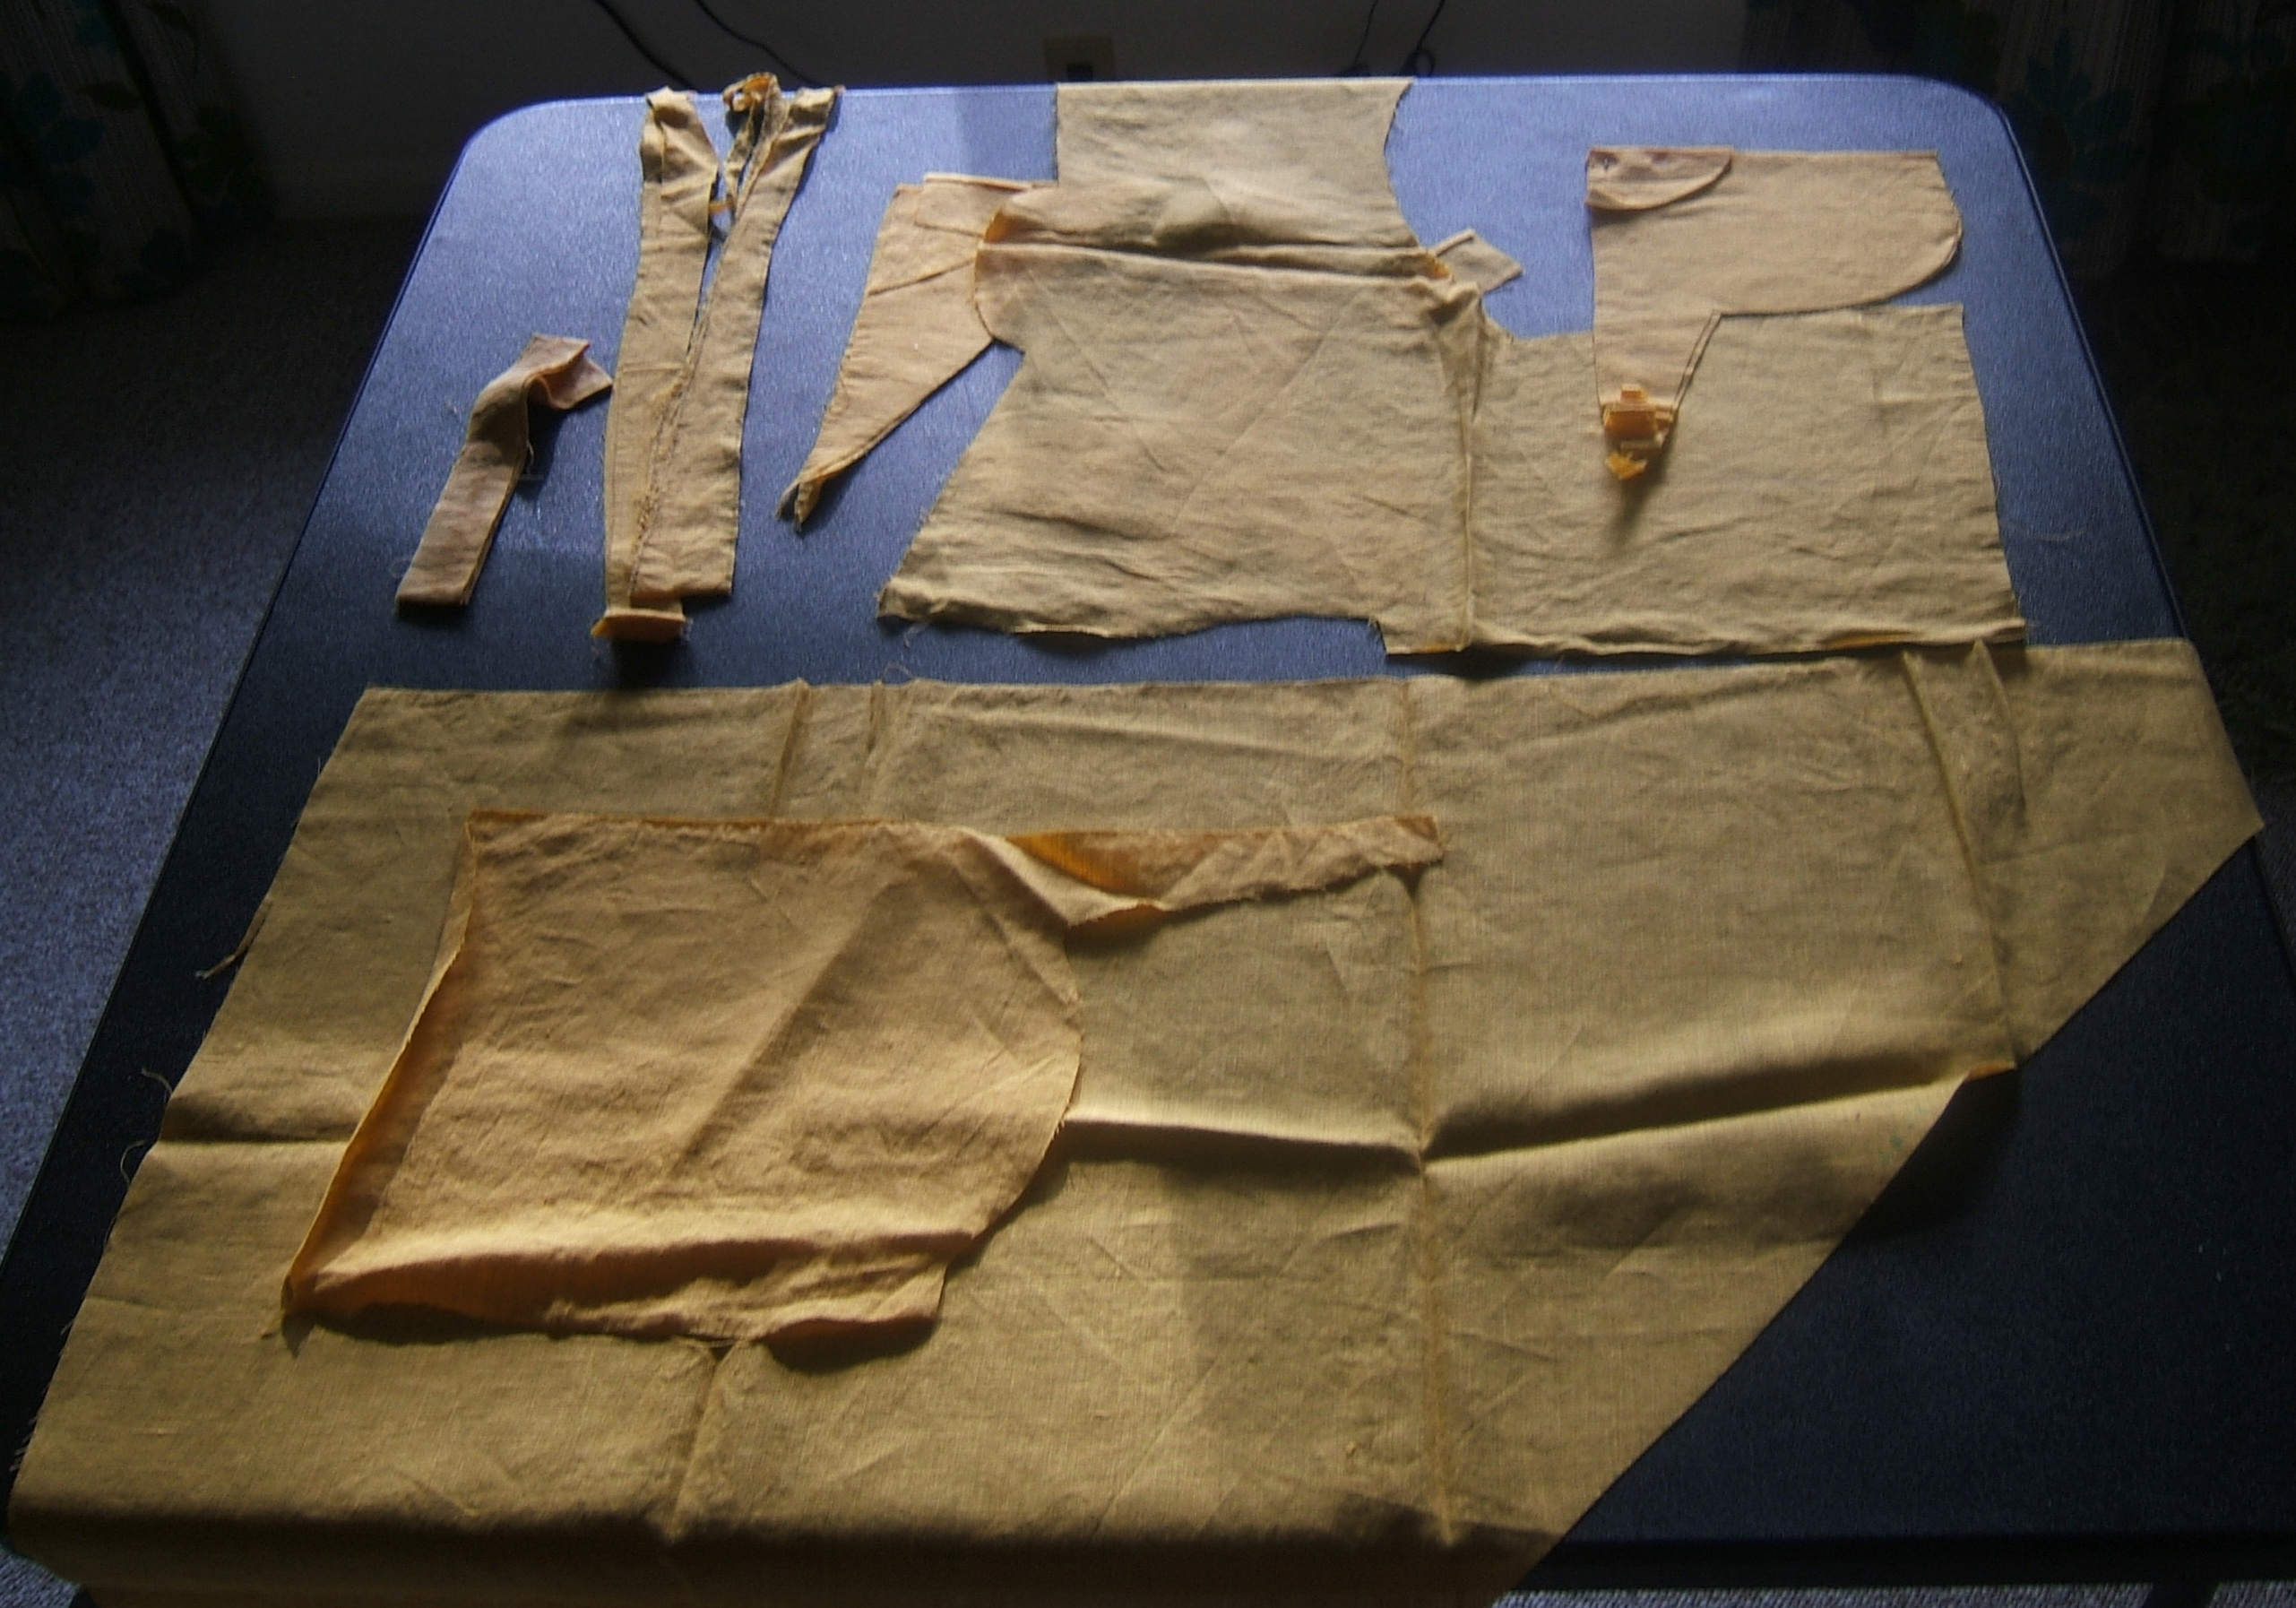
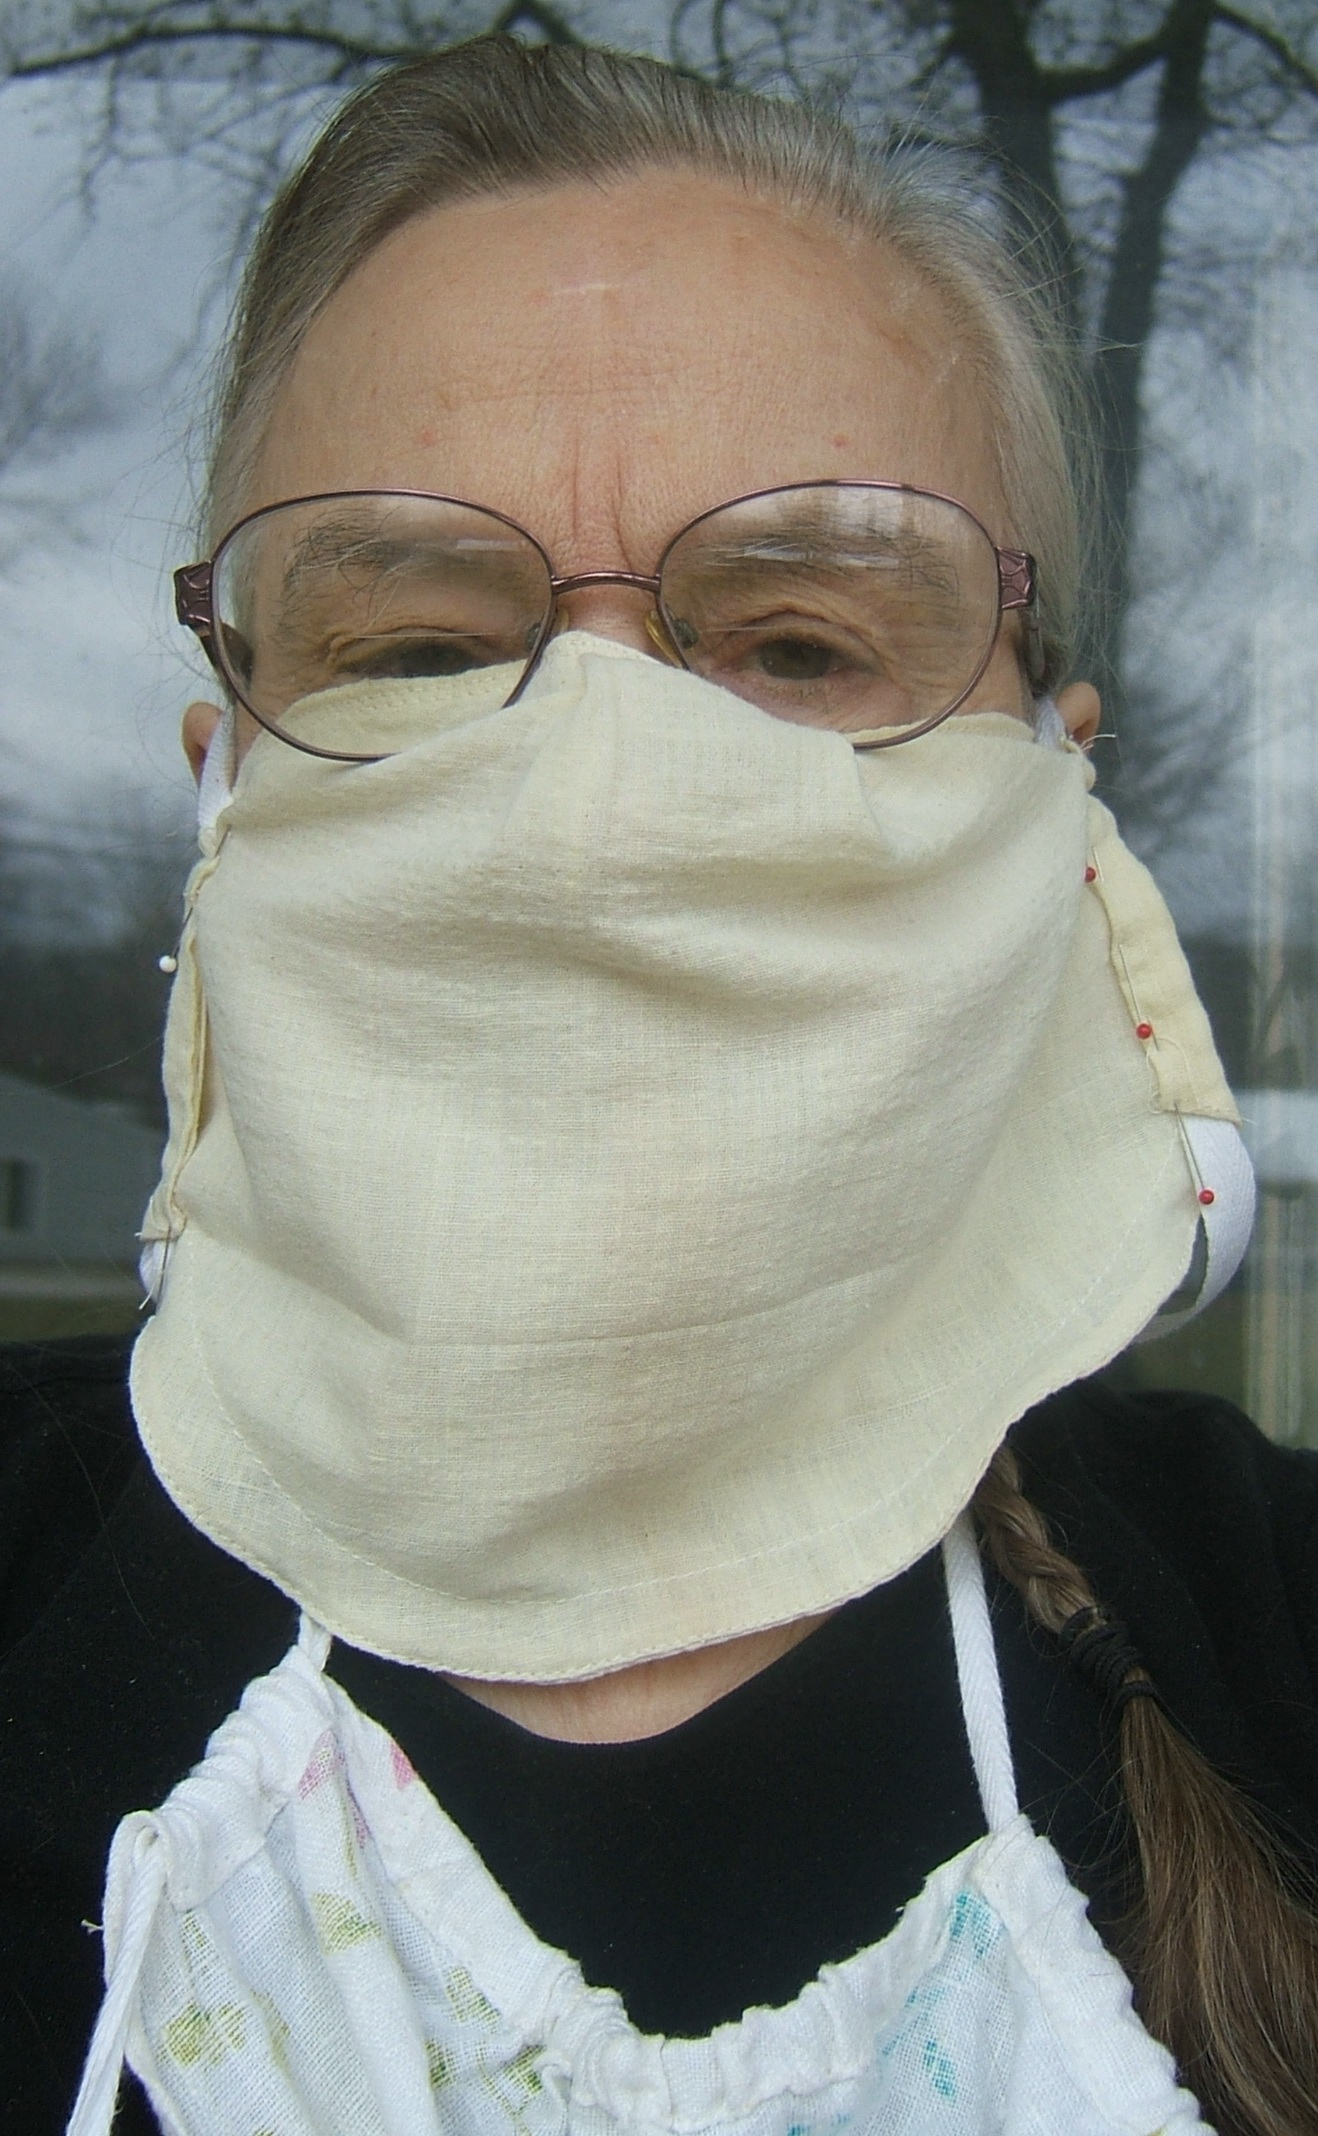
The mask in the picture was made from a "furoshiki", a hemmed piece of quilting cotton twenty-two and a half inches square. I wanted it to keep the sun off, and all my bandannas are somewhat sheer.
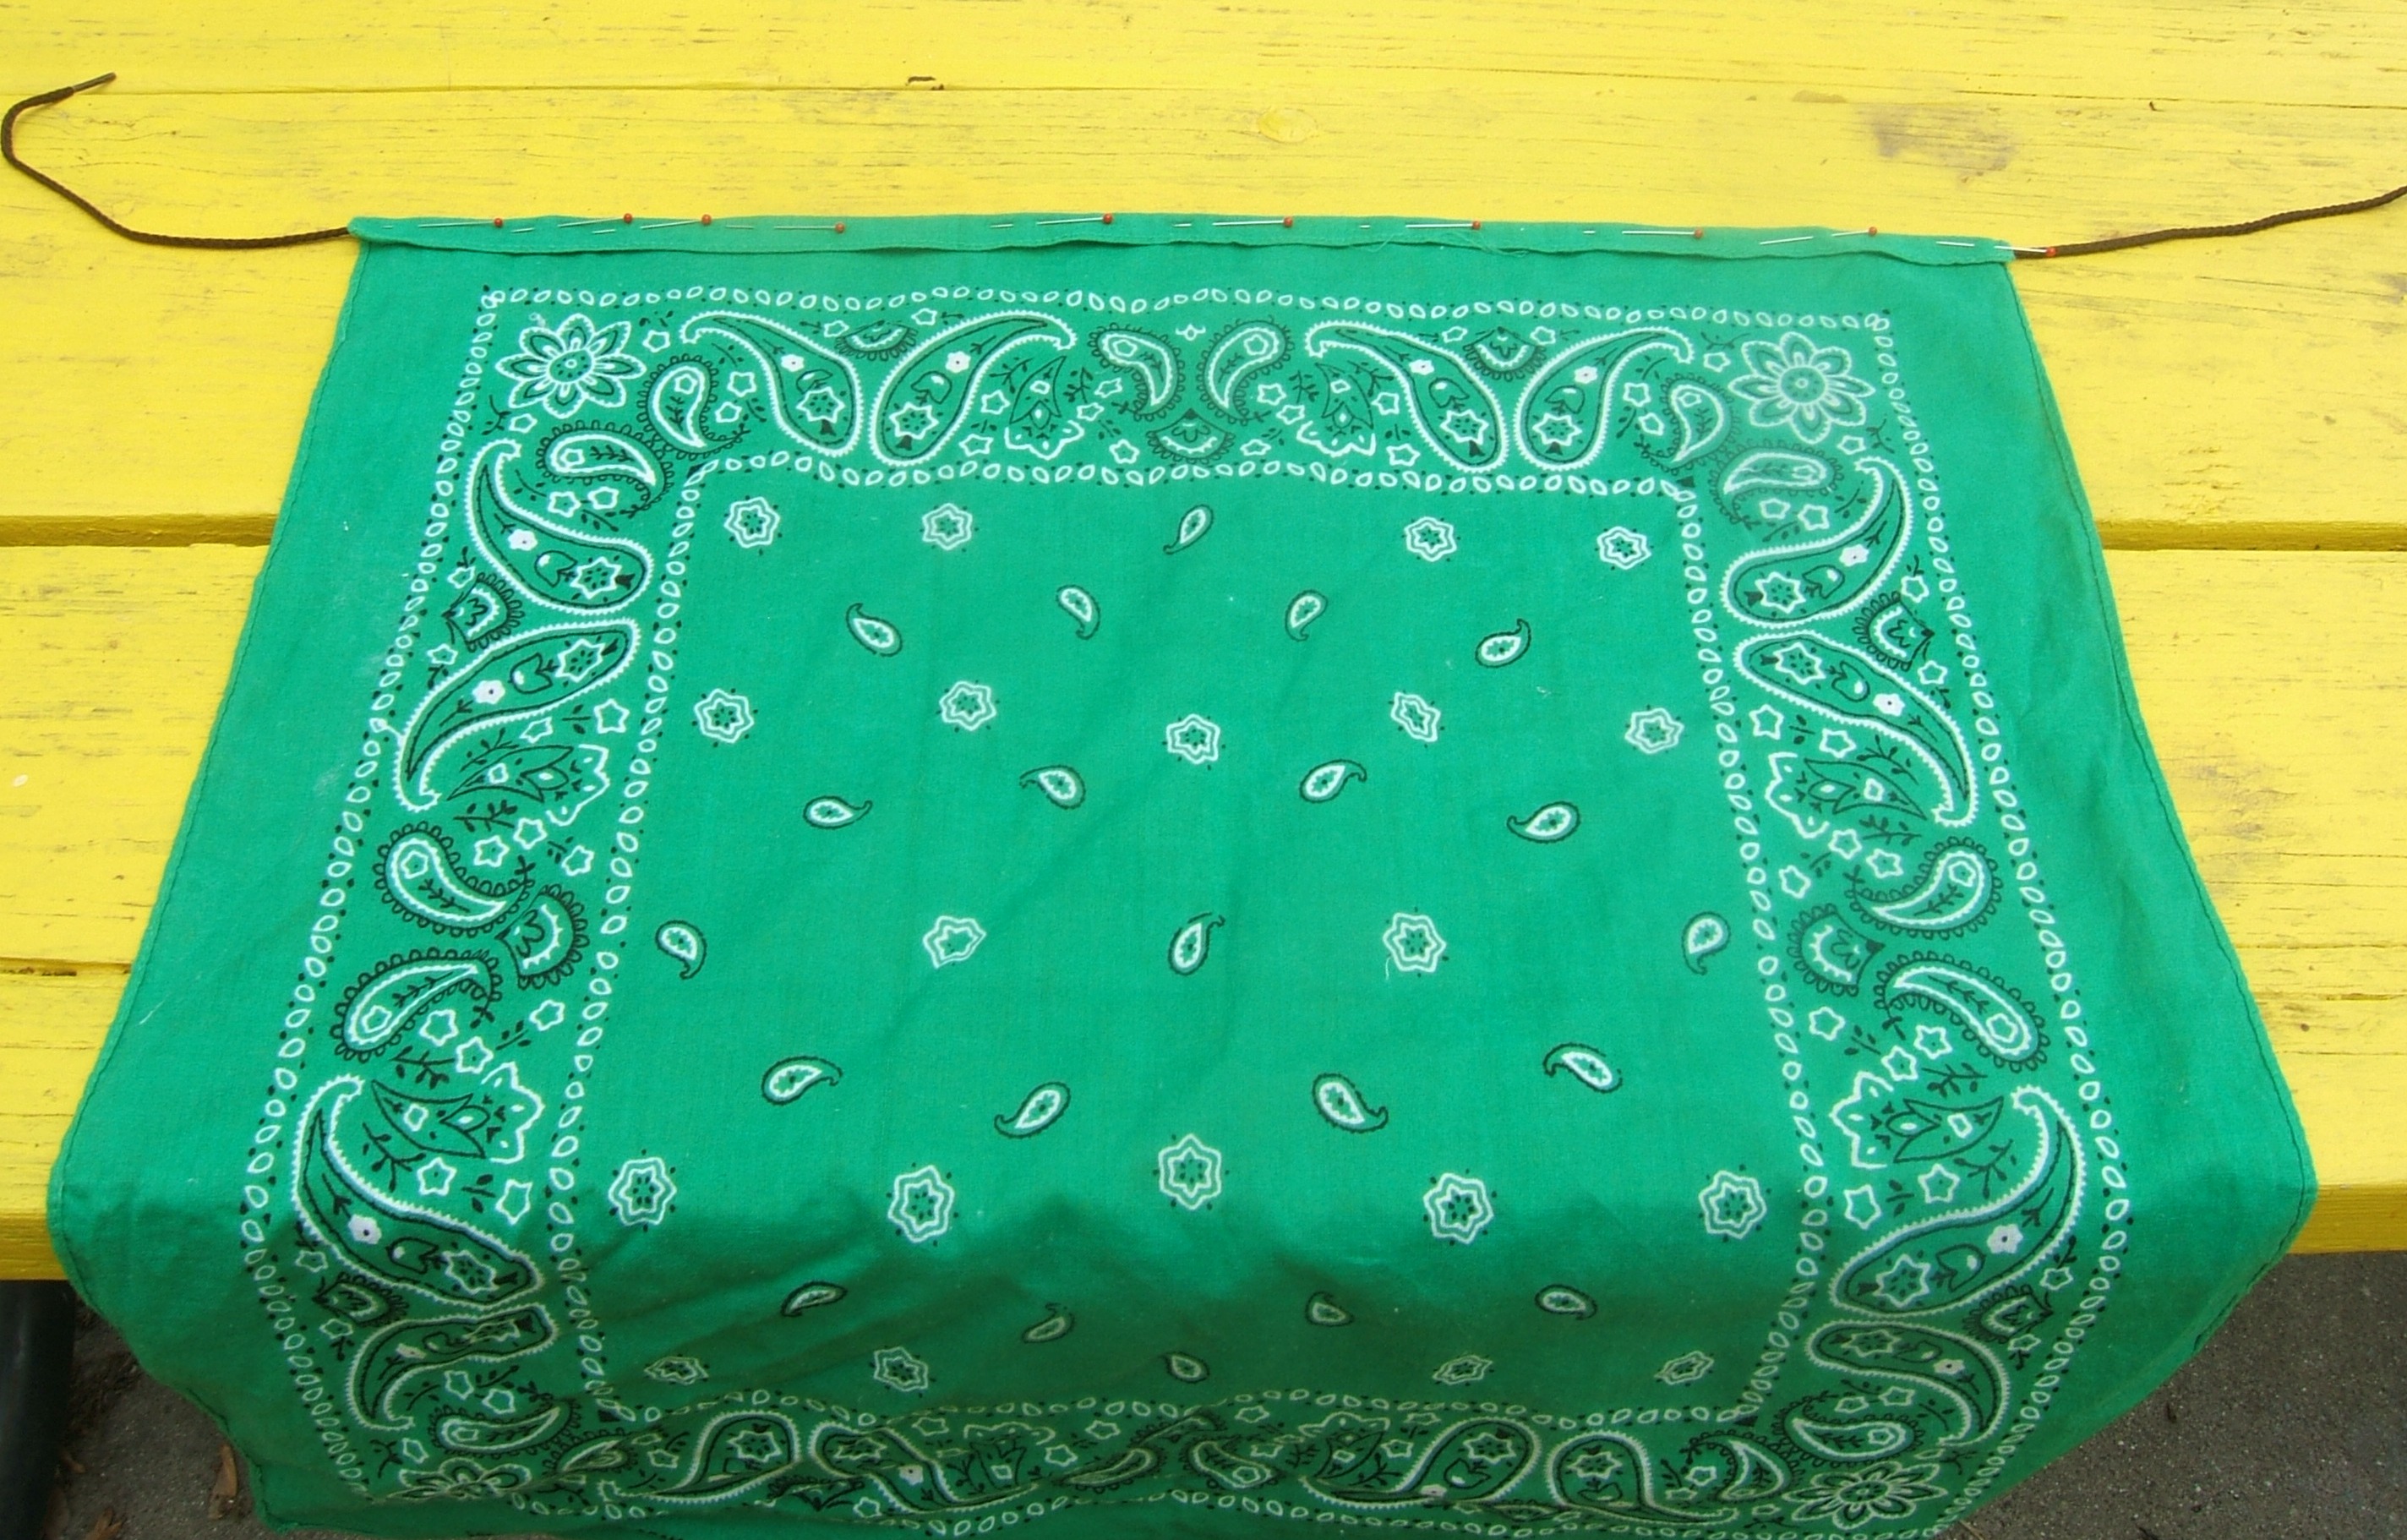
Fold a bandanna in half crosswise. (Determine which side is shorter, and fold parallel to the shorter side.)
For style points, make the fold a little off center so that the two flaps are not the same length.
Stitch half an inch from the fold. Use long stitches that will be easy to remove before you wash the bandanna.
Thread a shoelace, ribbon, or other string through the casing you have just made. If it's a shoestring, one can put it into the casing before the casing is stitched, as suggested in the aborted tutorial.
I find twill tape narrower than half an inch difficult to tie and untie.
Tie the mask on, put on your glasses, and tug up over the nose and down under each eye to shape the mask to your face.
Details:
If you don't know how to thread a needle, you can buy a packet of threaded needles at a supermarket.
You can thread a string through a casing with the aid of a large safety pin. Poke the string through the hole in the hinge of the pin, poke the pin into the casing, and push gathers onto the pin with one hand and pull them off the pin onto the string with the other hand until the pin emerges from the other side.
Comments:
I used a quilting-cotton furoshiki to make the model because I wanted it to be opaque, to protect my skin graft when I work in the garden. The stiffness of the cotton makes the mask incompatible with glasses, and it tends to slip out of place. I think that using tape instead of a shoe string would help it stay in place, and the soft fabric of a bandanna would also be less inclined to wander. But, unlike the green bandanna of the aborted tutorial, I have not unmade it and put it back into the handkerchief drawer. It's convenient for hanging up clothes and other times when I'm not going to be out long enough to make it worth my while to put on a headband niqab. I do unmake it when I wash it, to avoid permanent dirt lines on the wrinkles.
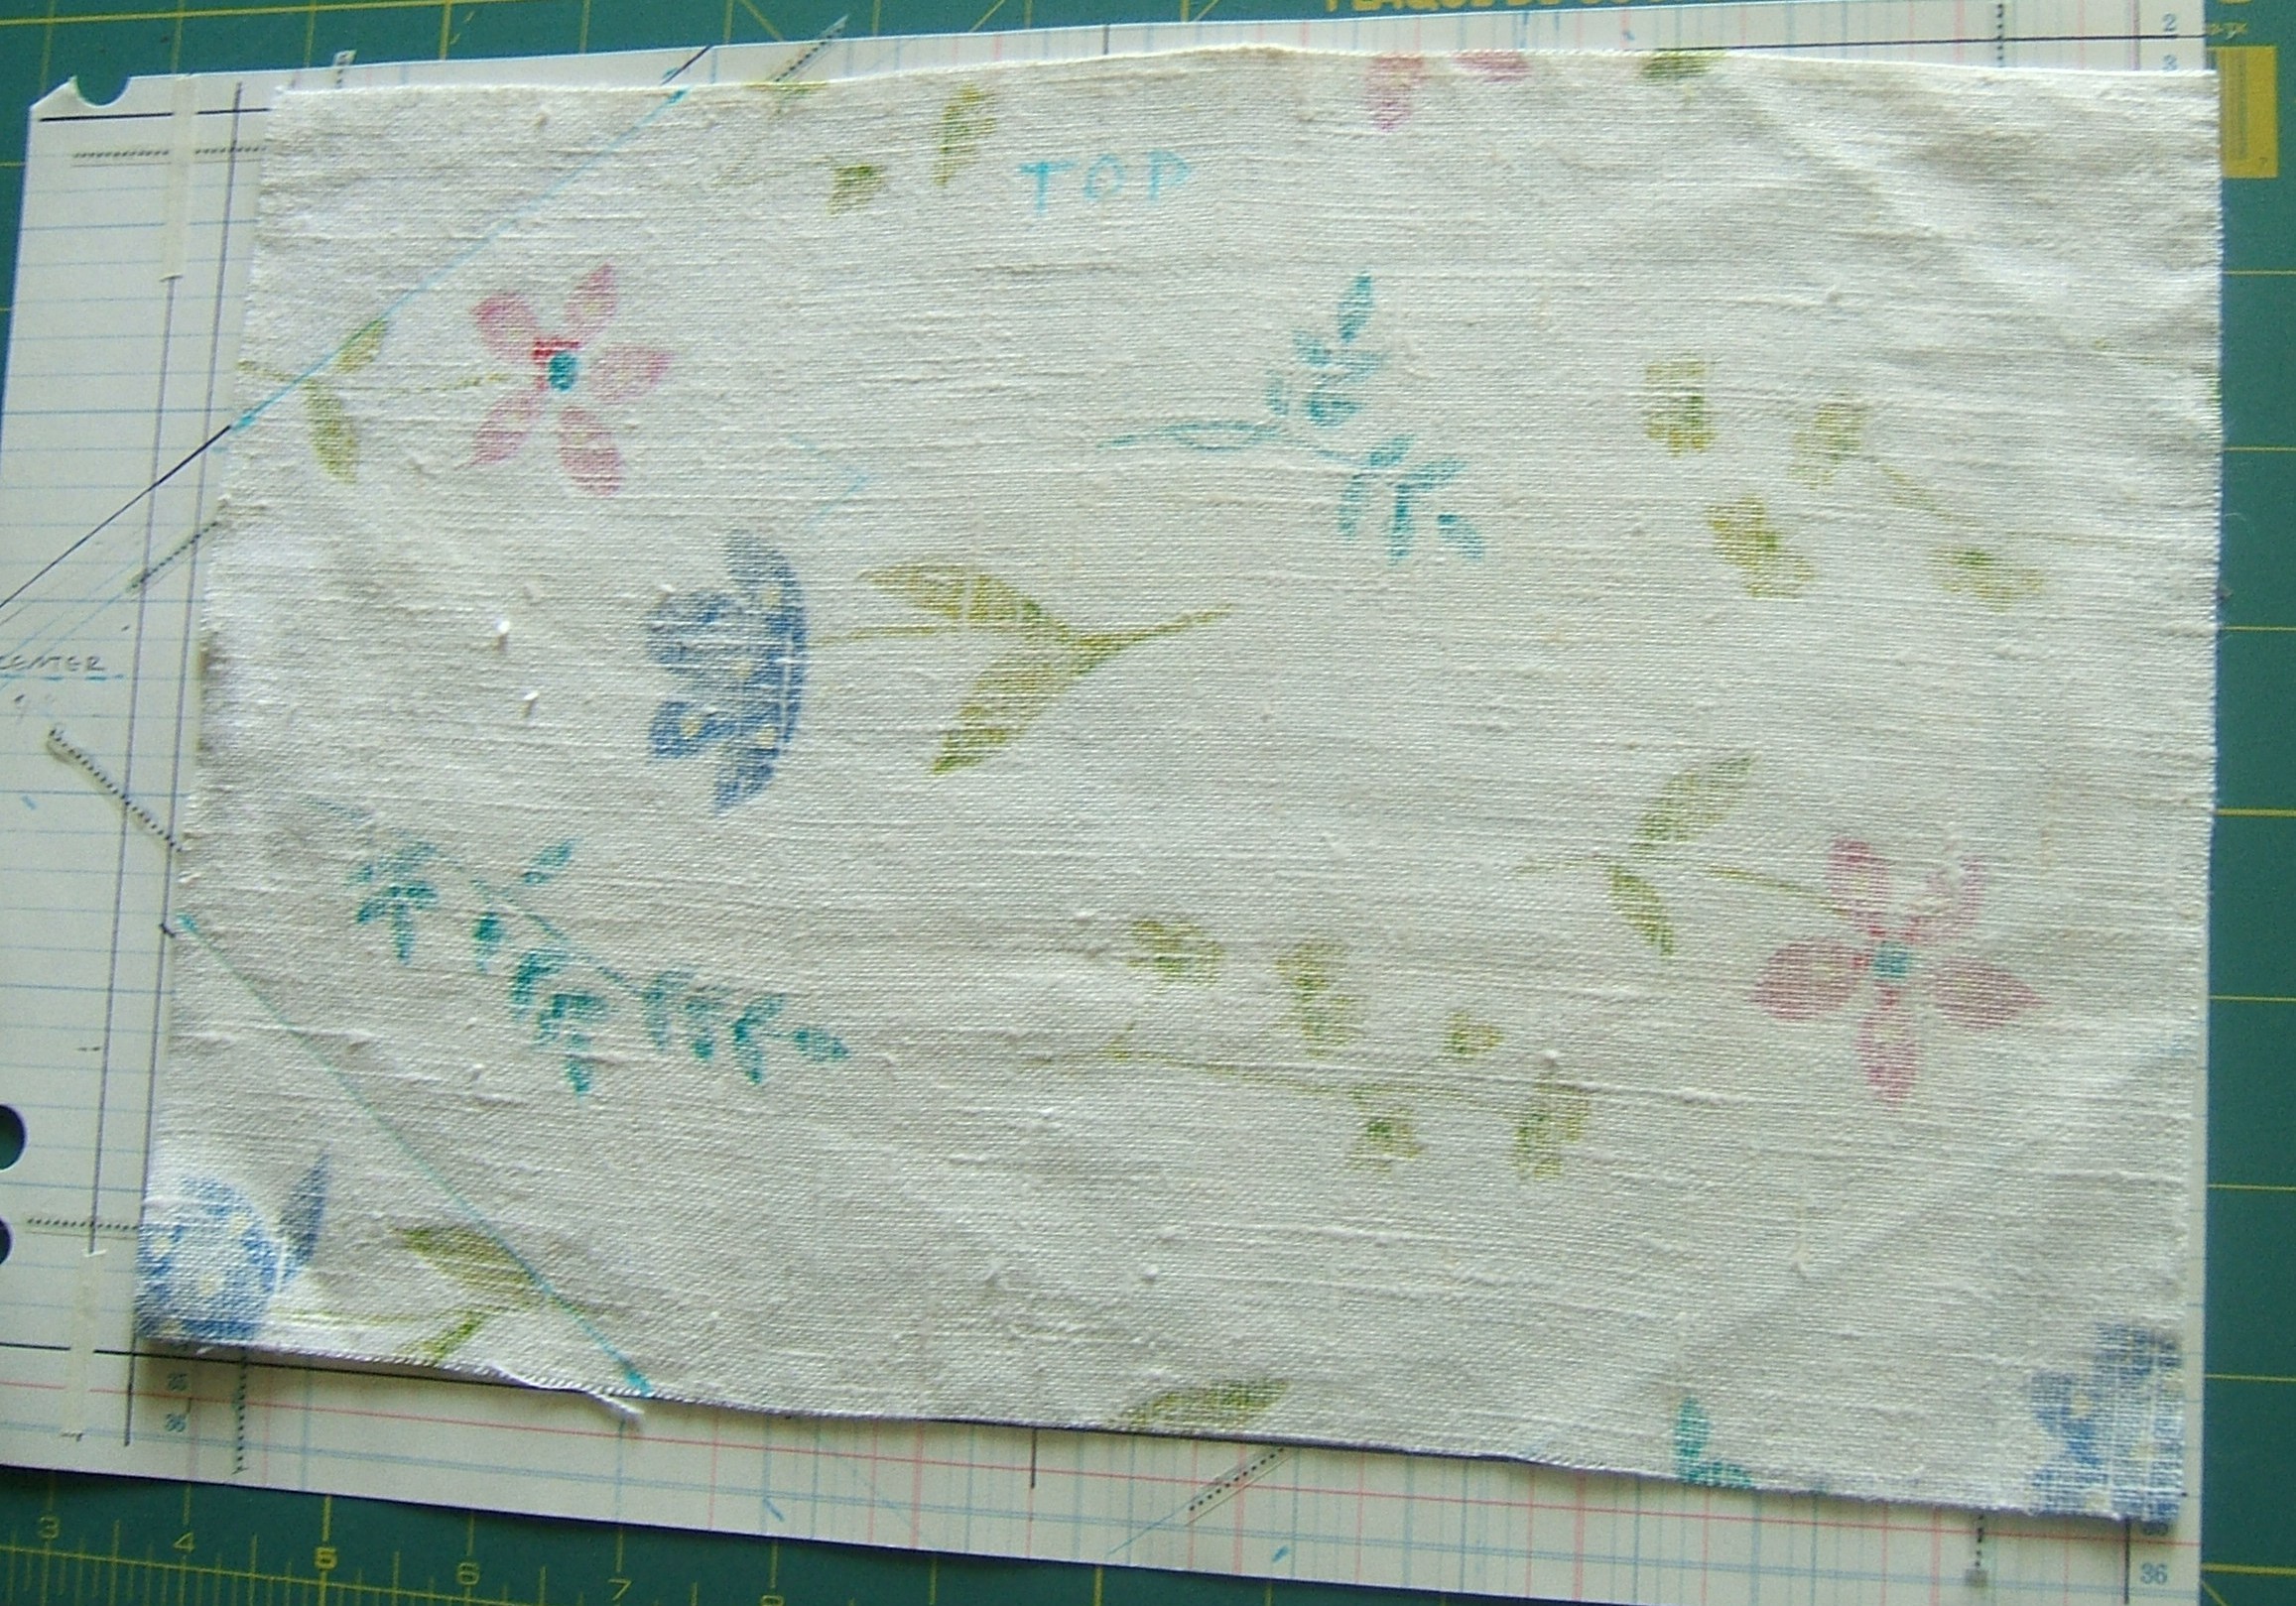
Yesterday I pawed through the box of linen scraps and took the offcuts from my taxicab-colored jersey out. Pity the jersey itself is worn out, but if I wear a jersey, I'll also be wearing bandaids, so my white gauze niqab will do fine.
The "taxicab" linen is a tad sheer, so I plan to use the same pillowcase scheme I used for the gauze niqab. A 13" x 15" veil is a tad narrow and a lot long, and the gardening niqab I made by folding a 22" furoshiki in half is plenty long, so I'll cut a 14" x 22" piece to be the veil. I think I can just get it in one piece from the bias-edge scrap left from cutting my taxicab scarf. (The scarf is still around, and in fairly good condition.) Then I'll cut two strips to piece together for the sash. 5" like the pattern? 3", which would come out half again as wide as the 1" twill tape I used for the gauze beta, which works fine? I don't have to decide quite yet.
Sudden thought: a linen brow-band will help keep sweat out of my eyes. But I can't wear a mask on my real bike, and I don't sweat on the "pedal-powered wheelchair" bike.
The tapes from which it hangs: I think I'll use white quarter-inch twill for the short tabs on the corners, and make a narrow tube of taxicab linen for the center tape that keeps the weight of my veil off my sore nose. And merely baste the sash until I've worn the niqab in the garden a couple of times, so that I can adjust the middle tape if needed.
Off to draw threads and cook lunch.
⁂
The thread drawn fourteen inches from the straight edge crossed the bias edge just at twenty-two inches.
Then I cut two three-inch strips and seamed them together on the bias edges. I thought that a seam slanting across the headband would be less conspicuous than a straight-up-and-down seam, and have fewer layers in any one place. For me, flat-felling a bias seam and getting the straight edges perfectly in line is a bit fraught, so I made a lap seam. Since the fabric is linen, pinching a crease in worked -- I was even able to pinch the crease out, after it had been sewn in and pressed with a presser foot. But I basted the turn-under anyway. Then I pinned, held it up to the light to see that it was straight, basted running stitch down the middle, and machine-stitched along both edges with ecru thread.
Then I decided that the seam was too wide, picked it out, pinched and basted narrower turn-unders, drew a wash-out line on one piece, pinned the seam, and took a nap.
In the afternoon I basted, stitched, and picked out the basting.
I also pinched a quarter-inch turn-under on the edges of the sash. I think I pinched the ends of the veil in the morning.
With luck and a bit of diligence, I should wear that veil in the garden tomorrow.
After cutting the sash and veil, I very carefully and with a great sense of virtue folded the remaining scraps neatly, put them back into the linen box, put the box back on the shelf, and laid the scraps of the yellow jersey and the pattern for the bra I plan to make of them on top of the box.
All without cutting a one-by-five strip to make the nose tab from. But when I took the box down this morning, I found a pair of strips that were already thread-straight and an inch wide, so I didn't have to unfold all those bits and pieces.
I think I'll slip-stitch the folds of the strip together instead of top-stitching by machine. I also think that I'll put the corner tabs a seam allowance from the stitching line. A quarter of an inch, stiffened by seam allowances, should support itself just fine.
Sigh. It's perfect weather for sewing outside, but the gauze veil is translucent and the furoshiki veil isn't comfortable, and I'm not all that hipped on sewing with a veil on anyhow. I'll pull the rocking chair up to the patio door. And renew the 45 SPF lipstick on my nose and chin now and again.
Measuring against the gauze niqab, I think that three inches will be ample for the middle tab. I'll take two inches off for the corner tabs, or maybe three-fourths for each tab - - there is supposed to be no space between the sash and the corners of the veil, and three eighths is an ample seam allowance.
The corner tabs are one inch and the middle tab is three inches. I basted the tabs in place, then sewed the side seams.
The next step requires me to heat up the iron. You'd think I had to heat it on a wood-burning stove and didn't have whole-house air conditioning, the way I put off steps that require an iron.
I basted the niqab together in the hotel room yesterday evening. I hope I remember what I did on Wednesday -- particularly the mistakes -- when I feel like writing tomorrow or the next day.
I didn't, but here's a picture of the finished veil:
It could stand to be a good bit shorter.
After much fumbling, I found that the pattern for the pleated mask that looks like what the surgeons on MASH wore is very simple.
One begins with a nine-inch by seven-inch piece of fabric that is finished on the long edges. I did that by cutting a nine-inch by fourteen-inch piece of gauze and sewing the nine-inch edges together, then pressing the seam open and flattening the cylinder with the edge of the seam allowance in one crease.
Optional: Make the top hem wide enough that you can insert a piece of metal to shape the mask to your nose.
One way: stitch across the hem where one end of the metal will be, stick the metal in through the open end of the hem, stitch across at the other end of the metal. Second stitching probably quicker to do by hand than by machine. (I'm not speaking from experience here because I shape my masks to my nose by putting my glasses on over them.)
Press the fabric flat, then fold it in half with the finished edges matched, press in a crease.
Then unfold it and fold each finished edge in to meet the crease, press in two more creases.
Use these creases to form three pleats about a quarter inch wide. Pin the pleats at the ends and in the middle.
The pattern I downloaded from Parkview Hospital said to bind the ends with the middles of two 32" pieces of tape. This leave a bit of excess tape on the tie around the neck, but it does obviate specifying top and bottom. I used 34" pieces because the tape had never been washed. Those pieces are 32" now.
I couldn't quite make out Parkview's binding instructions, so I sewed the tapes to the wrong side by one edge, with the other edge sticking out a smidge less than a quarter inch beyond the raw edge of the mask.
Then I turned the tape to the right side, with the fold along the stitching, and sewed the other edge down.
The picture appears to have been taken with the wrong side up. I tend to use it indifferently. It has become my "carry in a pocket just in case" mask.
The man I made the first mask for found tying the tapes extremely awkward, so I made one with short ties and pieces of quarter-inch elastic pinned to the ends of the ties. I don't appear to have taken any pictures, and later on I dis-assembled this mask to make my bike-riding mask, so I can't take any now.
That worked better, but he wanted one with ear loops like the disposable masks. I documented the construction fairly well in my sewing diary.
The basic idea is that one uses a short piece of tape, turns the ends in and bastes them in place so that they don't unfold in use, and when the tape is turned to the other side and stitched down, it forms a casing. Then one runs a loop of elastic through each casing. I used cord elastic because I had some.
That one stuck, and he's still carrying it in the car.
On washday, he said not to give the elastic-and-tape mask back, and I set it aside for spare parts.
Eventually, I converted the ties to casings and threaded fifty-eight inches of half-inch twill tape through the casings.
One puts this mask on by pulling it down the tape ends until the loop is big enough to put one's head through.
Then, with the loop around one's neck, one holds the ends of the tape to keep them equal in length and slides the mask up until it's in the proper position under one's chin. Friction will hold it firmly in place while one ties the ends around one's head above the ears.
Then one can lift the tape over the ears so that the mask drops down to be worn as a cravat. When the situation arises, one can pull the mask up over one's nose, then settle the tapes over one's ears.
I find this indispensable for riding my bike.
But it would be helpful if I could tell which was the top of the mask just by touching it; sometimes I get it tangled and have to re-tie the mask. Here is one place where a piece of metal over the nose would come in handy!
But if I'm in a dreadful hurry to get the mask on, I probably don't need it any longer than I can hold it in place with one hand.
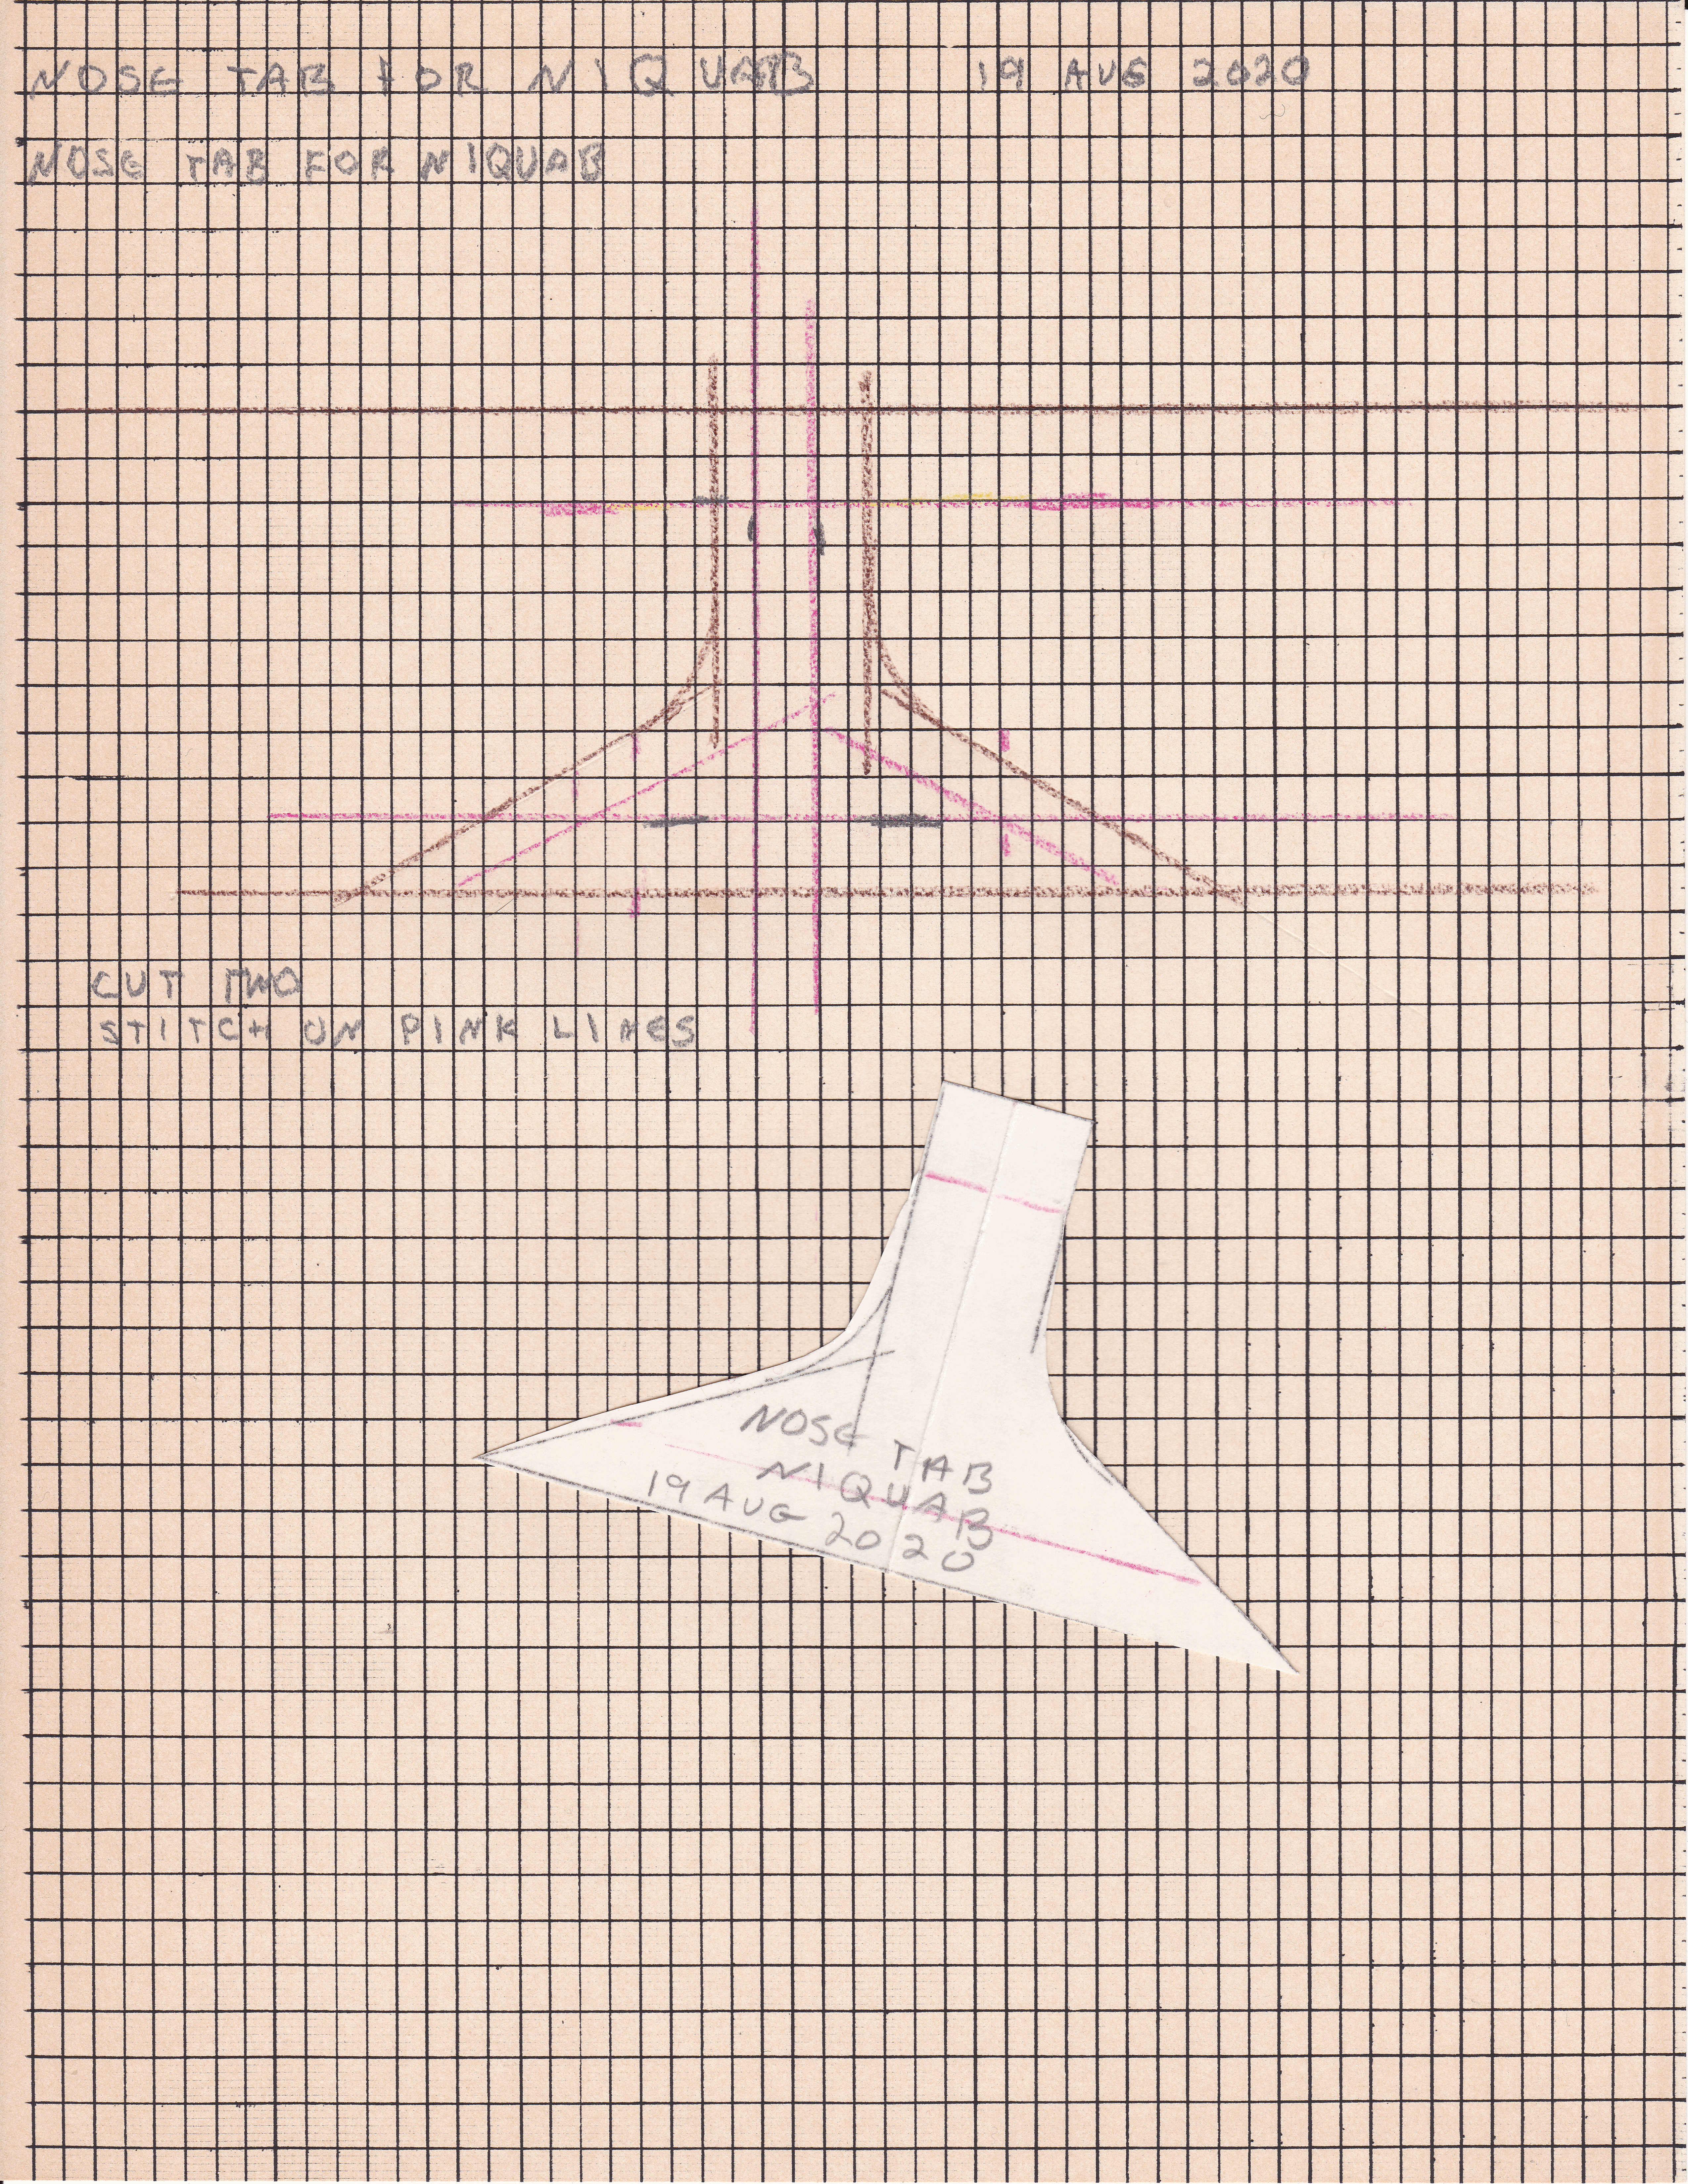
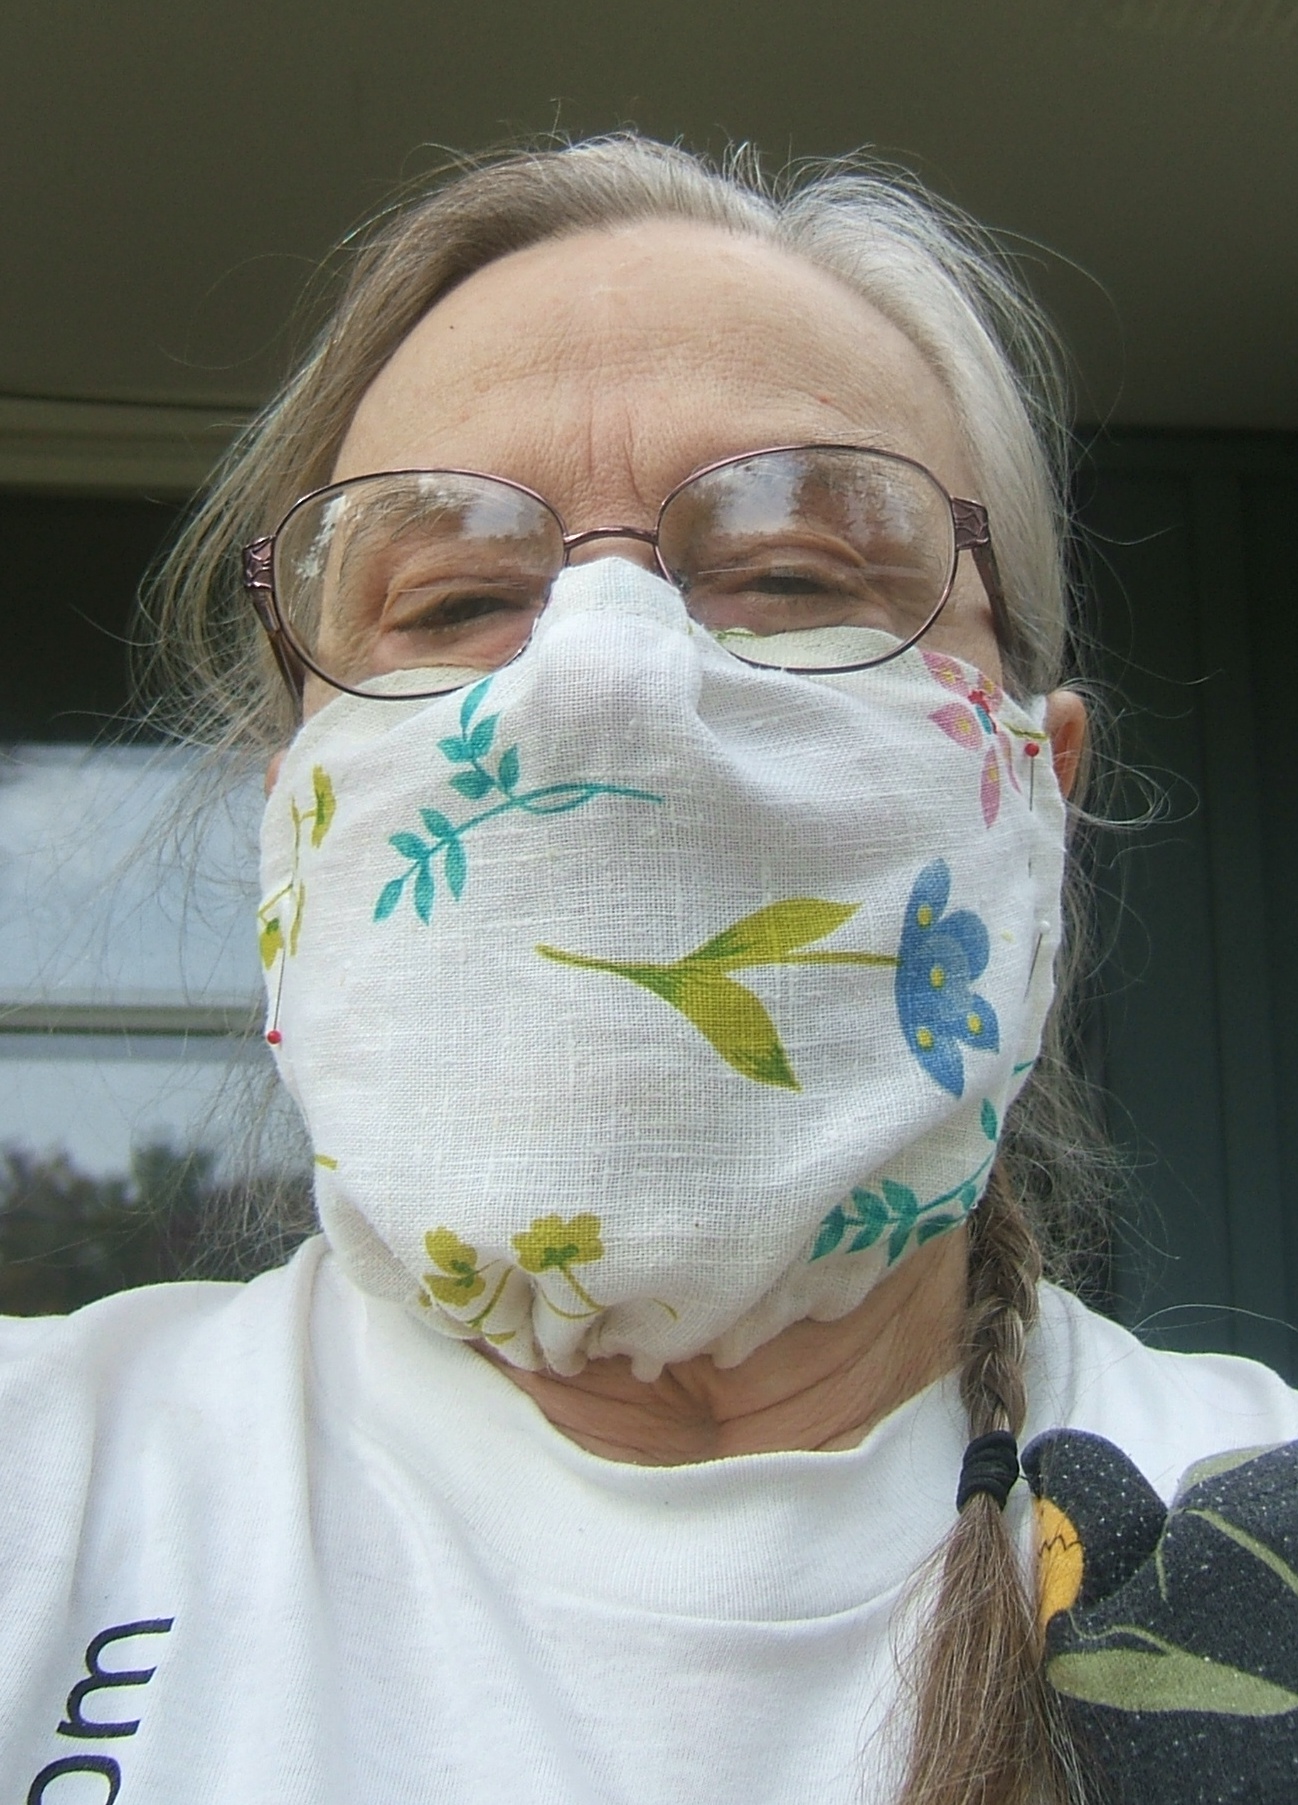
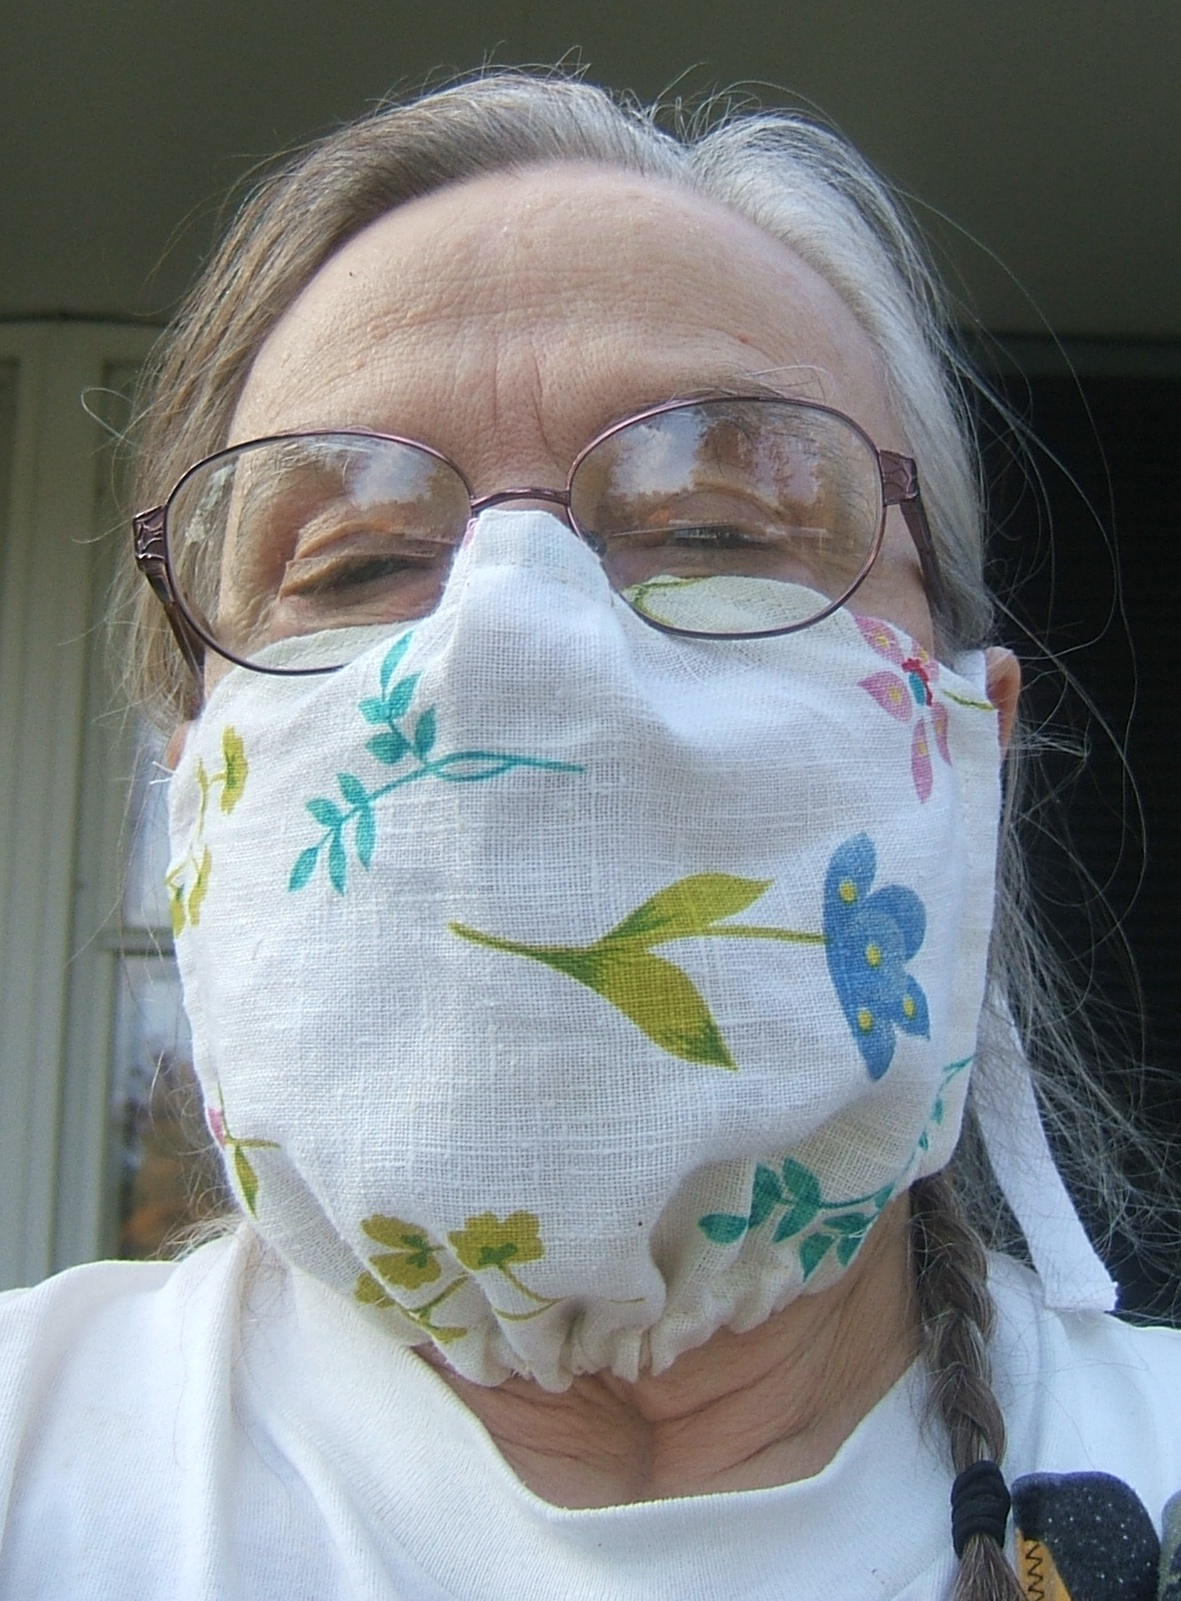
When wearing the orange niqab partially described above, I kept thinking that I should shorten the tab half an inch, and scoop out under the eyes half an inch, so as to cover my keratosis as well as my skin graft.
While trying to figure out how to curve the scoop to meet the tab gracefully, I realized that what I really needed was to widen the bottom of the tab. Poking the mask (this is called "draping" when done systematically) showed that I wanted it an inch wider on each side, and the wide spot should be not more than half an inch high.
Today I got around to drafting a pattern for the tab, copying it onto a postcard with carbon paper and a 2.1 mm crochet hook, and cutting it out. I used a pill box to round off the intersection of the wide spot and the tab.
The next step is fabric selection. I may have to give up my insistence on linen because I don't want to cut into a big piece, and my collection of scraps is rather scrappy. I have a wonderfully-soft piece of much-washed madras, but the color is horrible. Not to mention that I'm not into plaid. My white gauze would look good and be comfortable, but isn't much of a sunblock.
This could take a while.
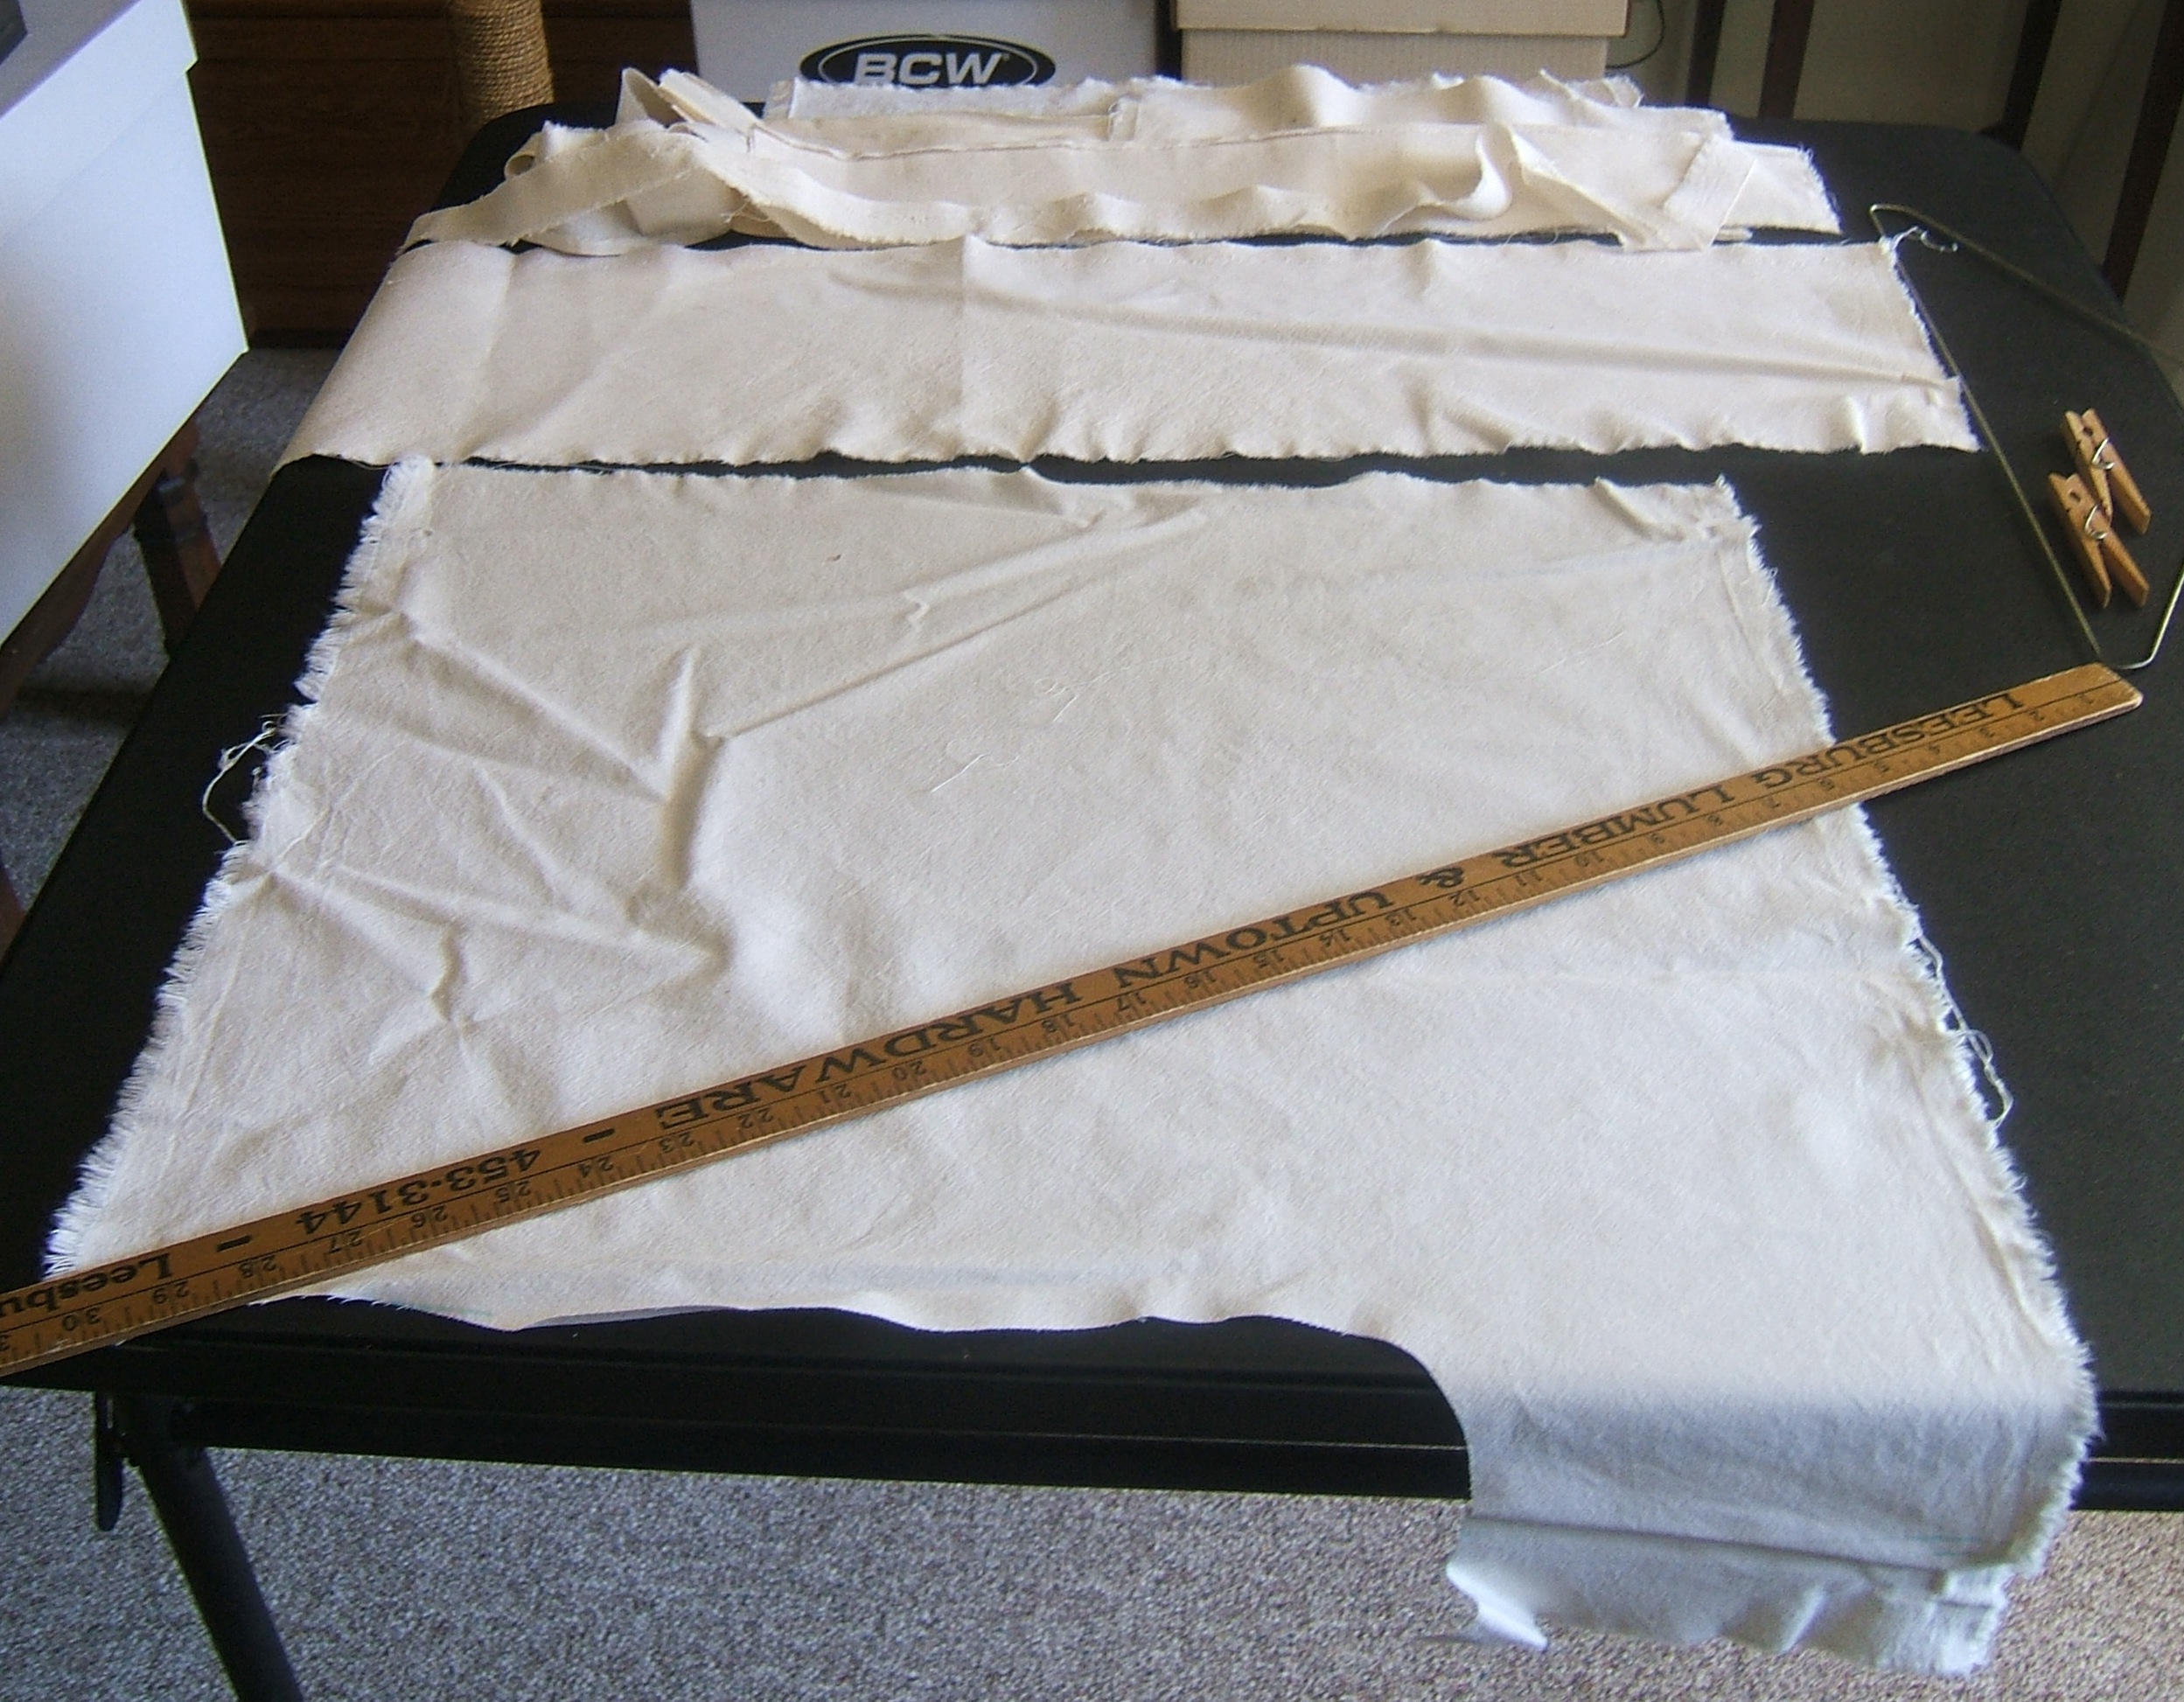
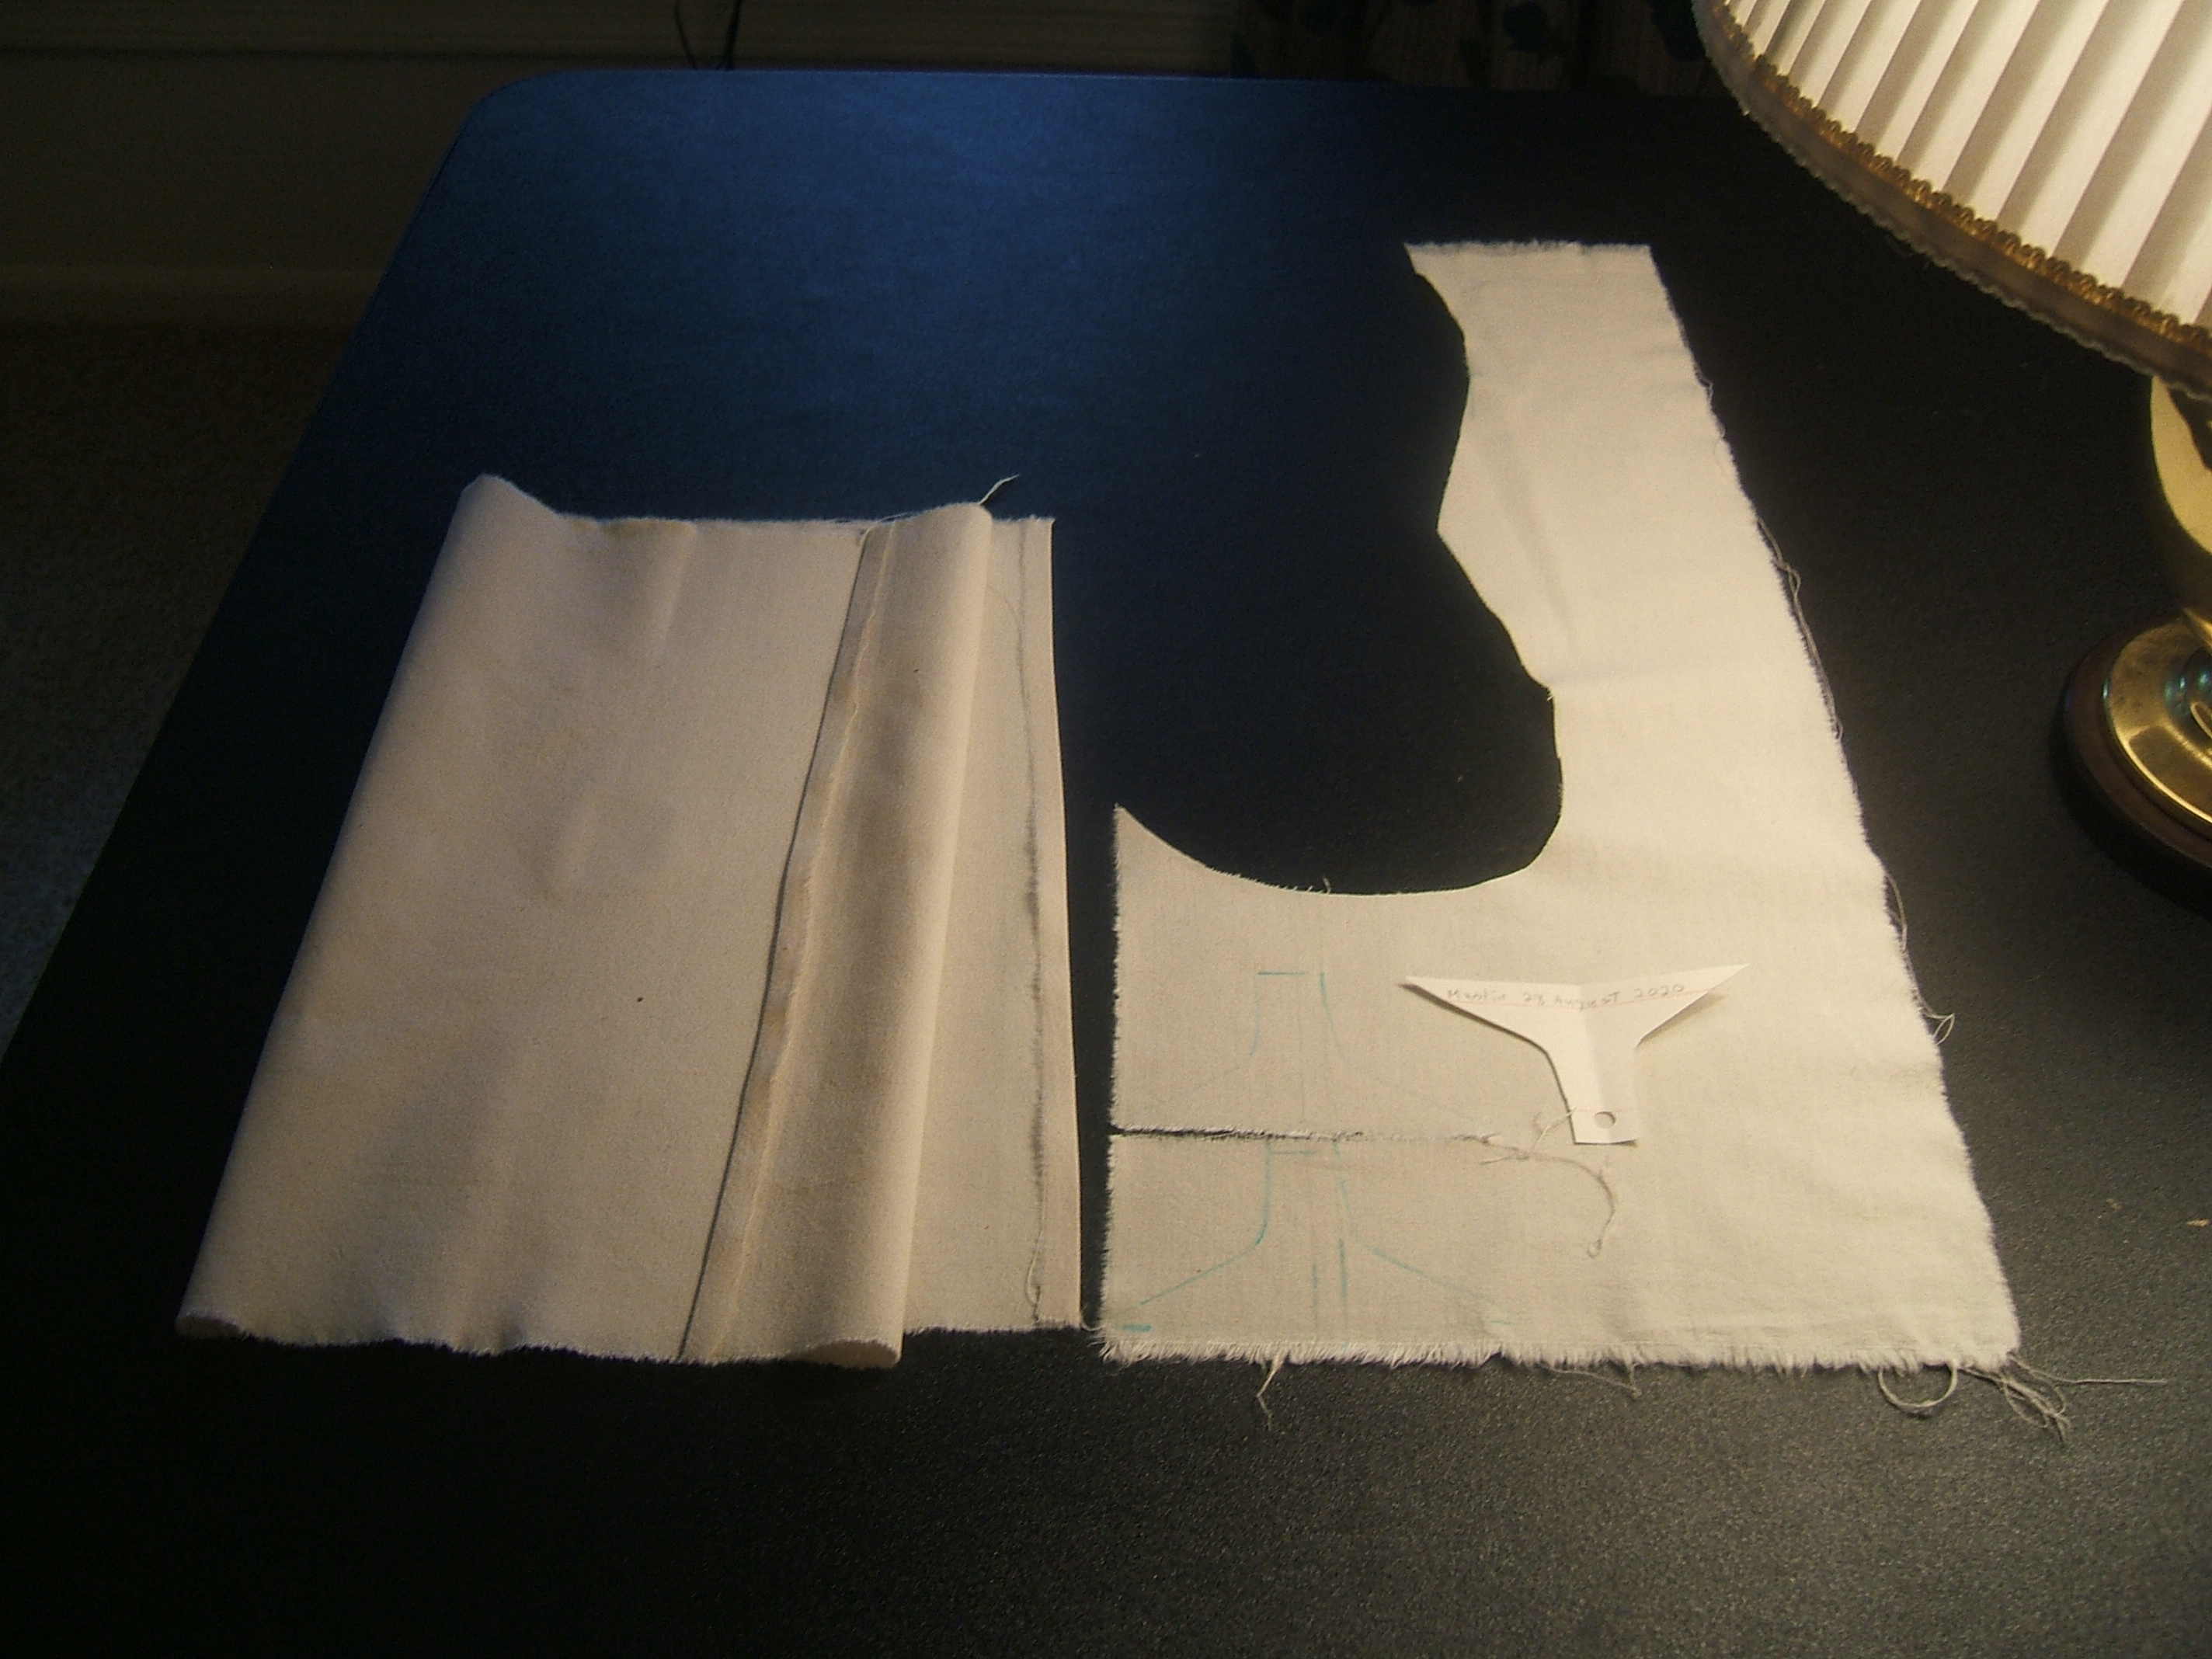
I chose an unbleached-muslin scrap of unknown provenance. It's twenty-two inches long and about eighteen inches wide. I wish I could guess what I cut off the side; it was cut along a wash-out line, so it must have been something I wanted more than one of, or something extra fussy.
I cut a 14" x 22" inch piece for the veil of the taxicab niqab, and it's too long. I think I'll tear off a 14" strip, then tear an inch off the top and bottom.
I cheated a bit -- the veil piece measures 14" x 20 3/4".
There are some strips that appear to have been torn crosswise off my roll of 60" muslin, probably left over from my cat-quilt binding project. One of them is the full width, so I can make the headband without piecing.
Since one edge of each piece has been pressed under, they must have been washed, but they are awfully stiff. Just to be safe, I've put the strip I plan to use into a saucepan of water over the lowest heat, so that it will take at least an hour for it to come to a boil.
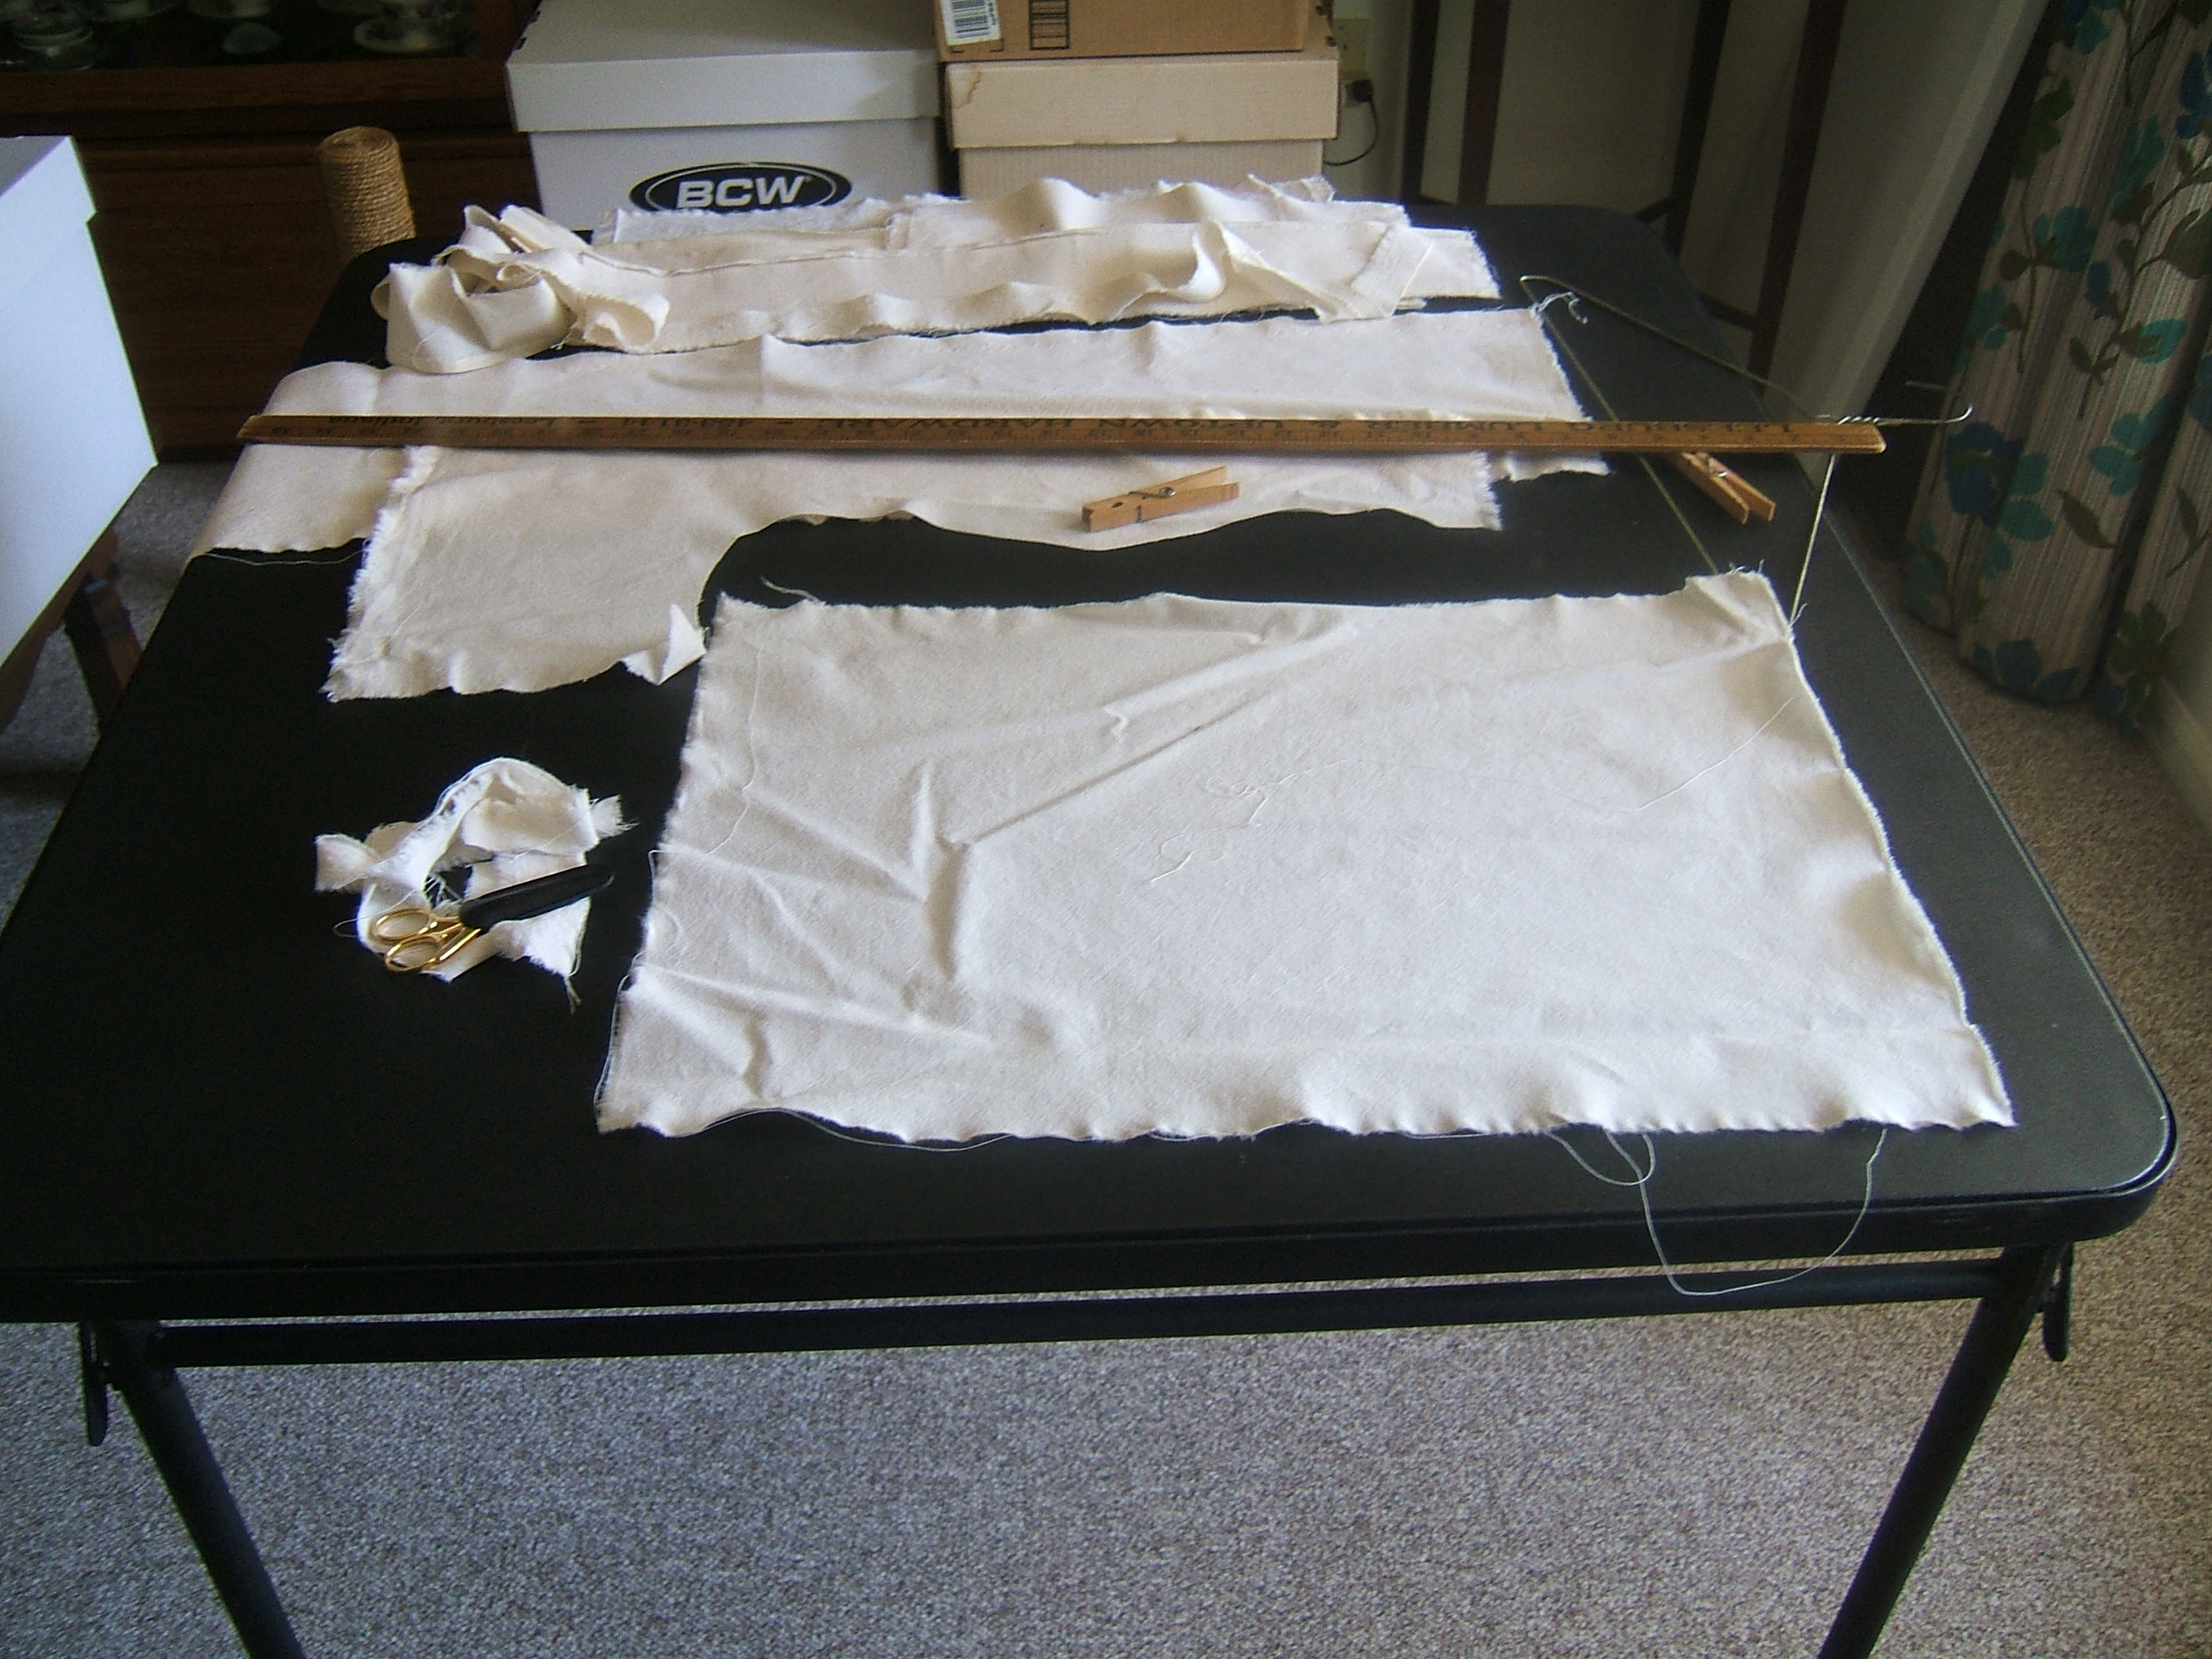
I've put away the scraps I'm not using, and I've torn the remaining scrap to guide the cutting of the nose tab. Now I need to press the fabric before proceeding.
Instead of cutting off the excess seam allowance, I drew a thread as a guide line.
I stitched a toe-width from each curved side of the nose tab, then turned it right-side out.
The White's toe is a tad less than a quarter inch wide, which made the tab a tad wider than I had intended. I decided that this was all to the good *before* I discovered that I could just barely turn the narrow part.

I got around to pressing the pieces, then hared off on a shopping trip. Trailhouse was sold out of bottle cages, but AutoZone might have a hose clamp to re-attach my old one.
I used the one-inch ruler on my point turner to make an air-erasable mark half an inch from each side of the veil, and used my shaku stick to mark the center. I folded the nose tab to find its center. The point turner also helped me baste the nose tab in place, by keeping the first anchoring stitches from catching the other side. The end tabs could be held to the mark with a finger while I basted them.
It has been bothering me that the strip for the headband has a good tuck selvage on each end, and I have to cut one off. A few days ago I got the wonderful idea of cutting the selvage three- fourths of an inch wide and using it instead of twill tape for the end tabs, but when it came down to it: Three layers of thick fabric vs. one layer of thin fabric; making a strip vs. two snips of the pinking shears: no contest.
It's assymmetrical, but I think I'll make one end of the tie selvage and the other a seam. Asymmetry is acceptable for work-apron strings, and this is unbleached muslin.
I used right-angle pins because I was more concerned with slipping side-to-side than which slipping along the line of stitching. This led to a bulge riding in front of the needle at one point, but stitching under tension took care of that.
This is a much neater job of stitching than I did on the taxicab-orange veil. I was concerned about missing the underfold where it was hidden, but only the first tab that I crossed was a problem, and a few hand back stitches took care of that and left the veil still reversible.
Then I measured the tie of the taxicab veil against the muslin strip, marked with my air- erasable marker (which is fading, but stroking several times will make a mark).
Then, for no better reason than that my shaku stick was right there, I drew a thread two sun beyond the mark. Drawing a thread in unbleached muslin isn't easy; boiling the strip didn't take any starch out, and the thread is very weak. But it was a short thread, and I wasn't fussy about which thread, so it didn't take long.
⁂
But there's an advantage to having the starch still in: after sewing the raw end and turning it, I finger-pressed the seam and it stayed put.
I folded the band in half and pinned it, right-angle pins again. I inspected the band from each side several times, inspecting the other side every time I shifted a pin.
I marked the center by folding and rubbing my air-erasable marker on the fold, then I slipped the tabs between the layers and pinned them.
I stitched the band the same way as the veil: starting at the fold, I stitched a toe's width from the edge to the other fold, made a smooth turn (well as smooth as the narrow spacing and long stitch would allow), and stitched back on the very edge, with great care.
I resolved that if I missed the fold underneath here and there I'd just leave it, since the inner row of topstitching would keep the edge folded, but it turned out perfect.
I did run over a pin, it flunked the "hold by the point and spin" test, and I added it to my sparse collection of bent pins.
I think this will be more comfortable after it's been washed a few times.
Frankly, my dears, I don't think that washing will make it less stiff. Air-spun threads just don't soften. When 200-count sheets first appeared, I was still eager to try new things and bought one or a set. The "luxurious" sheets never stopped crackling when I rolled over, and after it or they had worn completely out, I needed a piece of tough paper, tore a letter-size piece off the rag, and ran it through my printer without ironing it to freezer paper. It was still paper stiff.
Perhaps putting a box pleat in the middle will make the stiff veil work.
I picked out the stitches holding the nose tab to the veil, then I remembered that I hadn't photographed the finished veil, so I basted it back together:
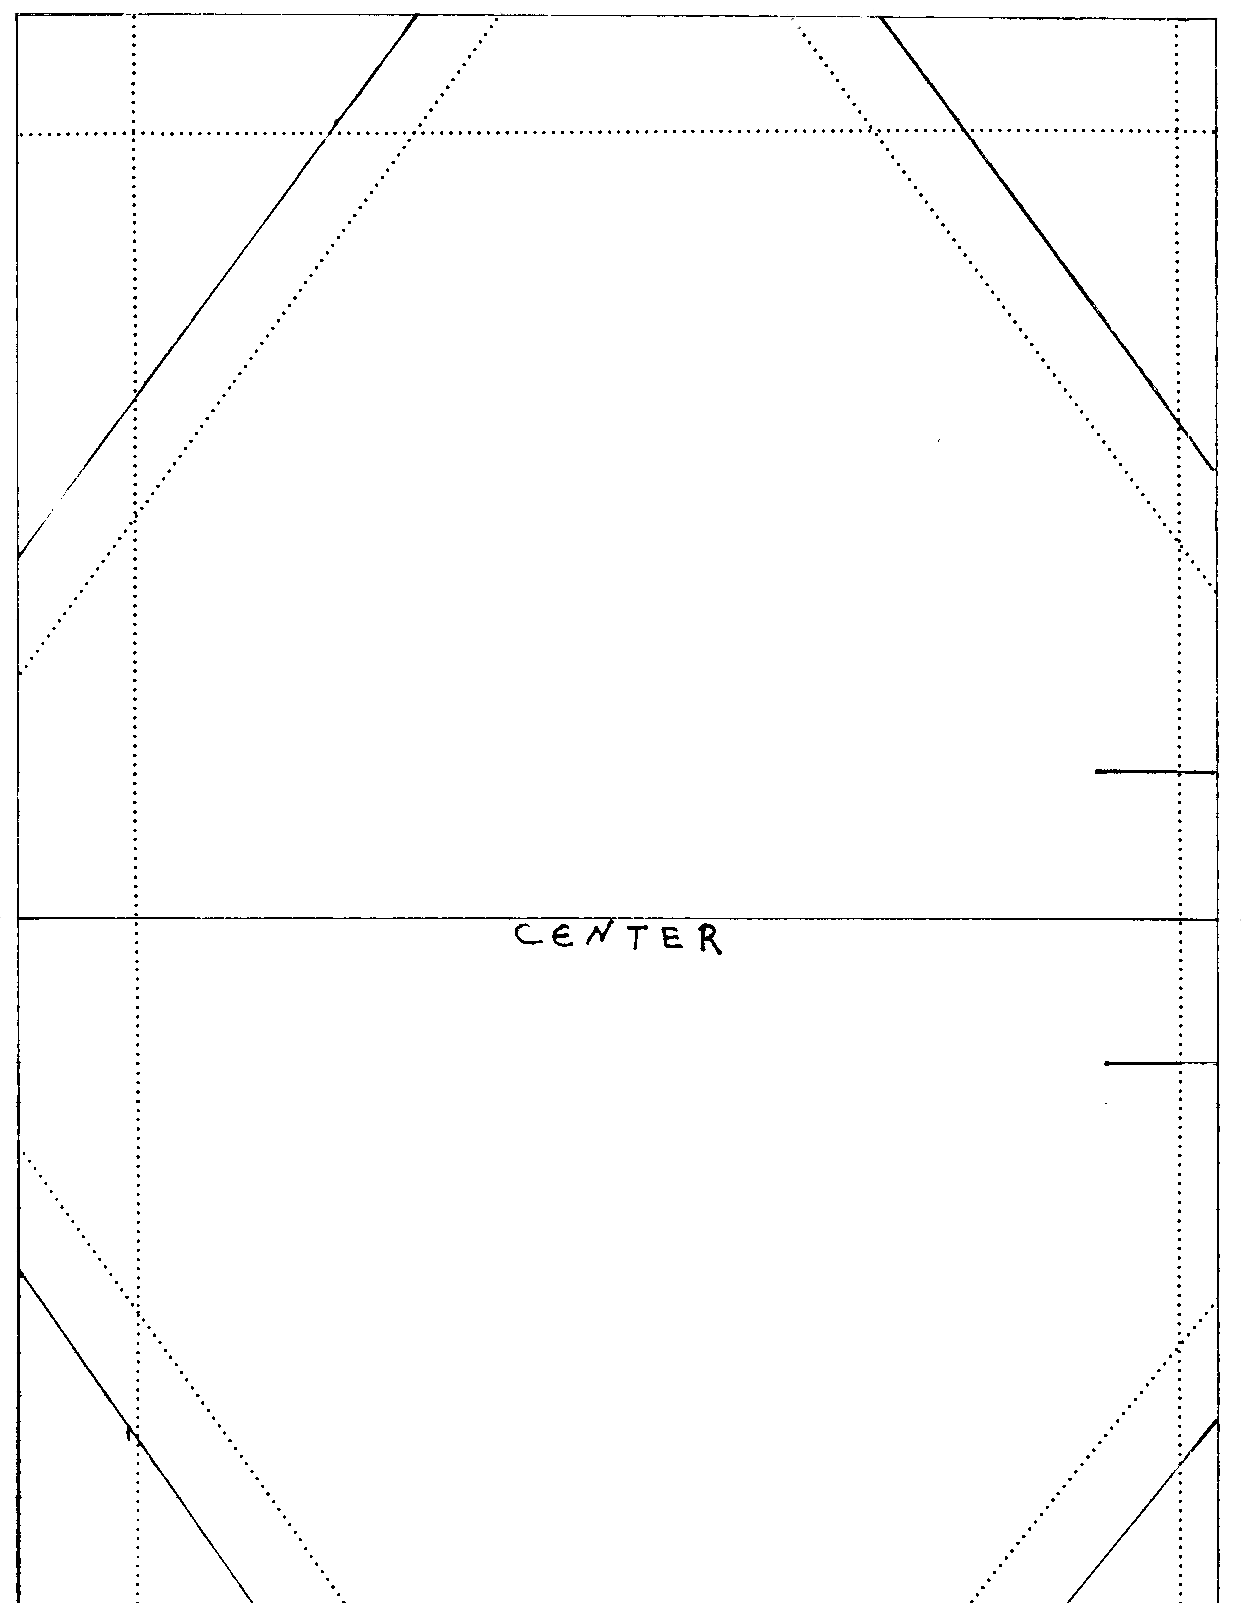
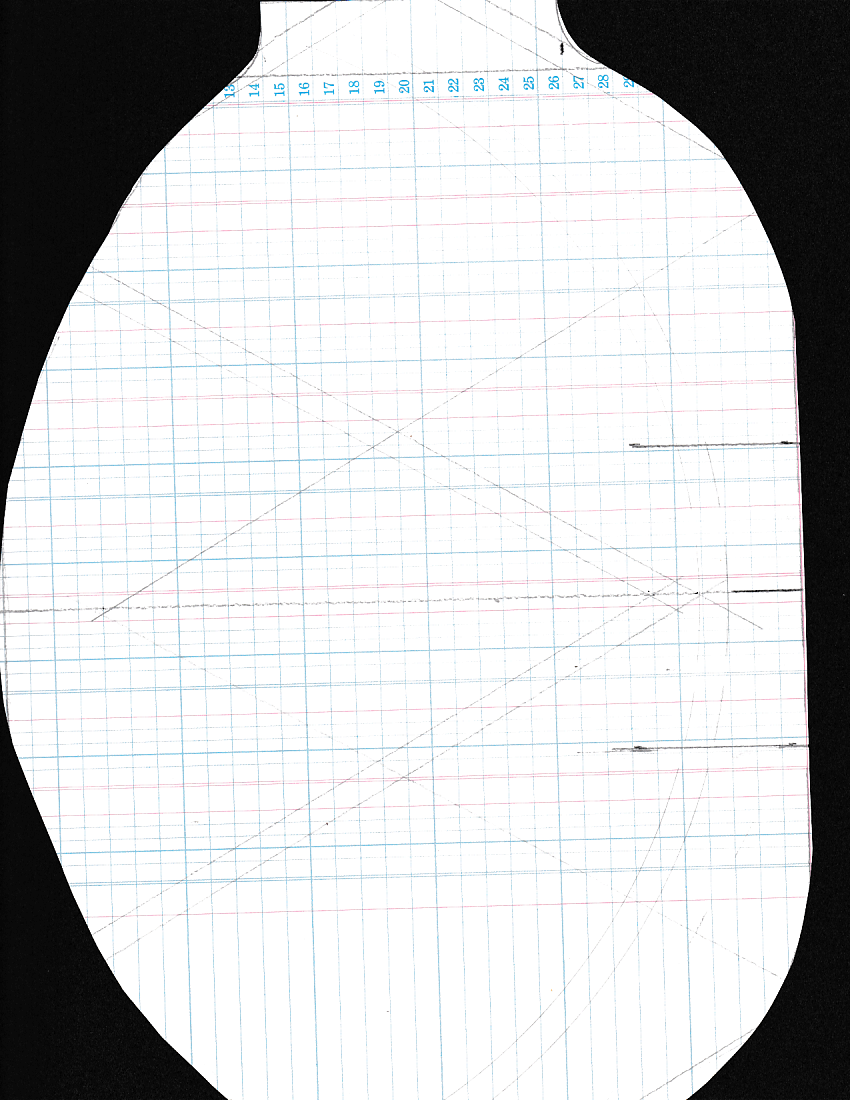
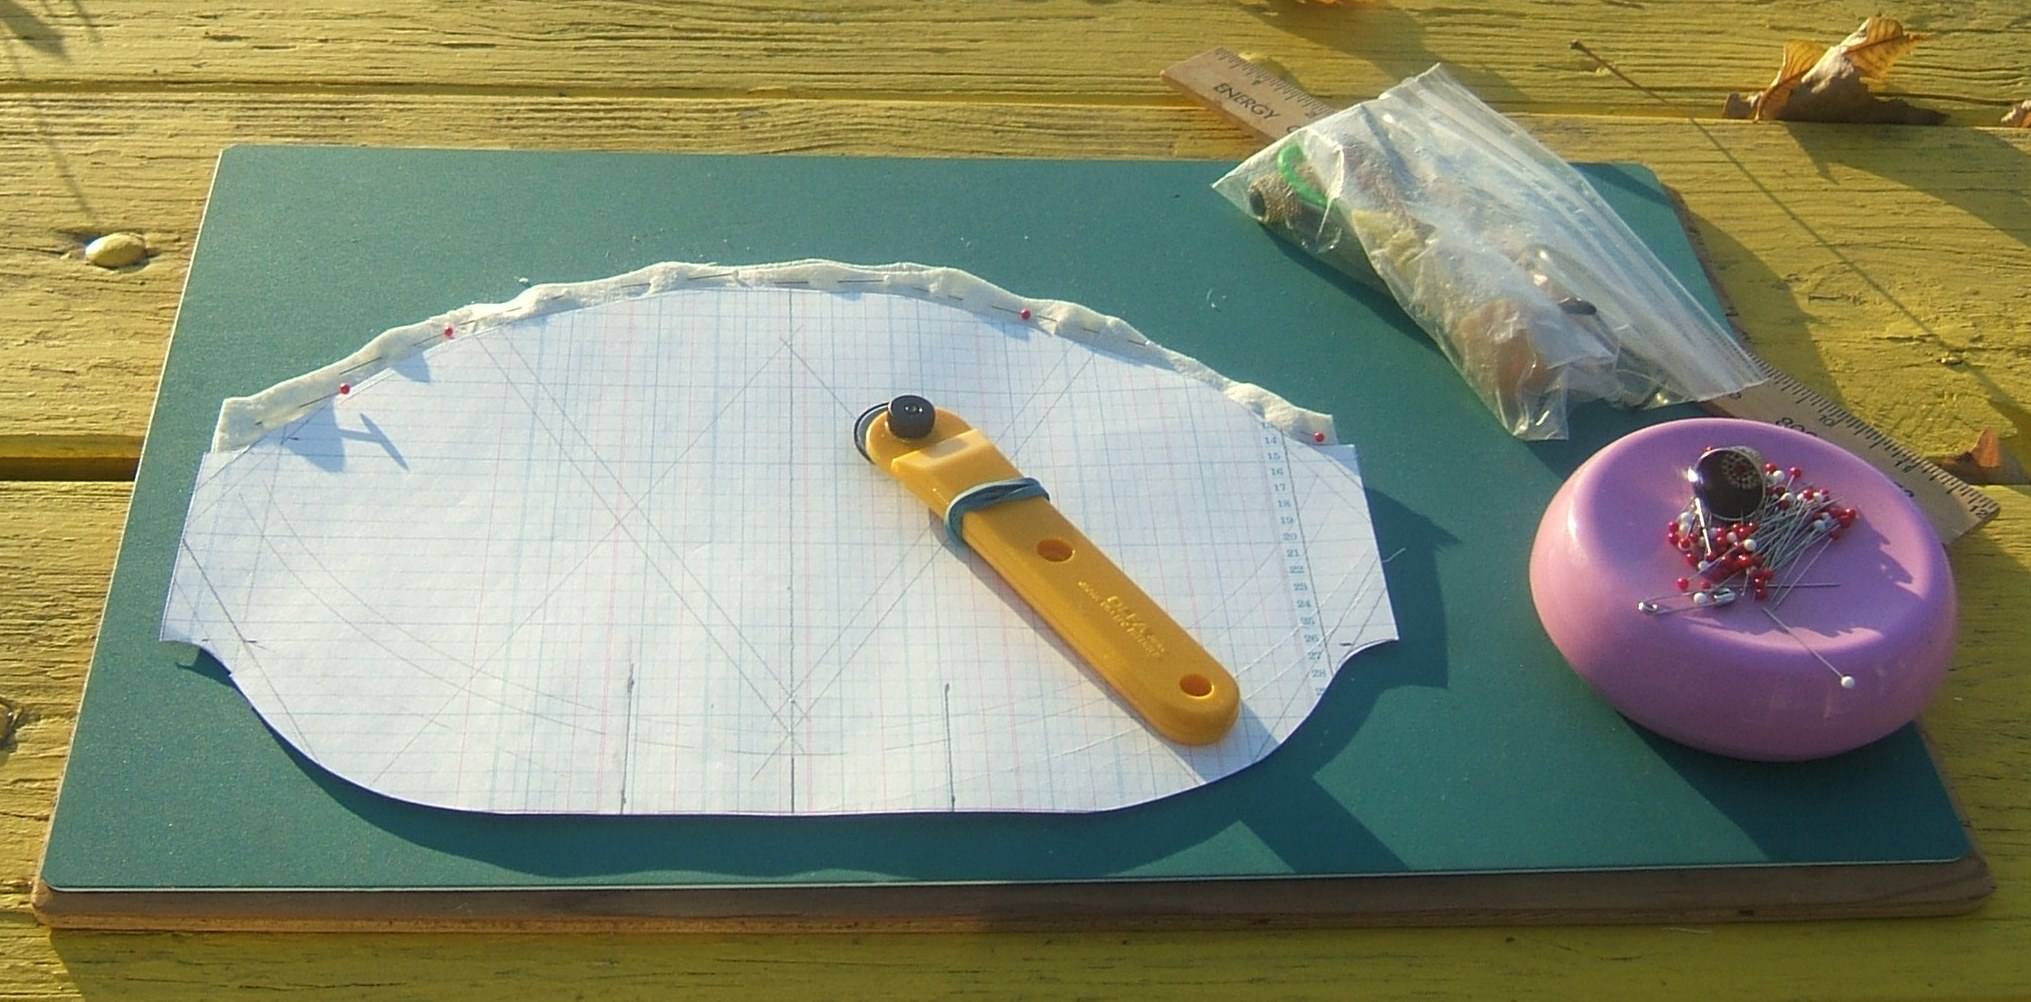
I'm told that I must draw my patterns with a drawing program so that they can be presented in vector format -- of course every single soul in the whole world can read vector format, whatever that is -- but it is ever so much easier to grab a ruler and whisk a pencil along it, so you'll have to put up with GIF.
One starts with a nine-inch by seven-inch rectangle. Only a quarter inch of the gauze mask was folded for the casing, but I want to make this casing of self-fabric, since there will be no pleats in it. Half an inch for the casing (the turn-under is already allowed in the nine inches) on each side, so the pattern is seven inches by ten inches.
Then I need to add for the pleats. I used three quarter-inch pleats for the gauze mask, which would eat up an inch and a half. But they were generous pleats, so I think I'll allow two inches: two half-inch pleats.
That makes my rectangle twelve inches wide, so it wouldn't fit on quadrille paper even if I could remember where I put it. But I have a roll of plotter paper that I forgot about because it's on the same pair of brackets as the roll of "petal pink" linen-cotton, and the fabric is in front. I'm not at all sure it isn't metric -- it was thrown out by a laboratory -- but it is marked with lines at right angles to each other.
&%@#! A twelve-inch pattern won't fit on my scanner. Perhaps I could draw it half scale.
Next we need hem allowance at top and bottom. A minimum of half an inch, so we are based on a twelve- by eight-inch rectangle. Or maybe I should use tape facings on account of the pleats.
Facings would allow me to add the nose tab from the muslin niqab. I'm planning to use Variation the fourth for the ties, so my nose will already be protected with band-aids when I wear it, but a nose tab would allow me to distinguish top from bottom when I'm grabbing to pull it up, and it could be tucked under my glasses.
Or I could put a metal strip over the nose. I've mislaid the disposable mask I kept for just such a situation, but there are more. But I think the pleats will obviate the need for a metal strip.
This topic came up on Creative Machine, and I see that elastic in the bottom of the mask would be better than pleats. This means that I need a seam allowance at the top and a hem allowance at the bottom. The seven inches high included a scant quarter inch for seam allowance. Three-fourths of an inch are needed for a hem. I think I'll base the pattern on a rectangle eight inches high.
(Two lines eight inches apart drawn on spread-sheet paper.)
Start with nine inches, add two inches for the pleats, and an inch and a half for two casings.
Twelve and a half inches fits on the spreadsheet paper, but just barely.
Two vertical marks two inches apart mark where the underfolds of the box pleat will come. The marks will fold to the center, and the folds between the marks will lie half an inch to each side of the marks.
I'm planning to hem the slanting parts of the tops, and face the straight part between them.
I want the straight part to be longer than the seam line of the nose tab. The seam line is three and a quarter inches long. The pleat will be one inch wide. So I need at least an inch and a quarter to each side of the pleat. Hemming the slanted parts will make the straight part shorter.
I think I'll resume this train of thought after a good night's sleep.
In the clear light of dawn: stop fussing over this makes it longer and that makes it shorter. Draw the fold line and add hem allowance.
But today is scheduled for other things.
I wonder how neat a dotted line I can draw with a pen? I think there are drafting tools for exactly that, but I don't have one. But I might have some left-over line tape.
A test shows that scanning in black-and-white drops out all colored marks. Do I still have a non-rep blue pencil?
Callooh callay! The line tape is repositionable, something I didn't think had been invented when I bought it.
Of course, it could have developed repositionability in the intervening decades. I have some first-aid tape that did that.
⁂
Now I have a dotted line a quarter inch below the top of my eight by twelve rectangle, and another three-fourths of an inch above the bottom. That leaves seven inches between them.
Three quarters of an inch from each end forms a seven by eleven-and-a-half rectangle. Two inches will be removed by the pleats; nine and a half.
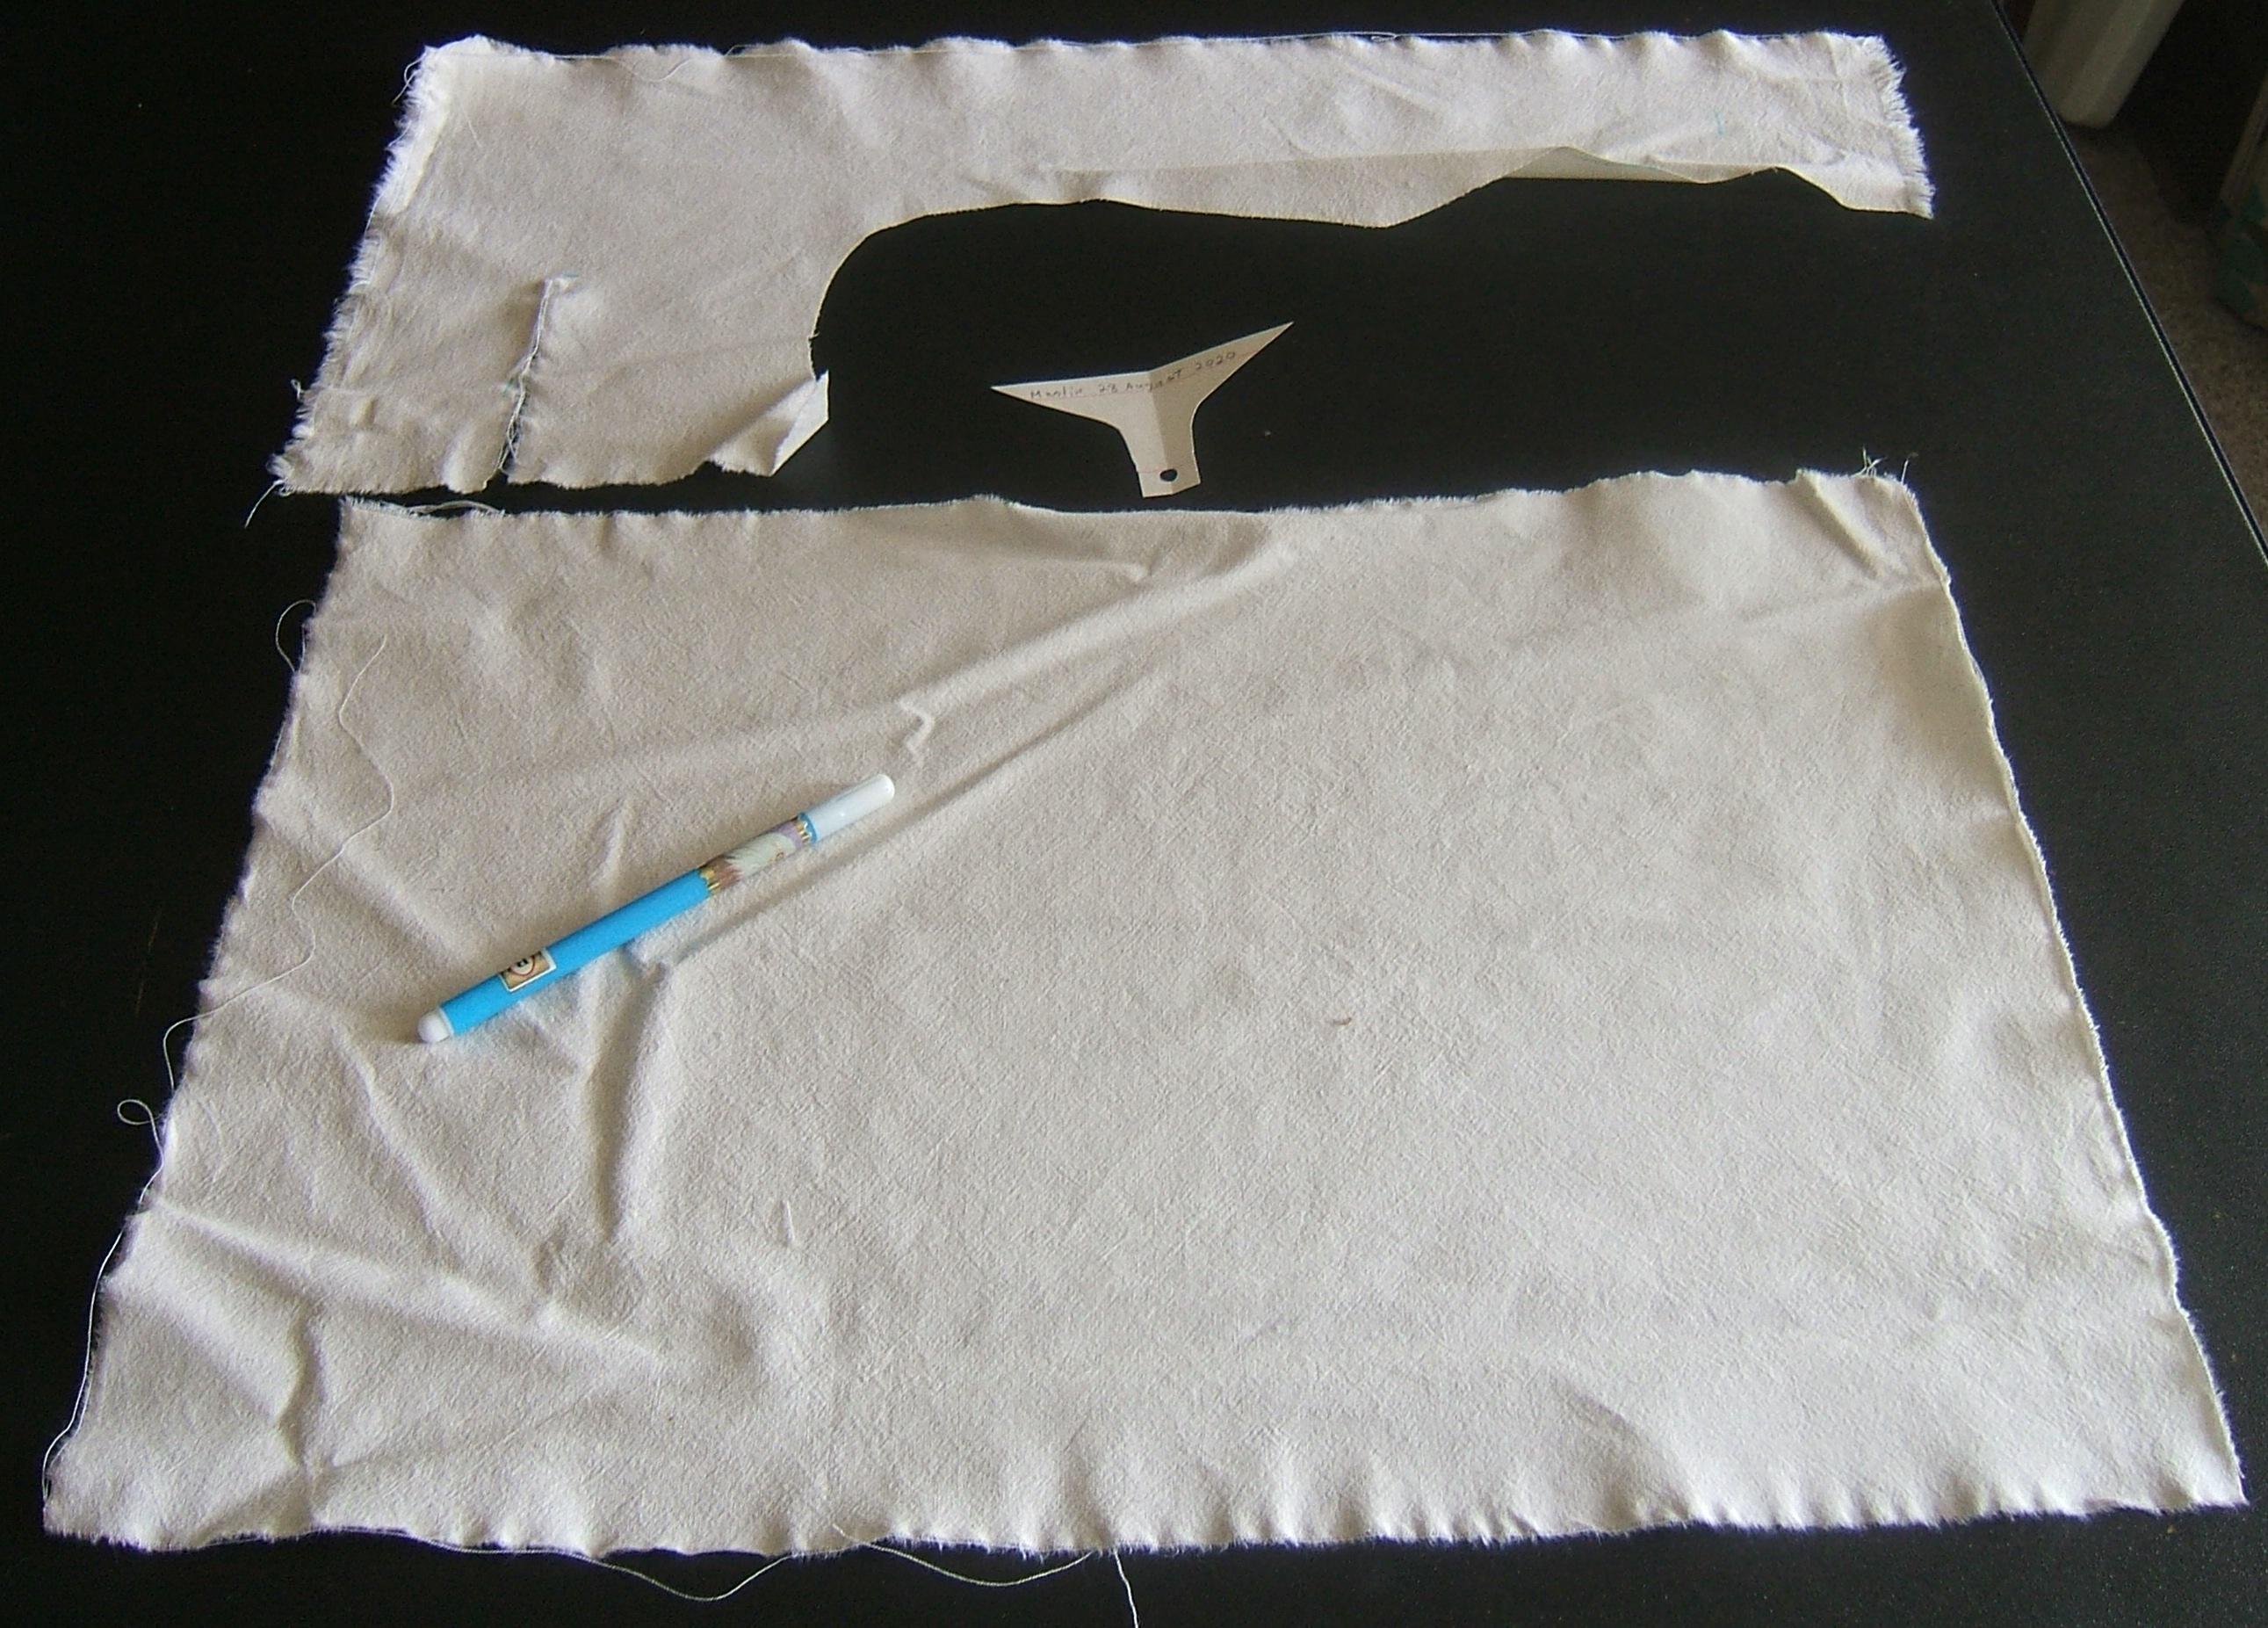
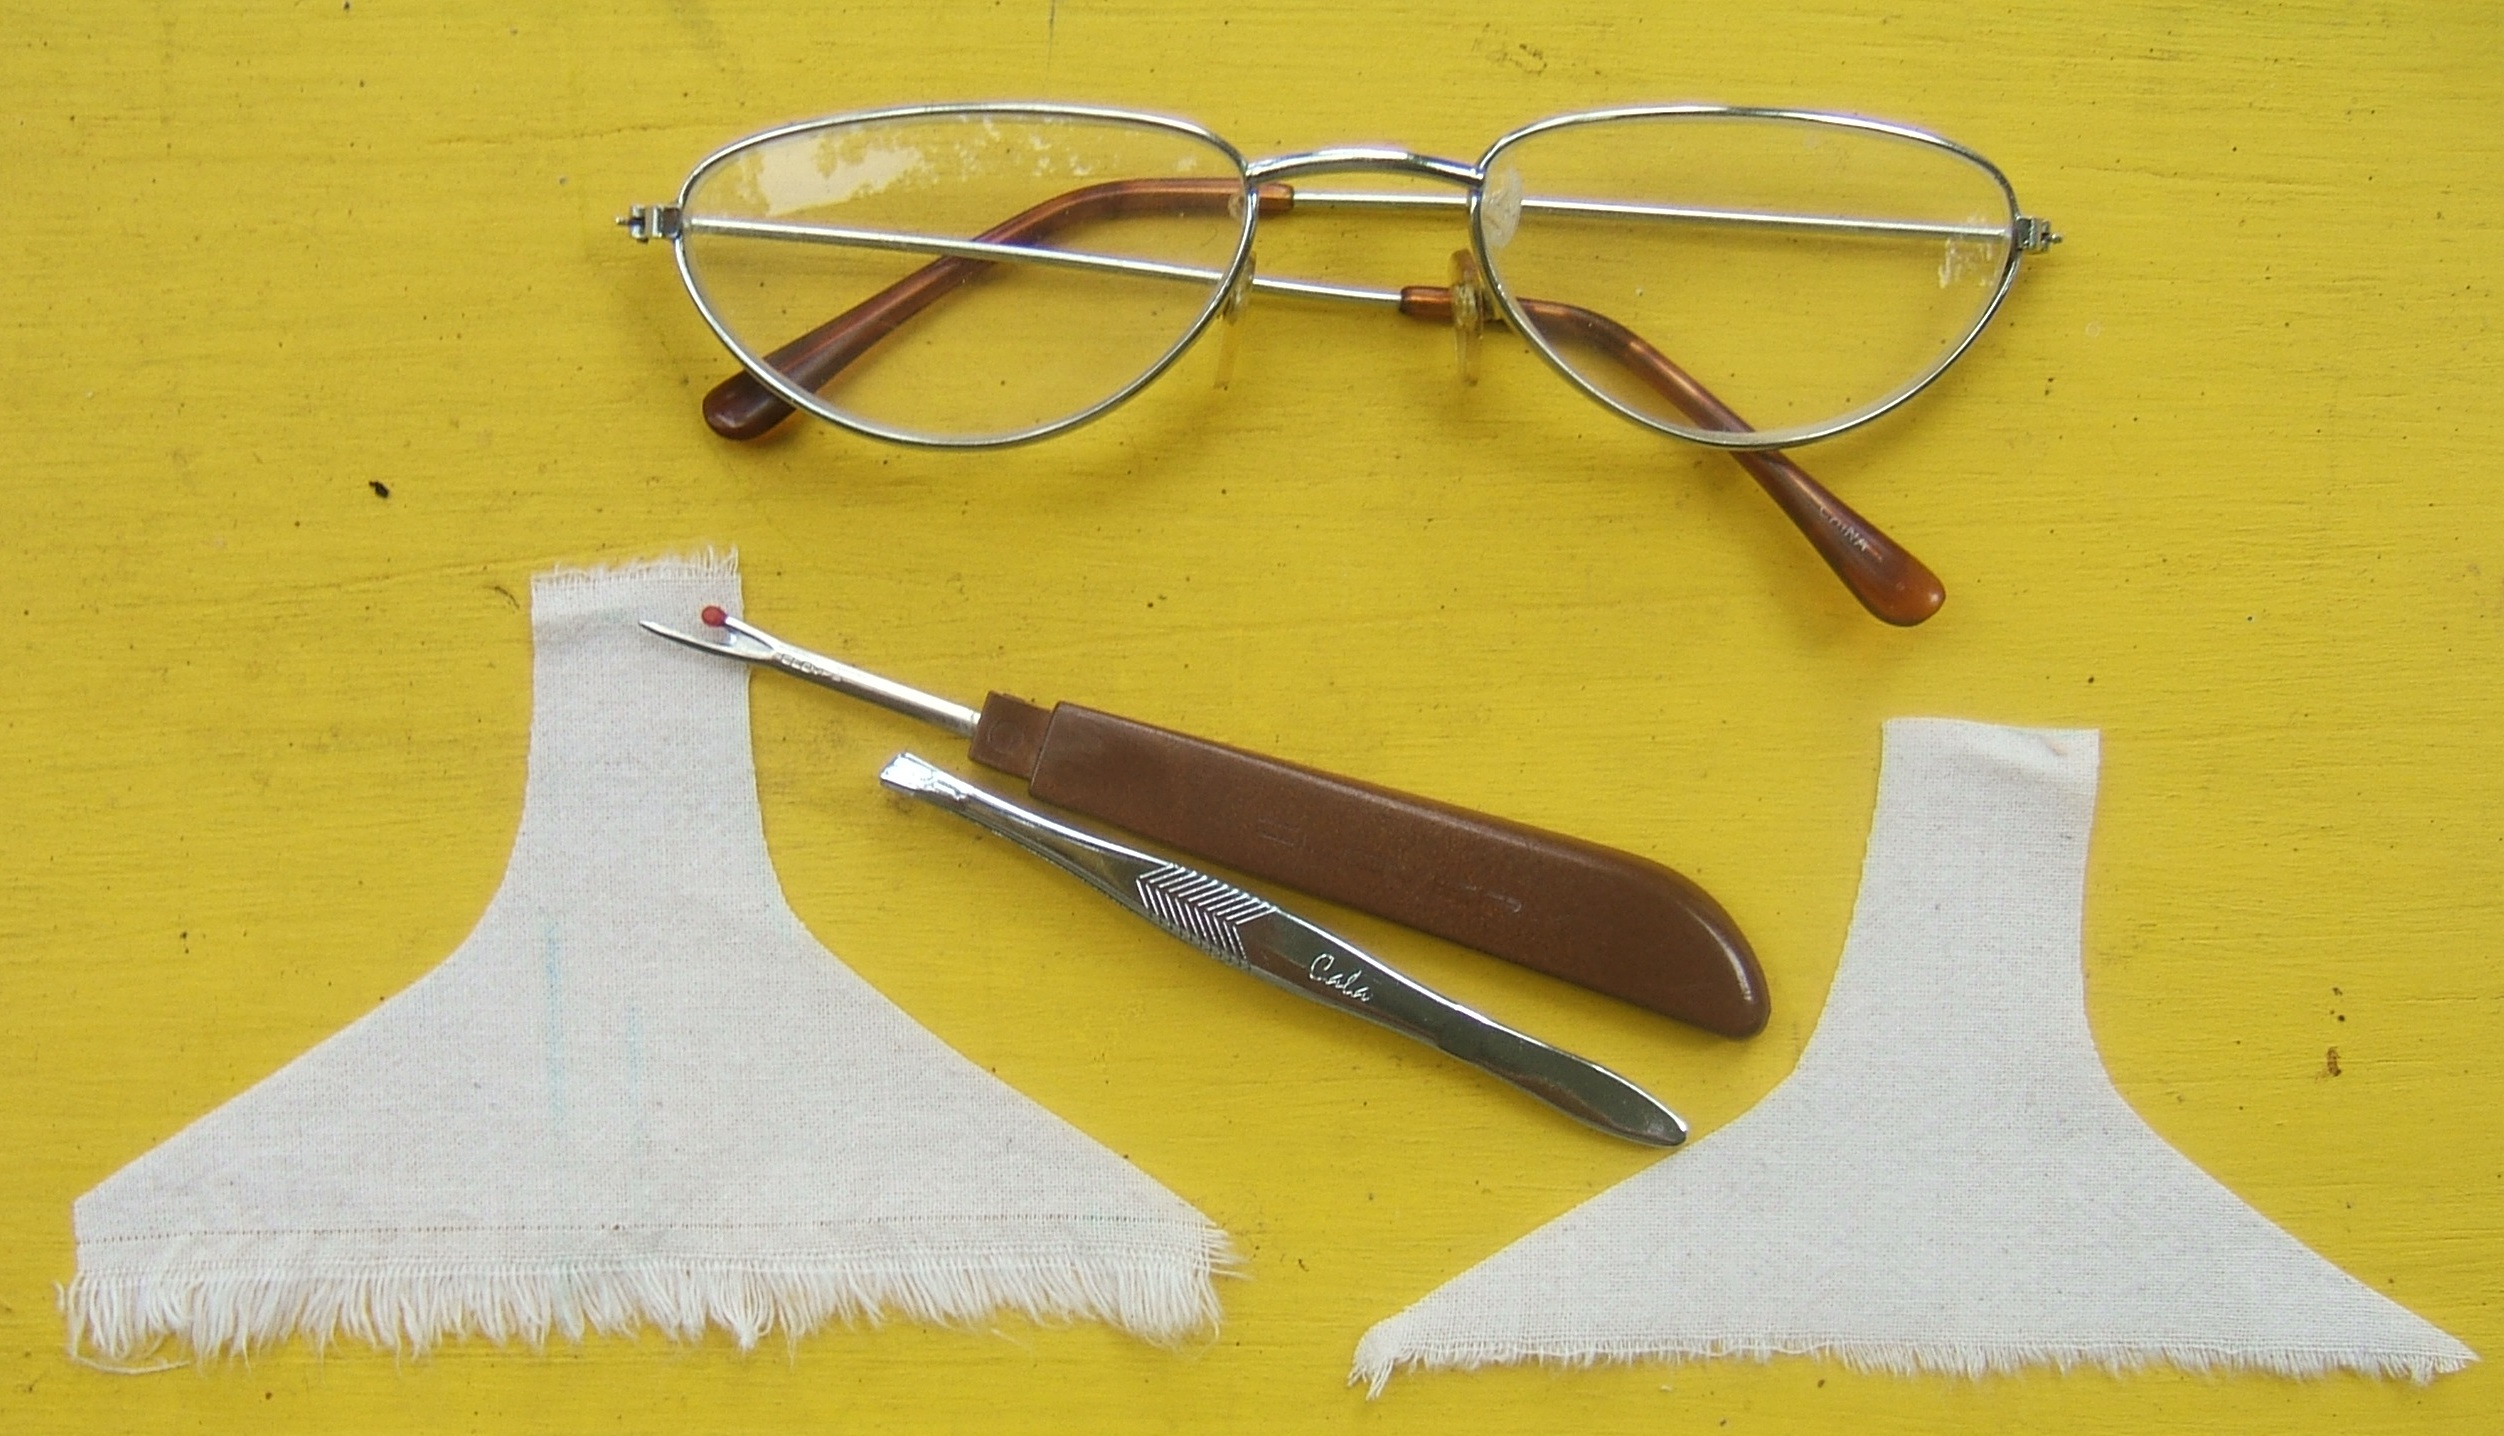
I made a nose-protector pattern by tracing my niqab-tab pattern onto a post card, then using my line-tape case as a template to cut off the tab along a smooth curve. I copied the center line of the tab pattern onto the protector pattern.
Measuring this on the mask pattern suggested that the mark on the fold line should be three and a half inches from the cutting line.
Calculating to check: Seven inches from twelve leaves five. The pleats take up two inches, leaving three. The nose piece is three and a half inches wide at the seam line. Oops.
More oops, the cutting rectangle is twelve and a half inches, not twelve, and the center line is off center. It is definitely time for a nap.
I've come to 25 September in re-reading my thoughts, and see that I changed from twelve inches wide to twelve and a half with no reason.
So the cure for the off-center center is to draw new cutting lines, each six inches from the center mark.
Measuring, I see that the right cutting line is only a sixteenth of an inch off. I'll leave it as is, since that is the end I don't plan to scan. (Cutting will be along threads and by measurements, so the diagram won't be used to make a pattern.)
The left cutting line is five sixteenths off. I will draw a new one, and crop off the old one in post-processing. A couple of bits of correction tape can mark it as no longer there.
I don't think I've yet discussed the realization that the angle in the hem complicates the plan of making it a casing. Tentatively, I plan to put a narrow hem in the slanted parts, and a casing hem in the space between them. But if I cut the hem by first folding and then cutting, the narrow hem will have to go around an angle. If I hem the slanting parts, they will slant when the casing is folded, which would be just fine if I didn't plan to put elastic in it.
⁂
After it sits a few days, the tape is no longer repositionable, but I managed to peel it off without damaging the paper too much.
My old copy of Firefox reads .png just fine, and the .png file gained bytes when I exported it to .gif, so I think I'll use .png -- but first I'll test it with the Firefox that runs on Windows 98.
The Firefox on this computer read a .png file in an old collection of clip art.
To postpone working, I photographed my drafting setup
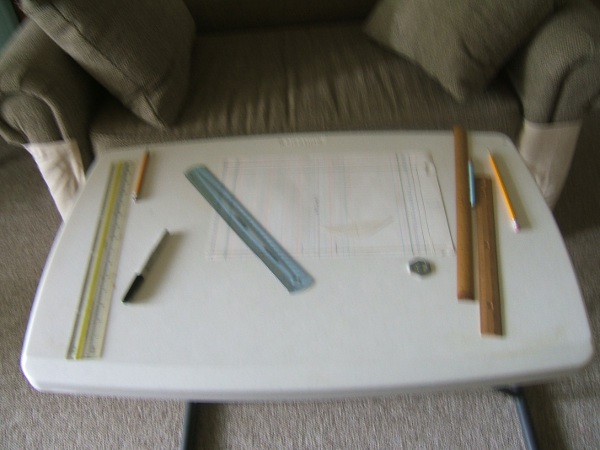
and discovered that the date on my camera is a day off.
So I reset the camera, only to find that it was correct, and then I looked at the directory and that date was correct -- so why did Explorer say that it had been modified yesterday?
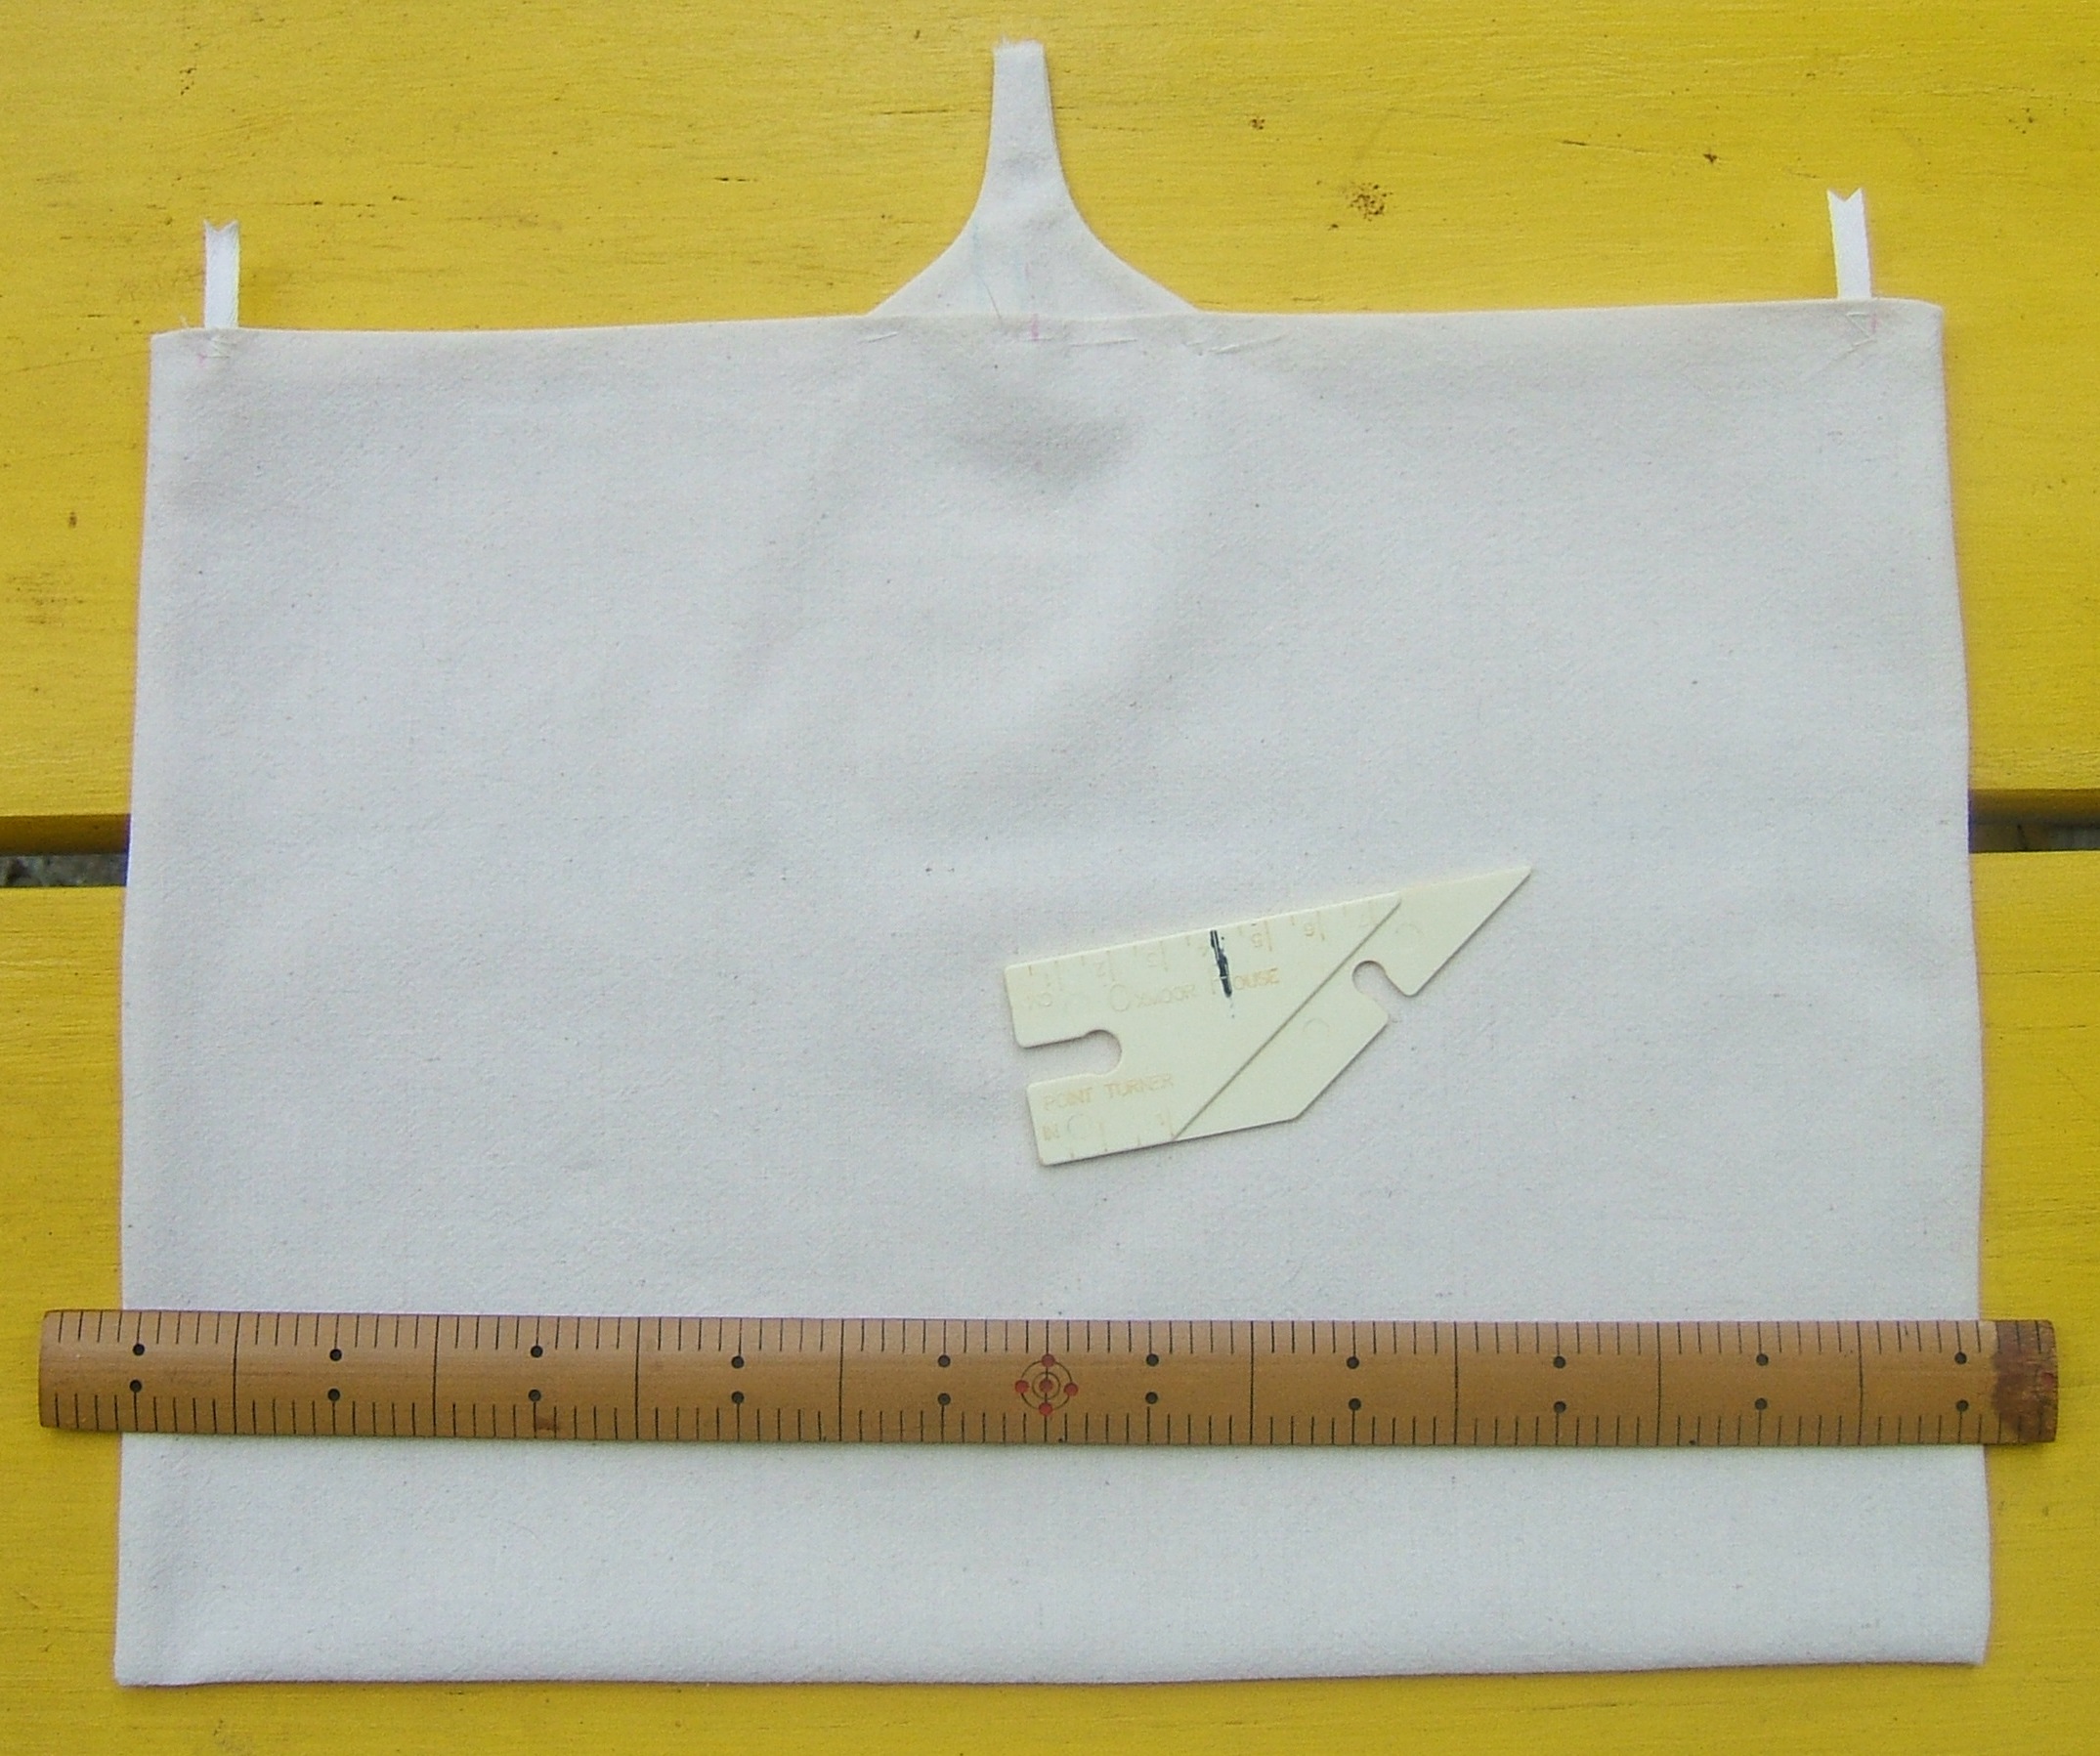
I checked the mirror: yes, I want the ties centered between the top and the bottom. I have measured the center mark several ways, and it is halfway between the fold lines for the top and bottom. The mask I'm replacing has been pleated down to three inches high at the ties, so I want the corner marks to be an inch and a half to each side of the center mark.
A line drawn through the corner mark with the aid of the mysterious hexagon-shaped thingy that I found in the street
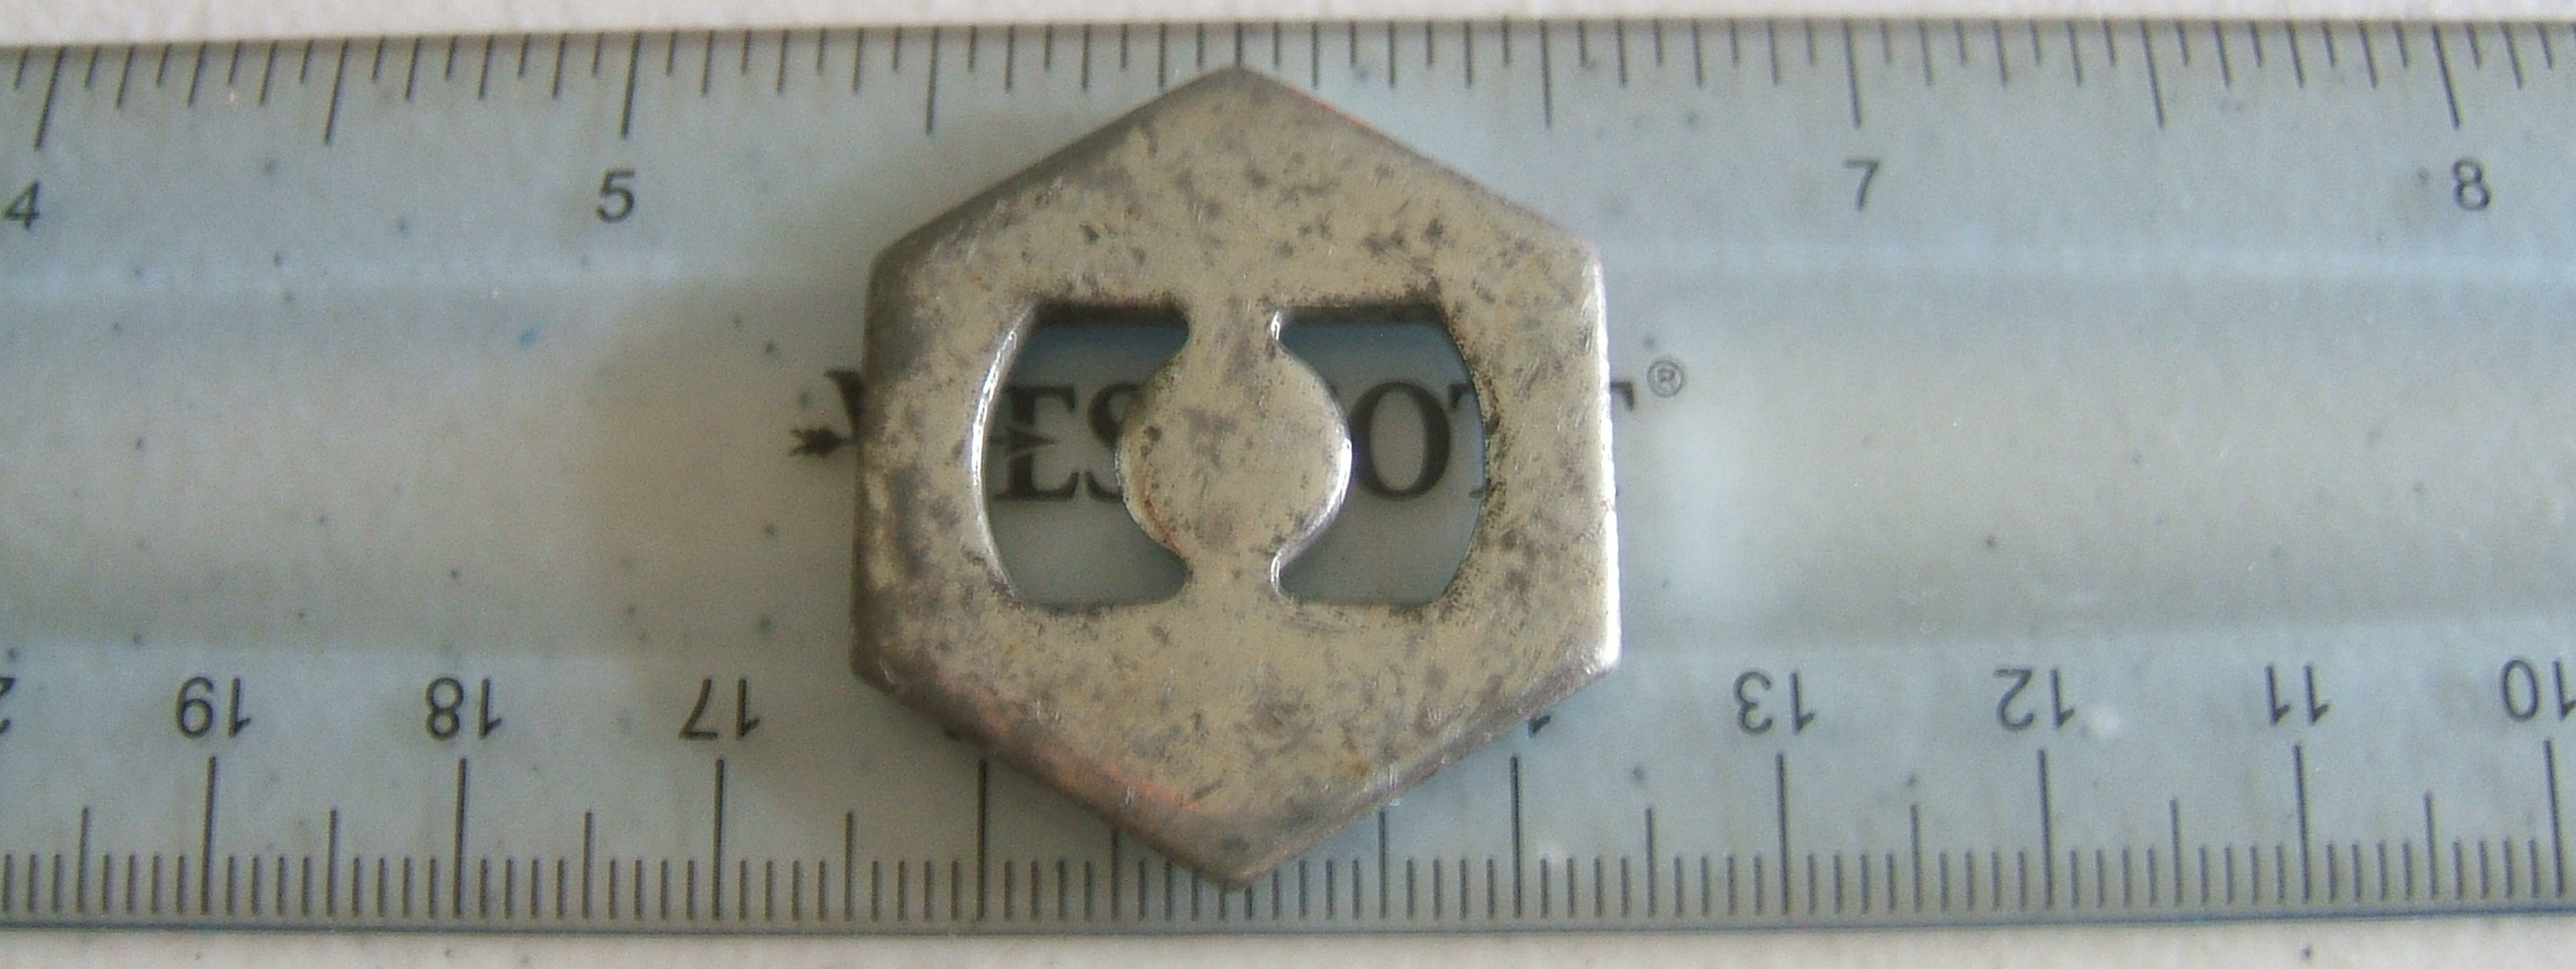
(our best guess is that it's a knock-out from one of those boxes sold to people who may or may not want holes in them)
passes exactly through where the edge of the box pleat will be, which would be fine and dandy if I weren't adding a nose protector.
So the line will have to be steeper than it is in the mask that I am copying.
Checking the mirror, the sides could be a bit lower at the bottom, and that would make the bottom line a bit shallower, but I think I'll continue with the equal spacing -- the slant at the top might make the whole thing move down.
The seam line on the nose protector is three and a half inches.
I shortened it to three inches, then made my marks on the fold lines one and five-eighths inches from the lines that will end up in the center after pleating.
With the bias lines drawn in, the casings for the ties look very short. They will be even shorter after I tie the mask on. I have decided not to second-guess myself.
So now when I draw the cutting lines half an inch from the fold lines, the pattern will be complete.
I finally got up the nerve to cut on the cutting lines on the nose-tab pattern. When I drew them, I was looking around for something to round the corners with, then reflected that this will happen automatically when I sew the two pieces together.

I'd better add "cut two" to the note on the template. It is best to make sure a stranger could use your pattern, because you will be a different person the next time you use it.
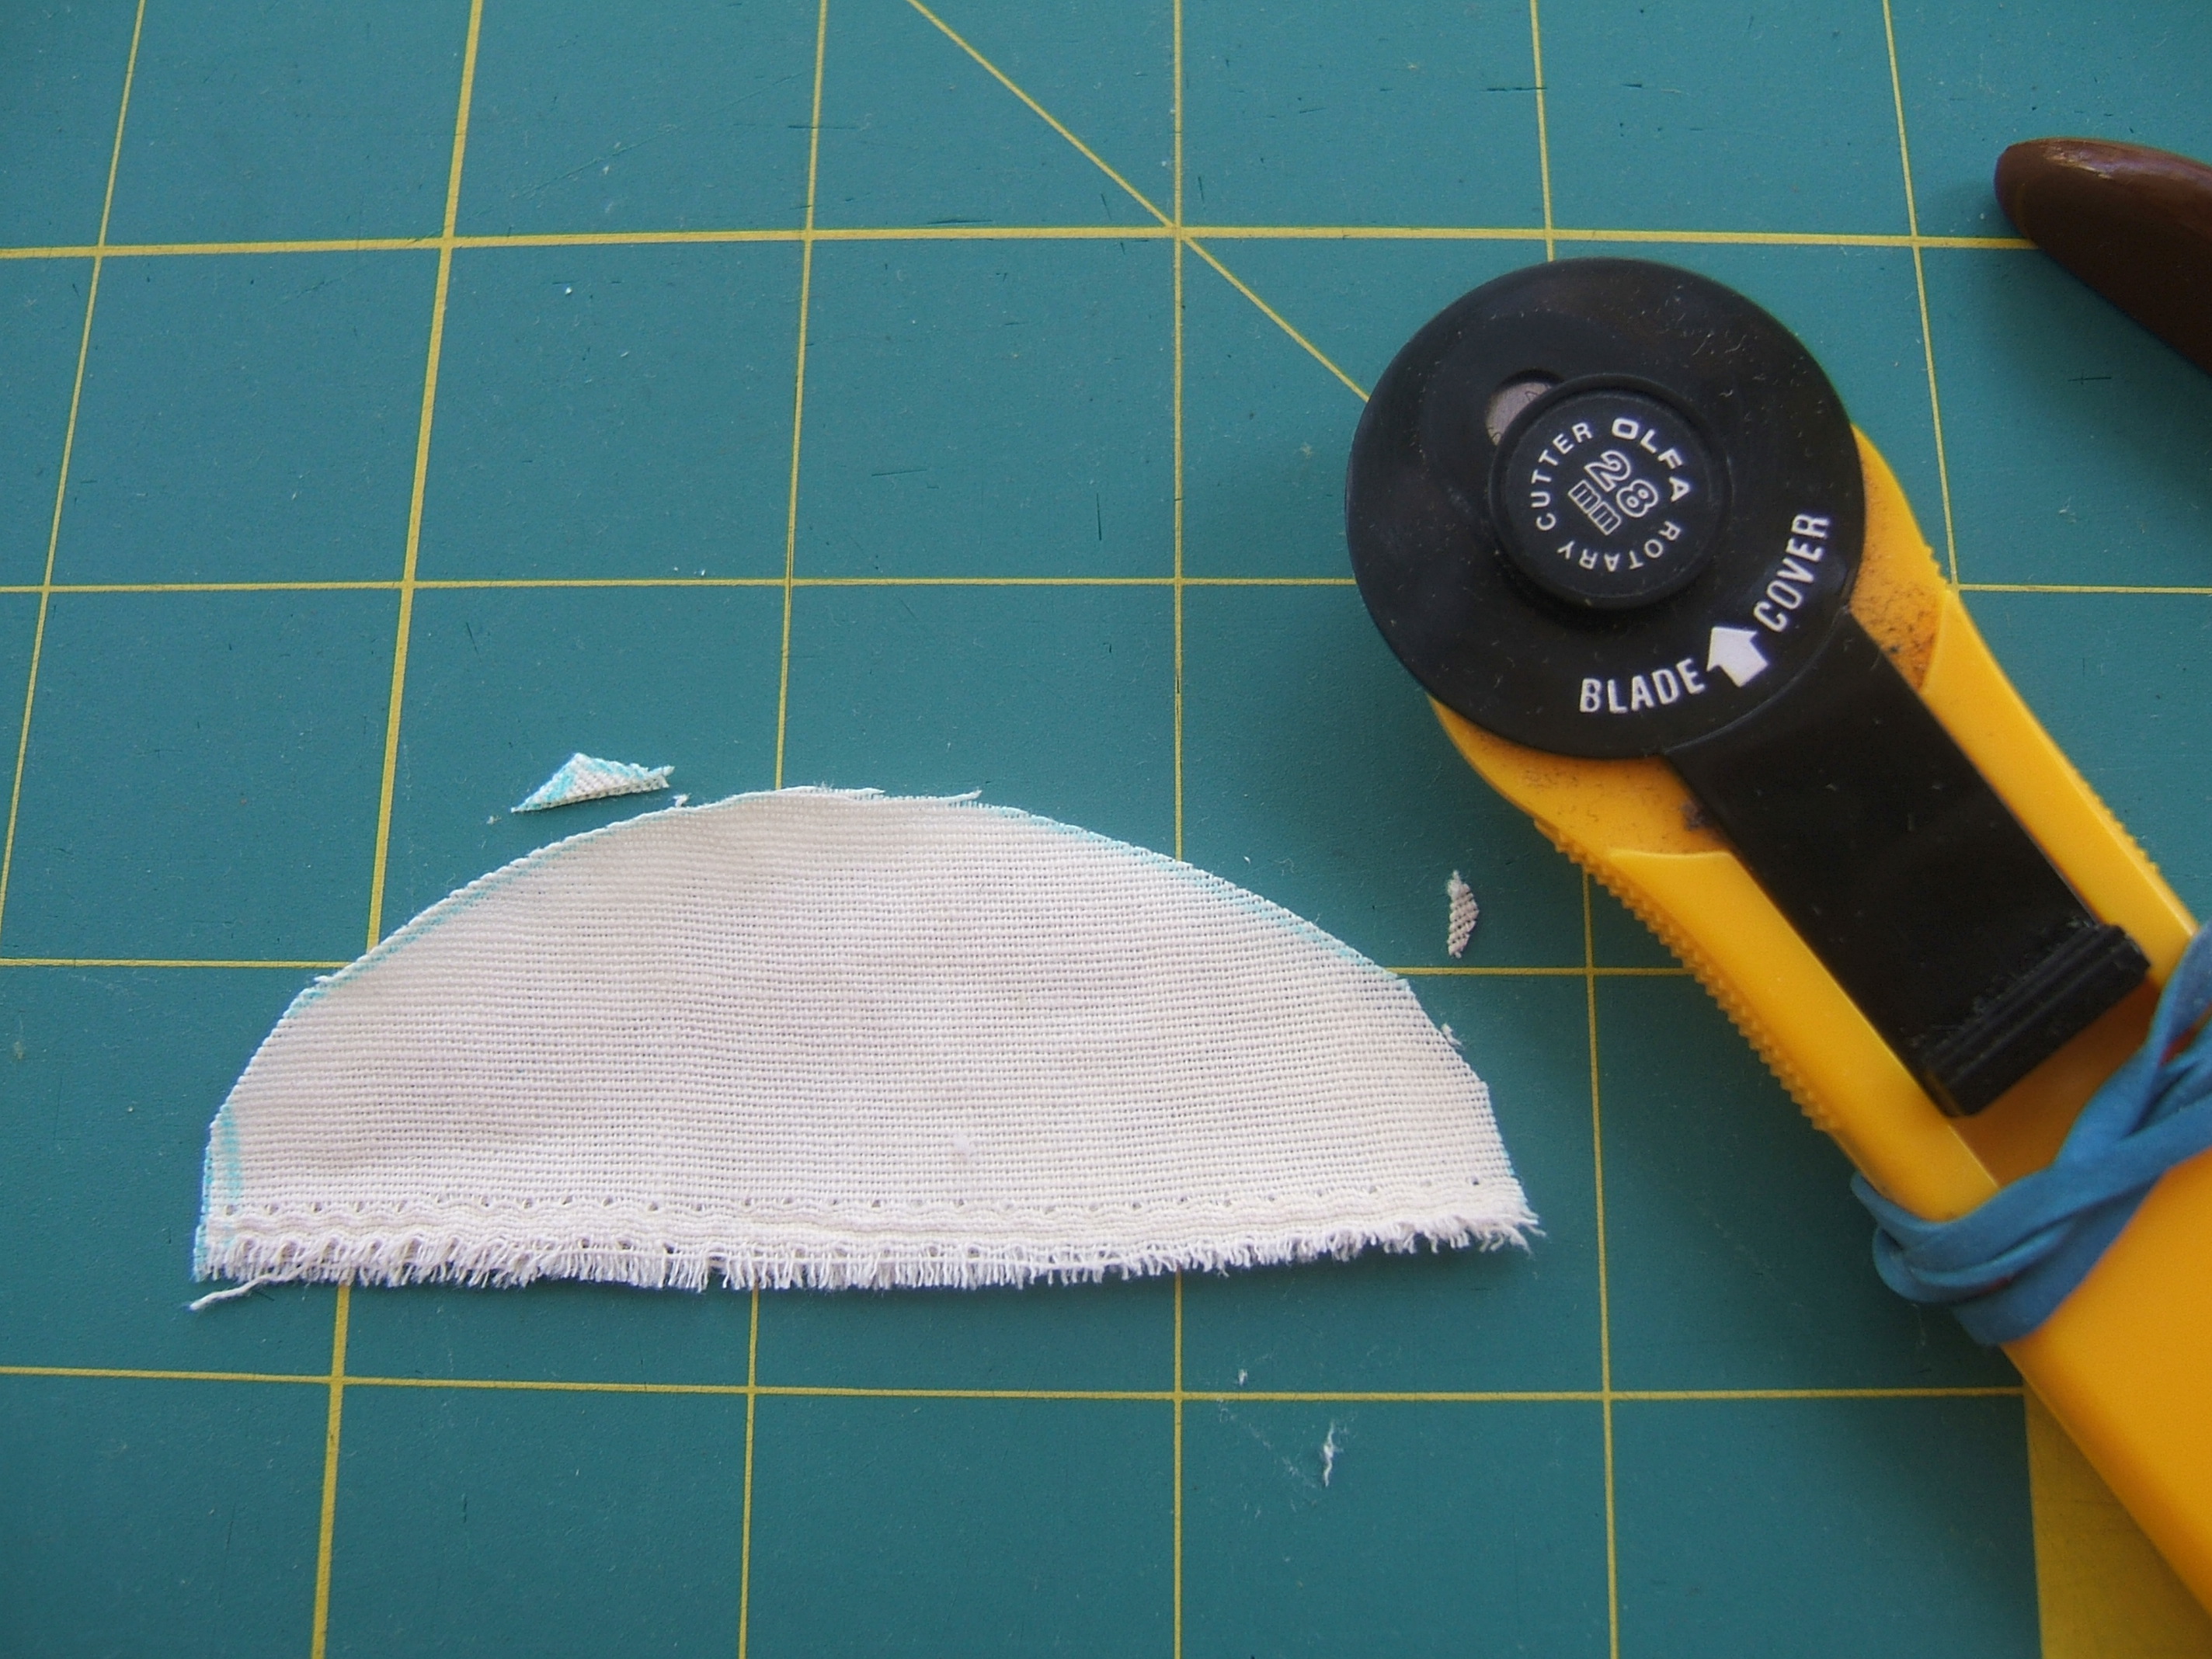
The rag is a worn-out linen pillowcase. Thin so I can use it double with a single-layer mask, and soft for my nose. It was dyed ecru, but straight laundry soap spilled on a sweat rag made from another piece of this case took the dye out -- or at least left a conspicuously-white mark.
Then after cutting them out, I stacked them and rounded the corners freehand.
Between loads of wash, I found time to sew the two nose-shield pieces together and turn them right- side out. While stitching, I realized that when calculating how much space to leave for it, I neglected seam allowance. Better to have too much space than too little.
I neglected to take it out of the scanner and press it when I was ironing sheets and masks later in the day. Probably pretty well pressed from the weight of the scanner cover by now.
After stitching, I wondered how I could keep the tiny thing from getting lost, then remembered that I'd left the pattern for it in the scanner with the diagram, and added the nose piece to the pile.
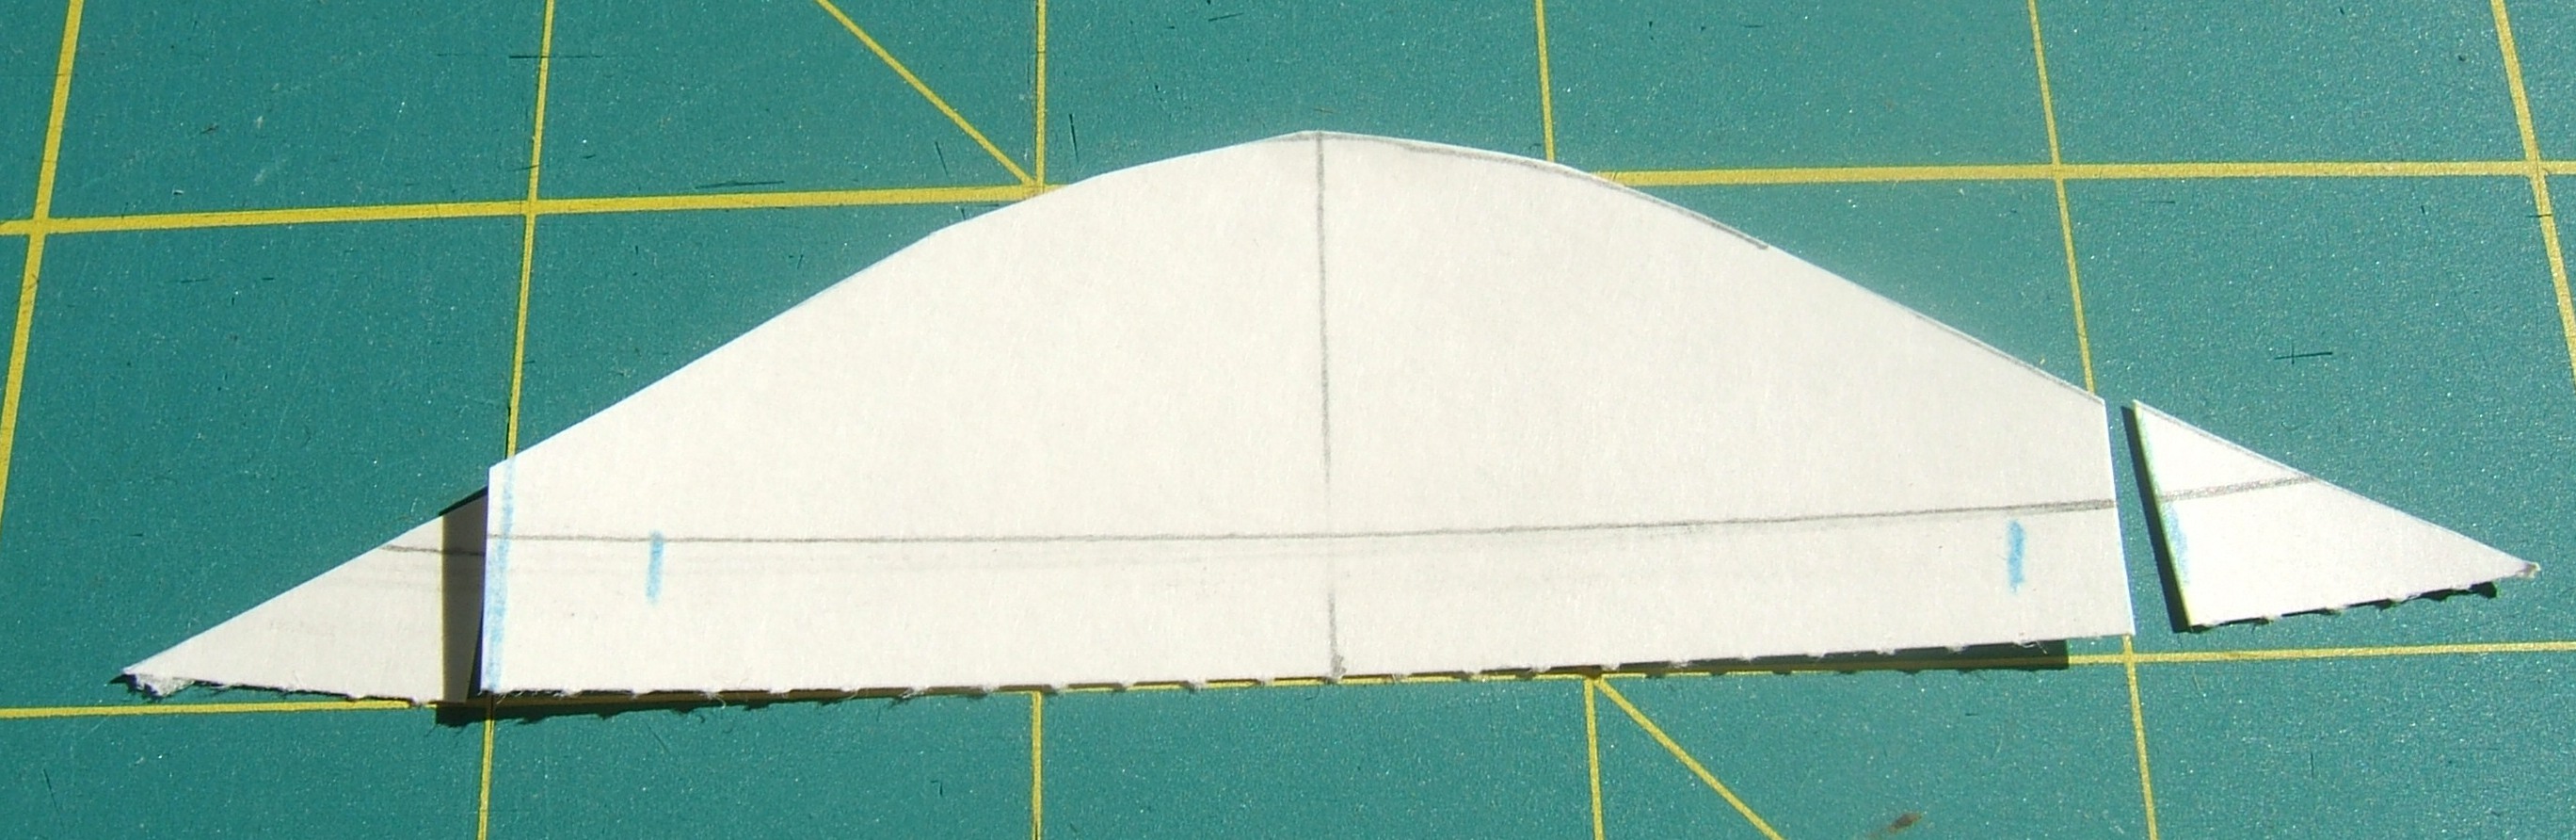
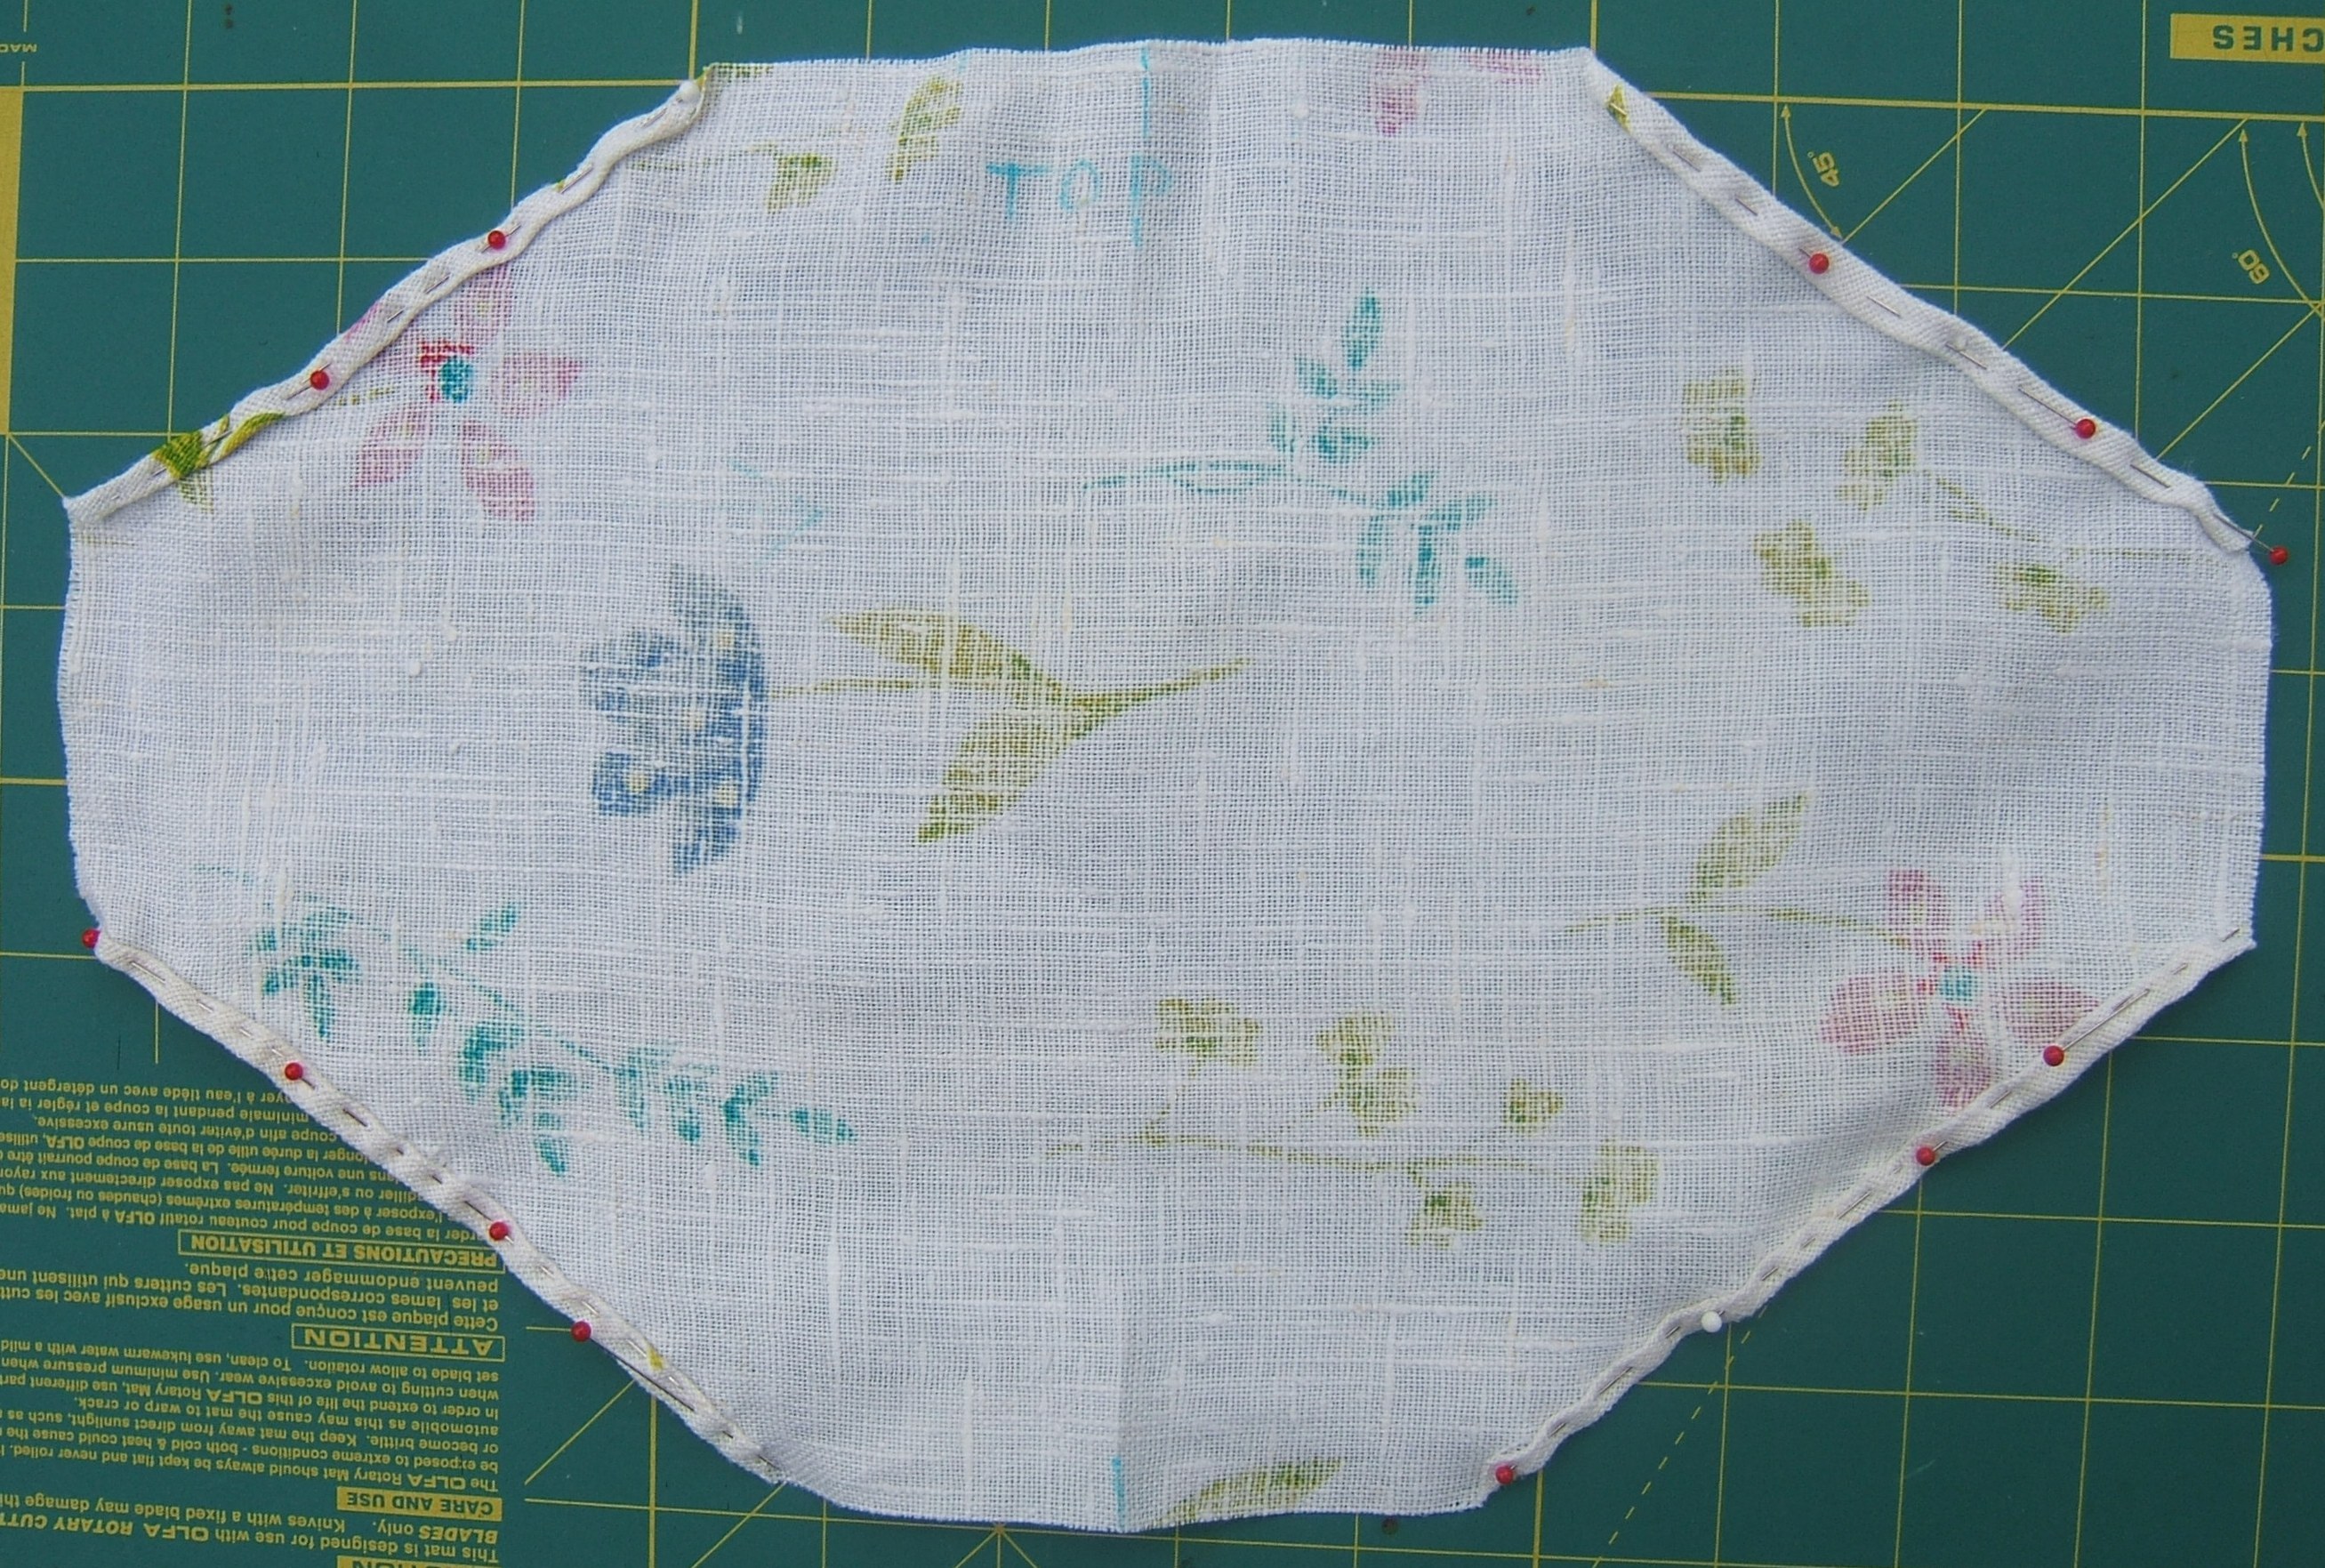
Cutting an 8" x 12" rectangle has gotten as far as putting the scraps on a card table.
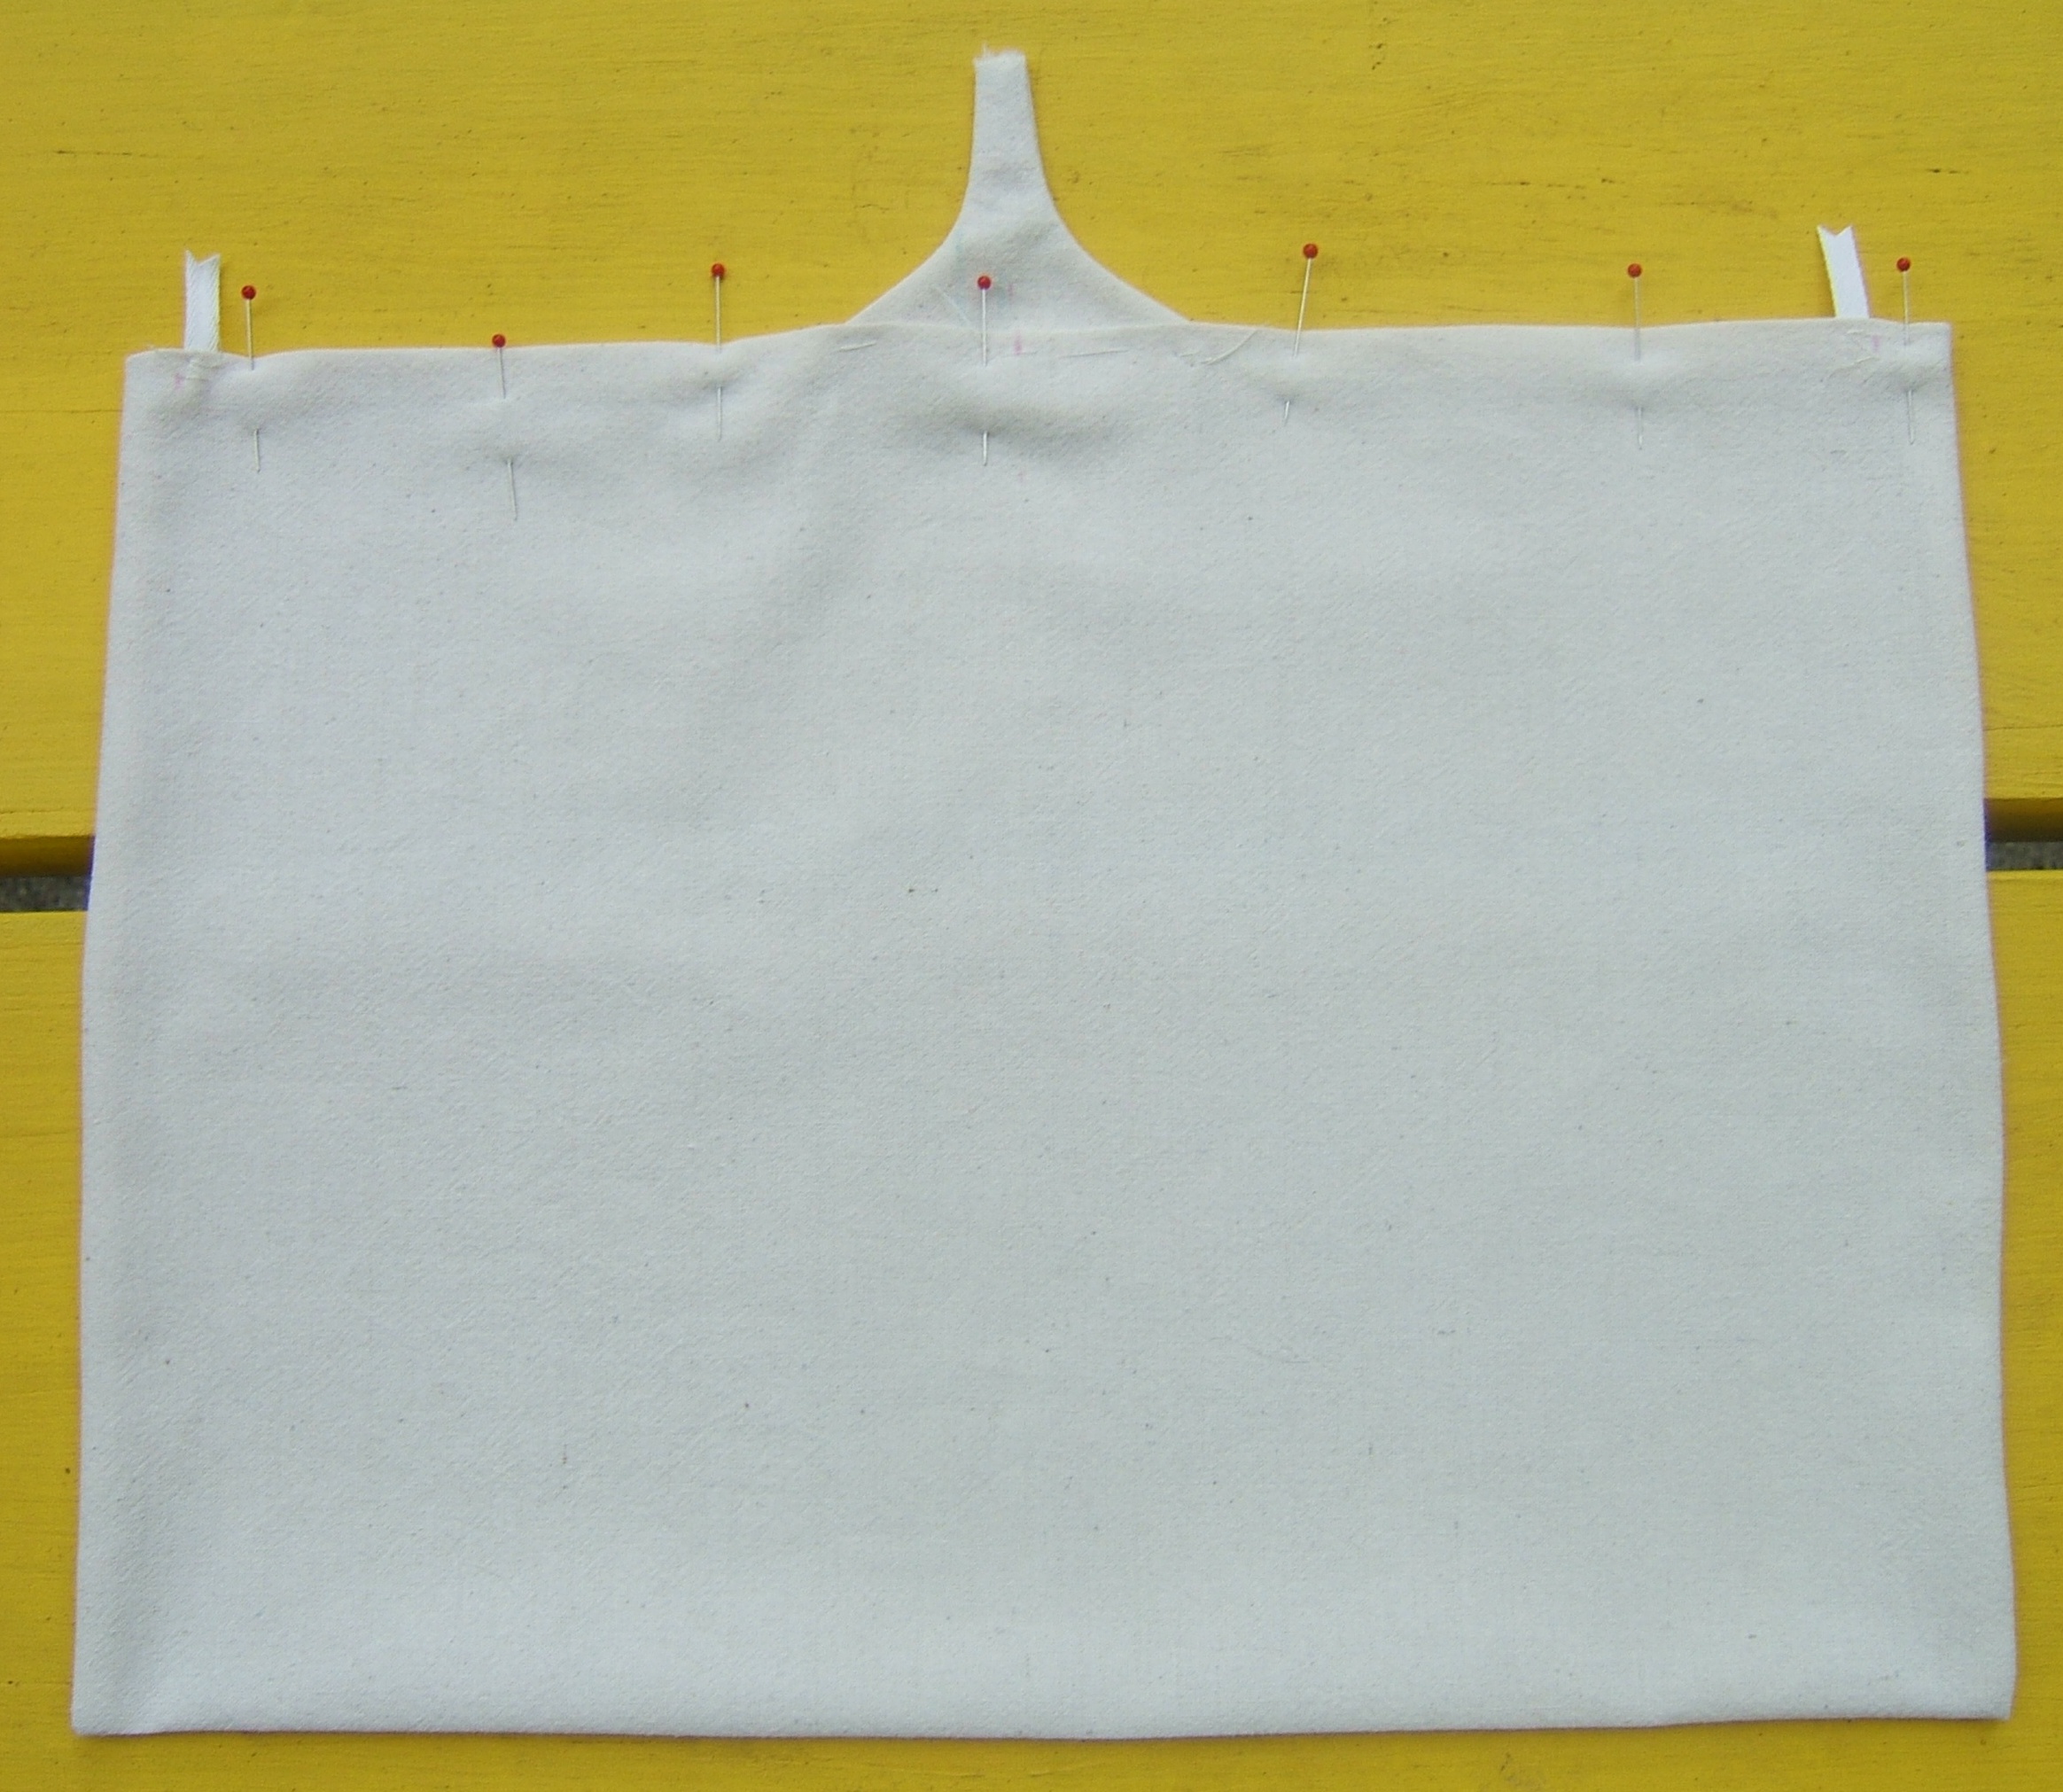
I cut the mask out today. Brief consternation when I began to mark the place to cut the corners off and realized that the corners were not symmetrical top to bottom.
So I wrote "top" on one side, then kept that side at the top when I turned the mask over to mark the other end. (The end of the diagram that I didn't scan is not accurate.) (There are some lines on the paper that I erased from the digital copy.)
I marked each end of each cutting line, connected the marks with the aid of a ruler, and cut along the marked lines -- one pair on the front, one pair on the back. To my surprise, the creases made by marking on the other side are visible in the photograph.
I need also to mark the center and the fold lines for the box pleat.
I also cut out two pockets for the dress the scraps are from.
And stuffed an acorn squash.
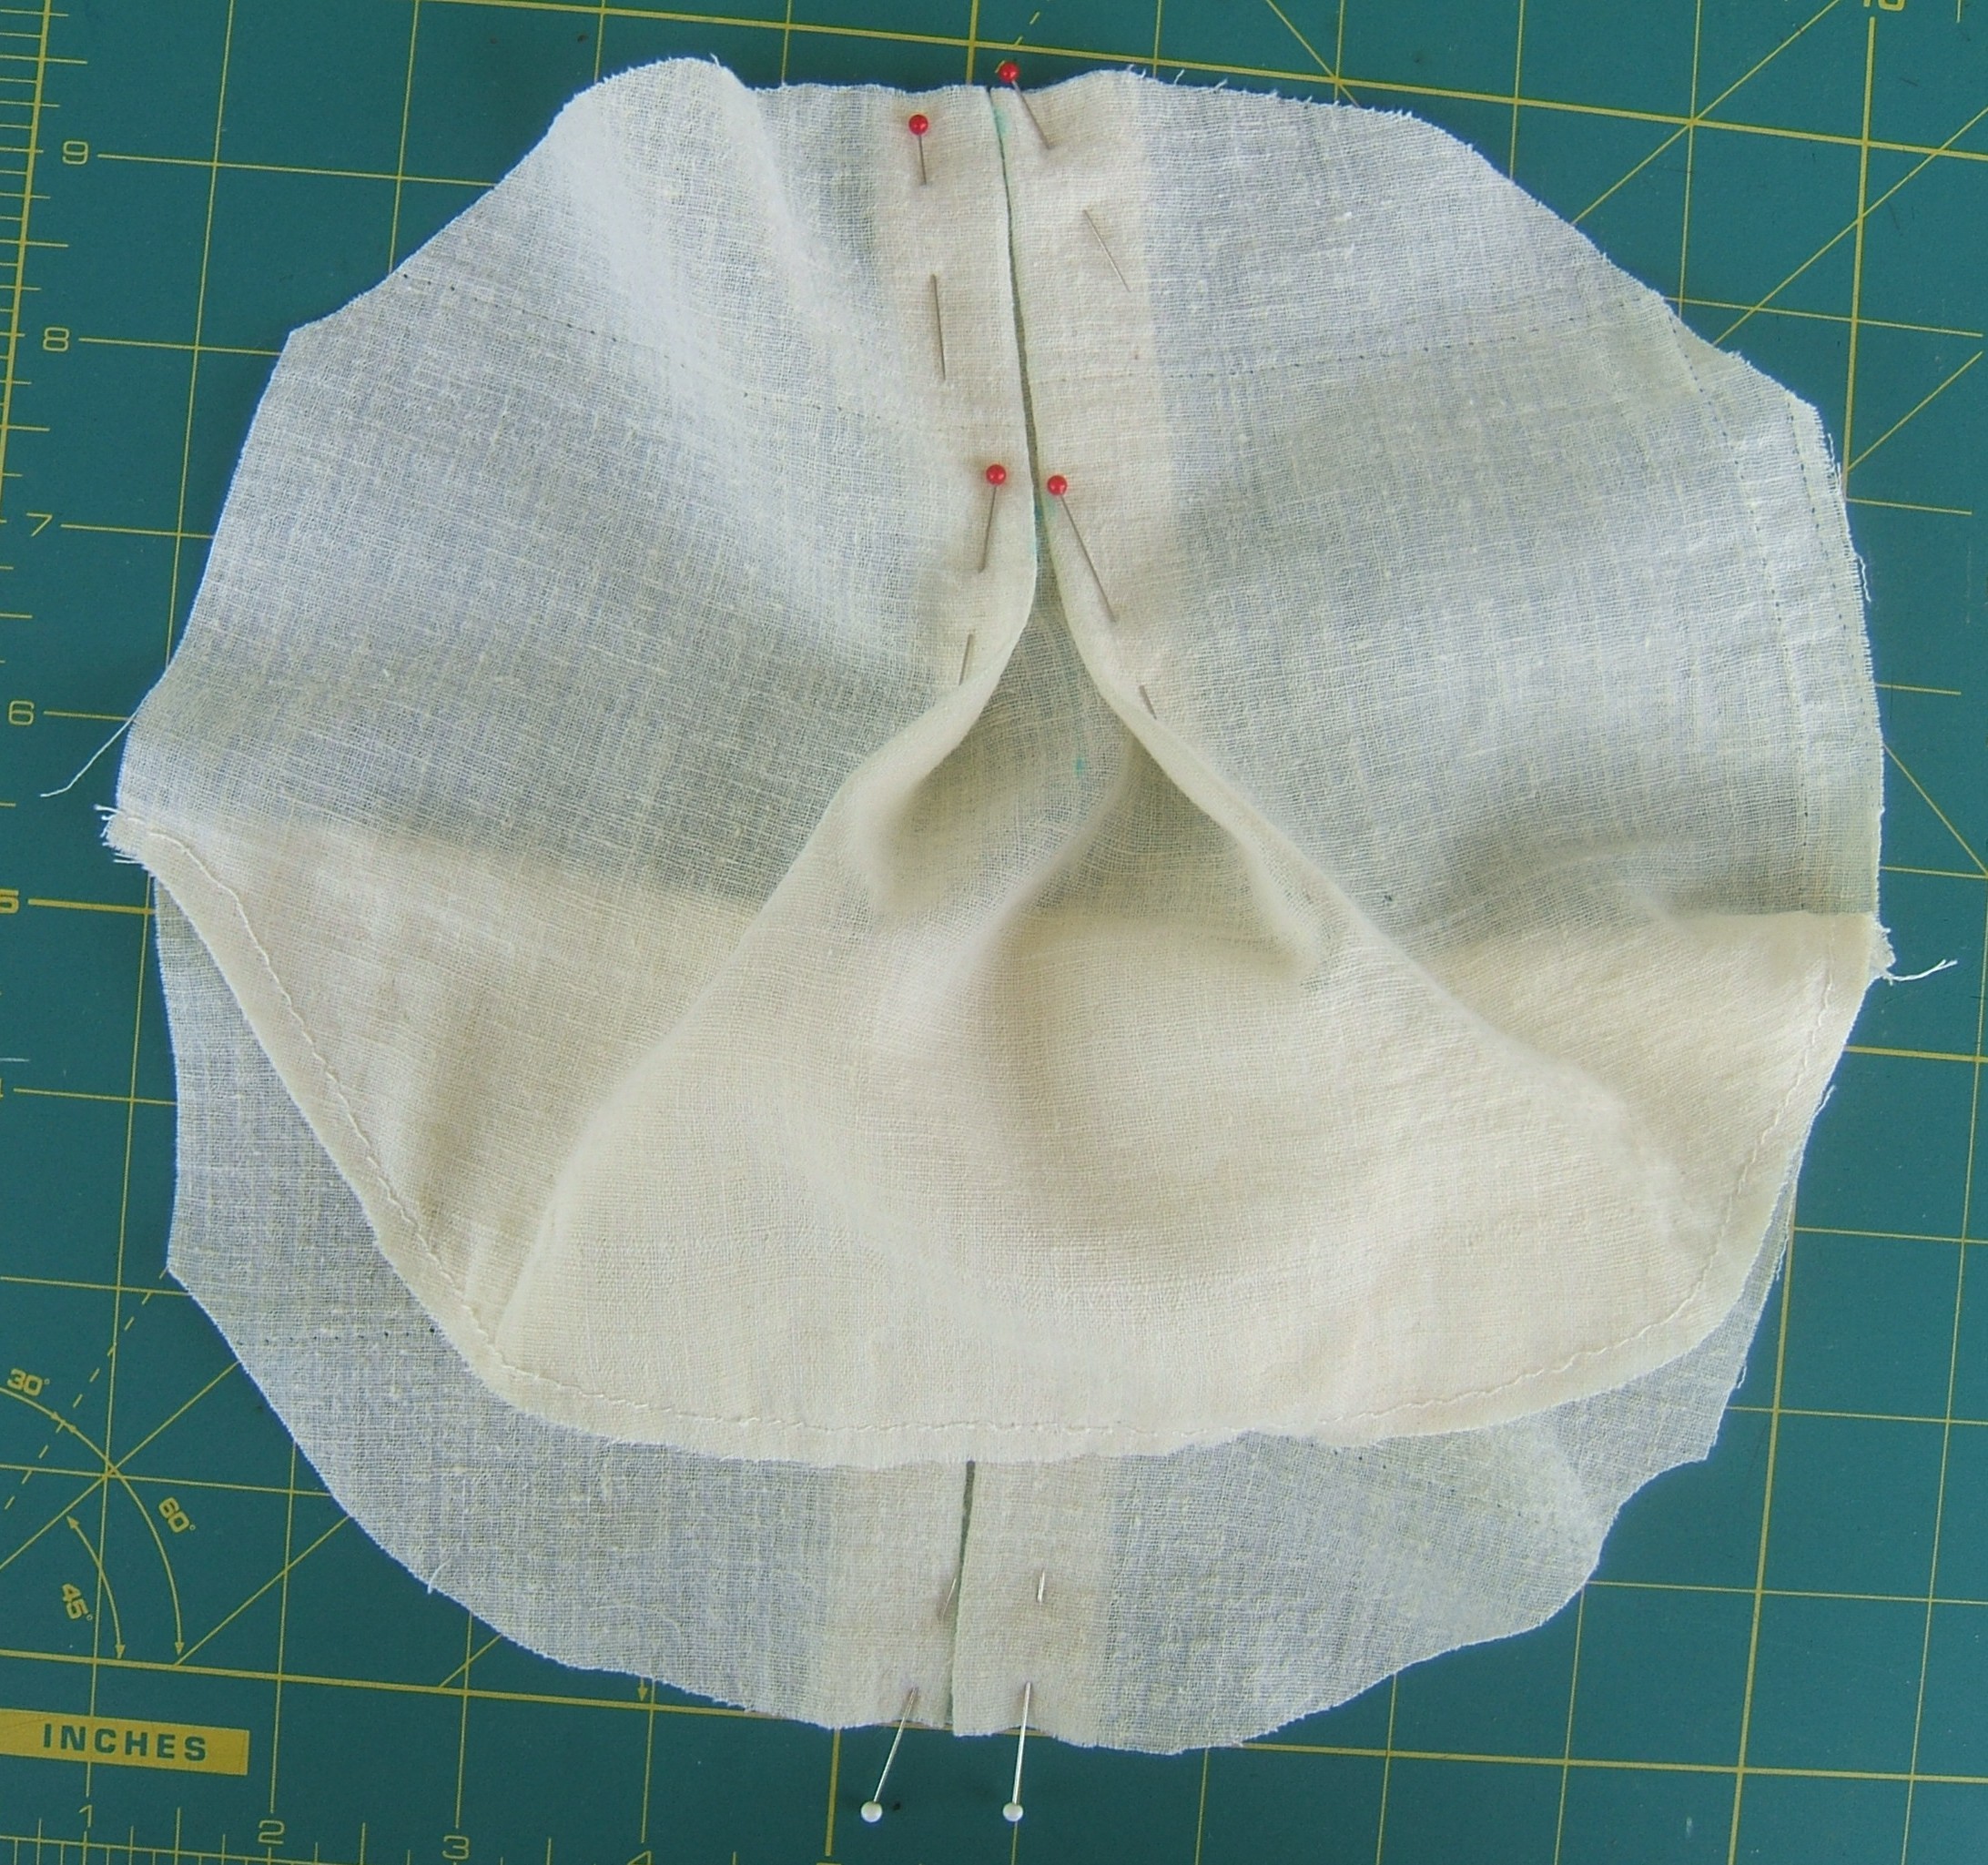
I pinched and pinned as narrow a hem as possible into each slanting edge.
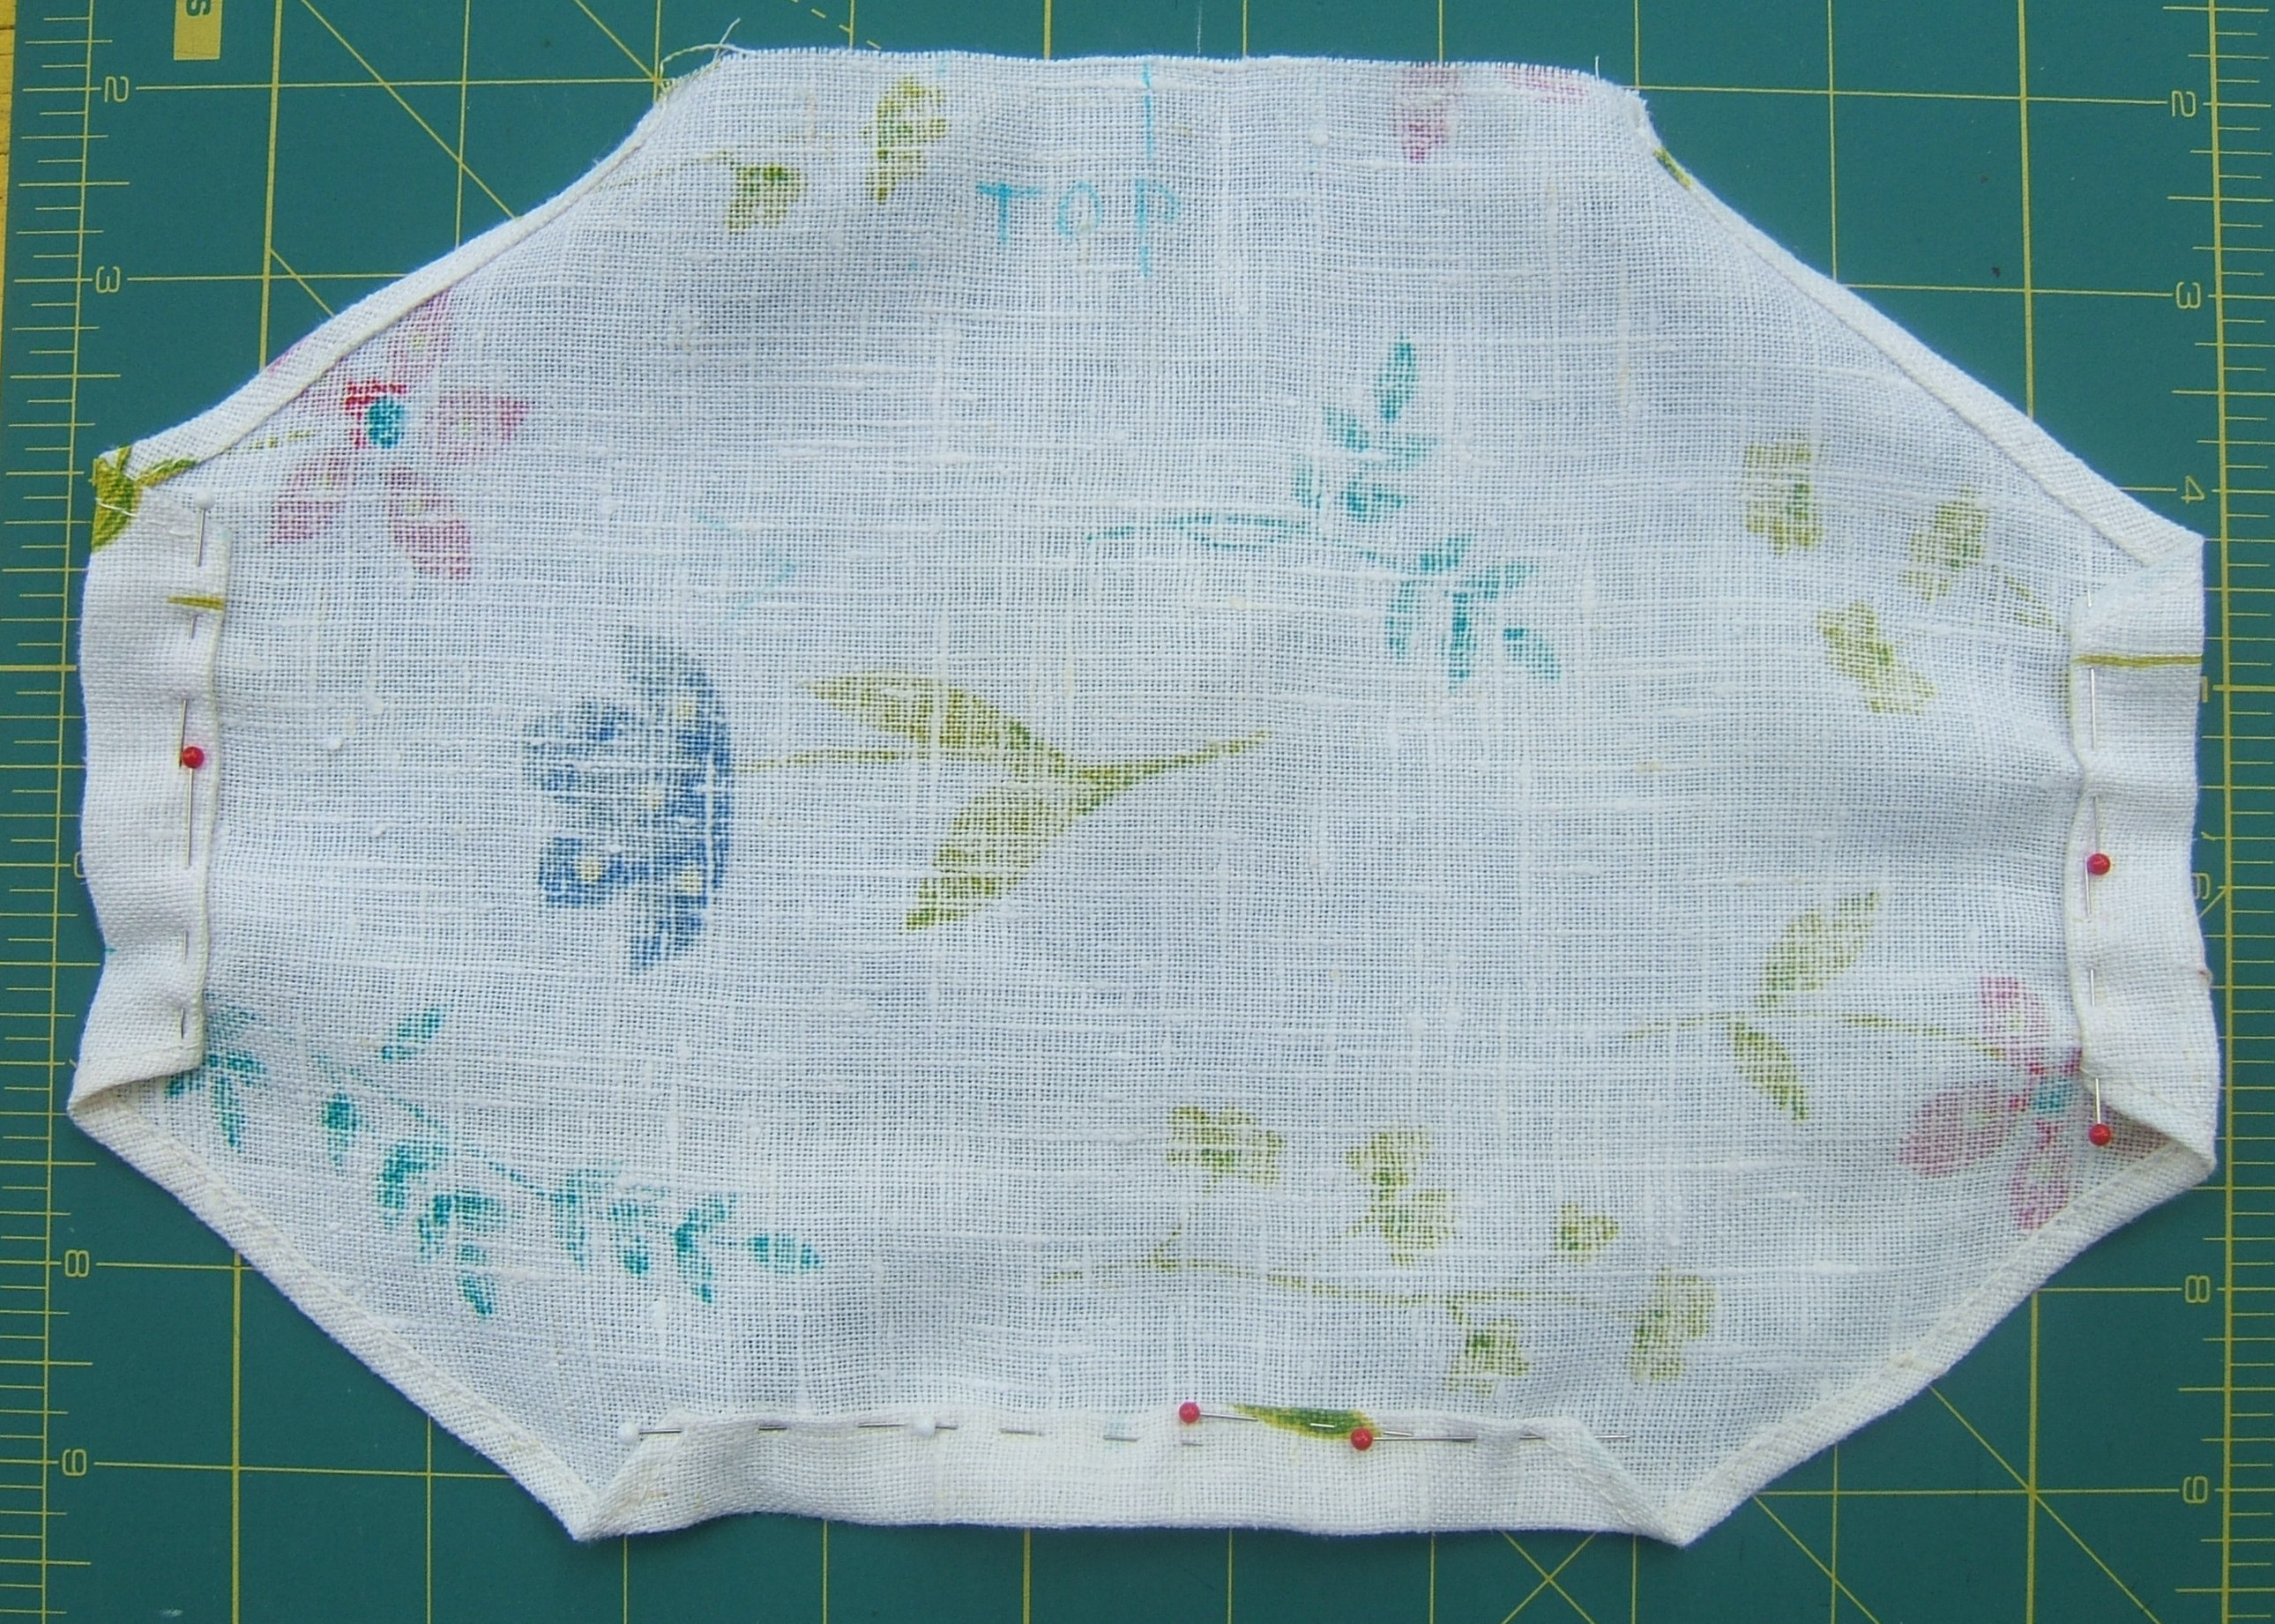
Then I sewed those hems and formed the casings in the same way. But I pinned the first fold, then folded to a line drawn on an appointment card.
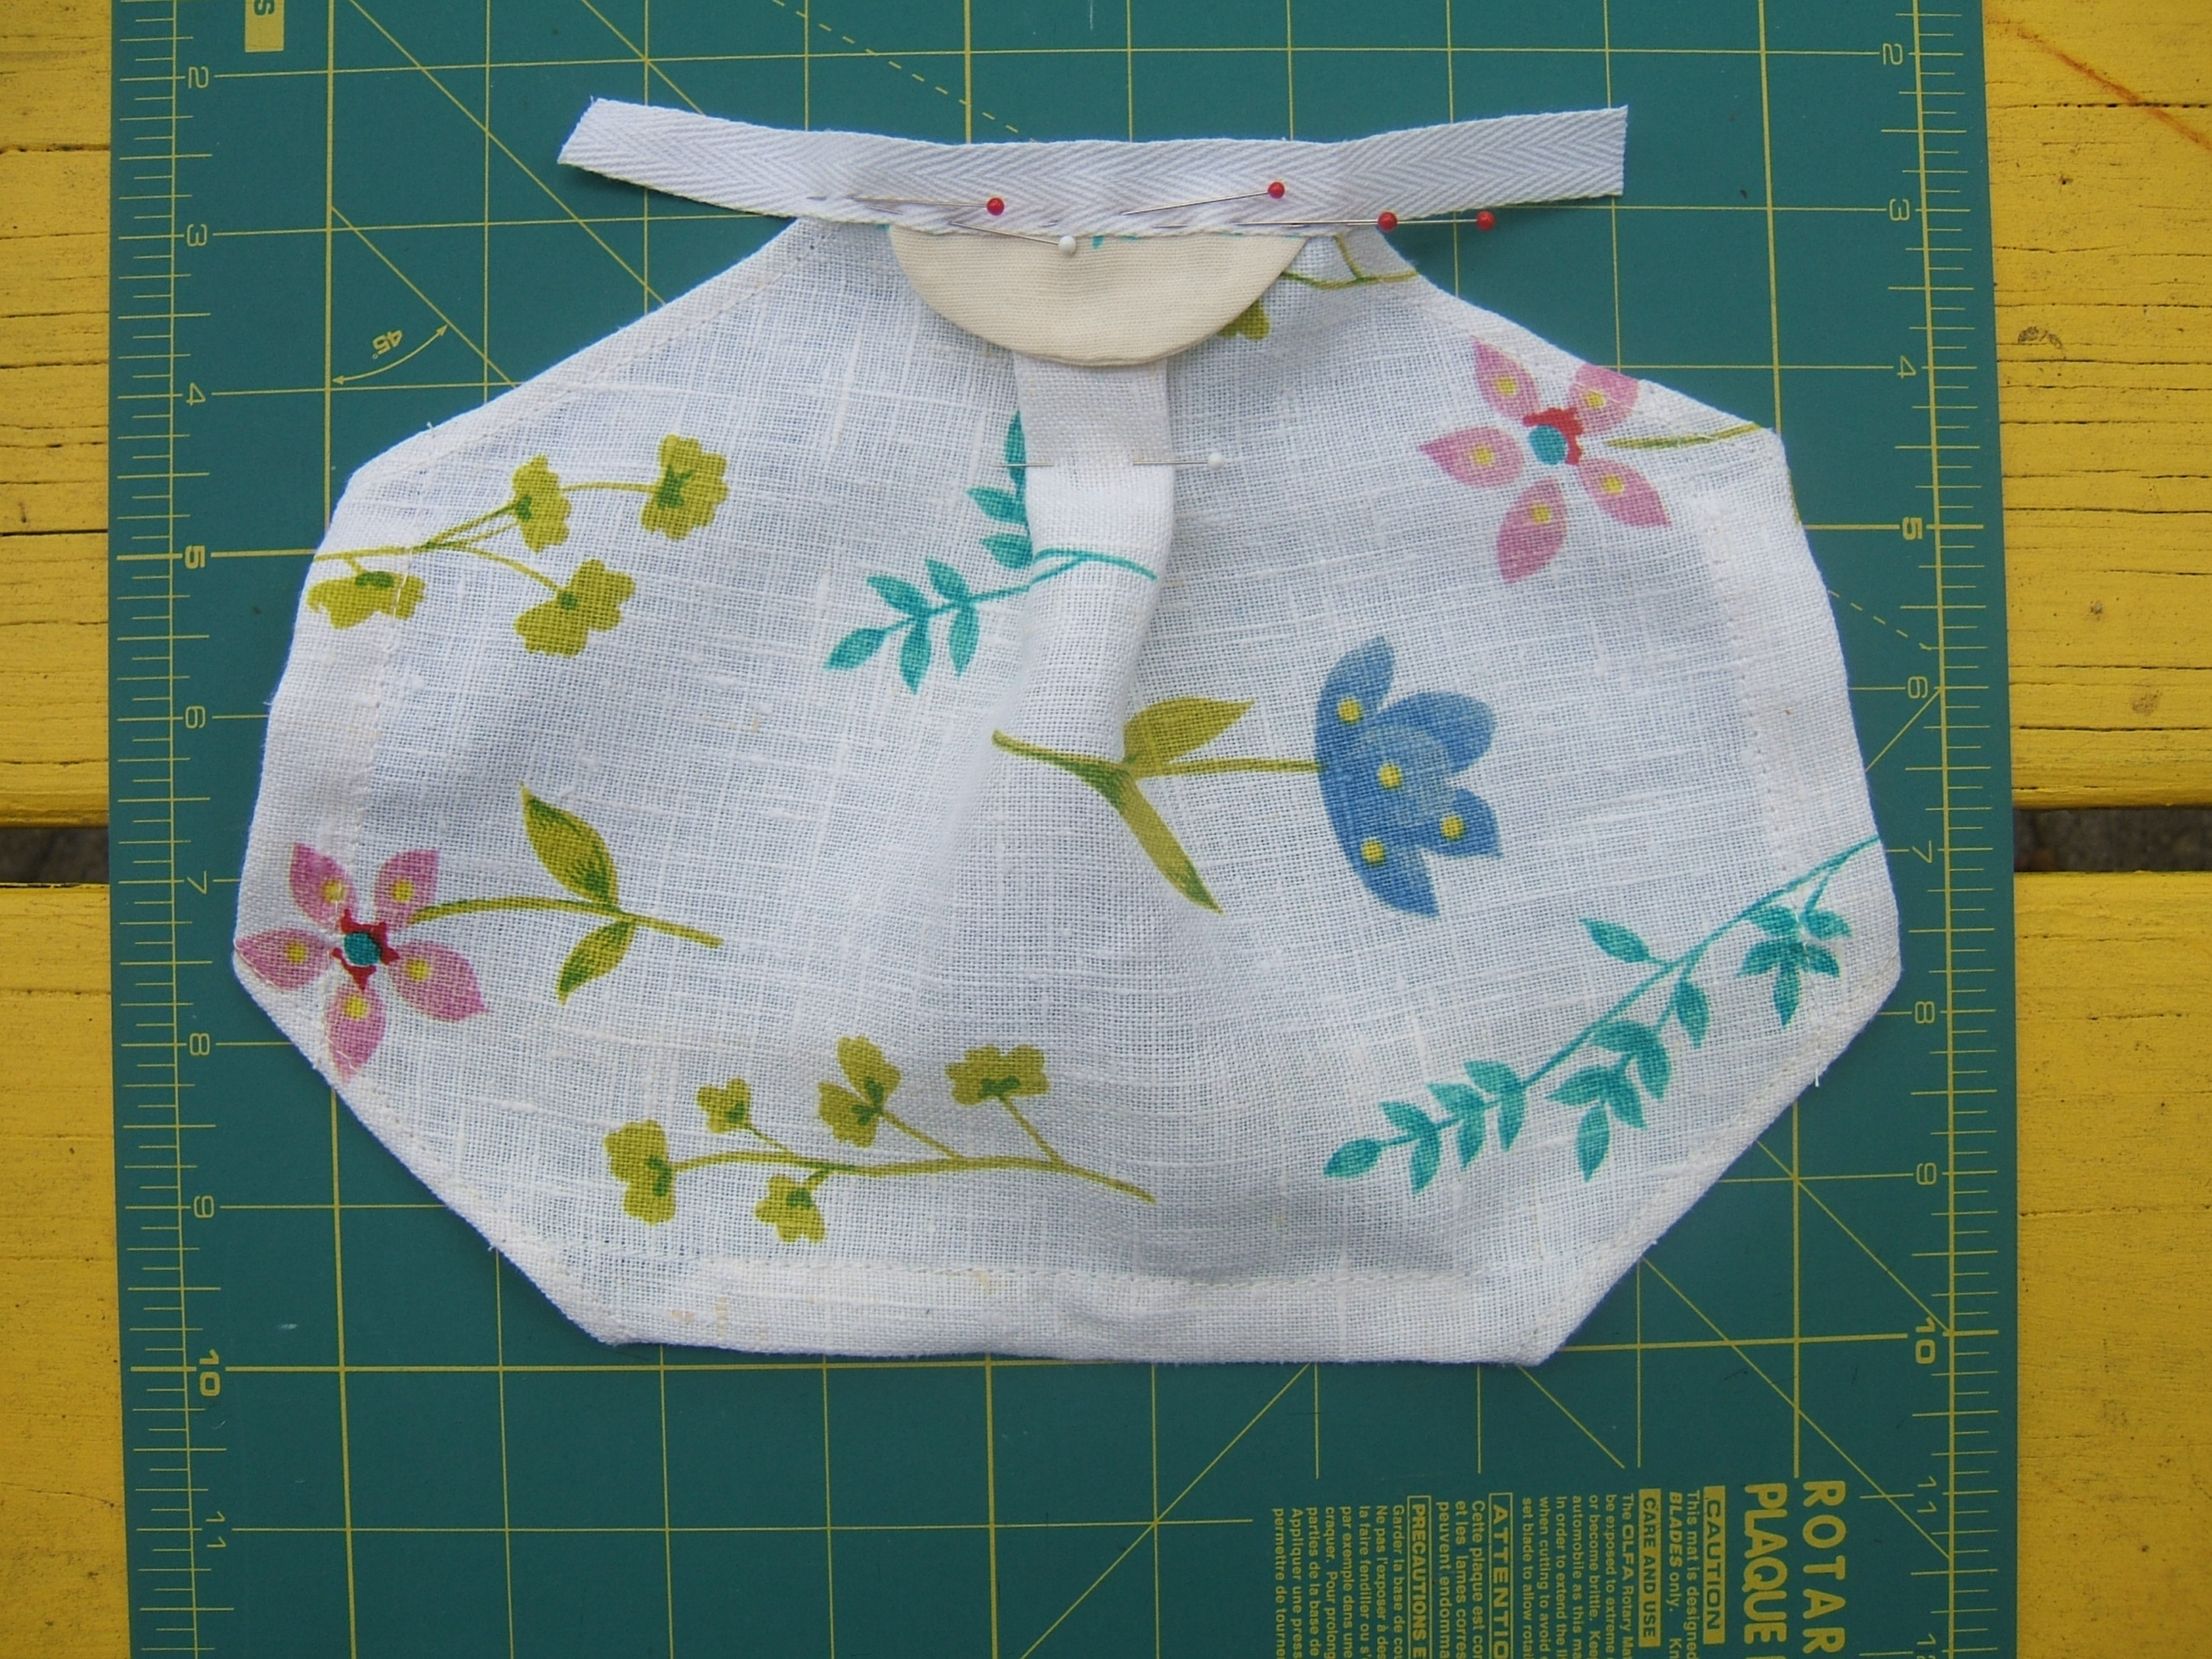
After sewing the casings, I marked one inch to each side of the center line, creased on the marks, and brought the creases to meet at the center line, thus forming a box pleat on the right side, and pinned the nose shield to the box pleat
I think I'll baste all this in place before adding twill-tape facing to the sandwich.
⁂
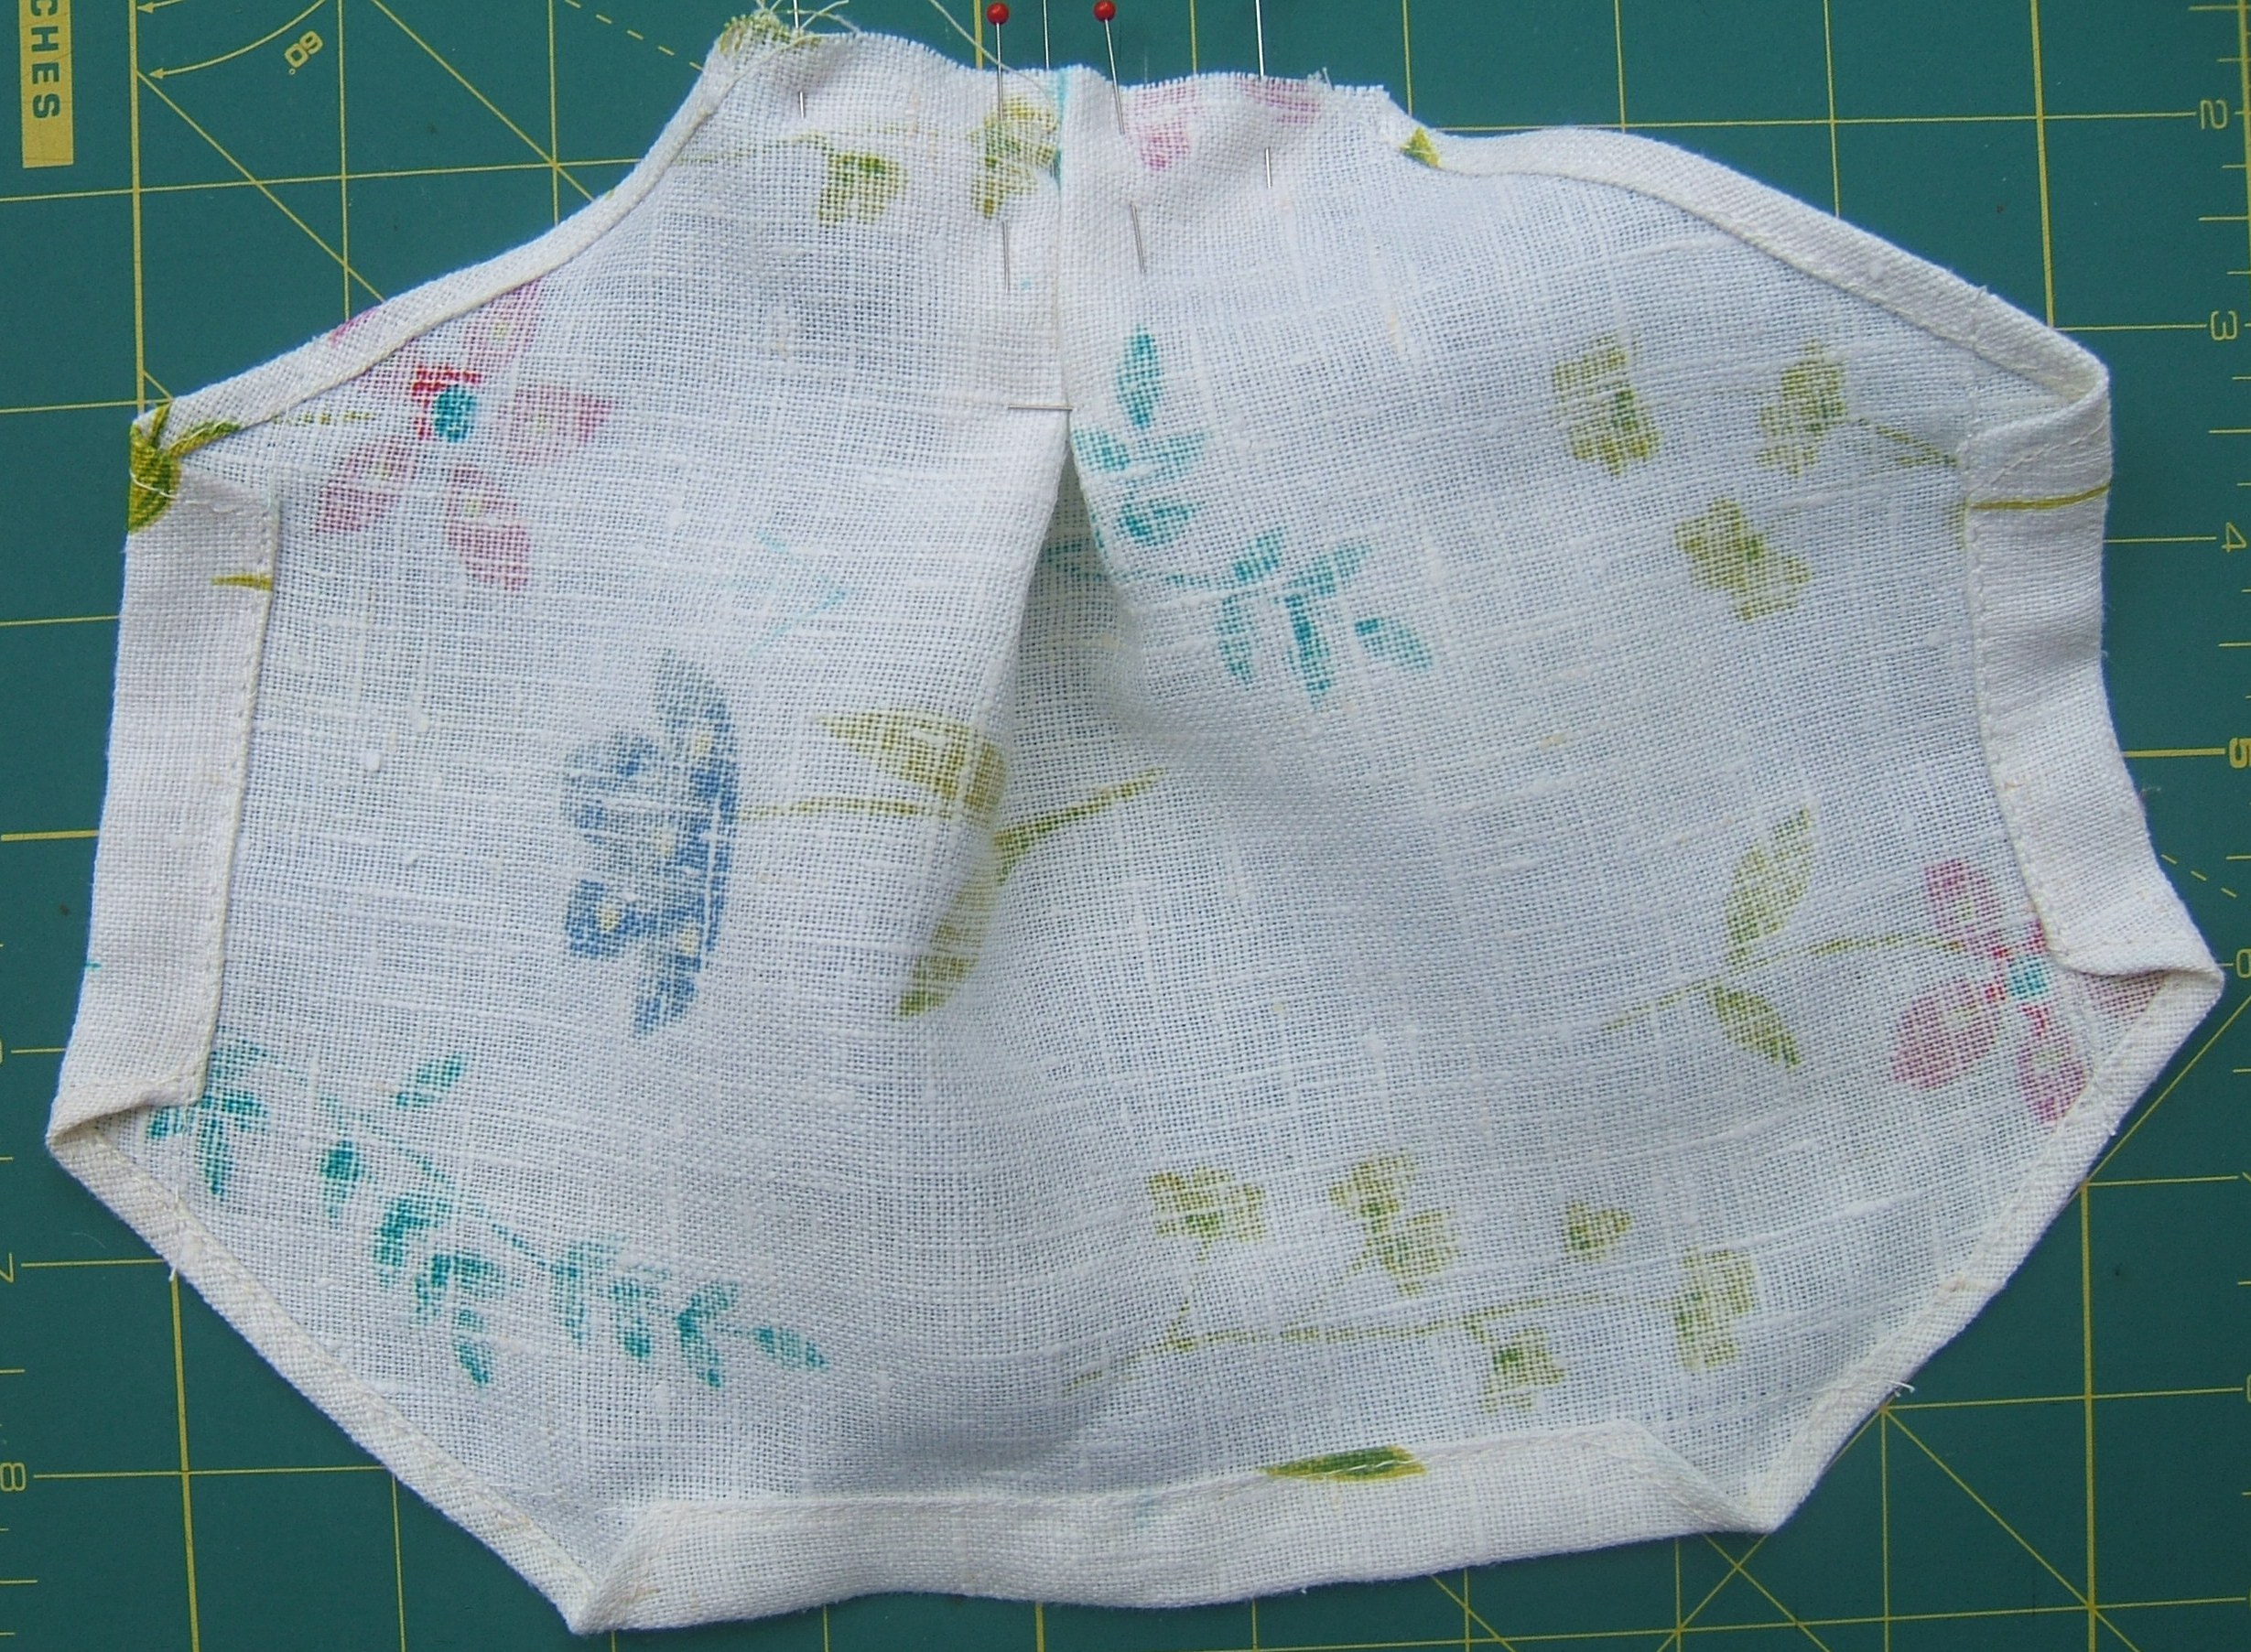
I sewed as close as I could to the raw edges of the mask and nose guard so that I wouldn't have to take those stitches out later.
I used a ruler to mark a line a quarter inch from the raw edges, pinned a piece of twill tape with its edge along that line, and carefully sewed exactly on the edge.
I turned the facing to the wrong side, tucked the ends under, and pinned it into place. My intention was to trim off the bits of tape that stick out, but I see that that would leave a raw corner, and at a point of strain.
I also see that I need to hot-press the layers flat before sewing the free edge of the facing.
And there matters stand at bed time.
I think also I need to edge-stitch the fold on the right side, to keep all those layers flat.
Well, well. I measured the chin casing, five inches, the pleat will take out two inches, I took down the elastics shoebox, the bag of quarter inch was right on top, and one of the scraps in with the coil was exactly three inches.
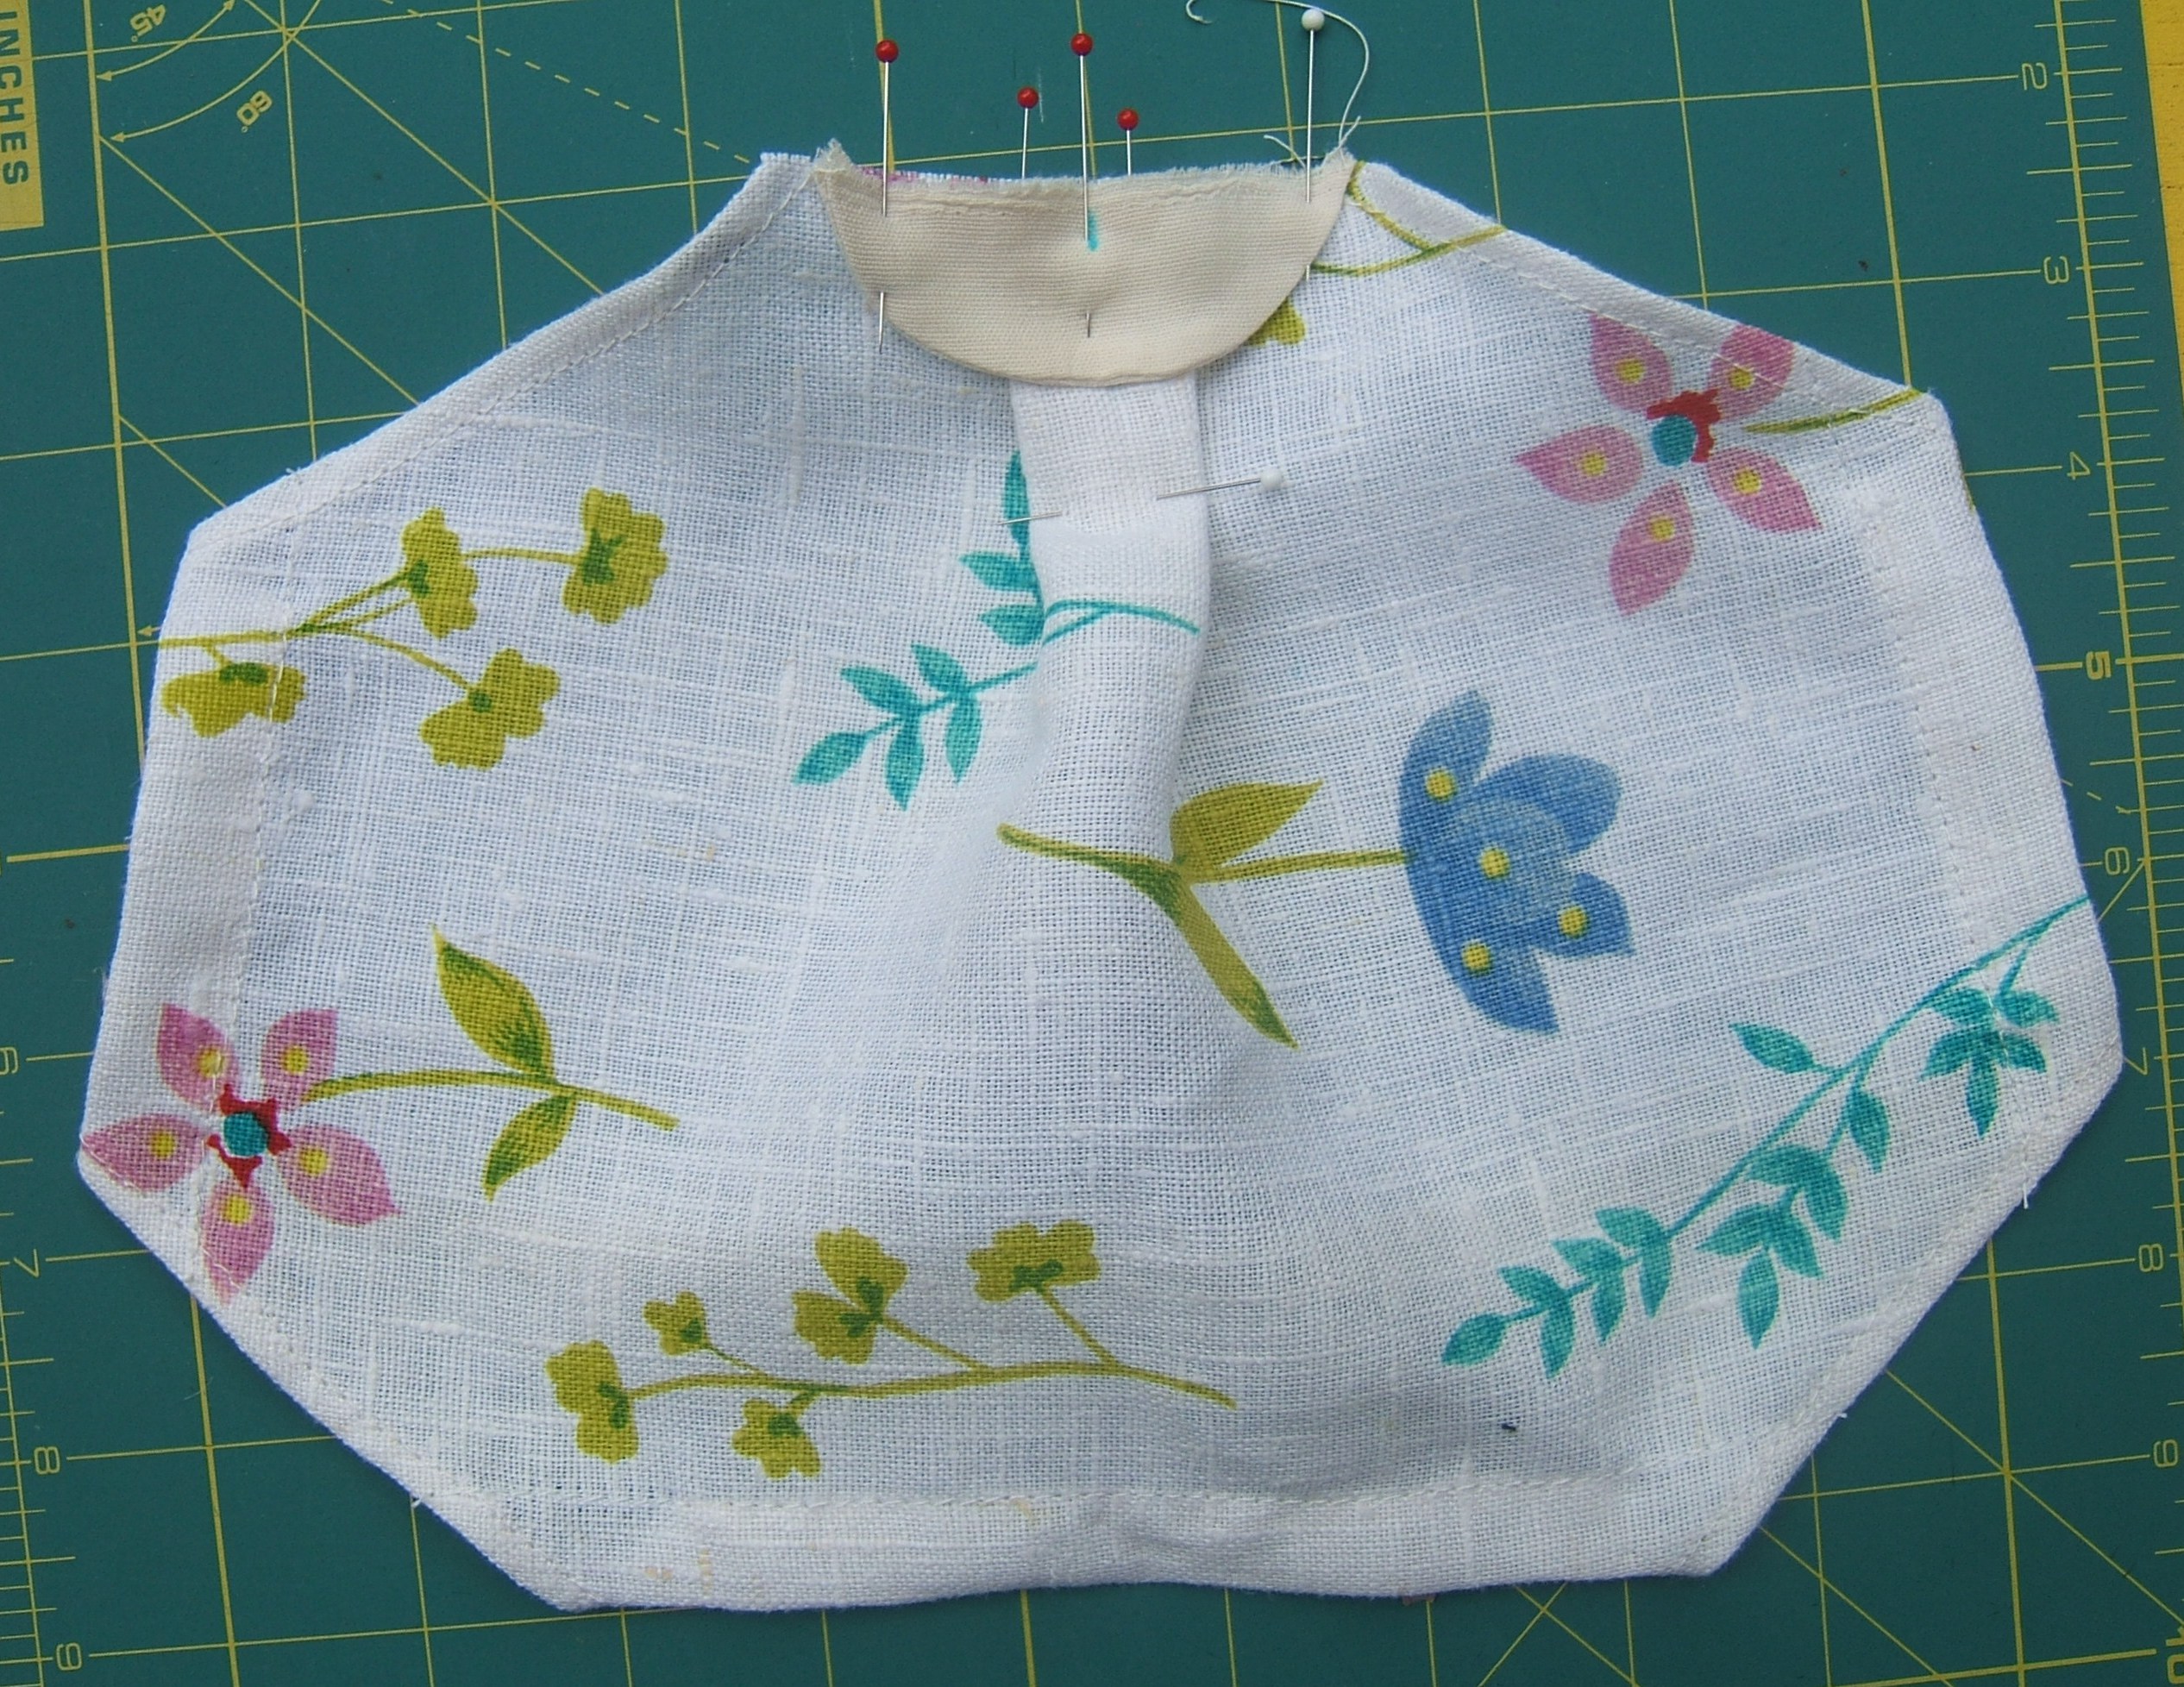
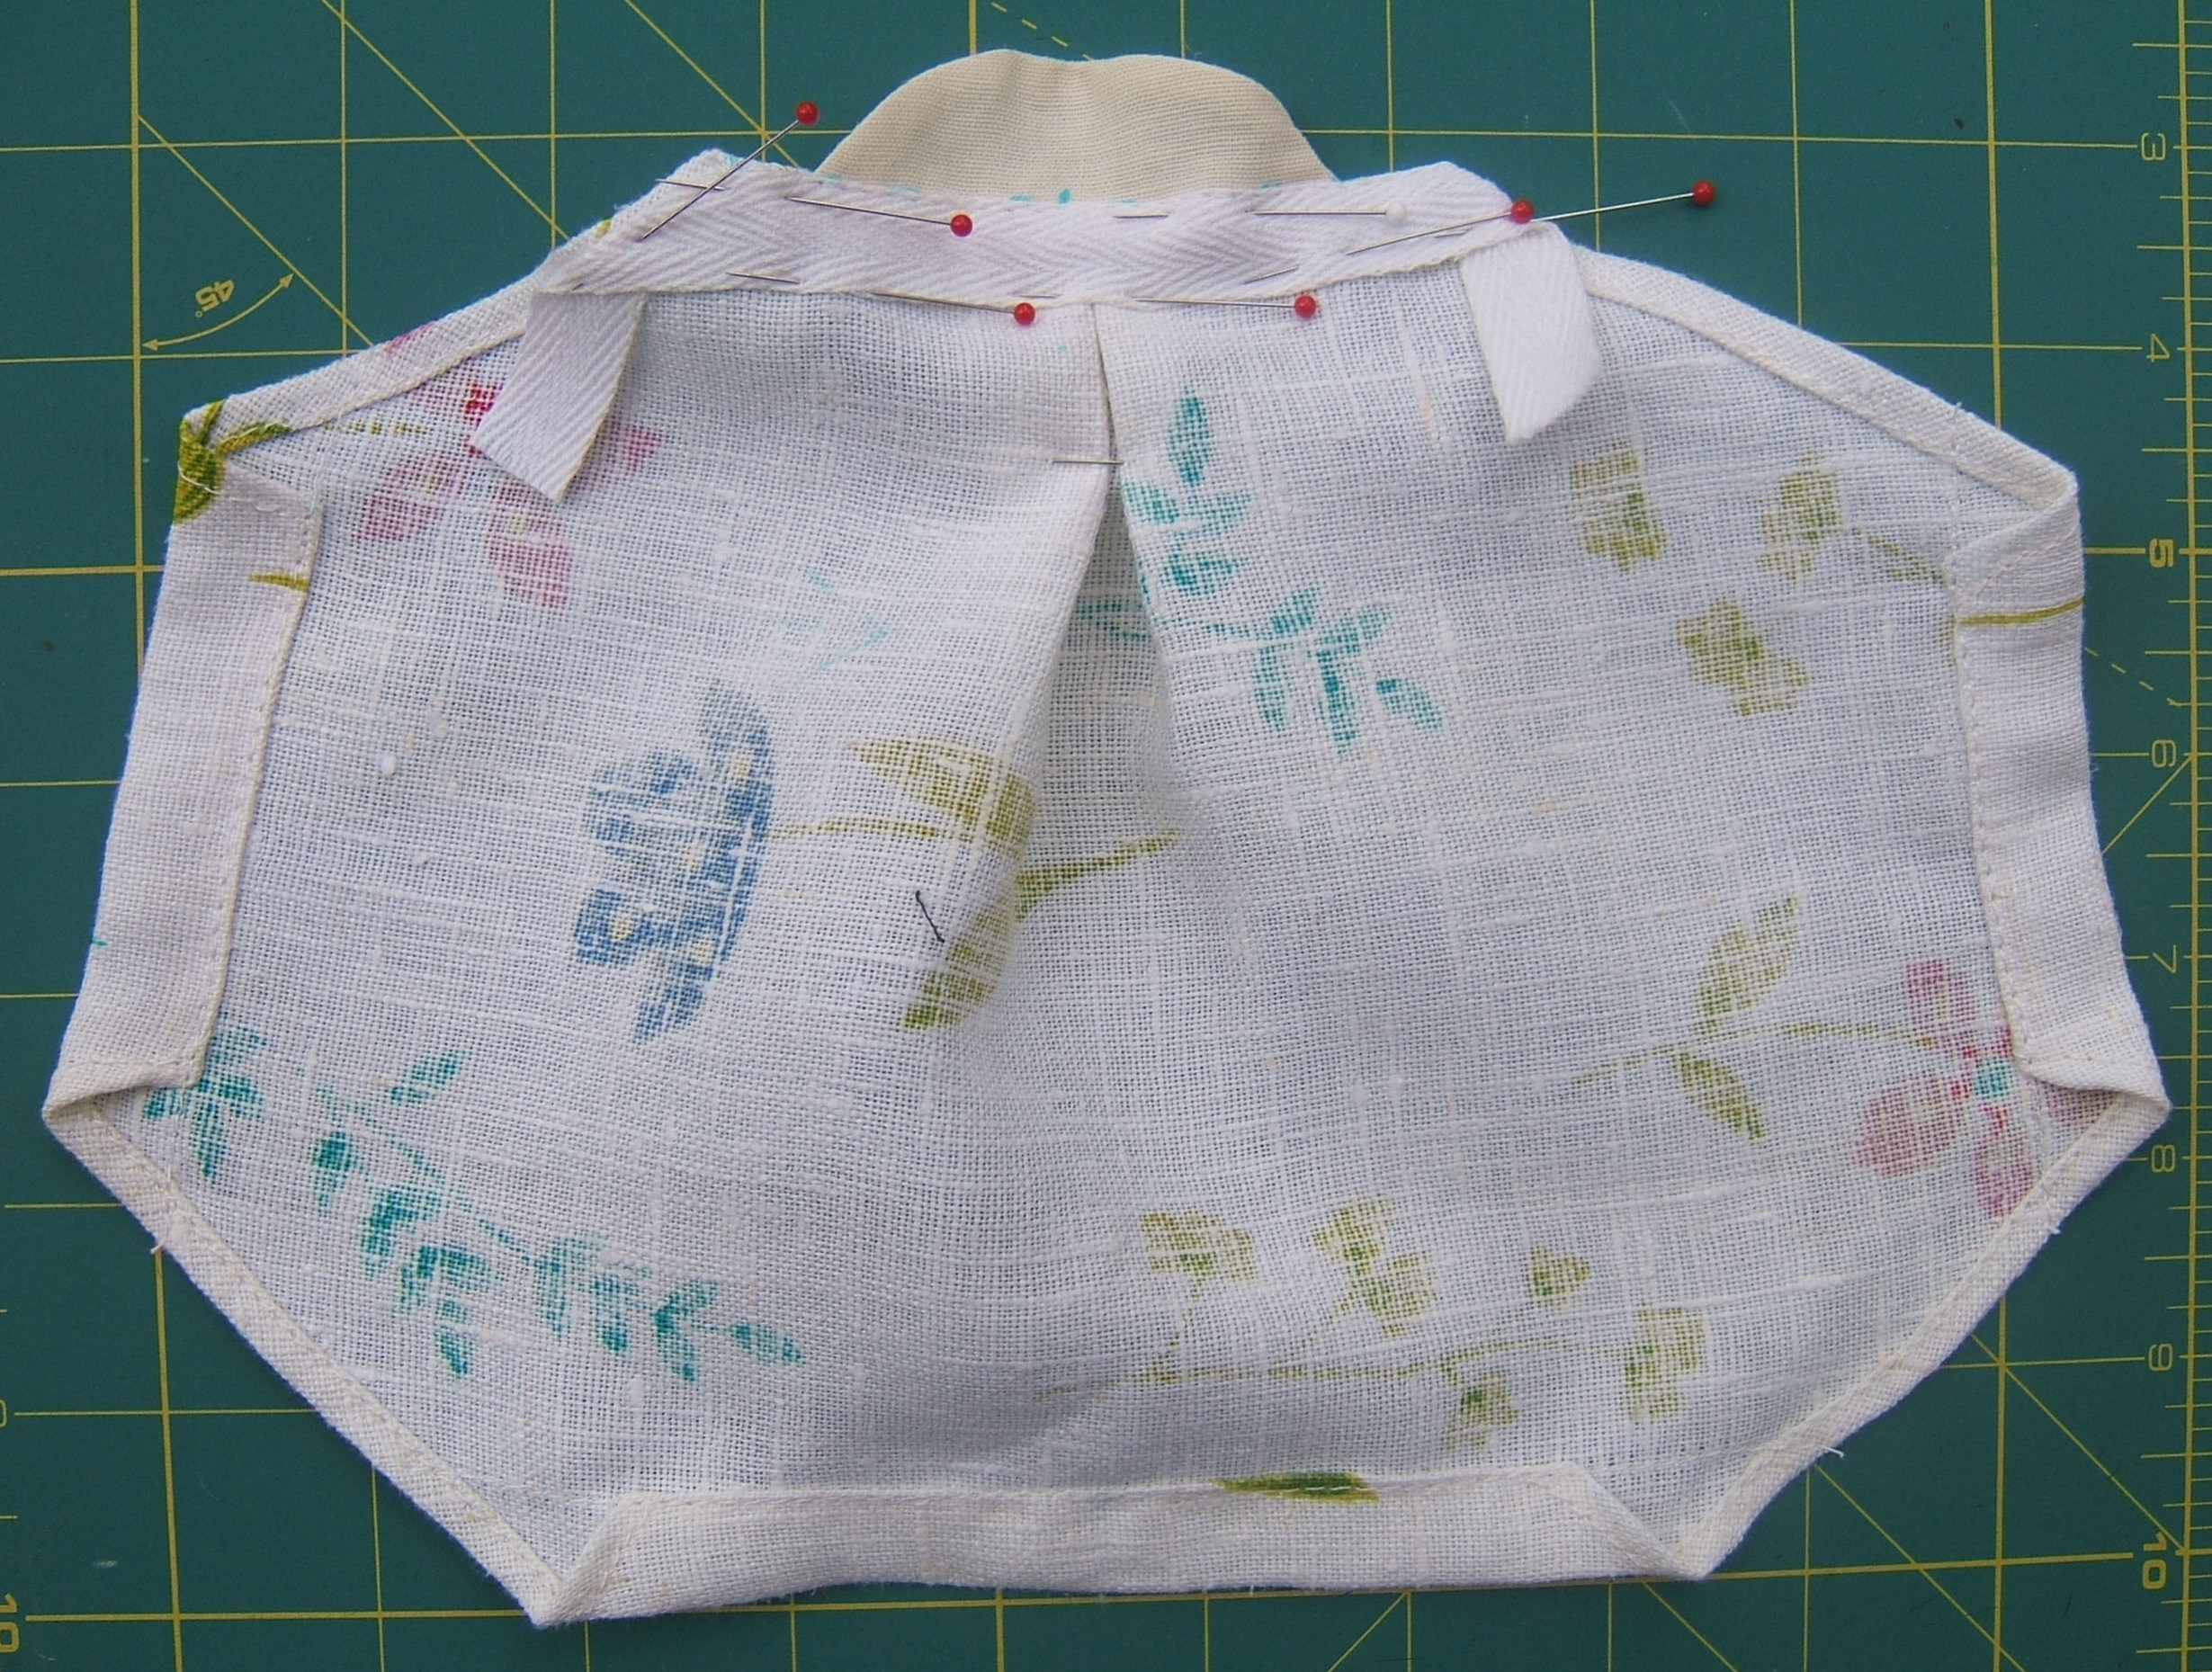
Instead of folding the facing to follow the edge of the mask, I shall fold it at an angle sharp enough (pin on your right) that the end can be folded underneath it (pin on your left).
With the end folded to the outside, as in the picture, I can see exactly where to trim it before tucking it inside.
I think the pleat and the facing would raise the mask enough without adding a nose shield. (Of course, someone without a keratosis on the nose wouldn't need to cover it above the nostrils.) And, as I noted earlier, that would make the angle of the bias edges closer to the regular hexagon shown in the picture I'm copying.
Well, it works, but I really want to try again without the nose shield, which pushes the facing down to press on my nose.
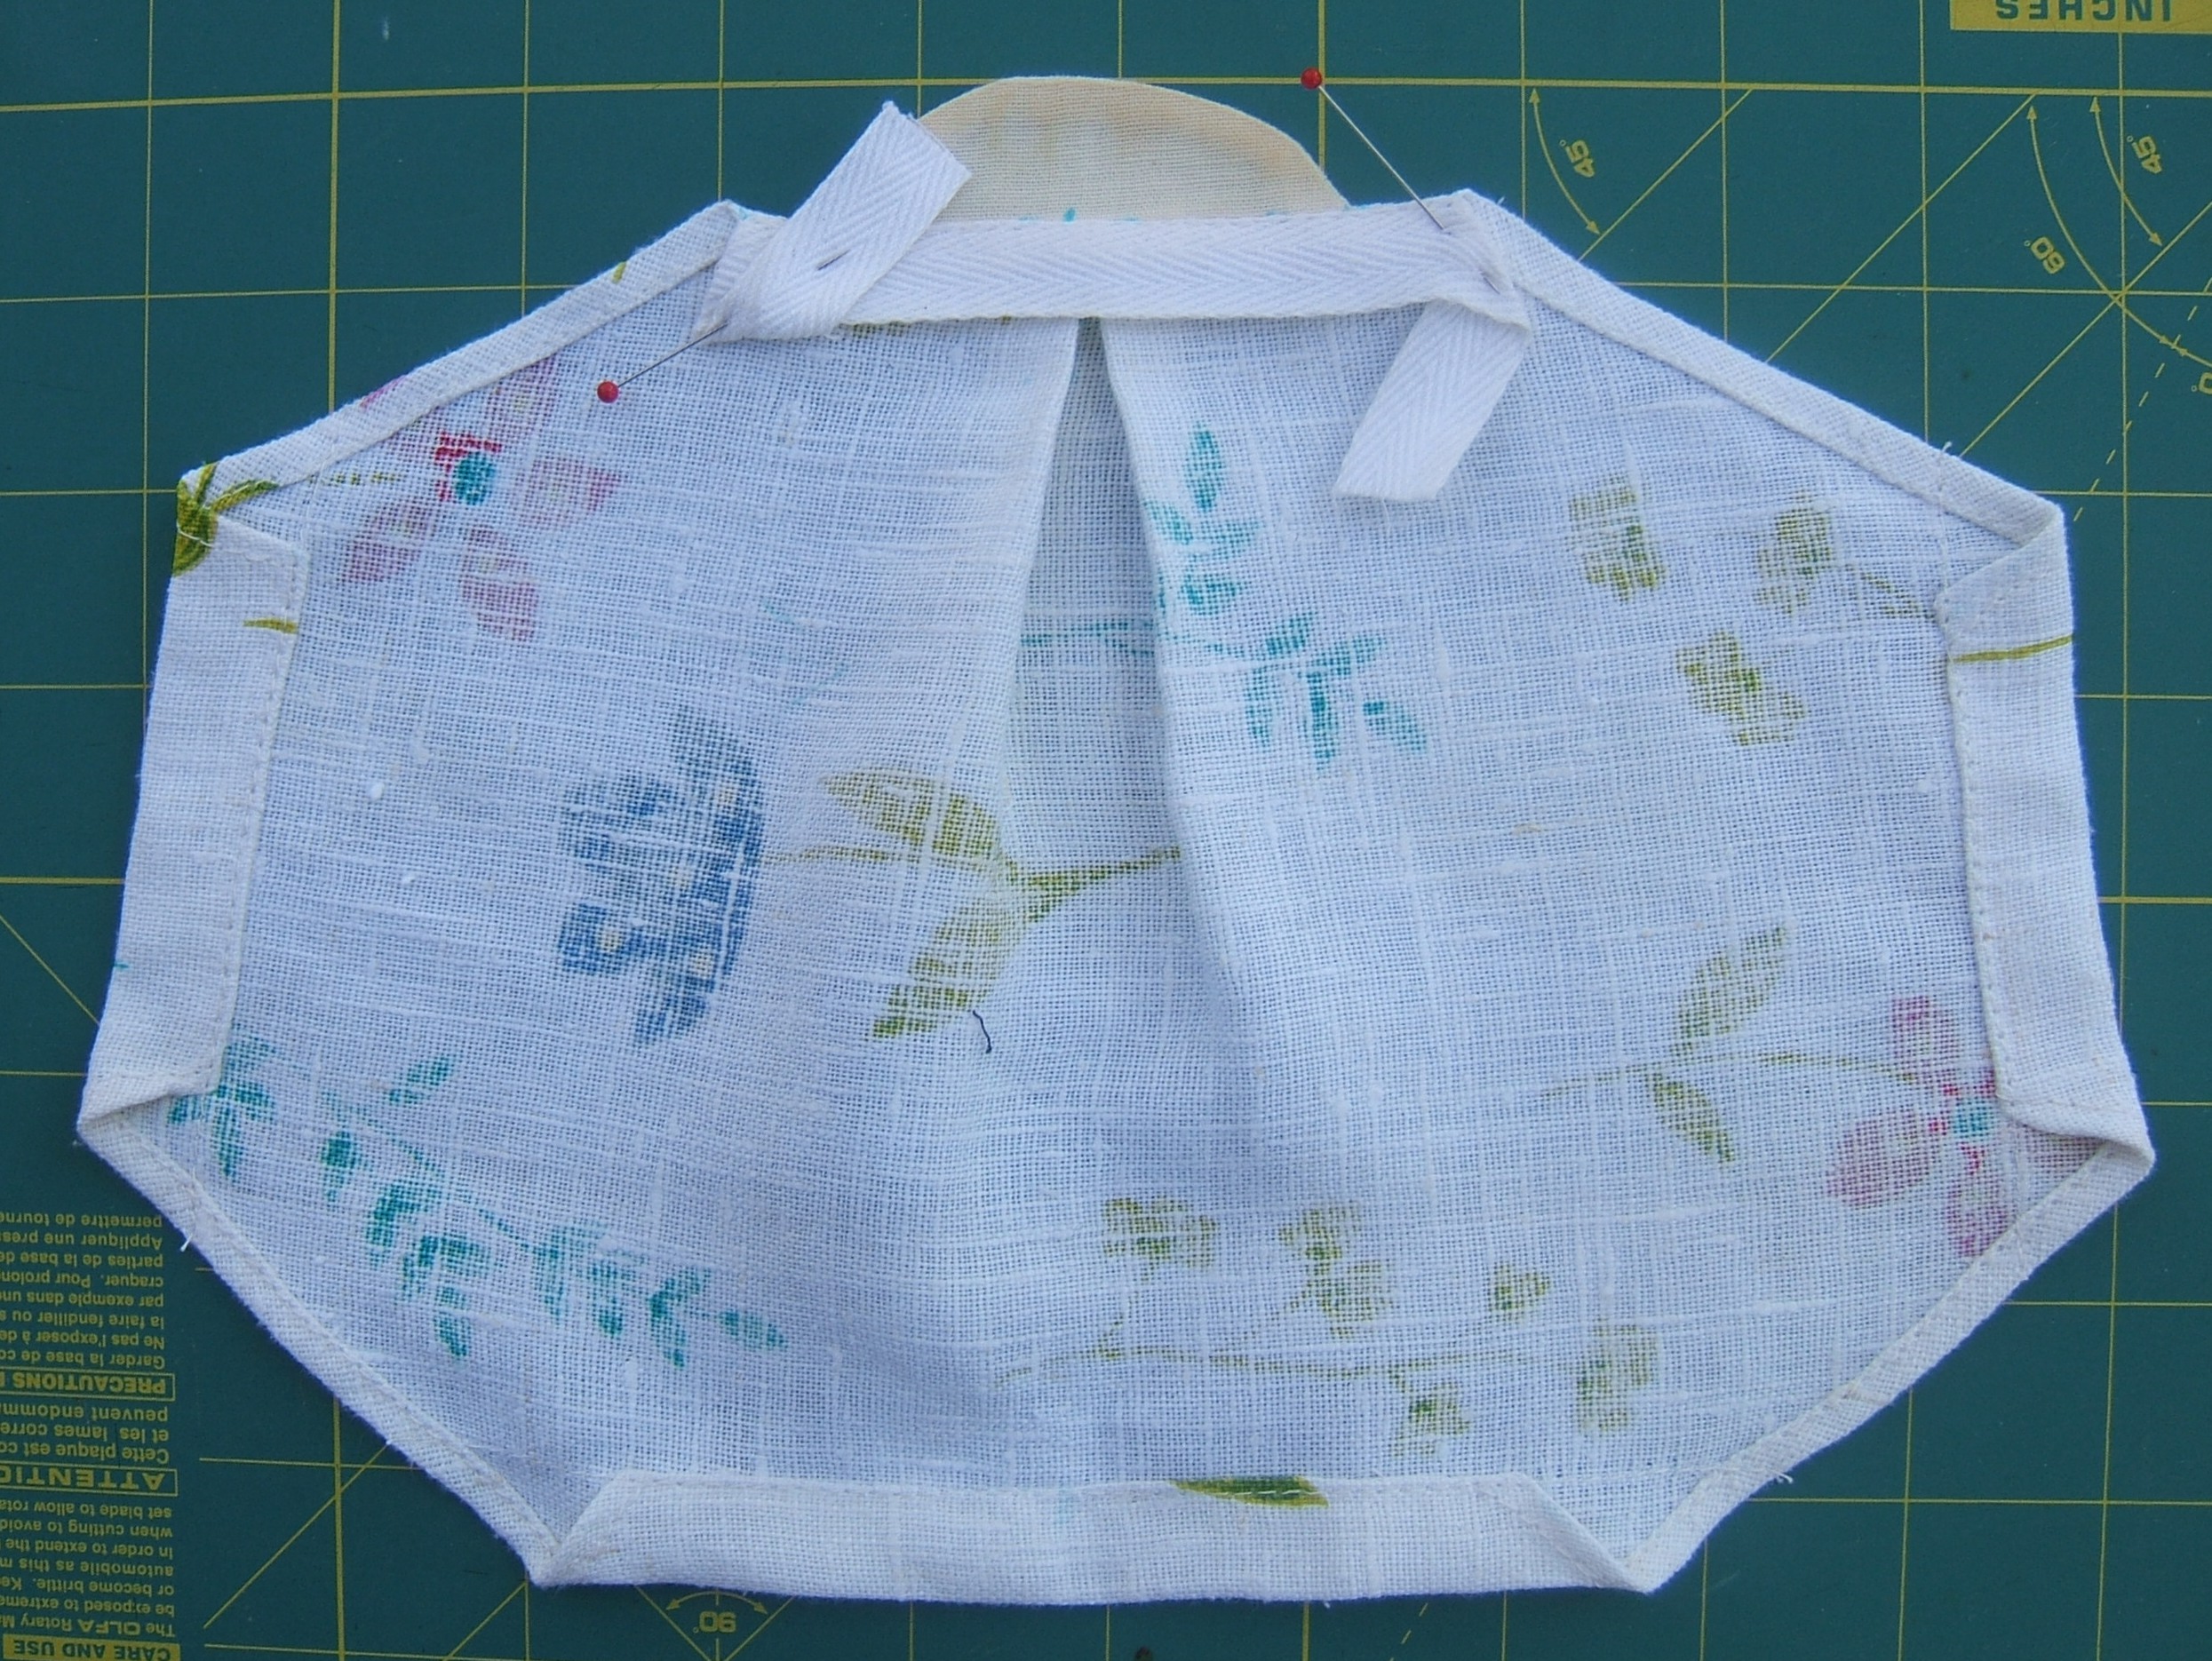
Note that the end of the tie is pinked in the picture; I hemmed it later.
After inserting it into the casings. I'd intended to use the tie from my old mask, but the hems prevented me from pulling it out of the casing. Just as well; I'm taking the old one with me on tomorrow's ride, and suspect that I'll change into it before I get back.
I do like the way it comes well below my chin, giving a larger filter for easier breathing.
But the bias hems will come closer together; perhaps I can cut the bottom as a curve and gather it, or run the elastic through a tape facing. Elastic running all the way to the tie casing would be a good idea.
Now that I've worn it, I see that the nose tab stands away from my nose and is quite useless at deflecting sunlight, so I have decided to pick the mask apart for its parts.
I'll cut the top slant to meet the pleat, and round off the bottom so that I can make a casing, perhaps a hem, perhaps a tape facing. A hem would be easier, if I can ease in the curve. A gathering thread will help.
Making the slanted hems wide enough to thread elastic will take at least a quarter inch out of the pouch under my chin, and rounding the corner will take out even more. But I think it will still be loose.
I marked key points before pressing the mask, and didn't press the creases out thoroughly. Surprisingly little needs to be cut off.
I used a soup plate to round the corners on the lower border. The curve on your left is neater than the curve on your right, so I shall cut on this curve, then fold the mask in half and trim the other corner to match.
I drew a fold line from the intersection of the fold line of the casing and the fold line of the hem to the corner of the pleats. Then I drew a cutting line half an inch from this line. The new cutting lines cross the old ones just where they cross the fold lines of the side casings.
This will make the side casings a hairsbreath shorter, and making the quarter-inch hems at the bottom into half-inch casings will make them a quarter inch shorter.
The ends of the bottom hem should taper to the original width between the ends of the elastic and the end of the casing -- but how do I get the elastic in? Eventually I saw the obvious: sew the middle first, install the elastic, then sew the ends.
When it came time to do it, I had a better idea: Sew the entire hem at casing width, install the elastic, then unpick the hems and re-stitch narrower.
⁂
While sewing the upper hems, I realized that I have another reason to taper the elastic casing: If I don't, there will be an exposed raw edge inside the tape casing, and this casing is slid up and down on the tape every time the mask is put on or taken off. And the fabric is loosely-woven linen.
⁂
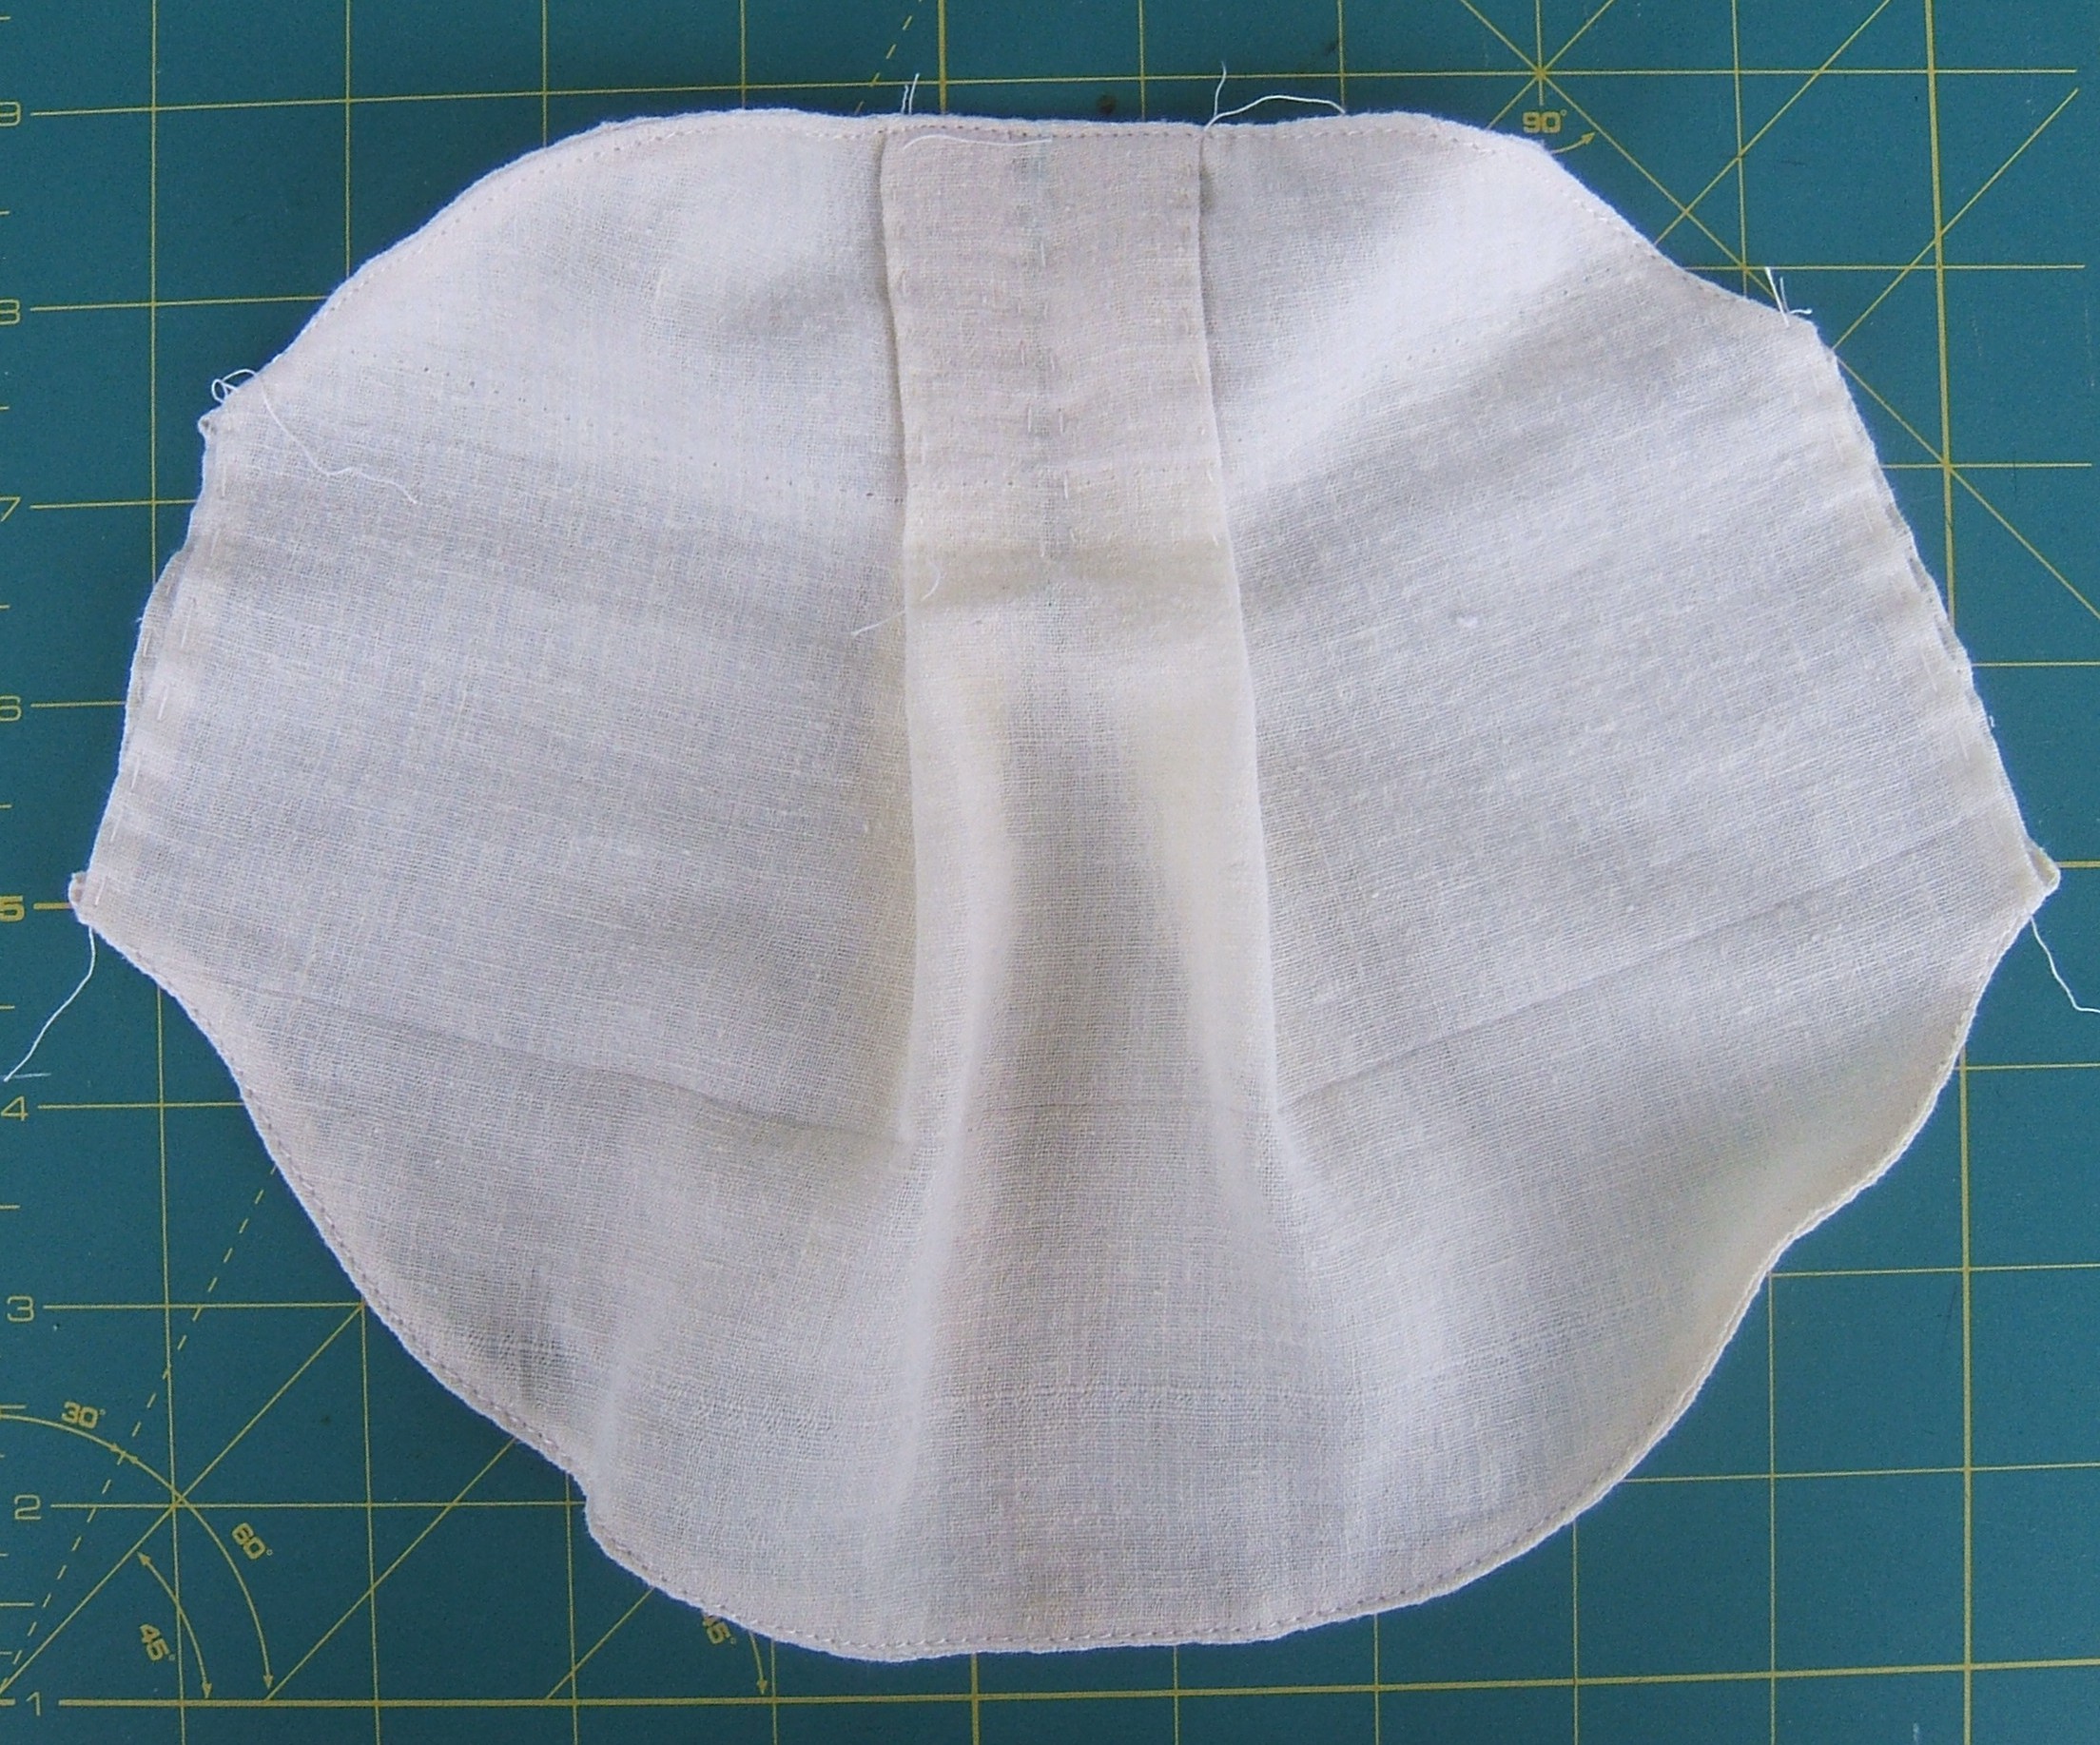
When turning the tape facing to the back, I discovered that the pins had lost their grip on the pleat and it was spreading open a little at the bottom of the facing. Then I realized that that was all to the good — the pleat ought to fan out from the top of the facing.
⁂
The pleat was fanning out a bit more by the time I got the ends of the facing tucked under and pinned. I stitched all around the facing, starting across the top, and kept things smooth with my fingers. Stitching a crease in is more efficient than pressing a crease in.
It's still not right. I think I should use quarter-inch tape for the facing, or at most three-eighths. And the pleat could stand to be a bit bigger. I don't think I'd have to widen the rectangle I start with to do that.
Humm. If I'm not happy after I've ridden with it, the facing could be picked off and the pleat re-sewn without changing anything else.
After my nap, I shall pin the side casings in and install the tie, so that I can measure the elastic against my face.
Now I'm thinking about how to make the mask from double fabric. My first thought was that that would eliminate the need for a facing over the pleat, but the pleat needs a bit of tape there to take strain. I do have some eighth-inch ribbon.
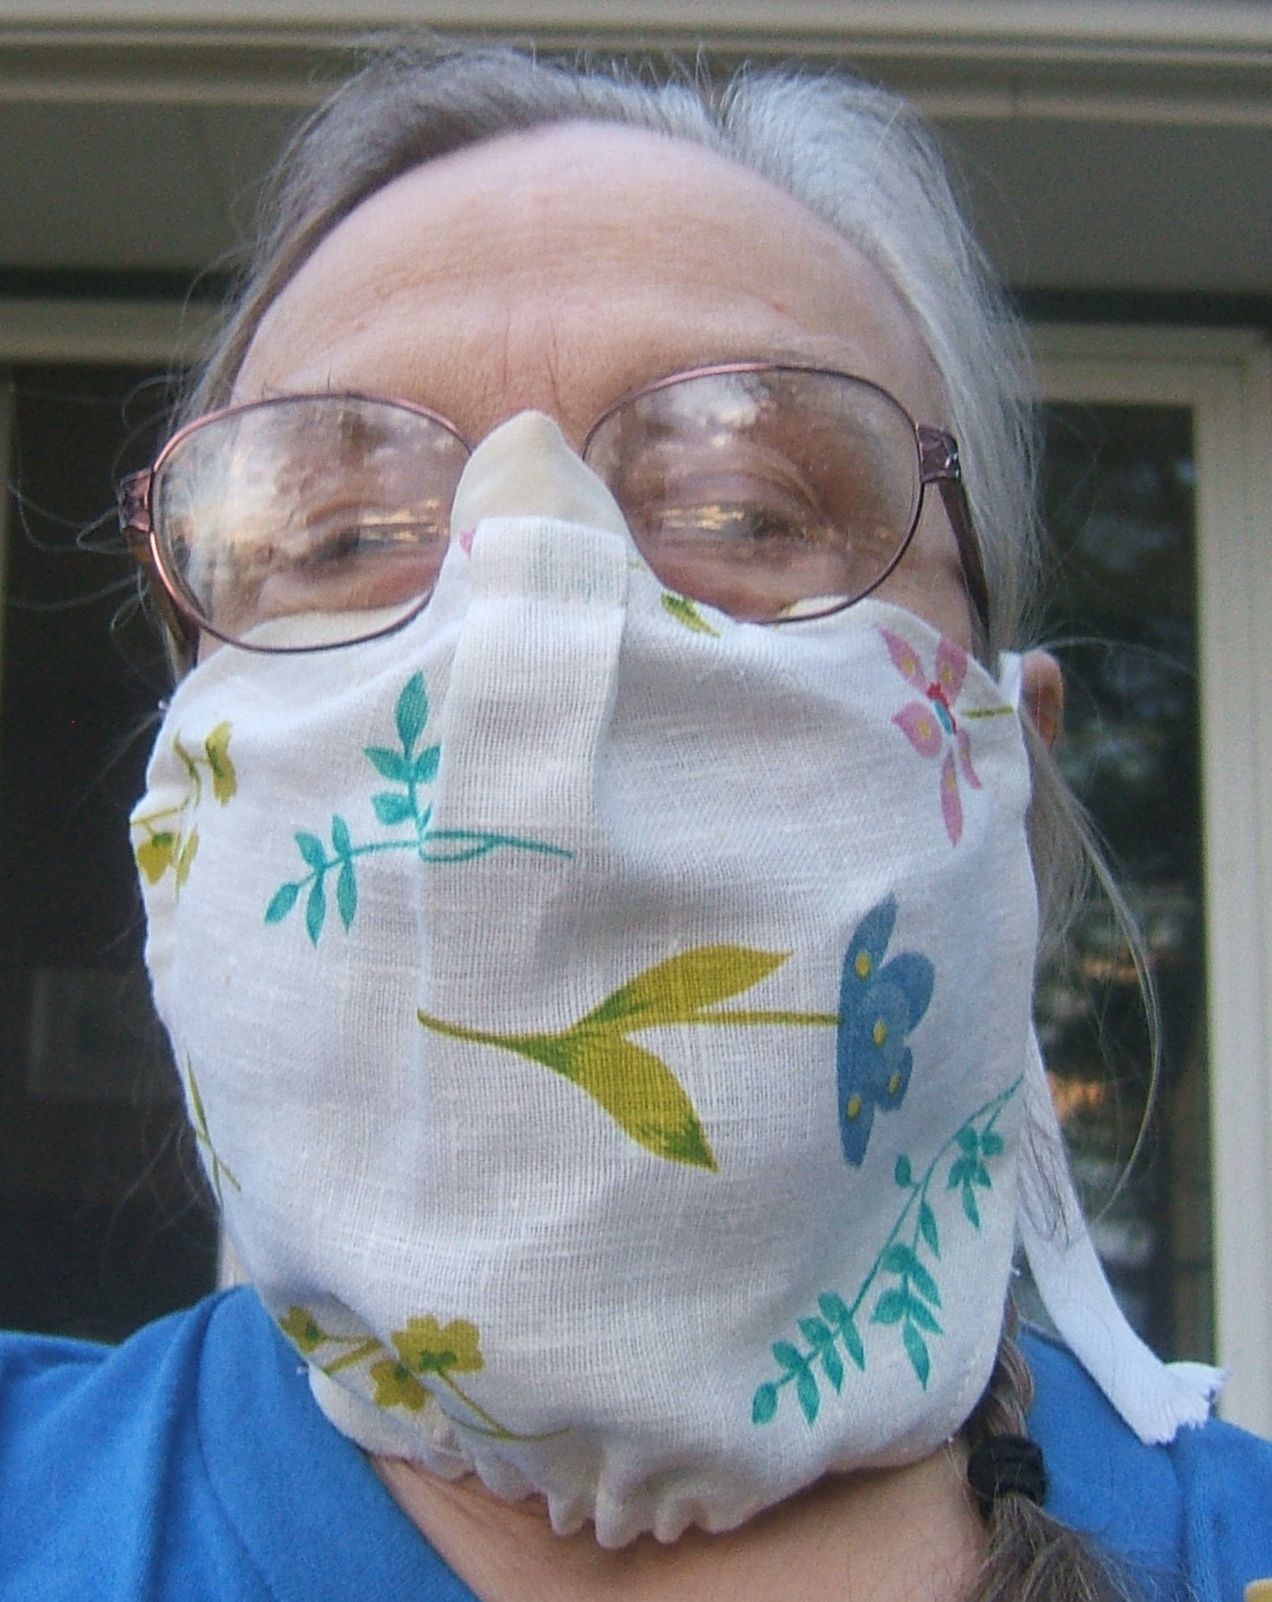
Well, well! Putting elastic under the chin makes the mask fit better at the top.
I think I can wear the mask as-is, but I do want to make anther with a wider pleat and a narrower facing.
I pinned the side casings and put the tie in -- at && inches it is definitely too long -- then pinned elastic to one side of the elastic casing and put the mask on. Then I pulled the elastic to a comfortable tension and pinned it to the other side.
I matched ends and marked where to cut the elastic to make it correspond to the other end, then cut off five and a half inches of elastic, marked the first-pinned end and marked the other side to match. As best I can measure along a curve with a straight ruler, it was nine inches between the marks.
Then I pinned the elastic between the marks and took the picture.
⁂
Tapering the ends of the casing was unexpectedly easy. I just folded the end to the narrowest-possible hem, and the rest snapped into place when I gave a slight tug.
I could have paid more attention to balancing the print.
Virtue: since the bottom is elastic, I can lift it to drink out of a bottle. This sounds like something I could wear on the bike in freezing weather, but it has been my experience that any protection (other than thick grease) anywhere near my nose collects condensation and soon feels very cold.
Epiphany with regard to the two-layer mask: If I pleat the mask and the lining before sewing them together, the pleats will support each other and no tape will be required.
Running the elastic between the layers instead of folding up a casing will make the mask half an inch longer, which I think will be good; an air pocket under the chin filters air that would otherwise leak out around the edges.
I intend to fold the double fabric to make casings for the tie, as this part is subject to heavy wear when worn as Variation the Fourth.
So I still need to start with an eight by twelve rectangle.
Drafting the pattern:
I began by getting out a sheet of spreadsheet paper. I thought I had some stiffer paper, but I must have used it all up.
Using the lines on the paper, I drew an eight by twelve rectangle. Then I used a ruler to draw lines three-quarters of an inch from each end and down the middle, and used the old diagram to mark the endpoints of the fold-ins for the casings.
Then I dug out my old drafting tools, which include a 30/60 triangle I'd forgotten about. This not only makes it easy to draw a hexagon, it eliminates the need to bisect an angle to find the center of the circle I intend to use as the lower cutting line.
On the other hand, the only compass big enough to draw that circle is dividers, and I can't figure out how to switch one point for a lead. Perhaps in the morning.
I didn't get out the board itself, since I don't intend to use the T square.
I scanned this in color so that you could see my mistakes. First I drew the circle on the wrong side of the paper, taking two tries to get it right. Then I used the 30/60 triangle to bisect the 120° angles between the side of the rectangle and the slanting edges, and found that the lines intersected on the center line as they should. Put the point of the dividers on the intersection, scratched a circle tangent to the horizontal cutting line at the bottom and the slanting . . . seamlines, added seam allowances, bisected again, drew another tangent circle.
Among the drafting tools was a stencil for drawing ovals of various sizes. I used this to round off the corner between the slanting edges and the side of the side-casing tab. In practice, this was a corner with the circle I'd just drawn, because the point of tangency was just where the slanting line met the tab. (Now I'm worrying: did I add seam allowance to the casing tab? It looks awfully narrow.)
I used a protractor to round off the corner between the top slanting edge and the top of the mask. Again, this took all of the slanting edge. I'm worrying that the curve comes too close to the expanded pleats, and I don't think that the hem should curve up just where it passes below the eyes. On the other hand, the curve is everywhere lower than the slanting line was.
I used the same oval stencil to round off the upper corner of the side-casing tab.
Next step is to select fabric. I want something soft, not too thick, and not so tightly woven that my breath goes around it instead of through.
And it would be nice if it were a solid color, or a "ditzy" print that looks solid from a distance.
Ooh, I found a scrap of white-on-white quilting cotton so lovely that I measured it even though it was obviously too small.
I've got two unbleached fabrics and what appears to be most of an old plissé nightgown. I thought the gown was dirty white, but it turned yellow when I put it into a bucket and ran water and detergent on it.
The thin, heavily tracked -- they call it "crépe when it's done on purpose -- muslin is a runner up to the plissé. I think I'll dispose of the fabric that appears to be a piece of an old sheet and a few unrelated scraps. I can get a couple of sweat rags and some skillet wipes out of it.
I wonder where I got the tracked muslin?
After a rather prolonged soak, the nightgown is hung up to dry. The foxing didn't come out, but doesn't extend into the piece I plan to cut off. It would appear that the nightgown originally had a yoke.
I opened the bottom of one seam and drew a thread across the bottom of the back.
I wonder when I began to prefer flat fell to french seams? When I put it on with the darts in the right place, the crease where the hem used to be drags on the floor. Perhaps it wasn't my nightgown; those darts are very small. But the dart control could have been in the yoke, and the gown probably dates back to when I used commercial patterns. (But I don't recall a nightgown pattern in my stash, and I do have the pattern for a dress I made under my older sister's supervision in the late forties.
Probably time to take everything out of the pattern trunk and look at it; I had forgotten some of the items on top of McCall's 3359.
I cut two 8" x 12" rectangles off the bottom of the nightgown, then cut around the pattern and pinned the seam under the chin.
Unfortunately, I used a cheap ruler instead of the pattern to measure the 12", and it came out a tad short. I don't think it will matter.
I intended to pleat and sew the nose seam after sewing the underchin seam, but the bobbin thread was running straight through loose loops of needle thread. After much poking and puzzling, and the use of a flashlight to read words indented in metal, I got a sort-of-tolerable seam by setting the upper tension on maximum, but by then I was running out of light.
I suspect that it's time to haul the White to Lowery's. I don't think it's *ever* been professionally cleaned and adjusted.
It would have been easier to form the pleats before sewing the chin seam, but not much easier, and this way I'm in no doubt as to which is inside and which is outside.
I found the center of one side by folding and rubbing a washout marker on the crease, then used the pattern to mark lines on each side of the center mark. Then I transferred these marks to the other piece by rubbing a marker over pins woven into the marks, and used a ruler to connect the dashes. Connecting them wasn't really necessary, because I pinched at each end and pulled to form the creases.
I folded each crease to the center line to make an inverted pleat, which will be a box pleat on the outside, and pinned.
If I didn't plan to edge-stitch after turning the work right-side out, I'd pull out the chin seam and do it over. The rest of this is going to be done on the Necchi.
I hand-basted the edges of the pleats and pulled out the pins. Machine basting would work, but hand basting is at least as quick on tiny jobs like this, and running stitch is easier to take out than lock stitch.
Then I sewed the top seam and turned the work right side out. I forgot about pressing the seam open first, but pressing such a narrow seam with the point presser stuck through such narrow openings would have been a chore, and pulling the sides apart before folding worked fine -- after I thought of putting glycerine on my fingertips to make them stick to the fabric when I was rolling the seam to the edge. The first application lasted until I was more than half done with the second seam. I pinned the fold into place, then edge-stitched by machine, length 2.5 mm.
On one side, the under-side stuck out a teeny bit beyond the side that up was at each opening. I declared this side the lining.
I picked out the edge stitching and opened the seam, then turned down the destined-to-be-outer layer an eighth of an inch, and turned in the lining a tad under a quarter of an inch, so the lining won't stick out beyond the outer layer when the casing is turned. I hand-basted these folds.
And there the situation stands at nap time.
I had a visitor this morning, and as I was lying in bed debating whether to wear the octagon mask or the old gauze mask around my neck while I was waiting for her, I realized that the point ot putting a box pleat on the outside was that the inverted pleat on the inside spreads out to the same shape as my nose.
I should make a mask in which I sew the mask together and turn it right side out before forming the pleats.
The edge-stitching under the chin is fourteen inches long, subtract an inch at each end for the tie casing, twelve inches left, elastic probably won't reach all the way to the tie casing.
My notes on the octagon mask say I put five and a half inches of elastic into nine inches of casing.
I found a six-inch piece of swimsuit elastic in the elastics box; feels about right when stretched from ear to ear. It's a softer stretch than the regular elastic in the other octagon mask, the other mask is almost loose, I think that the shorters and longers add up about right.
First step is to topstitch a quarter inch from the top and half an inch from the bottom.
But I fiddled around until nap time before getting started.
I have topstitched half an inch from the bottom of the mask, and a tad less than a quarter inch from the top.
The tape on the octagon mask has shrunk, so I can never fill in the "&&" in that account. The tape now measures one yard and almost sixteen inches, and has ample ease. I cut a yard seventeen to allow for hems, and shrinkage will lose about three inches.
I tried the mask on, then picked the basting out of the pleats and tried again.
I had the other mask around my neck because I was expecting a visitor.
I pinned the elastic into place, then pinned the tie casings and tried the mask on. Having two box pleats doesn't appear to have made a difference -- and it makes this picture of the inside-out mask look better.

And it's all done. I hand-sewed bar tacks where each of the pins held the elastic. I secured the ends of the stitches holding the tie casings by stitching from one edge of the mask to the other. If I make this mask again, I'll make the elastic half an inch longer, and anchor it where the casing stitching will cross it.
But I have enough masks for the moment. I'm thinking of making a piece of wool challis I happen to have into a niqab for walking to church when it's bitterly cold.
The first niqab I made is my best one, partly because the fabric is very soft and drapes well, but mostly because I didn't improve the pattern.
The original veil was cut thirteen inches wide and fifteen inches long. It's nice that the veil reaches my ears, but an inch wider would cover the ears and provide even more filtering for breath trying to reach the edges.
The extra inch also requires an extra tug to settle the veil after I put it on, and it makes it less easy to throw the veil back over the top of my head when I don't need it. And less easy to pull back into place when I see someone coming.
Really, fifteen inches long when a collarbone- length veil would filter fine? Yes, you need that extra length to keep the veil in place when you've thrown it back and want it to stay out of your way.
I can throw my orange linen veil back, but being shorter and slicker, it doesn't stay in place as well.
to be continued when I have time
&&& take pictures of veils thrown back
I'm coming to think that the center support for the veil doesn't do anything, and it would be much easier to throw back and pull down without it.
And I'd be able to put it on either before or after my glasses.
I discovered today that if one throws the veil back before bending over to wipe the gaskets on the refrigerator doors, fifteen inches is way too short.
While complaining that I can see the white veil and really, really need a black one, I realized that I haven't looked into my box of yarn-dyed and solid scraps. I'm pretty sure everything in there is stiff, but there might be something I've forgotten about.
⁂