The sheets are showing signs of imminent failure and I still haven't found any suitable linen, so it looks as though I'm using scenery muslin again.
Yesterday I looked up wide fabrics on Dharma's Web site, and got wound up in deciding how much to order. Muslin 120 inches wide would allow me to use it lengthwise, which means that I need two and a half yards per sheet, rather than three yards when using it crosswise, but one reviewer said that the batch she bought had lost two feet of width when washed, and 96" isn't quite enough — not to mention that I might have to hem the sides; some batches have selvages, but not all.
This morning I realized that I can buy enough to make matching pillowcases. Two yards would make five pillowcases, and two yards is also the difference between four times two and a half and four times three.
I was going to say "all set but for the minor difficulty that they are out of stock", but I just checked, and their shipment has arrived.
So I need twelve yards, plus ten percent for shrinkage and straightening — fourteen yards. Nearly half a bolt; I'm tempted to make eight sheets — which would last forever, and I got really tired of the last batch of scenery-muslin sheets. And I'm not sure the laundromat has a washer big enough to shrink thirty-three yards.
14 @ $8.99 = $125.86 — that's more than thirty dollars a sheet! Plus shipping.
33 @ $8.32 = $274.56 — $34.32/sheet. But only three and a third dollars per pillow case, and I have eight pillows.
Next decision: do I also buy black raw silk to make a less-dramatic version of my black, brown, and gold pleated-skirt outfit, or would that be *more* dramatic, and it's probably better to wait until after I get around to cutting my black crepe.
On the other hand, buying new silk long johns would make more sense than patching sheer silk knit. But I'm not taking "patch silk tights" off my to-do list.
And I also need a yard of hemp-and-cotton jersey.
I started darning my alpaca tights this morning. As usual, stretching them over the stainless-steel mixing bowl I use for a darning egg revealed lots of places where it's worn down to the two strands of size B sewing silk that I knitted along with the alpaca. That was a very good idea!
I need to buy a replacement for the other stainless-steel mixing bowl. I suppose the missing bowl will re-appear if I do. It was slightly easier to use as a darning egg than the one with a lip to fit the ice-bucket cooler, and I never bother to dig the ice bucket out of the Wheelie-Kool, but use the twelve-quart bowl instead.
I just mailed off an order for one bolt of muslin, two pairs of silk tights, and two yards of hemp/cotton jersey.
It's lunch time, and I haven't yet touched the alpaca tights.
⁂
Worked some in the afternoon, and I think none of the remaining thin spots are in danger of tearing into holes if I wear them next Tuesday. It was getting hard to see black-on-black well before five o'clock, so I won't be trying again this evening. We have one lamp that I can sew by, but it has to be aimed just so, and I have to sit in Dave's chair to use it.
The lamp store is strictly ornamental; perhaps I should look around in Staples. Pity our last stationer's went broke years ago. Biggest problem with buying a new lamp is finding a good place to put it.
Hrmmm . . . perhaps I should try using one of the headlamps I'm using as sewing-machine lights.
I also wound all the scraps of bias tape onto a bit of cardboard, one of the tape cores left from Evelyn's baby-gown making. One of the church ladies gave me the baby-gown stuff, but I lost interest when I discovered that a ready-made baby gown costs less than the flannel to make one.
I have yet to neaten the scraps and put them into the linen box. I hope wash-out marker doesn't set with age. There was a time when one could search for information on the Web. Wasn't as much information posted as there is now, but one could find it. If it isn't in Wikipedia, tough luck.
And Usenet is dying. I have yet to see a Web forum with usable threading. No discussions possible. There are long threads on some of the Go Comics comments, but replies aren't near their antecedents, and the whole thread is gone tomorrow. And no way to filter out malicious posts and people interested only in things that I find boring.
I removed the elastics from the old hanky-linen bra. The loops had stretched to sixteen inches, meaning the elastic had grown two inches since 2011. The houndstooth bra was made in 2015, which led me to downgrade my estimate of how good the houndstooth linen is. Then I remembered that the white bra had, for a long time, hung in the closet waiting for one last wearing in case I needed a white bra, but I polished off the houndstooth the minute it wore through. I don't think the white bra had been retired when I made the red ramie bras in 2016.
And I put the scraps into the box. Perhaps I should put a note in the bias box that there is some pre-made bias . . .
⁂
done. In the process I knocked a tatting shuttle attached to a net purse in progress, an unfinished pair of baby booties, a bobbin-lace bookmark, and some two-inch squares of blue plaid cotton-and-linen shirting to the floor. I put the tatting shuttle into a box marked "tatting samples" — I suspect that the un-marked child-size shoe box would have been a better choice.
I wonder how I came into possession of a child-size shoe box?
I put the other things back on the bias box.
I tried to unfold the scraps already in the box to add the small scraps, and discovered that it was two piles of scraps. Pinned to the one underneath is a packing slip for "hanky linen" dated 2006, with a hand-written note that it has been reduced to small pieces and bias. I didn't unfold it to verify that it's where I got the four "hanky linen" bras.
I'm wearing Bra A. I put it on for church yesterday, so it will be easy to remember that it's been worn twice when I undress tonight. If I remember, I'll write "Tue" on tomorrow's bra with a wash-out pen; it's time I stopped wondering, every night, "Did I get this bra out of the closet or off the floor this morning?".
Shortly after sending off an order for a bolt of wide muslin, I got an e-mail offering a free pattern for linen sheets from fabricstore.com. Oh, arr . . . I've overlooked fabric suitable for making sheets?
After much complication, I managed to download the pattern, and found that it calls for "cleverly" seaming their regular sixty-inch pre-worn-out artificial tow.
Spent today escorting Dave to the doctor. The doctor listened to me hacking all through Dave's exam and prescribed antibiotics for me too.
And now my eyes are hot, as if I had a fever. The forehead thermometer says no; I should dig out one of the old mercury thermometers and get a real reading.
On 1/17/18 6:15 PM, [creativemachine] wrote:
> . . . and a circle based bias wrap skirt,
> which looks to have enough of the generally
> missing wrap to avoid panty displays, and
> wind in general.
If I were designing a wrap skirt, I think I'd cut one back and two fronts, and make a buttonhole in the waistband just behind the left side seam — no, make a buttonhole on both sides, so that one can swap fronts after spilling chili into one's lap. There needs to be a belt loop just behind the buttonhole on each side, to keep the sash that isn't coming through a buttonhole in place. Then there needs to be at least one more belt loop on each side
--
Joy Beeson
http://wlweather.net/PAGEJOY/
west of Fort Wayne, Indiana, U.S.A.
At which point I realized that the post was getting away from me, copied it here, and deleted it. When I pasted it, I meant to expand it.
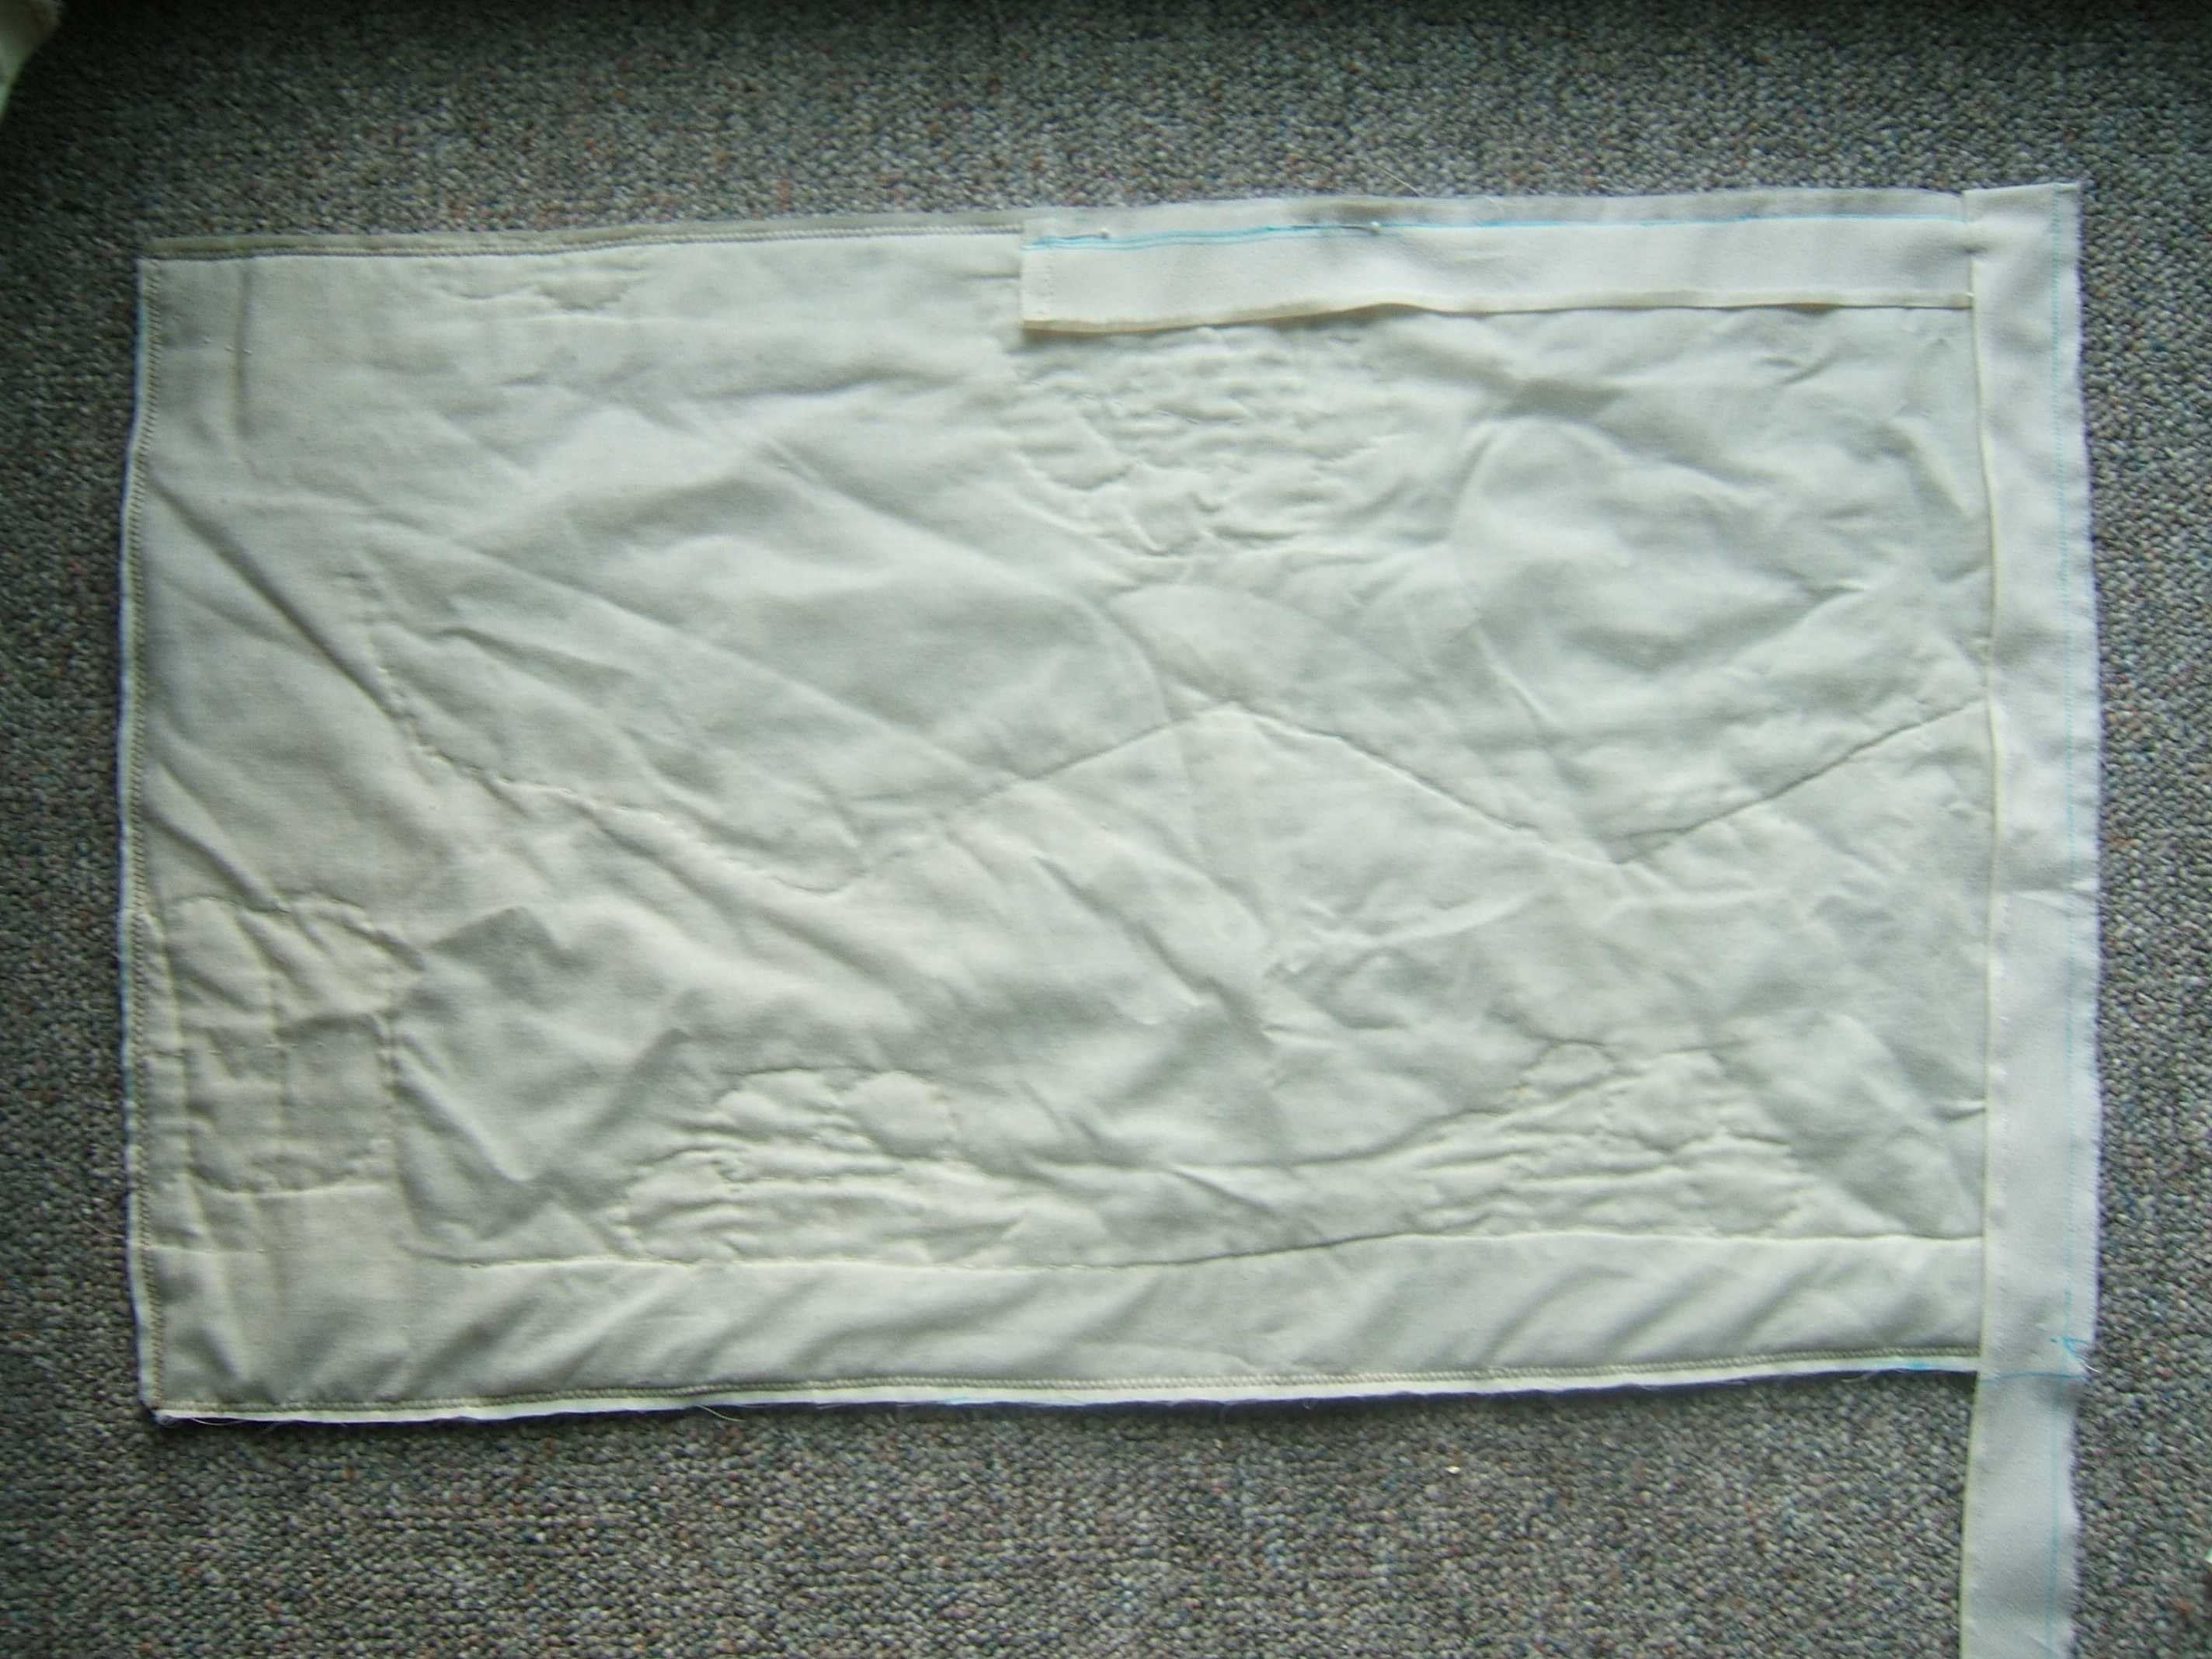
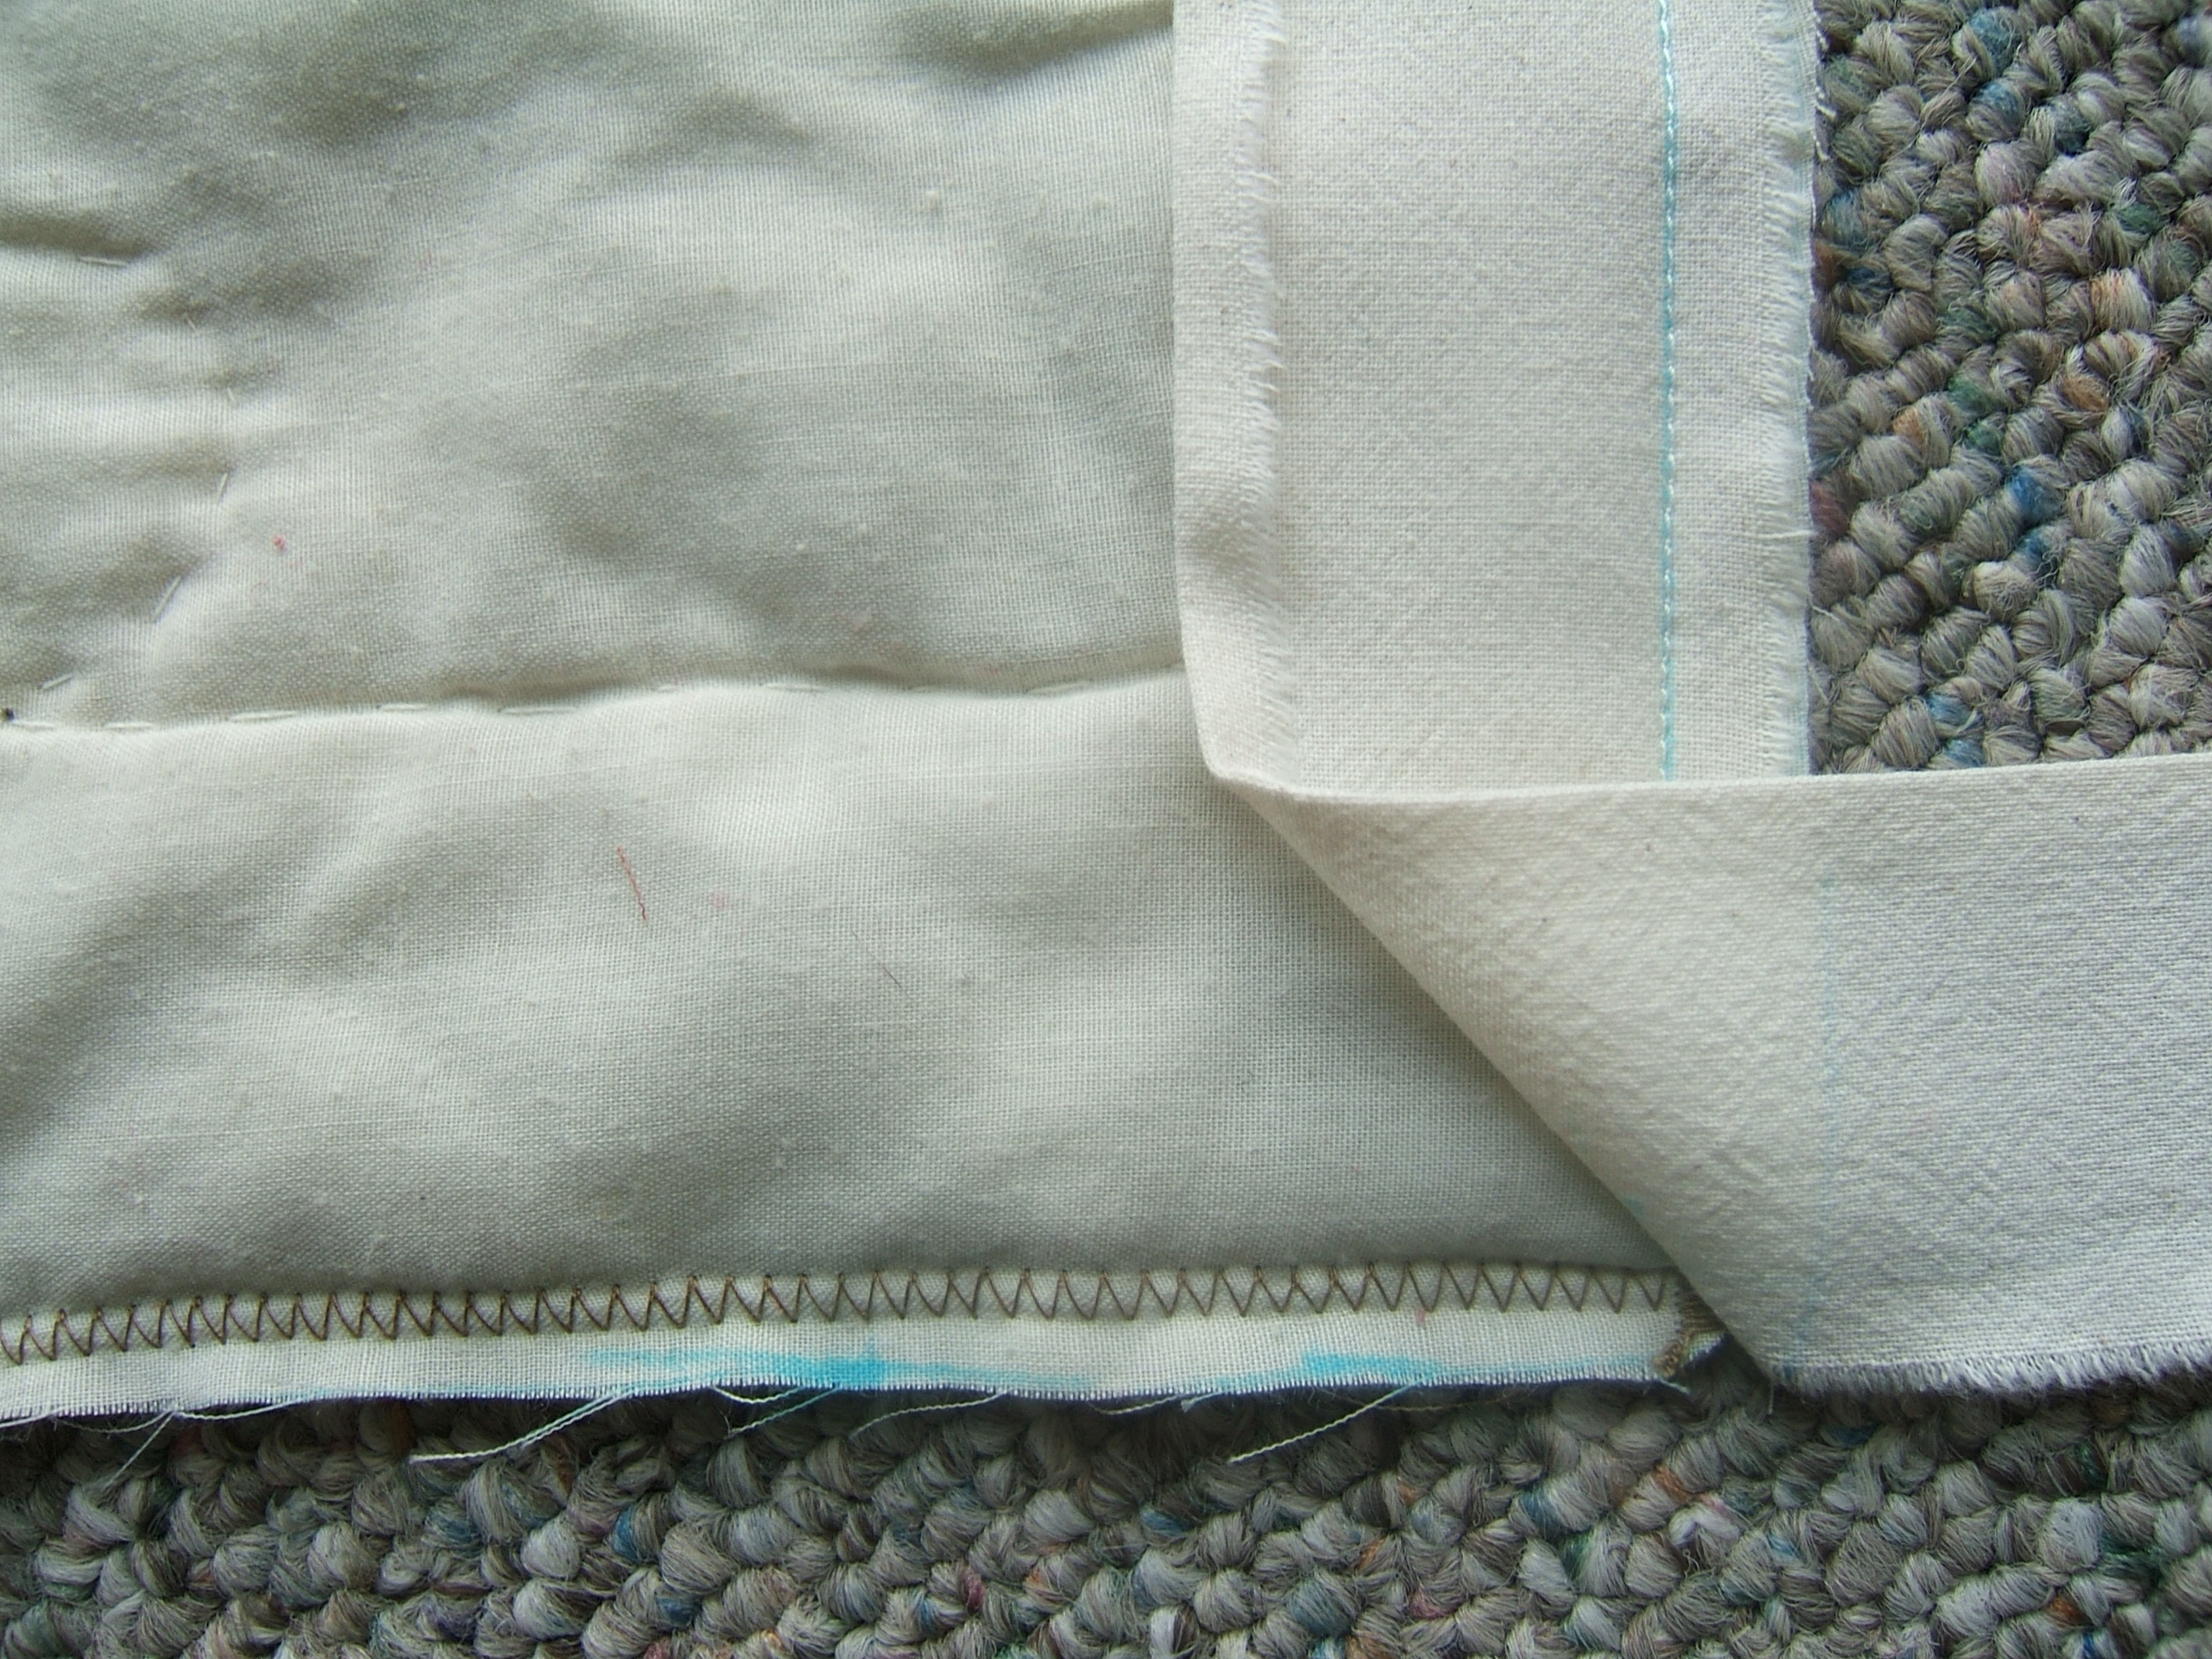
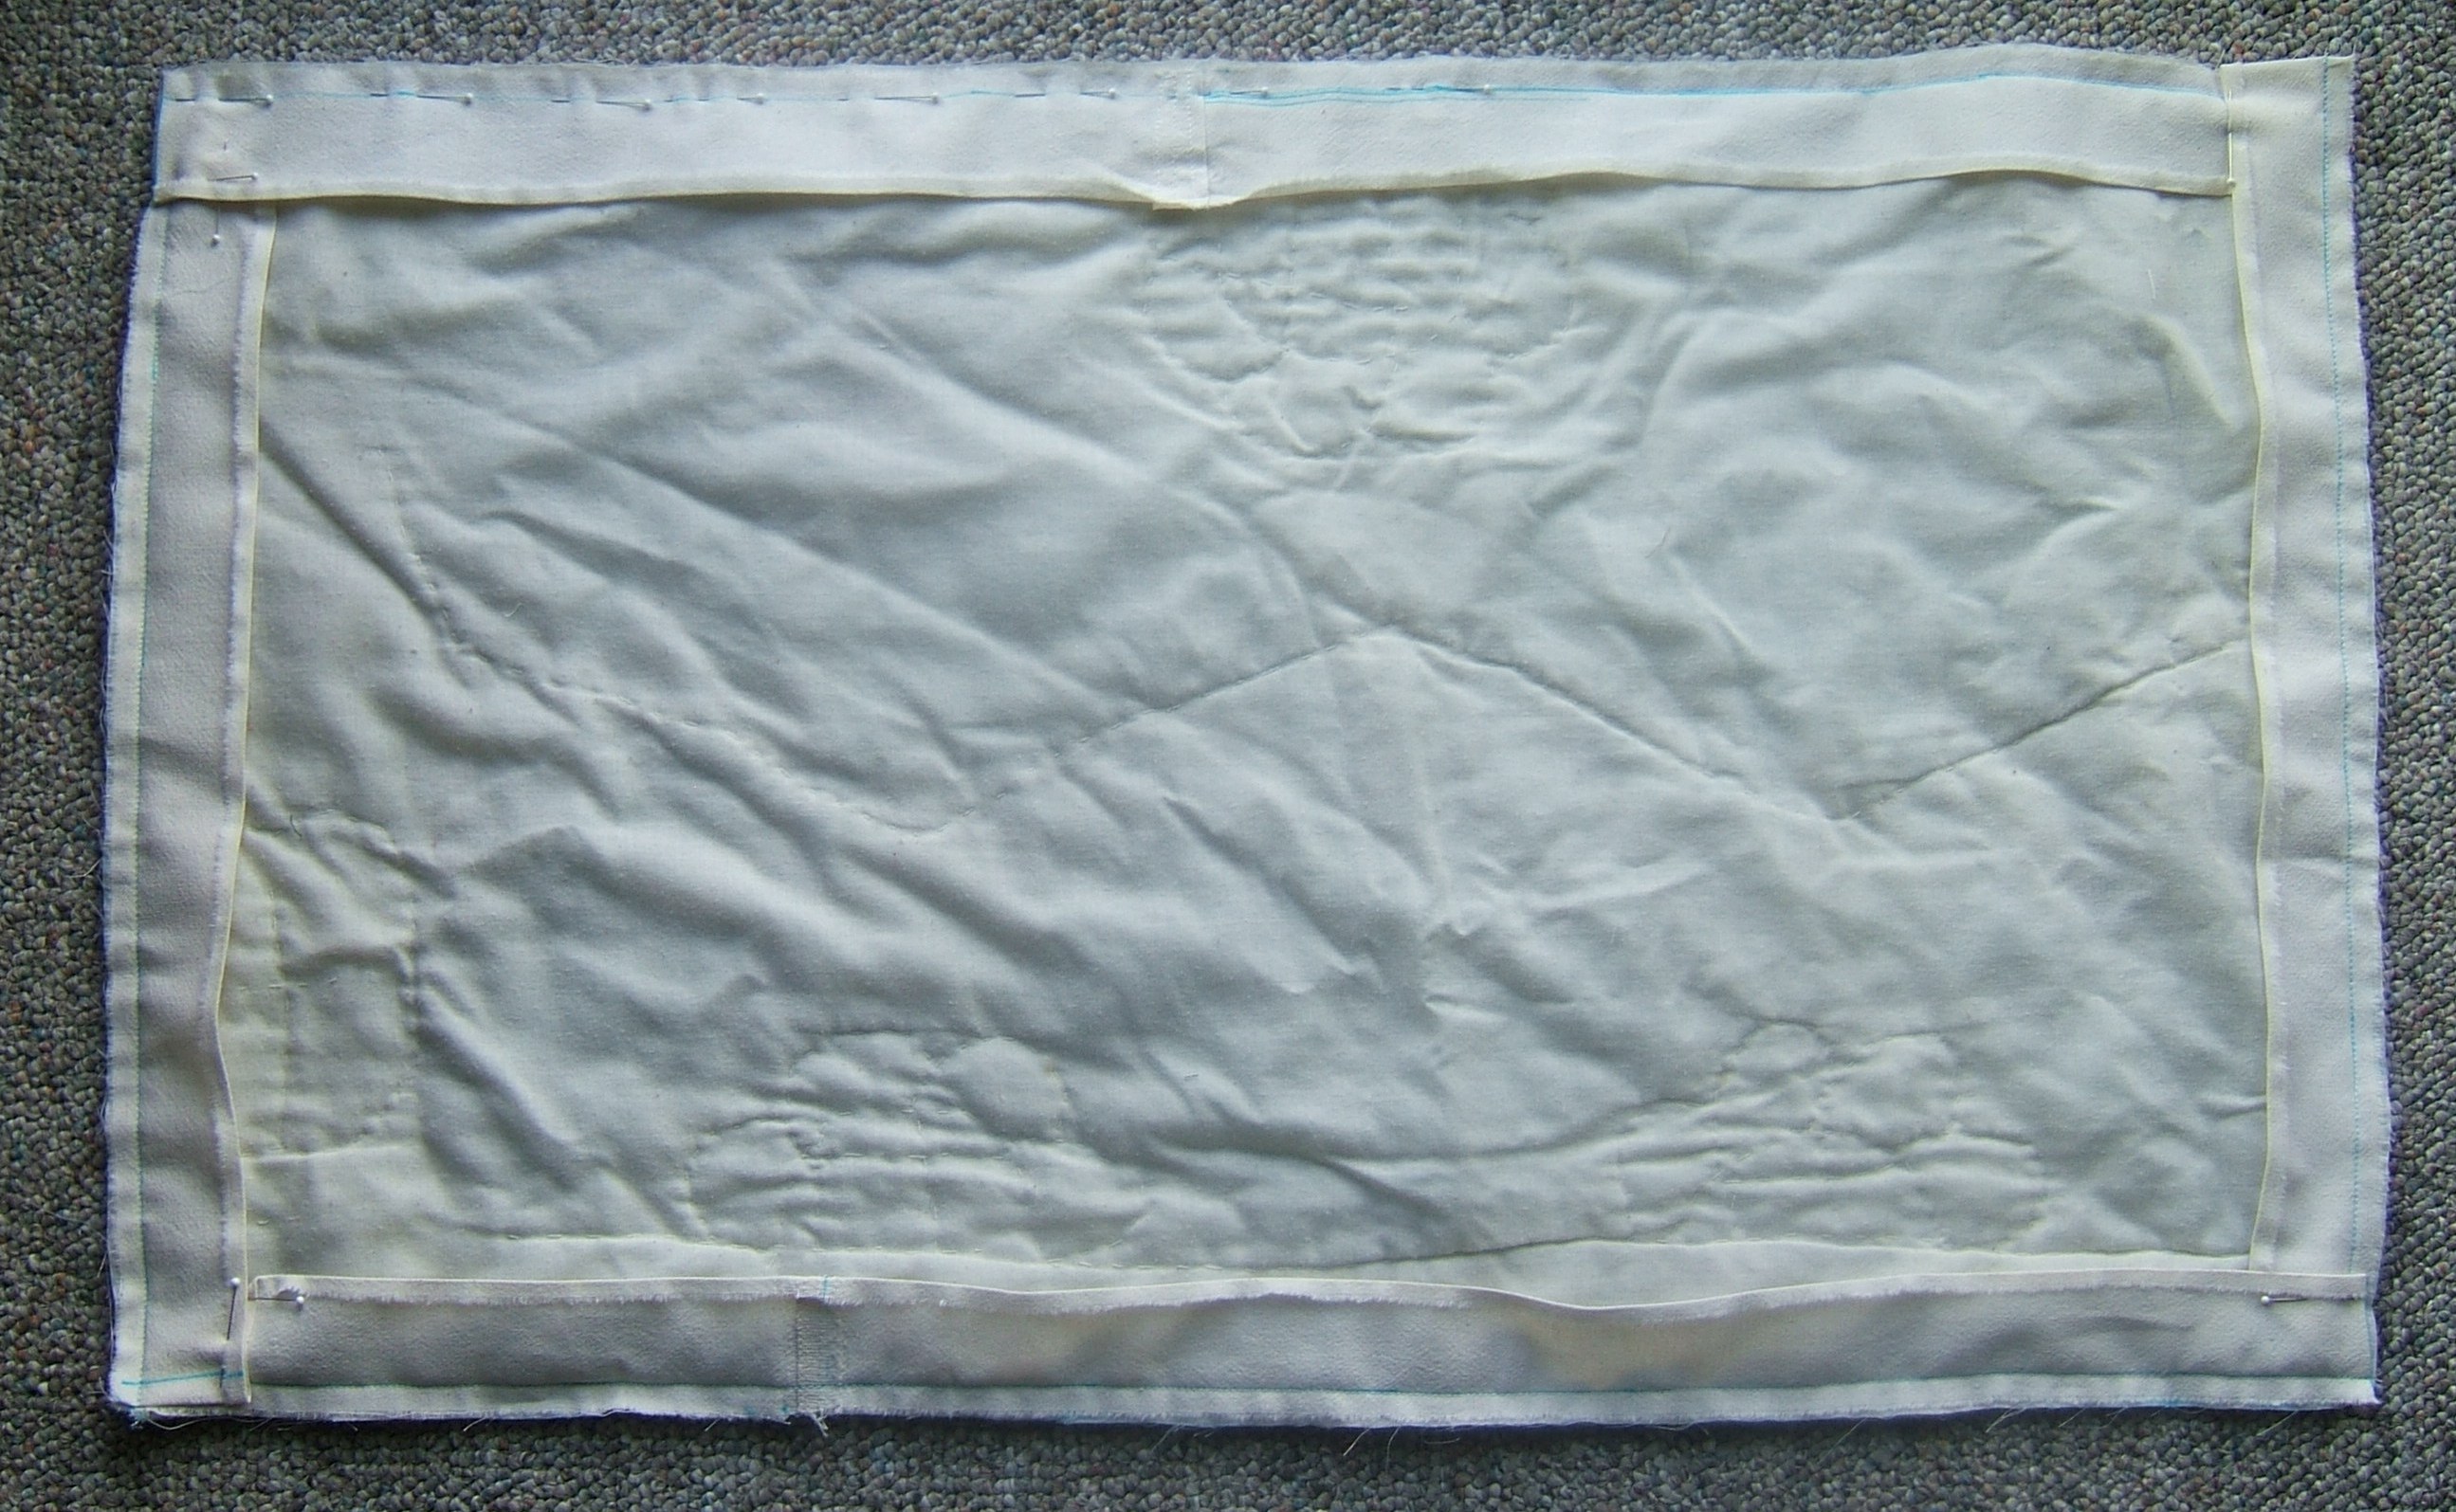
The muslin I ordered to make new sheets and pillow cases arrived today. I'd worried about where I'd store thirty-three yards of ten-foot muslin, and I'd worried about how I'd wash thirty-three yards of ten-foot muslin, but I didn't anticipate that I can't *lift* thirty-three yards of ten-foot muslin. Just thirty-one now, as I've torn off two yards and four inches to wash to see how much it shrinks, and make five or six pillow cases.
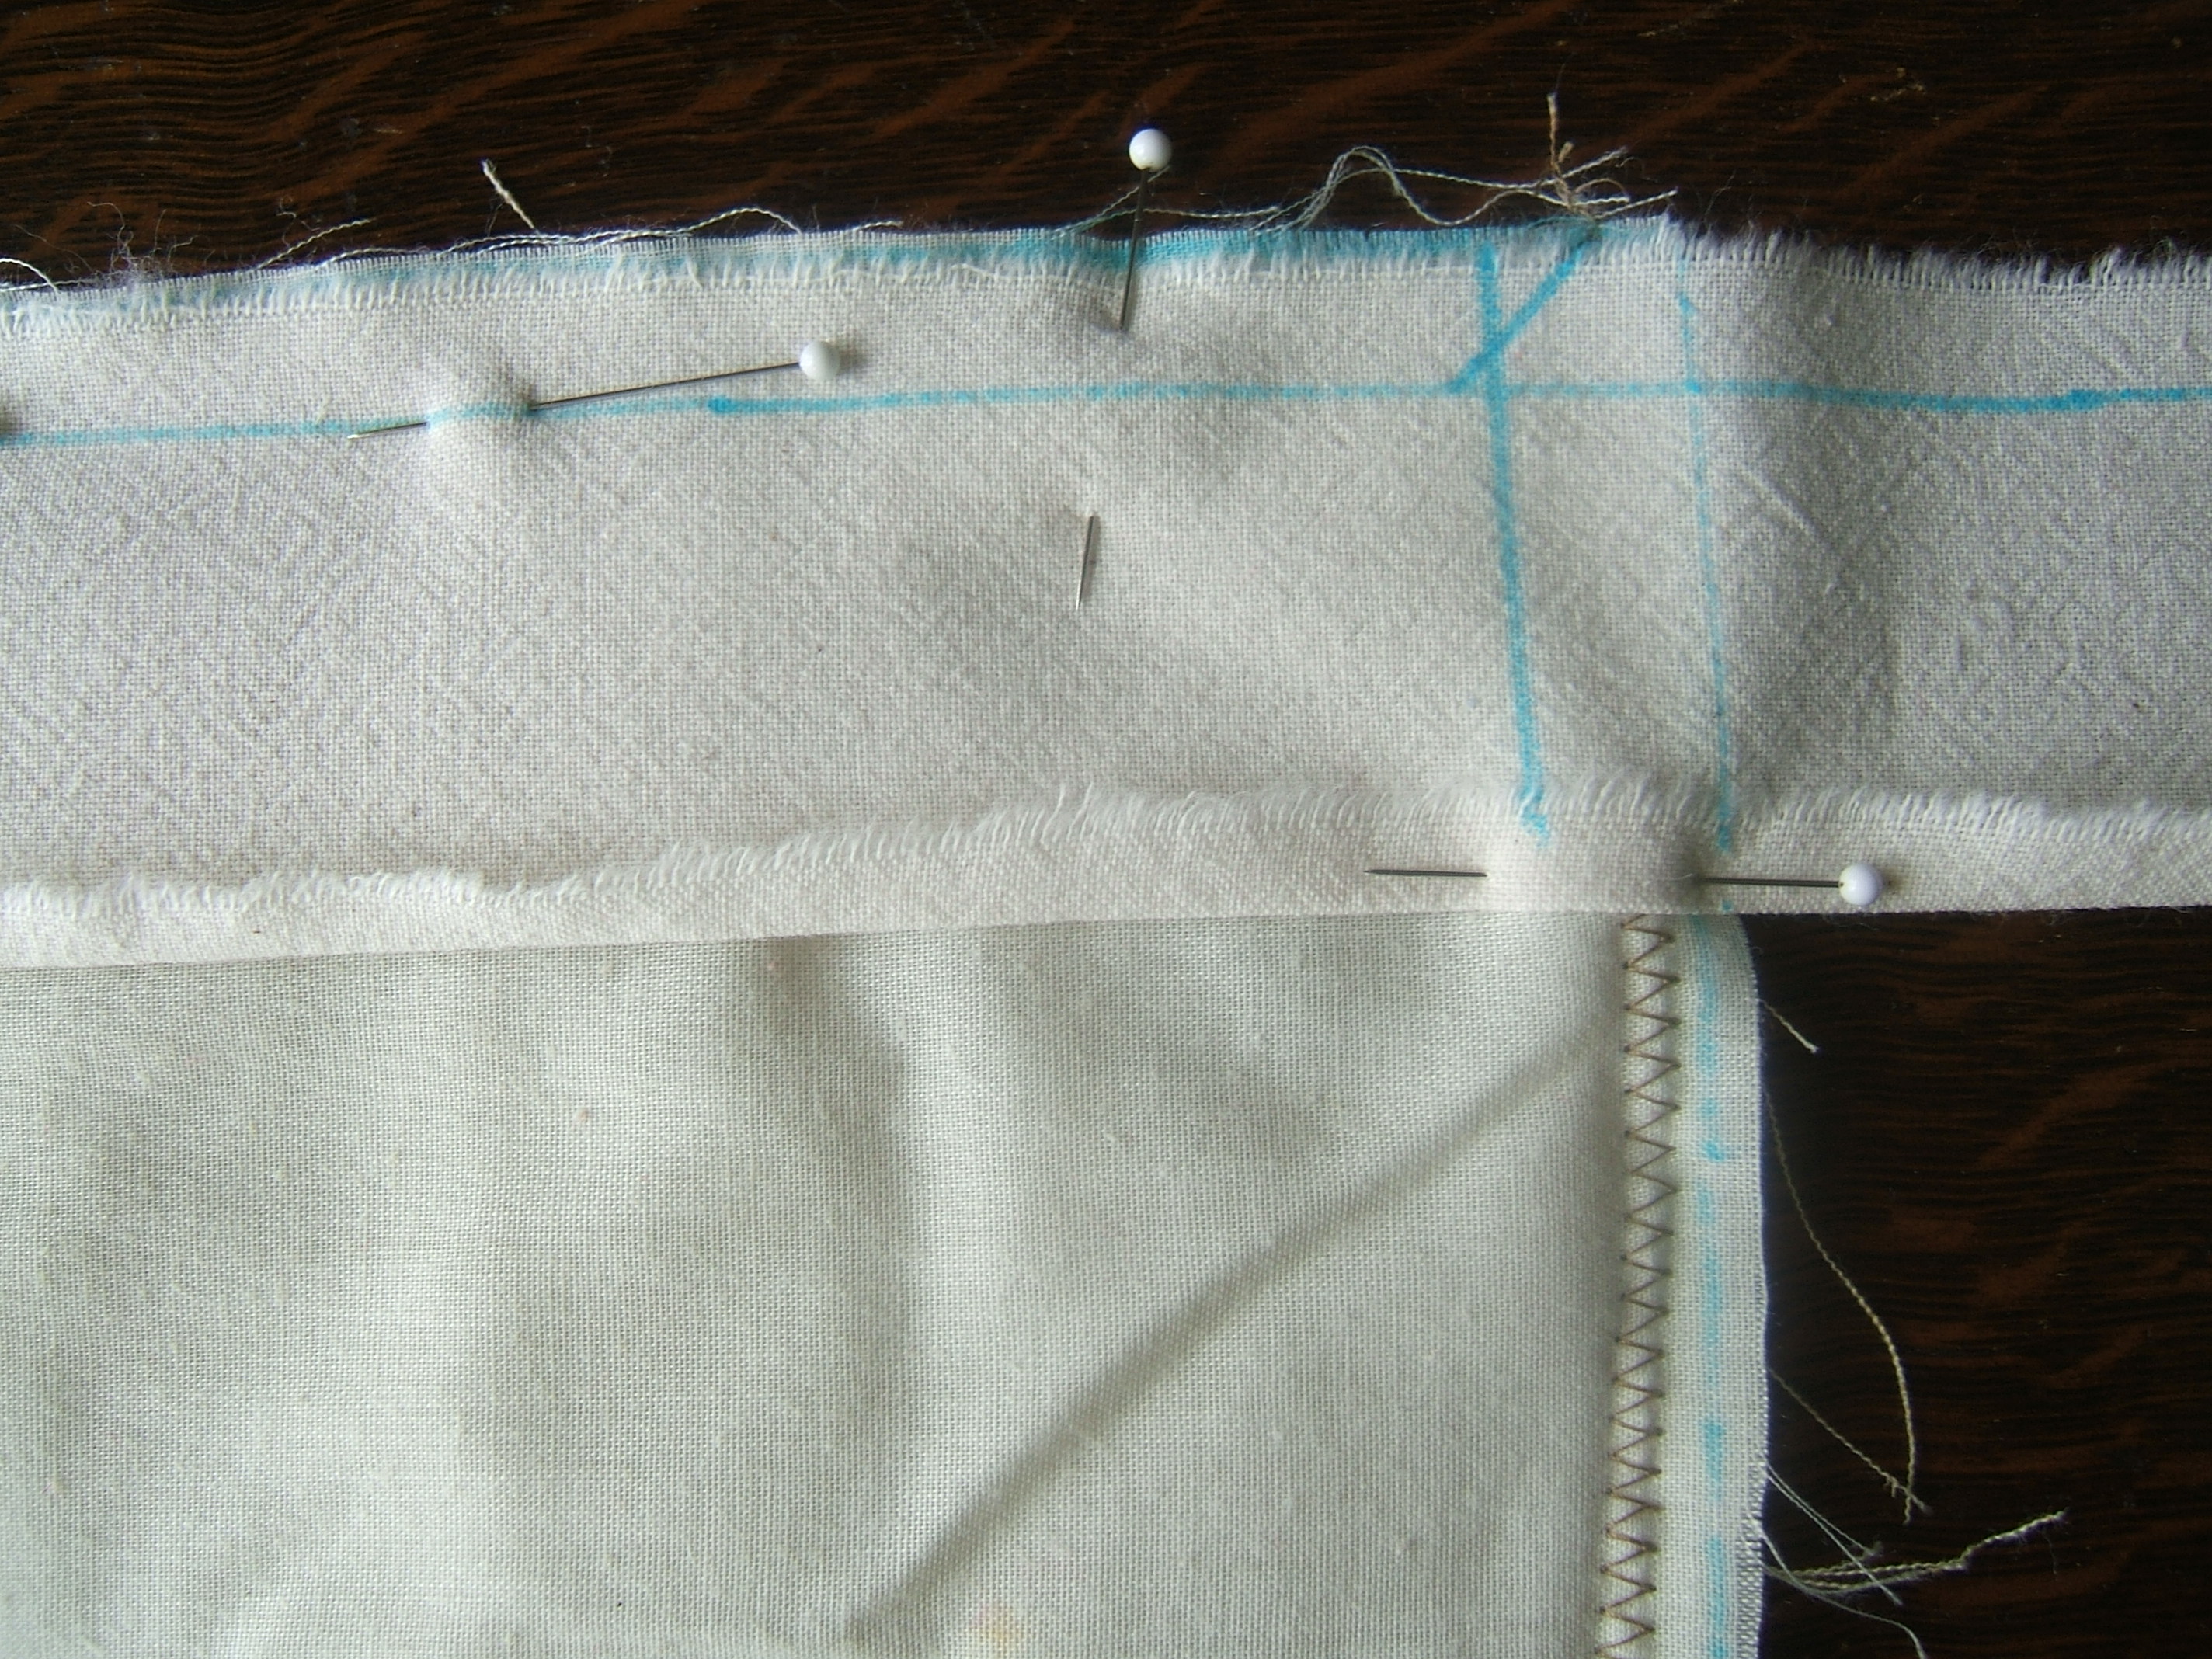
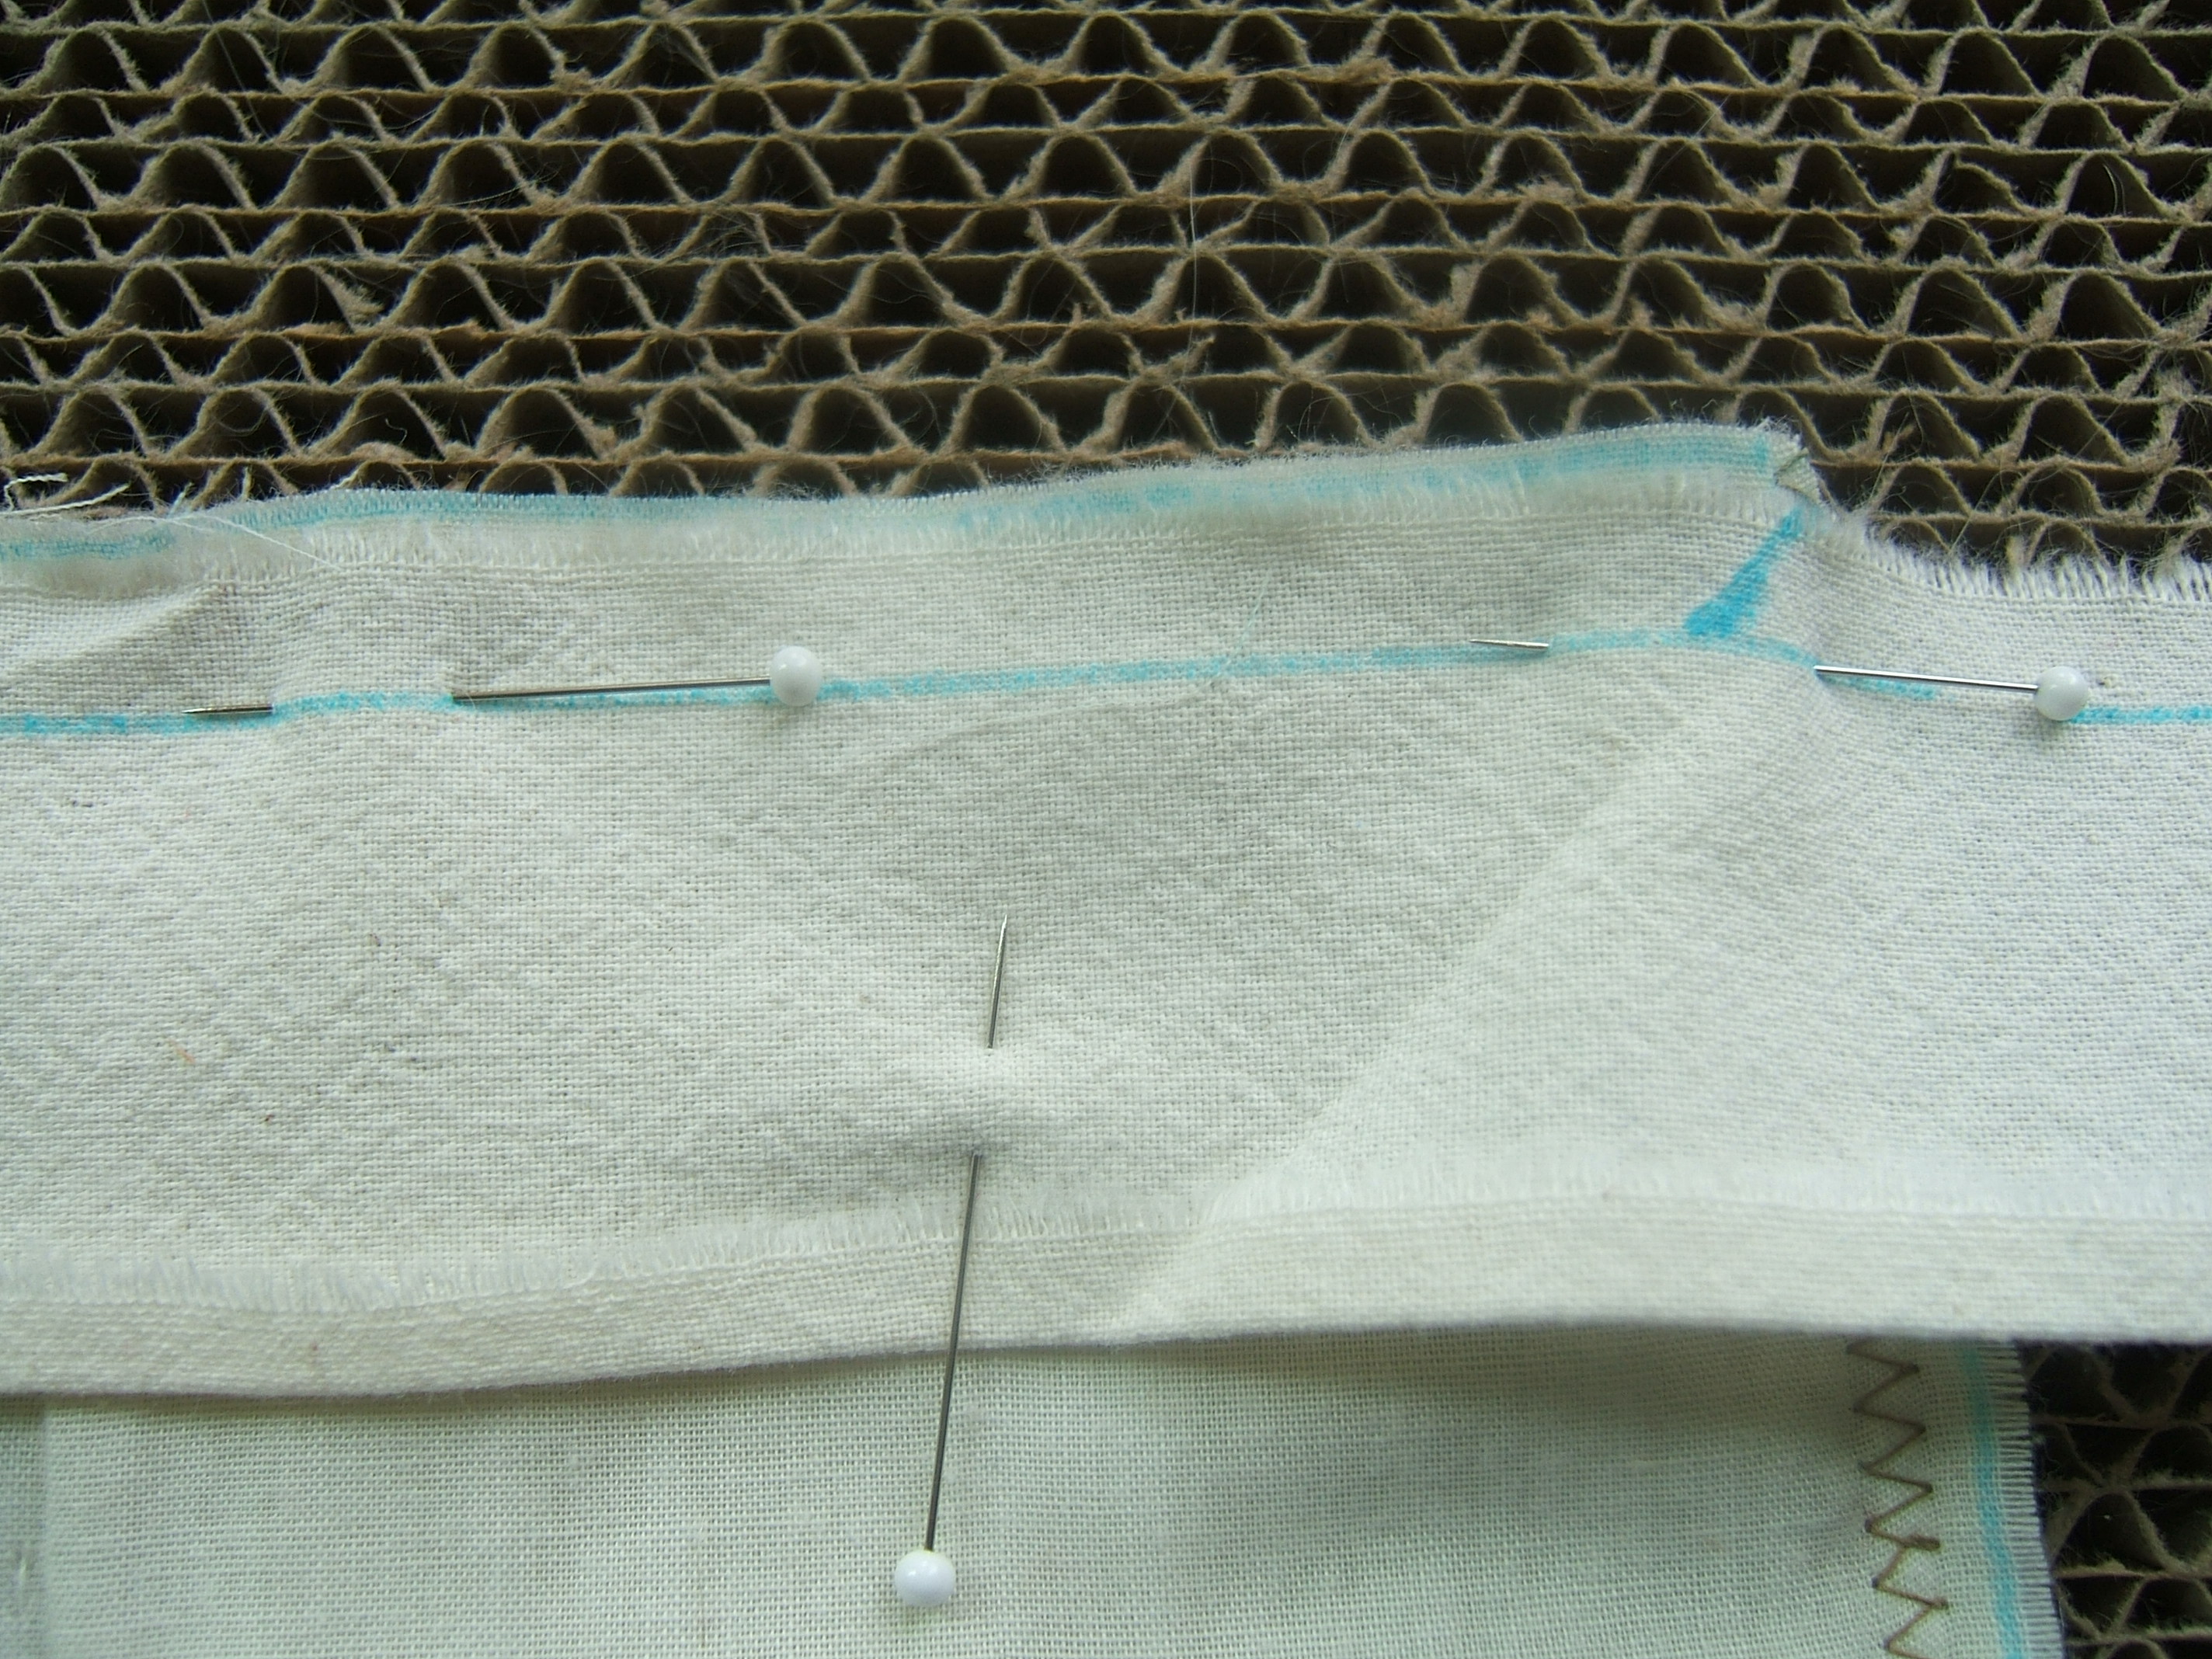
Dharma said that it might or might not have a selvage. It has a tuck selvage, but I had to ravel out threads to be sure of it, so I can use the selvages — if they don't pucker when washed.
I zig-zagged the torn ends of the sample yesterday evening, emptying two bobbins of thread that had lost its provenance. I was slightly surprised that my double-wound bobbin didn't give out.
But I was too tired to mark it and put it into the washer to soak overnight. It didn't help that the un-liftable bolt was on the table I wanted to use for marking.
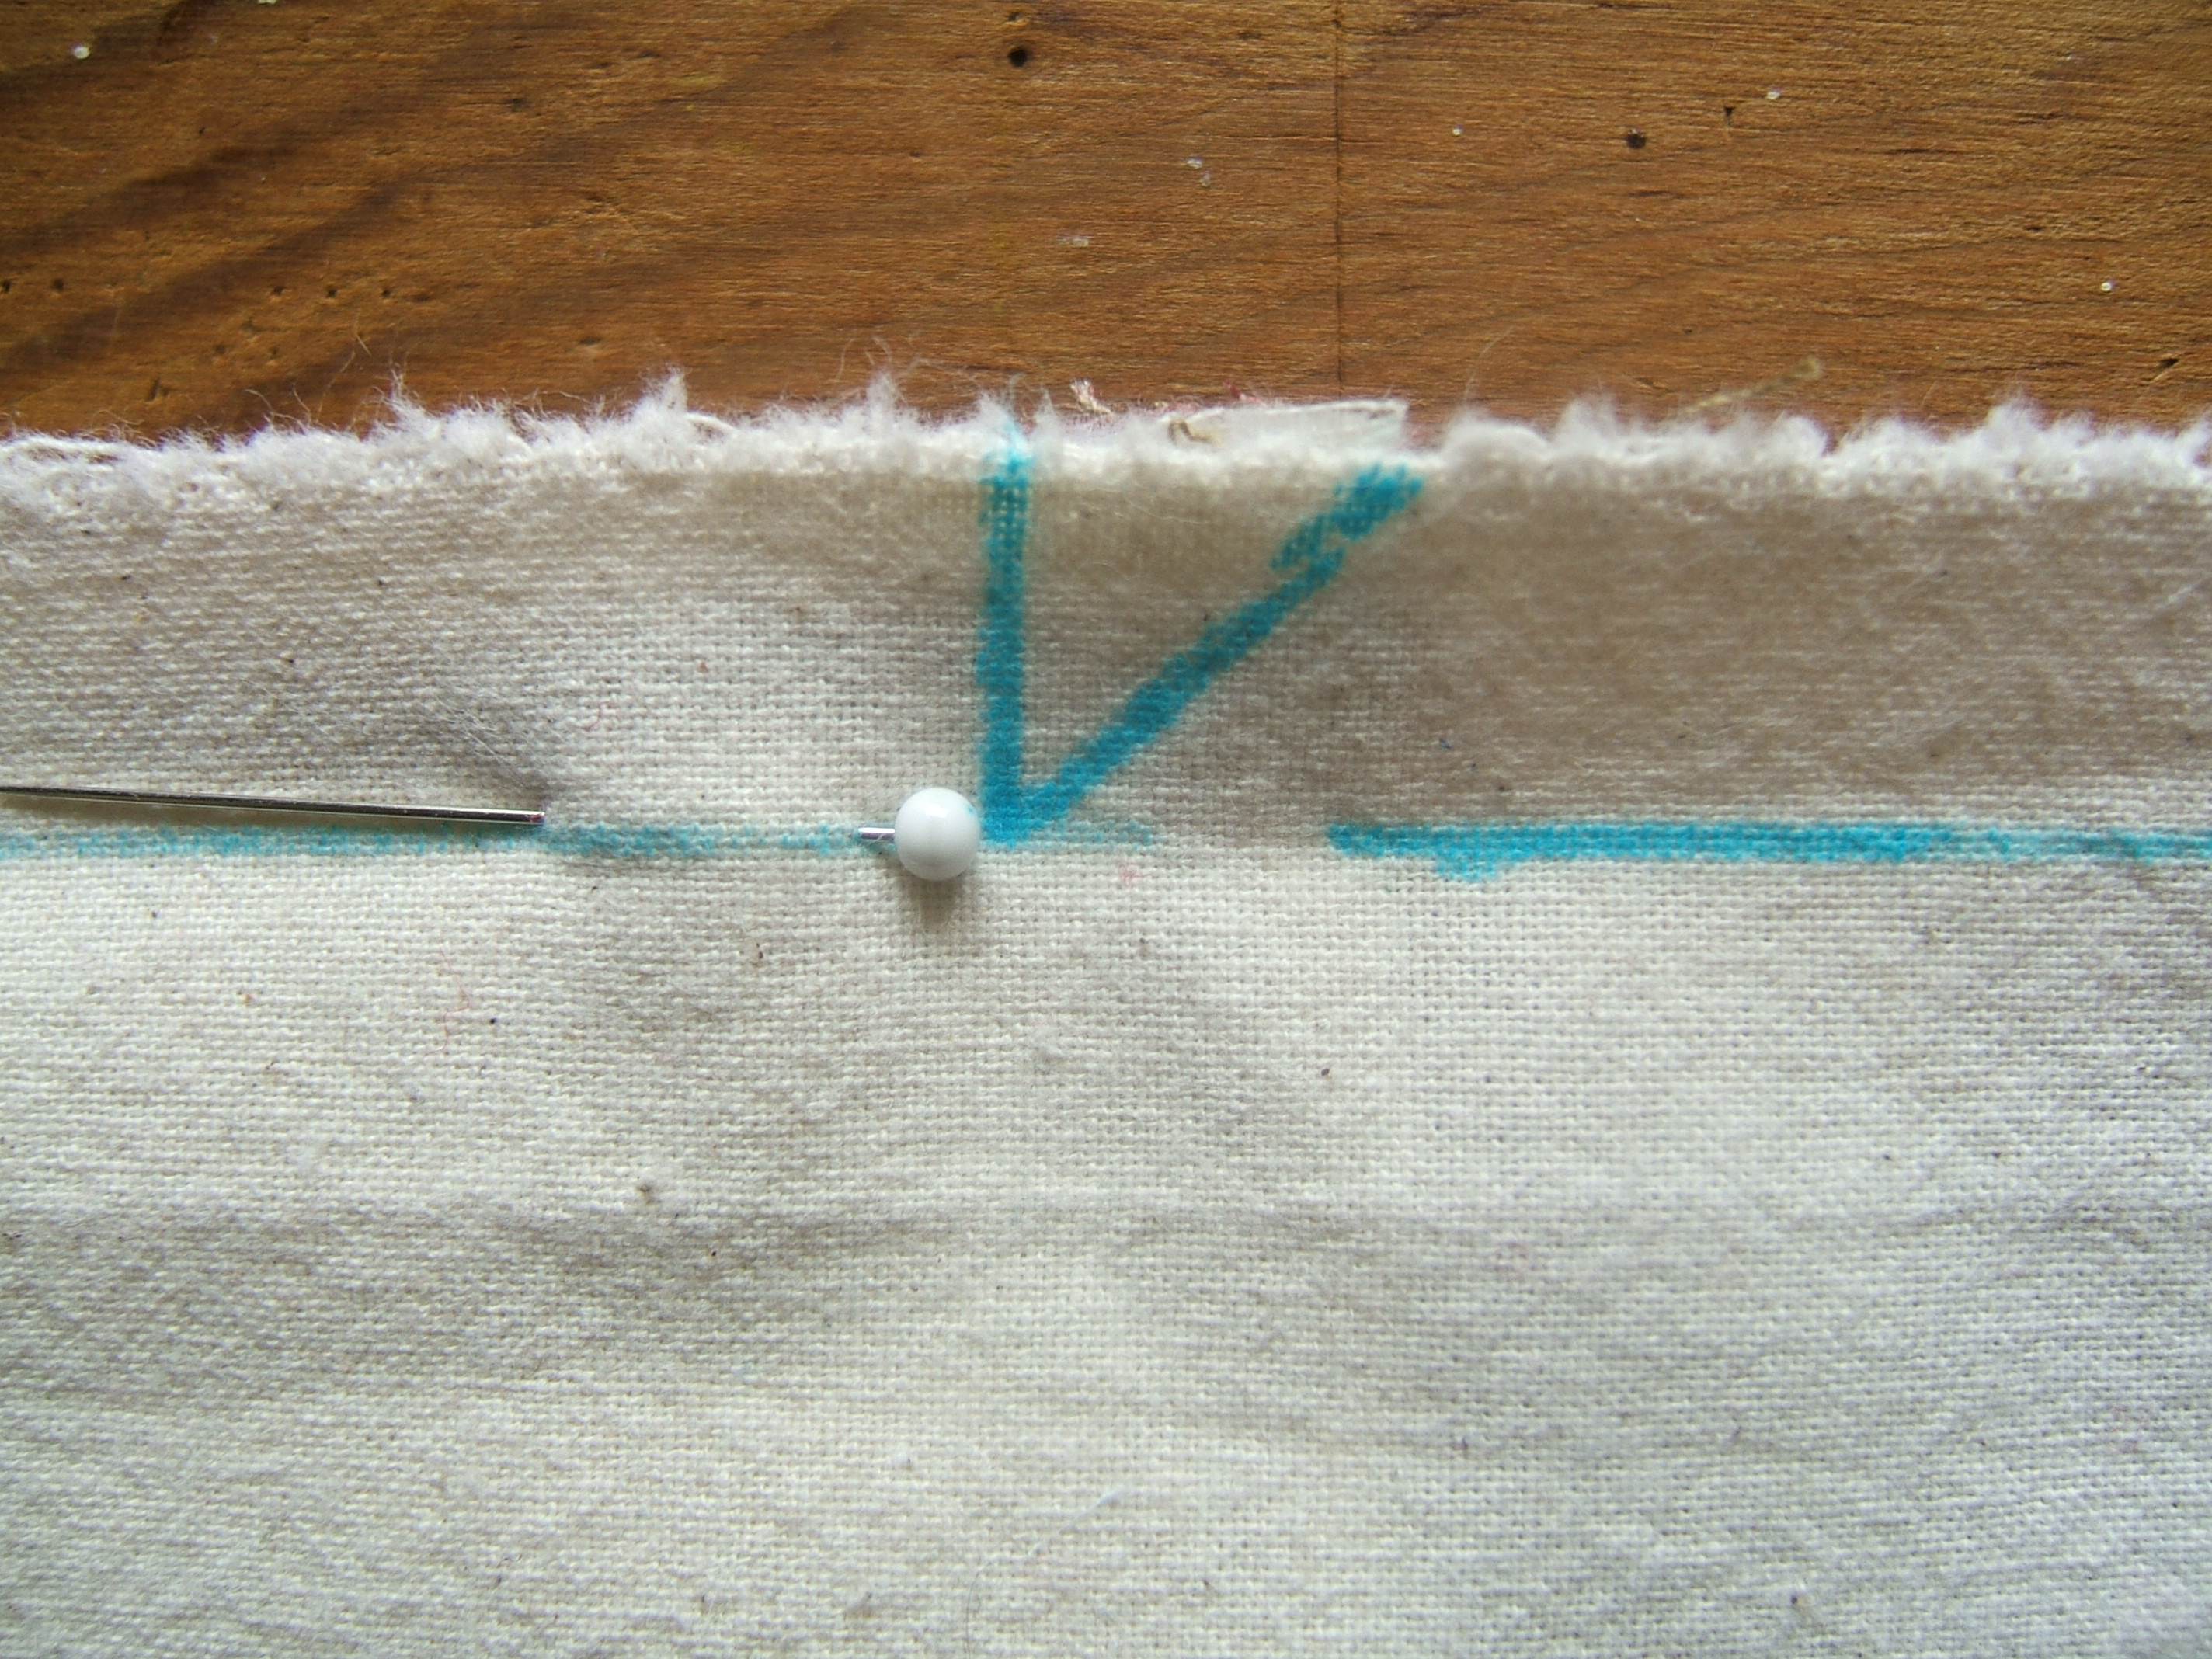
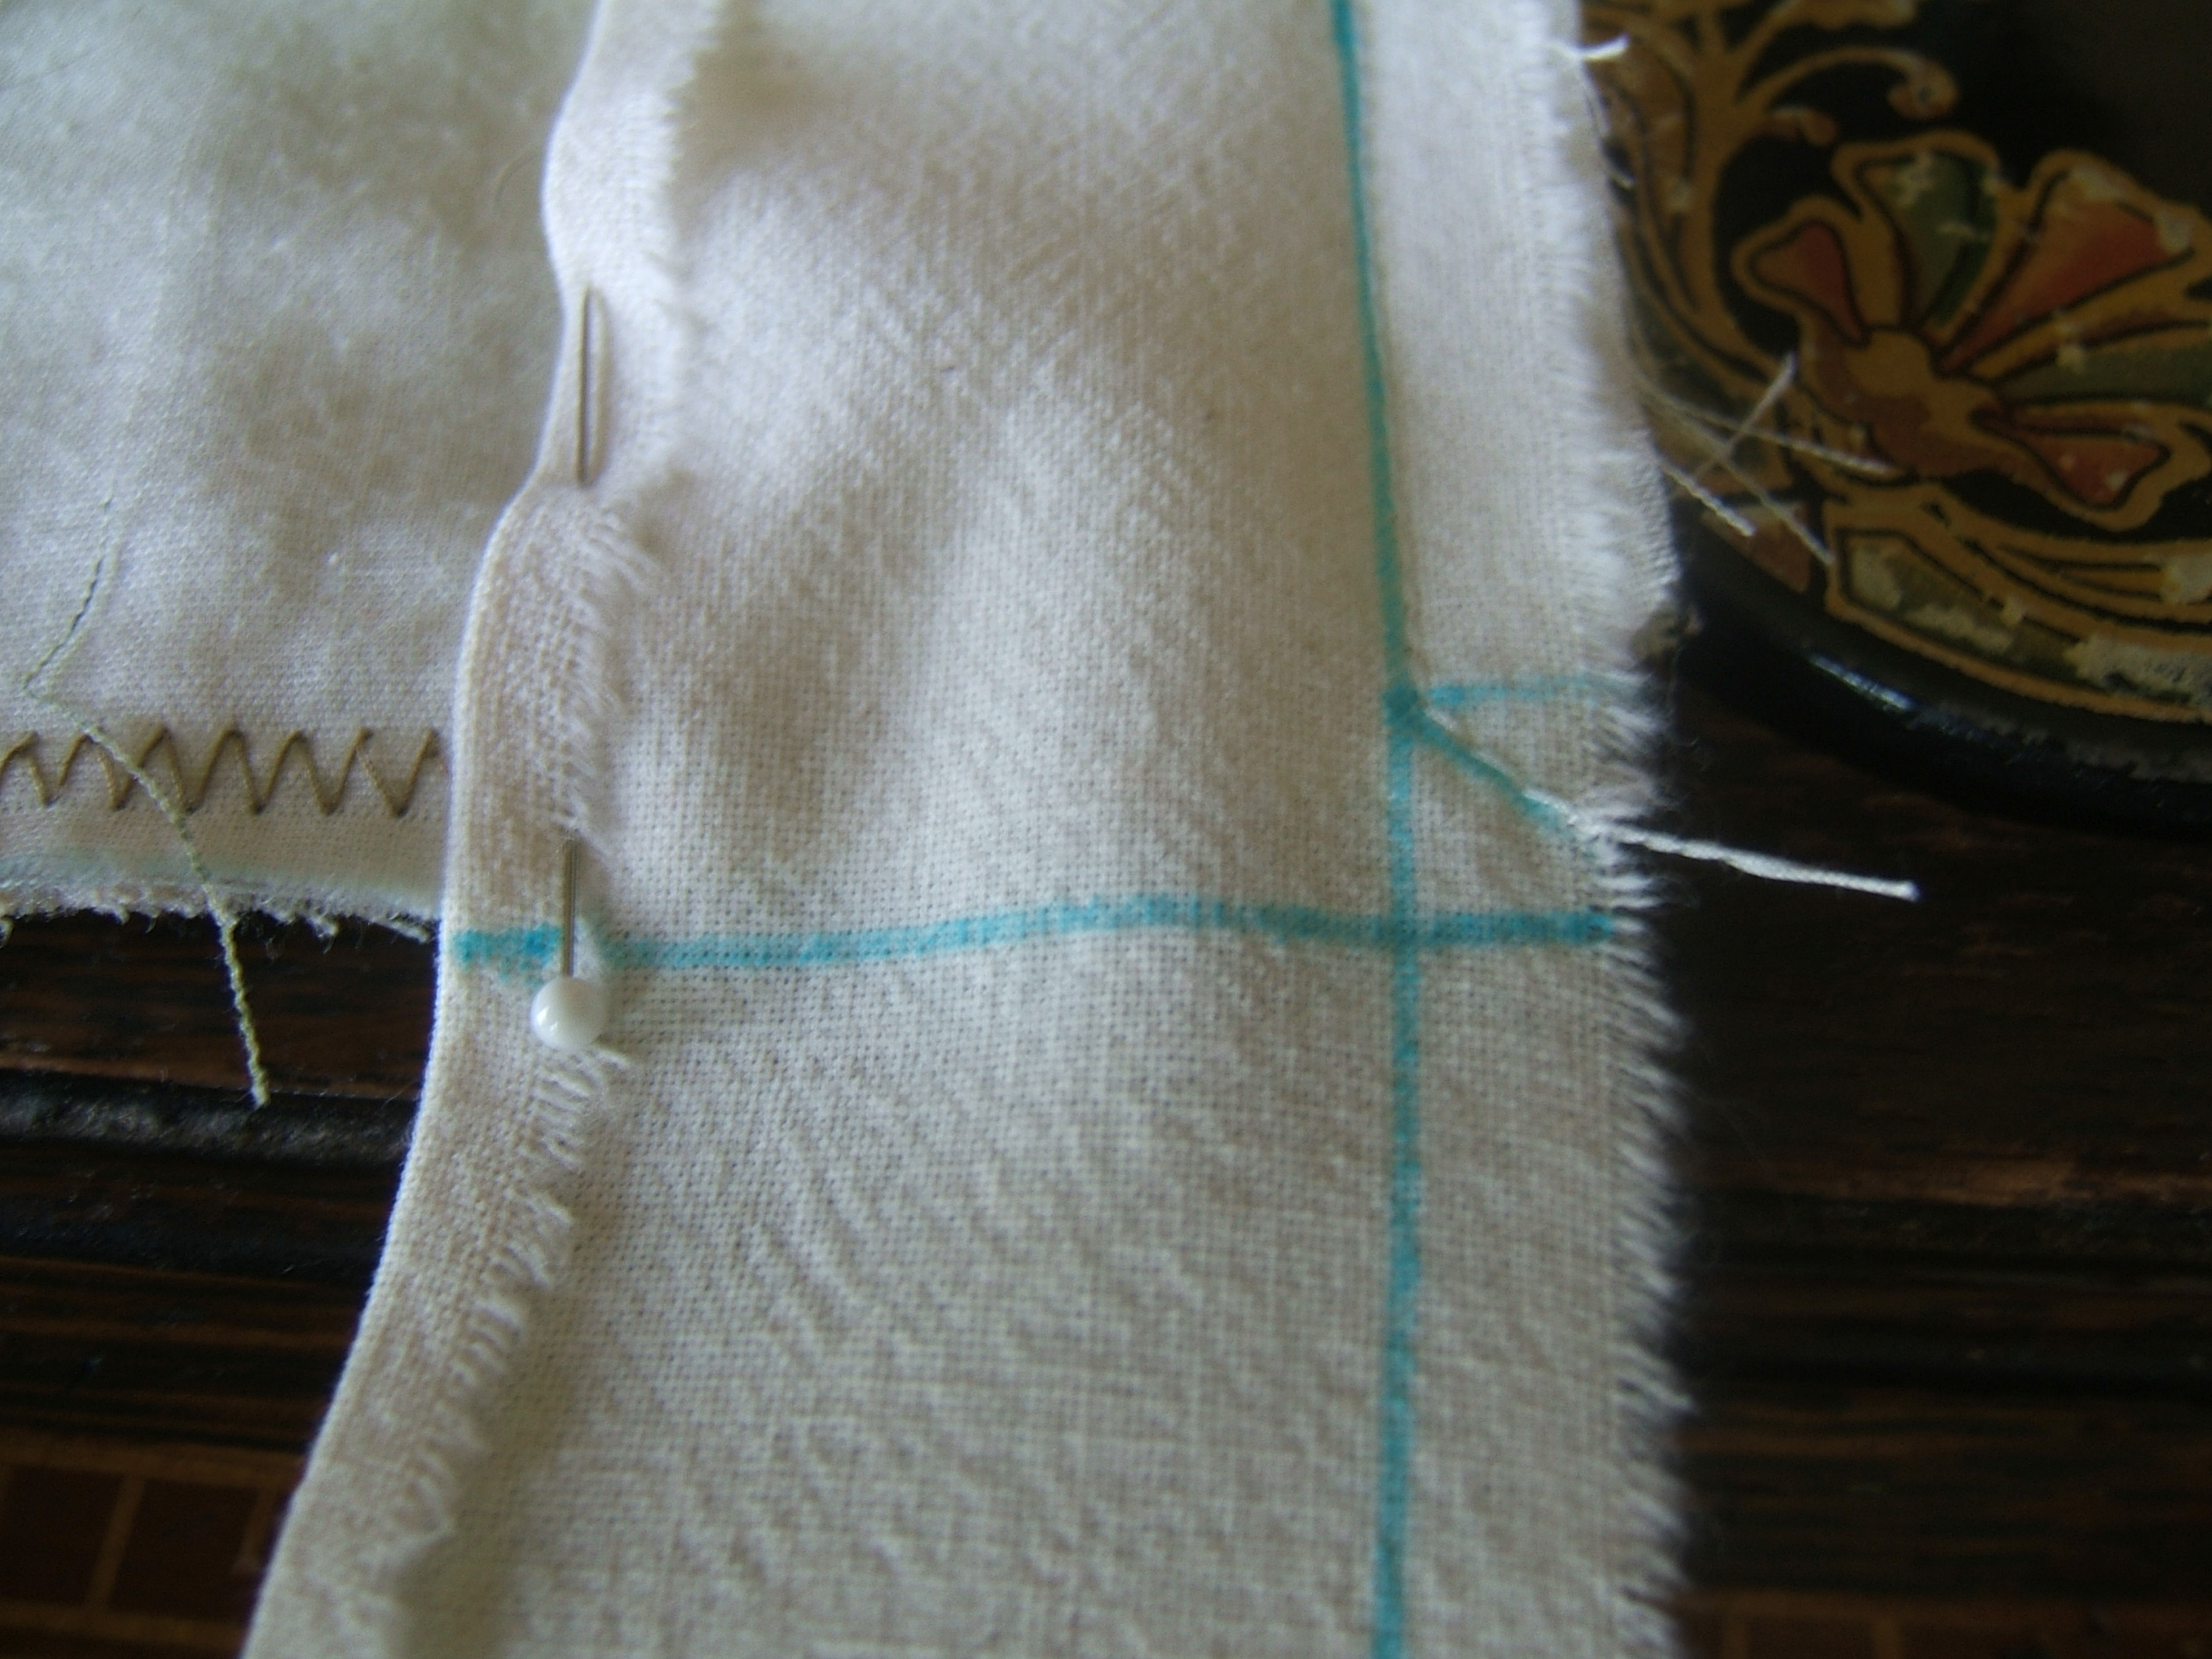
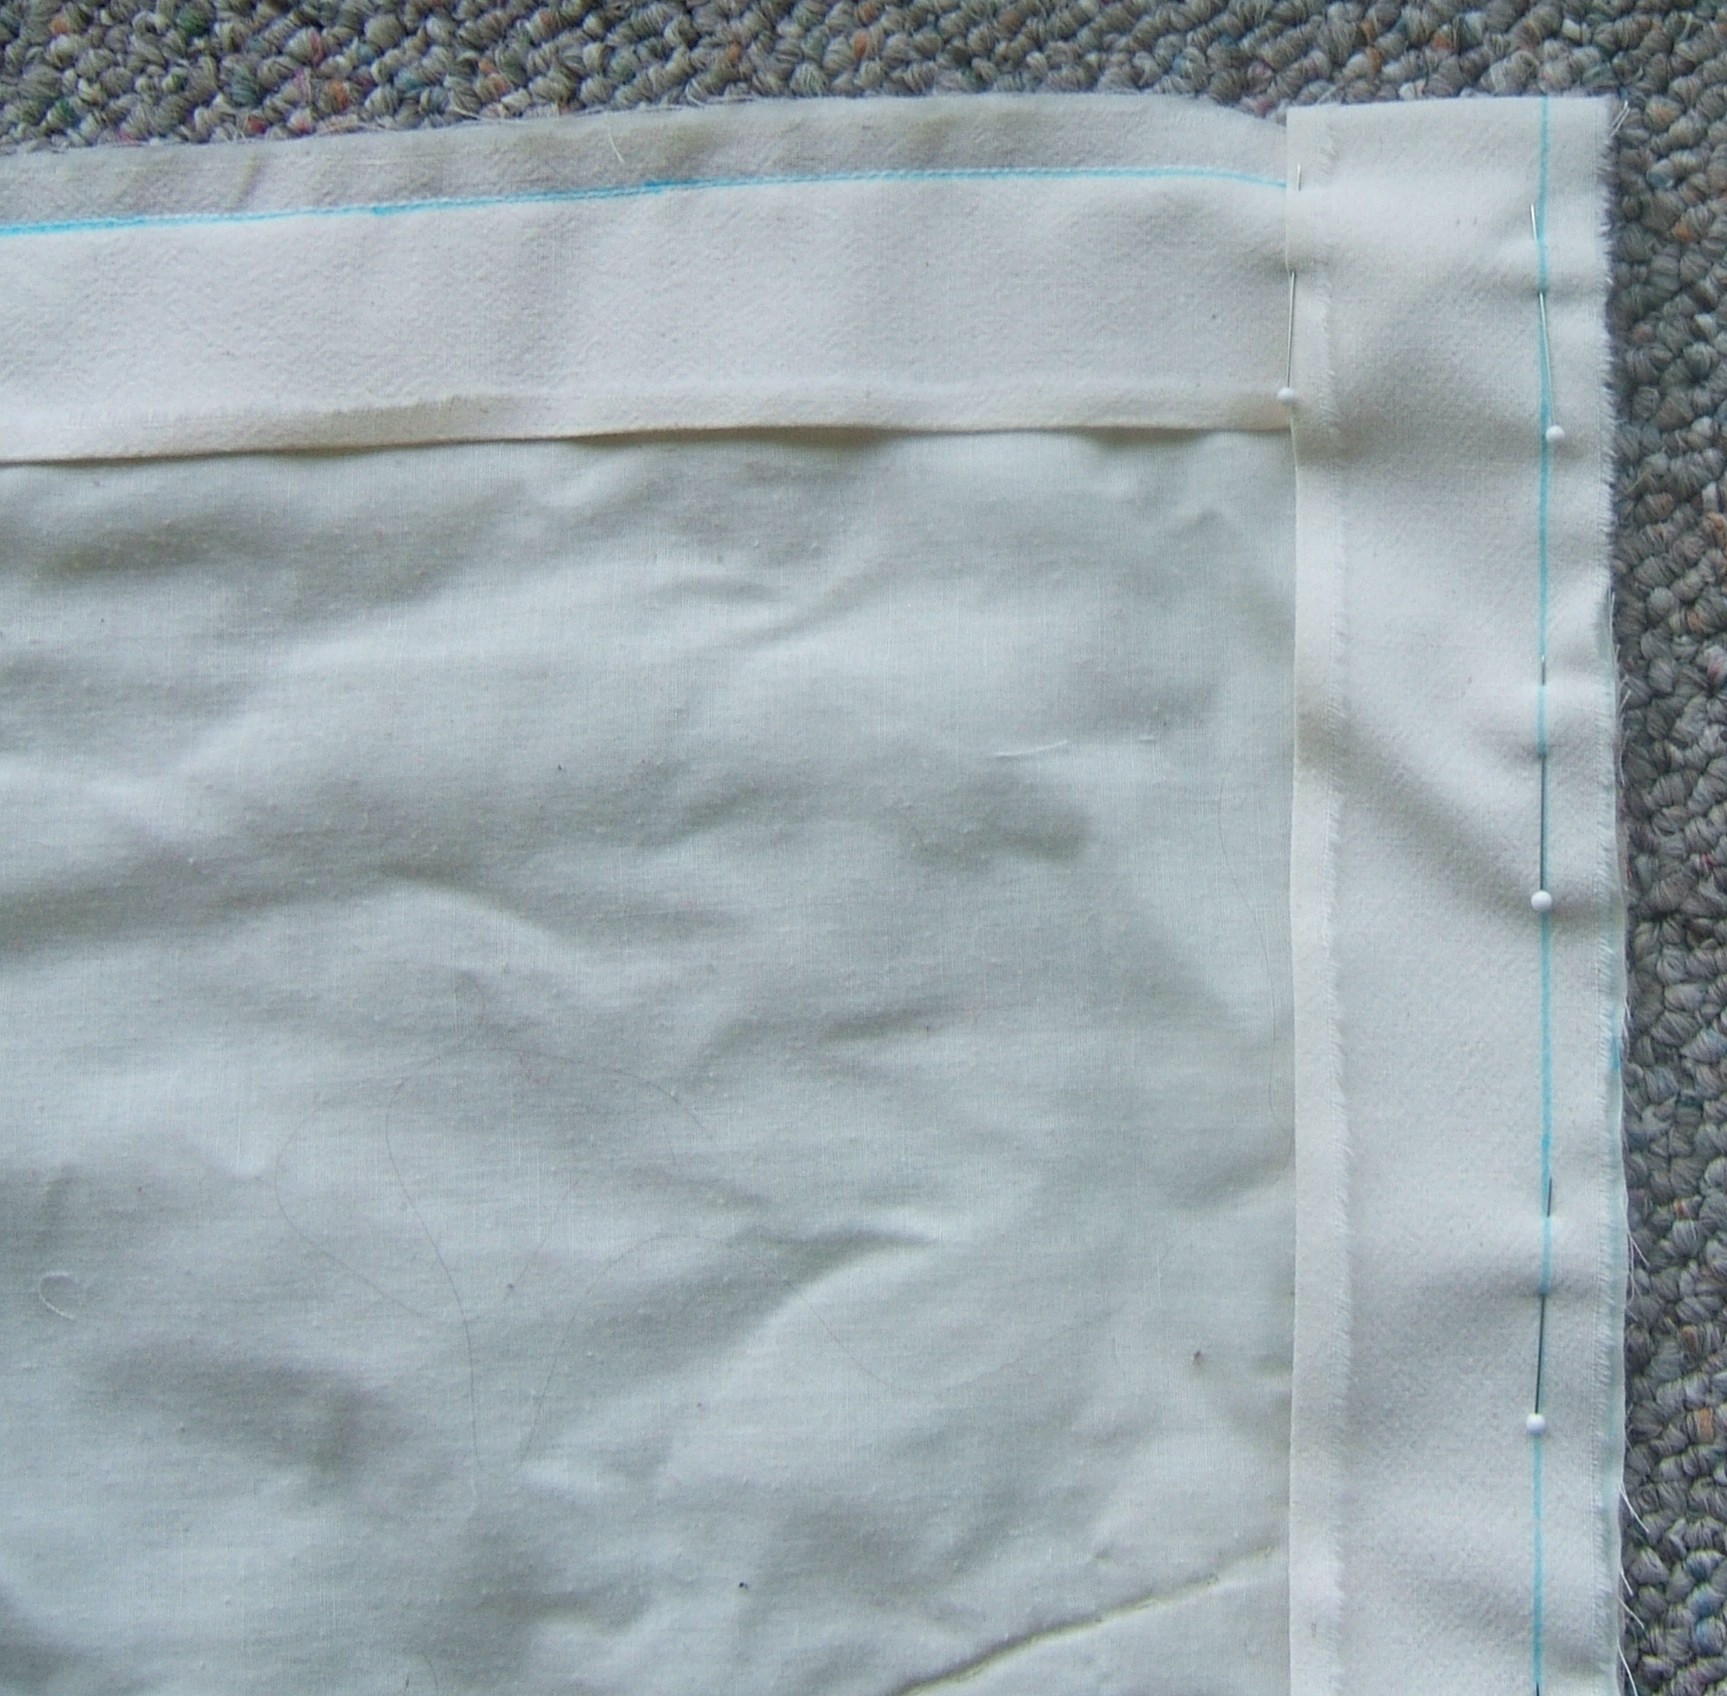
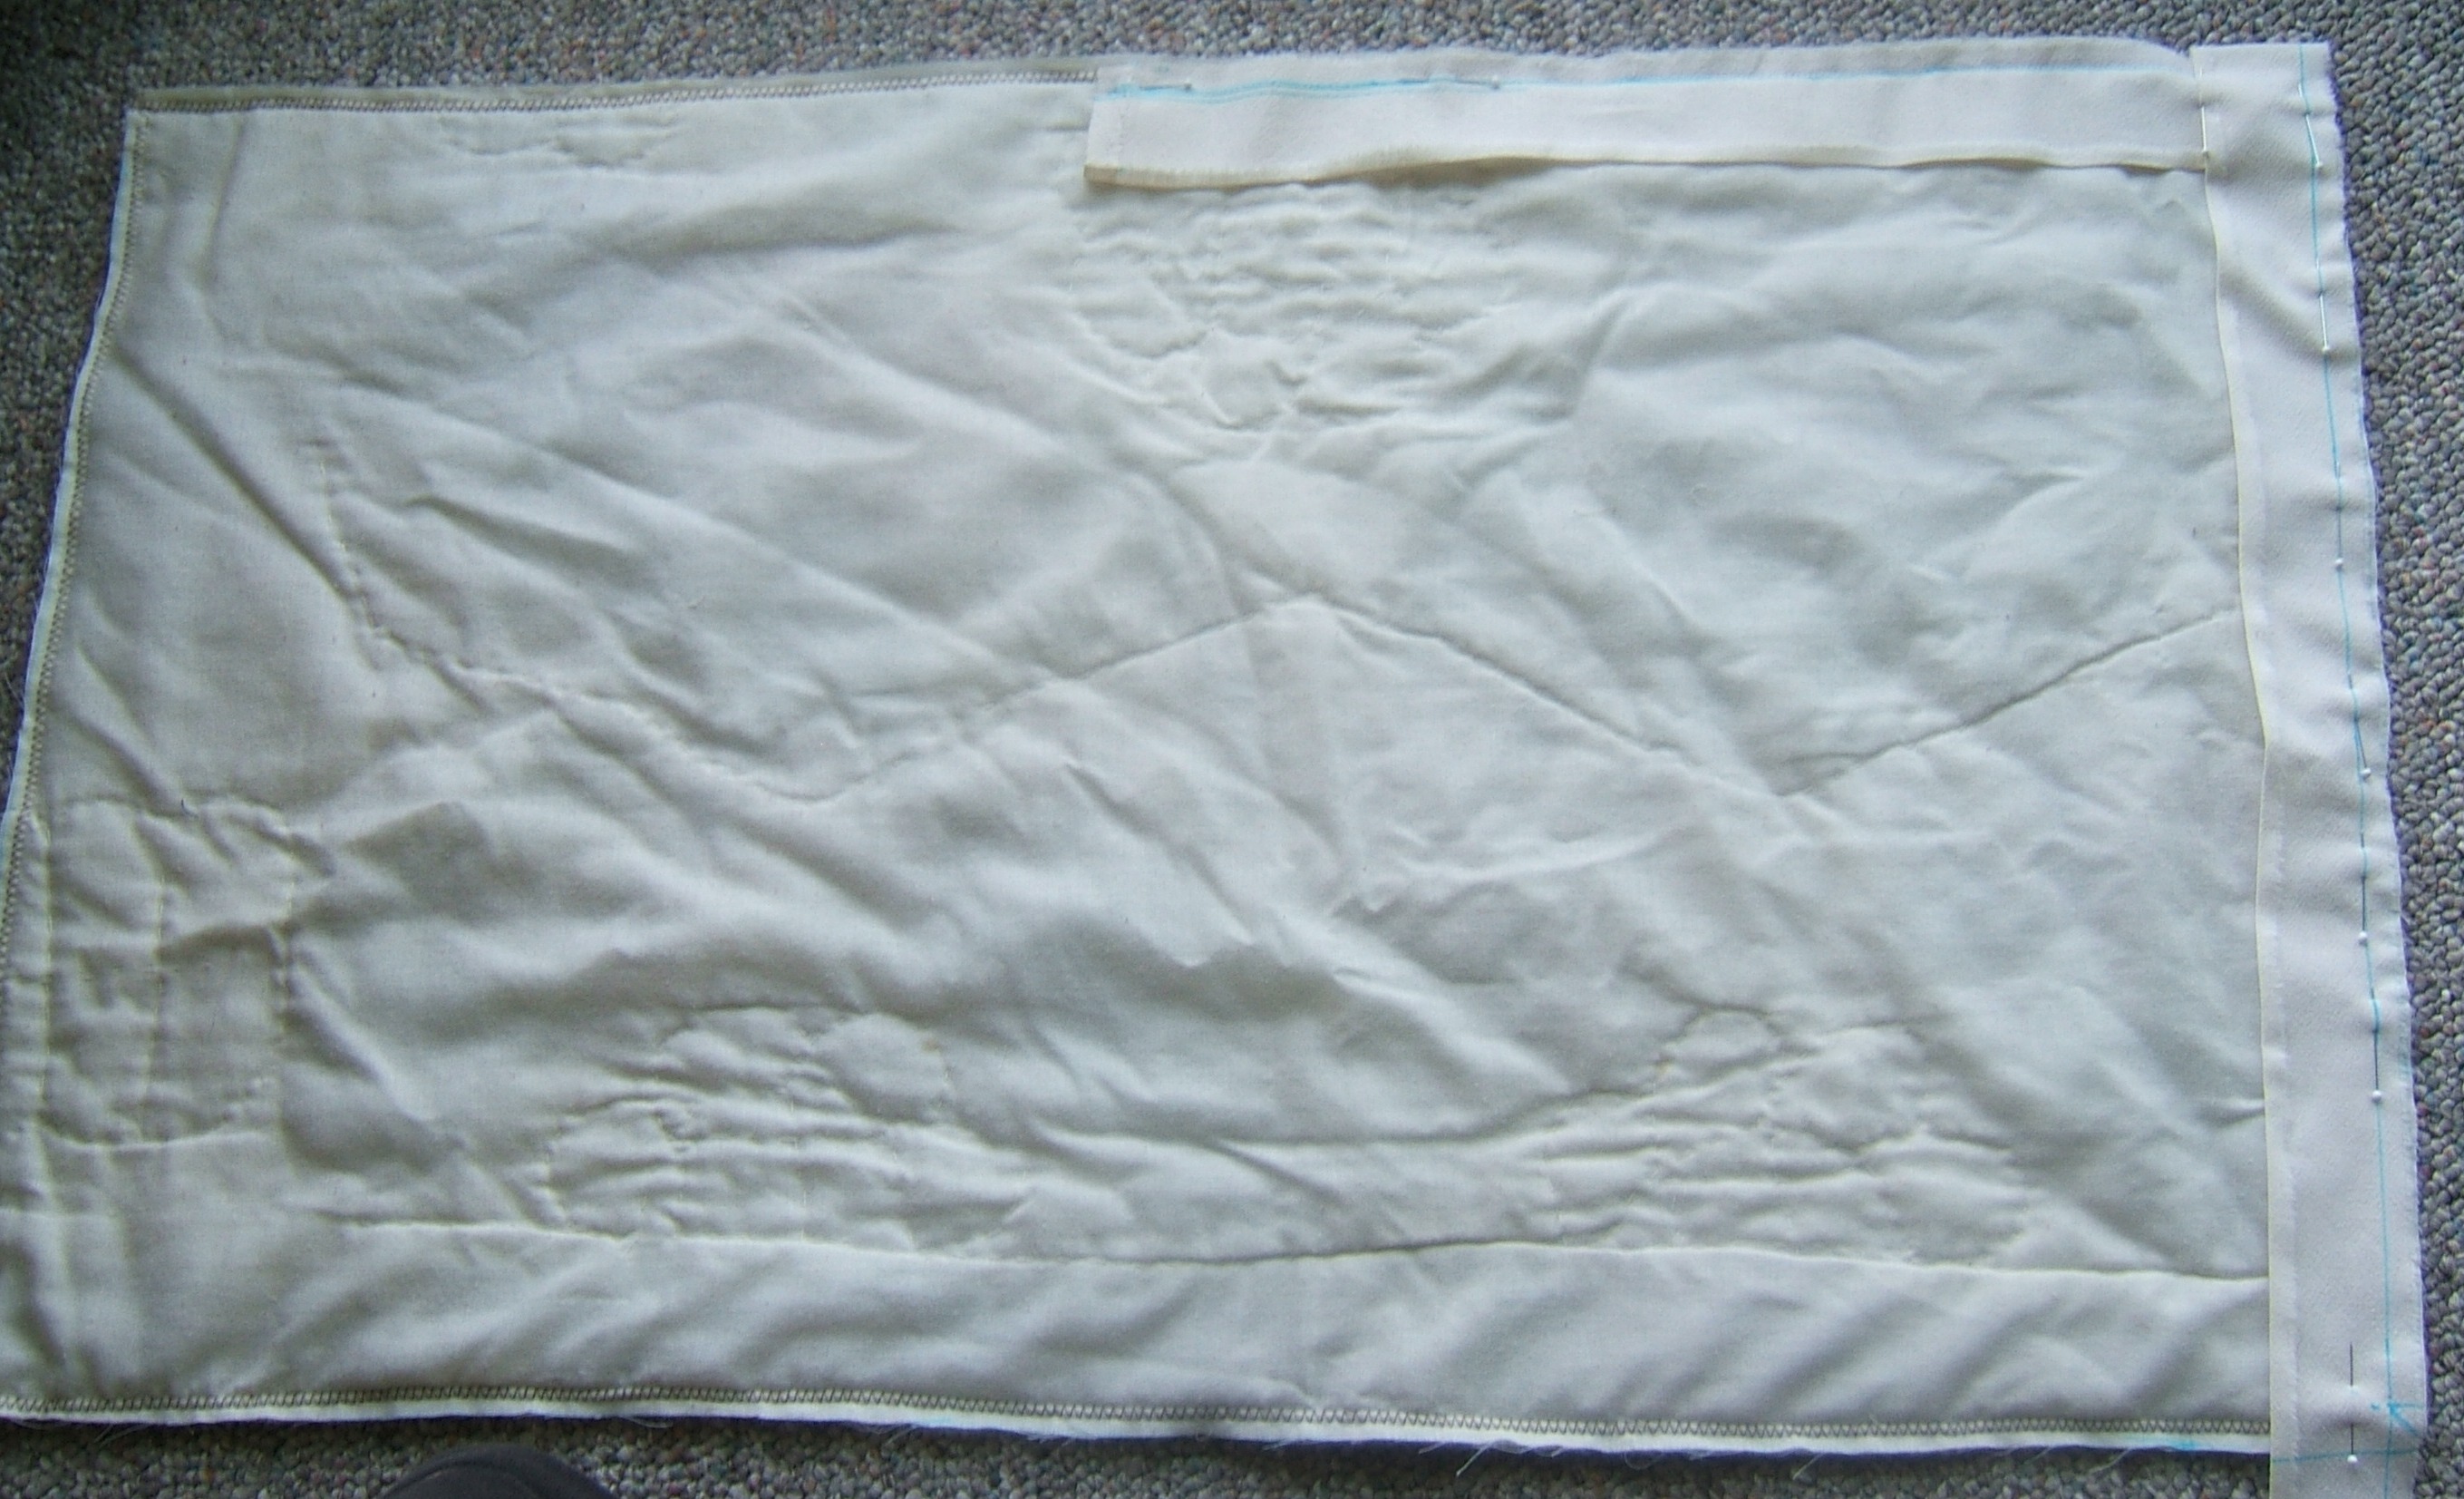
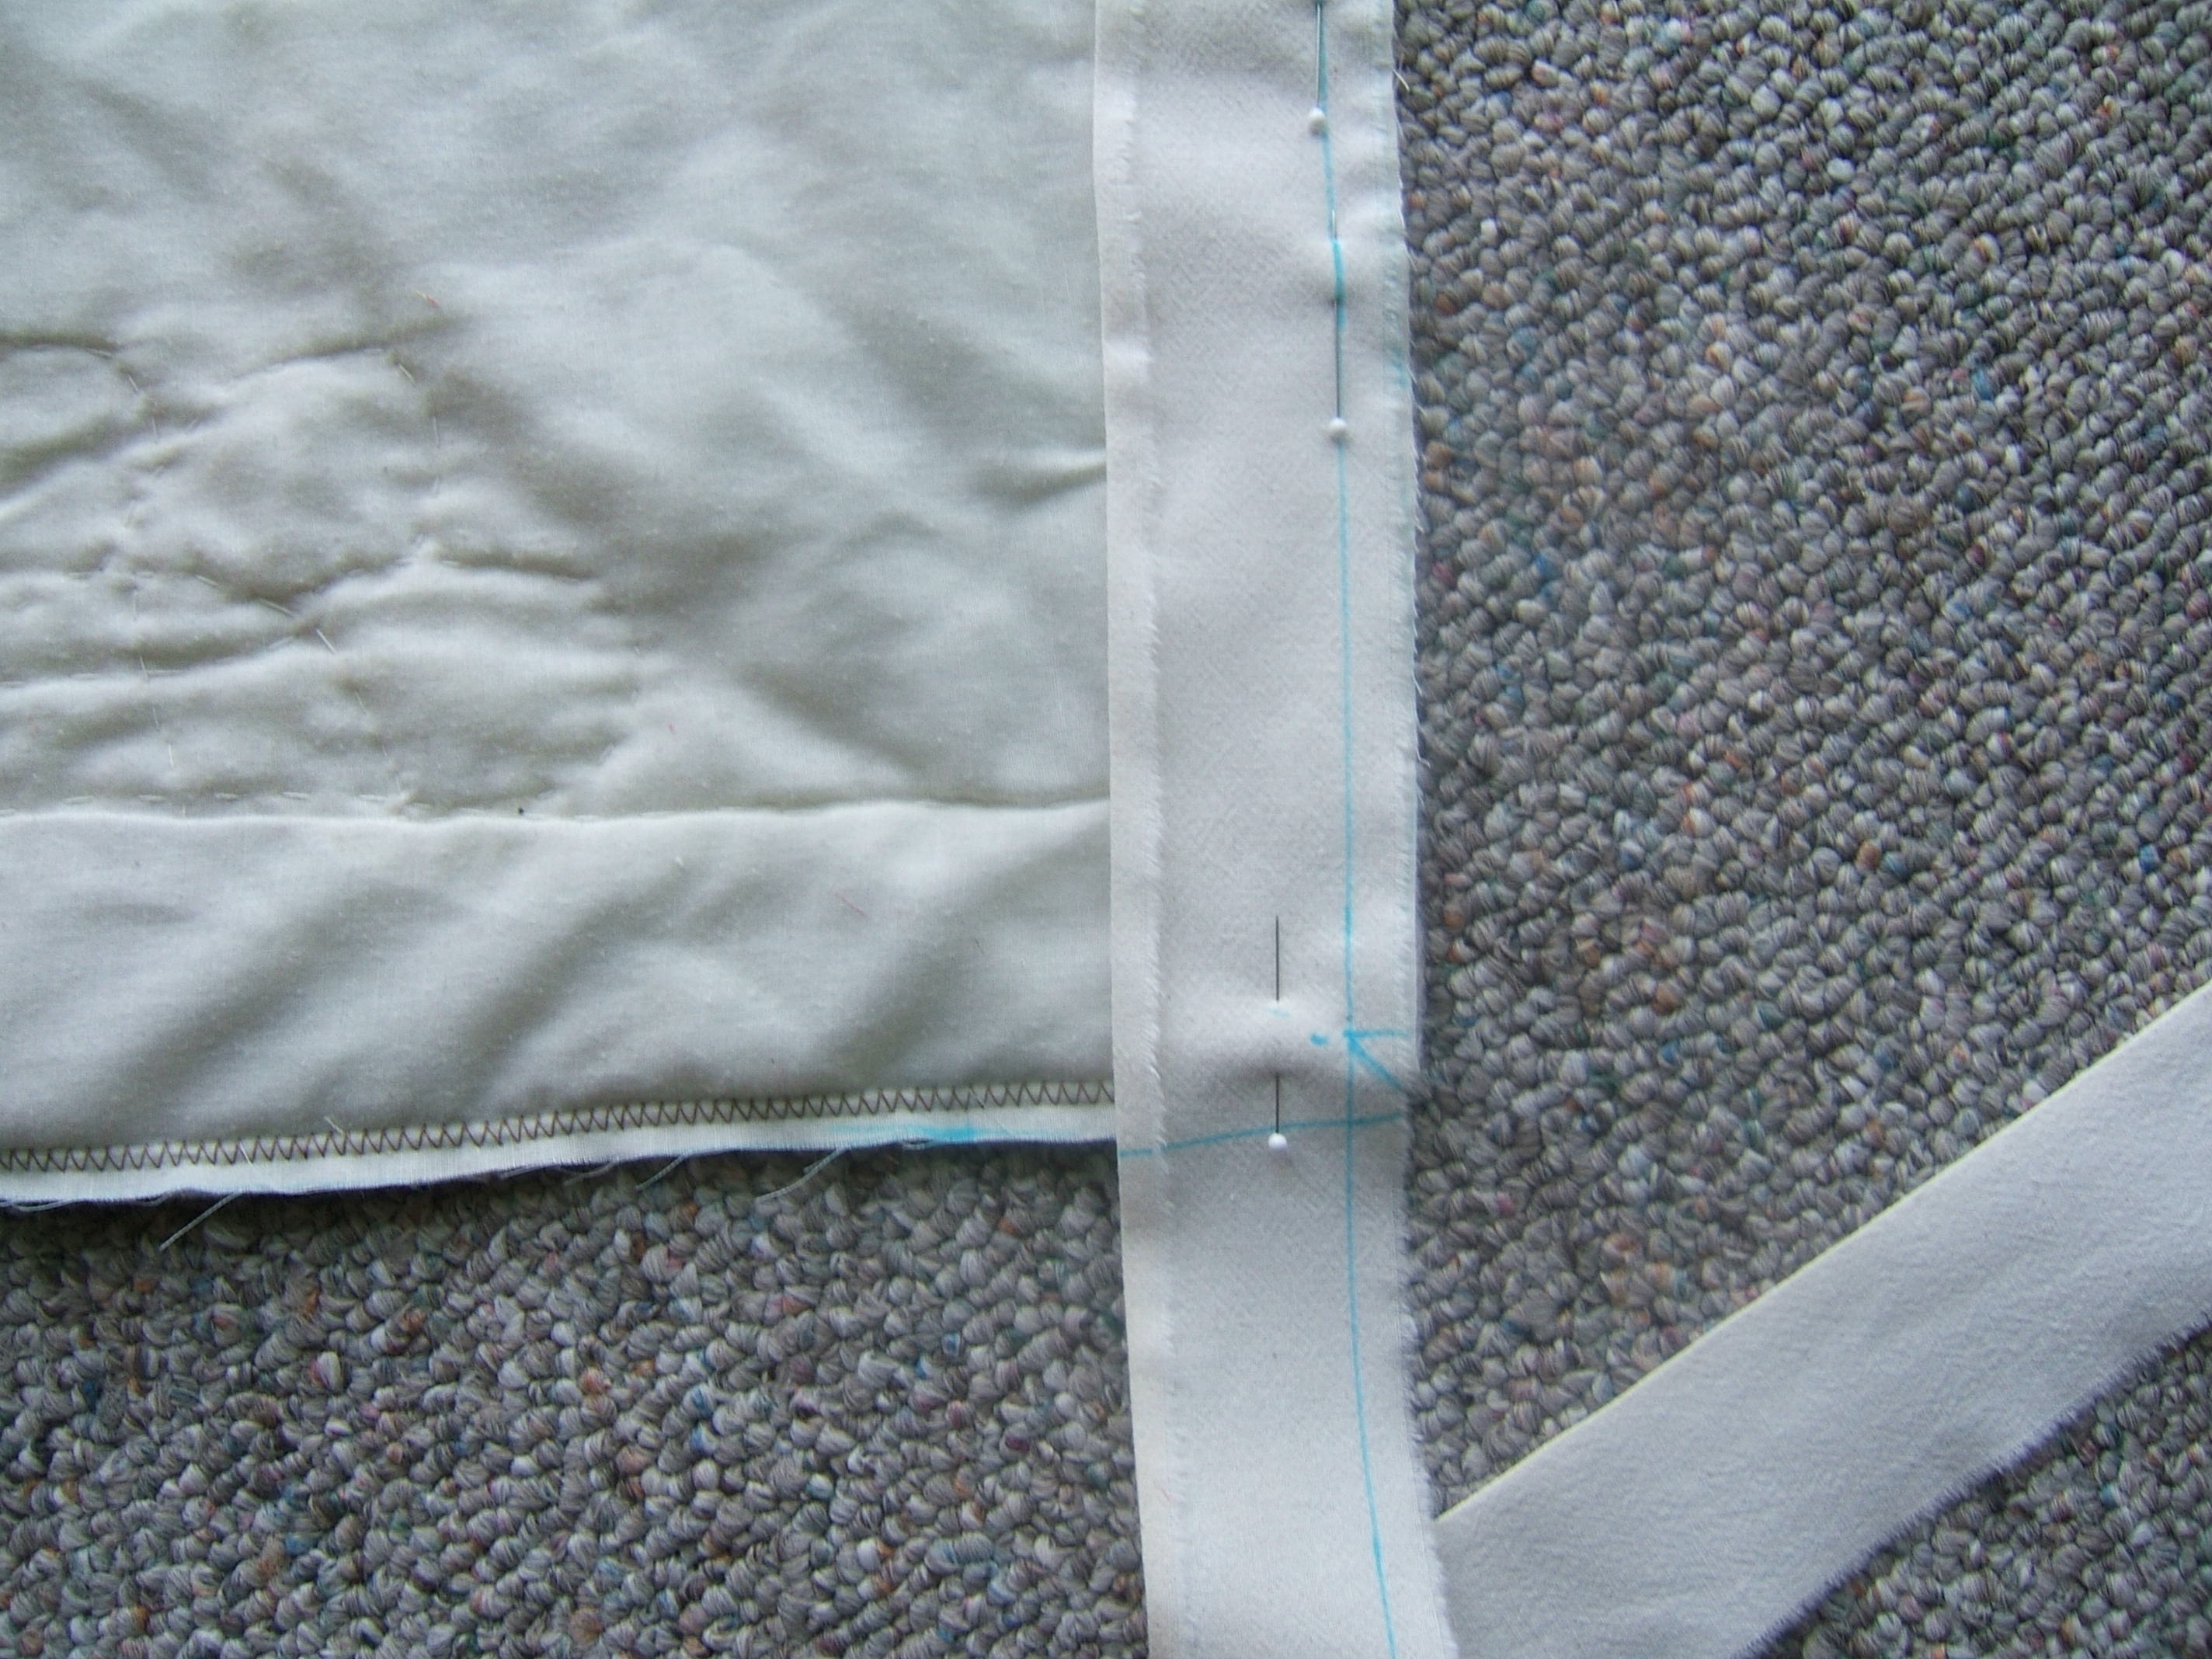
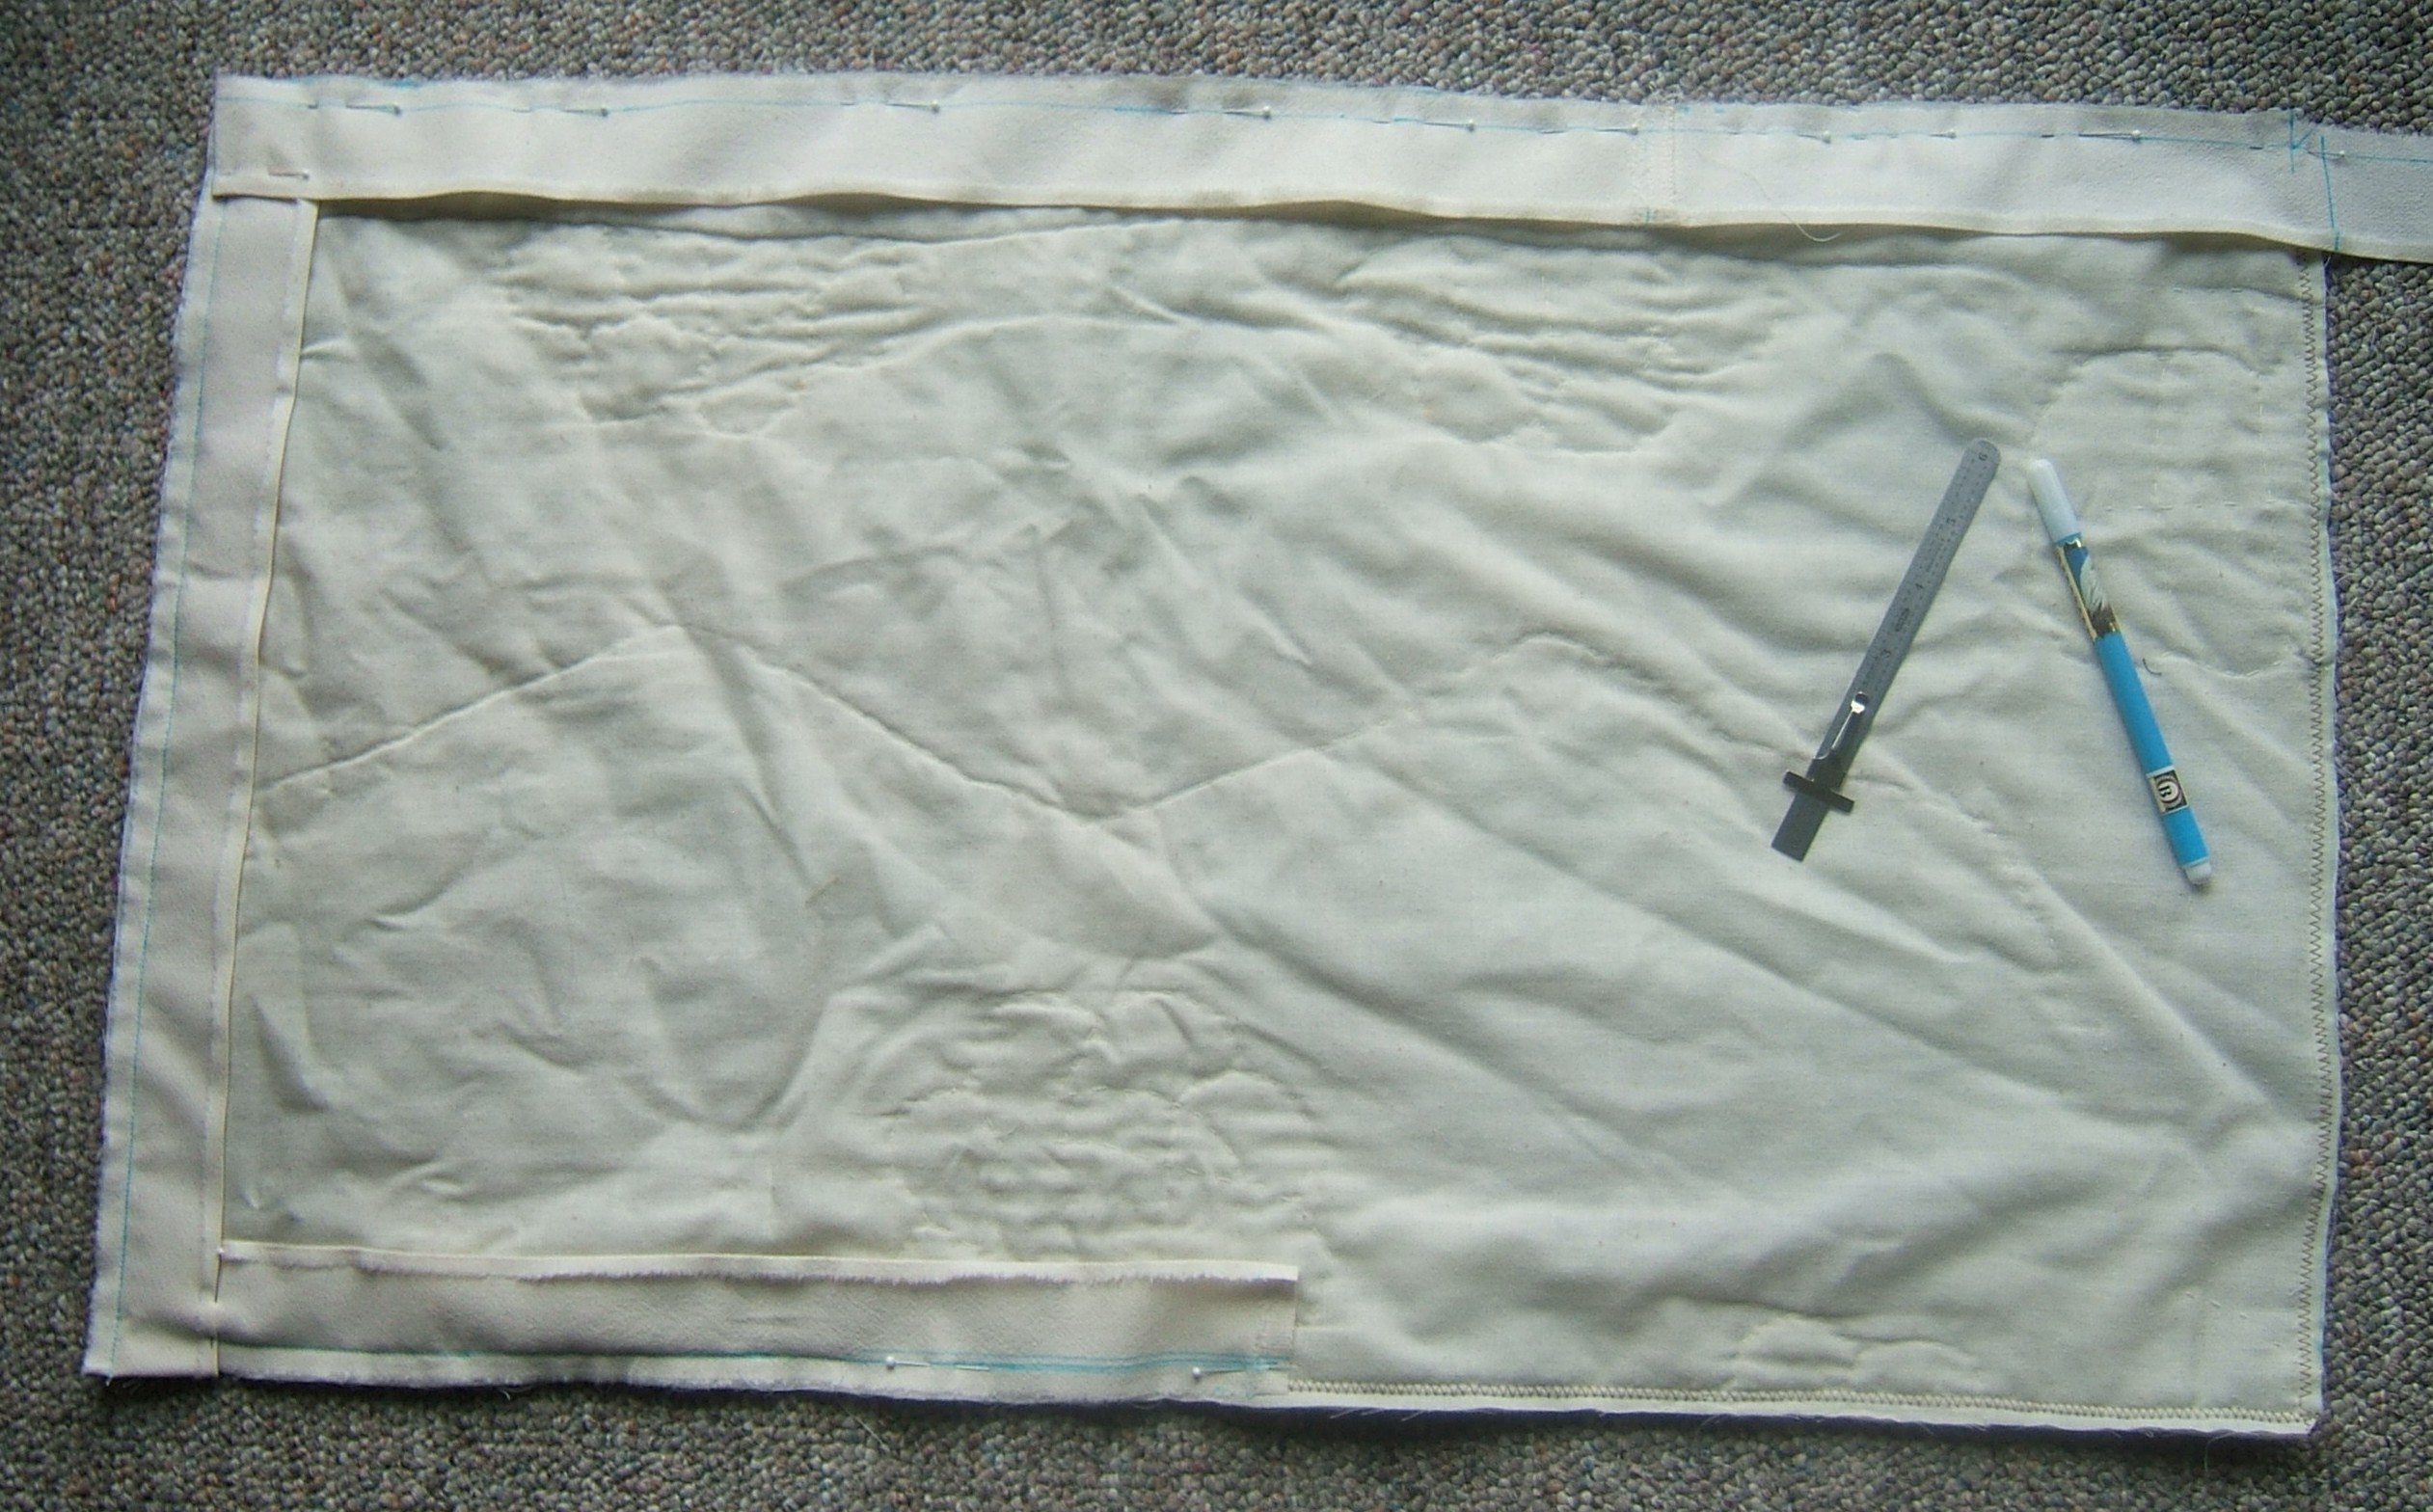
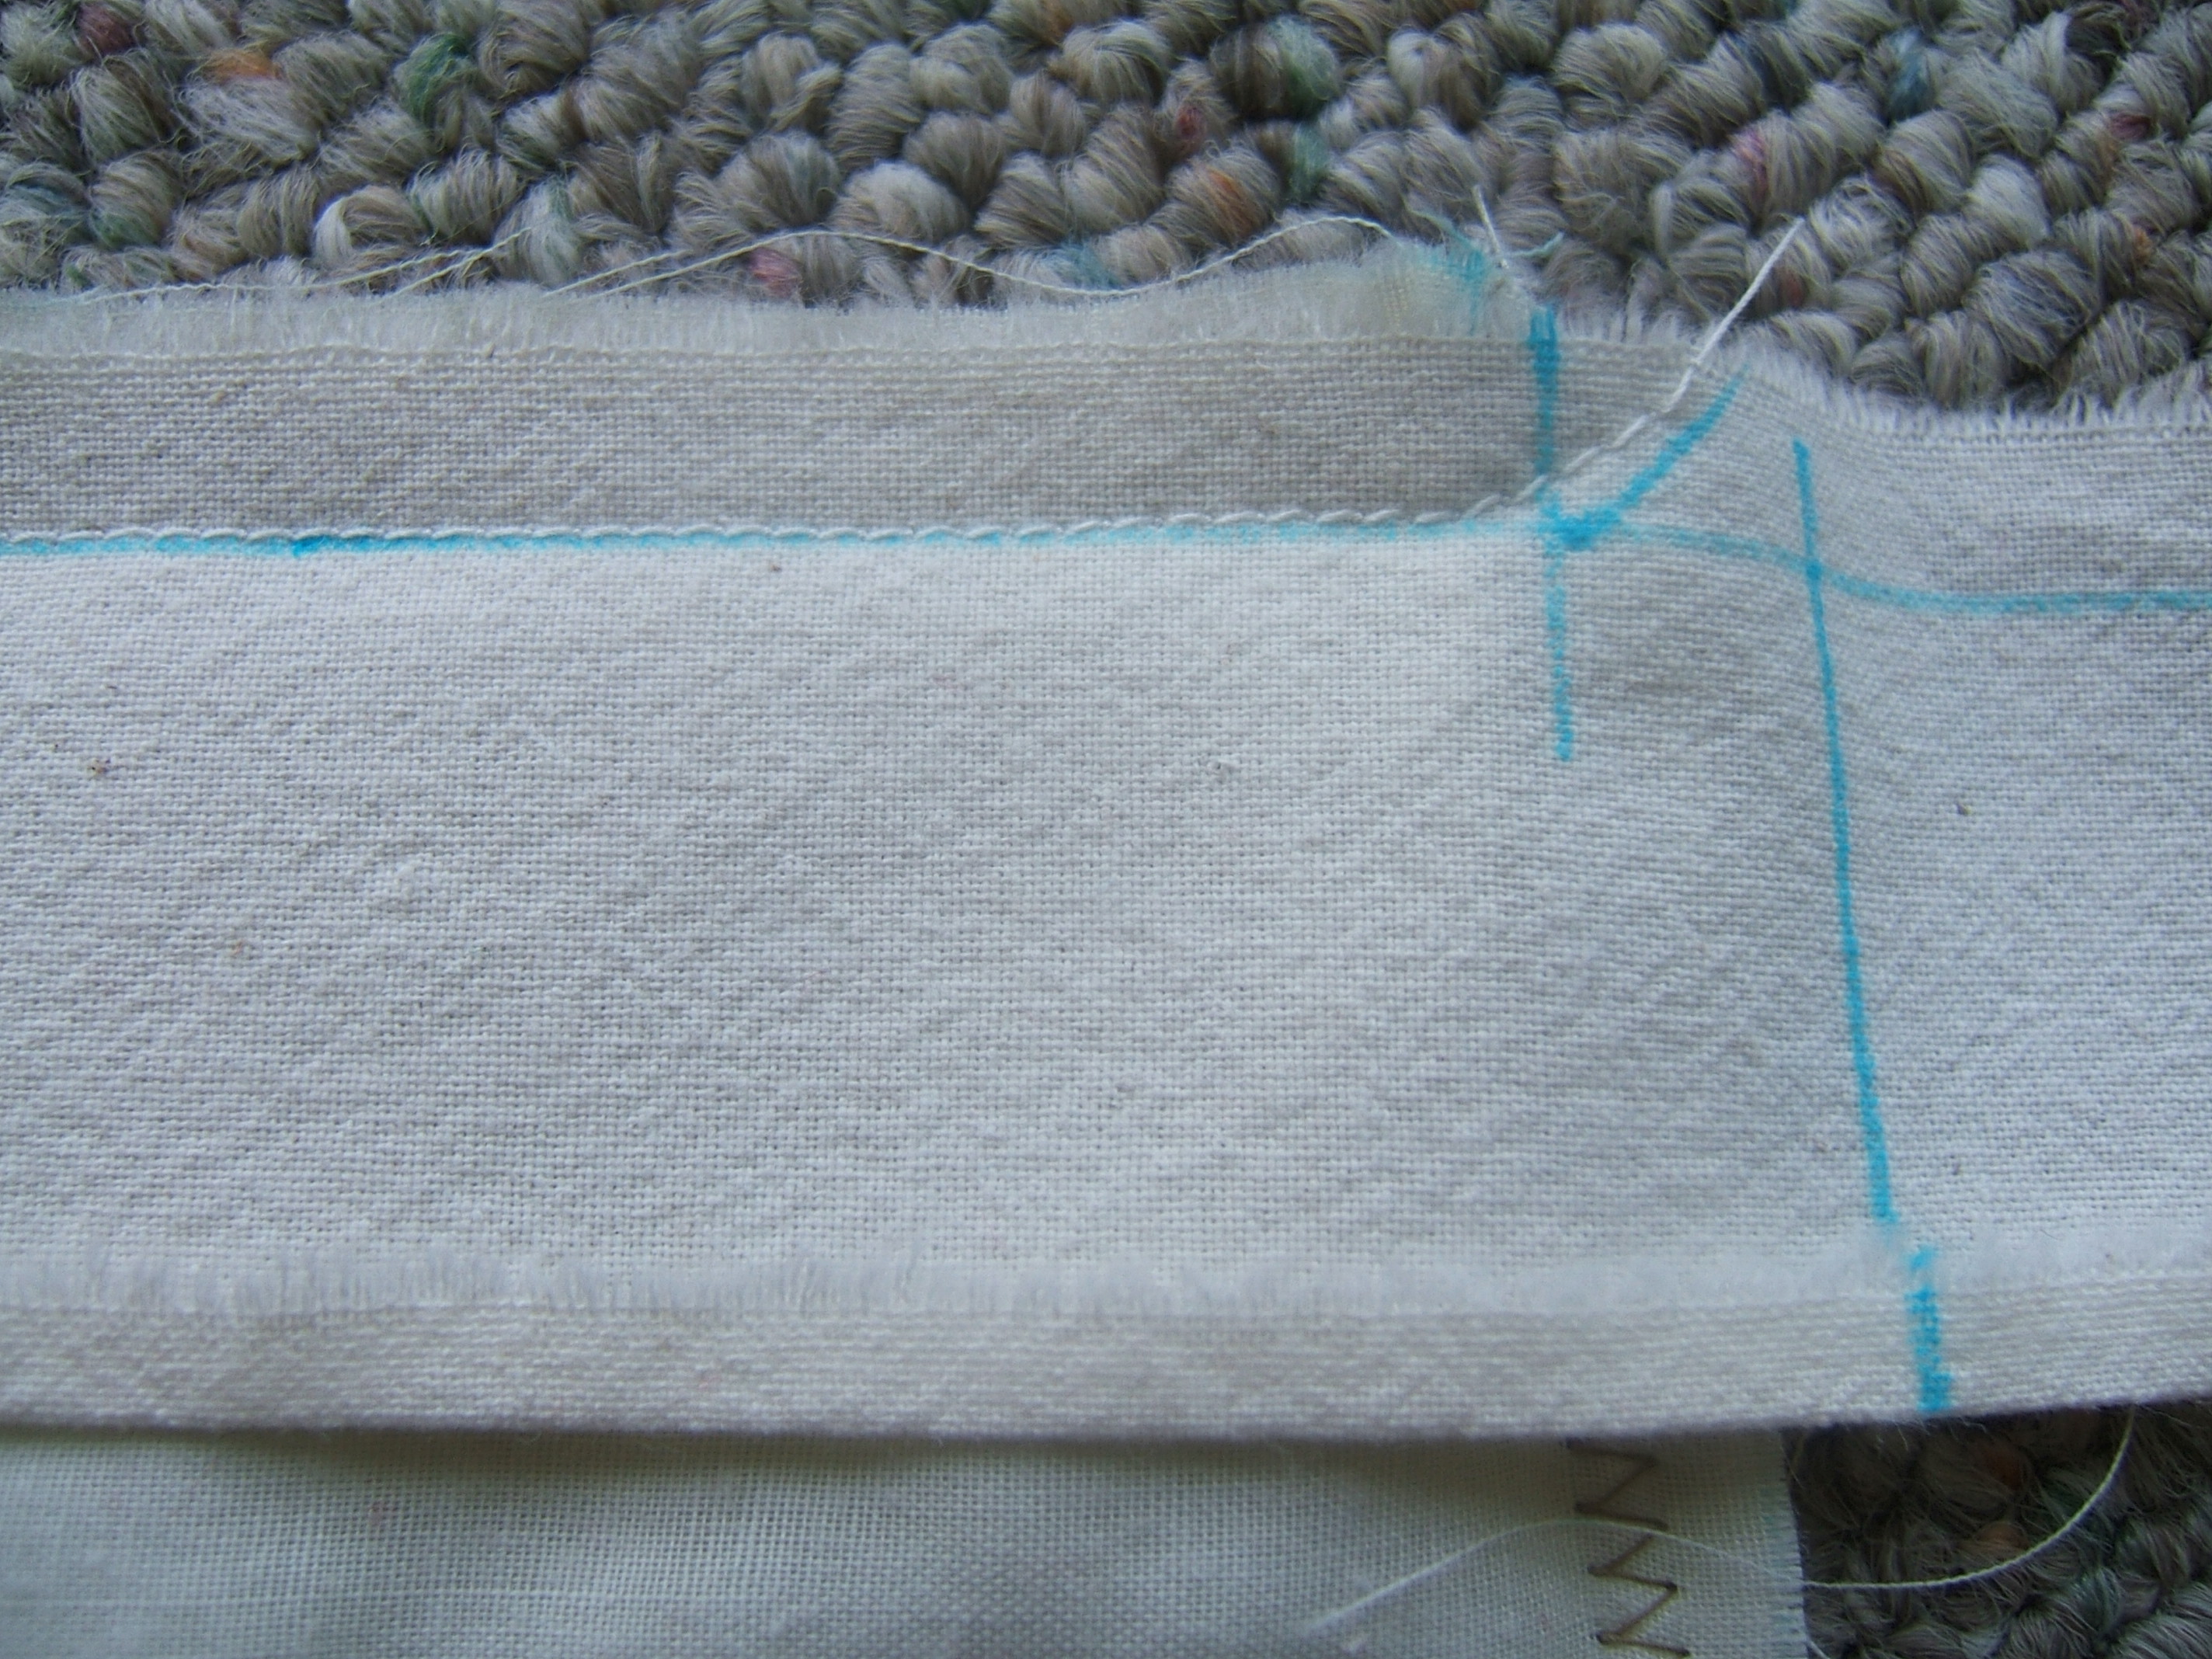
This morning, I did the job on the living-room floor, and divided all four sides into one-yard increments. I marked with a wash-out pen on the floor, sticking a magazine-style ad under the place where I wanted to mark, then sat in the rocking chair to running-stitch over the marks.
The width of the fabric is nine feet and eleven inches at both torn edges. The length is a quarter inch longer on one selvage than on the other. I started marking one inch from the torn edge, and had three inches left on one side and three and a quarter on the other.
This morning I spun the soaking water out and started the sample washing, then paused it until after supper because I needed to go shopping. This evening, I finished, and found that it had lost three inches of each yard in both directions wet, and was about the same after tumble drying.
The selvages appear to be quite usable. So to make a sheet, I need only tear off a suitable length and hem both ends.
And now I'm back to one sheet filling up the entire washing machine. Perhaps the linen ones will hold for a while; on Monday, I washed the one I'd basted around a hole in, and it came out still fit to use.
I put two of the three elastics into Bra B, then left the bra and tools beside the rocking chair. Al had not noticed when last I looked.
So I got up and tucked the thimble and bodkin into the snack bag of thread.
Bra B is hanging in the closet; I'm not sure when I did the work.
The garments I washed with the sample felt a bit starchy when I put them away; perhaps I didn't get all the sizing out. Though I did wash it twice, I didn't let it dry between washings, and I think that drying and re-soaking has an effect.
I ordered two yards of hemp-and-cotton jersey. It not only is too fine to make third-piece lining, it's too fine to make a T-shirt. I'll use it up making briefs sooner or later.
The silk tights are working out fine. At least the pair I wore on Tuesday is.
I validated OUTLINK.HTM yesterday, and the link I was trying to add still acted like a comment. Finally traced the problem to a missing close quote. Getting all the other errors out made it a bit easier to find.
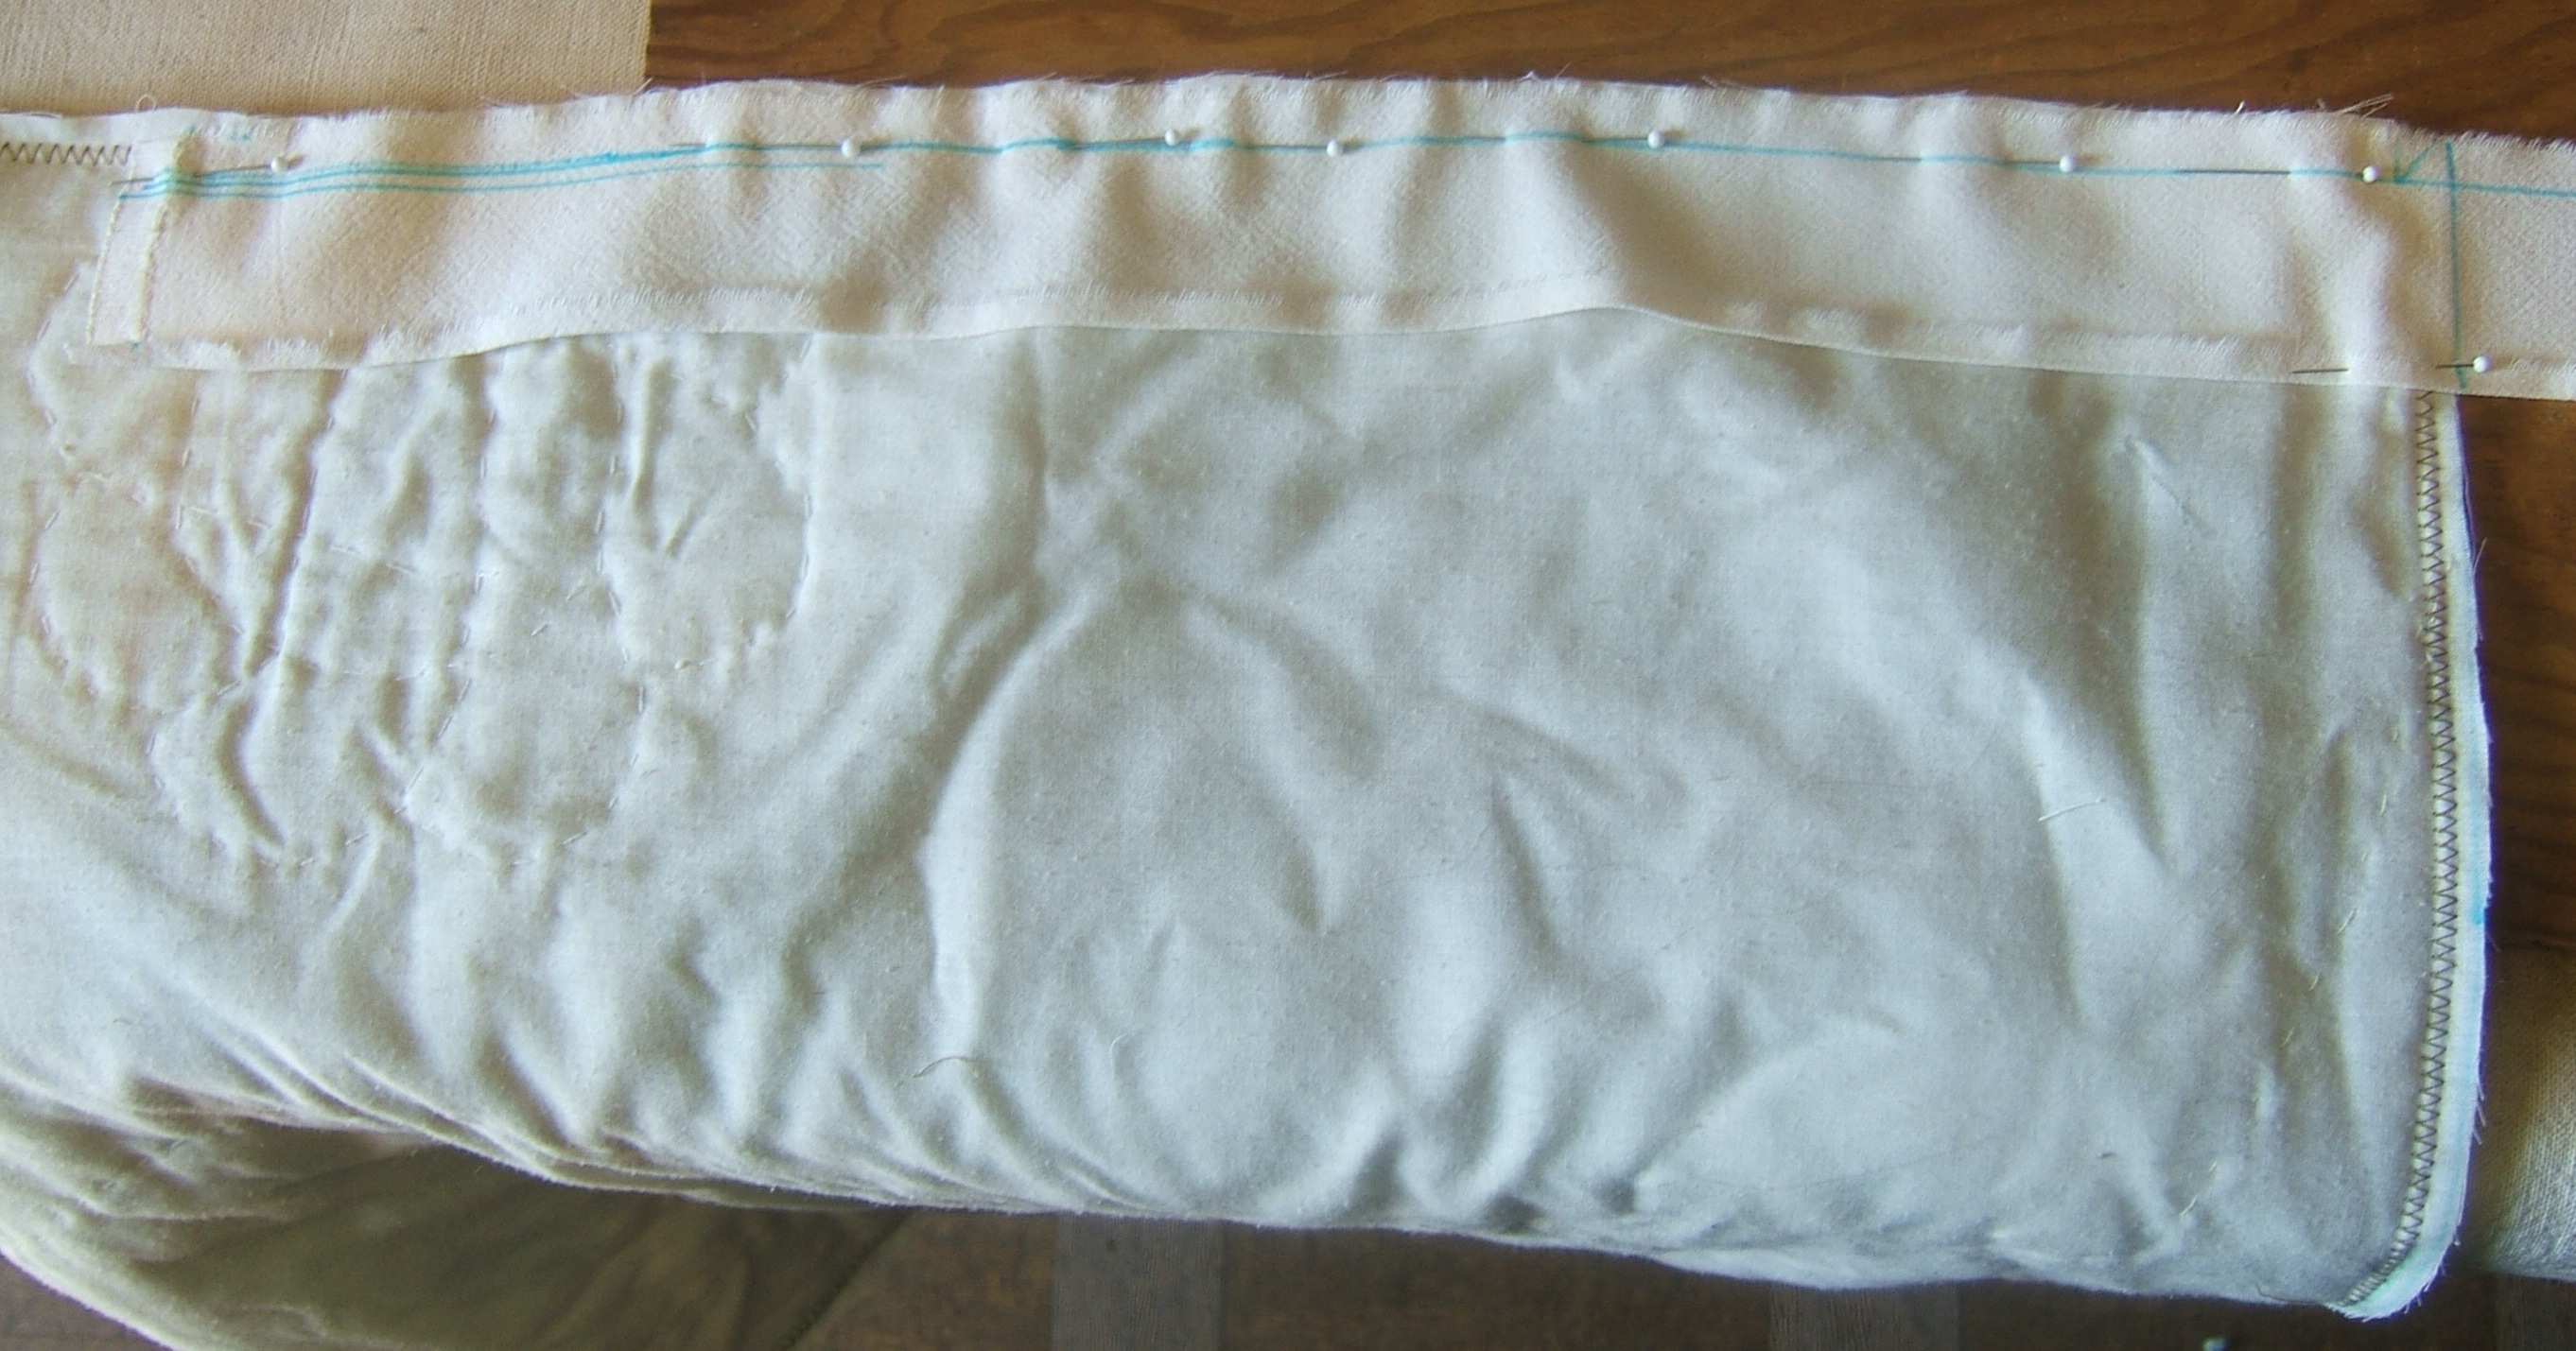
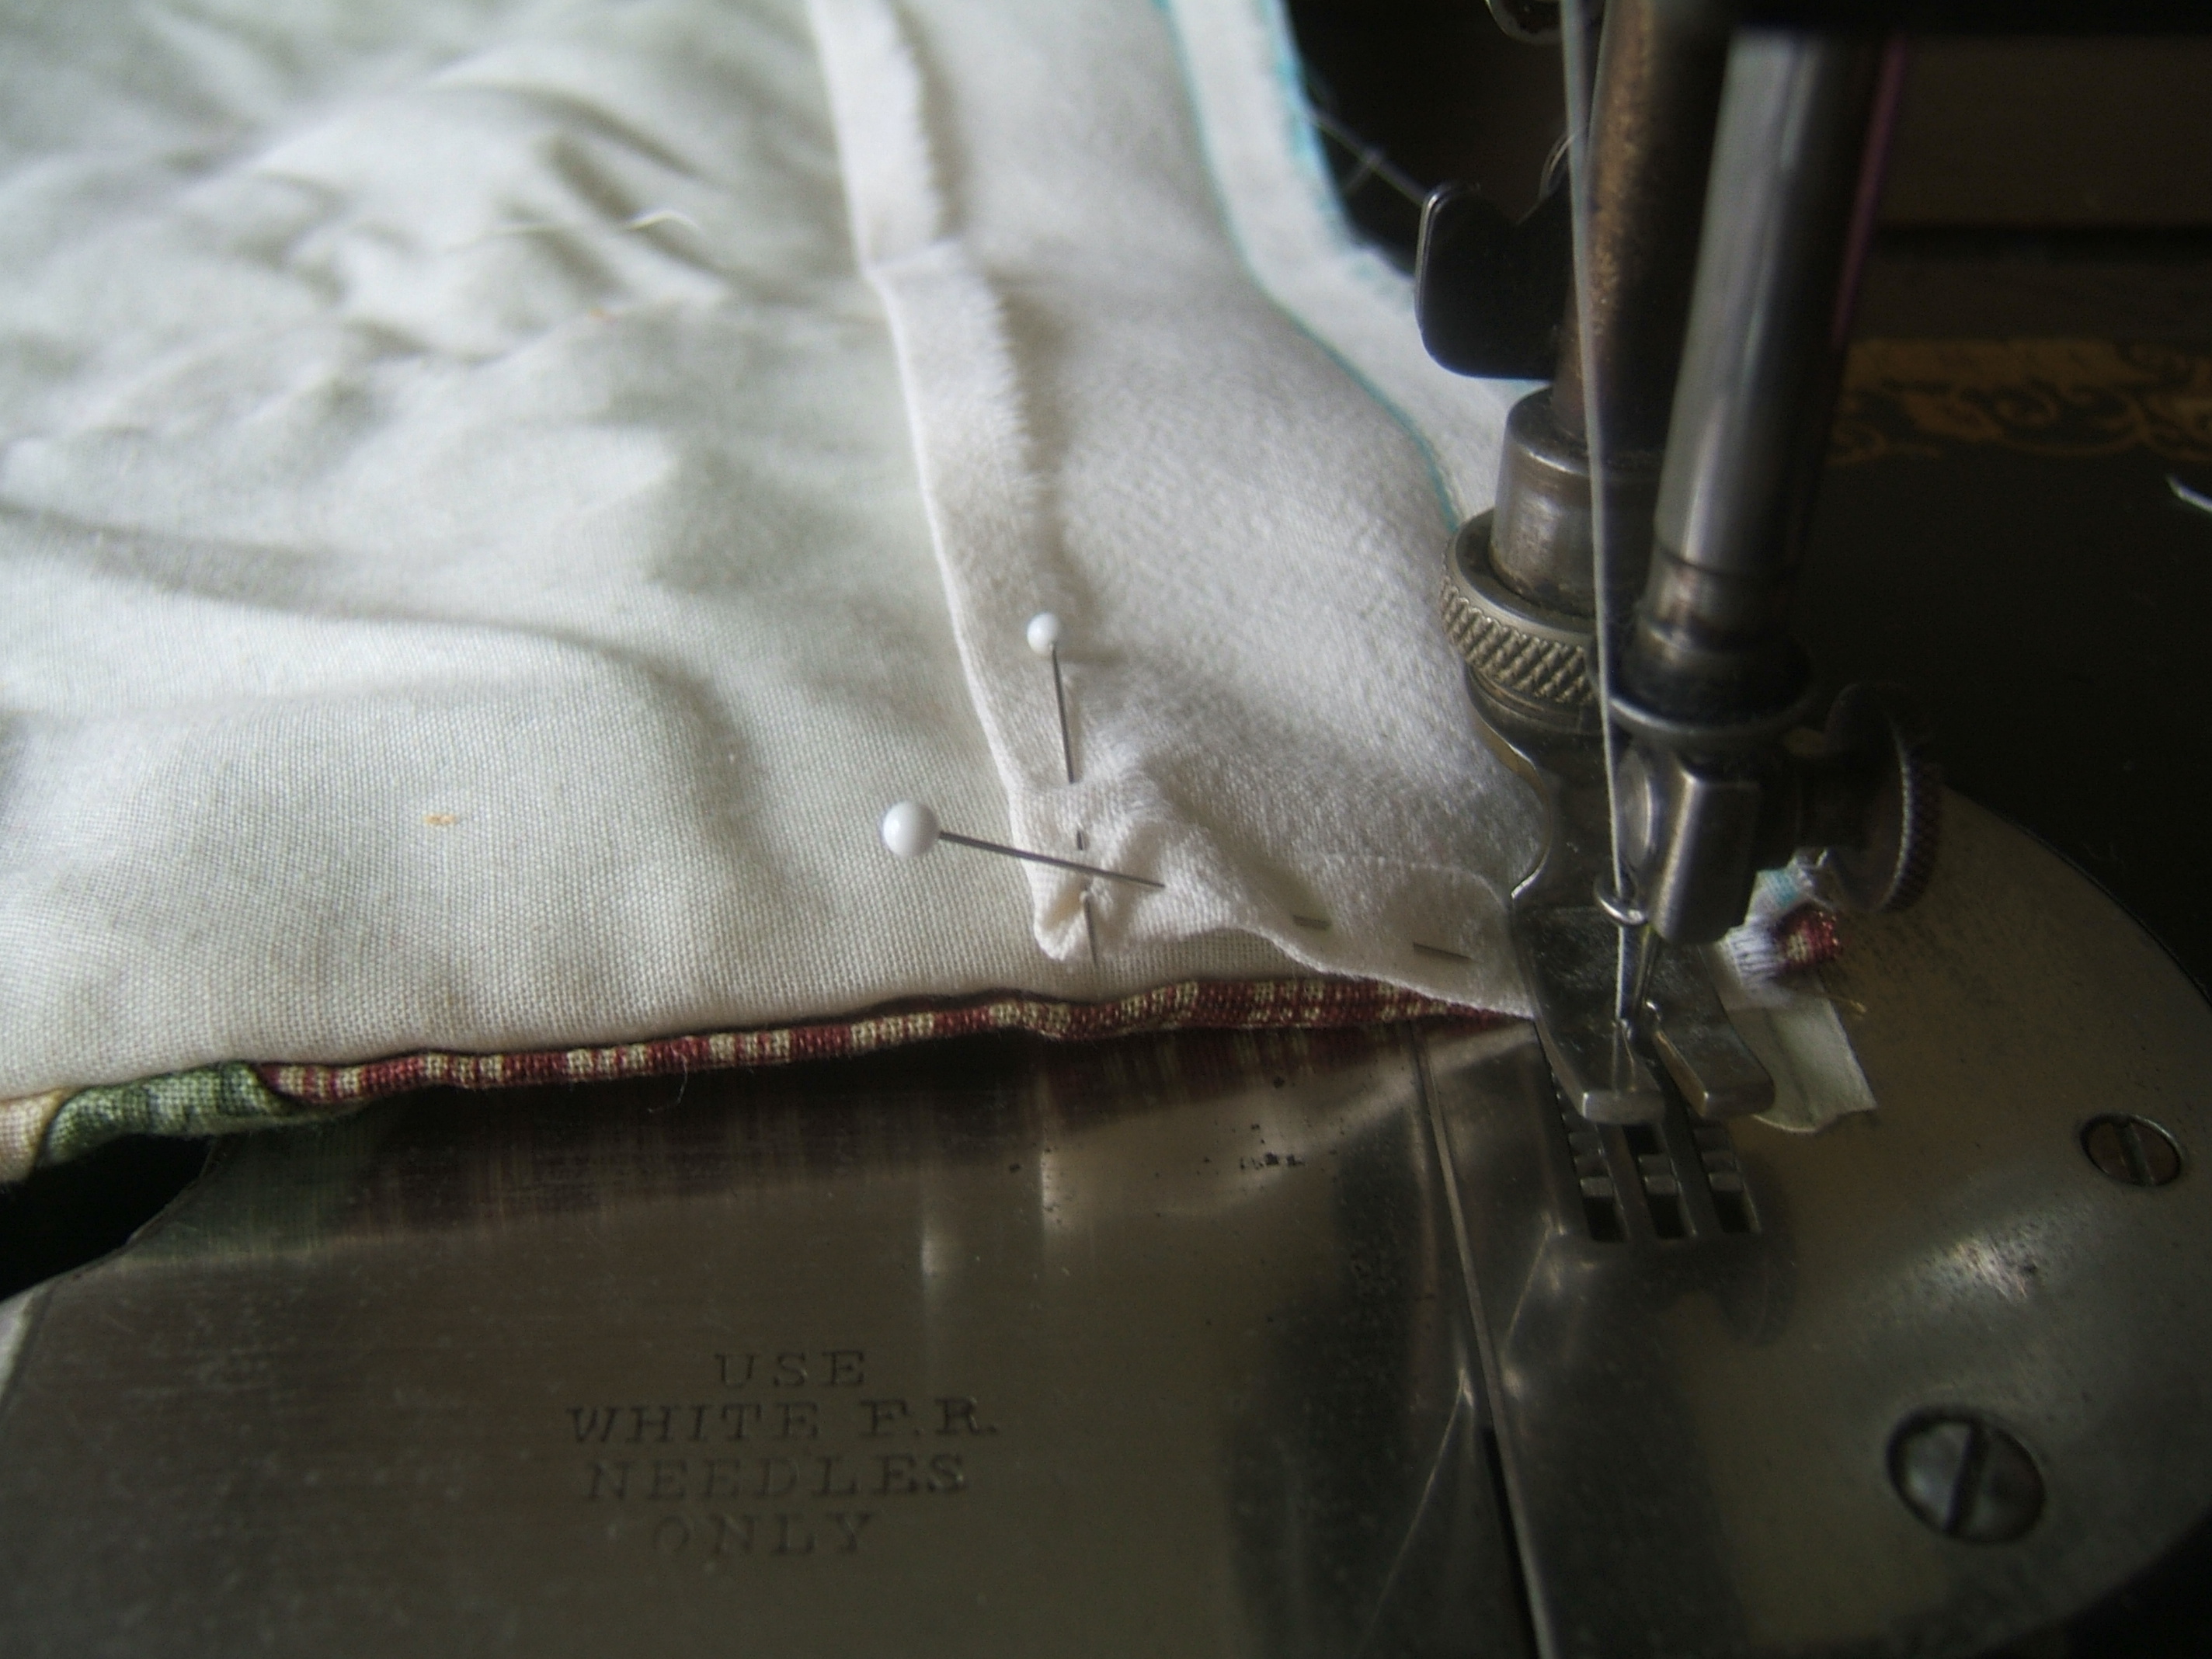
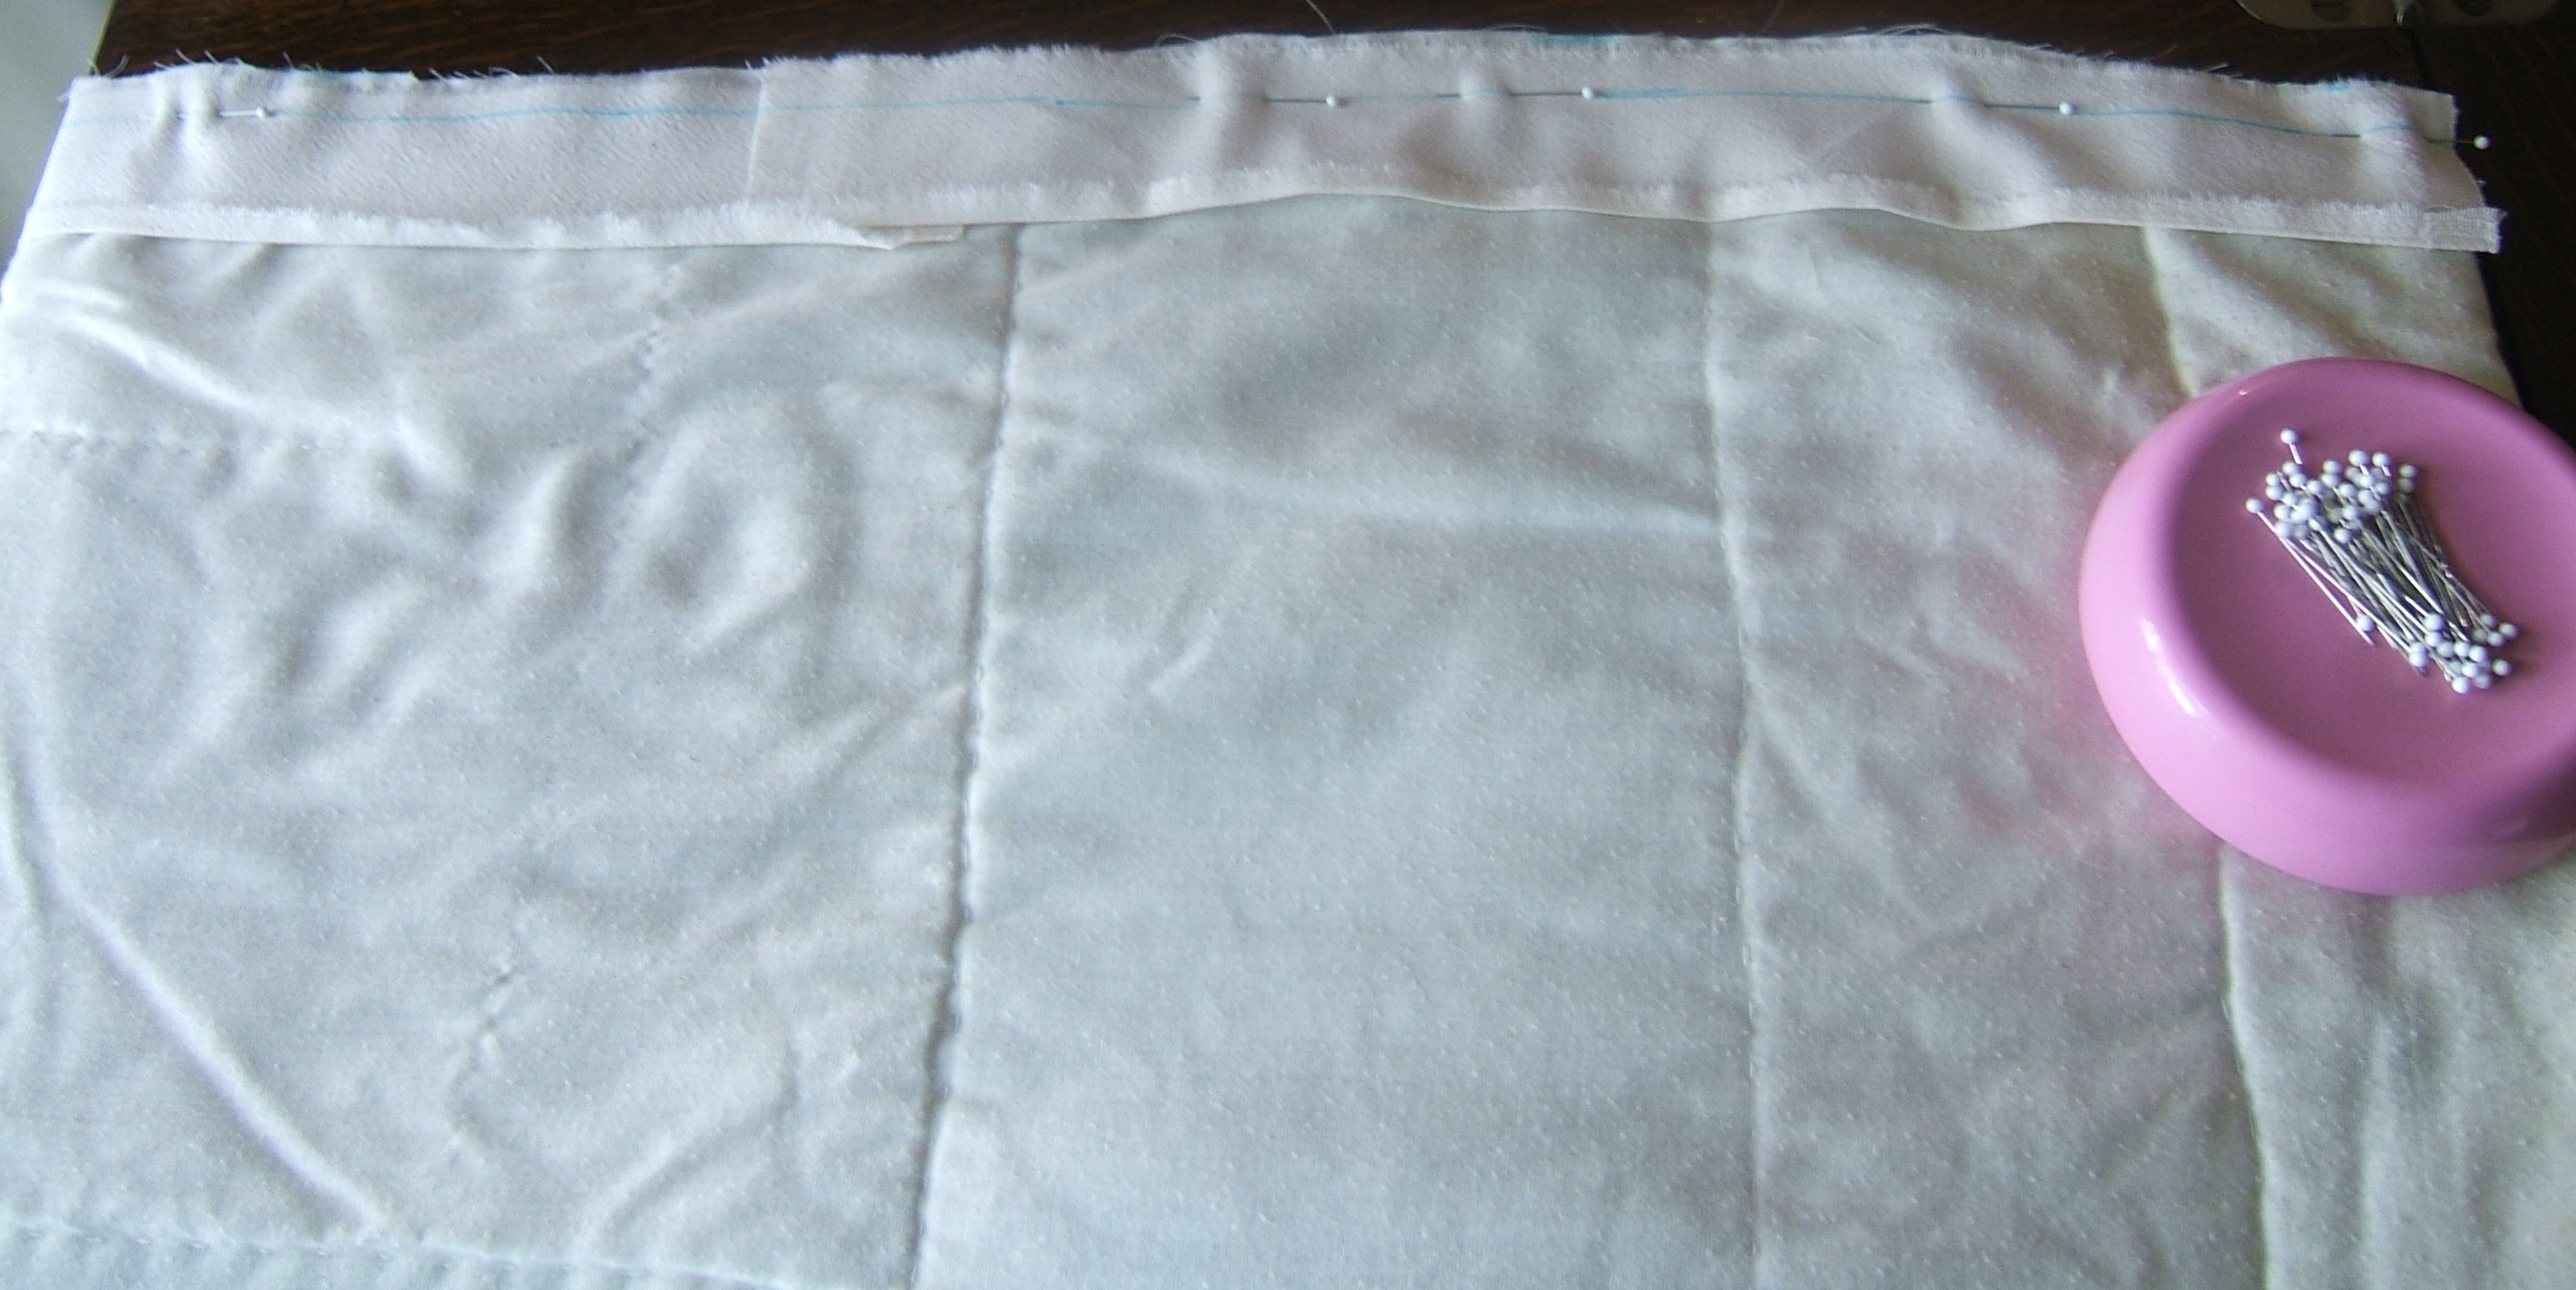
I tore the sample muslin into five pillow cases and sewed the seams today.
I ran out of pins — partly because I didn't press the fabric first, so I was pinning out creases, and I had to watch that it was flat as it went under the needle.
I planned the tears to use up every bit of the sample, and suspect that I've made the cases too loose. I think that next time I'll tear the selvages off first. If I remember. I had four fairly-new cases before I made these five, so that makes nine cases for six or seven pillows, so all the worn-sheet cases will wear out before I feel the need of more.
I have decided that when I make a sheet, I shall simply tear off three yards and hem the ends. I'm pretty sure that the classic "81 x 108" was the unhemmed, unwashed fabric.
On the other hand, I suspect that two-and-three-quarters yards (three yards minus nine inches) will make a rather long sheet, since we don't fold the sheet back to protect the blankets any more.
Hemmed the five pillow cases and put them into the linen closet today. One-inch hems.
Yesterday I went to Lowery's and bought ten yards of quarter-inch elastic, a box of pins, and a 28" parka zipper.
I selected red-headed pins, to be different from what I already have. I think that they will also be easier to find when I drop one on the carpet. I didn't check that they are glass, but just selected a box that looked like the one I recently emptied.
The parka zipper is to repair Dave's down jacket. I doubt that I can do it in time to wear it this winter.
The bolt of muslin is still on the card table in the parlor because I can't figure out what to do with it. I think that I can put it on the shelf where my five-foot muslin is, then put the roll back on top of it.
I'll have to move the shelf above it — if I ever contrive to put the sheeting on the shelf.
This morning I measured one of the old sheets: two yards and two feet. That makes the traditional hundred-and-eight — three yards — just right. I'll lose nine inches to shrinking and four inches to hems, and the old sheet is a couple of inches longer than it needs to be.
So I tore three yards off the bolt, folded the piece with some difficulty, and stashed it in the linen closet under the sheets. Then I folded the bolt in half lengthwise as neatly as I could. It really needed to be picked up by one end and shaken to take out the internal wrinkles from being folded in half the other way, but that is purely impossible. I managed by folding the bolt a few layers at a time and tugging on them — there are still going to be weighed-in creases, but not as many.
I cleared off the shelf, cleared everything dangling from the shelf above, cleared a path to the shelf, and cleaned it with a synthetic lambs-wool duster.
So I put my arms under the bolt like a fork lift and carried it to the sewing room with the two ends dangling down — and discovered that there isn't a way in the world that I can slide it into the slot reserved for it. I ended up dropping it on the floor, causing the careful folds to come undone.
At that point the washing machine needed to be emptied. Alt least the card tables were clear for drying the sheet.
Perhaps if I pull the pattern trunk out of the way so that the bolt can lie flat on the floor, re-do the folds, somehow turn it around so that the fold is toward the shelves . . .
I have a feeling that I'm going to end up tearing off three more sheet-lengths. I'd really, really like to post-pone that until the new sheet is made and washed at least twice, though.
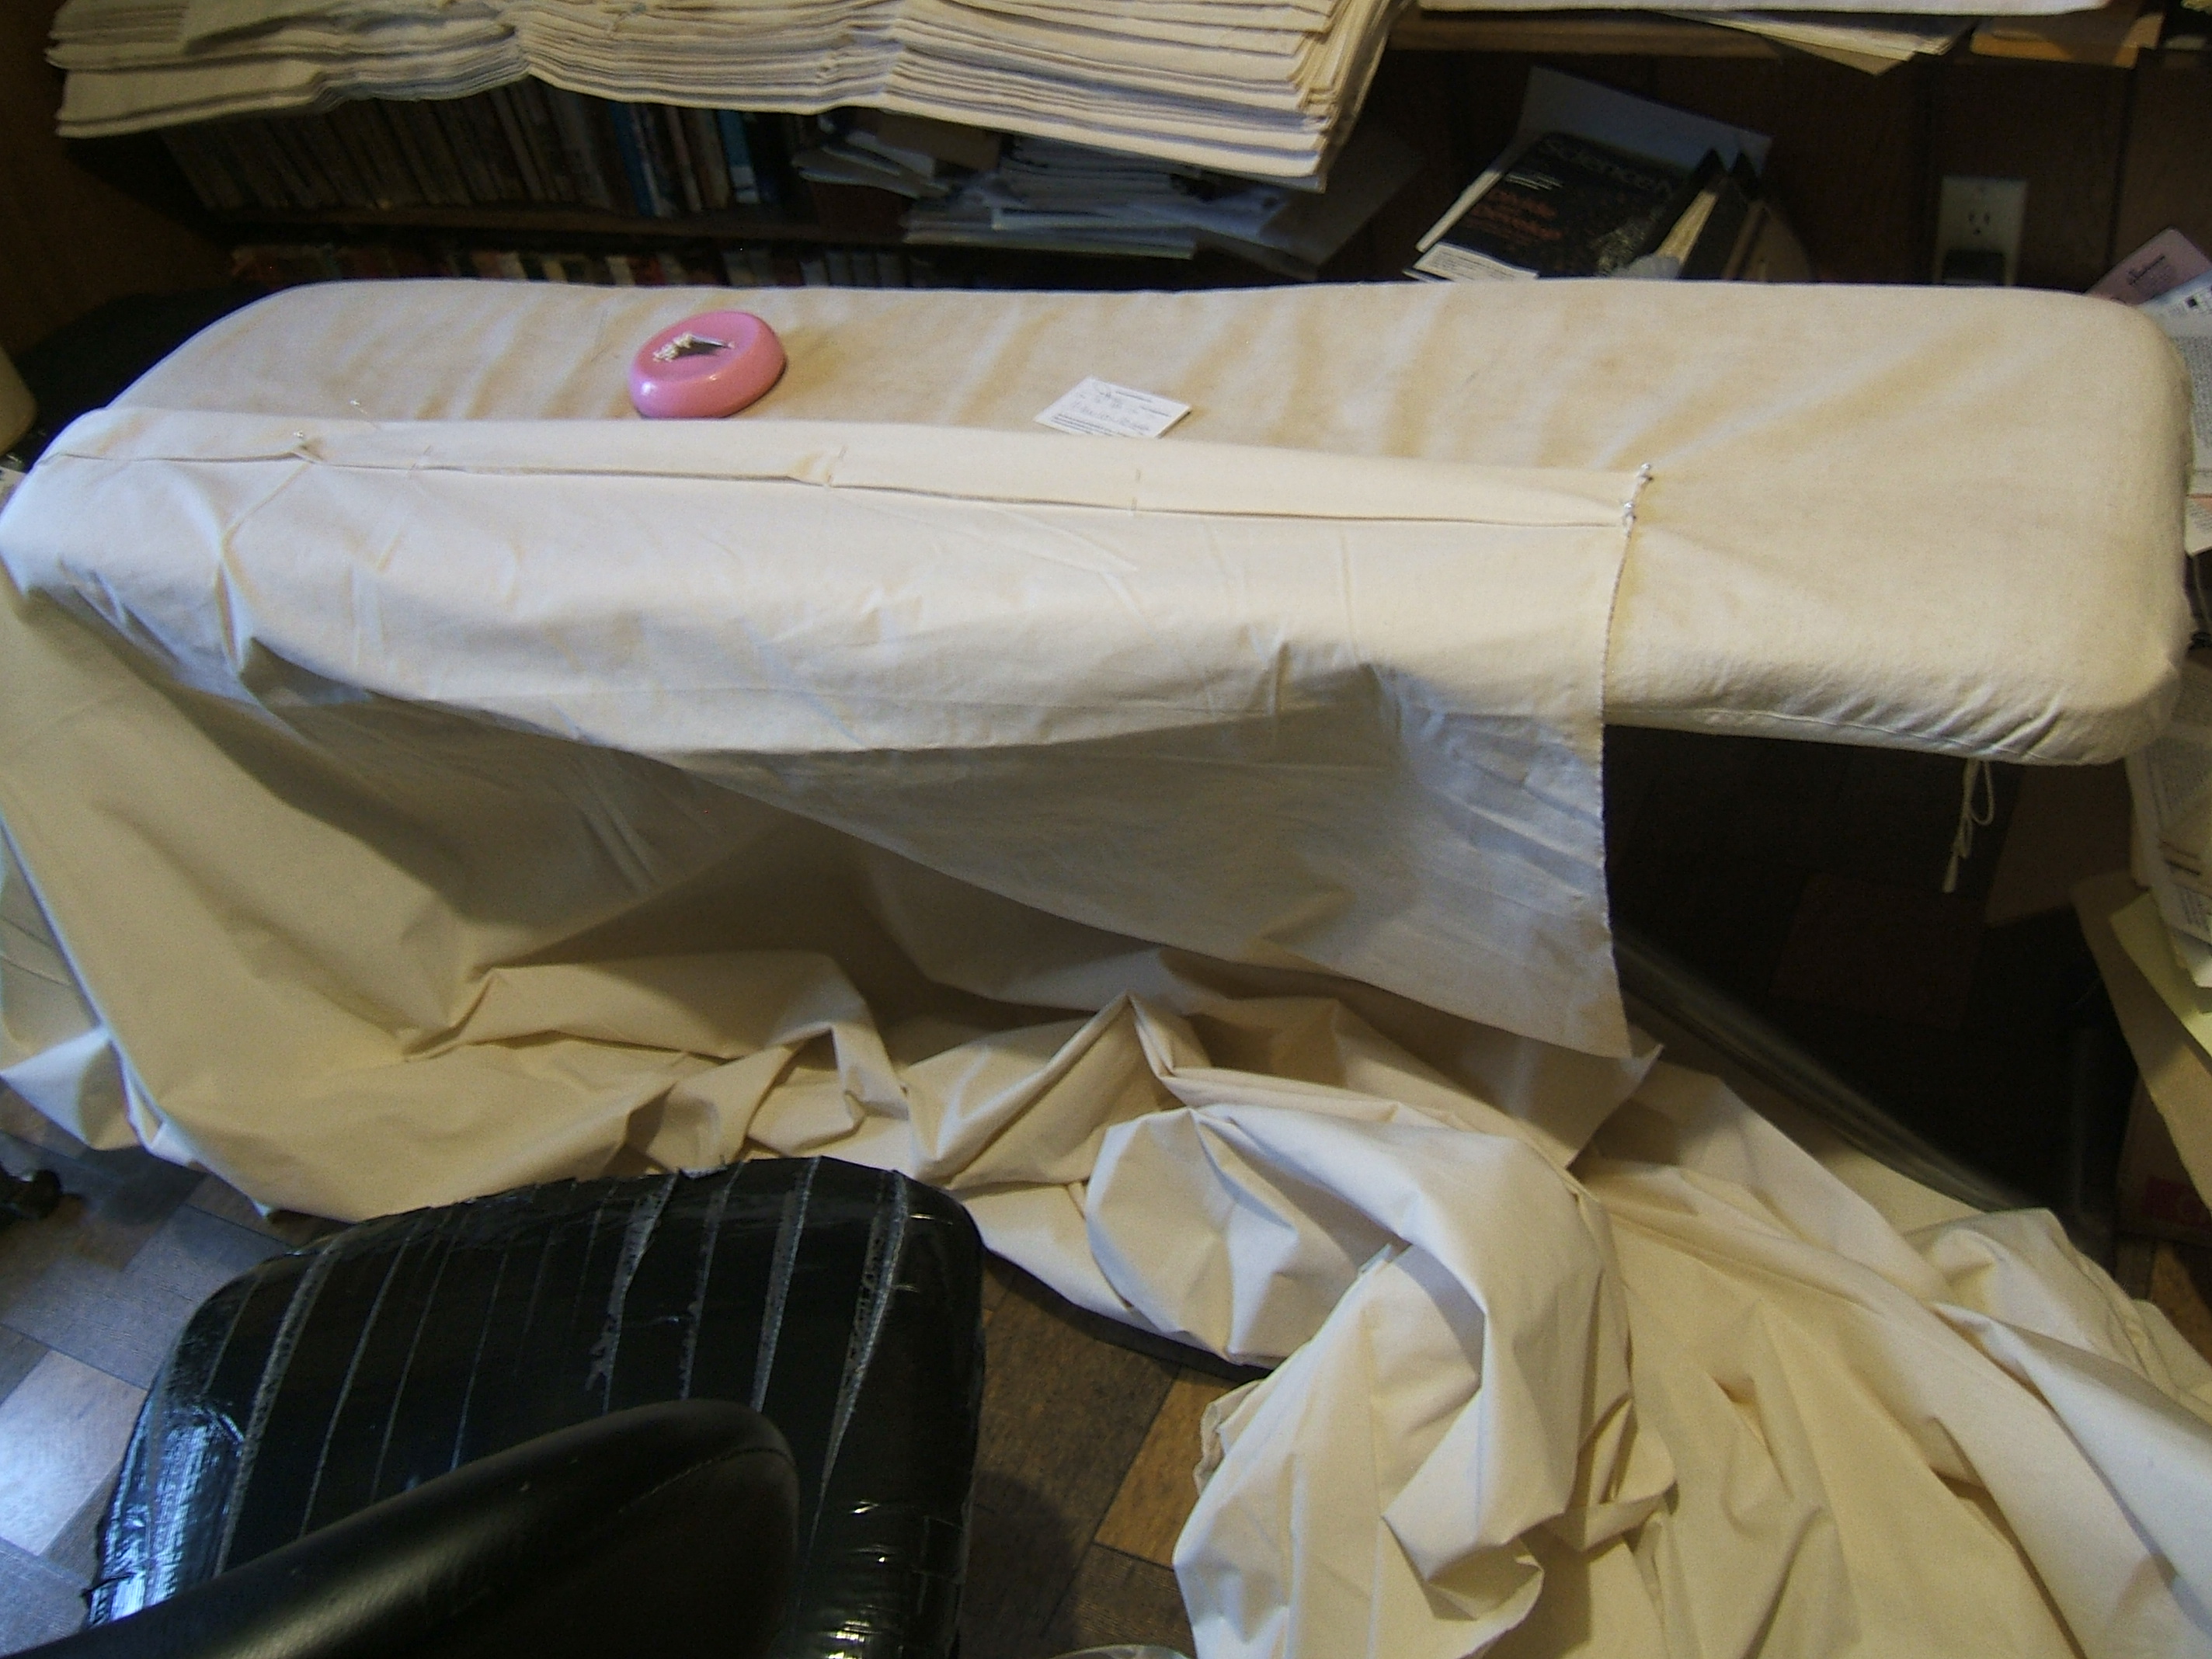
Hmmm . . . I'm pretty sure that I can get it onto the ironing board, and the board can be adjusted to be about as high as the shelf . . .
Today I cleared space and got the muslin onto the ironing board, and found that by good luck the height I'd left it at after working sitting down was just right, so I didn't have to adjust it with all that weight on it.
To neaten up the bolt to fit onto the shelf, I had to fold one leaf at a time. Tugging the ends after each fold kept the rumples reasonably in check until the last few folds. In the process, I realized that what I have here is book muslin: it's muslin, and it's folded like a book. It's not much like organdy, though.
To get the roll of five-foot muslin back on the shelf, I had to raise the shelf above one notch. But this made room to pile on the roll of blue-plaid linen-cotton shirting and the roll of agricultural burlap, which had been behind the shirting and I'd forgotten that I had it.
In the meanwhile, the slot above the rolls was now too narrow to be any use, so I cleared off the books from the shelf above, moved that up one notch, and I'm now putting the books on the shelf above the rolls of fabric. When I've got that all done, I'll have to move the shelf that I took the shirting and burlap off of down a notch so that I can use it and the former bookshelf for the boxes that I cleared off the shelf the books are now on.
I've got a post-note on the wall to keep track of the order the books are in. So far I've put back general housekeeping, general sewing, costume, and designs, and I'm starting on embroidery. In those categories I made no attempt at alphabetizing, since there's no more than a half dozen of each.
I discovered that I have a copy of McCunn's _How to Make Sewing Patterns_; I'd been thinking that I needed to buy one. I do need a copy of the bra-making book. Dave says that our credit card has a service in which they will transfer money to a vendor without giving him any secret numbers; I'll have to look into that.
I wasted some time reading one of the housekeeping books.
For a while there I thought the books wouldn't fit on a shelf exactly as long as the one they came from. I didn't have space for the Woolgathering leaflets, and laid them on top. And I shoved one of my thin pieces of orange crate under the last few to keep Knitting Workshop from falling off the end. Knitting books are alphabetical by author; I made no effort to sort within the other categories.
I should have put flags on the "hey, I want to read this" books.
I suspect that the boxes I put back are not all of the boxes that I took off, but I have access to the ironing board again.
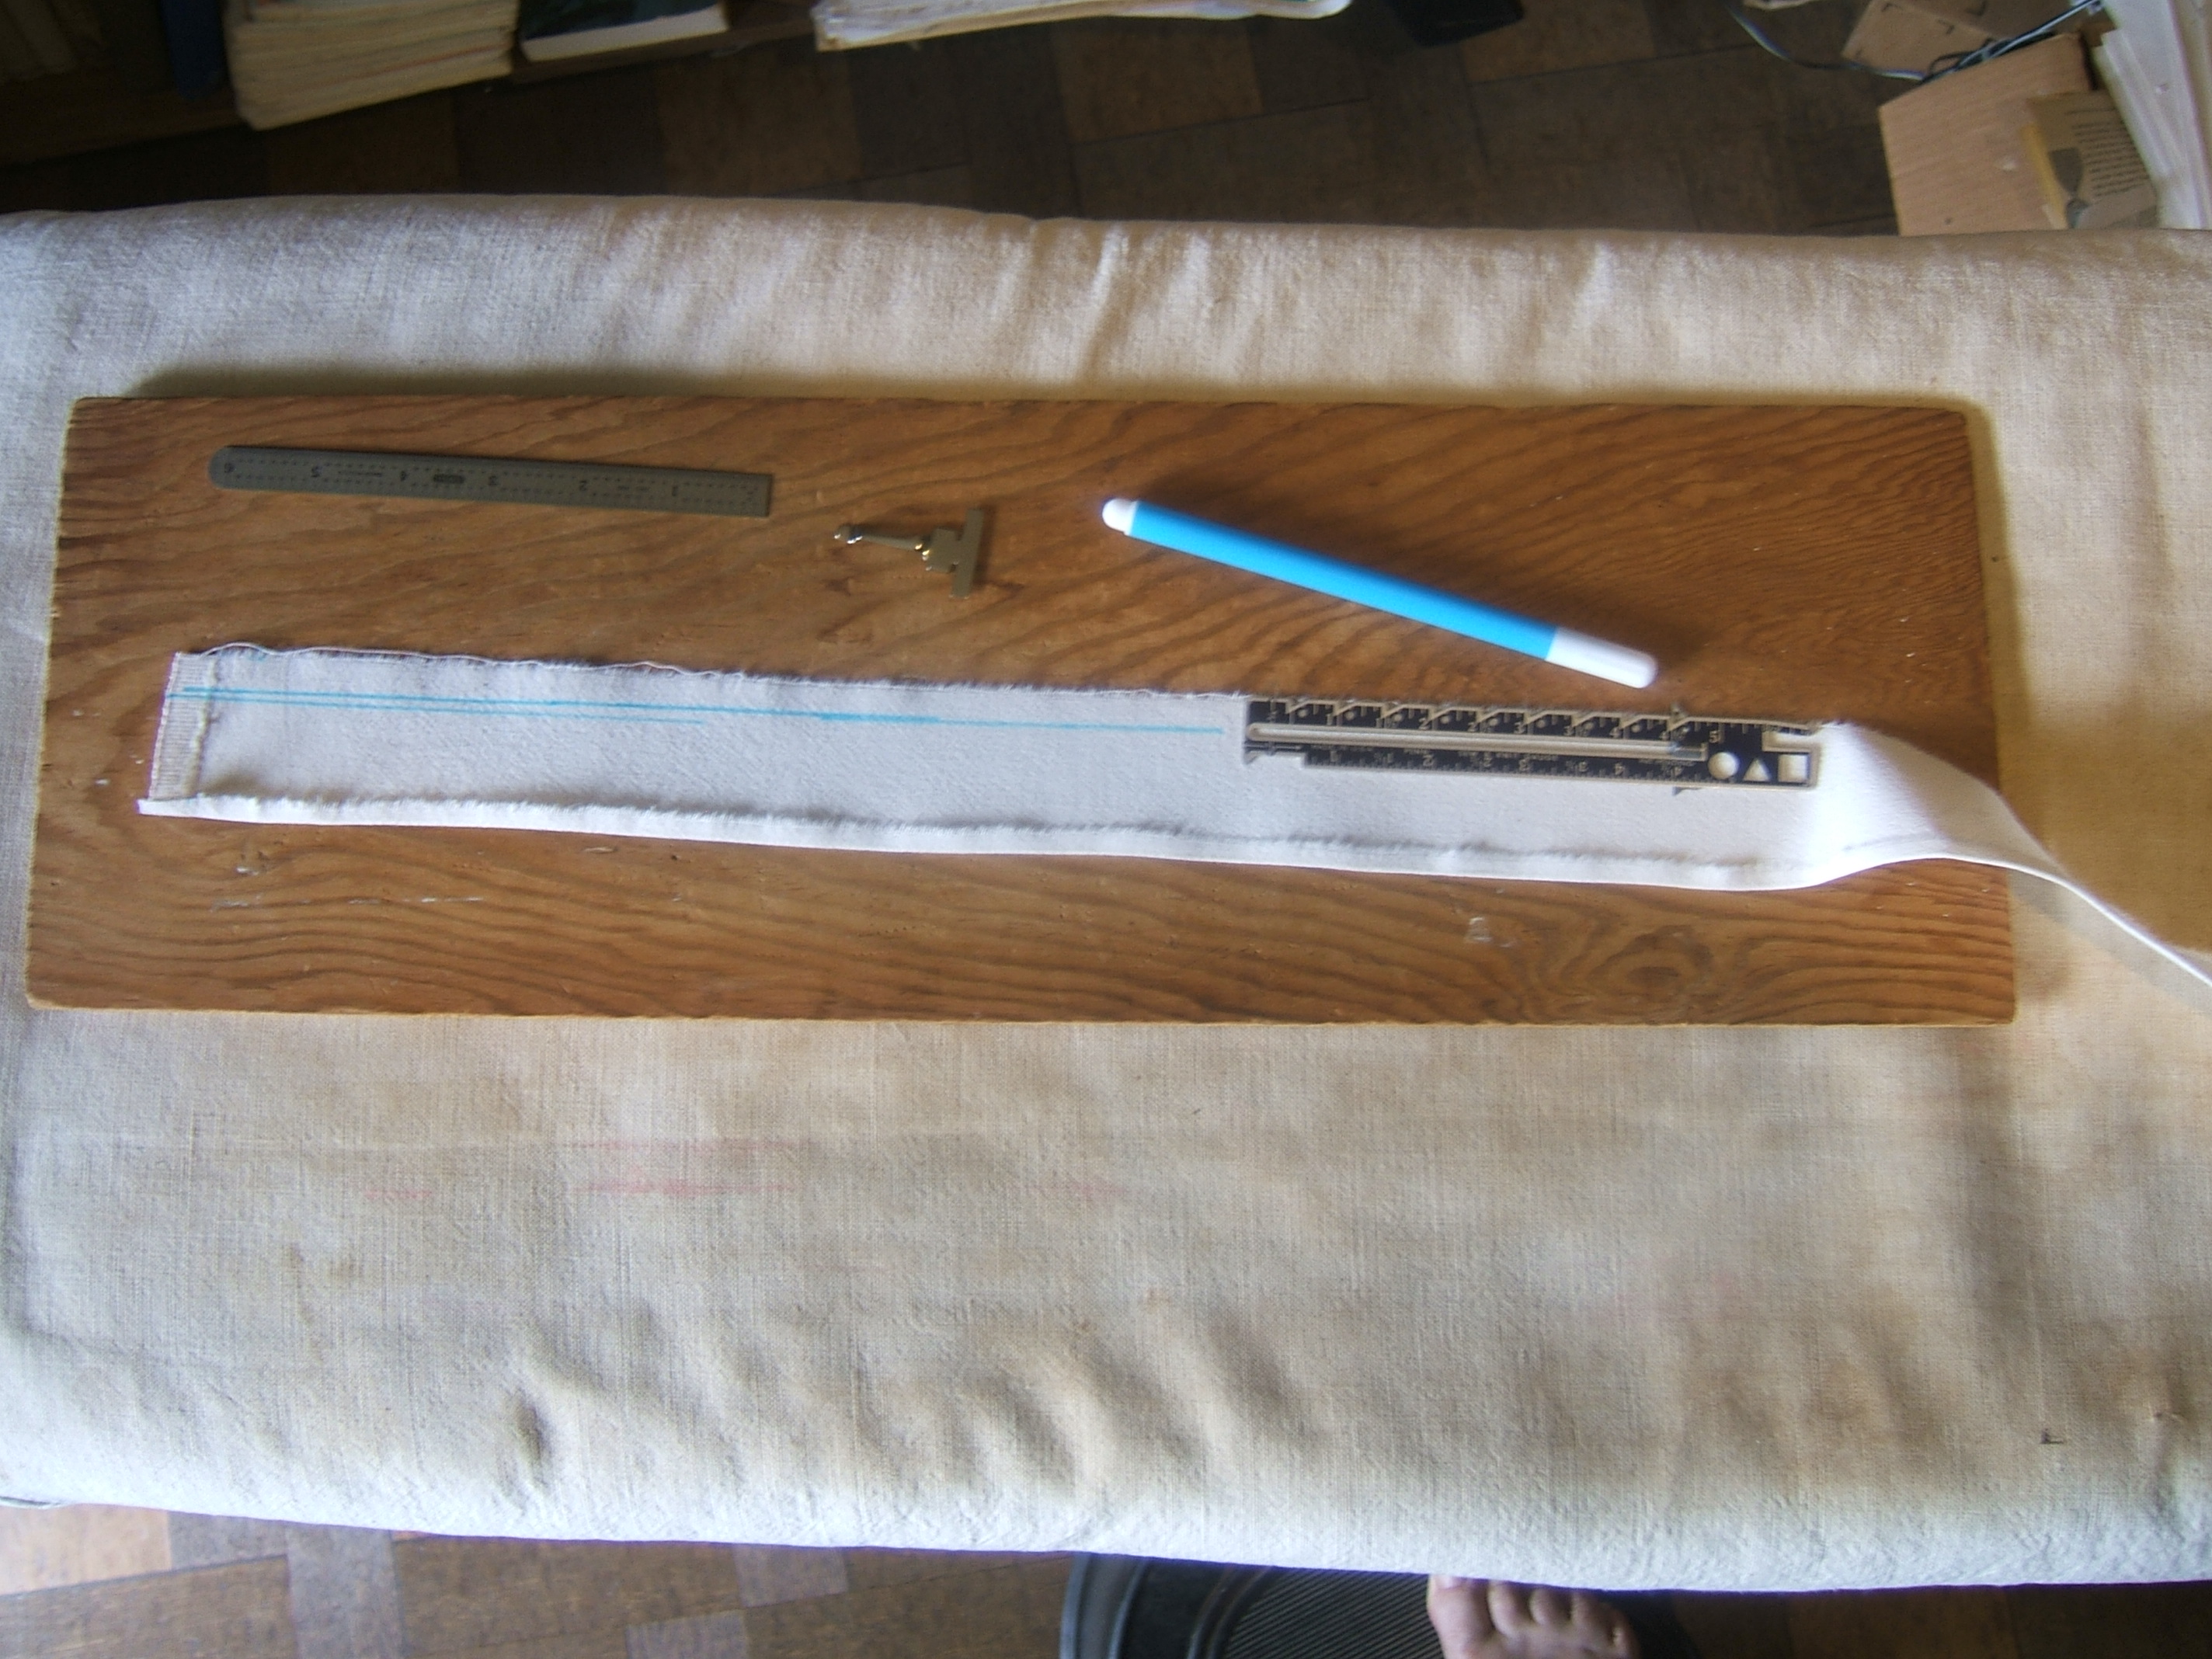
I've begun work on winding my teaching shuttle. I dithered over how much thread to cut off and mark, then realized that I can mark a couple of yards, wind them, and then decide how much more to mark before cutting off the ball.
In marking the first section, I discovered that I want to dilute the bluing way down. It's going to take a while, since I need to let each section dry thoroughly before starting on the next, but I'm not going to need that drying rack for a few days.
Unless I decide to wash Sunday night so I can postpone the laundry until Wednesday. Can't wash on Monday because I'm getting my teeth cleaned — and Tuesday is the only day in the ten-day forecast fit for riding my bike.
⁂
I ironed the two shirts I washed stains out of last Sunday, and learned that re-arranging the shelves lost the space where I used to keep the sleeve board and hams, but I think that tidying the bottom shelf, to the right of my collection of Tarzan and other E.R.B. books, will create a place to put them.
I should take all the books off the shelf again, and use my horsehair whisk broom (the maker called it a shoe-polish dauber) on the tops of the pages.
⁂
The sleeve board and both hams fit neatly into the narrow slot formerly occupied by the roll of shirting and the roll of burlap.
Pity. I could use some motivation for tidying the bottom shelf!
From the bottom up: my pattern chest, with a corner of the footlocker in the background. Since it's nearly black, nothing shows except a white bag in the black backpack lying on top of it.
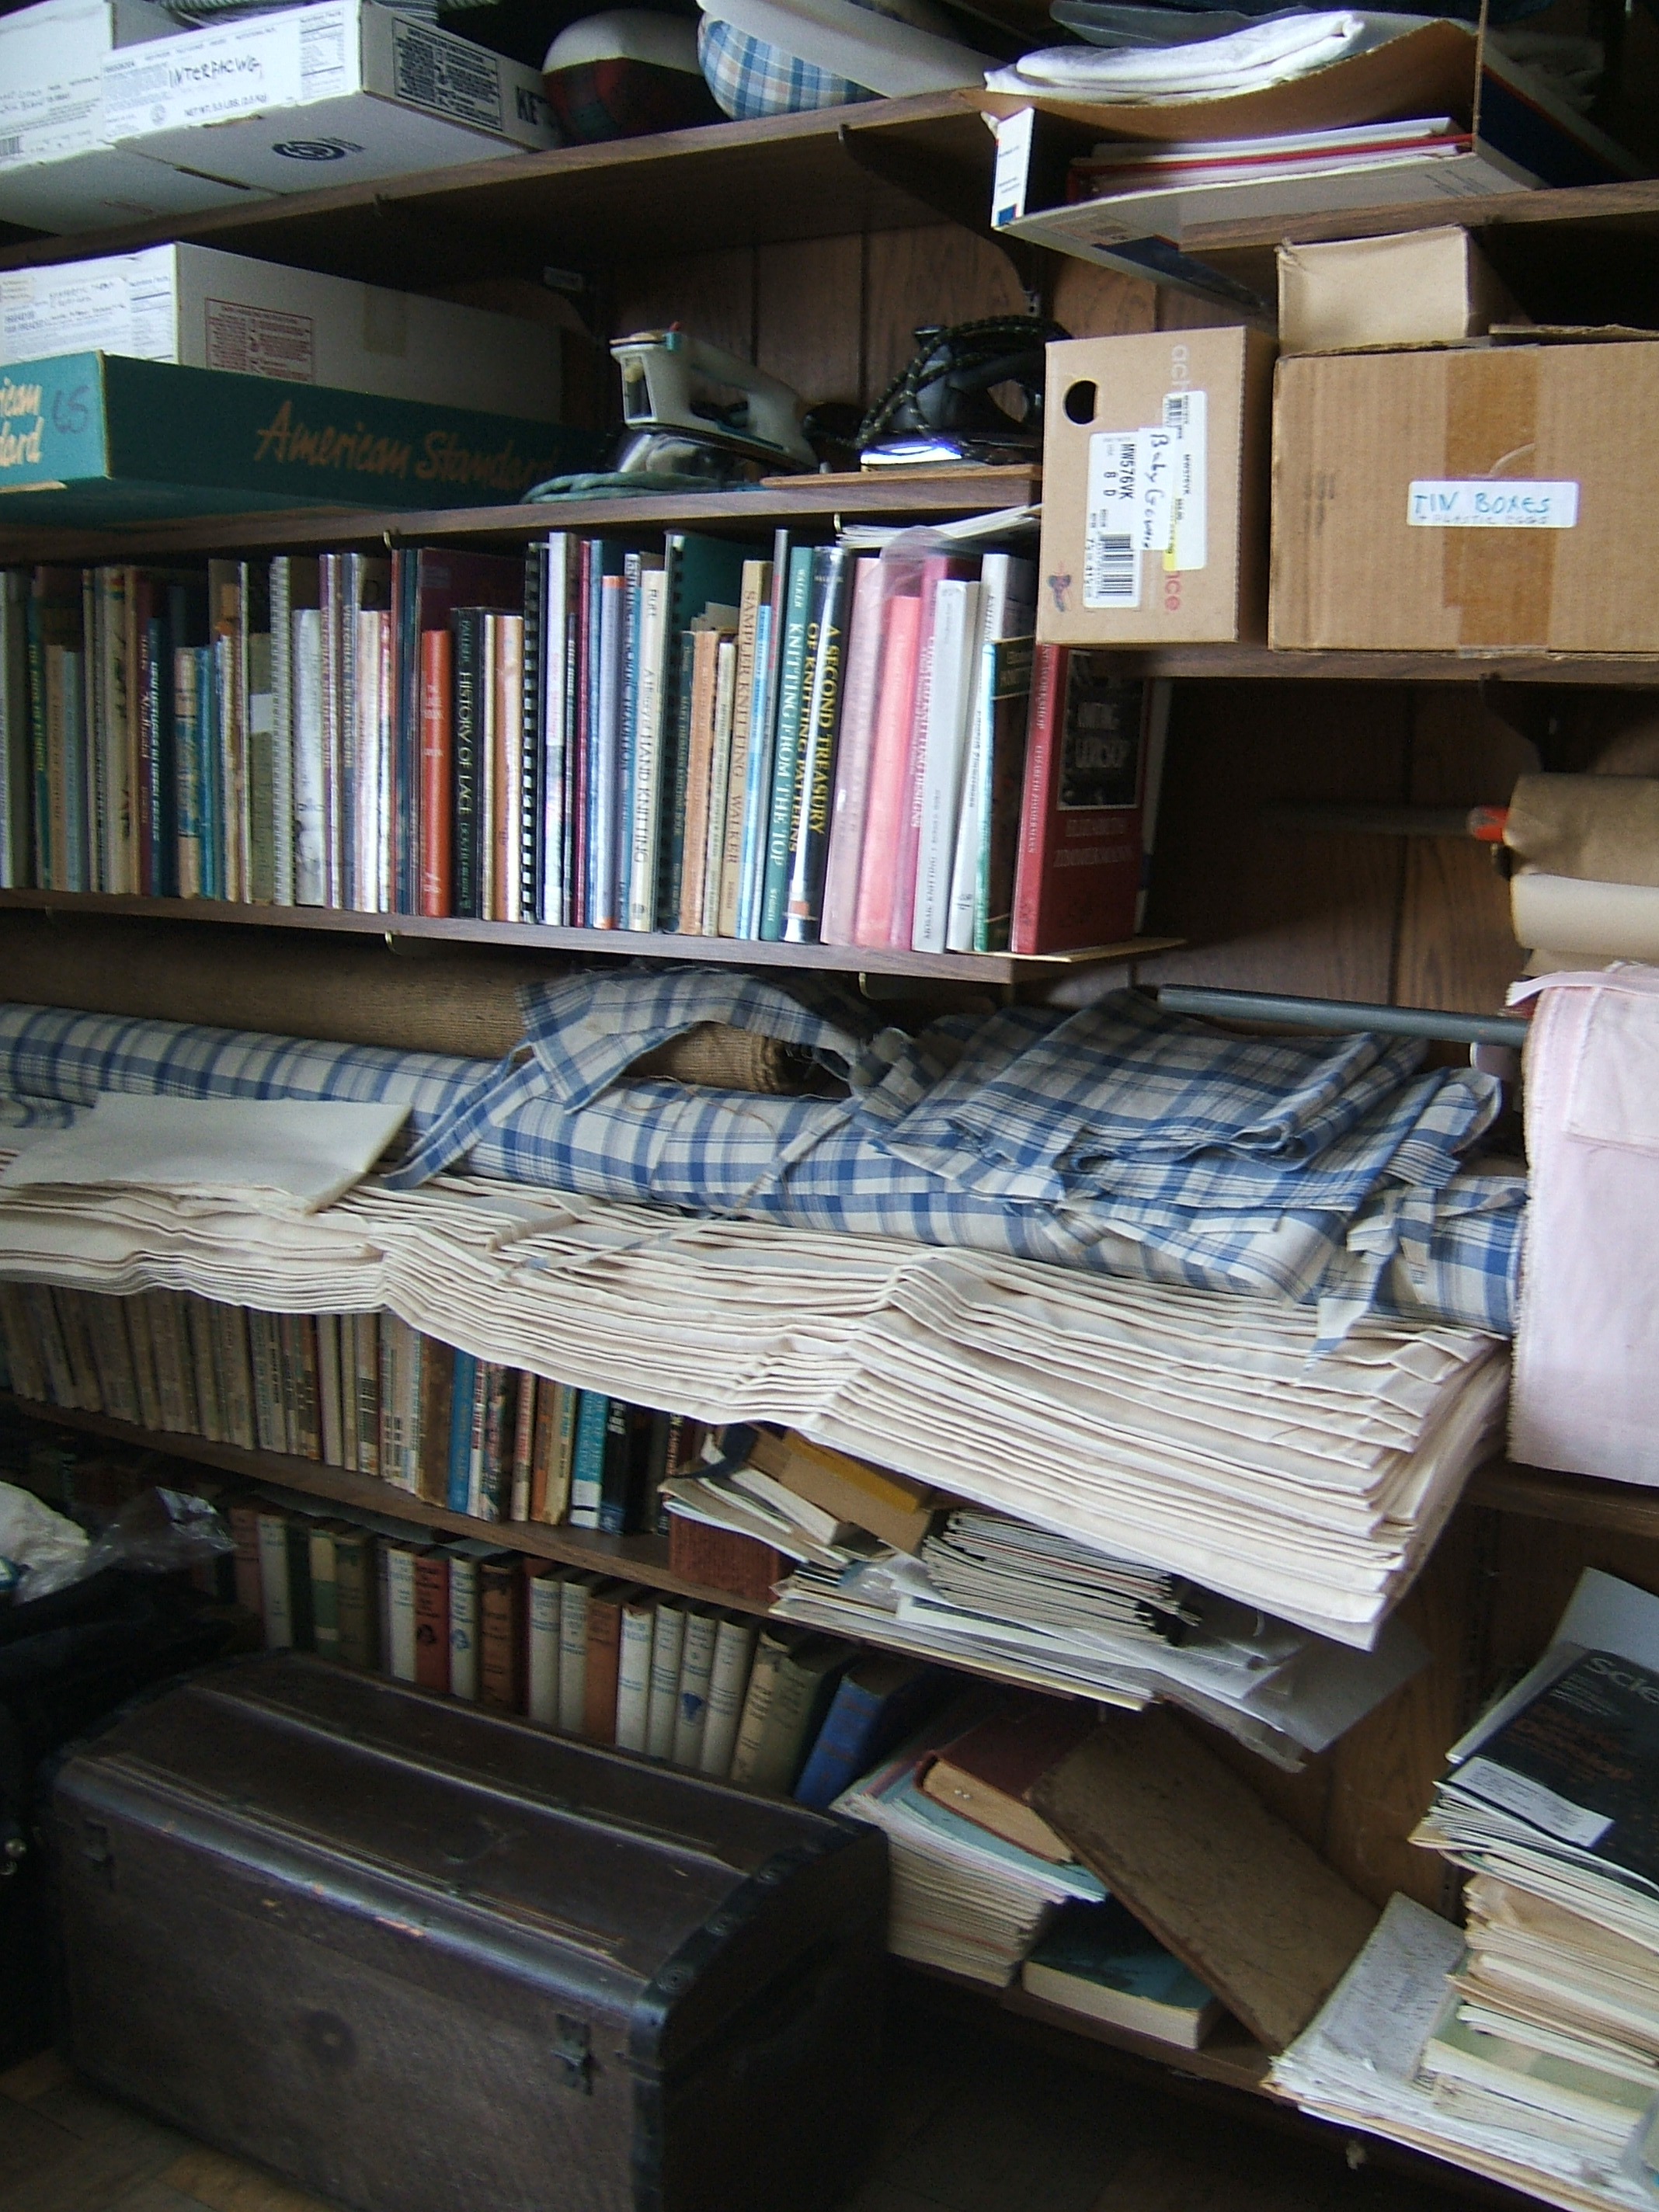
My fiction collection, with the ends of the shelves in need of tidying, and a bigger mess on the bottom shelf to their right.
The bolt of muslin and three rolls of fabric: shirting, five-foot muslin, and burlap. These extend under the broomstick supporting the "petal pink" linen-cotton blend. The roll above the pink fabric is newsprint.
My needlework books. The offset shelf to their right keeps them from falling off. They fit so tightly that Knitting Workshop doesn't slip down, but I put a scrap of very thin plywood underneath it.
Three irons and two boxes. I used twist-ties to keep the cords of the two irons I seldom use from tangling in the cord of the iron I do use. The green box is silk scraps, and the other holds synthetic tape and iron-on thingies. Hey, there are three spools of ribbon I could add to my embroidery-gig stuff in there. I should take everything out of that box and put it back. There is some silver reflective tape — yellow tape, alas, is extinct, but I shouldn't need to re-reflect my mittens any time soon.
And, just barely in the shot, two hams and a sleeve board.
I really should find out what's in the squashed-looking box above the tin boxes. (That also includes plastic boxes, such as the pin box I recently emptied, but I haven't changed the label.)
Yesterday, while getting ready to go to the dentist today, I wound off a few needlefuls of black Medici and finally found the thread connecting the two skeins.
The skein that has the original neatening-stitch and the label appears to have only two ends, and it's fatter than the other, so I hung it in the closet.
There are only two D-rings attached to the skein still hanging on a spare shelf-support; perhaps I have also found all the broken ends.
The dime finally dropped, and I started using the D-rings to hang up the ends to keep them out of the way.
The patient ahead of me cancelled, so I never even got my mittens out of the bandanna — until the hygenist asked what sort of mittens I was darning.
But I did darn them this evening, under the triple lamp, and used up all the Medici I'd wound off — there was a second hole I hadn't noticed. Then I re-attached the reflective tape where it had worked loose and was catching on the handlebars. I needed a thimble for this part, and reflected that it was lucky that I was working at home right next to the arm where I keep my Magnetop thimble. But I do have a thimble in my little bag of stuff, and I'd brought it.
Had a little trouble seeing black on charcoal despite 3.5 glasses; the triple lamp just isn't as good as natural light.
I put the chocolate-truffle box I'd carried the needle, medici, and silk in into the backpack, because that is where I look for needles.
I didn't use up anywhere near half of the gold buttonhole silk. This was lucky because the spool of red buttonhole silk I'd brought as a back-up was, on closer inspection, size A. So that's why it wasn't lined up with the others!
We're past the middle of the coldest part of the year, and I still haven't repaired my wool jersey. But nowadays, I don't go out if there is the slightest chance of rain.
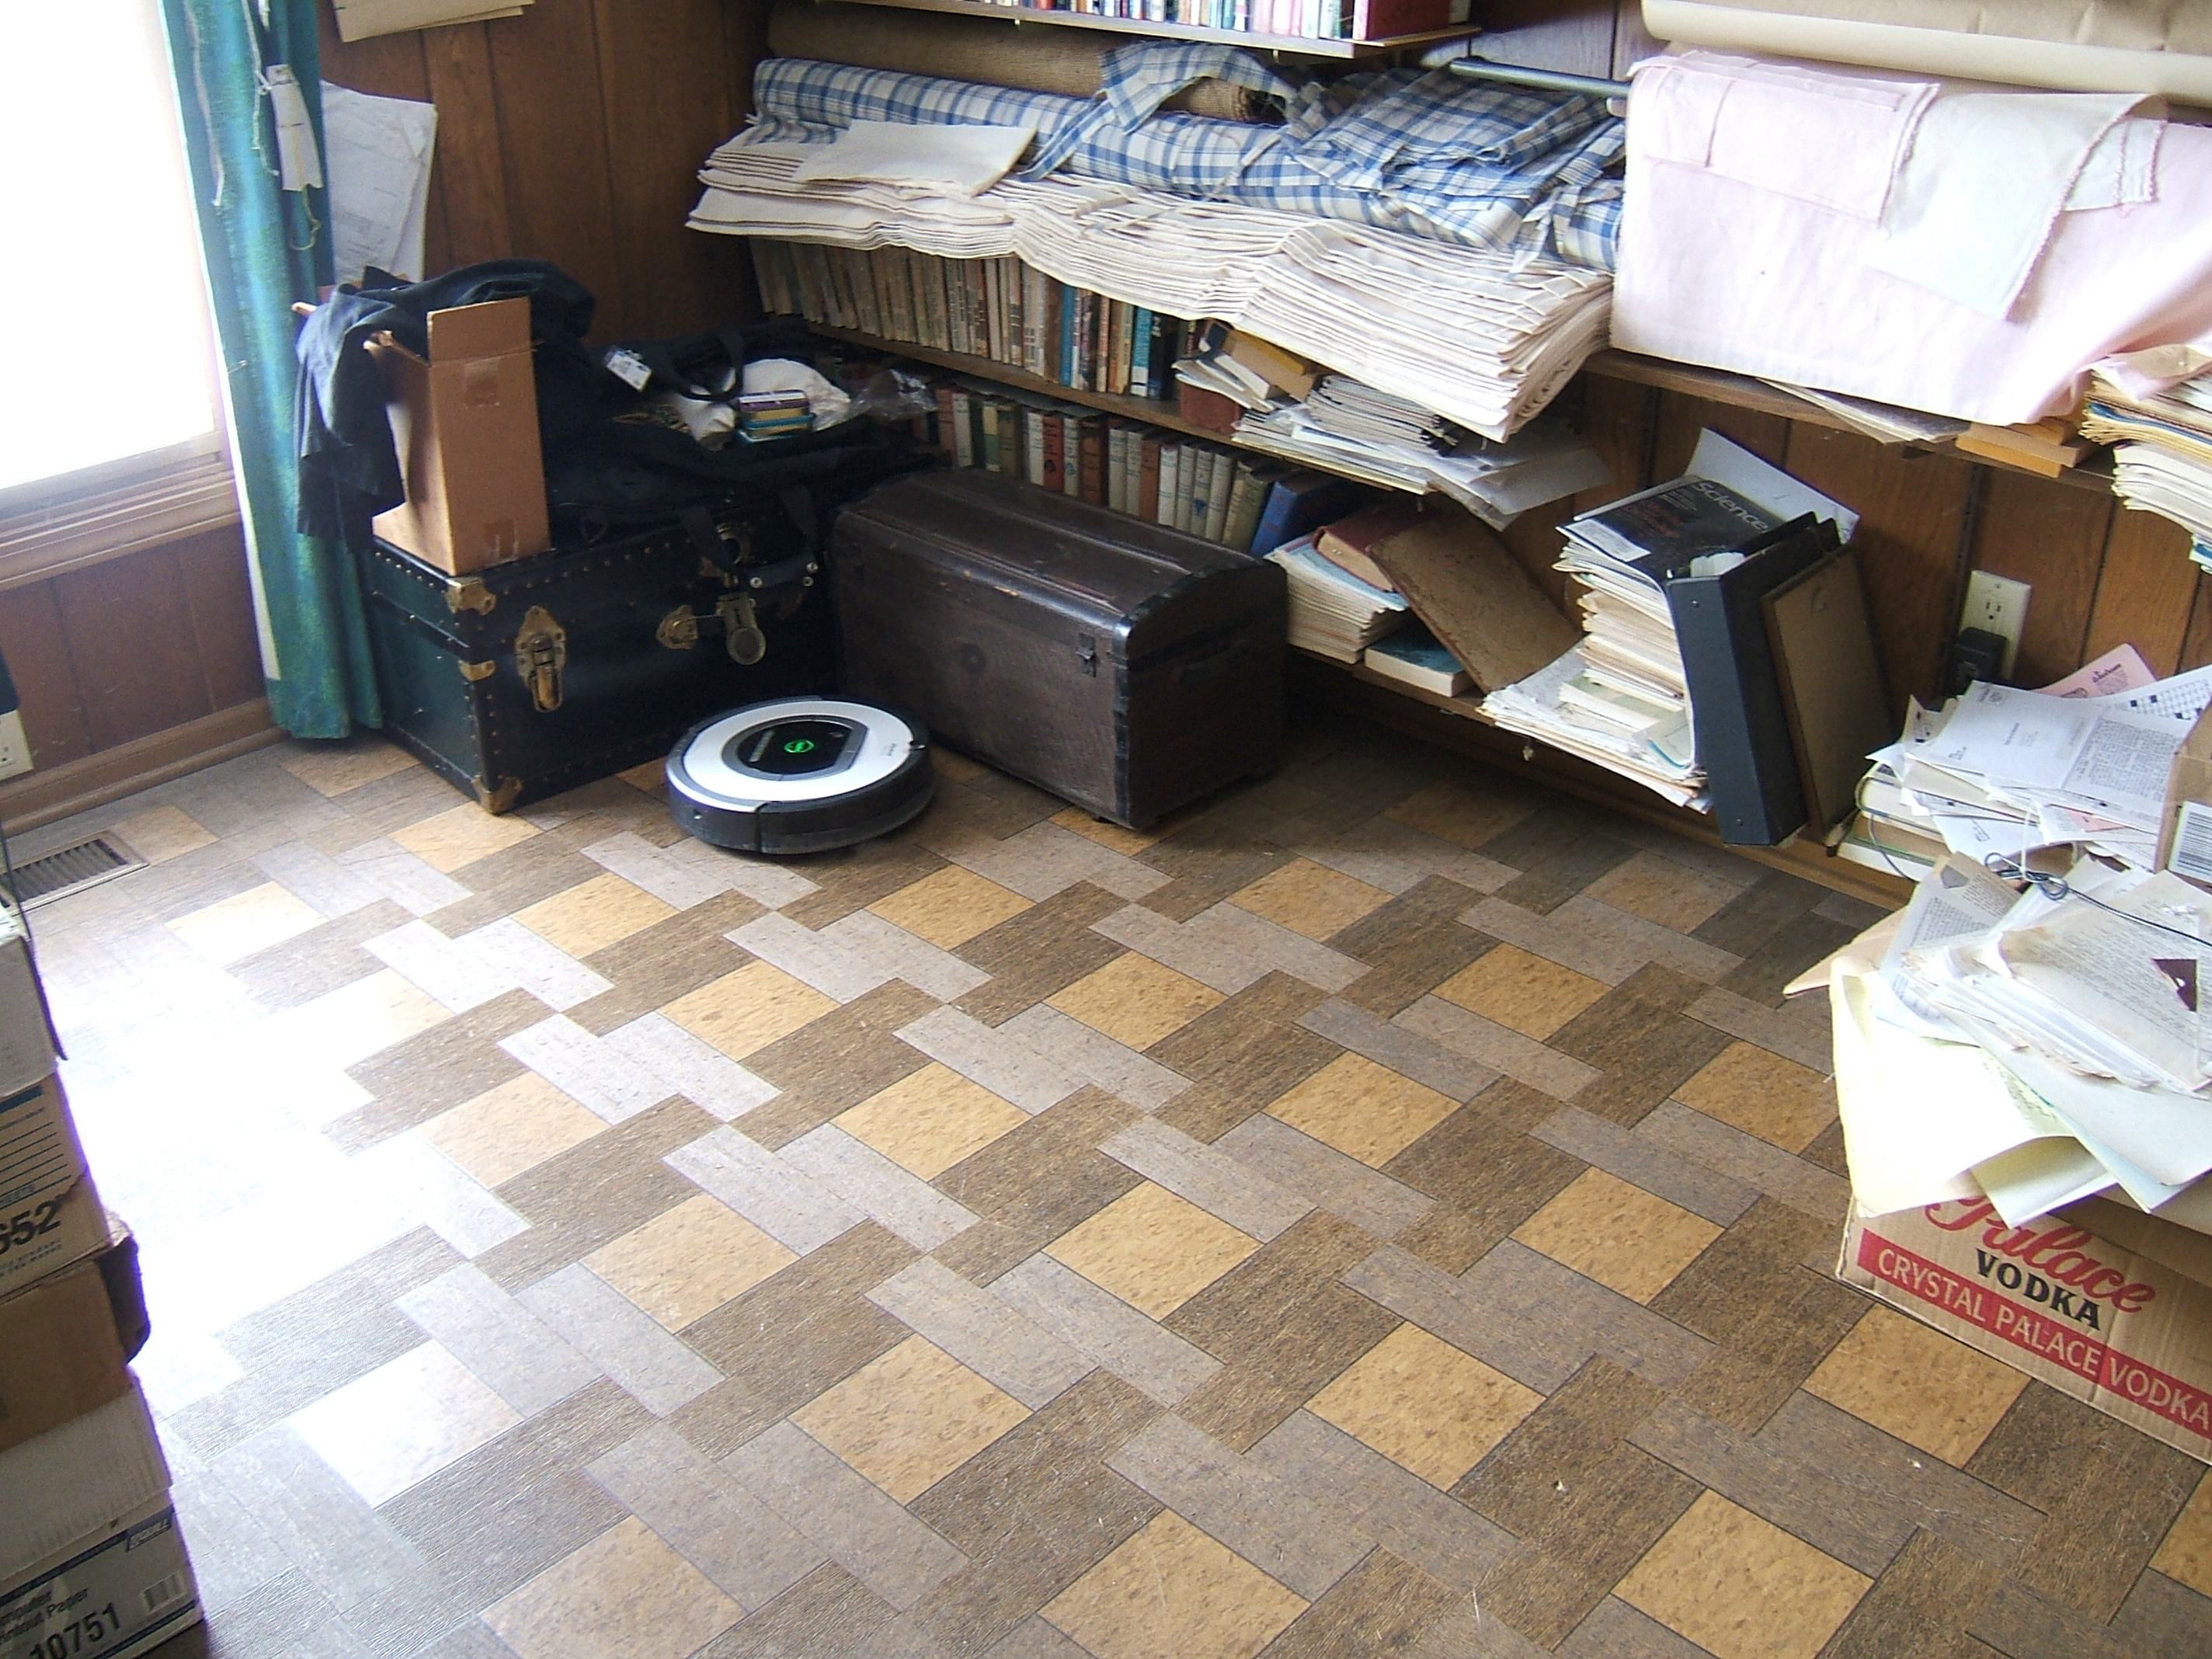
It's Roomba day in the sewing room. You don't often see this much floor.
Today was also laundry day, since I was otherwise occupied on Monday and Tuesday.
Yesterday I sat down to thread elastic into Bra D. After a while I looked at the bodkin I was sewing to the second piece of elastic & thought that I ought to take a picture of that for Pictures of Tools, and did, and upon uploading it I found that there was another picture of bodkins that hadn't been linked to, and the page really, really needed divs. I did get back to threading elastic eventually (the picture of Grandmother's bodkins still isn't linked) but the third piece of elastic is inserted-but-not-sewn and the cat is sitting on it.
I spent most of this morning adding a Table of Contents.
A day or two ago, I noticed the scrap box marked "unbleached", and reflected that I never dig into the box for muslin when I have two bolts in plain sight, so I took it down intending to sort out what was fit to take to Goodwill and trash the rest.
When I opened the box, I found that I'd already done that. There was nothing in the box but some reclaimed sleazy muslin that might do for underlining and a sizable piece of unbleached seersucker that I don't want to part with.
So I added a label this morning and put it back on the shelf.
Yesterday I started to change the dirty bottom sheet and found that the top sheet was torn. Of the two remaining sheets, one has basting around a small hole.
So the three yards I tore off the bolt of wide muslin are now on the ironing board, waiting to be hemmed. I hope to press the fold-under between loads of wash today. But first I'll finish sewing the last piece of elastic in bra D so I can get it off the rocking chair.
The actual stitching of the hems will be an anti-climax. I wonder what the March sisters would have thought of that.
The tear in the sheet is along the flaw in the goods that I noticed when I dried it on the card tables. Now I'm debating whether to darn the flaw or make pillowcases at once. But the pillowcases I made from this fabric when it was brand new didn't hold up any time at all. Perhaps my best bet is to reserve it for underlining. In the meanwhile, I've put an embroidery hoop around the tear to keep it from getting bigger.
I've begun wearing black pants to church, which has revealed a dire shortage of winter blouses. It's also put "lengthen waistband of polywool pants" on my to-do list. I think the best procedure is to replace the safety pins with stitches. Stitches that will hold, but will be easy to remove.
⁂
Bra D is off the rocking chair! That leaves three pieces of elastic to cut and thread into E, and a bit of embroidery on C, D, and E.
This is not a rush job, as it's washday and there are four bras hanging in the closet. On the other hand, I washed two days late last week, and absently-mindedly wore one bra four days instead of two. On the third hand, I washed two days late last week and didn't run out of bras. I did use all the sweat rags, so I tore up a pillow case that has been cluttering up the sewing room because I didn't want to put it on the rag shelf without washing it, I didn't want to wash the tear bigger, and I thought I had too many sweat rags. It made two good sweat rags plus two that I tore into skillet wipes when they came out of the washing machine today.
⁂
Save for underlining. I'll have to wash the sheet before putting it away, so I have to baste back and forth over the tear.
I can move the seersucker to "solids and woven-in", and replace the "unbleach" labels with "underlining" labels. It will be quite a while before I need another summer dress.
Yesterday Dave had to turn the end table upside-down. While emptying it, I found thirteen unread issues of Threads. I was right to let my subscription expire.
Stacking Threads flat does allow me to take full advantage of the unseemly height between the top shelf and the ceiling, but for all practical purposes the issues on the bottom half of each stack are inaccessible.
I pinned hems the width of an appointment card in the muslin this morning.
And sewed them that afternoon. The bobbin of the White was at least half empty, and almost lasted the six and two-thirds yards of hem. Someday I'm going to have to load some measured thread onto it.
The torn sheet is now in the laundry bin. I learned that if you darn in an embroidery hoop, you need to keep the tweezers handy, because every now and again the needle gets flat to the fabric and can't be picked up with fat fingers.
About halfway through, I realized that running stitch across a slit while weaving over and under the raw edges is a variant on baseball stitch/antique seam. I meant to make the rows across the not-yet-torn flaw half an inch apart, but they were seldom more than a centimeter and often less than a quarter inch. Perhaps I should have drawn guide lines with a wash-out marker.
I took my left hand out from under the hoop once and like to never got it back. It seems that all of that king-size sheet is immediately under the hoop.
mend pocket on wool short-sleeve
jersey That jersey is too
badly worn to be worth mending, but I need to wear
it tomorrow, so I darned the two leaks in the
pocket with buttonhole silk. Besides,
washable wool appears to be extinct, so I'm not
likely to be able to replace it.
I wish one could still buy custom-made bicycle clothing. Mrs. Jones died; I've no idea what happened to Marthe Hess.
bar tack on back pocket of cotton
jersey
If I patch the old wool jersey up and wear it, I need to pick the front pockets off and move them up onto the shoulders, and I need to put a dart across the back.
So I tried it on — and if I'm going use the back dart to convert this into a woman's jersey, I'm going to have to do it in that order. The dart needs to be in the middle of the pockets.
Should I judge the dart by the size of the wrinkle under the arm, or by the size of the dart in my T-shirts?
Or I could make a very short dart.
Today is washday, and while putting in the first load, I decided that the shirt I was wearing should go into the second load. Thinking about brushing out its pockets reminded me that there was a leak in one of the smock pockets, and that reminded me of a couple of big leaks in the smock pockets of the shirt I was about to put on.
Quick, quick, before the first load comes out, set up the Necchi. First I had to dig down to it, because there had been a few weeks of "where's a safe place to put this for a few minutes" since it had last been used.
It was still set up for basting from when I washed the sample of 120" muslin. I dropped the bobbin of no-provenance thread and unwound quite a lot, so I loosened the clutch and used the bobbin winder. There were only a few turns left on the double-wound bobbin I took out of the bobbin case; being already set up for bobbin-winding, I wound one strand of greeny-brown and one strand of blue onto an empty bobbin.
Necchi bobbins are easier to come by than White bobbins, so I have several extras — enough to use bobbins to store no-provenance thread. Of course, it's no-provenance because it's on a spare bobbin; I never lose track of what's on a White bobbin.
Then off to the White to fetch a spool and two bobbins of black poly thread, thread the Necchi and test the zig-zag stitch. I was thinking of putting a note into the bag so I'd put the poly thread back into it, but the White bobbin left in the bag has a label that says "poly". Also it's the only spool bag in the drawer of the Necchi.
At which point I realized that I'd already mended the shirt I was wearing, so I went through all that for two inches of zig-zag.
I got all the wash clean and hung up before I finished writing the above, and prepared and ate a skillet of tamale-pie grits. Now it's nap time.
While putting yesterday's wash away, I noticed that the casing had worn through on the least-shabby pair of shabby underpants, and judged that there was enough wear left in them to bother with a repair, so I picked the stitches out, saturated the edge with a 3:1 starch dilution, and hung them up to dry.
lengthen waistband of polywool
pants
When I added that to the list, I thought that I'd hand-baste with silk where the safety pins were, but this morning I reflected that I had the Necchi set up with black poly — then realized that I couldn't machine-stitch around the hook, and went back to the original plan, but two layers of waistband are so thick that a lot of the "basting" is widely-spaced backstitch.
Anyhow, it's done and I have black pants to wear to church next Sunday. I don't have a suitable shirt, however. I've been thinking of making a cotton-print shirt to test my plan to use Pat Erny's sleeve placket to make a side slit, but whatever print I choose is going to be striking, not something that I can wear two Sundays in a row.
Perhaps I'll wear my black turtleneck and blue vest next Sunday.
Hey, I've got a gray vest. Requires a tucked-in shirt, though.
I've also been thinking that I could test the side slit by retrofitting my raw-silk shirt.
darn seam ends of tan blanket
If I have tan mending wool, it isn't in the box labeled "Medici and darning wool", but a white no-provenance wool thread did a neat and inconspicuous job — on the second end, after I'd figured out what I was doing.
Yesterday I started work on converting 042, the apron essay, into HTML.
revise apron essay
Still need to convert a cross reference into a link.
I ironed a shirt, and pinned the new casing in the underpants I'm mending.
And I should take some photographs to brighten it up.
When I made the dark-brown blanket, I tore off exactly a third, and joined the halves of the third with a butt seam to make them the same length as the two-thirds I was sewing it to. You really, really can't butt-seam torn edges!
While making the bed this morning, the buttonholes in that seam bugged me. I reflected that the Necchi was already set up with black poly, inspected the holes and noted that each was overcast on both sides, and ran a line of zig-zag down the seam, squeezing the buttonholes closed as they went under the presser foot. Two of the buttonholes didn't close, so I also made a partial pass.
This should have left eight ends of thread to trim, but I could find only two. Holding the mend up to the light reveals places where another pass of zig-zag is required, but I don't have a light-table flatbed plate, so I put the blanket back on the bed at this point. It had been surviving for years in its previous state, after all.
Now to change the thread on the Necchi and finish repairing the underpants I plan to wear tomorrow.
⁂
Got distracted with polishing links in 042; the underpants are on the ironing board with a bodkin and a piece of elastic, waiting for ten minutes of work.
I lost track of the cord elastic I took out of the underpants, so I selected one of the quarter-inch elastics that I took out of the discarded bras. Took a few grabs to find one; there appear to be a lot of short scraps of new elastic in the bag of used elastic.
Wore my garish tights for the first time today, and discovered buying them large enough to fit over other tights made them too loose in the waist.
The good news is that the waistband is a casing, and it's wide enough to divide into more channels than I can use. I think one quarter-inch elastic will do, it can't need more than three, and it's wide enough to take four comfortably.
The bad news is that I can't think of a way to open a flat-locked seam and close it again.
A buttonhole would work, but I'm not sure that one round of elastic will be enough. And hand-worked buttonholes are a bit tedious.
It will probably be simple after a good night's sleep.
I also bought cheap fleece tights in four sizes, intending to wear one over the other. I must mark them before taking them out of the package. At the moment I'm thinking of bar tacks in red, orange, yellow, and green — red on the smallest, of course.
I should shave at bedtime so as to get ready for church faster in the morning, but in my present condition I'd probably cut myself.
I've figured out how to elastic the maroon-stripe tights. I'll make a hole just big enough to put in a quarter-inch elastic near the bottom of the hem, and buttonhole around it. If one added elastic isn't enough, I'll pin it near the top of the hem and stitch around below it, then put in a second piece of elastic.
Hmmm … first I'll pin it near the bottom of the hem and stitch around a toes-width from the edge. Might be a good idea to make a vestigial ruffle even if I put in only one round of elastic, in which case I'd stitch, then insert.
Today washday. I cleared the ironing board — putting everything away! — so I could iron the hems of a sheet that had been washed for the first time, and now it's draped over the ironing board to dry. I'd hung it outside, but it was blowing too hard to leave it out while I take my nap, and I want to lie down as soon as I finish hanging the load that's in now, so I brought it in damp.
The muslin sheet and two pillowcases crowded the washer; a linen sheet takes less than half.
I soaked it overnight in the hope of getting out all the sizing; I'd like to get a clear idea of how big this sheet is before I have to make another. Before hemming and washing, it was three yards long and ten feet wide.
I thought I could get my sewing organized today; instead I'm going to have to search the sewing room for an extremely-important paper that I left on the ironing board.
I've forgotten exactly which extremely-important paper it was, but it didn't take long to find it. I think I'd put it into the embroidery-gig backpack.
Mark the four pairs of new tights
I put them all into a bag to be taken to Goodwill.
I revised the bodkin section, and scaled the picture of grandmother's bodkins, but not only didn't get to <strike> "check ed.dir of pictures of tools against the links", I have to add "photograph polish dauber" to the list. I have a large horsehair polish dauber for delicate whisk-brooming, and it isn't in the picture.
I've begun work on tightening the waistband of the tights that have a gray stripe across my butt.
The waistband is a faced strip more than two and a half inches wide, with 3/4" elastic caught in the top seam. Yesterday I stitched around it the width of a narrow presser-foot toe below the top and worked a tiny buttonhole close to the bottom.
When working the buttonhole, I quickly found that it was wise to poke the handle of a pair of tweezers into the hole at frequent intervals to check that only the facing was being stitched. After the second time I was forced to break off and cut the stitch that had caught the public side of the waistband, I switched to overcasting so that I could take a stitch out. Pulling on the thread to lift the edge while poking the needle also helped. It didn't help that I cut the hole with the low-quality "straight operating scissors" I keep in the White for cutting threads, and didn't think of cleaning it up with my stork scissors until after I'd started stitching.
It's an untidy hole, but it won't face much wear, and it doesn't show. I used the same polyester thread I'd used for the ruffle stitching, since "no cotton" is the theme of these tights.
This morning I checked my briefs pattern. I cut the cord elastic thirty-three inches long. Then I pulled on, as if it were pants, one of the elastic rings salvaged from a worn-out bra and it was plenty loose enough, so I intend to cut the elastic thirty inches long. But right now, it's time for my nap.
When hanging up the wash yesterday, I noticed a frayed spot on the neck hem of one of my new bras. Shouldn't take long to pick out an inch of hem and re-stitch it.
On Saturday, I stopped by the animal shelter and found out what size pieces to cut my dirty quilt into. I've got the straightening strip I tore off the ten-foot muslin soaking in a bucket of water with a drop of dish soap, and plan to use it for binding. I also intend to pick the pink hems off the worn-out linen sheet and bind cat blankets with it. My scraps include a piece of washed muslin five inches long and nearly a yard wide.
No telling what I will find when I start going through the boxes.
When hanging my wool jersey on the to-do hook, I noticed a piece of unbleached muslin that I cut off the bolt with the intention of washing it smooth and making a spectacular poncho shirt with appliquéd quilting motifs, but before it had been washed enough I got tired of poncho shirts. That will make excellent cat-blanket binding.
I spent most of the morning sewing — and dragging stuff out of the sewing room, then putting it back when Roomba was done.
I decided that I'd move up the pockets on my wool jersey even though it isn't worth mending, because washable-wool fabric is extinct. (I thought online shopping was supposed to give us more choices!) So I drew water-erasable guidelines on the spots that need darning, finding lots more in the process, then picked off the cell-phone pocket. It was surprisingly difficult because the thread Mrs. Jones used blends in very well. I brushed off the lint and dropped the pocket into the bucket where I'm soaking the straightening strip off the ten-foot muslin. I should change the water today.
Add elastic to garish tights
Then I finally got around to cutting thirty inches of quarter-inch elastic and threading it into the tights with a gray stripe across my butt. I pinned the ends together and felt around to be sure it was flat — finding, at the end, that I'd wandered off onto the elastic that was already in there. So I went around again — this time I figured out that when a bunch of gathers have piled up in front of where I'm feeling, I can pinch the elastic where I've gotten to, then take a firm grip on the elastic on the other side of the gathers and pull it through my pinch. After getting back to the beginning, I unpinned the elastic, gave one end a half twist, and went around again. Lo and behold, I'd twisted in the correct direction!
I used my tweezers-and-ring bodkin, the one I bought in Nappanee. (Sigh. I'd love to shop there again. I've got to start spending a little time building up my injured rotator cuff every day, and I should drive the car on a straight road more often.)
I was surprised that the ring went through the buttonhole with no trouble, but the place where the tweezers gripped the elastic hung up. Perhaps that was because I was expecting trouble from the ring and didn't think about the beginning of the elastic.
Then after lunch, I picked out the bit of hem where I'd missed the edge while hemming the neck of bra B/red/two. I decided to get out the tools to remind me to sew it up after my nap, then saw that the job was so small I might as well do it now. I used running stitch anchored by back stitch at both ends, but switched to overcasting at the frayed spot, putting my needle through the holes left by the machine stitching.
After naptime I'm making meatloaf, and after supper I'm buying milk and eggs, so this is probably all the sewing for today.
When I undressed after yesterday's ride, I wanted to put some sweaty silk into the bucket where the straightening strip and the pocket were soaking, so I rinsed the pocket under running water, wrung it in a towel, and laid it out to dry.
This morning I basted it to the jersey. I was in some doubt as to which was the hem, because the sewing-on marks had washed out. This gives me hope for the stitch marks on the jersey.
I shoved one of my pieces of plywood inside the jersey so that I could baste with it lying flat and not worry about catching the other side.
Then I tried it on — when this high, the pocket doesn't work when the zipper is open. Then I put my notebook into it. Something isn't right — I never reach for my notebook with my left hand. Then I tried my cell phone in it.
I can sew it on in this position. I'll use a safety pin the first time I use it, then stitch around in a circle instead of making a bar tack, to avoid making a stress riser.
Now where did I put the silk thread I ravelled out of the tights with the too-tight waistband when I removed the elastic and replaced it with quarter-inch elastic in a casing?
Found some on a wooden spool that wouldn't fit into an Altoids-type box, and a tea box won't fit into a pocket. Finally, down at the bottom of the box of tin boxes, I found a screw-top aluminum provision box that used to be a first-aid kit. That thing must be fifty years old.
Now it's labeled "jersey-darning silk" and the spool is in it. Soon to be joined by a needle and, I hope, the rest of the silk-tights silk. I do have a little white and off-white buttonhole silk.
Make cross-reference in 042 into a
link I can't find any
cross reference that isn't a link. Perhaps
I should have been more specific than "cross
reference", perhaps I mis-typed the name of the
file, perhaps I linked it and forget to check it
off.
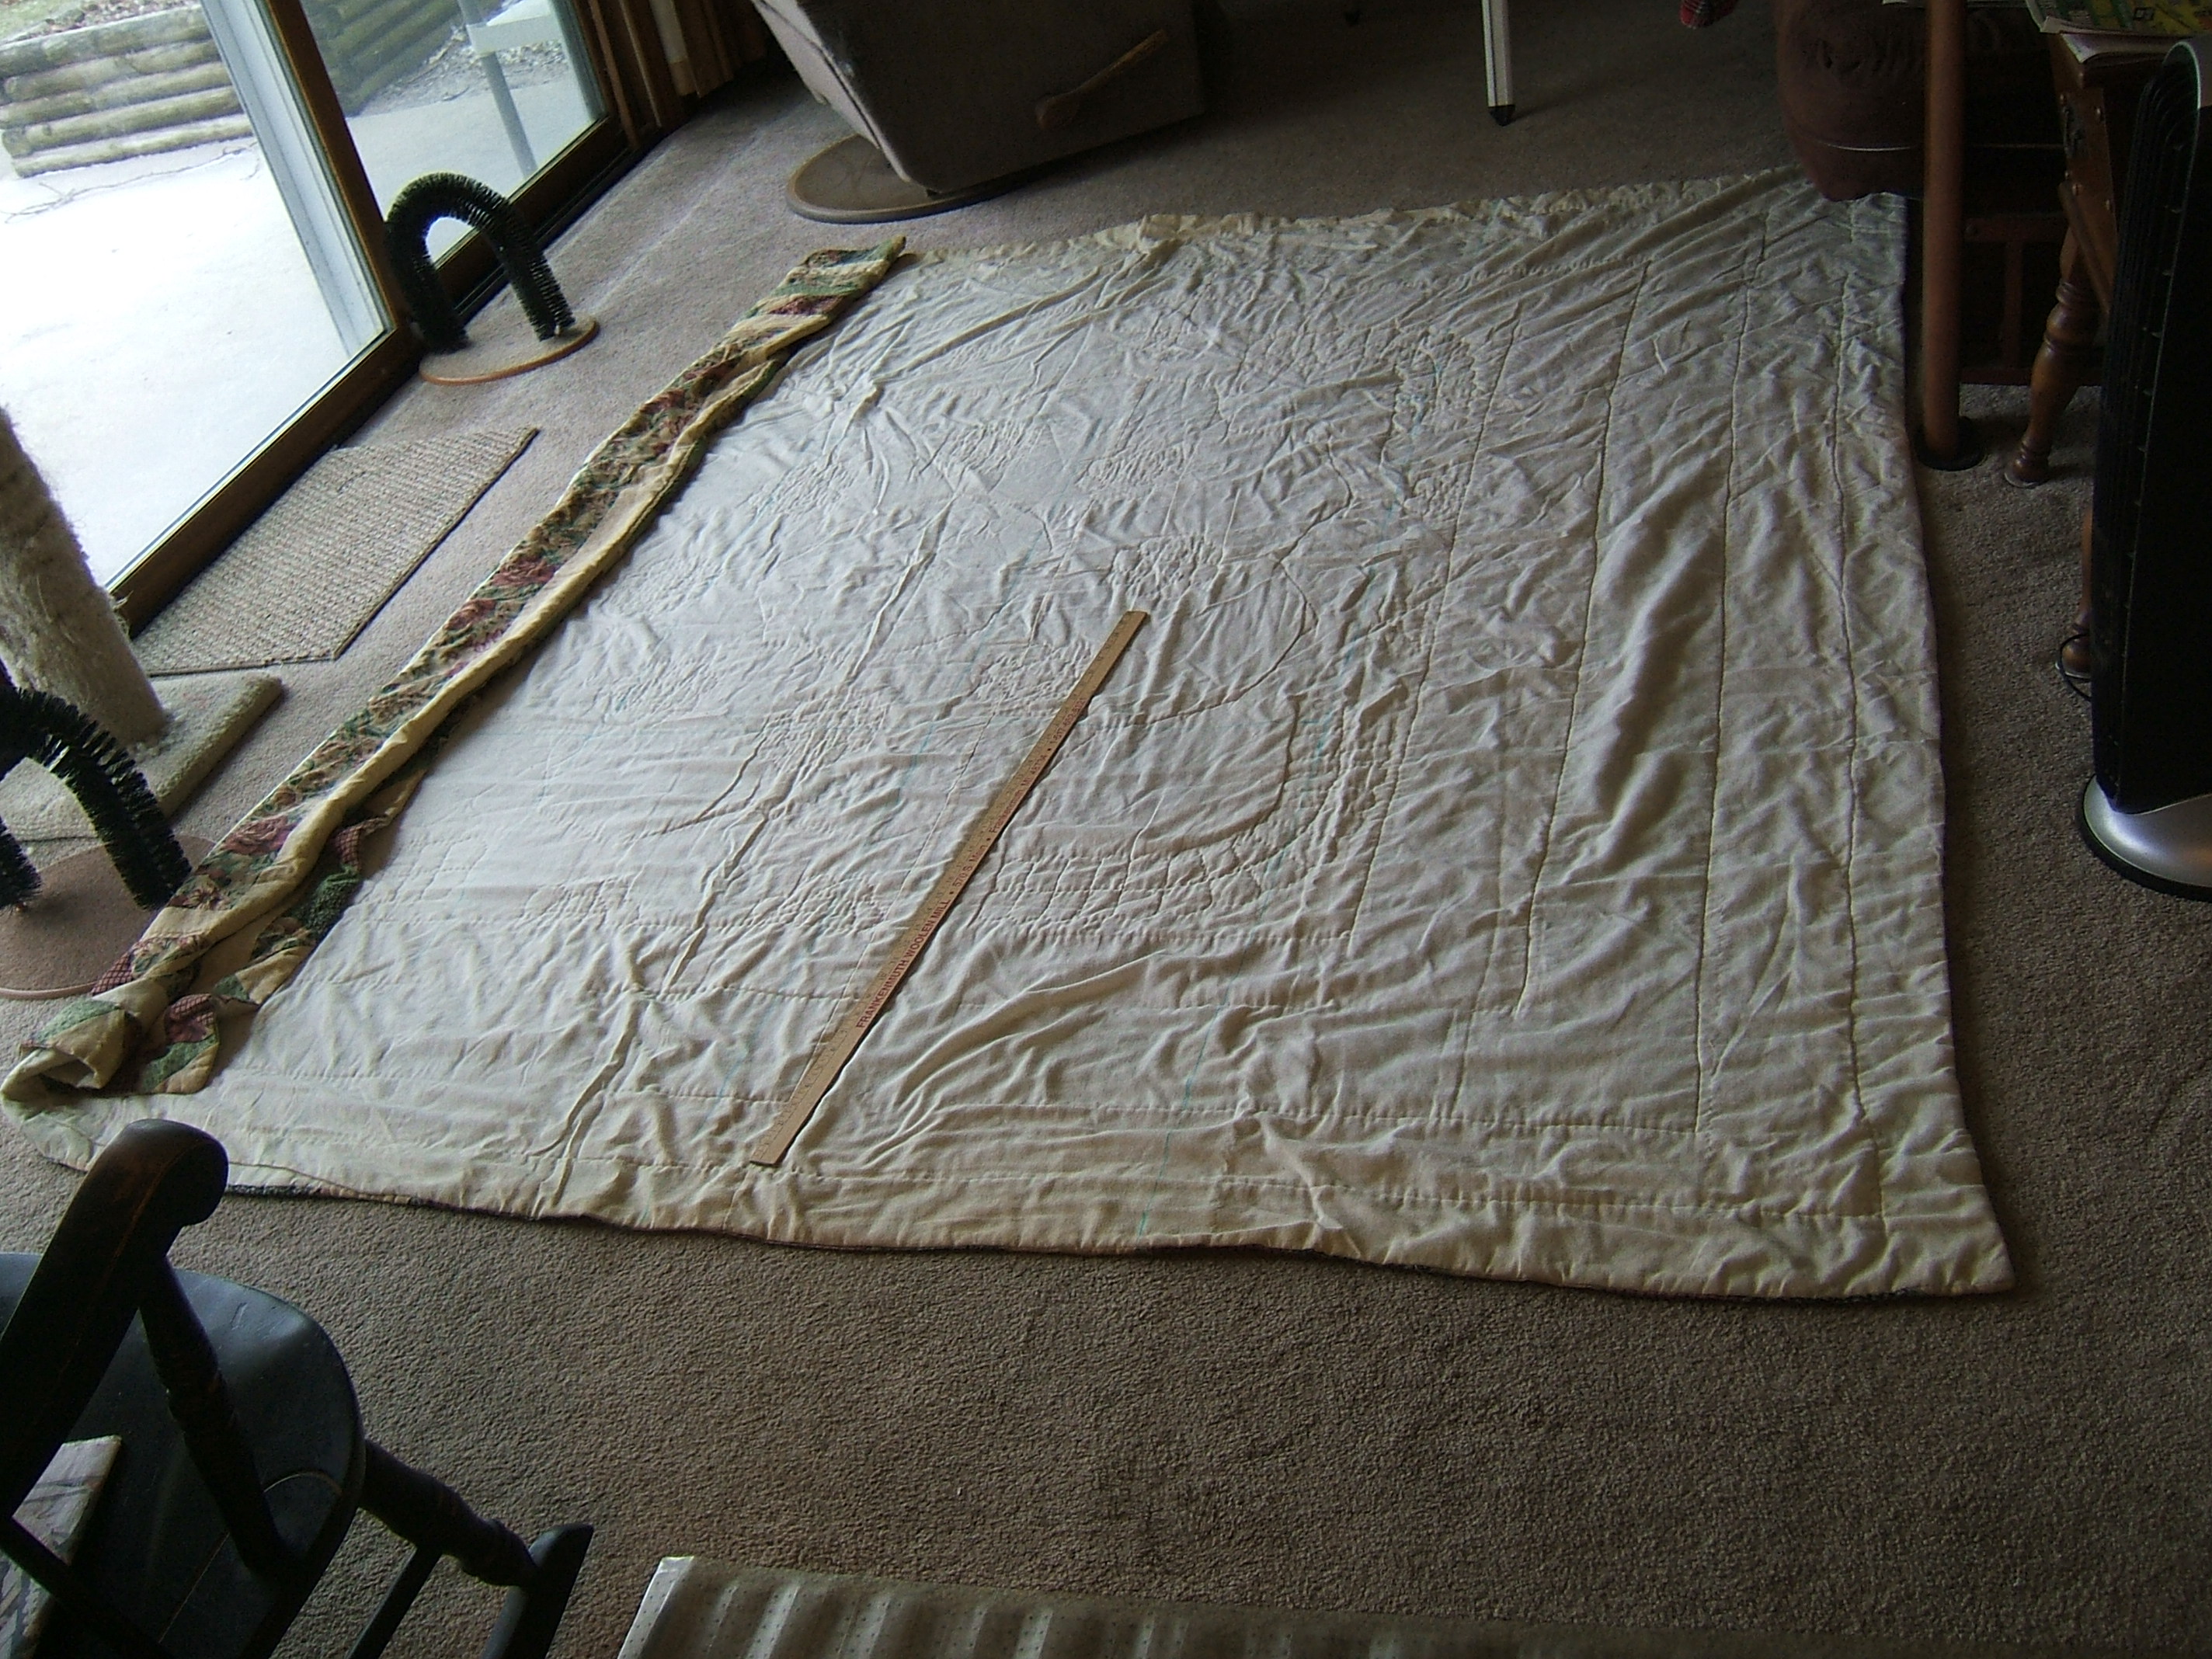
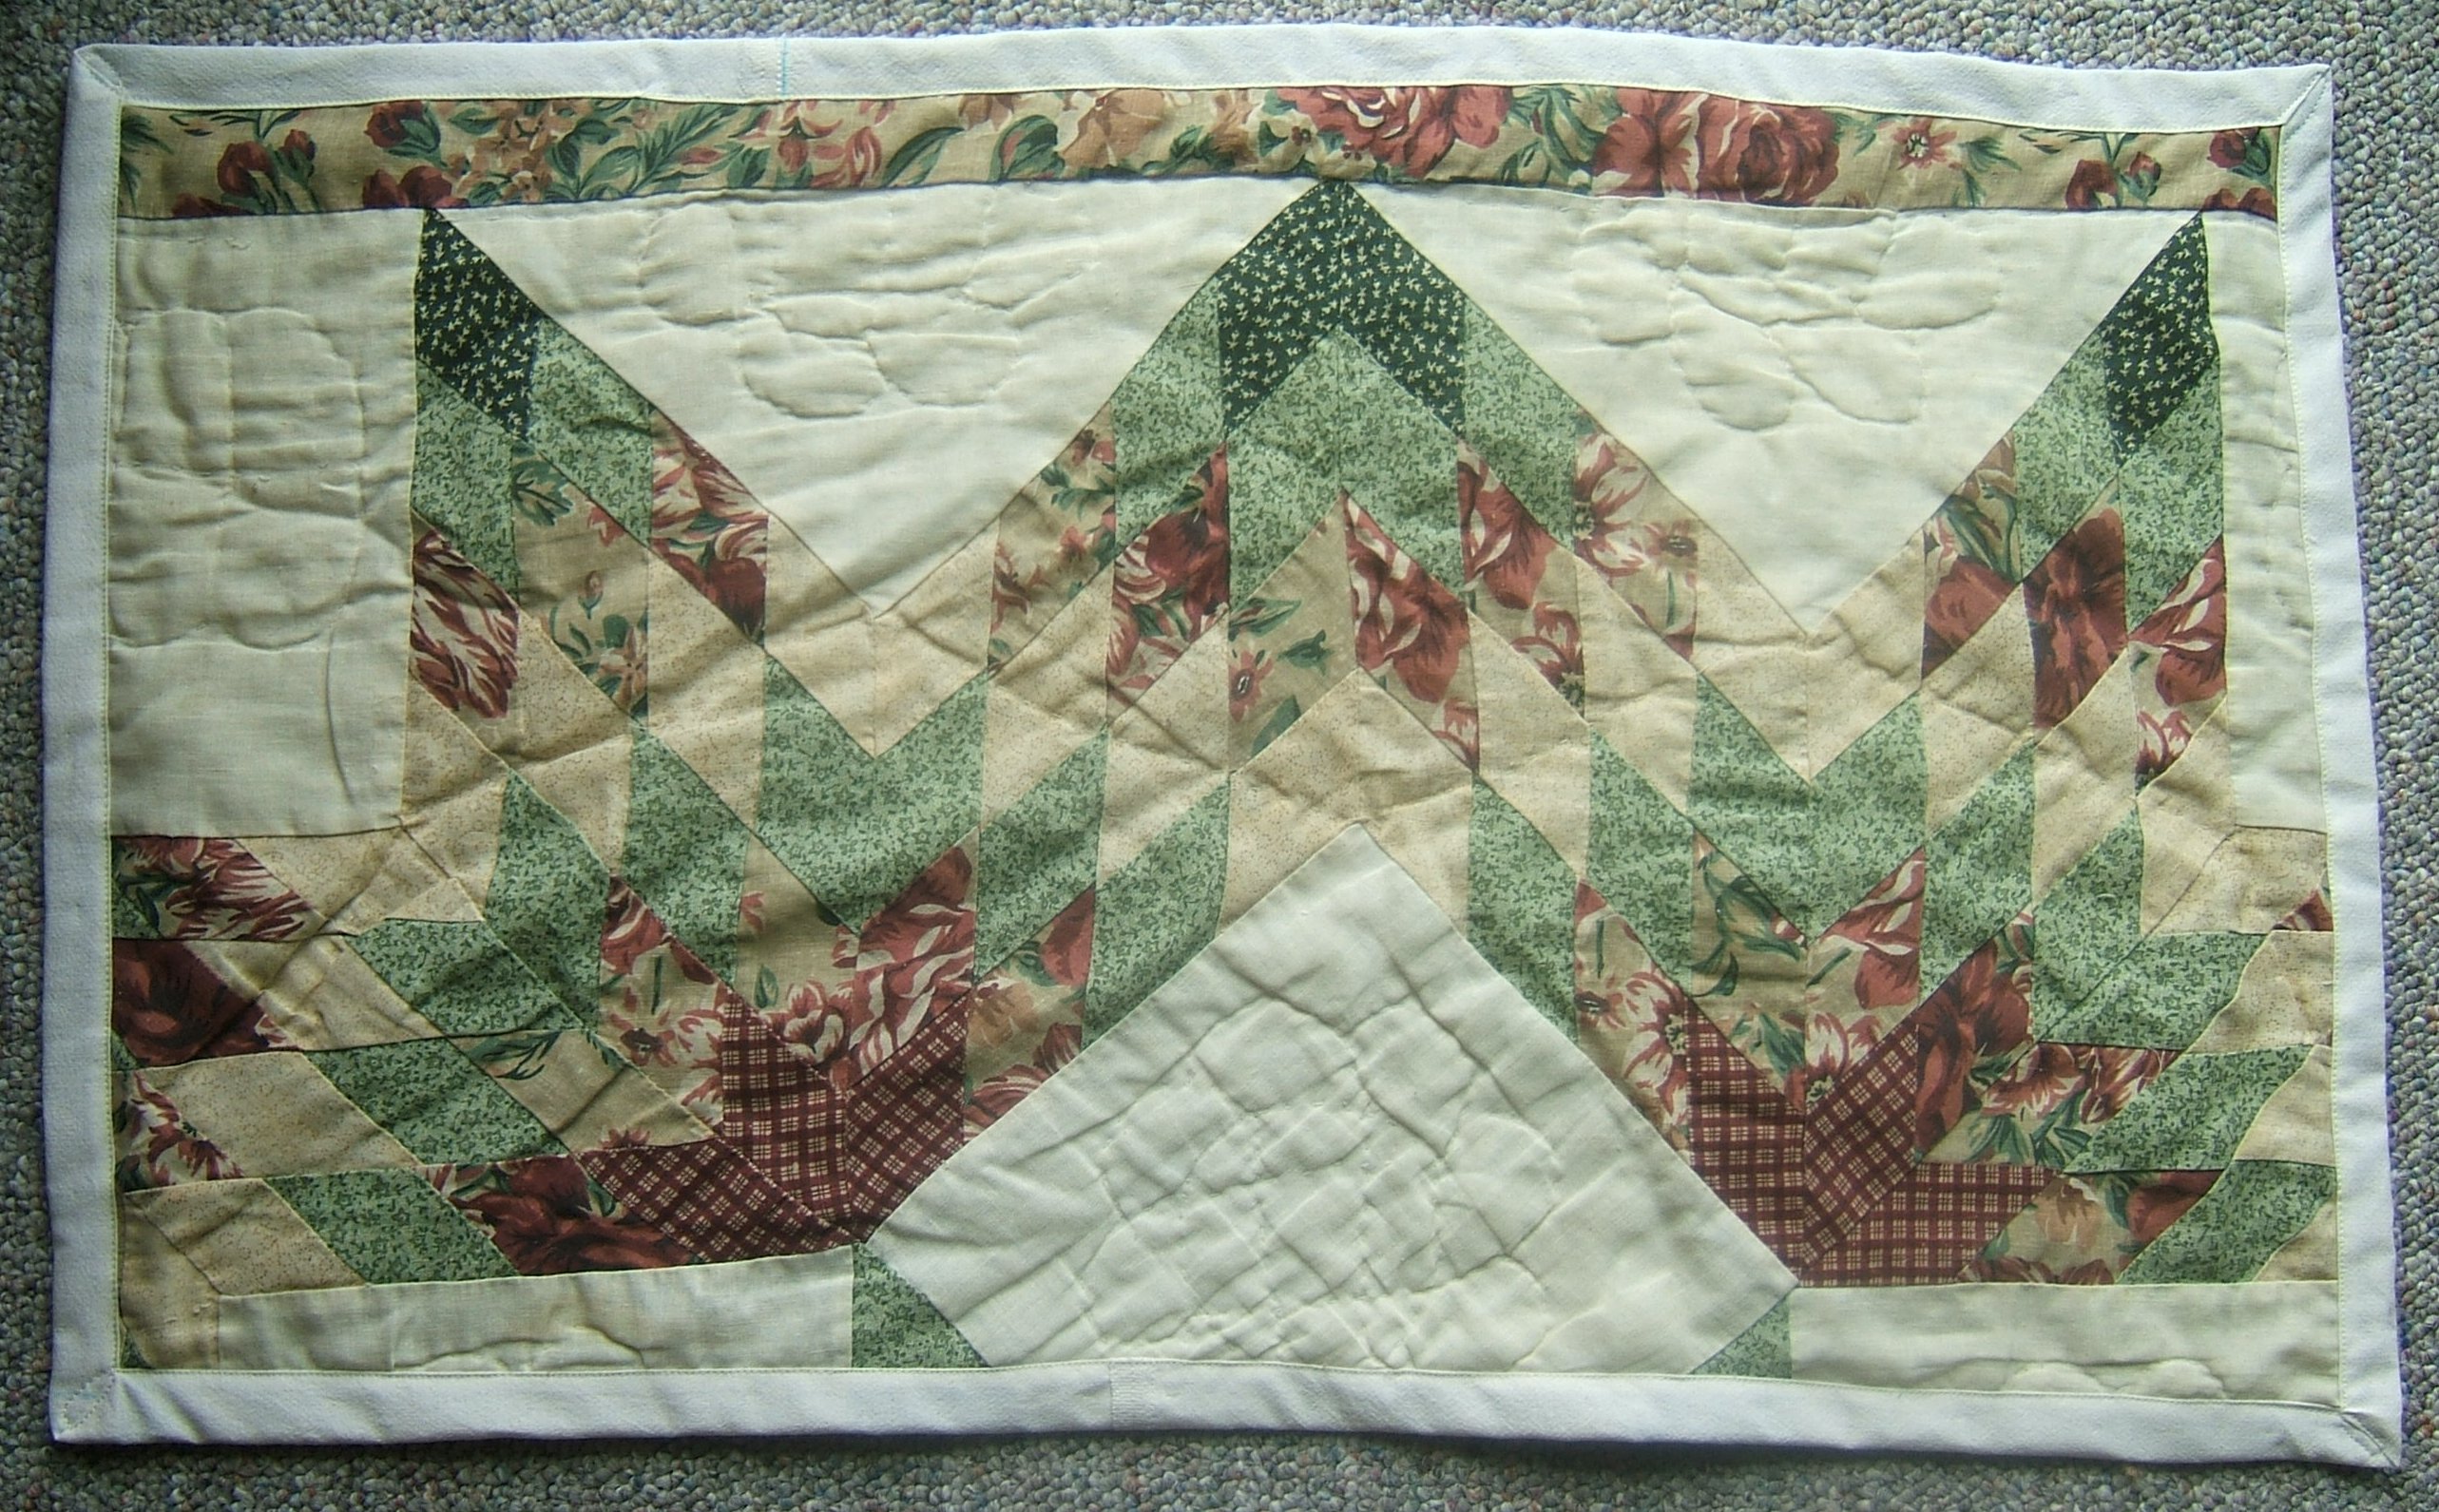
I marked the old quilt for cutting up for the animal shelter. Crawling around on the floor is more strenuous than I remember.
I got four rows of two 30" x 18" cat blankets, with two 27 1/2" x 36" dog blankets at their ends, and a 24" strip is left along the side. I'll probably cut that into three pieces, perhaps one square and two rectangles. I'll decide after it's a size I can mark on a table.
I can use deprecated thread for the before-cutting zig-zag, since it will be covered by the binding.
I see that the thread already on the Necchi is suitable for mending the body-pillow pillowcase, so I'll do that first. It's not on the to-do list, since I found the broken seam while collecting pillowcases for Monday's wash.
Finished cutting up the quilt yesterday, except for the 24" strip. I think I'll cut it into two pieces, because each piece will be a reasonable shape after being folded in half, and this thin quilt needs to be at least doubled.
On Wednesday, I found a bobbin of olive Subsilk in the drawer, and then picked what I thought was the spool it was wound from for the top, but that turned out to be tan when I wound the last of it onto a bobbin. The light was poor enough that I didn't notice the first two times I wound bobbins.
The first time I re-wound, the thread piled up at one end, and I found that the winder had been threaded all tangled up. I had to break the thread to get it out of the tensioning device, so I used up the partly-wound bobbin — and then made exactly the same mistake, but I noticed that the threads were wrong before winding any. The third time, I put the bobbin in the winder and guided by hand until there was enough thread on it to hold, then put the thread through the tensioning device and the guide. (The guide hole is slotted, so this was possible.) And it wound neatly. That bobbin ran out when I was nearly done on Thursday, and the spool ran out just before it was full. So I found a greeny spool that probably was the one that the first bobbin was wound from.
My original thought had been to zig-zag on each side of all the cuts, then cut with my rolling knife, but while sewing the cut that separated the 24" strip, I realized that I should make the quilt smaller as rapidly as possible. So as soon as that cut had zig-zag on both sides, I draped it over the stool that I use as a small table for JOYXP's mouse and cut it with shears. Then I cut the dog blankets off, cut them apart, and so forth. I don't know at what point I knocked off for the night.
I began and ended each zig-zagging with short stitches. I was nearly done before I thought of shortening the stitches when crossing cutting lines.
Althecat, AKA Al E., approves of having a stack of quilt pieces in the sewing room.
⁂
The 24" strip has been cut in half and added to the pile. Now I need to bind them.
Oops! I did the stitching on that cut with the double bobbin I put in to zig-zag the edges of the straightening strip, which I need to wash before using it. These blankets will be washed early and often; it wouldn't do to have the binding shrink.
I figure that the straightening strip will do one cat blanket. Or two, if I cut it in half lengthwise.
frayed pocket on everyday jeans
This was both easier and harder than I expected. When I saw the fringe poking out, I assumed that the raw edge had torn free of the stitching, which would have been a small but complicated repair. Turned out that the stitching had worn away — rather a lot of it, so that I had a simple but large repair.
But the other pocket has torn free of the side seam at the bottom of the opening. This looks like an easy matter of shoving it back in and re-stitching the seam, but I'd have to rip a little more of the seam first, and I need to put the pants on early tomorrow morning. I don't want to start something that absolutely has to be finished before bedtime. If it's done before the pants are washed, that's plenty of time.
They really ought to go into the next load of darks. That isn't until Monday; should be plenty of time for a small job. But today and yesterday I got up thinking "today I iron the shirt I washed on Monday, and press the straightening-strip so I can make it into binding" — and I haven't quite finished clearing off the ironing board.
Today I ironed the shirt, the straightening strip, and the muslin for the abandoned poncho shirt, which I plan to make into binding strips. I plan to use the edge-stitching attachment of the White to join the selvages of the poncho muslin; I may practice on the straightening strip.
For a while there, I thought I didn't have an edge-stitching attachment, but it's merely different from the one in the book.
Searching the attachment box was incidental to cleaning out the upper-right drawer in search of my seam ripper — I found a screwdriver I hadn't been using because I thought I didn't have one, and put it into the drawer with the attachment box. I thought I could put it into the attachment box, as I do with the screwdrivers for the Necchi, but I was lucky to be able to fit all the attachments back in. So it's in the drawer beside the box, along with a mystery tool that appears to be a weight for something to do with sewing.
There are more packets of sewing-machine needles than I thought. I decided to put them into a box and mark it "Schmetz" to neaten the drawer, but when I went looking for the small Altoids box to see whether it was big enough, I first found a clear plastic box that perfectly fits two stacks of machine-needle packets.
The seam I need to replace is mock fell, and the White is already set up with black thread, but I need to find a basting needle. I think I'll baste the pocket to the front with black thread and just leave it in.
Come to think of it, that's the way I sewed the seam originally — but it was machine basting. Once two of the three layers are attached, I can treat it as a lap seam.
Search for bra images suitable for Edge
Finishes I'm not sure
whether I did it today or yesterday, but there's
now an image in Edge Finishes. Still don't
know what's wrong with the Unordered Lists in that
file.
other frayed pocket on everyday
jeans Good thing that
I meant to leave the basting in. The layers
were so thick that I had to back stitch.
Darn fingertip of overmitten
At my last appointment with Dr.
Ashton, I finished whipping down the last row of
buttonhole stitch, then began sewing a pocket onto
my only wool jersey (not counting the one that
shrank until I can't even wear it as a bottom
layer). I'm thinking that I should add some
needlefuls of white medici to the Altoids box I
marked "Medici and
At that point I got up to see what was written on the box, started a new box for the jersey, and wandered all over hunting for the white medici I saw while cleaning up. Never found it, but there was a skein of thin almost-white yarn in the arm of the futon, so I wound off three needlefuls and put them into a "pill pouch" to keep them neat. Then I fetched another pill pouch and stuffed the needlefuls of black Medici in the "Darning Medici" box in my overmitten into it, messing them up in the process. But at least they are easy to tell from the scraps of Medici in the box.
I'm fed up with the ancient screw-top box I'd been keeping the silk thread for the wool jersey in, so I wound off the long-john silk onto a spool that would fit into an antacid box. The two spools are the same diameter, so that was quick and easy. But I have yet to put a needle suitable for Medici into it. May finish the overmitten first and use that needle. All I need to do before washing the mittens and putting them away for the summer is to lace the two pieces of reflective tape together. I think.
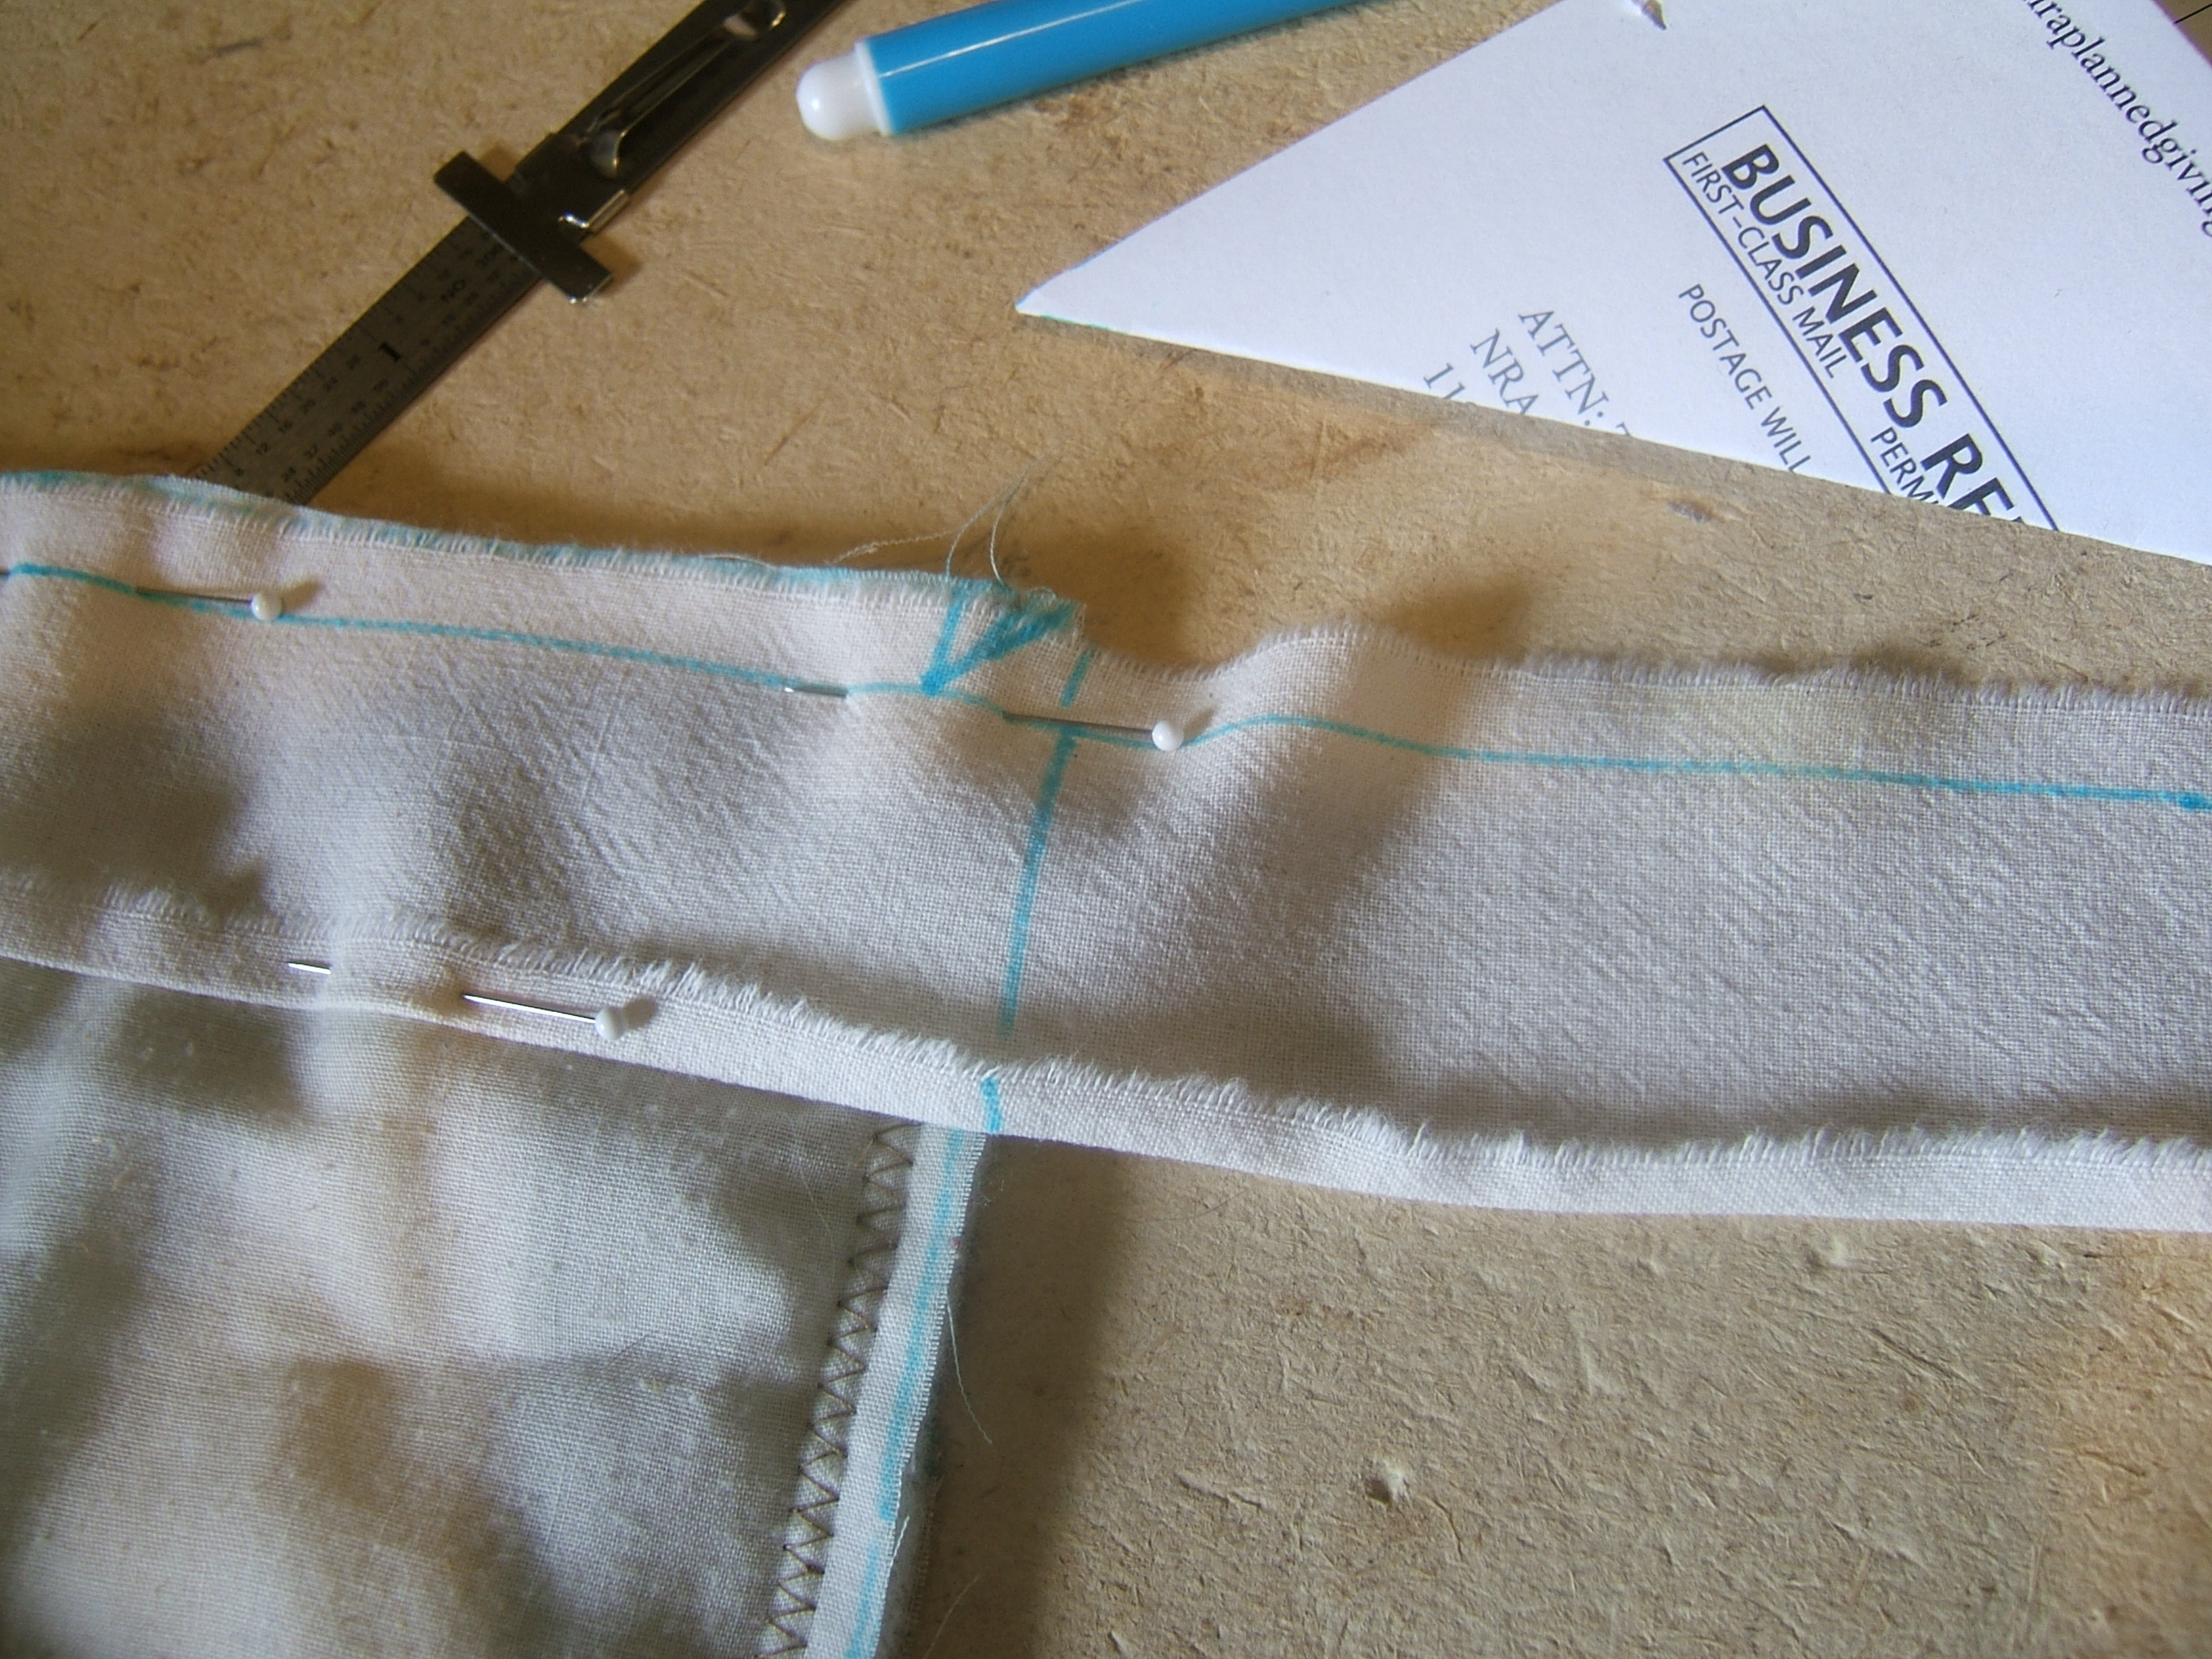
Some time earlier this week I got around to pressing a quarter inch on one side of the ten-foot strip of muslin, and this morning I started to pin it to a cat blanket. After fiddling a while, I DuckDucked "quilt binding corner", then started to pin again. When I got to the corner, I realized that a half-inch seam (The instructions all called for a quarter-inch seam) would be easier to miter if I drew the stitching line on first.
Somehow instead of fetching marking tools, I wrote this entry, and now it's time for lunch. But I did, just now, mark the stitching line. Hope I can stop marking after I get the hang of binding cat quilts.
⁂
Validate Rough011.HTM
It needs more work.
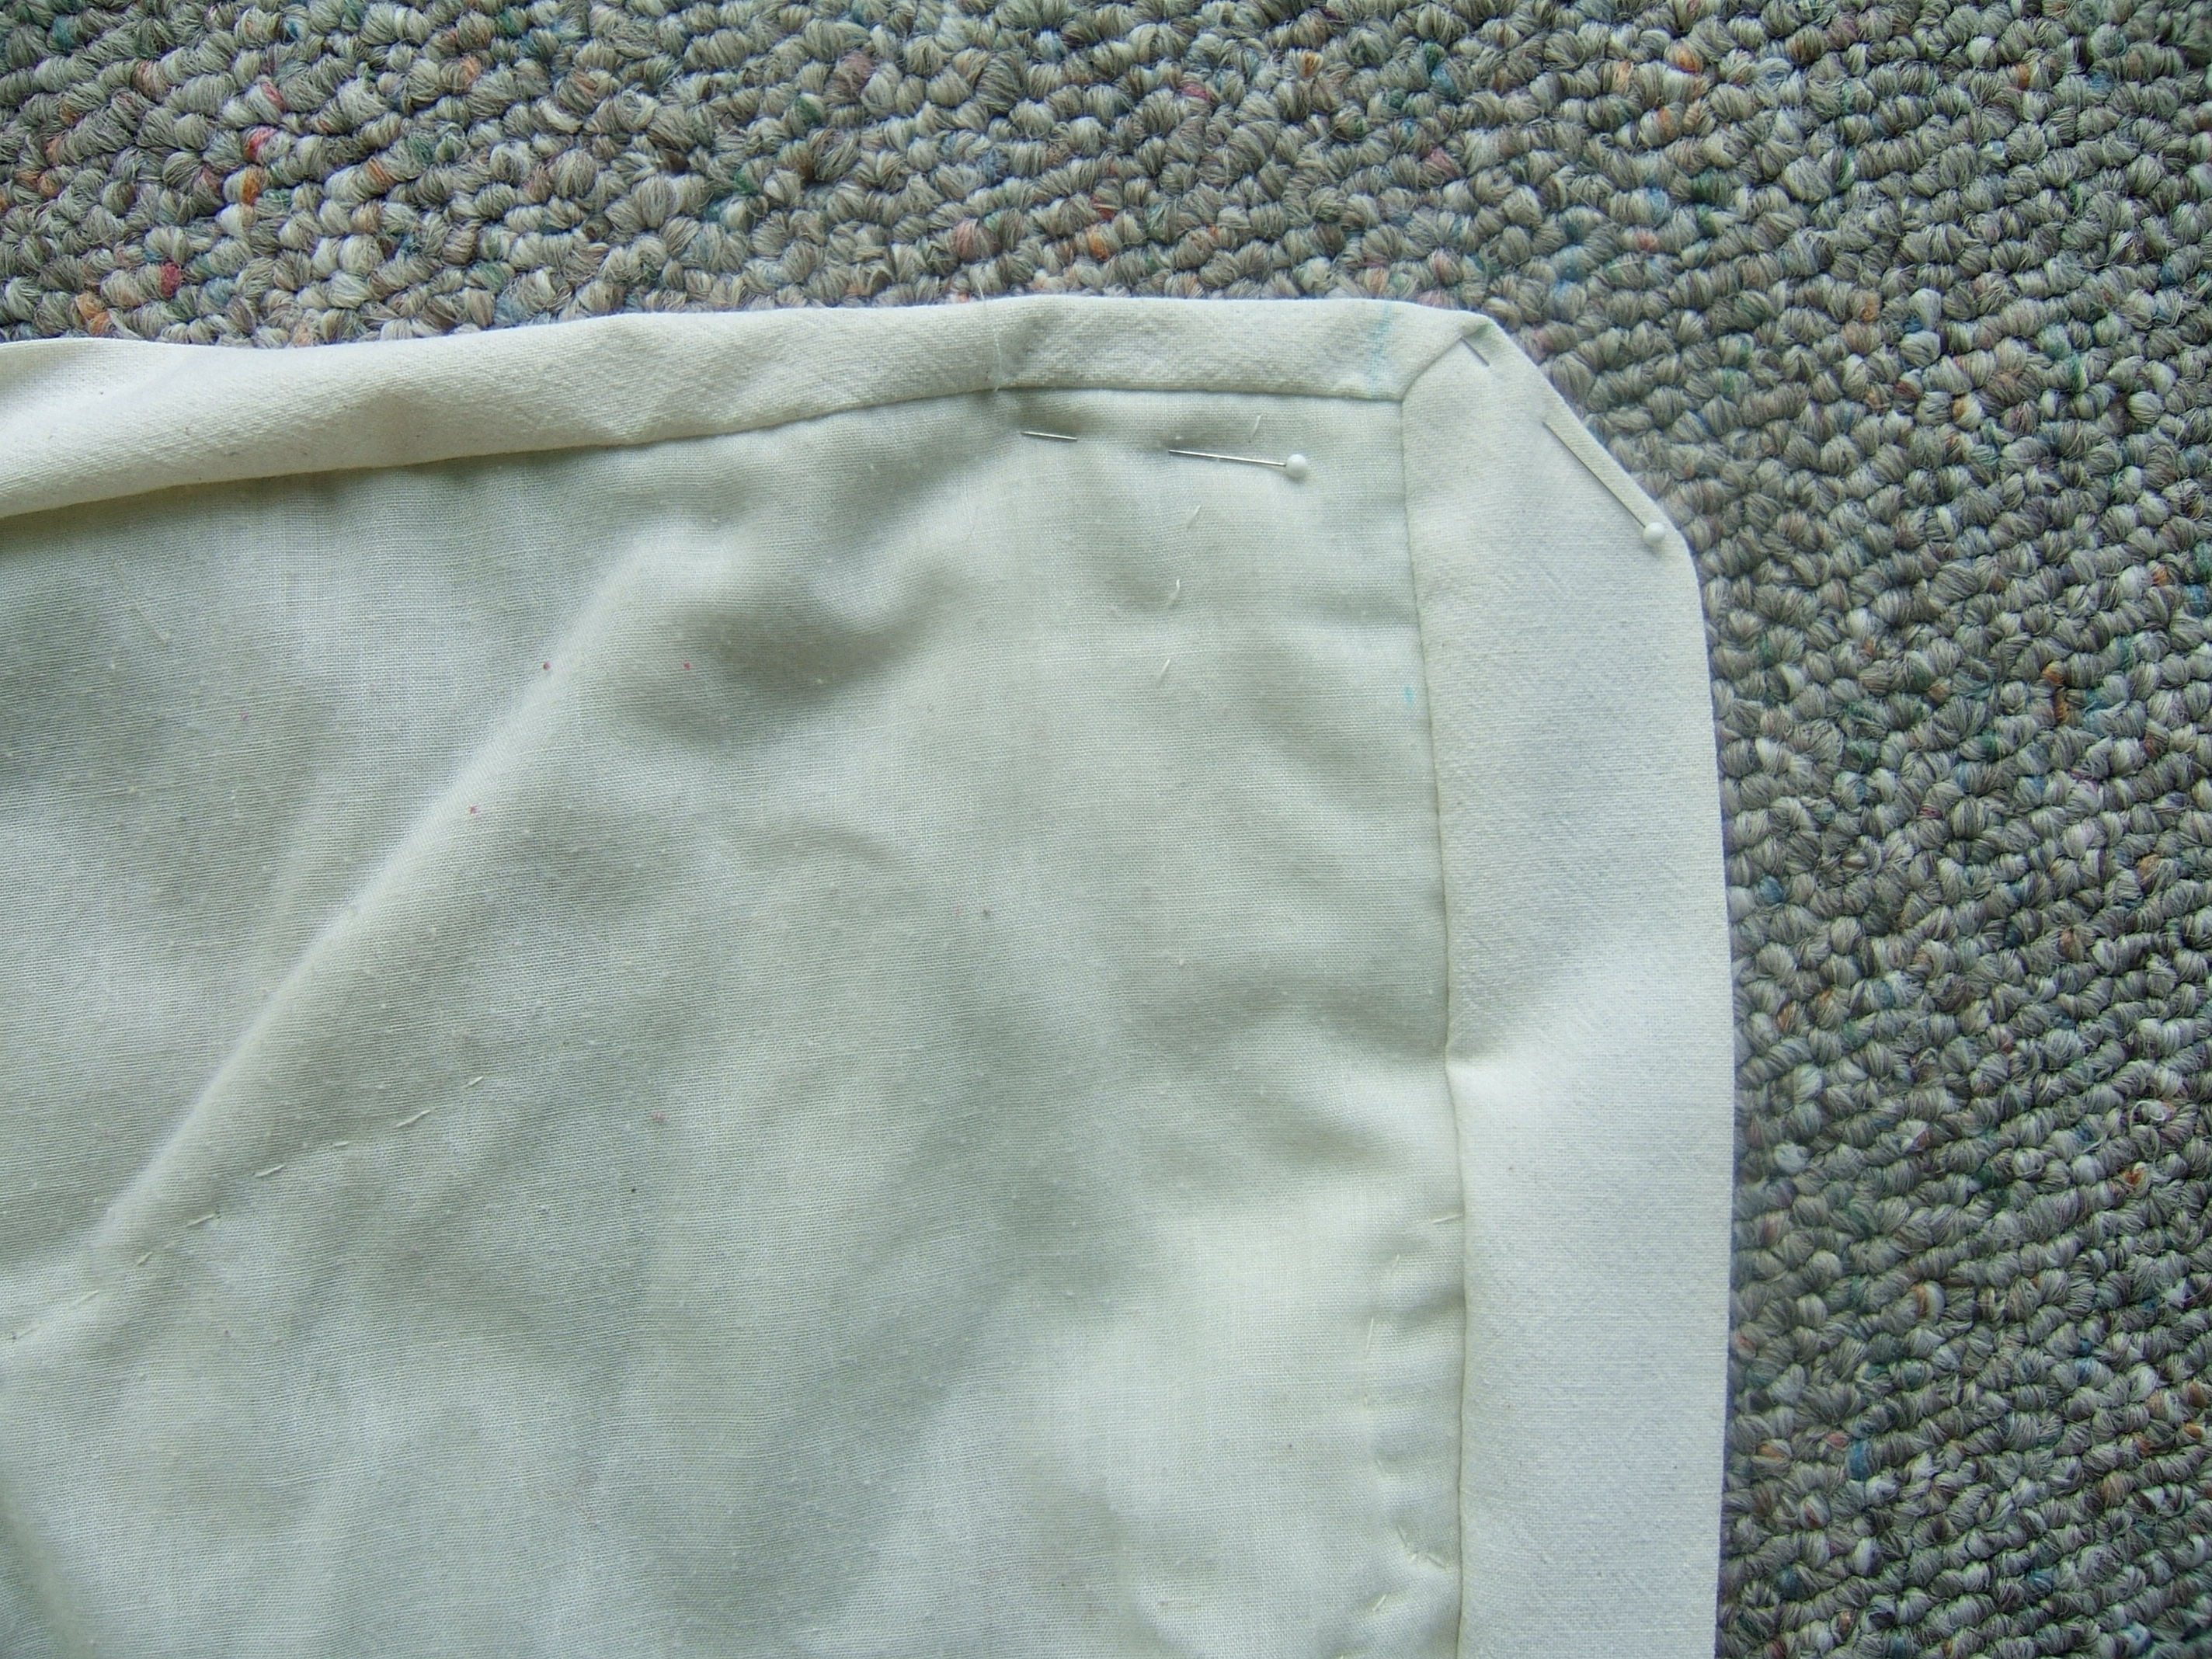
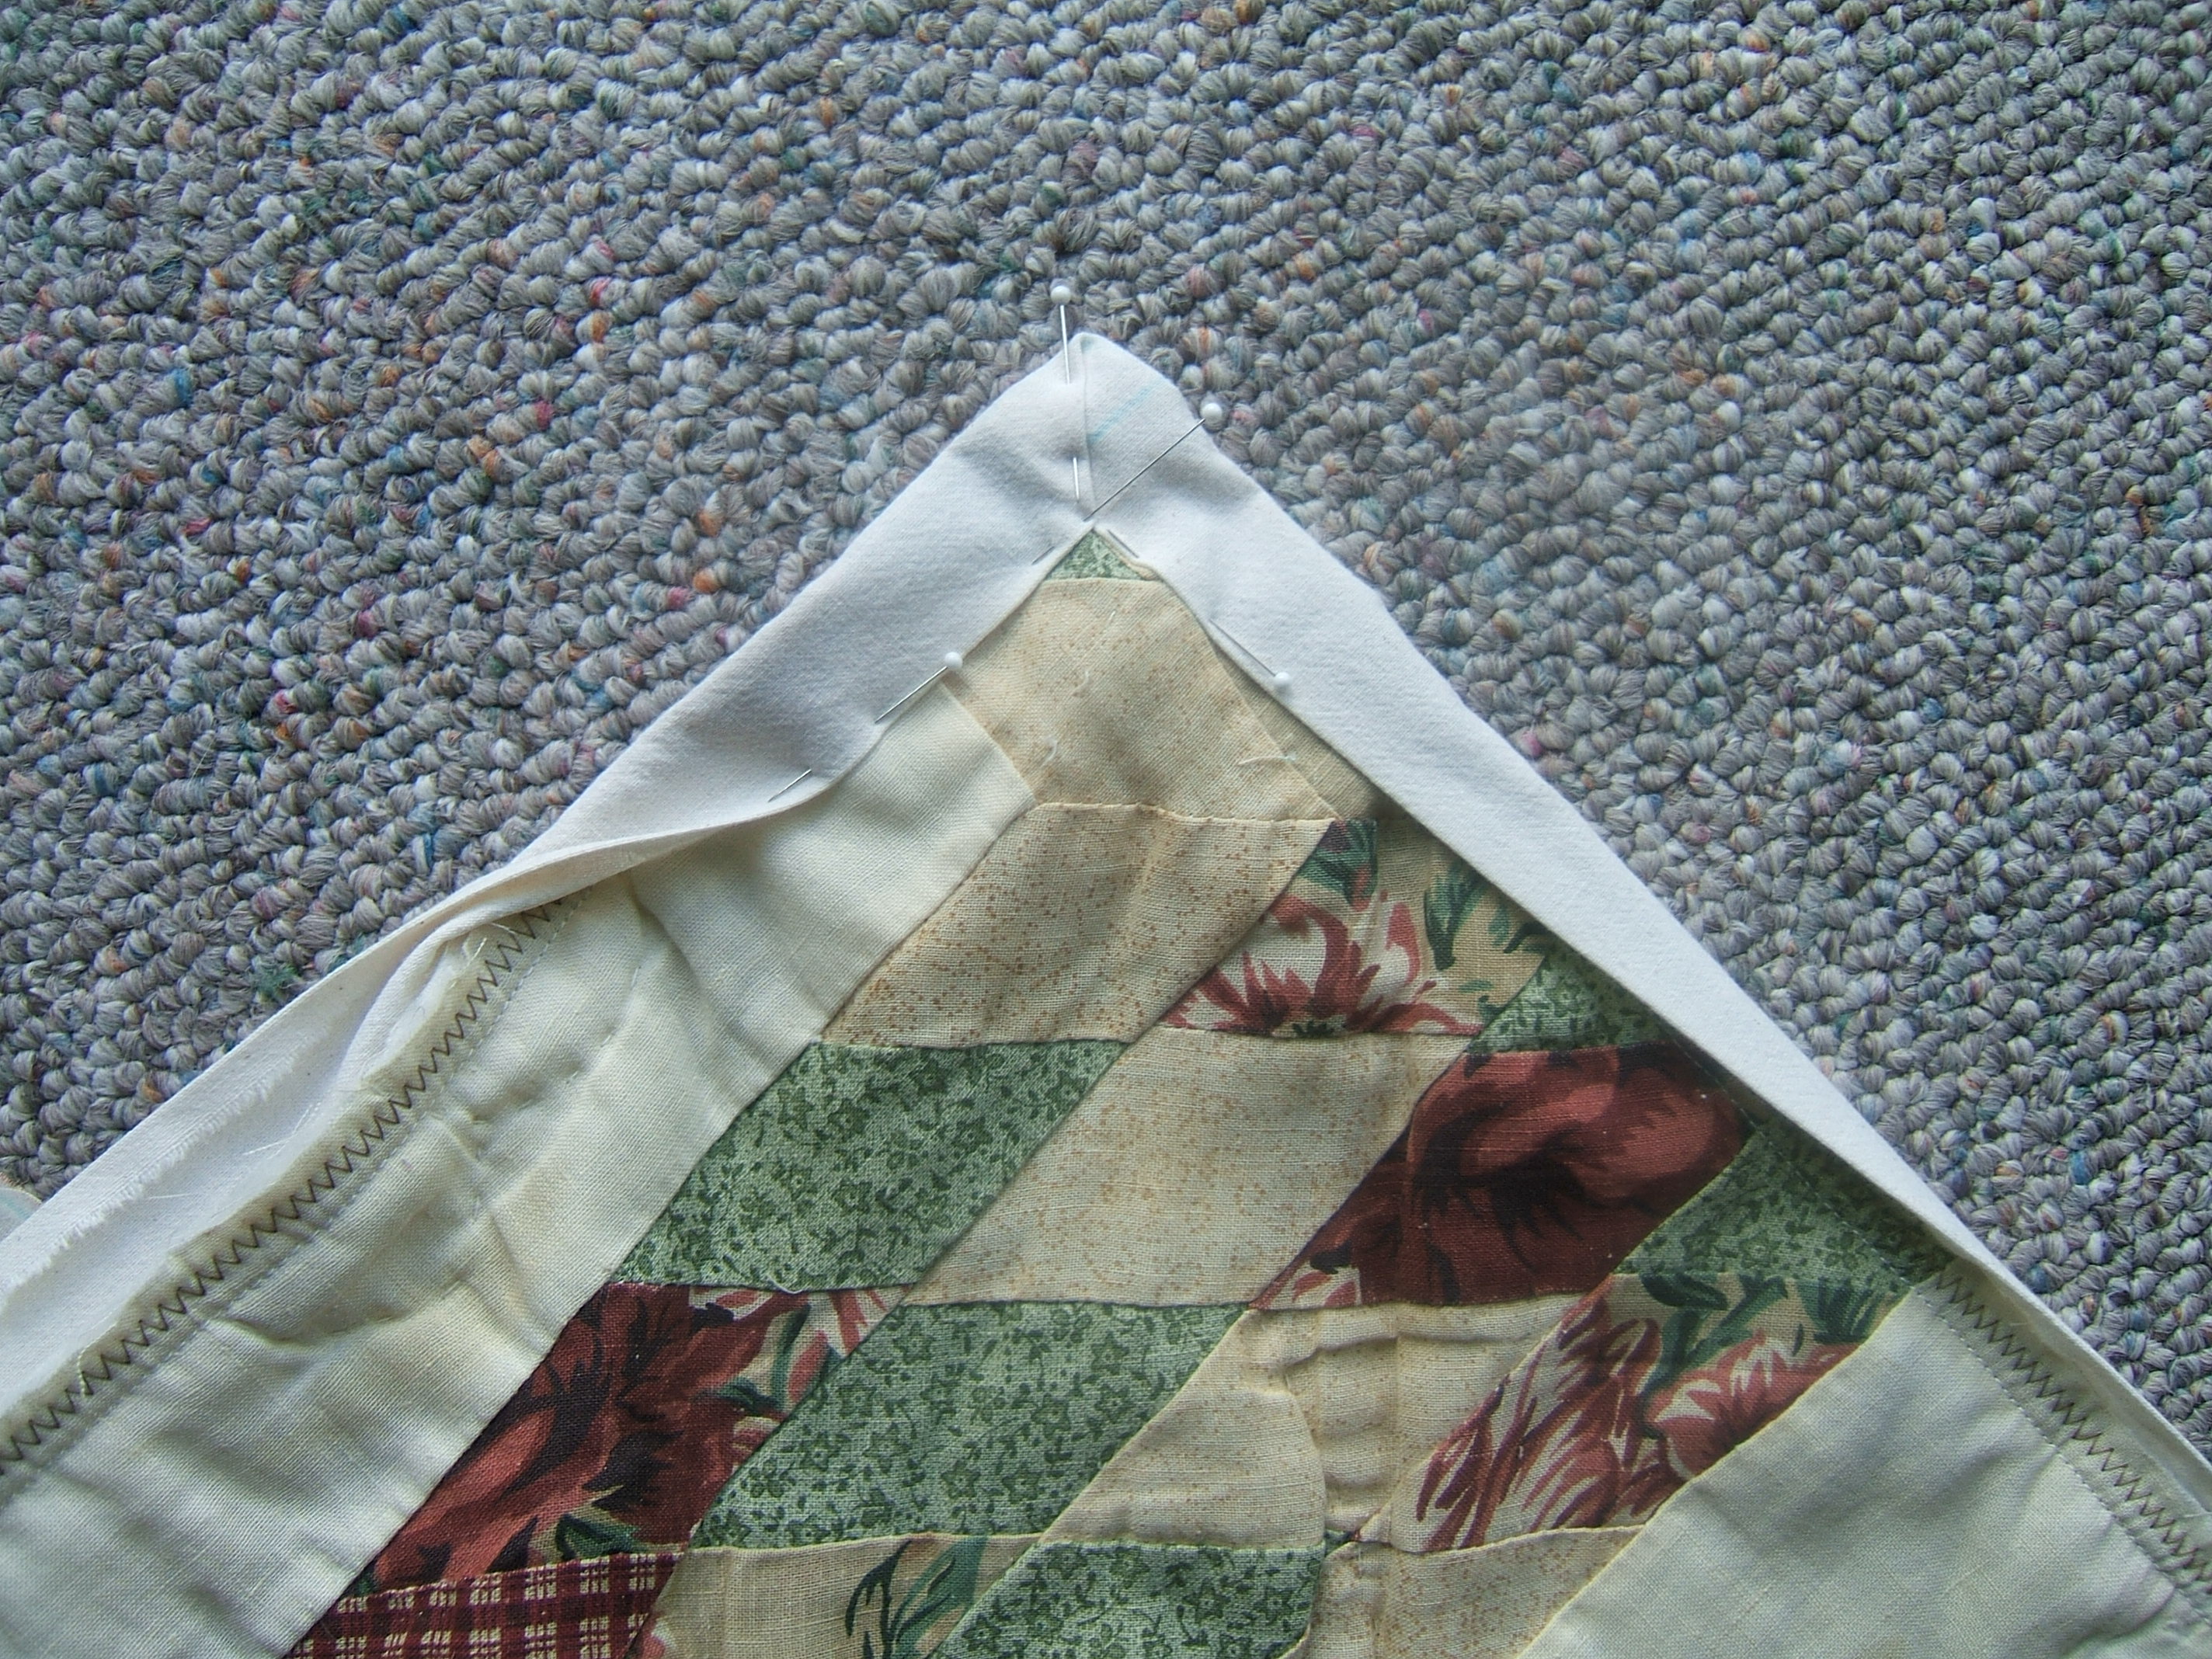
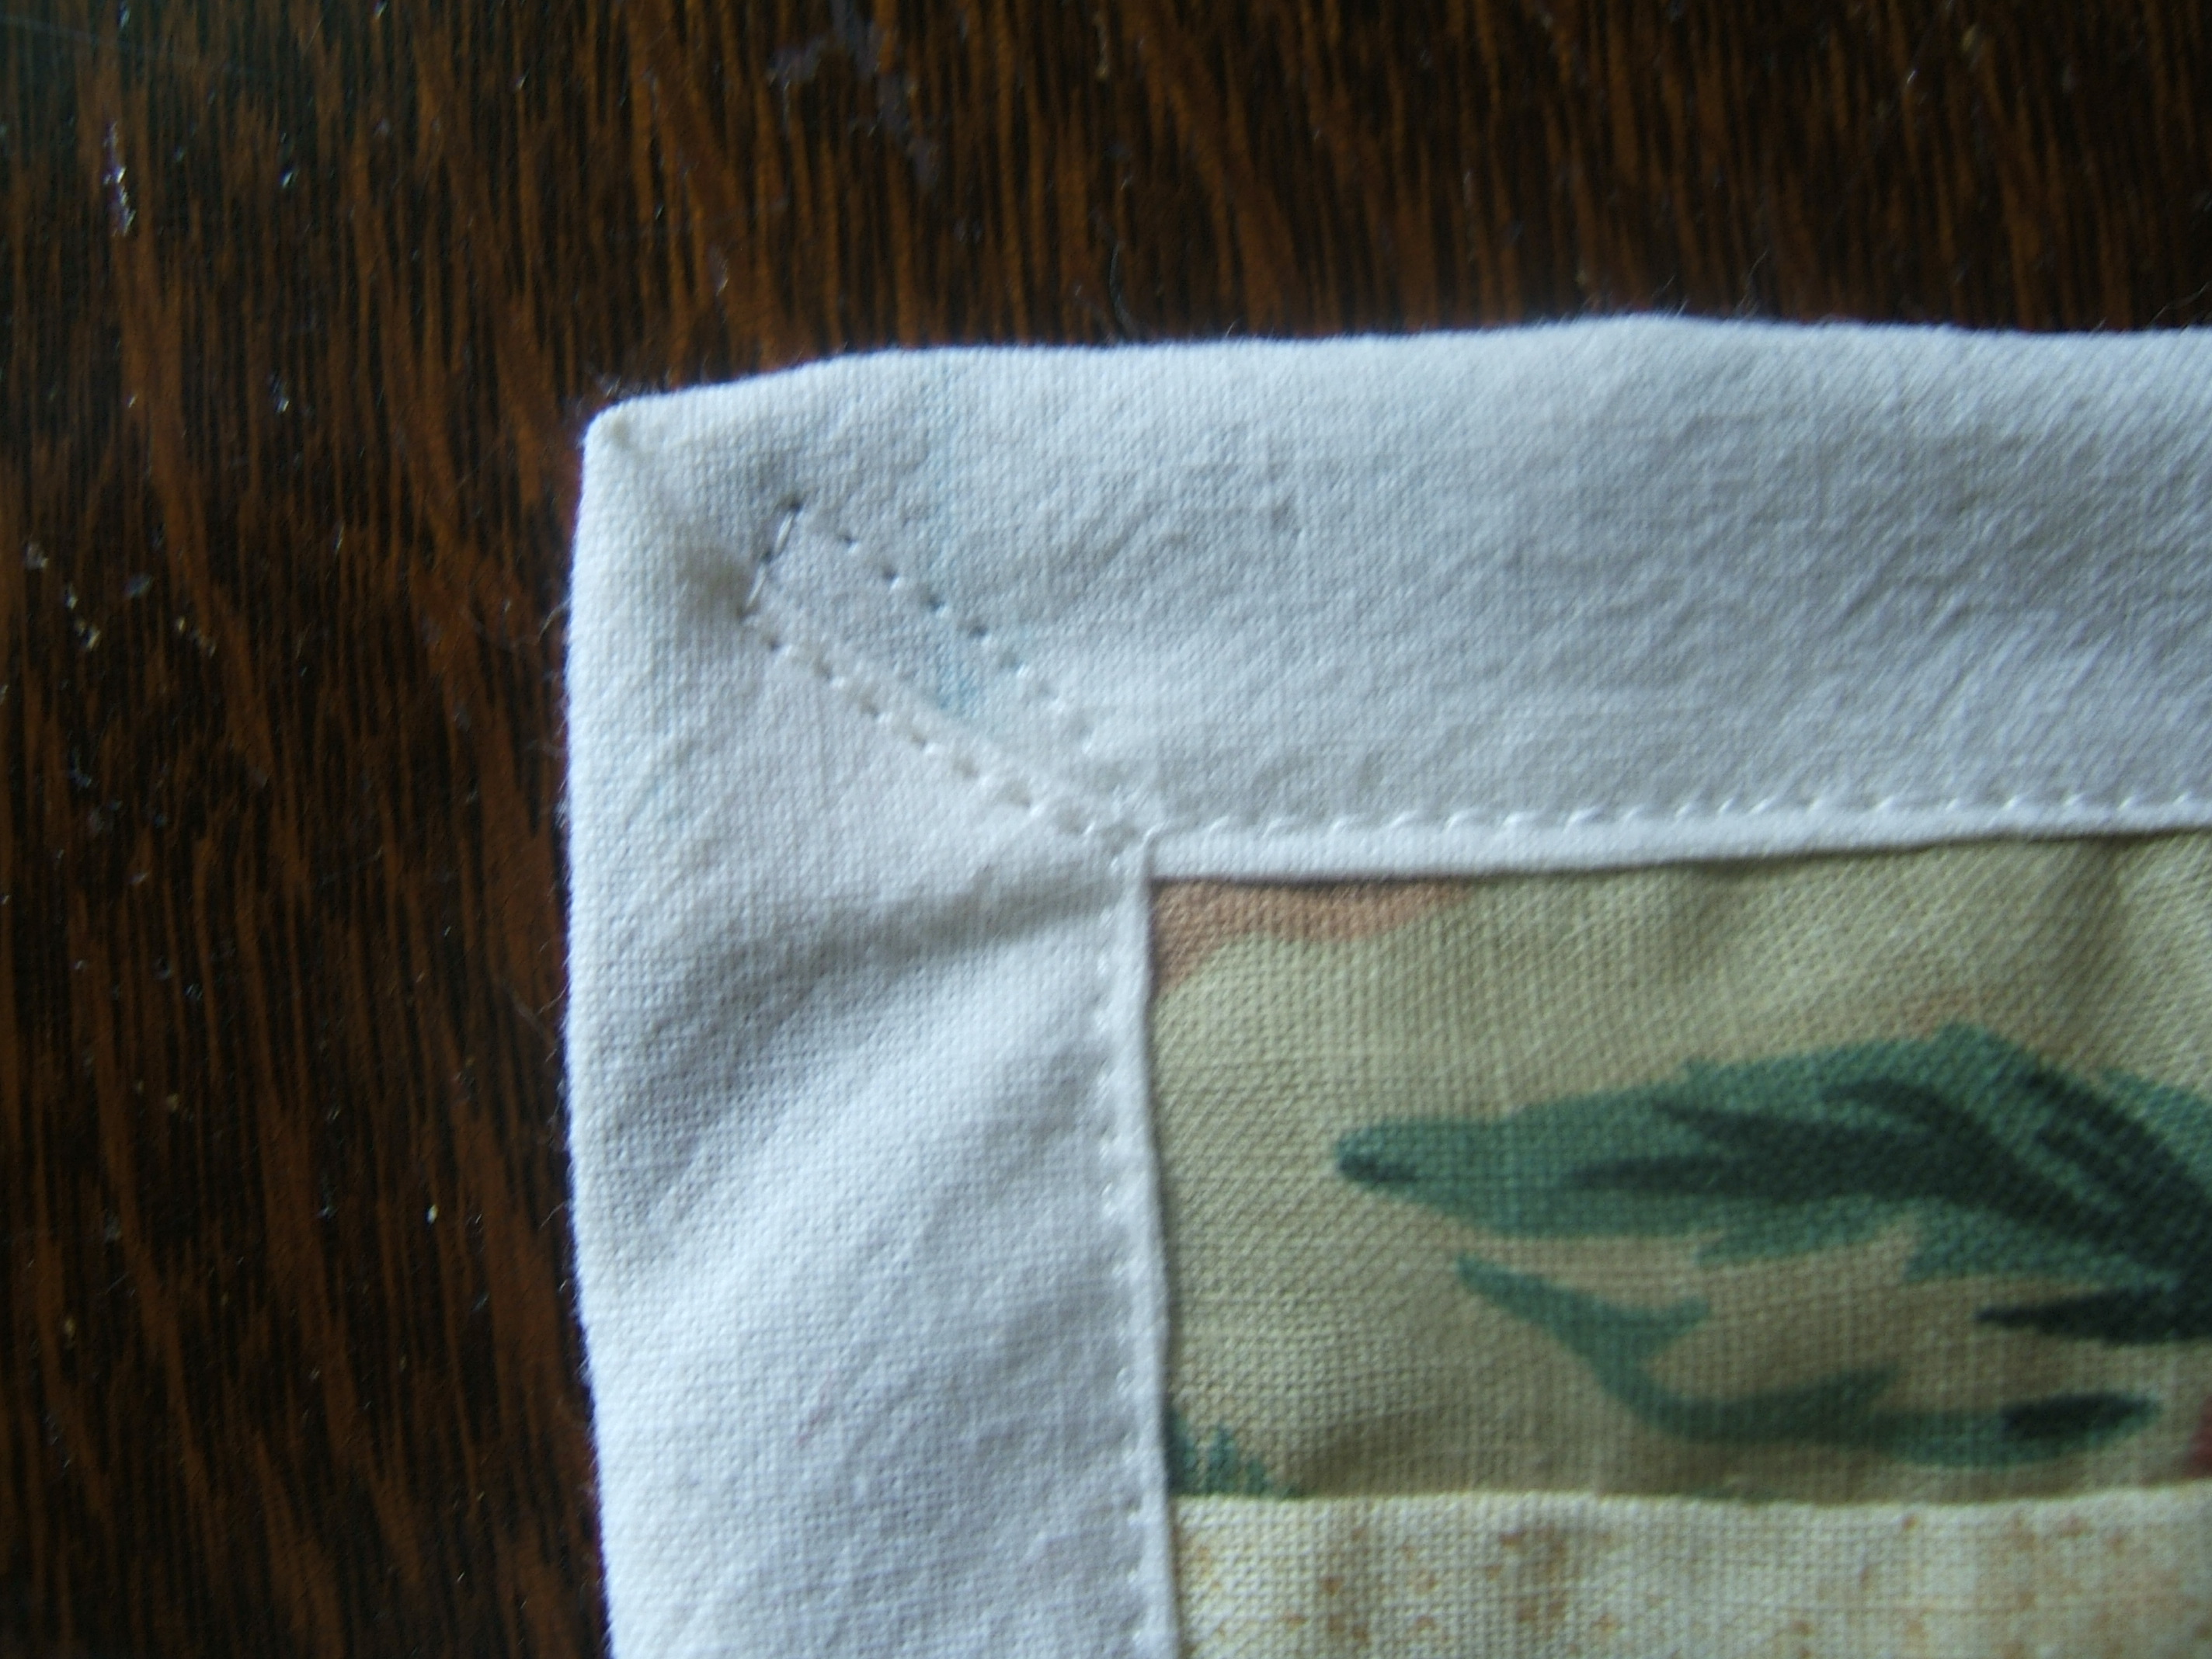
Turning a quilt-binding corner is very simple, but I don't think I would ever have hit upon it without DuckDuckGo. That's partly because I was wedded to the idea that one pins everything before stitching anything, as when hemming.
I wasted a lot of time getting an almost-clear shot of marking the corner.

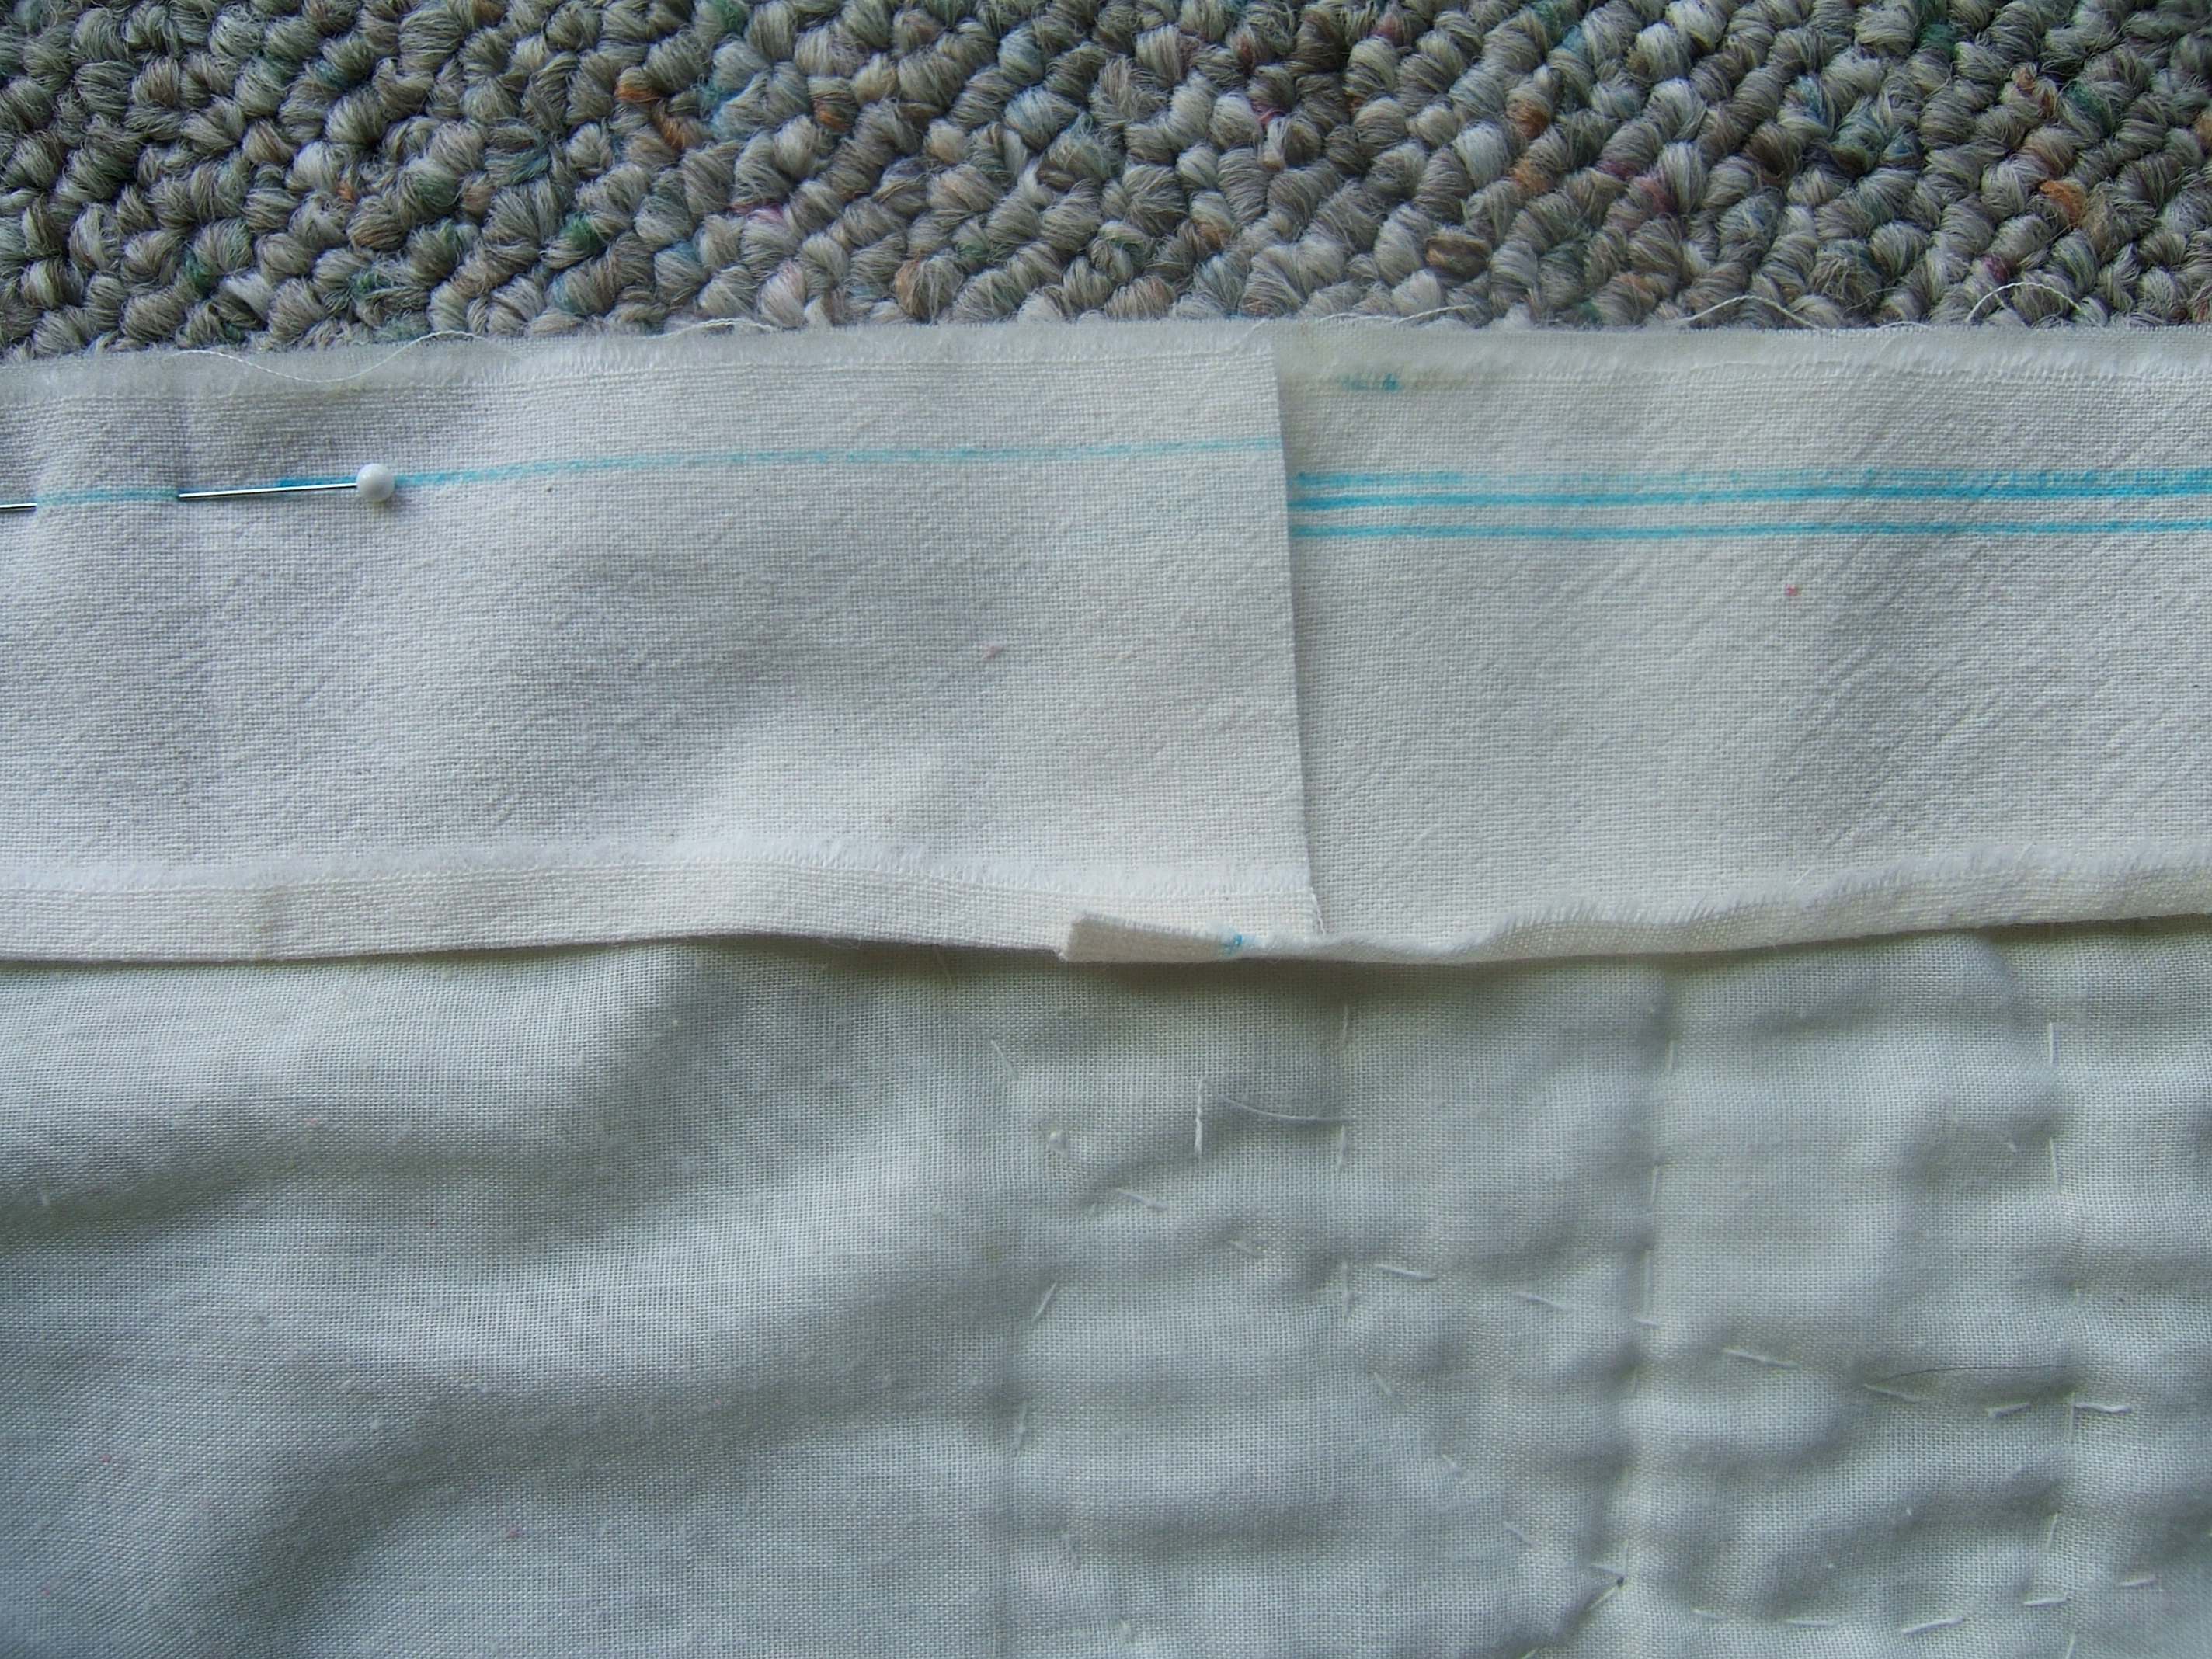
Drawing a line on the binding at the edge of the quilt underneath not only helps with marking the bias line, it marks the place that should be folded and matched to the previous edge when pinning the next edge. Ummm … that's a lot easier to do than to say.
⁂
The well-washed muslin is a quarter inch shy of forty-two inches long. Half is twenty one, a quarter is ten and a half, an eighth is five and a quarter, so it will make sixteen strips two and a half inches wide and a yard nineteen long. Sixteen times a yard and a half, eight times three, about twenty-four yards
I had fifteen inches left of a ten-foot strip, about three yards per cat blanket.
The muslin should bind eight cat blankets.
⁂
An unexpected use for the headlamp on the sewing machine: When I started to fold the White, I felt a bump, which I attributed to the spool of 100/6 being too tall, so I tucked the spool into a loose loop of the headband on the light.
⁂
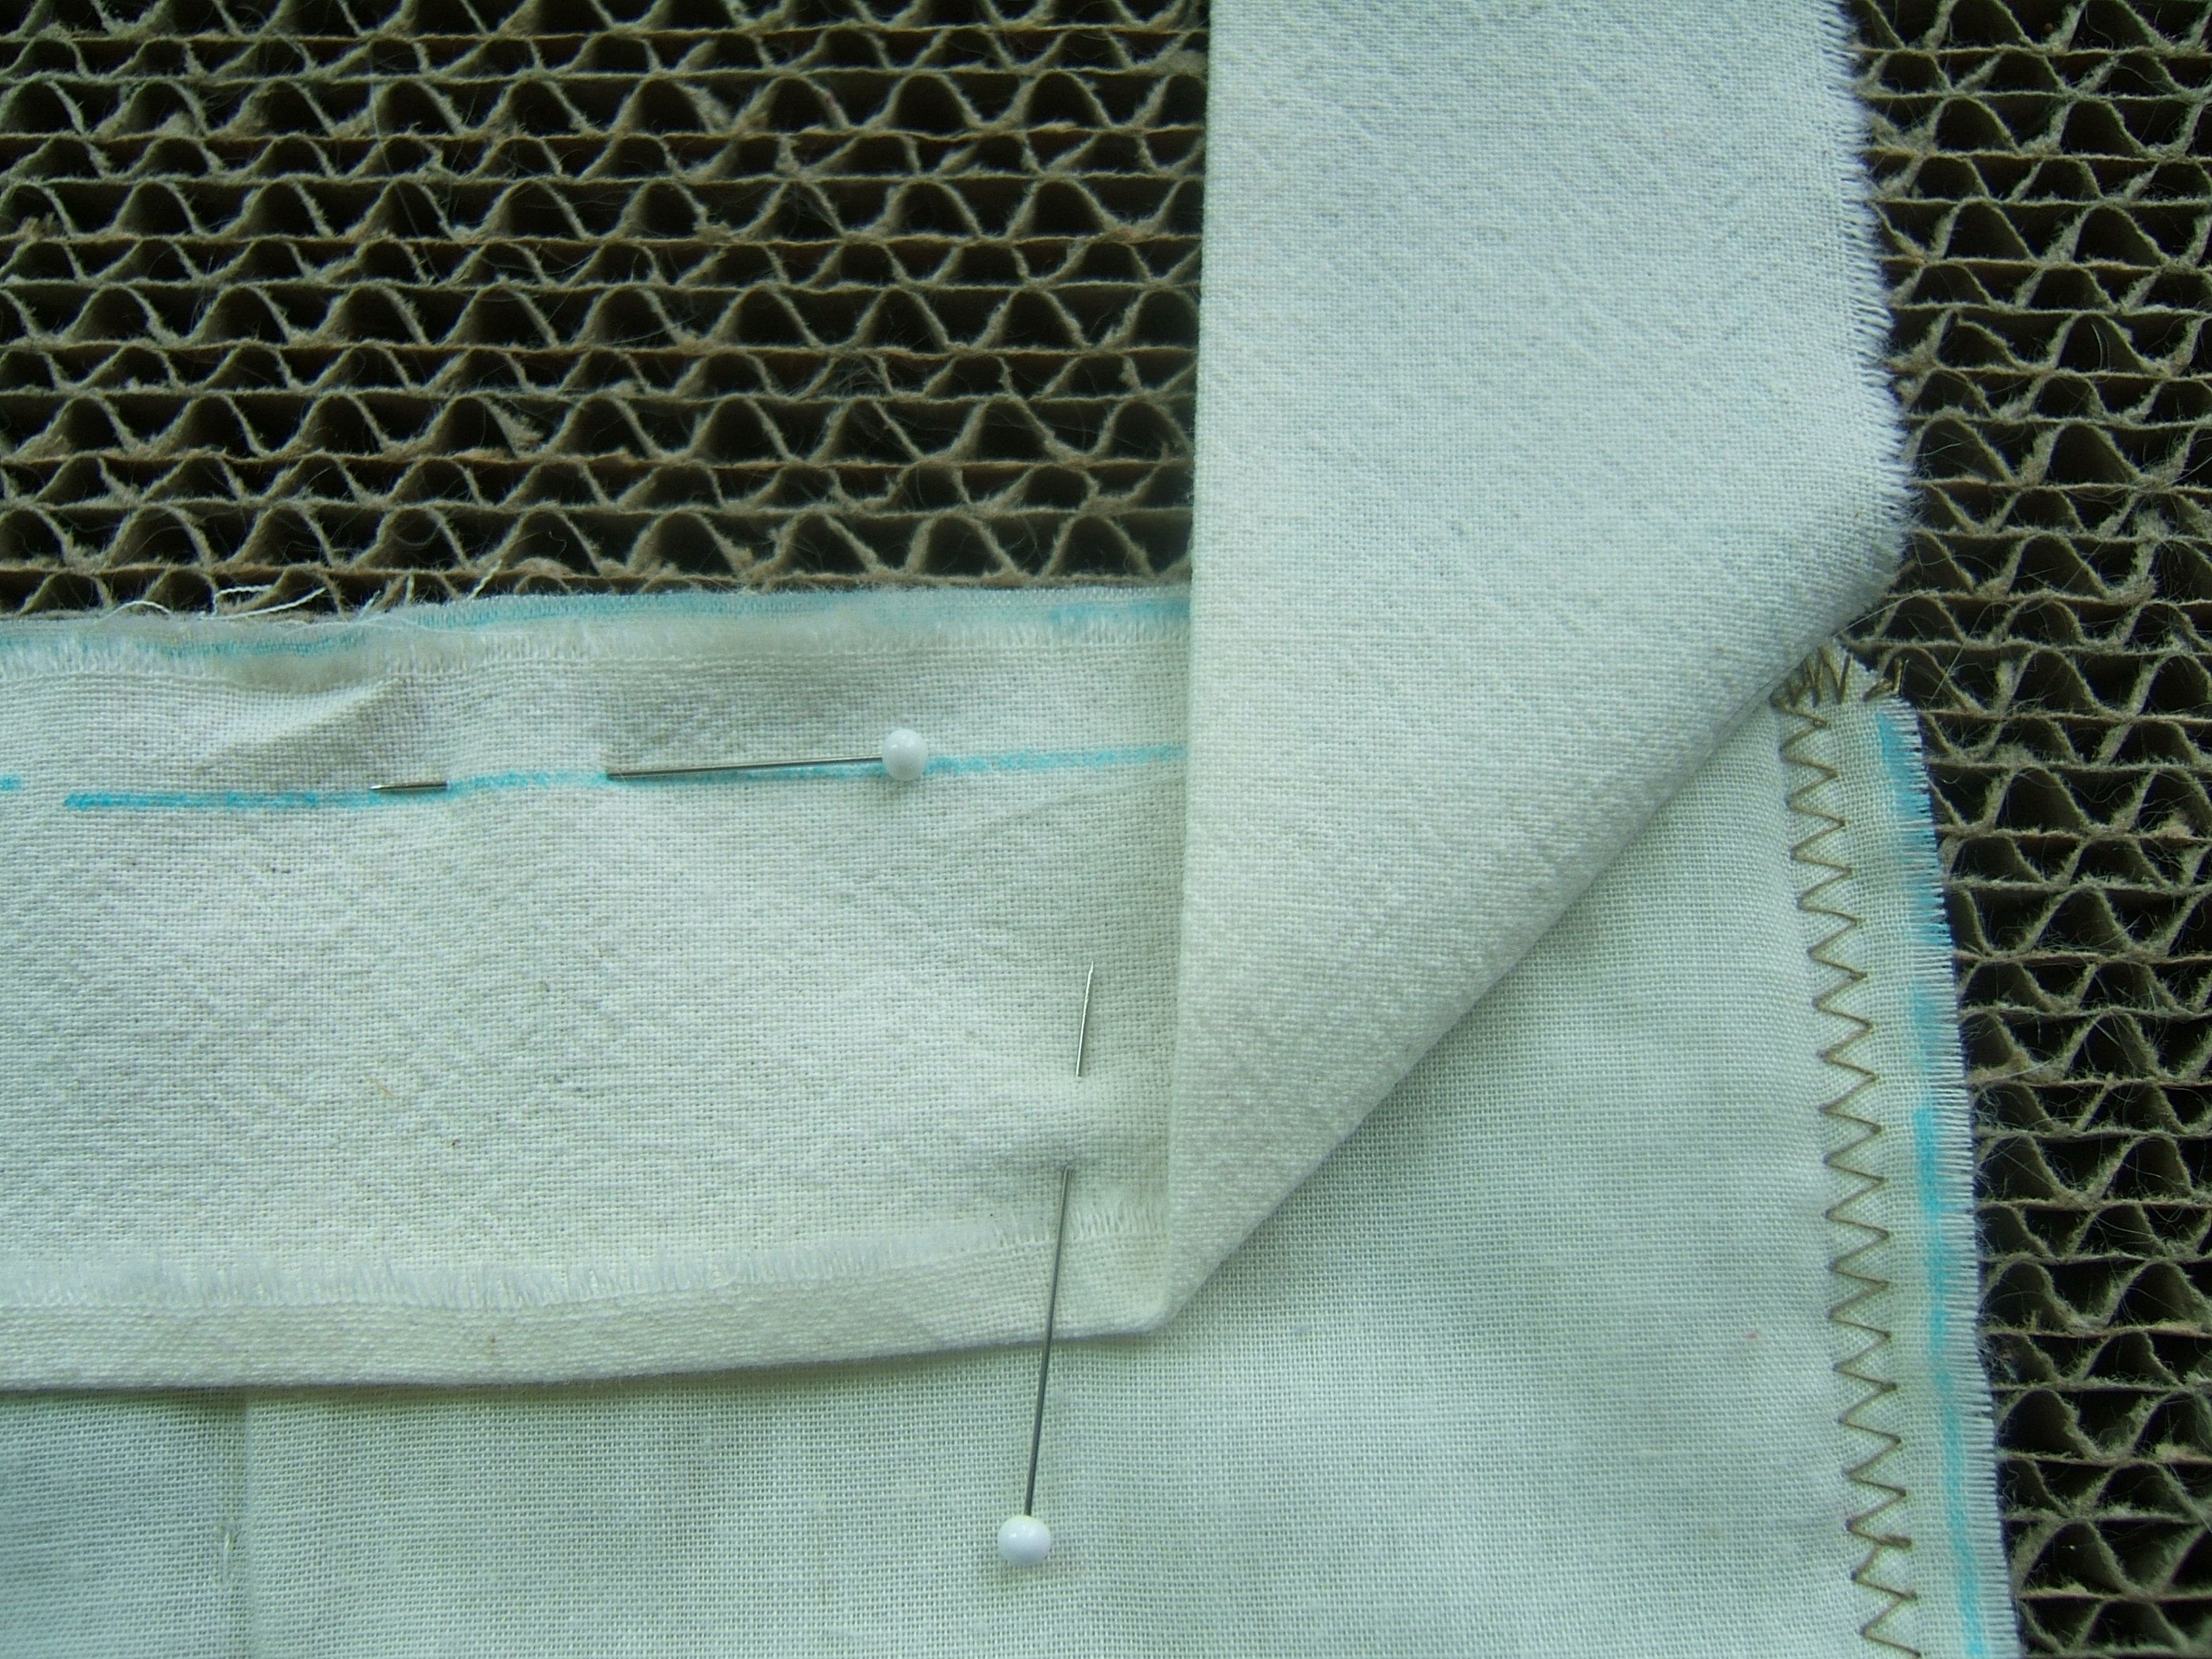
Surprise! The diagonal crease that appears when you turn the binding to the back is not the diagonal crease I carefully steamed in.
The top stitching will also need to be done one side at a time, so that I can stitch down the diagonal crease. When I get to the fourth side, it will already have a diagonal crease stitched down over the beginning of the stitching. I'll deal with that when I get to it.
I should make a tutorial when binding the last cat blanket, after I've figured out what I'm doing.
Sixteen half inches would make four extra strips if I switched from two-and-a-half inches to two inches — but I couldn't get that by repeatedly tearing in half.
A fortunate error: I just noticed that I turned one of the diagonal creases the wrong way, so that the binding on that side lies over the stitching on both ends. So if I start by just stitching, straight across underneath the folds, the side at the right end of that side, when I work back to that side, I can sew it on top at both ends.
I think I spoke that last clause in a dream a week or few back, and woke up wondering what I meant by it. Am I psychic?
I stuck a pin into the side to be sewn first; I hope I remember what it means on Monday.
I did remember, and one cat blanket is in the laundry hamper. I don't know about the cheap old quilt, but that binding will wash!
When I folded the machine after finishing the quilt, I found that the bump I felt before was the machine reaching its final position; the spool had ample clearance. I did "attribute" tentatively when writing the previous post!
Tearing in half repeatedly not only makes the pieces half an inch wider than they have to be, it won't work when the pieces are sewn end-to-end before the next tearing. The second tear can be made from both ends to the seam, but the third will have three seams in the way. By folding and rubbing a wash-out marker one the crease, I have marked each edge into four 10 1/2" segments. Now each needs to be divided into five equal parts. My metric ruler makes it 28.3 cm — useless. My shaku stick makes it seven sun, which would make each piece fourteen bu. I'm pretty sure one of my typing rulers has tenths … one has the tenths in the middle, where one can't mark by them. The other has teeny numerals with no dividers on plastic that has gone beyond yellow into brown, and both make the distance between marks 104 tenths of an inch. The shaku stick it is!
I shall repeat my fortunate error so as to do all stitching by machine. If I were using this finish on an art quilt, I'd pin all at once, stitch around, and secure the miters with hand slipstitch.
I think I shall nip the corners of the quilt before attaching the binding, and thereby not need to snip the binding along with the quilt.
I'm tempted to tear the well-washed muslin in half and try out my edge-stitching plate tonight, but I'm afraid of "one more seam" syndrome.
(When I think I have time to sew one more seam before going to bed, I have to pick it out in the morning.)
tighten screws on mouse
pad The stool I use as a
table beside the monitor of JOYXP was wobbling.
Grumbly-gripe. I don't have an edge-stitching foot. What I had thought was an edge stitcher is a shirring plate. But I can make a lap seam the old-fashioned way, by drawing a guide line with my wash-out marker.
Hoo hah! When I tore the fabric in half, the tear ended exactly at the mark I'd made on the other end!
Then I noticed that that was the only mark I'd made on that end. That was easily remedied — but if I'd marked the other end *before* sewing the pieces together, I wouldn't have sewn them with the right side up on one end and the wrong side up at the other. Ah, well, there isn't that much difference between right and wrong on unbleached muslin.
⁂
So I tore off a strip and arranged it on the ironing board with the worse side of the seam up, and the worse side of the selvage on the left up, and marked the stitching line. The selvage on the right will probably be cut off.

Another cat quilt in the laundry room.
I had a better idea: I folded all the miters the same way, pinned all four sides, then as I edge-stitched around, I pivoted to sew along the diagonal, then stitched back to continue sewing the binding down. Theoretically, I stitched toward the corner a toe width from the fold,then stitched back on the fold, to increase the chance of catching the fold underneath.
I don't know about this cheap old quilt, but the bindings will wash! When they are only half an inch wide, the miters wouldn't need securing at all if this were an art quilt.
There are only two more that need to be bound on all four sides.
I'm planning to document the binding of the third cat quilt.
First I tore off a strip of muslin. This time the tears did not meet in the middle.
Duh! If I press the fold before marking the stitching line, I don't have to be fussy about spraying water around.
I wanted the seam allowance to be a tad narrower; after fiddling around trying to measure the seam gage, I thought of simply marking lines with both tools and comparing them. The difference seemed about right, so I proceeded. The seam gauge proved easier to use than the ruler, because I had a place to put my fingers.
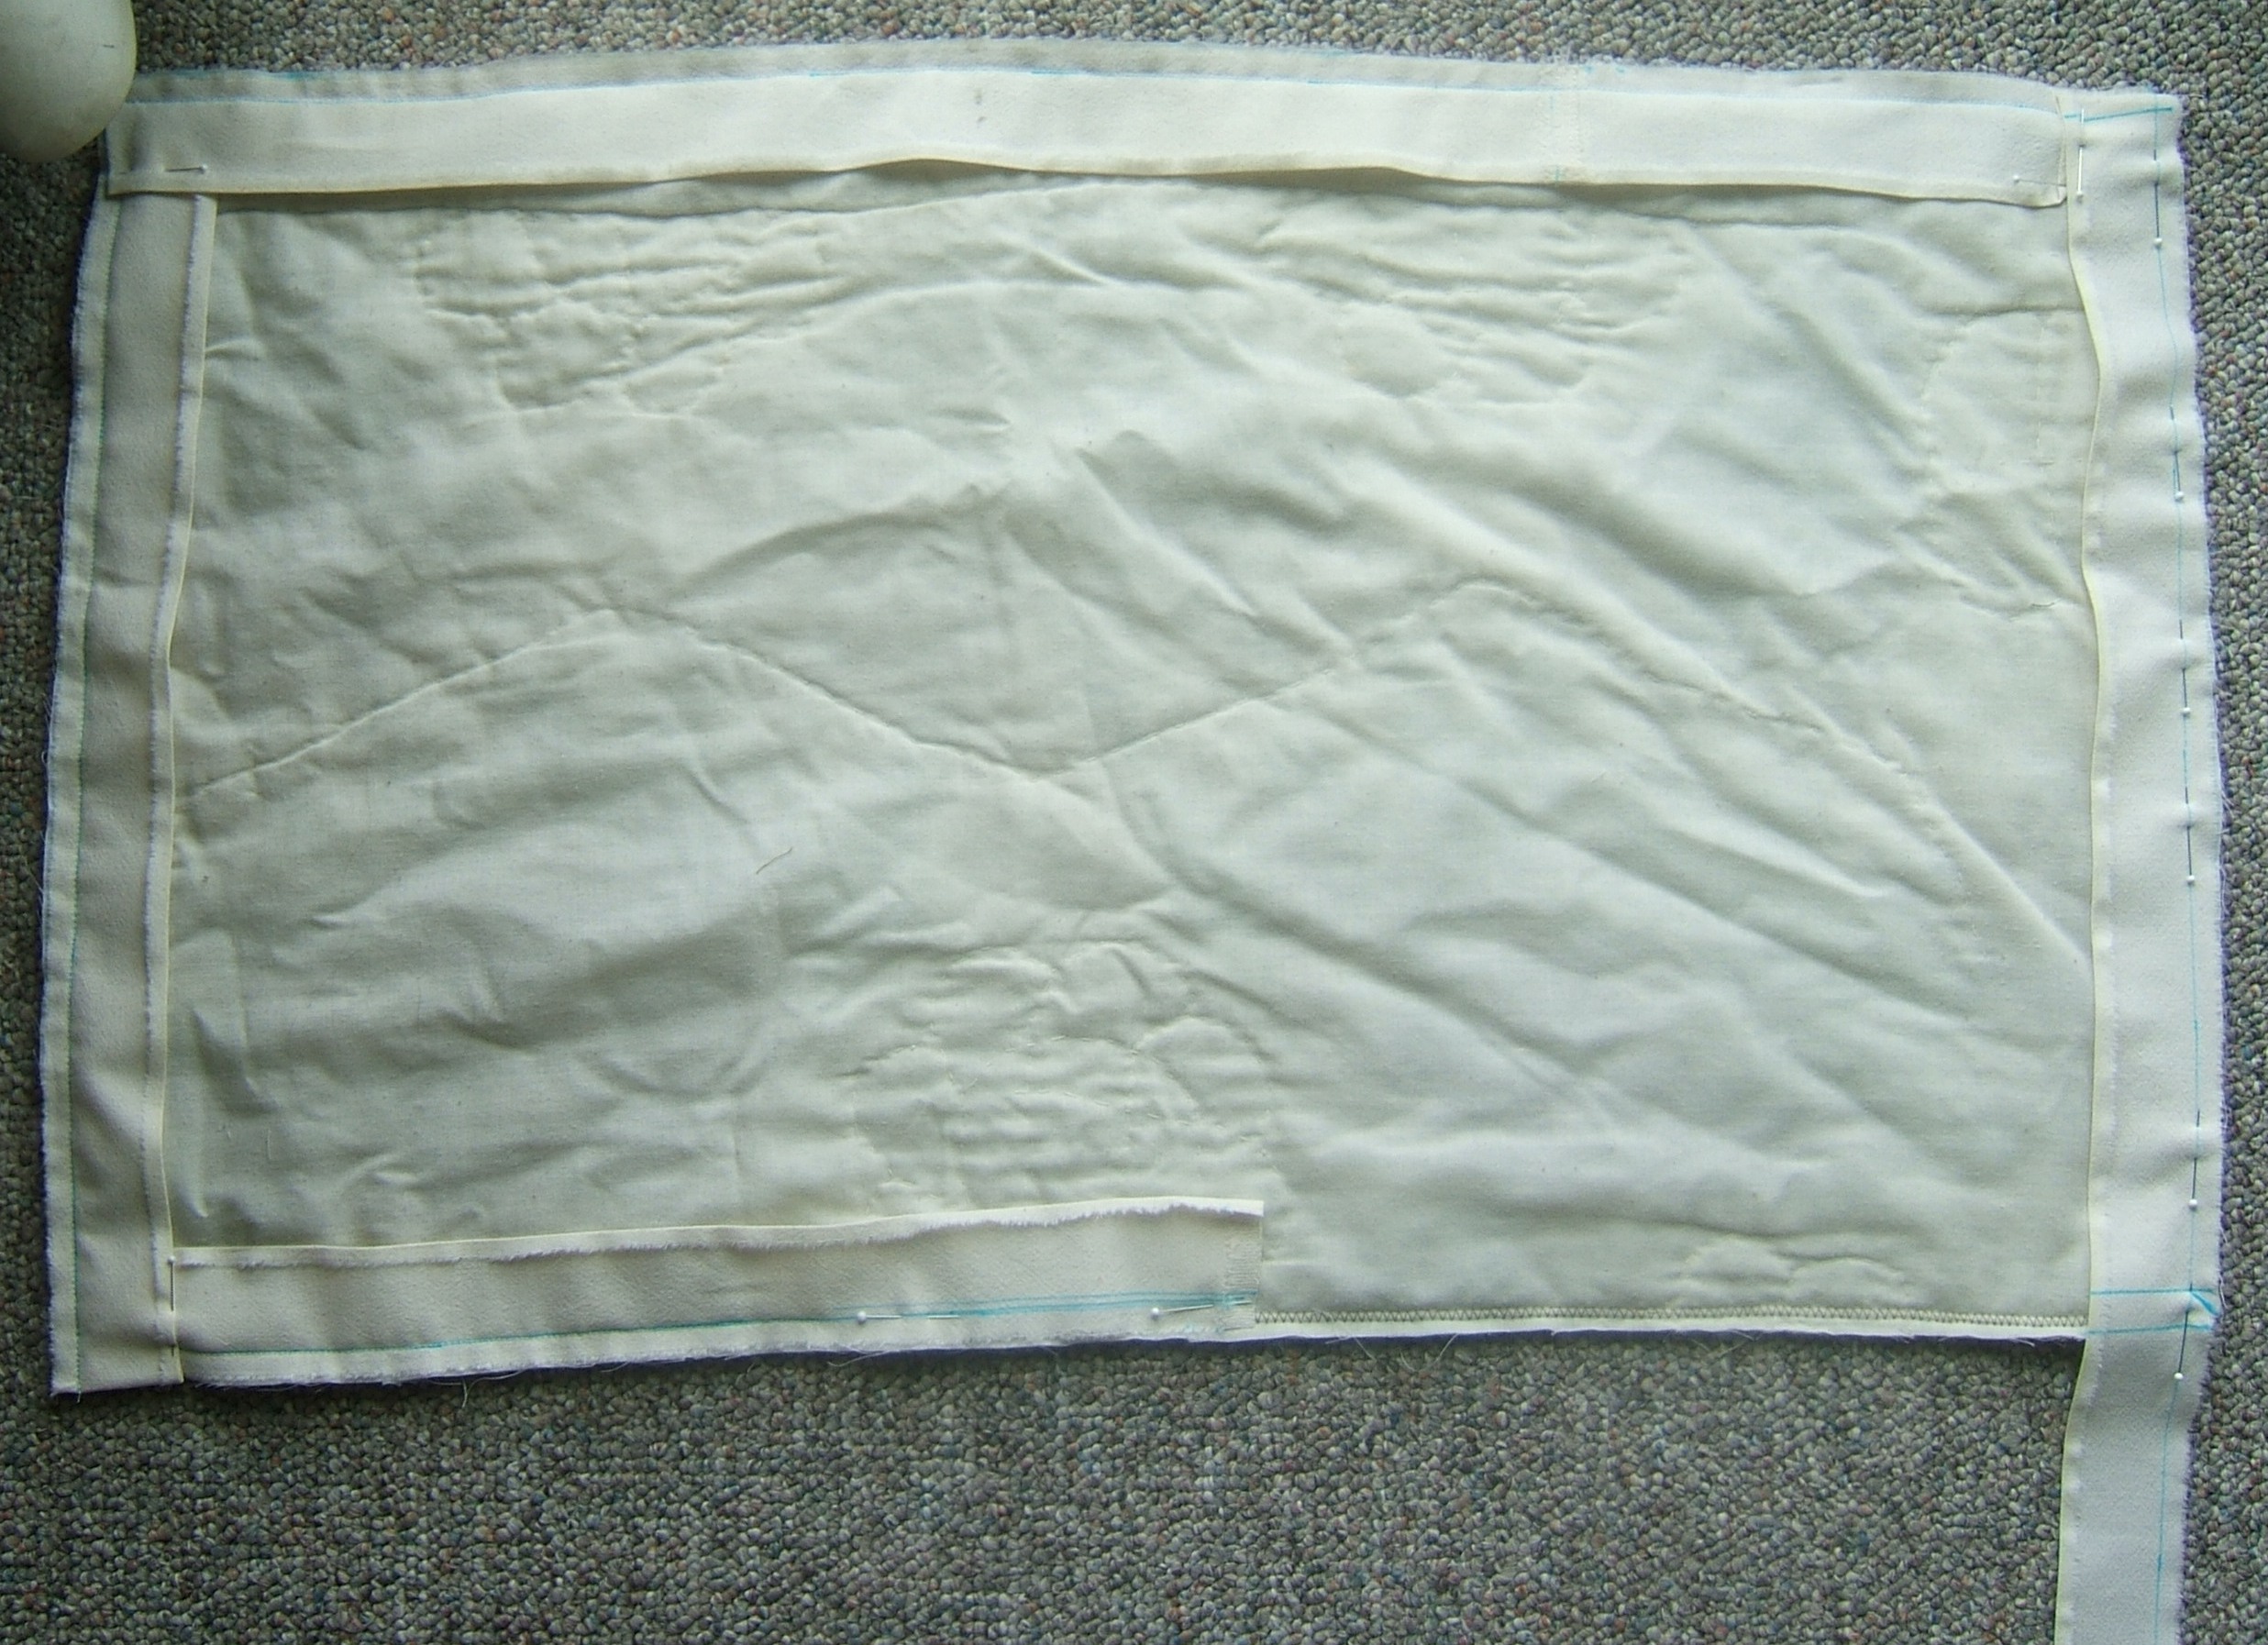
I pinned the strip to one side of the quilt, careful that the uglier side of the selvage was up, and marked the diagonal line at the corner.
And stitched on the stitching line.
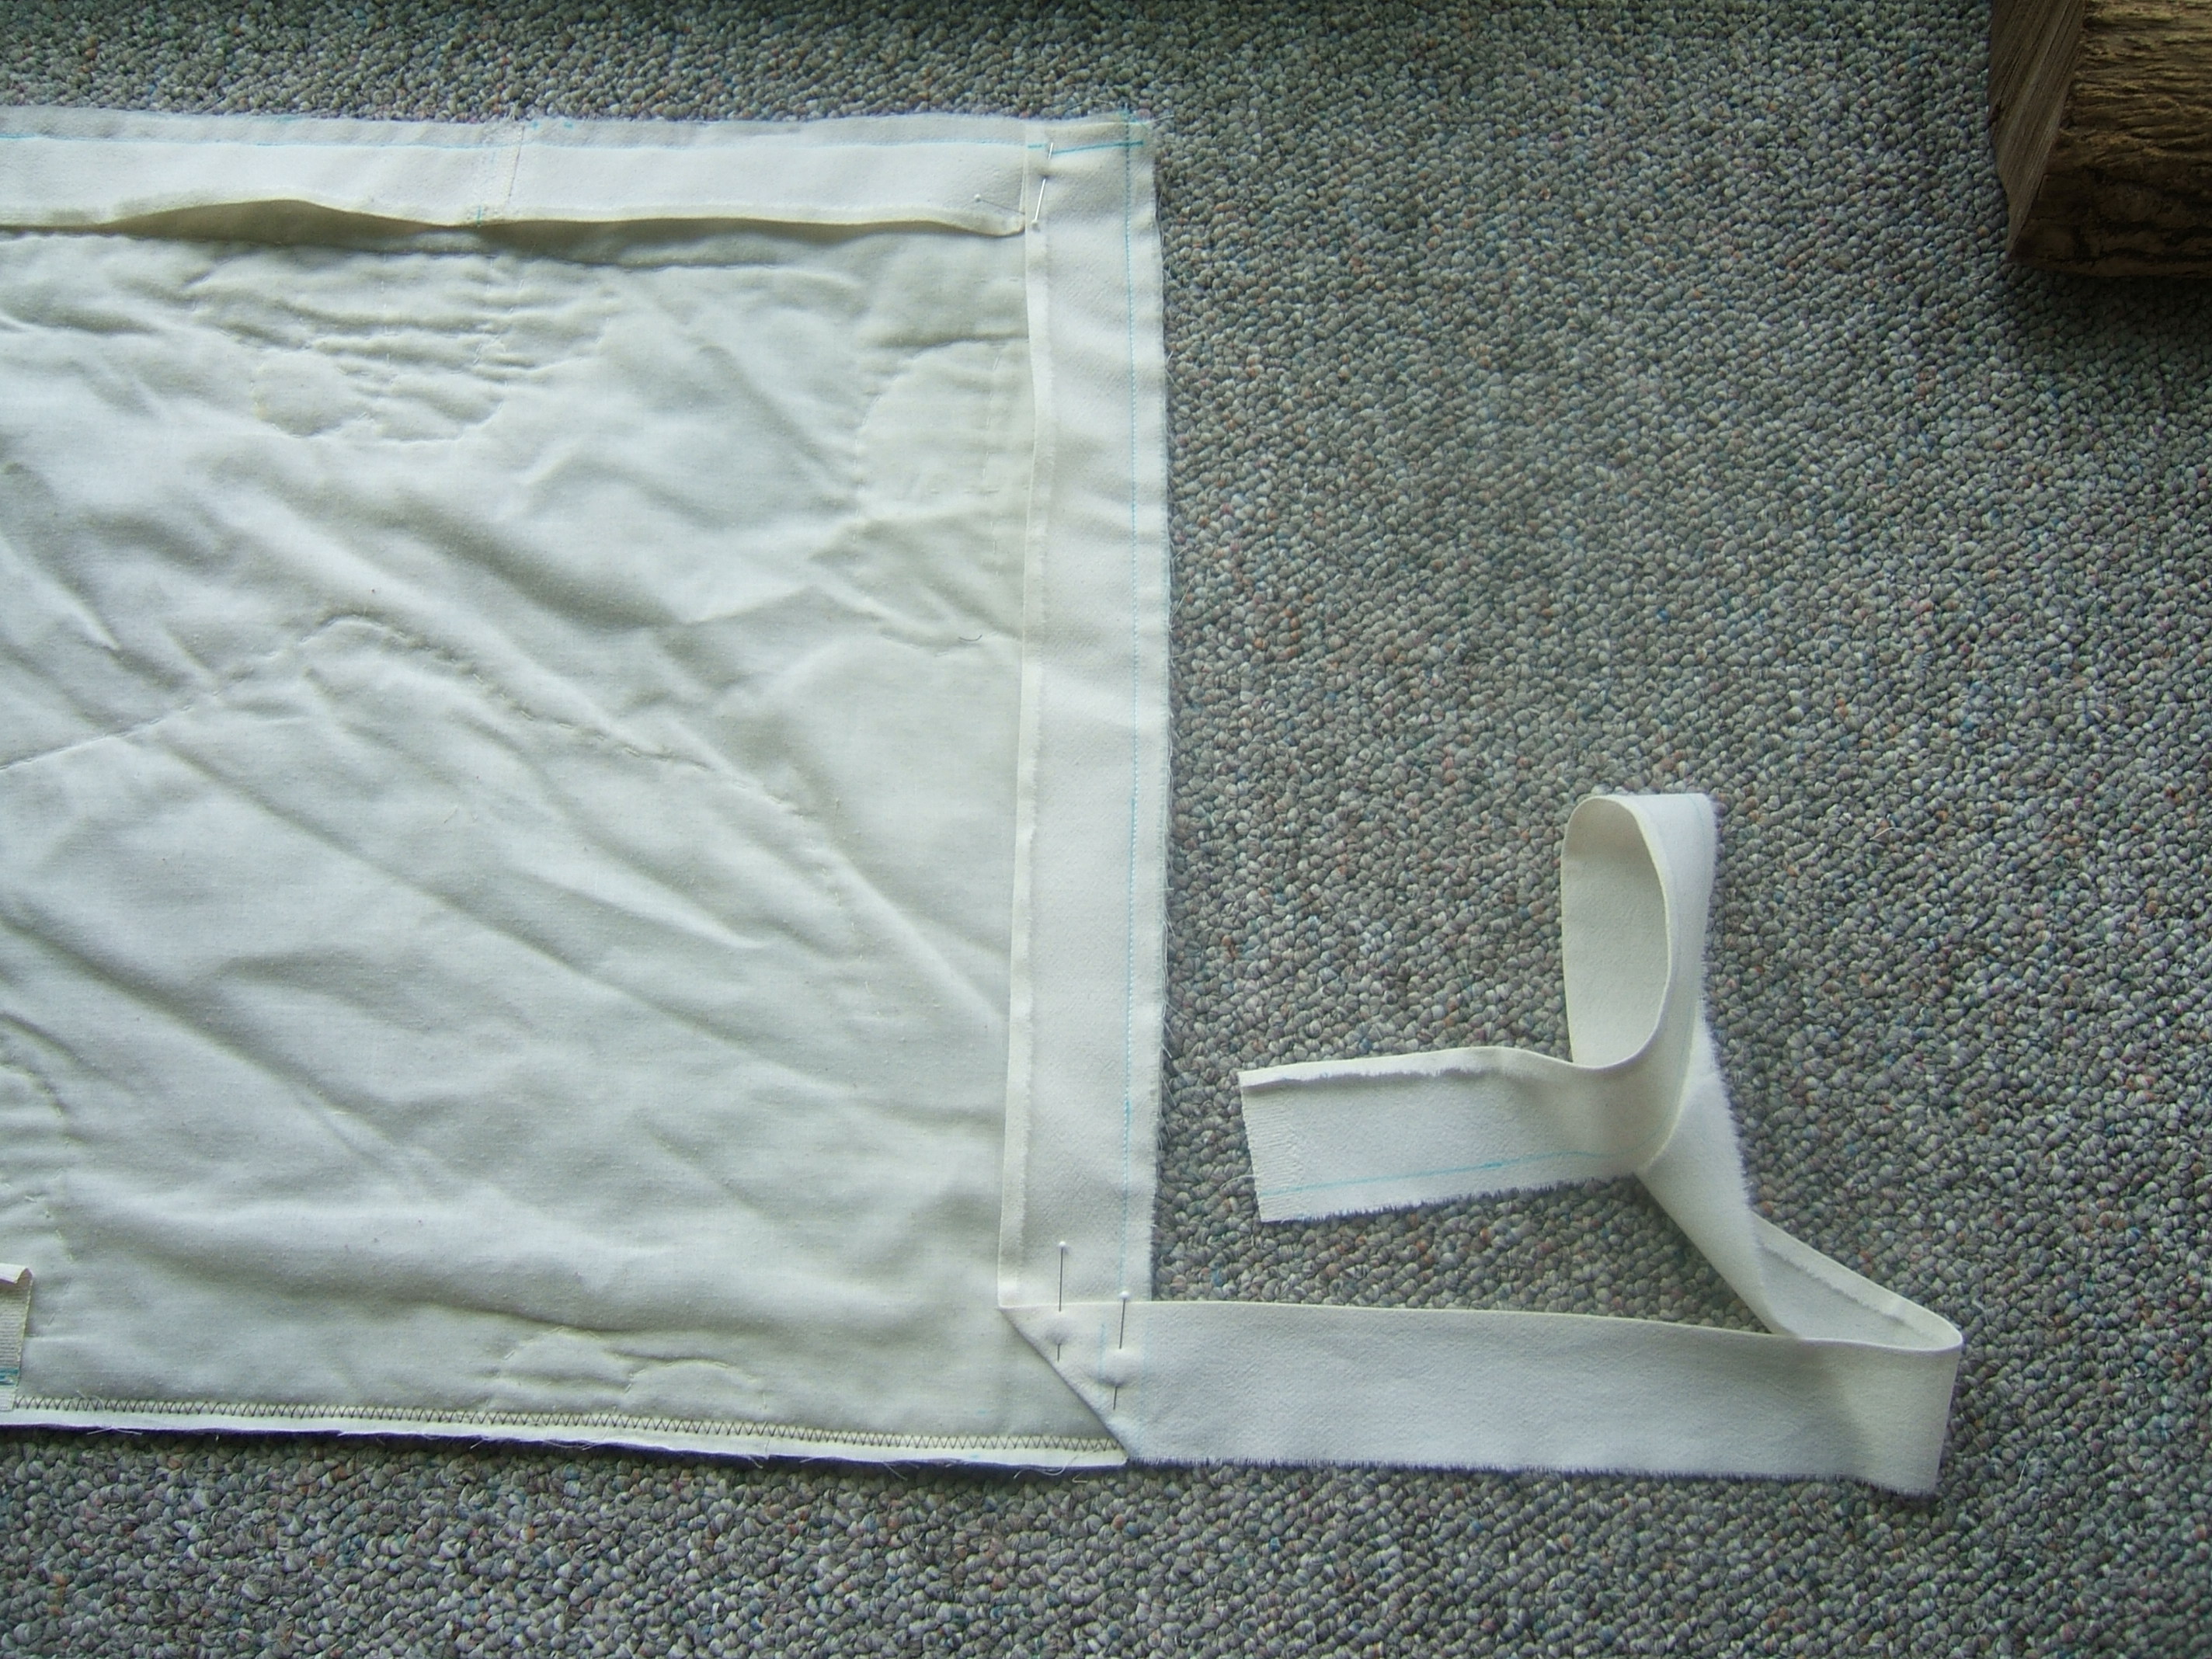
I folded the corner more-or-less on the stitched line to make a miter underneath the strip
and pinned the second side.
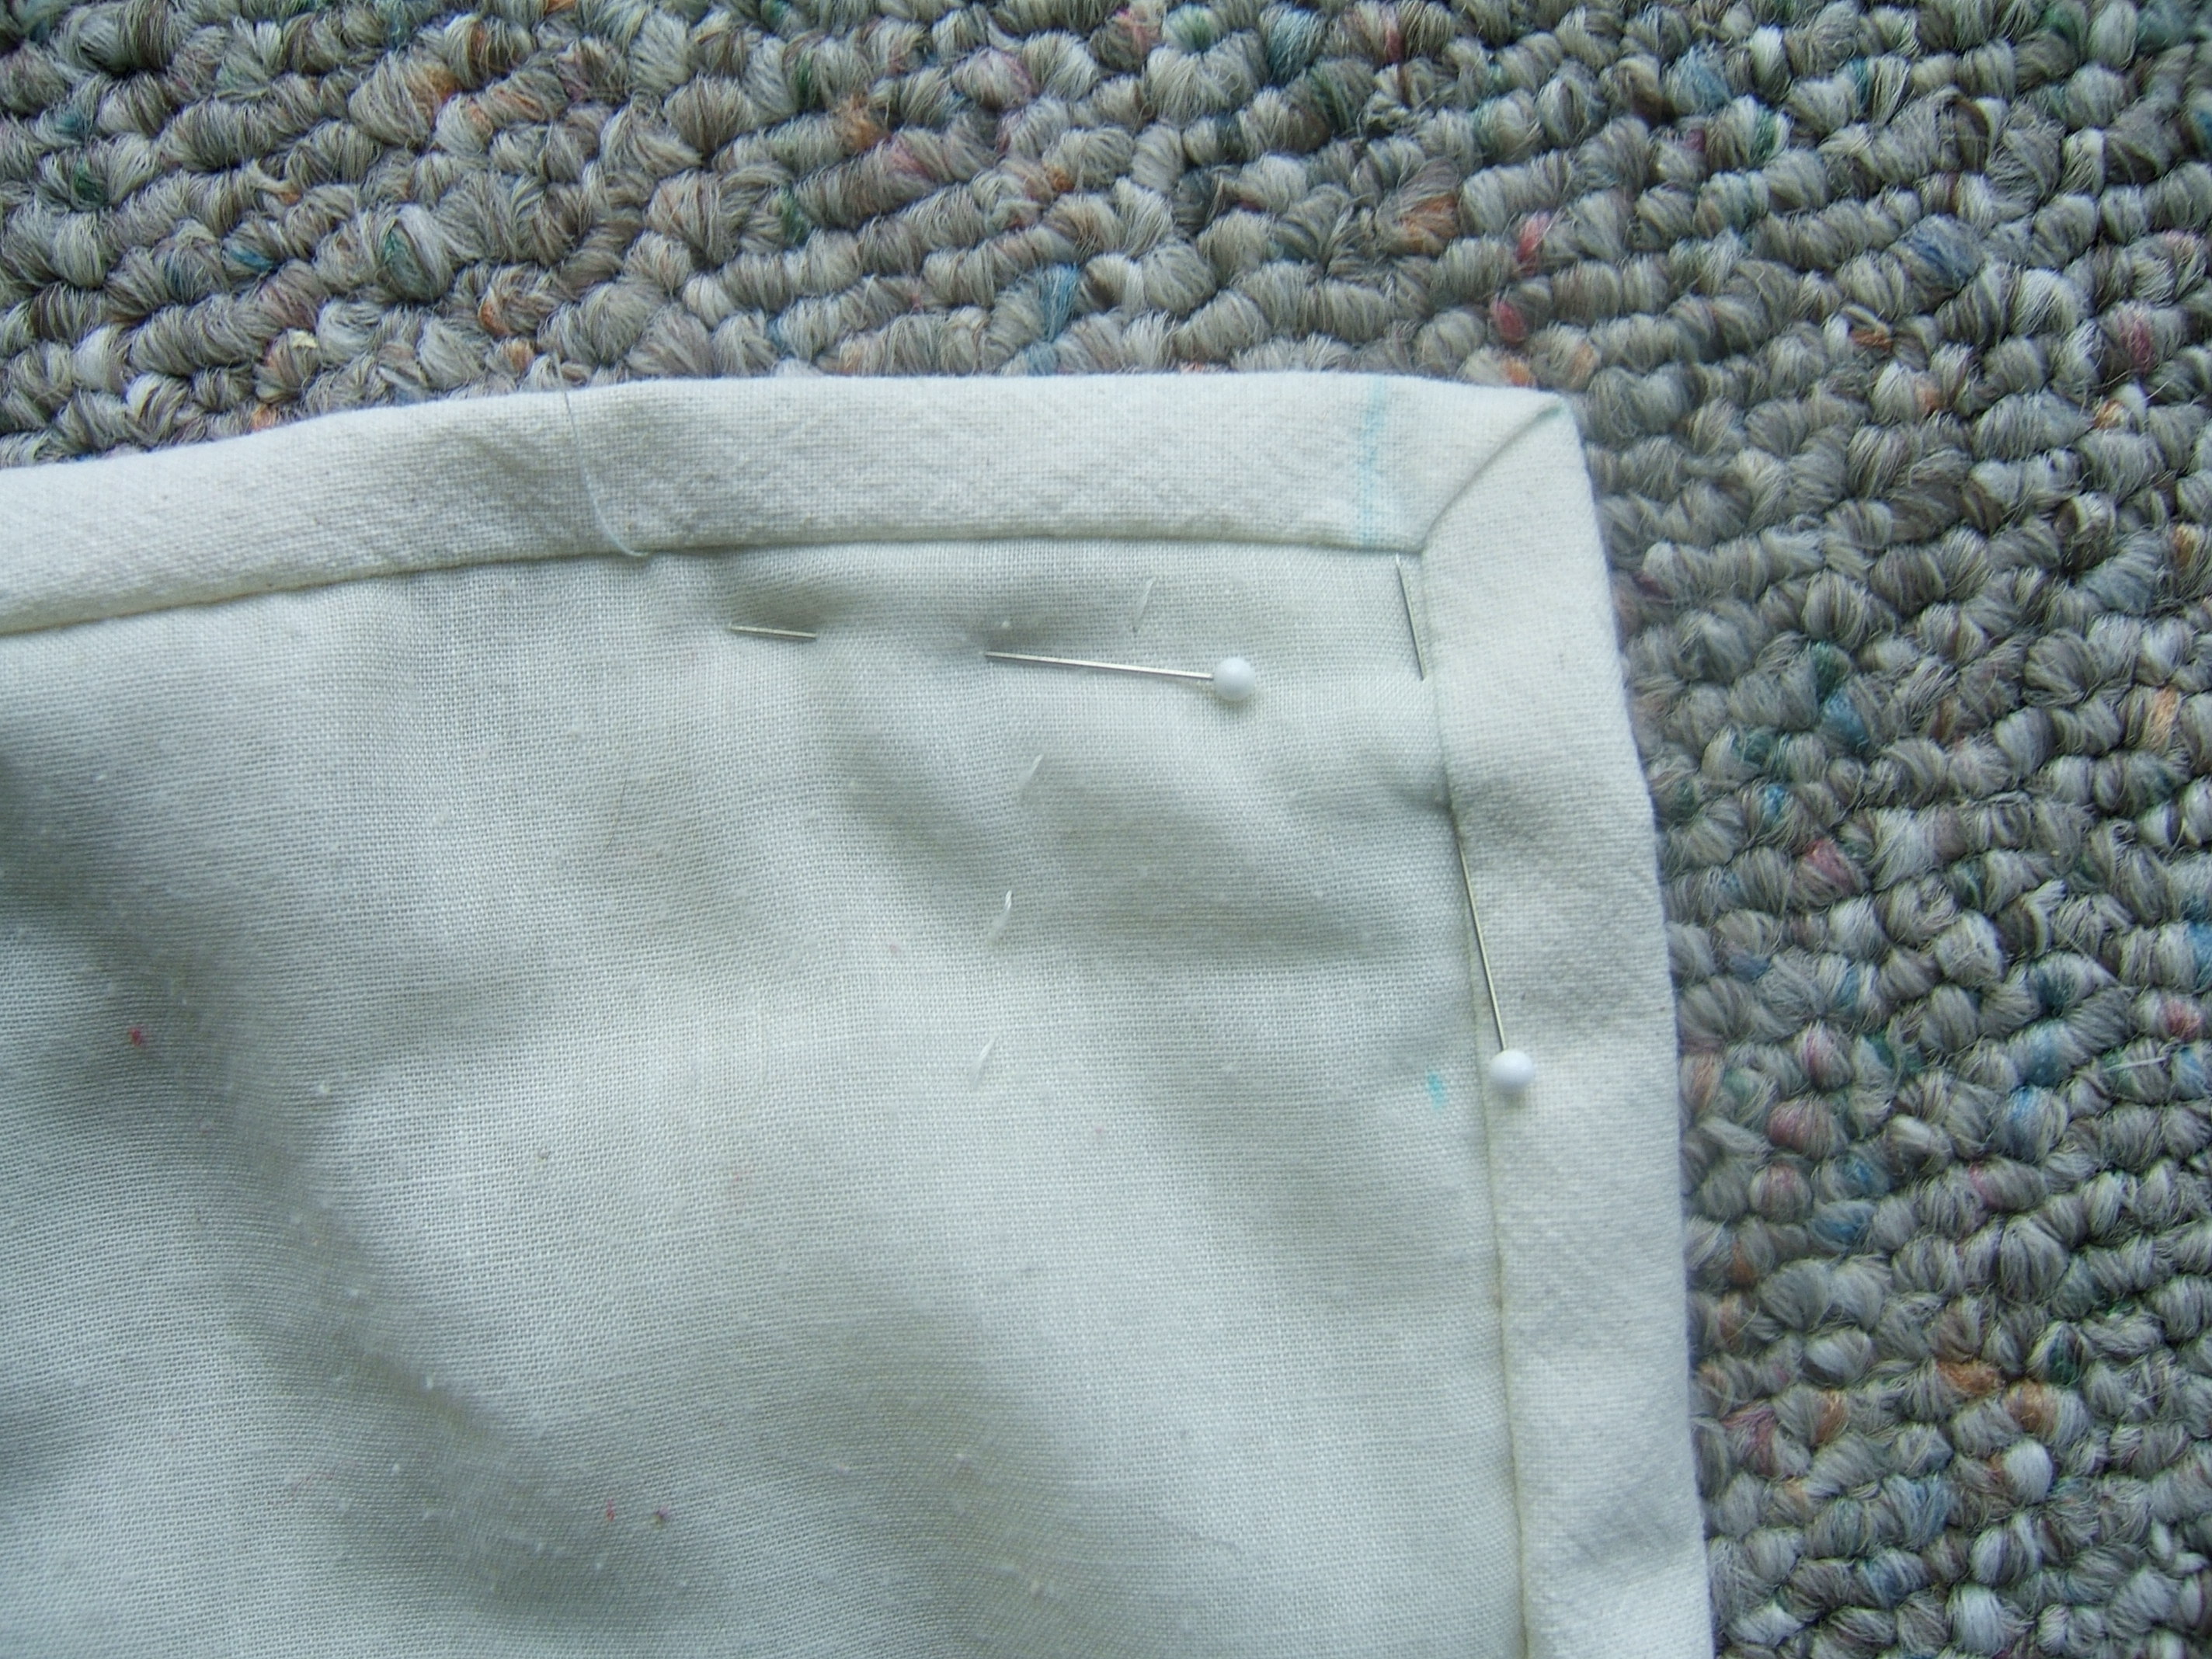
Having had the insight that the main purpose of the diagonal line is to end the stitching, and it doesn't do much to guide the folding, I started it farther back — just stroking both sides of the steel ruler when I marked the edge-of-the-quilt line.
And that's as far as I got this morning. Stopping to take pictures really slows this process down, even though I didn't stop to upload them, trusting to the T button on the camera to show that they are in focus and properly exposed.
After supper, I sewed the second side,

mitered the corner,
pinned the third side,

and sewed it. Since the markings were a bit off, I pivoted before I'd quite gotten to the diagonal line.
The light was going, and I'd already made a mistake, so I knocked off for the day.
And uploaded and edited photographs until nearly ten.
I have finally figured out that when mitering, the diagonal fold has nothing to do with the case. You want to line up the raw edge of the tape with the edge of the quilt, as in the third photo back, and let the bias fold fall where it will.
First, I took a close-up of aforementioned mistake.
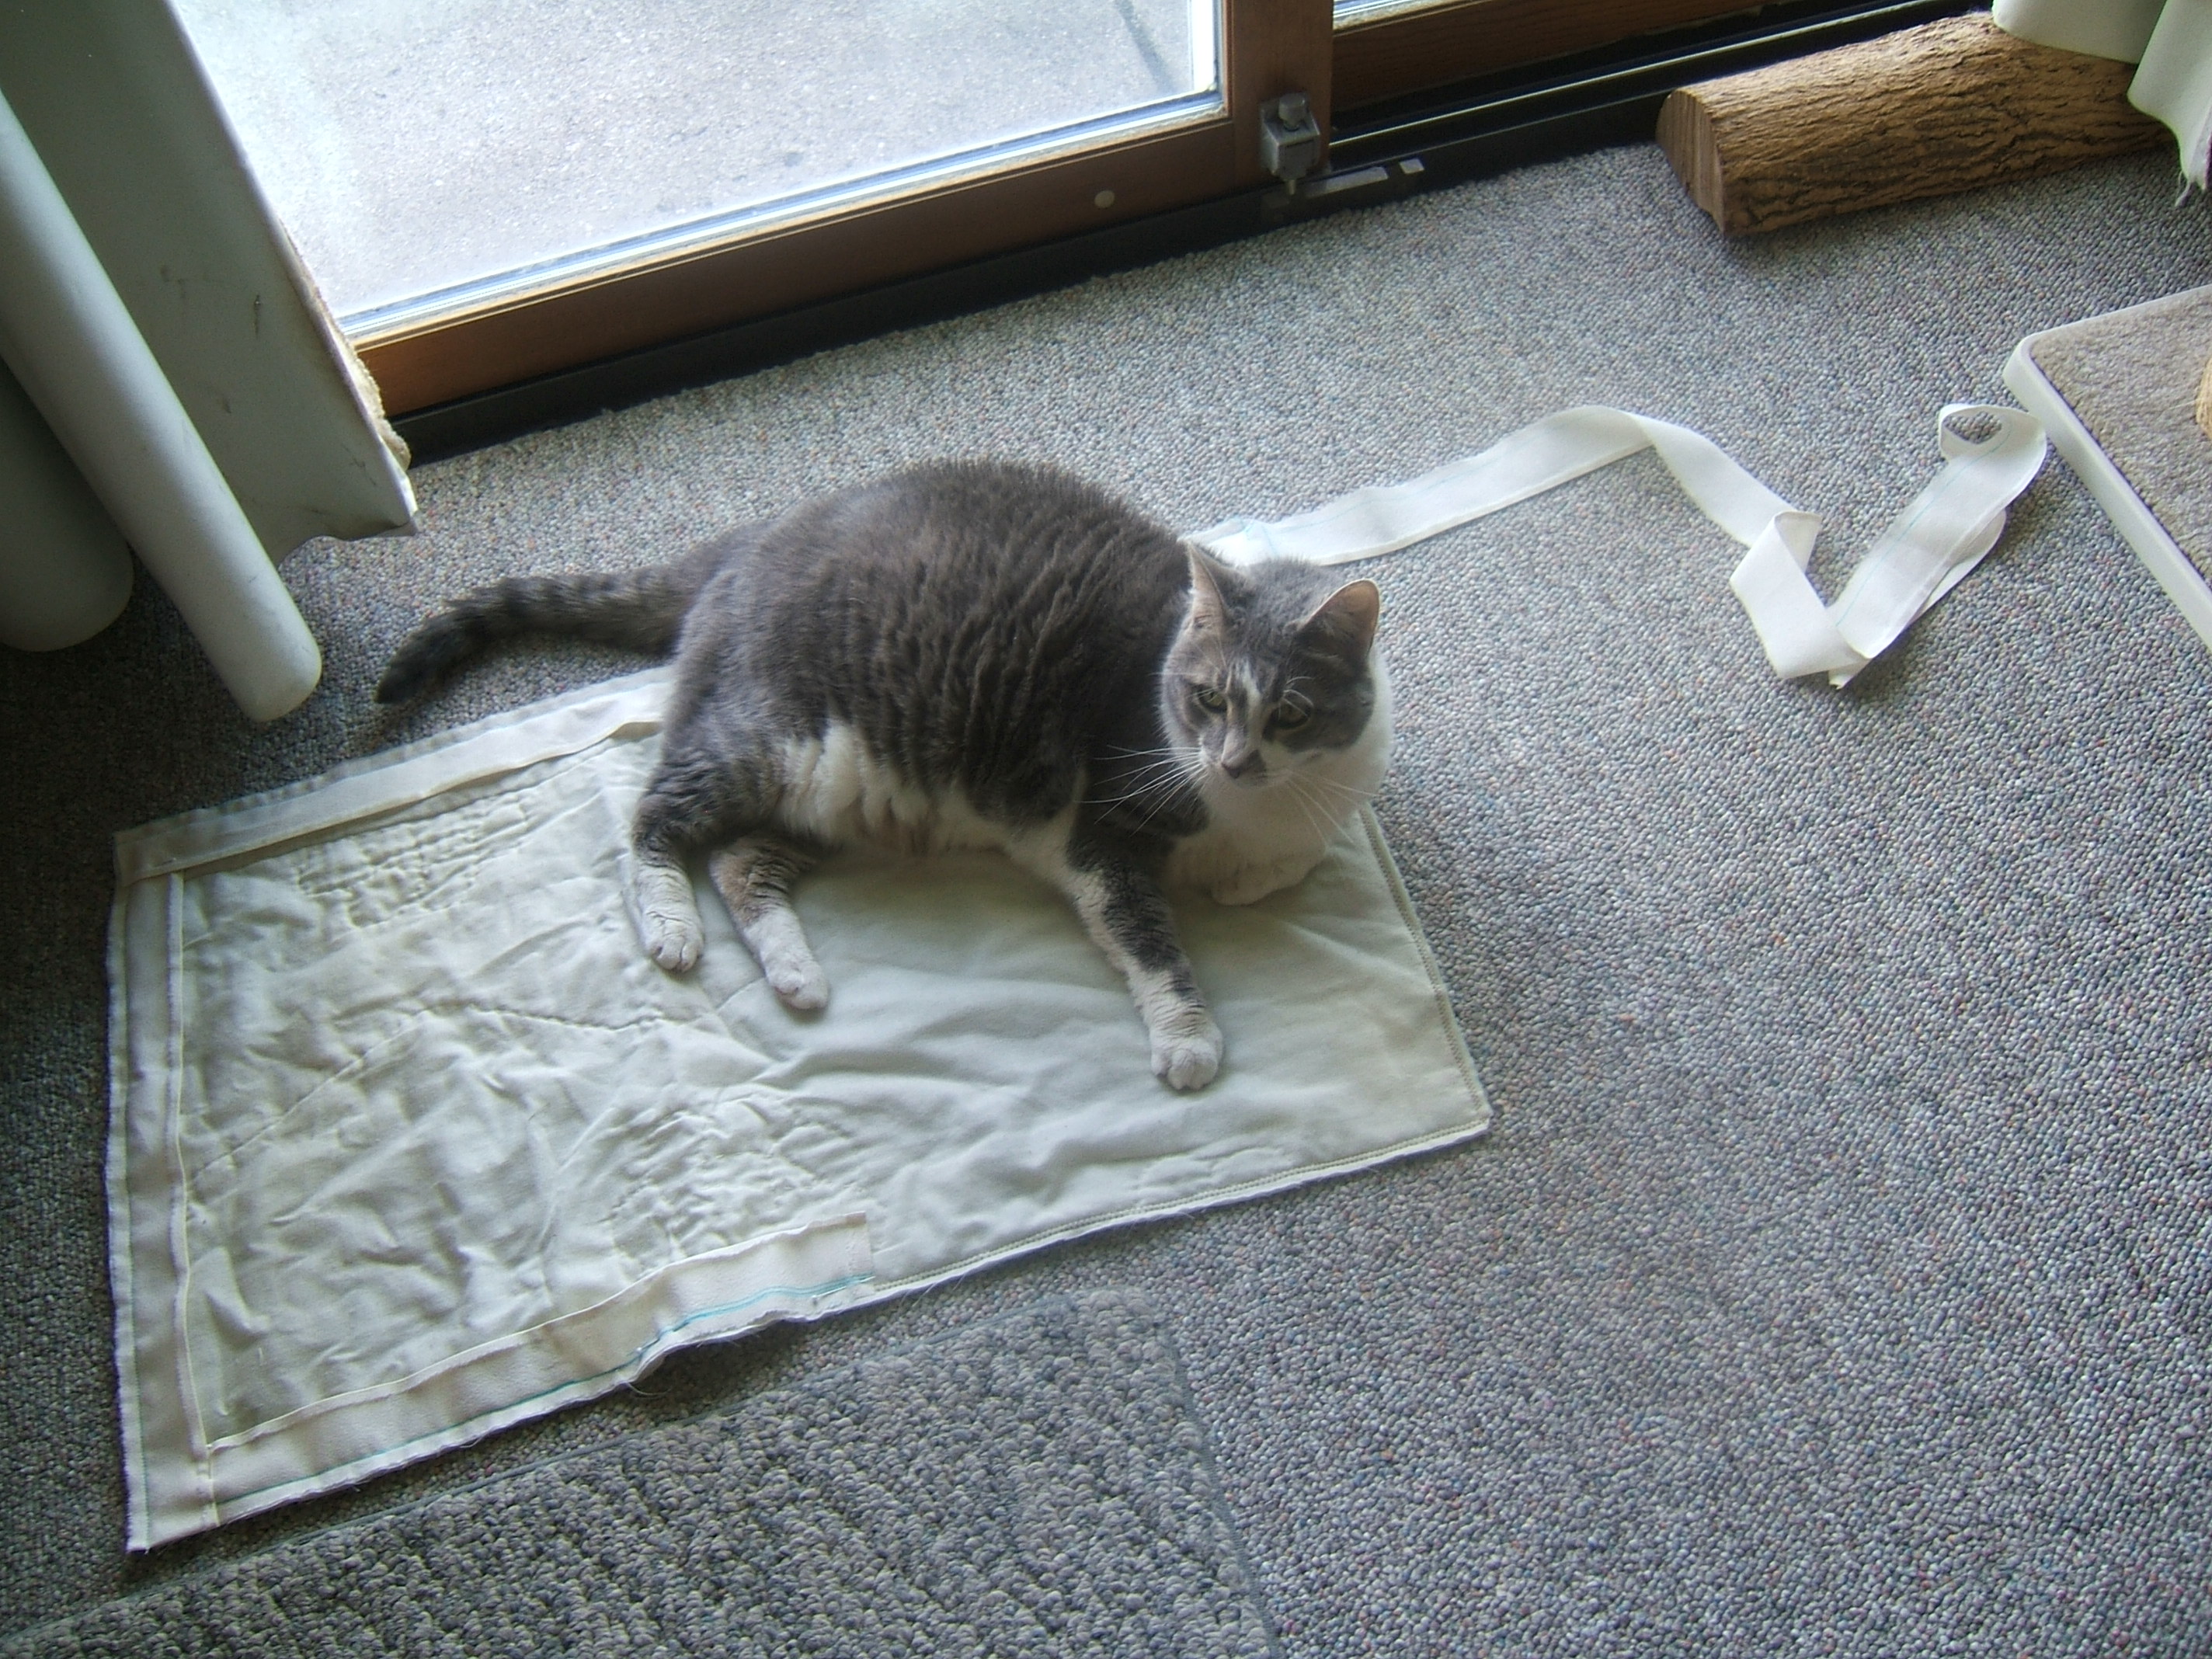
With a little unwanted assistance. Al has given the cat quilts his seal of approval; it was naughty of me to leave them draped over things after Roomba's latest pass.
I mitered the corner and pinned the fourth side.
Then sewed the fourth side and mitered the fourth corner.

And pinned the other end of the first side. The picture is a bit confusing because I rotated the quilt one-eighty from the preceding picture.
The above picture was taken before trimming the binding to length.
And this picture was taken after trimming.
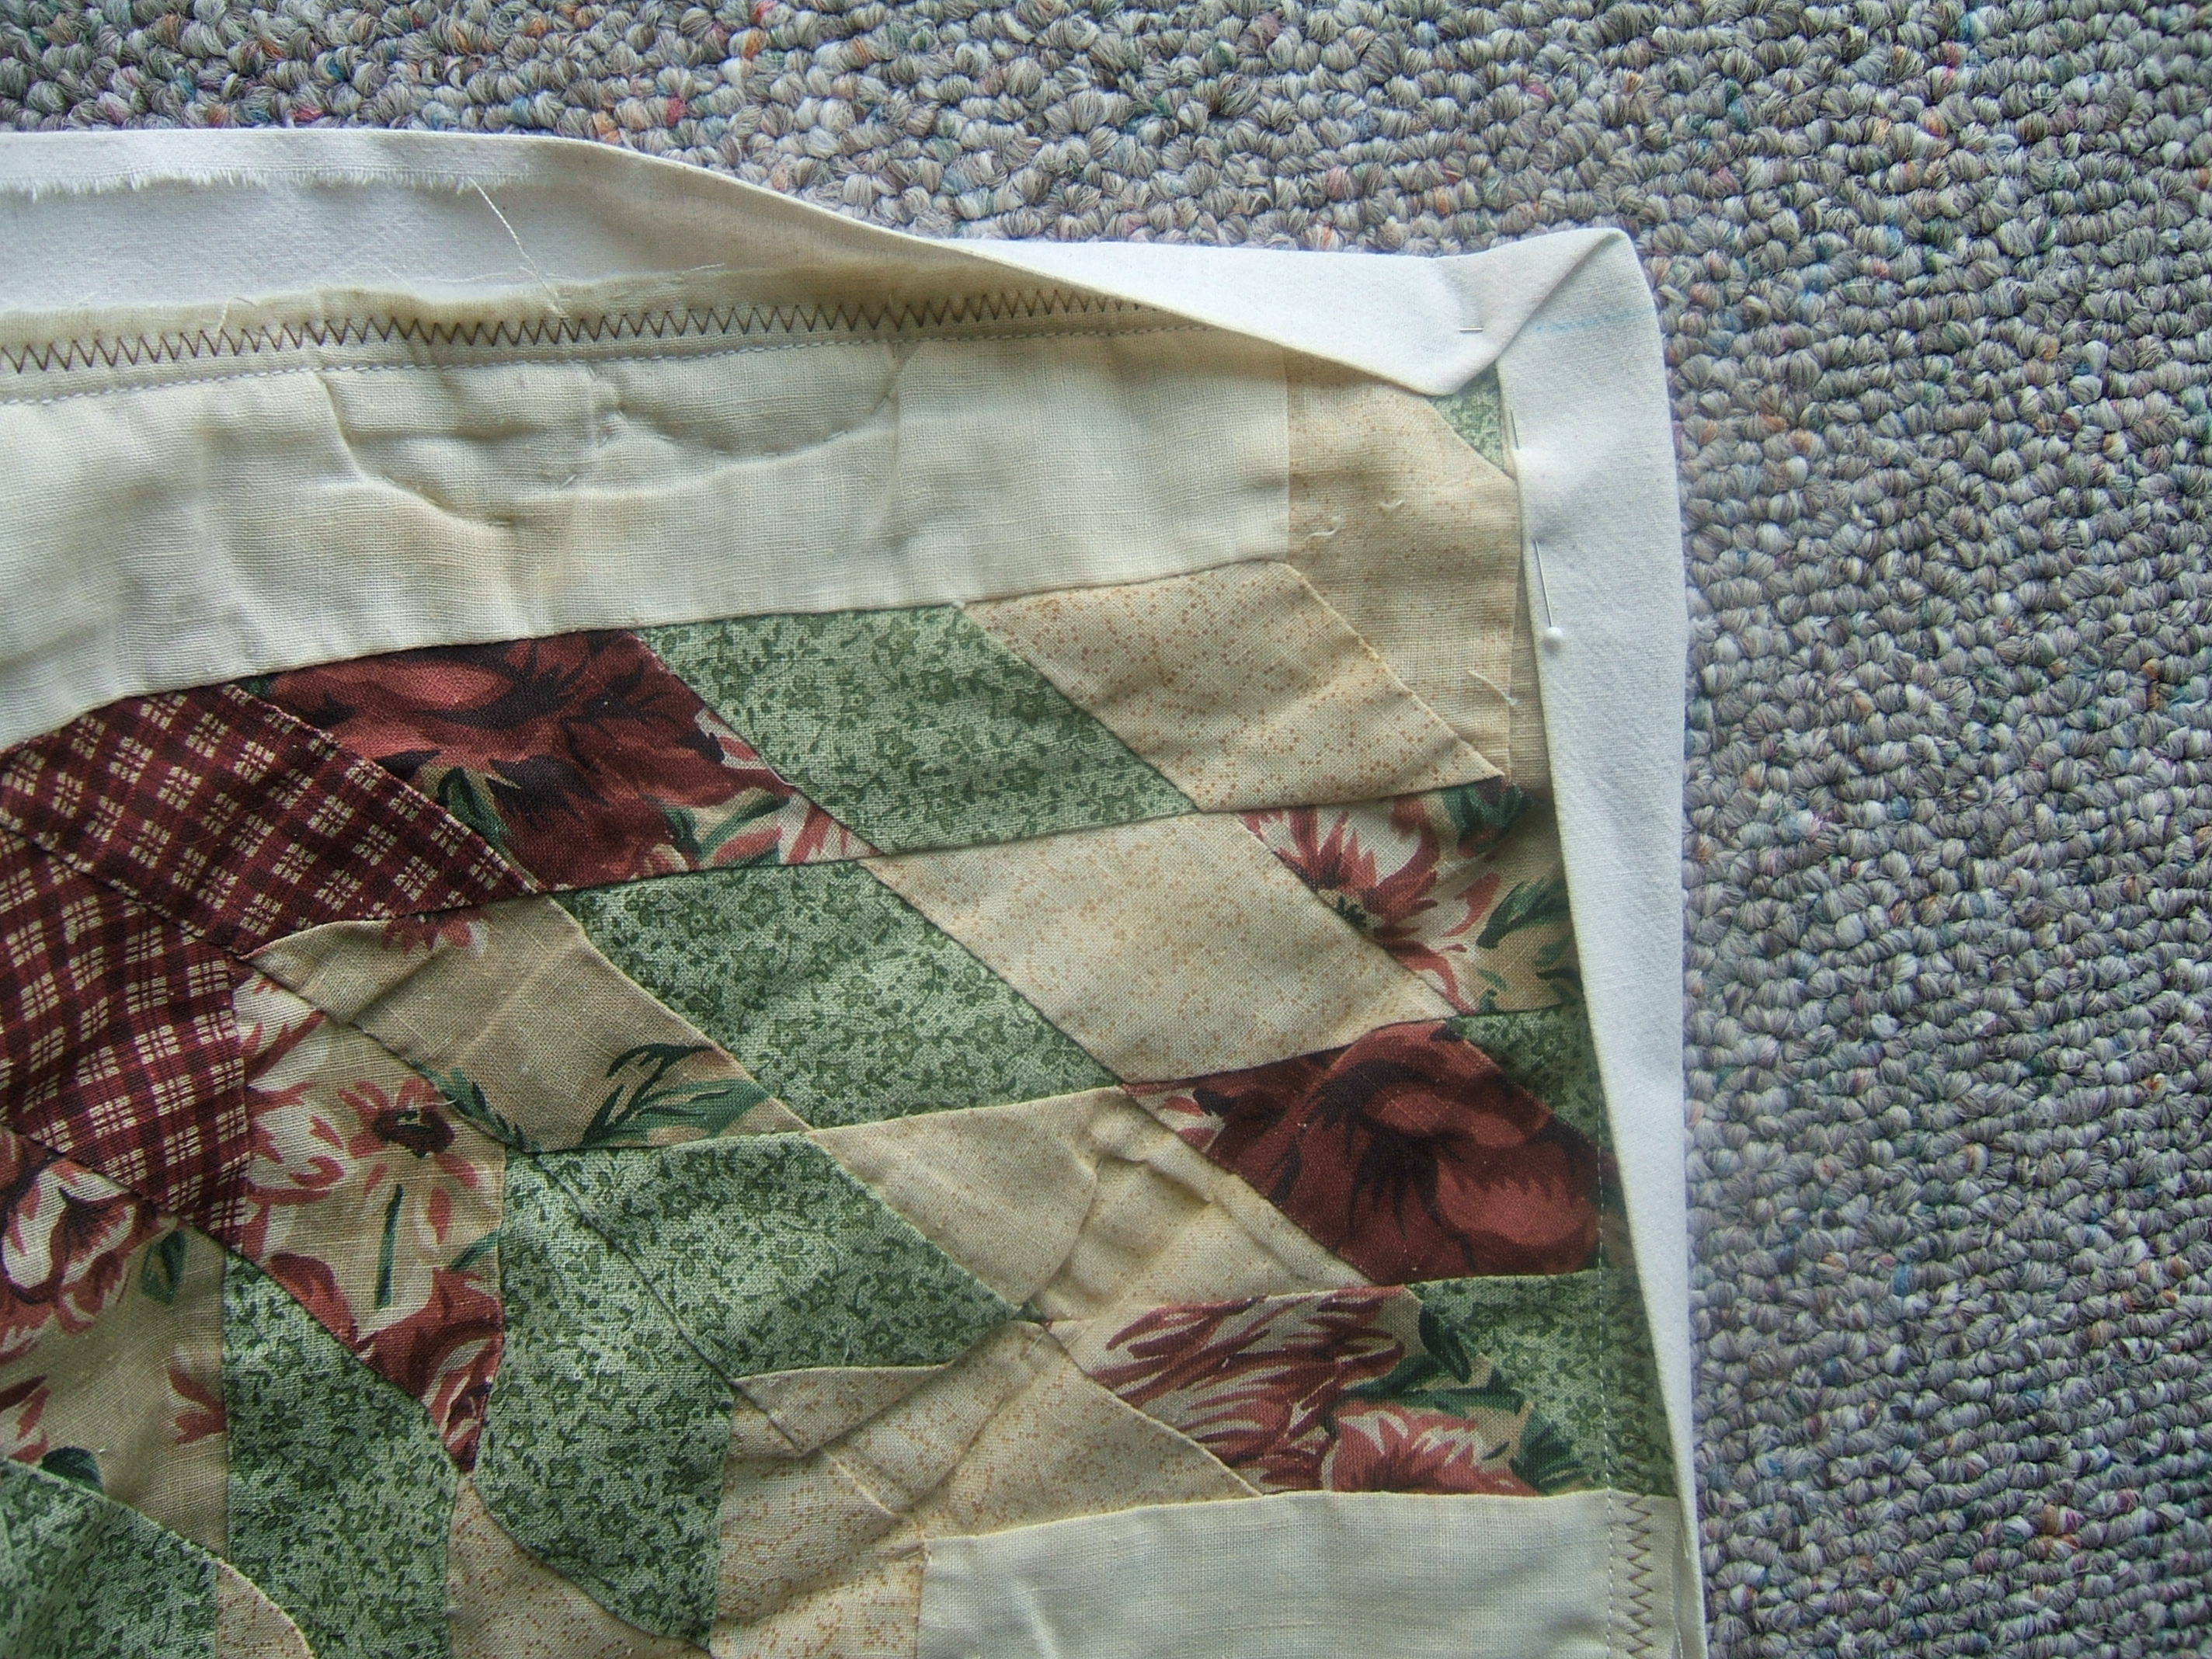
The lap seam sewn, I've pinned the first/last side of the binding.

Here it has been sewn and I'm starting to turn the binding to the right side. I didn't mark a matching line, as I usually do when sewing a lap seam, because I could pin it as it lay.
The pin in the corner made the crease hold still for its portrait; it wasn't used in the turning.
A person making an art quilt, my sources say, would sew this binding on the right side, then turn it to the wrong side, where it can be secured with hand stitching that doesn't come through to the right side.
Turning to the right side: pins are stuck in to make the folds pose for their portraits, not used for the actual work.
I considered pressing the binding away from the quilt to make turning easier, but I've been getting on fine by stretching it with my fingers as I pin.
I think I shall turn the bias folds on the front to point in the same direction as those on the back, to make it easier to catch both folds in one stitching. On the other hand, opposite directions make it less lumpy.
Opposite directions is easier, because it allows me to fold in the direction that I'm going. I could pin the other way, but I like working from left to right. So less lumpy it is.
It's going to take a little finagling
To make the corners on the right side neat.
All corners but one have been pinned.
Now it's ready to flop over.
And pin in the stitching lines from the right side. While I was pinning the miters, I used the round end of my steel pocket ruler as a folding bone to settle the bias folds.
And another cat quilt hits the laundry hamper. I'll probably wash them the day after tomorrow.
In the enlarged picture you can see now I stitched a loop at each corner to secure the folds. In an art quilt, these would have been slip-stitched by hand or left alone.
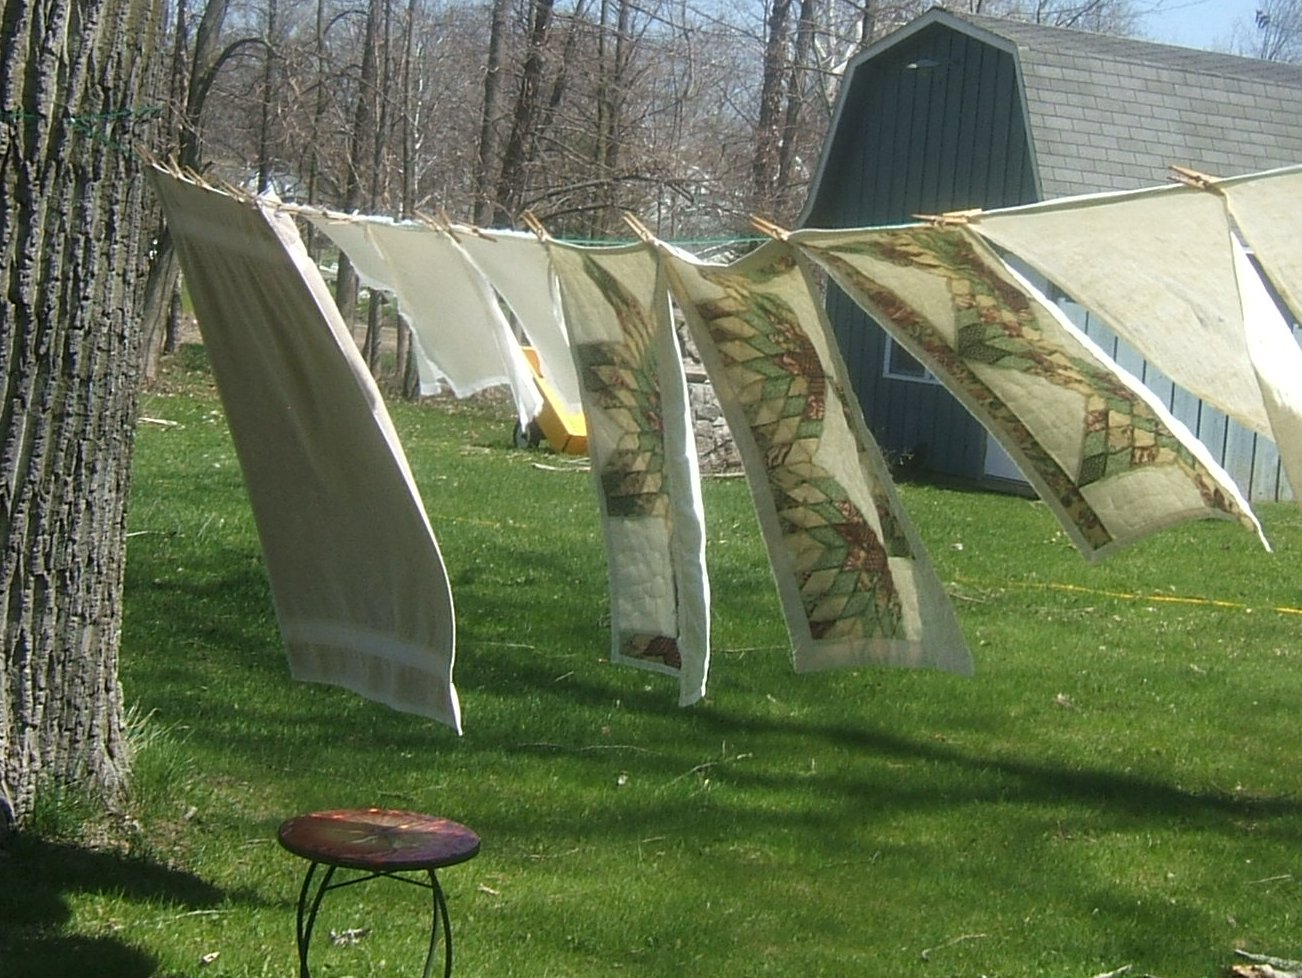
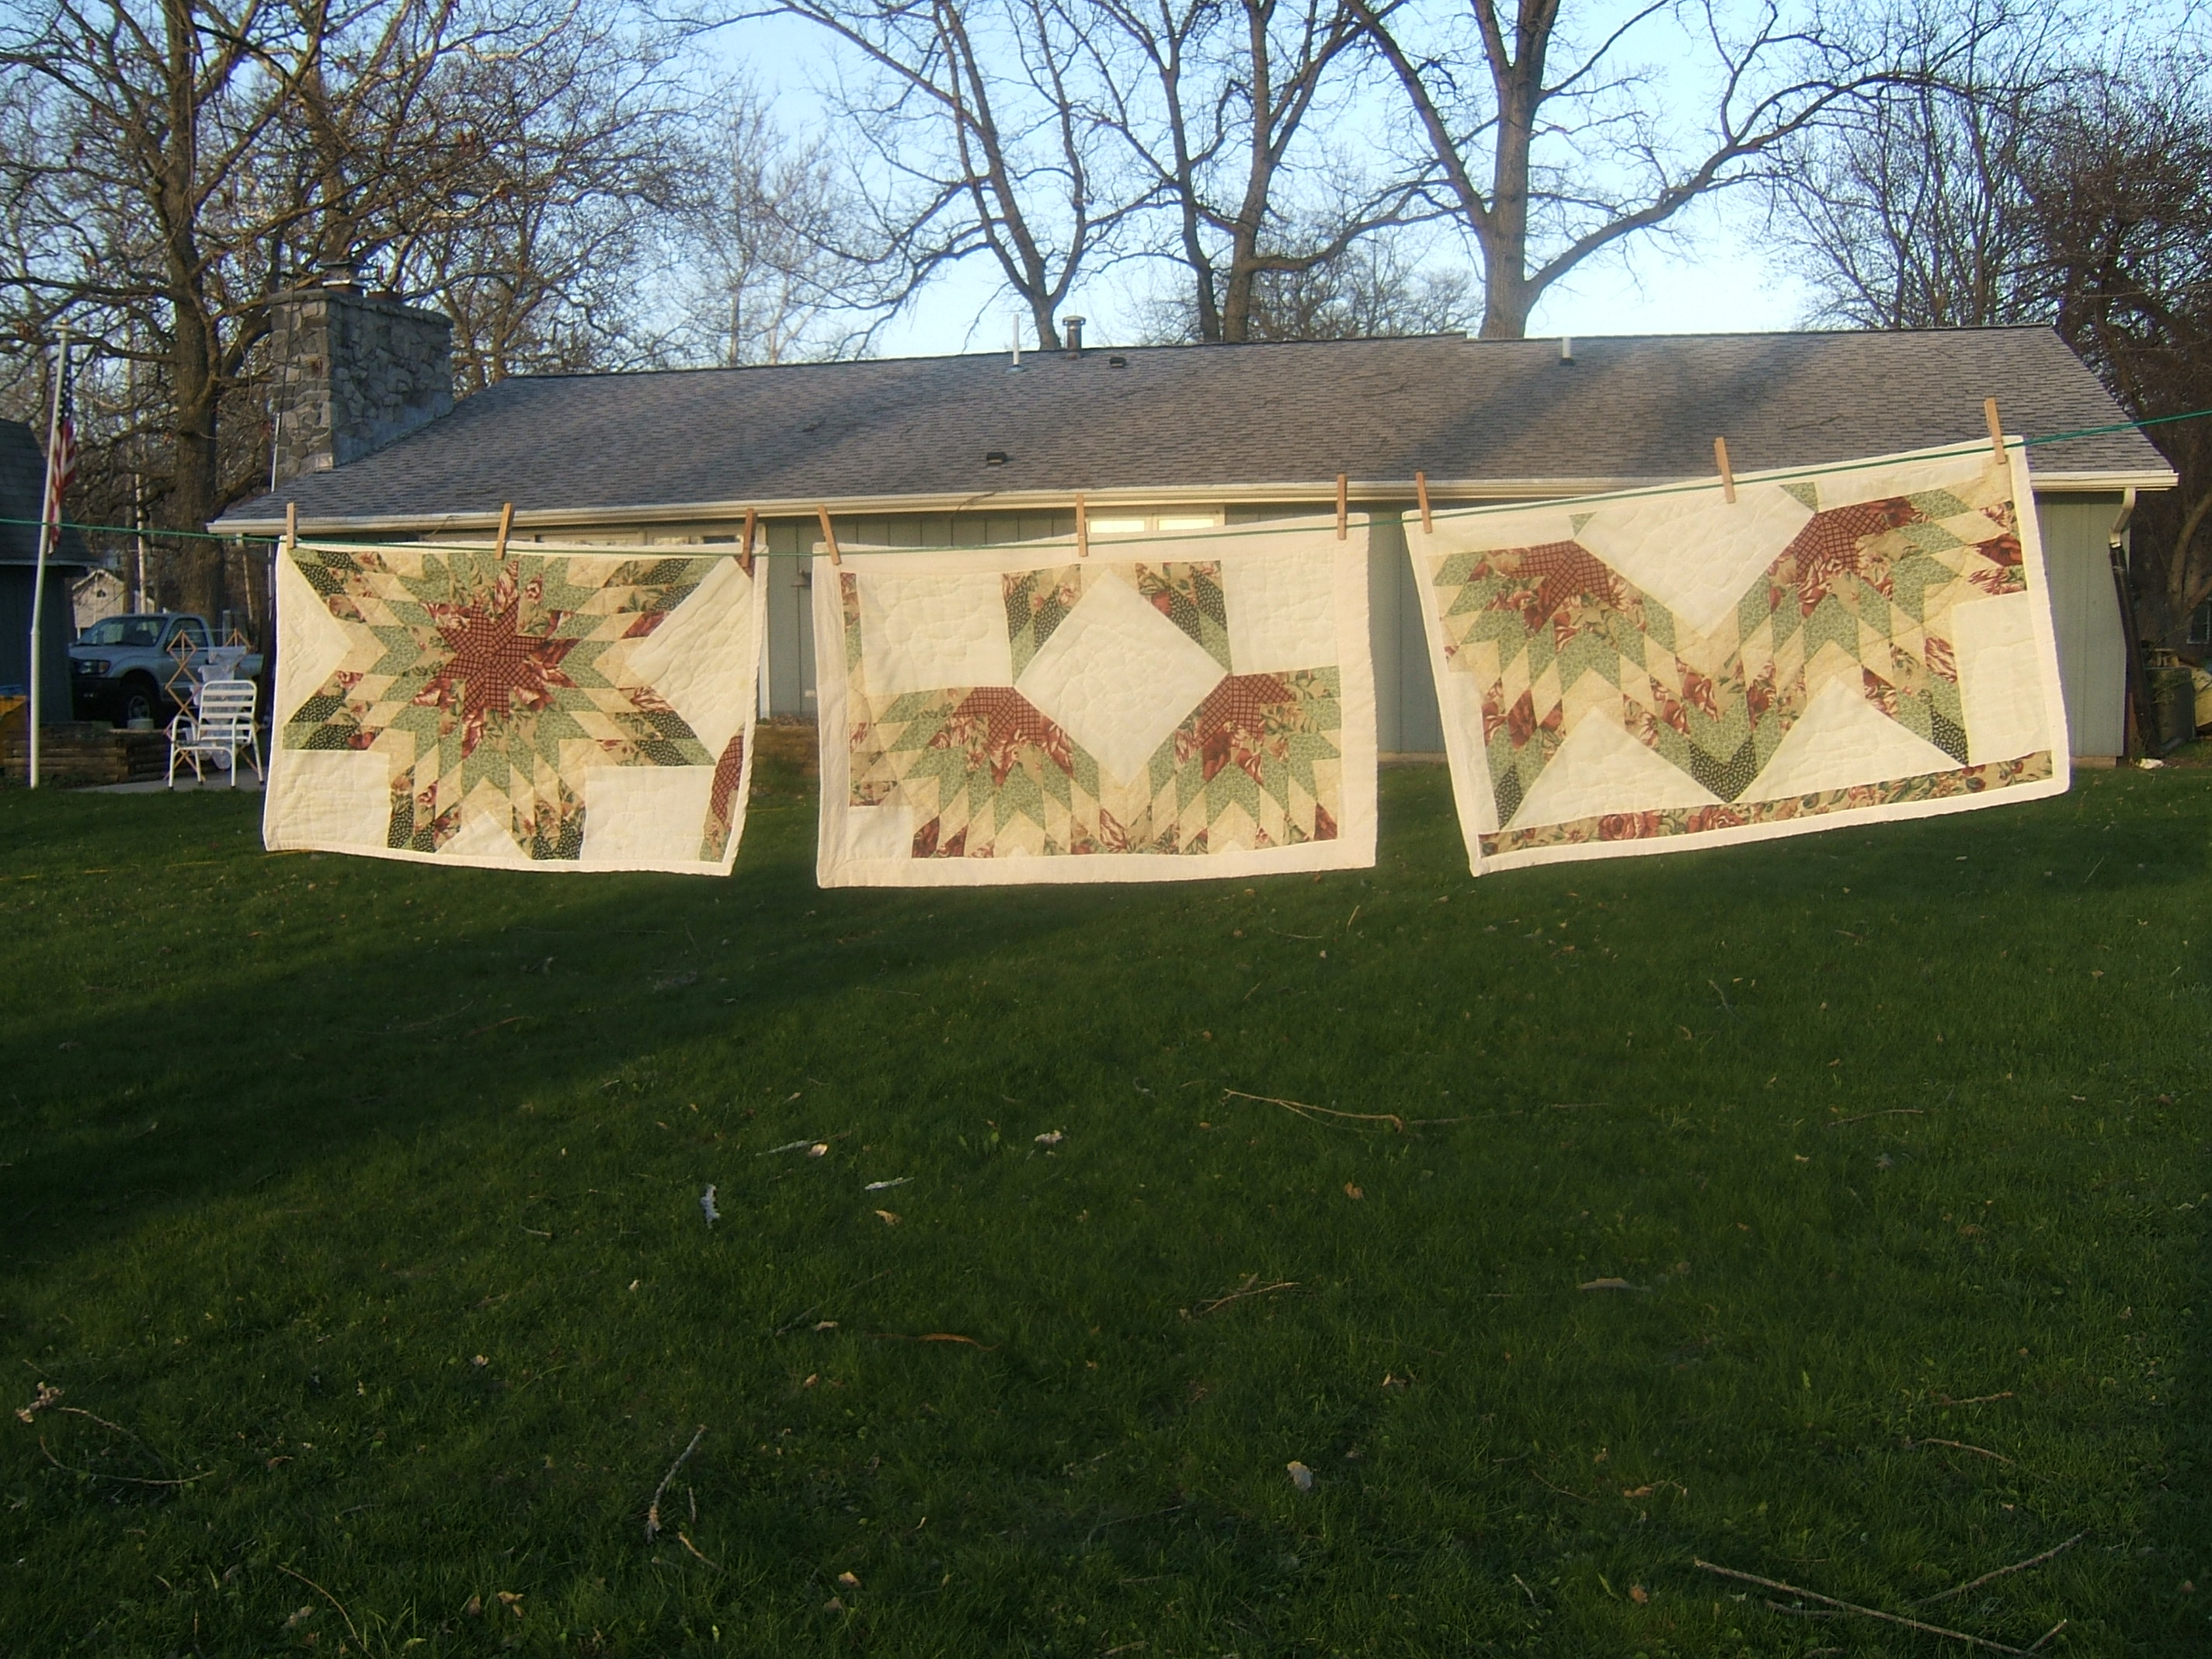
It's washday!
The essay on patience on the table-of-contents page also applies to photography, now that it's cheap to make a hundred shots to get one good one. The paragraph on failure of patience applies even more. I've have gotten a much better shot if I'd waited until the sun moved to the west — or if I'd taken the quilts down and turned them around so that the ornamental sides were in the sun. Even in the current set-up, I'd have gotten a better picture if I hadn't settled for the first picture I snapped.
But I have a lot of other things to do today.
I don't guarantee that the decorations on the table of contents will still be the same when you read this, but there are a lot of pages in worse need of attention — links to the "personal web pages" that Comcast used to include in our package, for example. The first two pages that turned up with obsolete links made me say "ew, gross!", which considerably delayed the search for more.
I found this picture in my diaryzine folder while getting ready to mail the May issue of the Banner. I took it on the last day of April and edited it on the first day of May. I've forgotten why.
While dressing to go out, I realized that if my watch pockets were a little deeper, I could carry my cell phone in one. Full circle: my cell phone is my pocket watch.
It's a pity that caught-in-the-seam pockets are so hard to retrofit. It will be a long time before I make new pants. And even longer before I *finish* new pants! I still haven't completed my last set of two pairs. And the slacks that need completing already have the watch pockets installed. But the waistbands have not been installed, which would make it easier to to undo the side seam.
mend and wash flag
Pinned the frayed flag this morning, and lo and behold, the Necchi was already set up with black polyester. Eventually I remembered mending the pocket of one of my two twinkle-twinkle slopping-around shirts.
It's time I put a timer pocket on another T-shirt, because in hot weather it takes more than two to get through a week, and long-sleeved shirts are not an option. I'm planning to make two matching smock pockets this time, because after wearing the twinkle-twinkle shirts all winter, I keep trying to put stuff into a pocket my Arachne shirt doesn't have. I must not forget to make the timer pocket deep enough for my cell phone. The pocket on the Arachne shirt is almost deep enough.
I planned my flag-stitching route carefully to make a T-shaped repair in one pass. Two rows on the hem that had come unstitched, four on the one that had frayed through at the edge. The flag is in the washing machine now. Cold water; I was sure it was intended to get wet, but not so sure it was heat resistant.
⁂
In the afternoon, I pressed a crease into the next binding strip, then ironed one of the two shirts that have been on the to-do hook since washday before last. I didn't have any trouble keeping up when I had ten white shirts every washday, plus sport shirts for the weekends. Why is it so hard to iron one or two sport shirts per month?
I reflected that my leg board would be perfect for marking the stitching line — and can't remember where I put it. There aren't a lot of places where one can put something eight inches wide and three feet long!
Well, that is explained! I wanted to bind the fourth all-raw-edge cat blanket while I had it figured out, but I hunted and hunted through the pile of blankets, and all I could find was pieces cut off the edges of the quilt. There are five cat-blanket pieces — and there were eight to start with.
It's a good thing I've been writing things down — I was on the verge of taking the pieces into the living room and re-assembling them when I thought to look up the entry I made on the fourth of April, which says that I marked four rows of two.
So now I can figure out how to bind two or three sides of a blanket. I considered taking the binding around the corner, but surely stitching the ends will suffice.
The binding on the second blanket didn't turn quite as far onto the front as I'd have liked, so I marked a narrower seam allowance on the binding of the third blanket. This turned a bit farther than I would have liked, so I marked a blue line right at the edge of the fourth cat blanket, and am pinning with that blue line showing. I tried to take a picture, but the light was a bit dim to get a focussed shot. (My camera keeps the shutter open longer when the light is dim, so one has to hold it really, really steady, and propping my elbows on the ironing board wasn't quite enough.)
I still haven't found my leg board, but the piece of wallboard that I'm saving because it reminds me of the fabric-painting fad of the forties is long enough.
I remember painting ivy leaves around the edges of a table cloth, using a stencil I cut to the shape of a real ivy leaf, but don't recall what became of it. I think that it fit Mom's miniature dining table, which she got to use only once or twice before the grandchildren outgrew it.
find the spots where the missed photos
belong and re-write the text
undiv "up to TOC" links in
ROUGH010.HTM
It's fun to read the to-do list and find things I already did. Course checking that I'd done the second one turned up a couple of spots I missed.
It's bright in here this morning.
I gave up sketching to the corner, and used an improvised forty-five degree corner to mark the bias line.
⁂
I not only finished that quilt before nap time, I bound another one, start to finish, in the afternoon and evening. I also took three pictures, and made some notes, which I will now try to expand and unscramble.
I think this is still the first quilt, showing how I used the forty-five degree "business reply card" to mark a little more than a seam allowance from the corner.
And I've just finished sewing the binding to the quilt. Since one side was already finished, I turned the end in and pinned in a miter.
Turned to the right side and top-stitched. My corner loops are getting neater.
Forgot to snip the quilt corner before sewing the binding to it. Perhaps I should snip all the quilt corners.
I haven't, but I snipped the corners of the afternoon quilt while drawing the "here's the edge" line around it. I can, of course pin a tad back from the edge without drawing a line to match to, but when the edge is fuzzy and not perfectly straight, the line helps a lot.
⁂
Department of too soon oldt, too late schmardt: Instead of measuring where to draw the bias line, I folded up the binding in line with the here's-the-edge line, as I will after stitching, finger-pressed a crease where it will fold, then drew the stitching line just a tad short of that.
The crease, I'm pleased to note, points exactly at the middle of the place where I snipped the corner of the quilt while drawing the here's-the-edge line.
Only moderately-late on the schmardt. I have three more cat quilts and an undetermined number of dog quilts yet to bind. Well, the number of dog quilts is determined, but I haven't counted them lately. I think it was two off the end and one off the edge.
⁂
Refinement: with the crease right there, I don't need no steenking bias guide, I just mark parallel to the crease, passing through the corner of the snip while the crease passes through the middle. I should take a picture of that while making the next quilt.
⁂
Folding the right-side miter in the direction of least lump is easier regardless of which way I'm pinning. Harder to hit the fold below, but it has some stitching inside it anyway.
Interpretive hike in the morning.
In the afternoon I pressed the binding strip and a shirt, marked a stitching line on the binding, marked a match-the-raw-edge line on the next quilt, and pinned the binding strip ready to start stitching tomorrow.
I've mentioned that the tears have not been meeting at the seam when I tear off binding strips — a situation that can only get worse. The dime finally dropped and I went to the other side of the spliced muslin, where the tears had been sewn lined up, and folded the ends together carefully matched and cut both snips at the same time, so they matched perfectly and met the seam together. Then I cut snips for the next strip before continuing, so I'd be sure to remember where I was at. I think this is the third strip I've torn that way, and it's still working.
There are five strips left on the muslin, and two cat blankets and four dog blankets on the pile. Looks as though I'm going to use the muslin up exactly.
I finished the quilt in the afternoon and evening — once again, there are going to be three quilts in tomorrow's wash.
Sew hooks and eyes on pedal
pushers
Then I machine-basted the pedal pushers I'd worn to church with safety pins in the waistband. Since I hadn't even begun to install hooks and eyes, this was easy.
Then I re-wound the spool of 100/6 I emptied a few days ago. (I swiped the one that belongs on the Necchi for the White.) I ran down the battery in the screwdriver in the kitchen drawer. When I checked with Dave that I was correctly changing batteries and putting the faded one on the right charger, he pointed out that the larger screwdriver in the garage is faster. And it takes the same size bits, so I just stuck the spool onto it without needing to re-shim or anything.
It's faster, but it also can be held only one way so I couldn't change fingers. Eventually I realized that well, duh, I've got another hand!
Then I ran the battery in that one down too. He changed its battery himself and put the other charger in the other outlet on the counter, remarking that he didn't remember ever charging those batteries. I finished up with the slower screwdriver; by then there was hardly any thread left on the ball.
I chose a bit that was longer than the hole in the spool, and shimmed it with flat toothpicks. It proved impossible to put a toothpick on the flat opposite the first one — perhaps I should have inserted them simultaneously — so I shimmed the adjacent flat. That made the spool a tad off-center, but that didn't seem to bother anything. I think that shimming every other flat would be the way to go. I'll have forgotten that by the time I empty the spool.
Later on, I realized that screwdrivers are meant to run in short bursts, with frequent chances for the battery to recover.
variegate Speed Cro Sheen and load
teaching shuttle
Pity I didn't think to count the one-foot sections before winding it, as I don't seem to have noted the length of the thread anywhere, and it is just right.
After much soaking in buckets, I got the excess bluing out by dint of sewing the thread into a pillow case and running it through the washer with the other whites.
This was more than one washday ago, This evening I got tired of shifting the thread back and forth from sewing machine to ironing board and wound it on the shuttle.
Today I pressed the strip I tore off yesterday, marked the stitching line on the next cat blanket, and pinned the first side. There's enough light left to finish attaching the strip and maybe turn it to the other side, but it's such a gloomy light!
After tearing that strip, I thought to snip the remaining three tears at once, but I was distracted by fetching pins to keep them lined up while snipping and got a half twist in the muslin. I want to tear them at once to see how badly I've messed myself up, but the muslin is much easier to keep track of while it's all in one piece.
Washed the three new cat blankets, and machine dried them because it was gloomy out, then discovered that I'm out of wire hangers to store them on. (Didn't help that there were also pants that need to be pinned to wire hangers in this wash.) I pinned two quilts to a hanger, and hope to deliver those six before next washday.
The line-dried quilts look cleaner than the machine-dried ones. That might be because the first three came out of the middle of the quilt and the next three came off the edges.
While sorting the laundry, I threw two pairs of underpants into the trash. Maybe I should move cutting into the hemp-and-cotton knit a bit higher on my priority list. (I don't think it's on the to-do list at all.)
Put away the socks I washed yesterday, and worked green and gold bar tacks on two pairs to make sorting easier next time.
Then I started to finish the cat quilt I pinned yesterday. Attaching the binding went well, but after pinning it to the front I started stitching on the wrong side. In correcting that, I somehow started stitching at the wrong end. Stitching in that direction would have worked just fine … but all my pins pointed the other way. So I stitched just far enough to overlap comfortably and re-started at the other end. And that was all weebly-wonked so I picked it out and re-re-re-started.
Then I noticed that I'd wandered off the edge in two places, stuck pins in them so I'd remember, and missed the edge in two more places. Then two spans from finishing, the bobbin thread ran out.
At that point, I decided that it was time to cultivate the garden. Not really dry enough to plow, but I want to go on a bike ride tomorrow. Things are coming up nicely in the garden.
Before going outside, I emptied the remains of a ball of thread that had been in the hand-sewing stuff I keep in the north arm of the futon onto the bobbin, which half filled it.
⁂
I finished the job after supper, but at this rate I'm not going to have three cat blankets in next Monday's wash.
As I was sitting down to write the above, and wording a complaint that the binding strip I tore off today had a terrible, terrible jog, I realized that I could rip out the seam. So I did, and started to pick at the seam in the three remaining strips. I won't re-stitch until I need to piece a strip for the next quilt; I might well want to use one of the scraps instead.
The six finished quilts are packed on the bike for tomorrow's dump tour. Now I'm planning my route.
The next quilt has only two sides, so one strip will do it. After pinning the first side, I remembered that there is no picture at the place where I first noted the change in my technique, so I photographed the corner
I didn't notice that moving the quilt into a good light had rumpled it until I was scaling the pictures. Here, gentlemen, we have another failure of patience. Perhaps I'll shoot again while binding one of the dog blankets.
I bound the last cat blanket today. Well, it's down to final stitching, which I intend to do before my nap, despite the cascade of errors that plagued this step of the previous blanket.
⁂
I not only did that, I started the first dog blanket, and finished it after supper.
It had three raw edges, and would have taken almost, but not quite, all of two strips. I started to prepare to splice, but thought it wasteful to overlap two selvages, so I spliced on the longest of the scraps, sewed two edges, and pinned the third. The shortest scrap was too short, and the other scraps were wastefully long, so I tore the scrap from the binding strip I made from the straightening strip to match the strip I'd pinned, then pinned it from the end and overlapped the way I did for joining the ends of the strips on the four-sided blankets.
I drew the matching line, but ignored it and instead matched the longest threads in the fringe from tearing to the raw edge. Since I measured the stitching line from the base of the fringe, this proved adequate. I'll skip the match-marking for the final three blankets.
I don't press the binding strip away from the blanket after the wrong-side stitching, but I do stretch the strip with one hand on the blanket and one on the binding strip. This gives the fabric an idea of where I want it to fold.
Somewhere along the way I've switched from pinning in the line I plan to stitch along to pinning near the fold that I can feel underneath.
While top stitching, I broke the thread twice, and near the end, I used up that half-bobbin of thread and had to wind again. This time I wound from a new ball that I had put into the snack bag to replace the one I finished, and didn't even take off all the belt winding.
There are only three dog blankets left, and all are two-sided. I'm going to have muslin left over.
I pinned one side of one dog blanket today.
Two cat blankets and one dog blanket are drying on a rack in the garage. Still three pieces to bind.
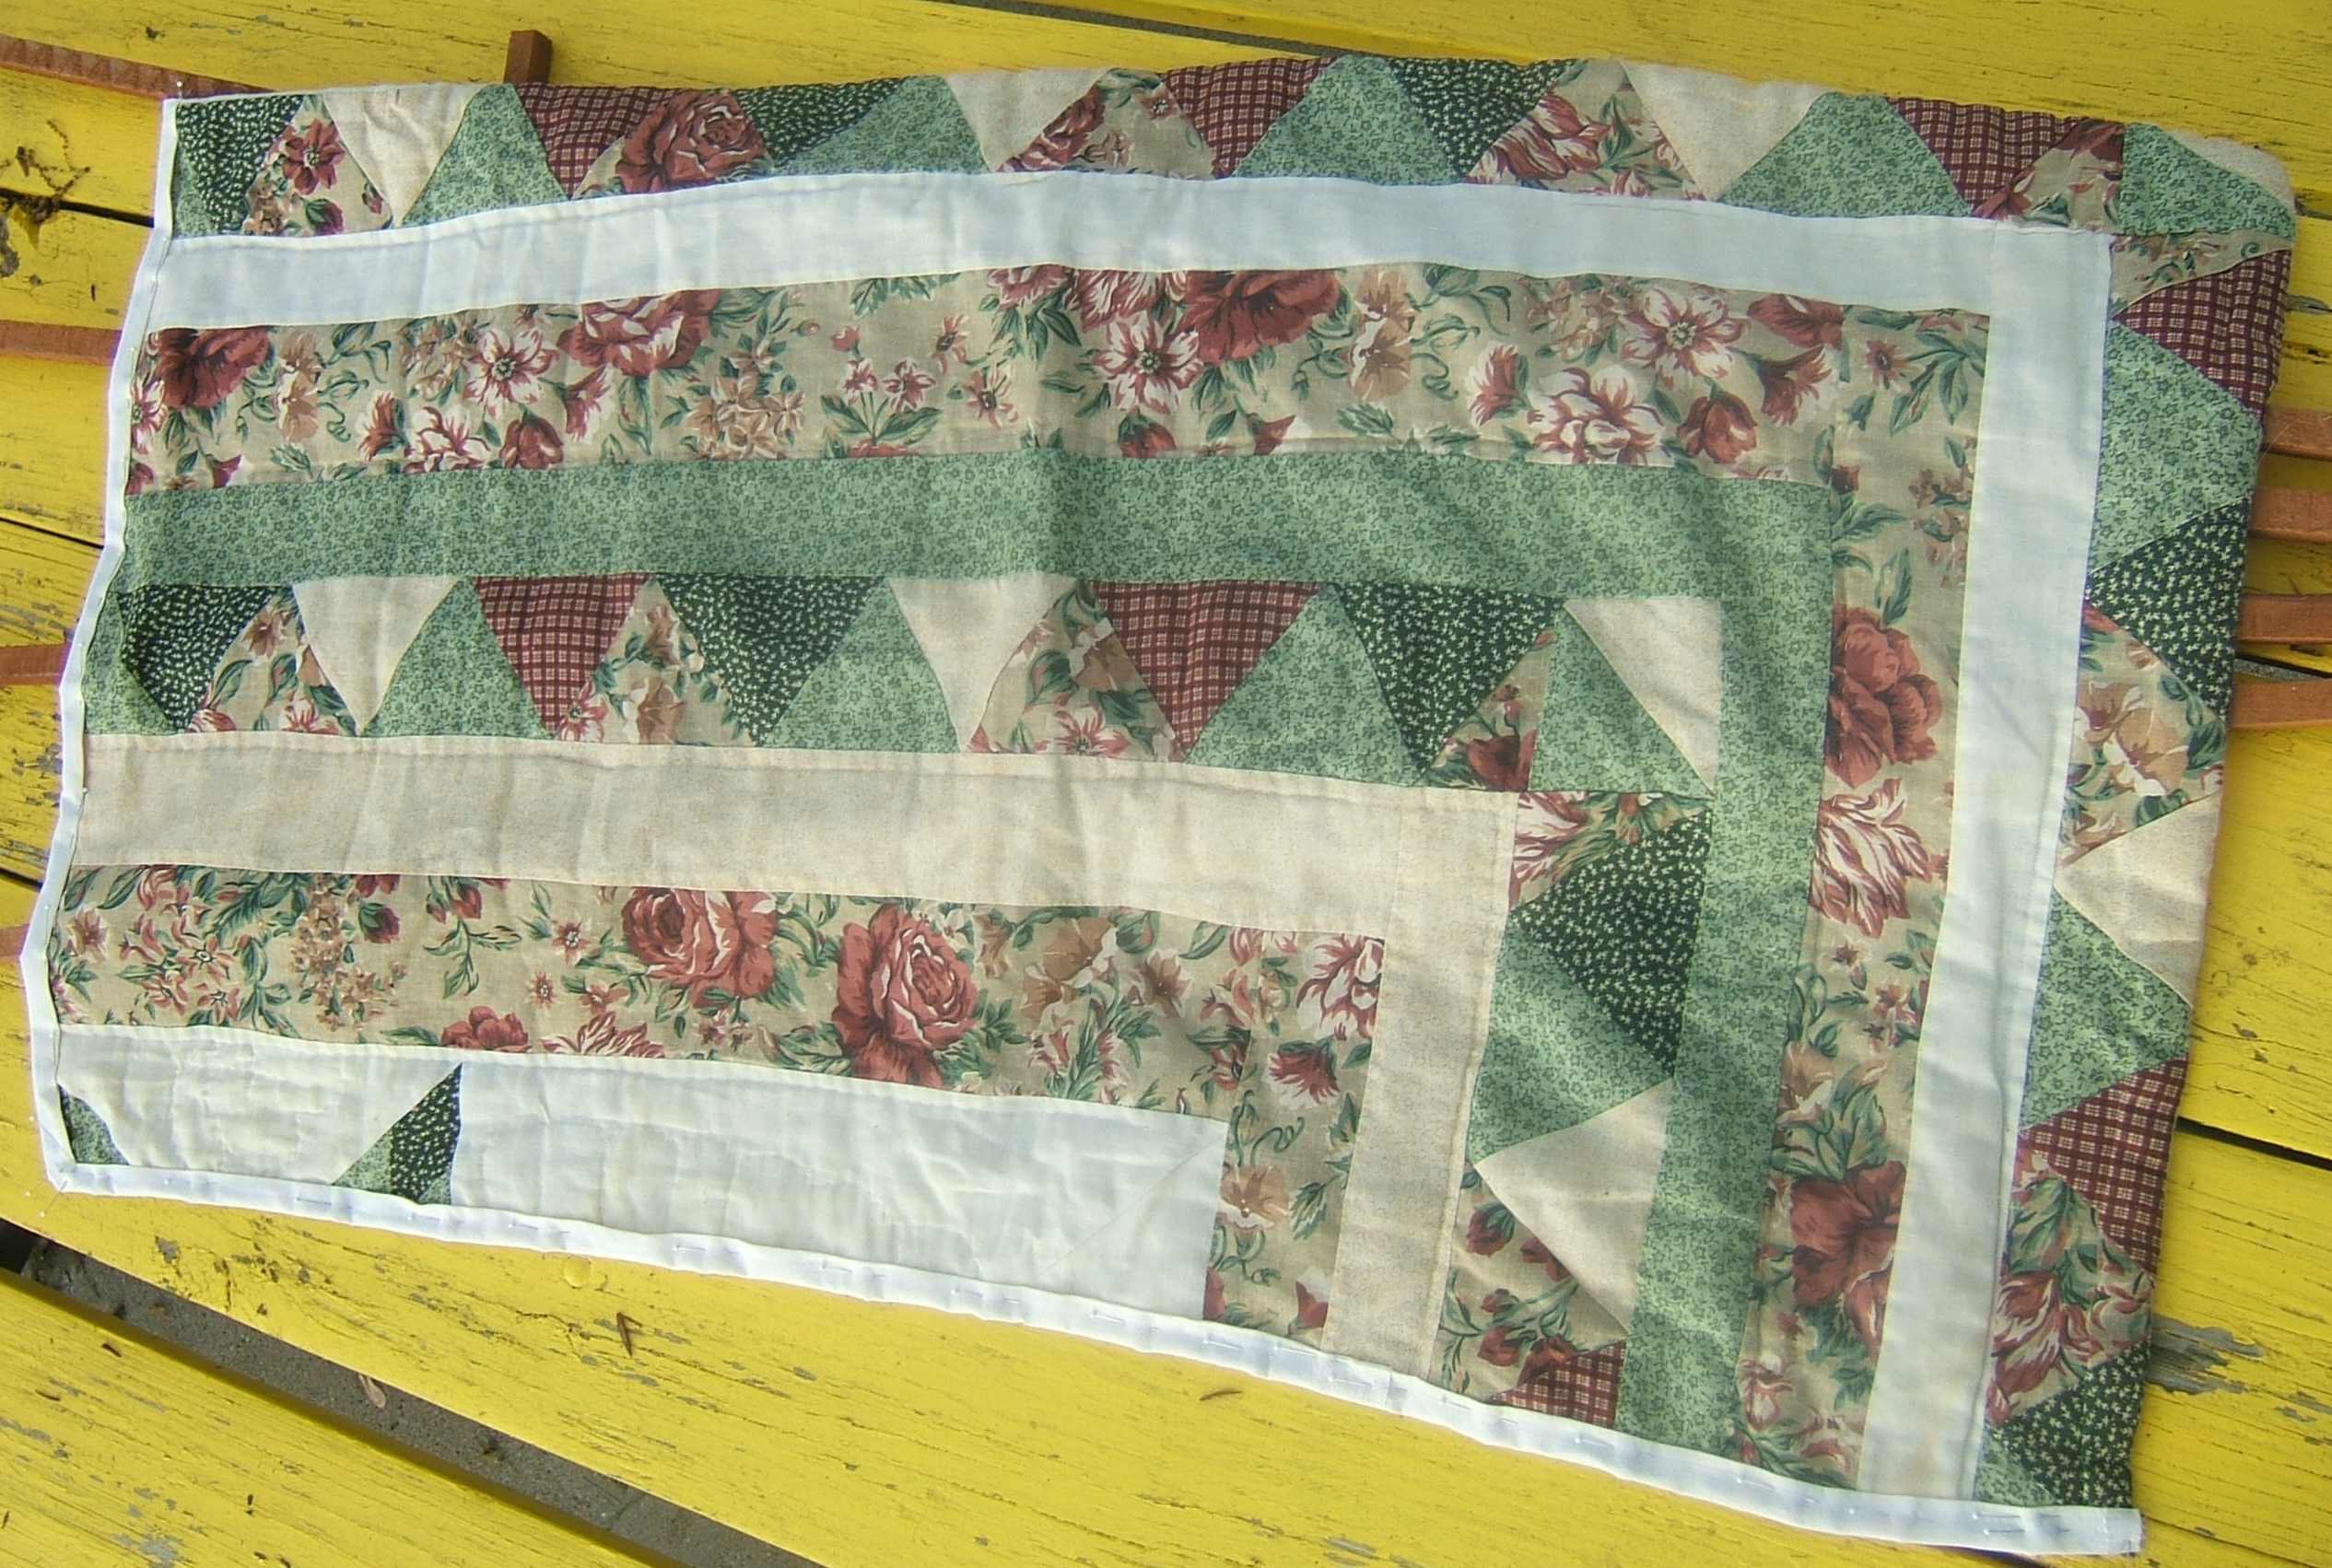
I bound one blanket today, two to go. Time to decide which project to tackle next.
Perhaps I'll hem the cotton-lined linen dress. It shouldn't take long, and it will get a large object out of the sewing room.
I should sort out doctor's-office projects and put them in a separate list.
I think the elastic in the red bras may date back to the time I thought that swimsuit elastic would prove extra-durable. I should pull it out and put in good elastic — or pull the seams out and cut out an inch.
I hauled down the tulip-print scraps with an eye to making timer pockets for T shirts.
After Dave went through much fuss and feathers to get me a virtual credit-card number, I ordered four yards of Fashion Fabric's yellow linen to make a new summer jersey. It says it's suitable for pants, so I have hope that it's not sheer and flimsy. Dithering about buying it paid off — it's on sale at three dollars off until Memorial Day. A tad over ten dollars a yard, with shipping, and the original price was twelve something. (Sale price nine something.)
⁂
I finished a dog quilt today. Two in the laundry and one to go. Perhaps I could drop off the three washed quilts on tomorrow's ride.
I pressed two binding strips, so one is ready for the last quilt as soon as I mark the stitching line. A marked stitching line really makes things easy; I've dispensed with most of the other marks, but I'm thinking of using marked stitching lines on other projects.
I'm also thinking that I'll try stitching right on the crease mark when I miter the last corner. (Only one corner per quilt, since there are only two raw sides.)
I had to mend two places where the piecing seams had come undone; this makes me fear for the durability of the quilts.
My tutorialoid documentation isn't much use as a tutorial. I don't care to expend the time to organize it, but if someone else does, I hereby issue permission to take anything off my web site to use in your tutorial as long as you let me link to it.
Um … considering what happened when I wrote an article about bicycles for my HMO's newsletter, I also demand the right to write a rebuttal. At least a quilt-binding tutorial isn't going to kill anybody. Changing "less dangerous than other dangerous facilities" to "all dangerous facilities are safer than non-dangerous facilities" might.
I just read Fabrics-Store.com's tutorial explaining how to make knife pleats the hard way. I wonder whether I've covered this topic. <adds "check for pleat instructions" to to-do list>
scour iron sole Which
brought my attention to the to-do list.
All the time I've been putting off this horrible
chore, I forgot that the iron in question is a dry
iron with a steel sole: put some baking
soda on a wet sponge, rub for a few seconds, wipe
off with towel. No scouring powder, no
aluminum-grey, no digging cleaning agent out of
holes. I polished the whole iron while I
was at it.
Then I remembered that I'd collected site-revision chores together, and moved "check for pleats" down a few lines.
I learned today that fabrics-store.com's Premier Finish linen is real linen, not artificial tow — at least they strongly imply that without coming right out and saying it; all the details between "gently harvest" and "wash three times" are omitted — but it doesn't come in yellow.
They are having a sale on "bleached". I think. Since I have no intention of buying, I didn't check the date on the e-mail. But the link still worked.
I think I'll make hemming up my linen gown the next job after I bind the remaining dog quilt. The way the weather is going, I may want to wear it next Sunday. Well, not *next* Sunday, because I'm going to a barbecue the day after tomorrow. Which is good, because I haven't planned any sewing time for tomorrow.
⁂
I pinned binding to one side of the last dog quilt, just to make it technically true that I have sewn today.
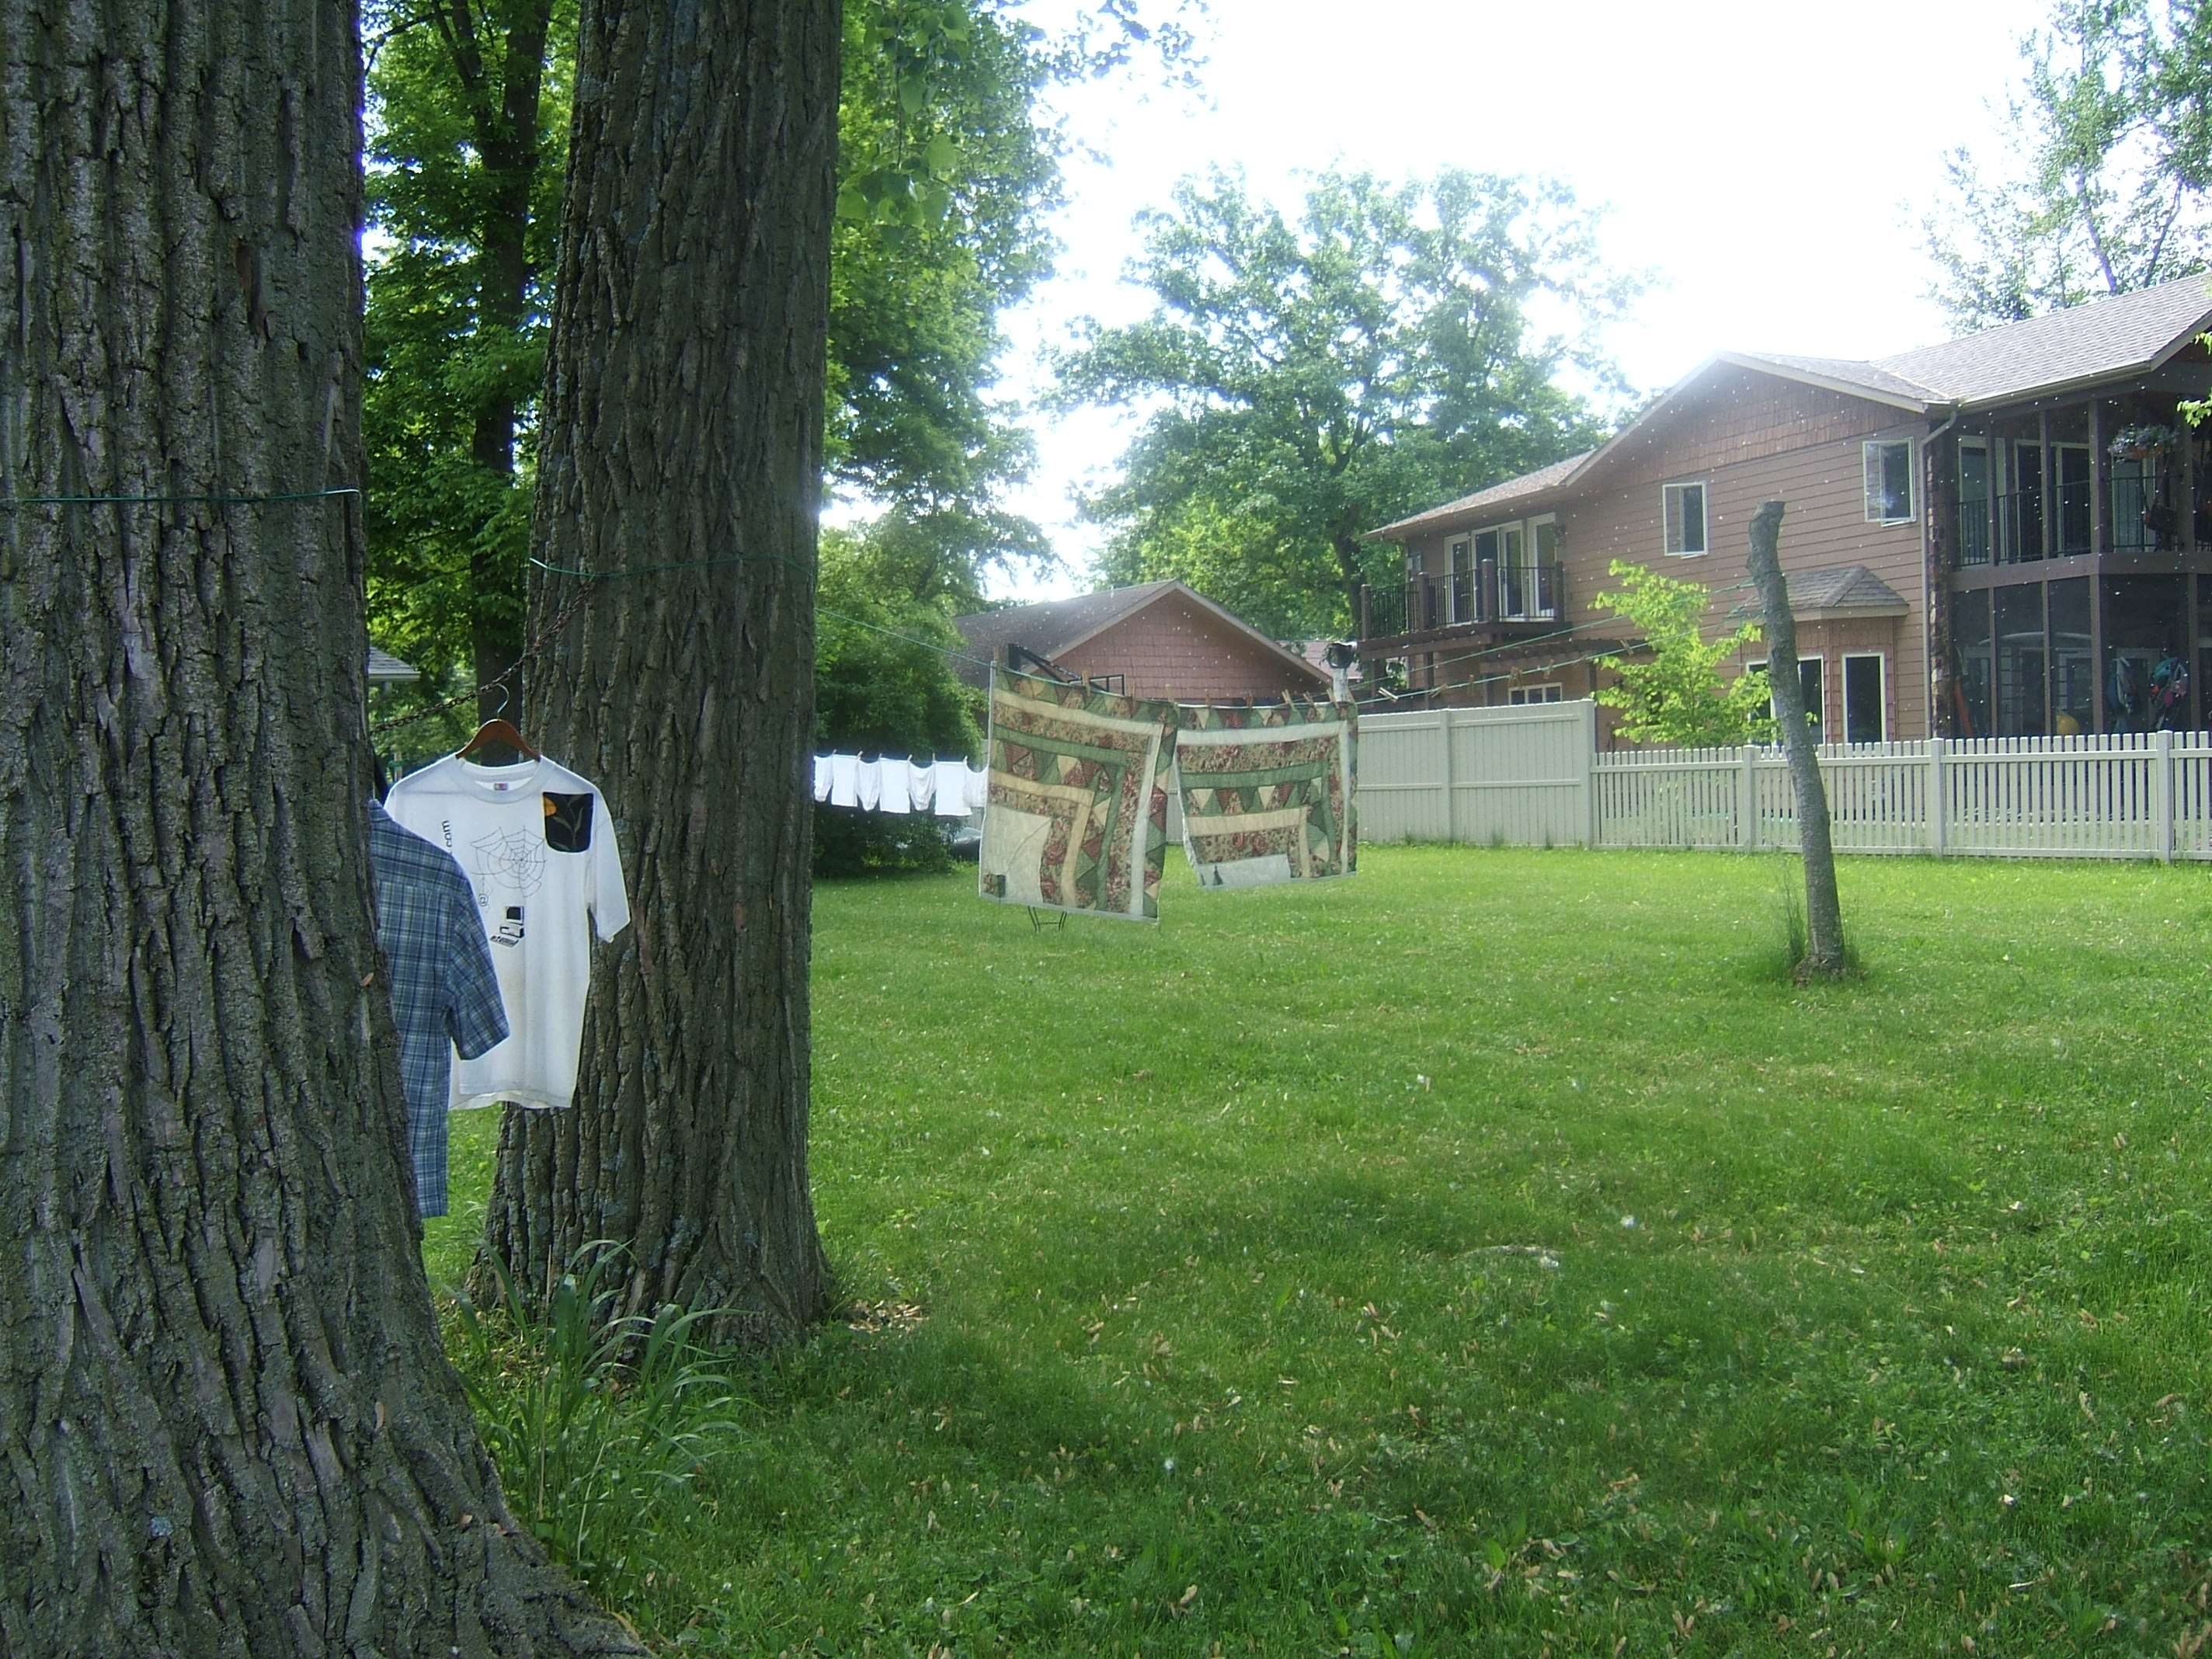
Washday, and I still haven't touched a needle to the last dog quilt. But those two are hanging in the sewing-room closet, and I probably won't go past the animal shelter until after next washday.
The two shirts in the foreground are both of my timer-pocketed T-shirts. Washing clothes wearing a T-shirt with no pockets gives me motivation to get on with adding pockets!
cut old quilt into 18" x 30"
pieces
The last dog quilt is in the laundry hamper. It still needs to be washed, dried, bundled up with the other two, and delivered, but all that will happen as side effects of doing other things.
By the end, I eschewed all markings except the stitching line, and I intend to mark stitching lines more often. The diagonal stitching that I said was only to end the stitching neatly actually runs down the crease that you put in when folding the corner before stitching the next edge. If you crease exactly the way it's going to be folded, the stitching should follow the crease exactly. But it's better to fall short than to go over.
timer-pocket a T-shirt
I meant to make six smock pockets first, but the first scrap I found was suitable for a timer pocket and too small to make a smock pocket.
Incidentally, I decided that my to-do list uglified the bottom of this page and commented it out. You can still see it by viewing the page source.
Crying shame that the tags for comments include the ASCII symbol for —. Comments complicate the search-and-replace for dashes, and I can't use dashes inside comments without upsetting the validator. Hence the "- -" somewhere in the to-do list.
The White Family Rotary is more important than ever. My bad leg has taken to aching if I sit quietly too long, but treadling keeps it happy. <pause to take the walker for a brisk trot> It's amazing how much better I feel after using my exercise equipment, and even more amazing how little exercise does the job. I rarely do more than walk to the living room and back, and often don't trot all that briskly.
The mate to the timer-pocket scrap is large enough to cut a smock pocket, so I marked cutting lines on it, intending to use it as a template, but the next scrap down was a pair suitable for smock pockets, so I cut them into rectangles as large as would fit, letting a corner slop over the edge because I intend to cut the bottom corners rounded anyway. I'll use the same template I used to round the corners of the timer pocket.
Really should have pressed the pocket before appliquéing it.
None of the remaining scraps are self-evident, so I knocked off at that point. I spent today editing and mailing the Banner, and working in the garden.
To Do: begin June Banner with an account of Beaver Dam giving an estimate on the repair of the willow. ($1800 to remove one trunk, $3000 for both.)
My yellow linen will arrive in tomorrow's mail.
A rough-and-ready measurement says it's four yards and sixteen inches long and fifty-four inches wide. I must measure more carefully before washing it. The weight seems about right; at least it's not transparent like the linen I made the previous jersey from. No selvage or a fringe selvage, depending on your point of view, but there's a selvage-type tightly-woven stripe at each edge. I hope I can finish the jersey before the end of hot weather!
I spent today cruising downtown Warsaw. Did some token garden work after supper.
The linen measures fifty-three inches wide, just as it says on the web site. One selvage measures four yards sixteen inches, the other four yards fourteen.
Grumble, gripe. While making the bed with a linen sheet, I reflected that the yellow linen is the perfect weight for shirts and I should write down the ounces for future reference. So I went to the web site and all it says is "light/medium".
After zig-zagging the ends of the fabric, I'm down to one bobbin of no-provenance thread. I tried tying the end of that bobbin to the end of the one I'd just used up, but it broke at the needle. Perhaps because I lost track of the knot in the glare from the window.
So I got up and turned the Necchi to a right angle with the window, like the White. The space for my chair isn't as cramped as I'd feared, I can put the right leaf down when I'm using the ironing board, and if things bump into the window, I can shift the machine to the right — it is on wheels.
I'll probably have to shove it over a bit when I want to open the trunk.
This also improves the view when I'm sitting at the computer.
The last cat quilt is in the same load of wash as the yellow linen.
⁂
I found a lot of yellow lint in the filter after drying the linen. It's good that this will be the last time it's tumbled.
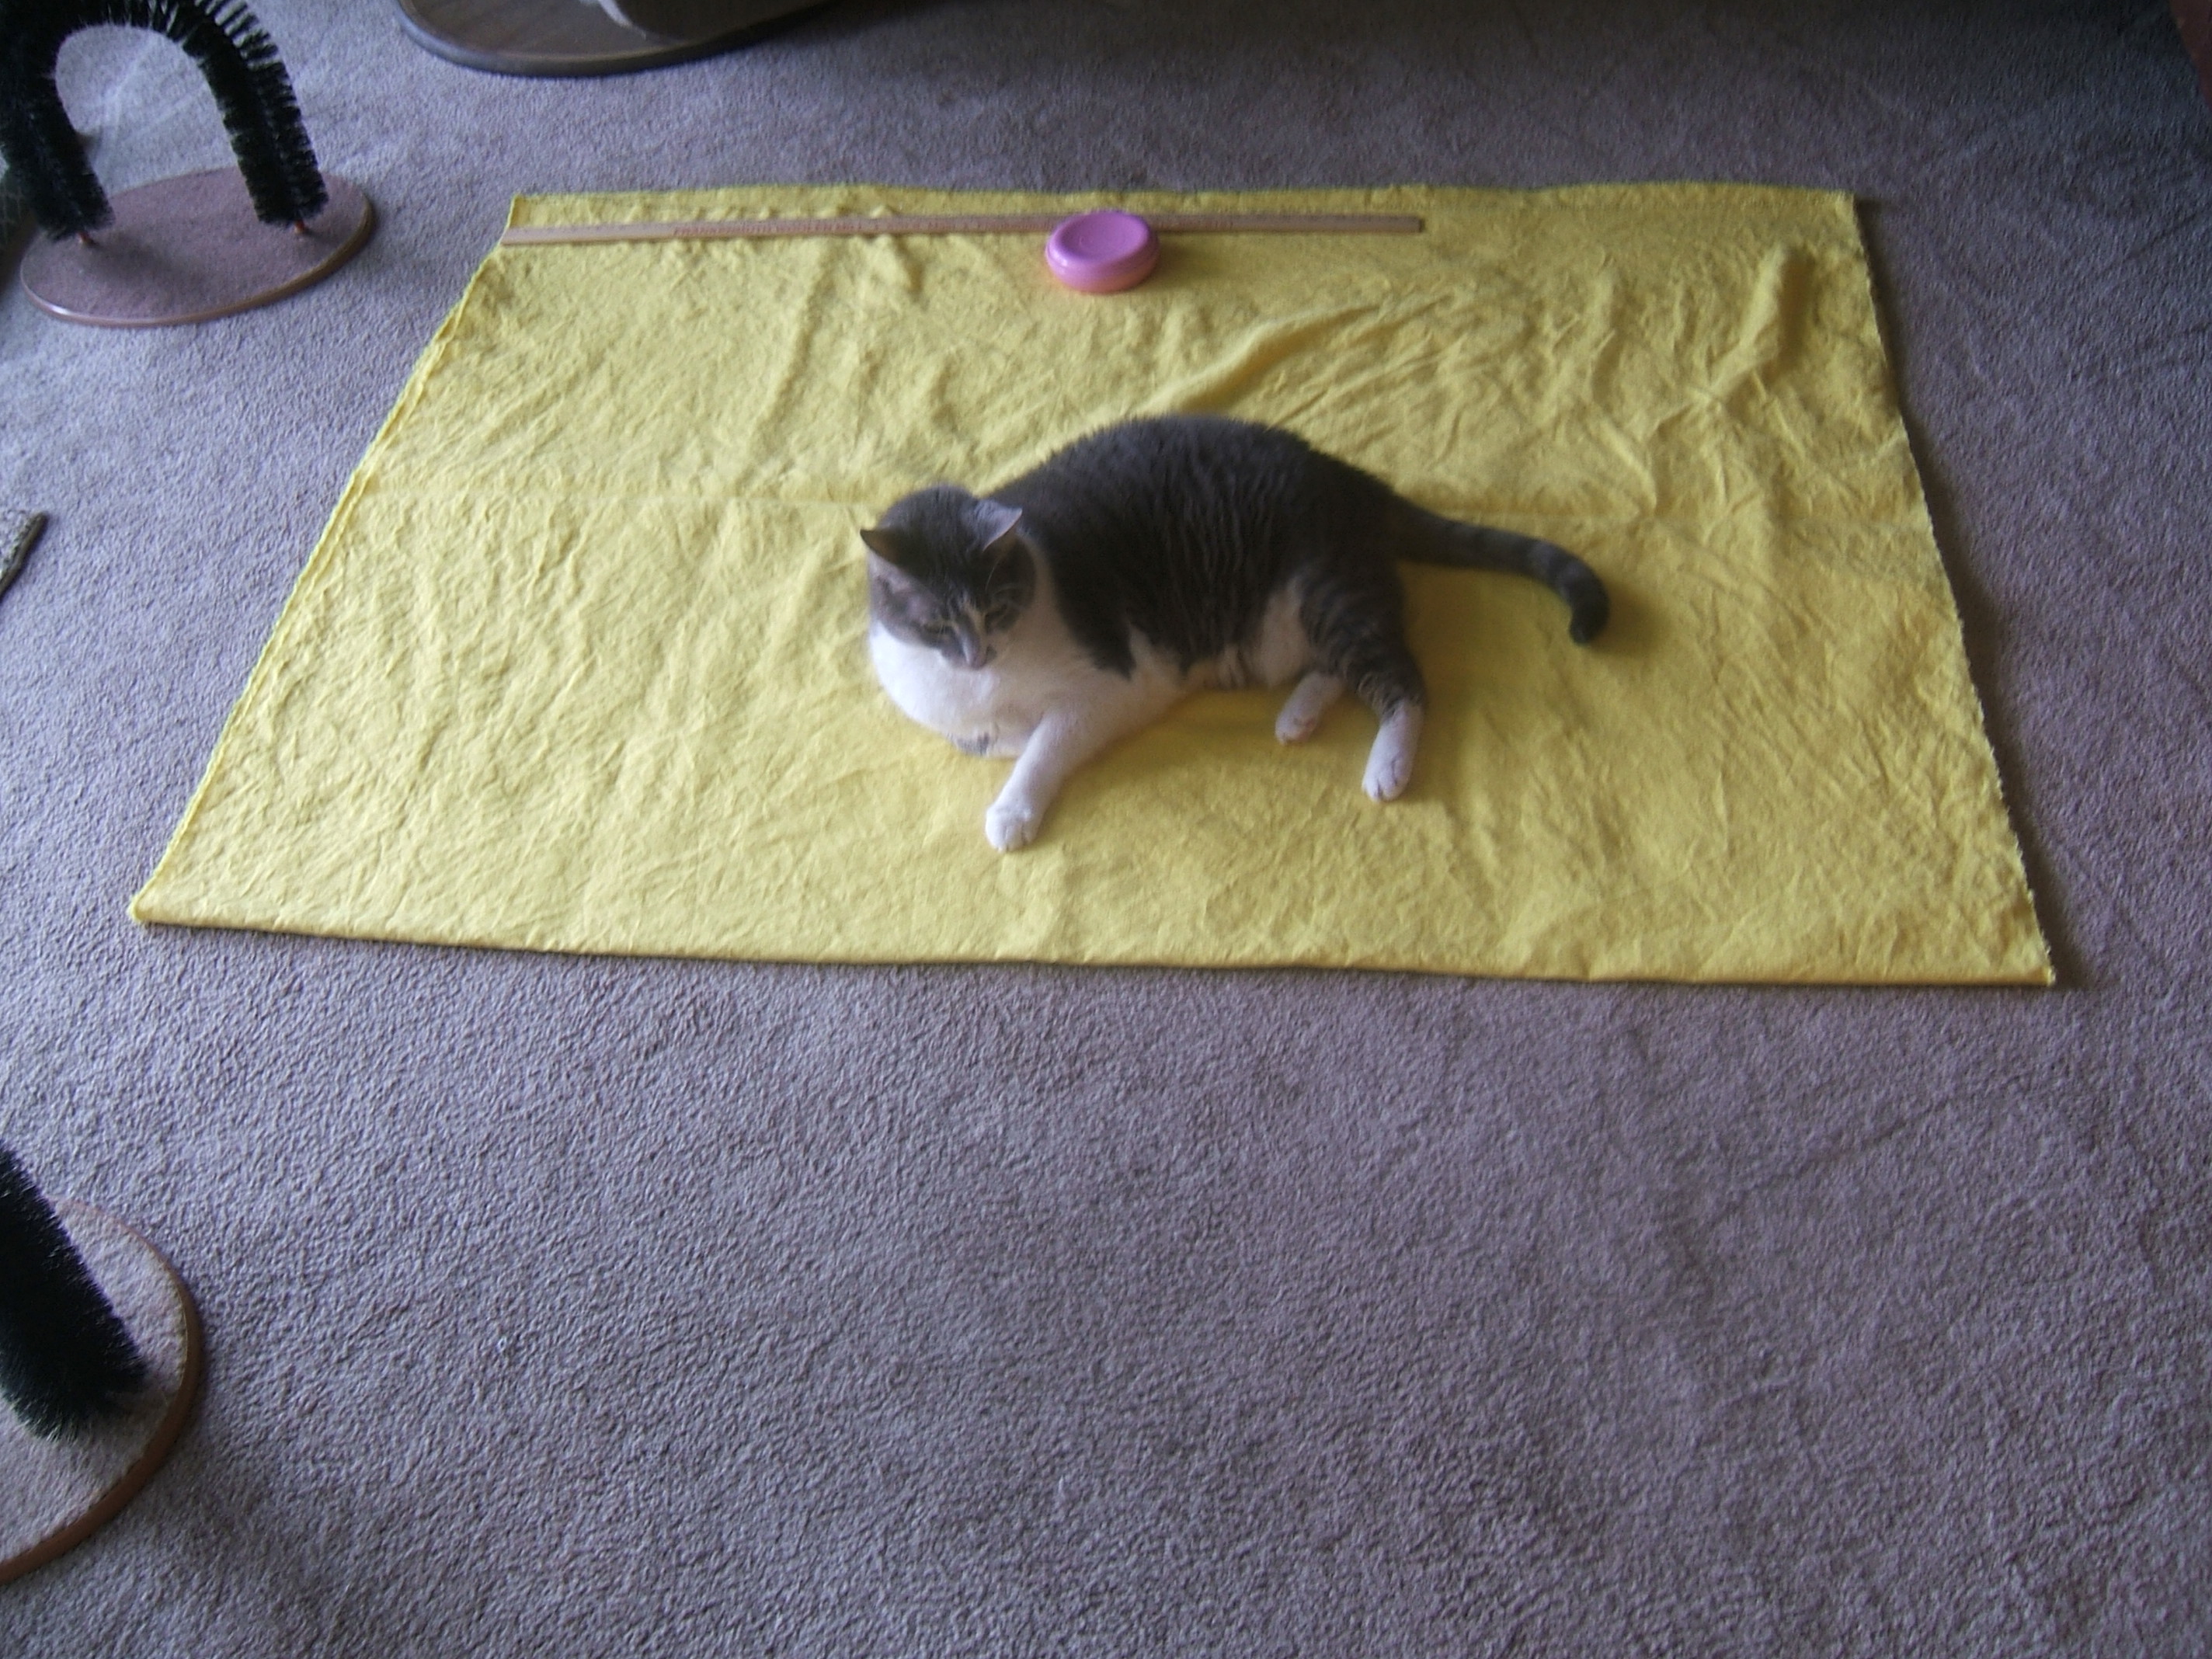
After washing, the linen is fifty-two inches wide.
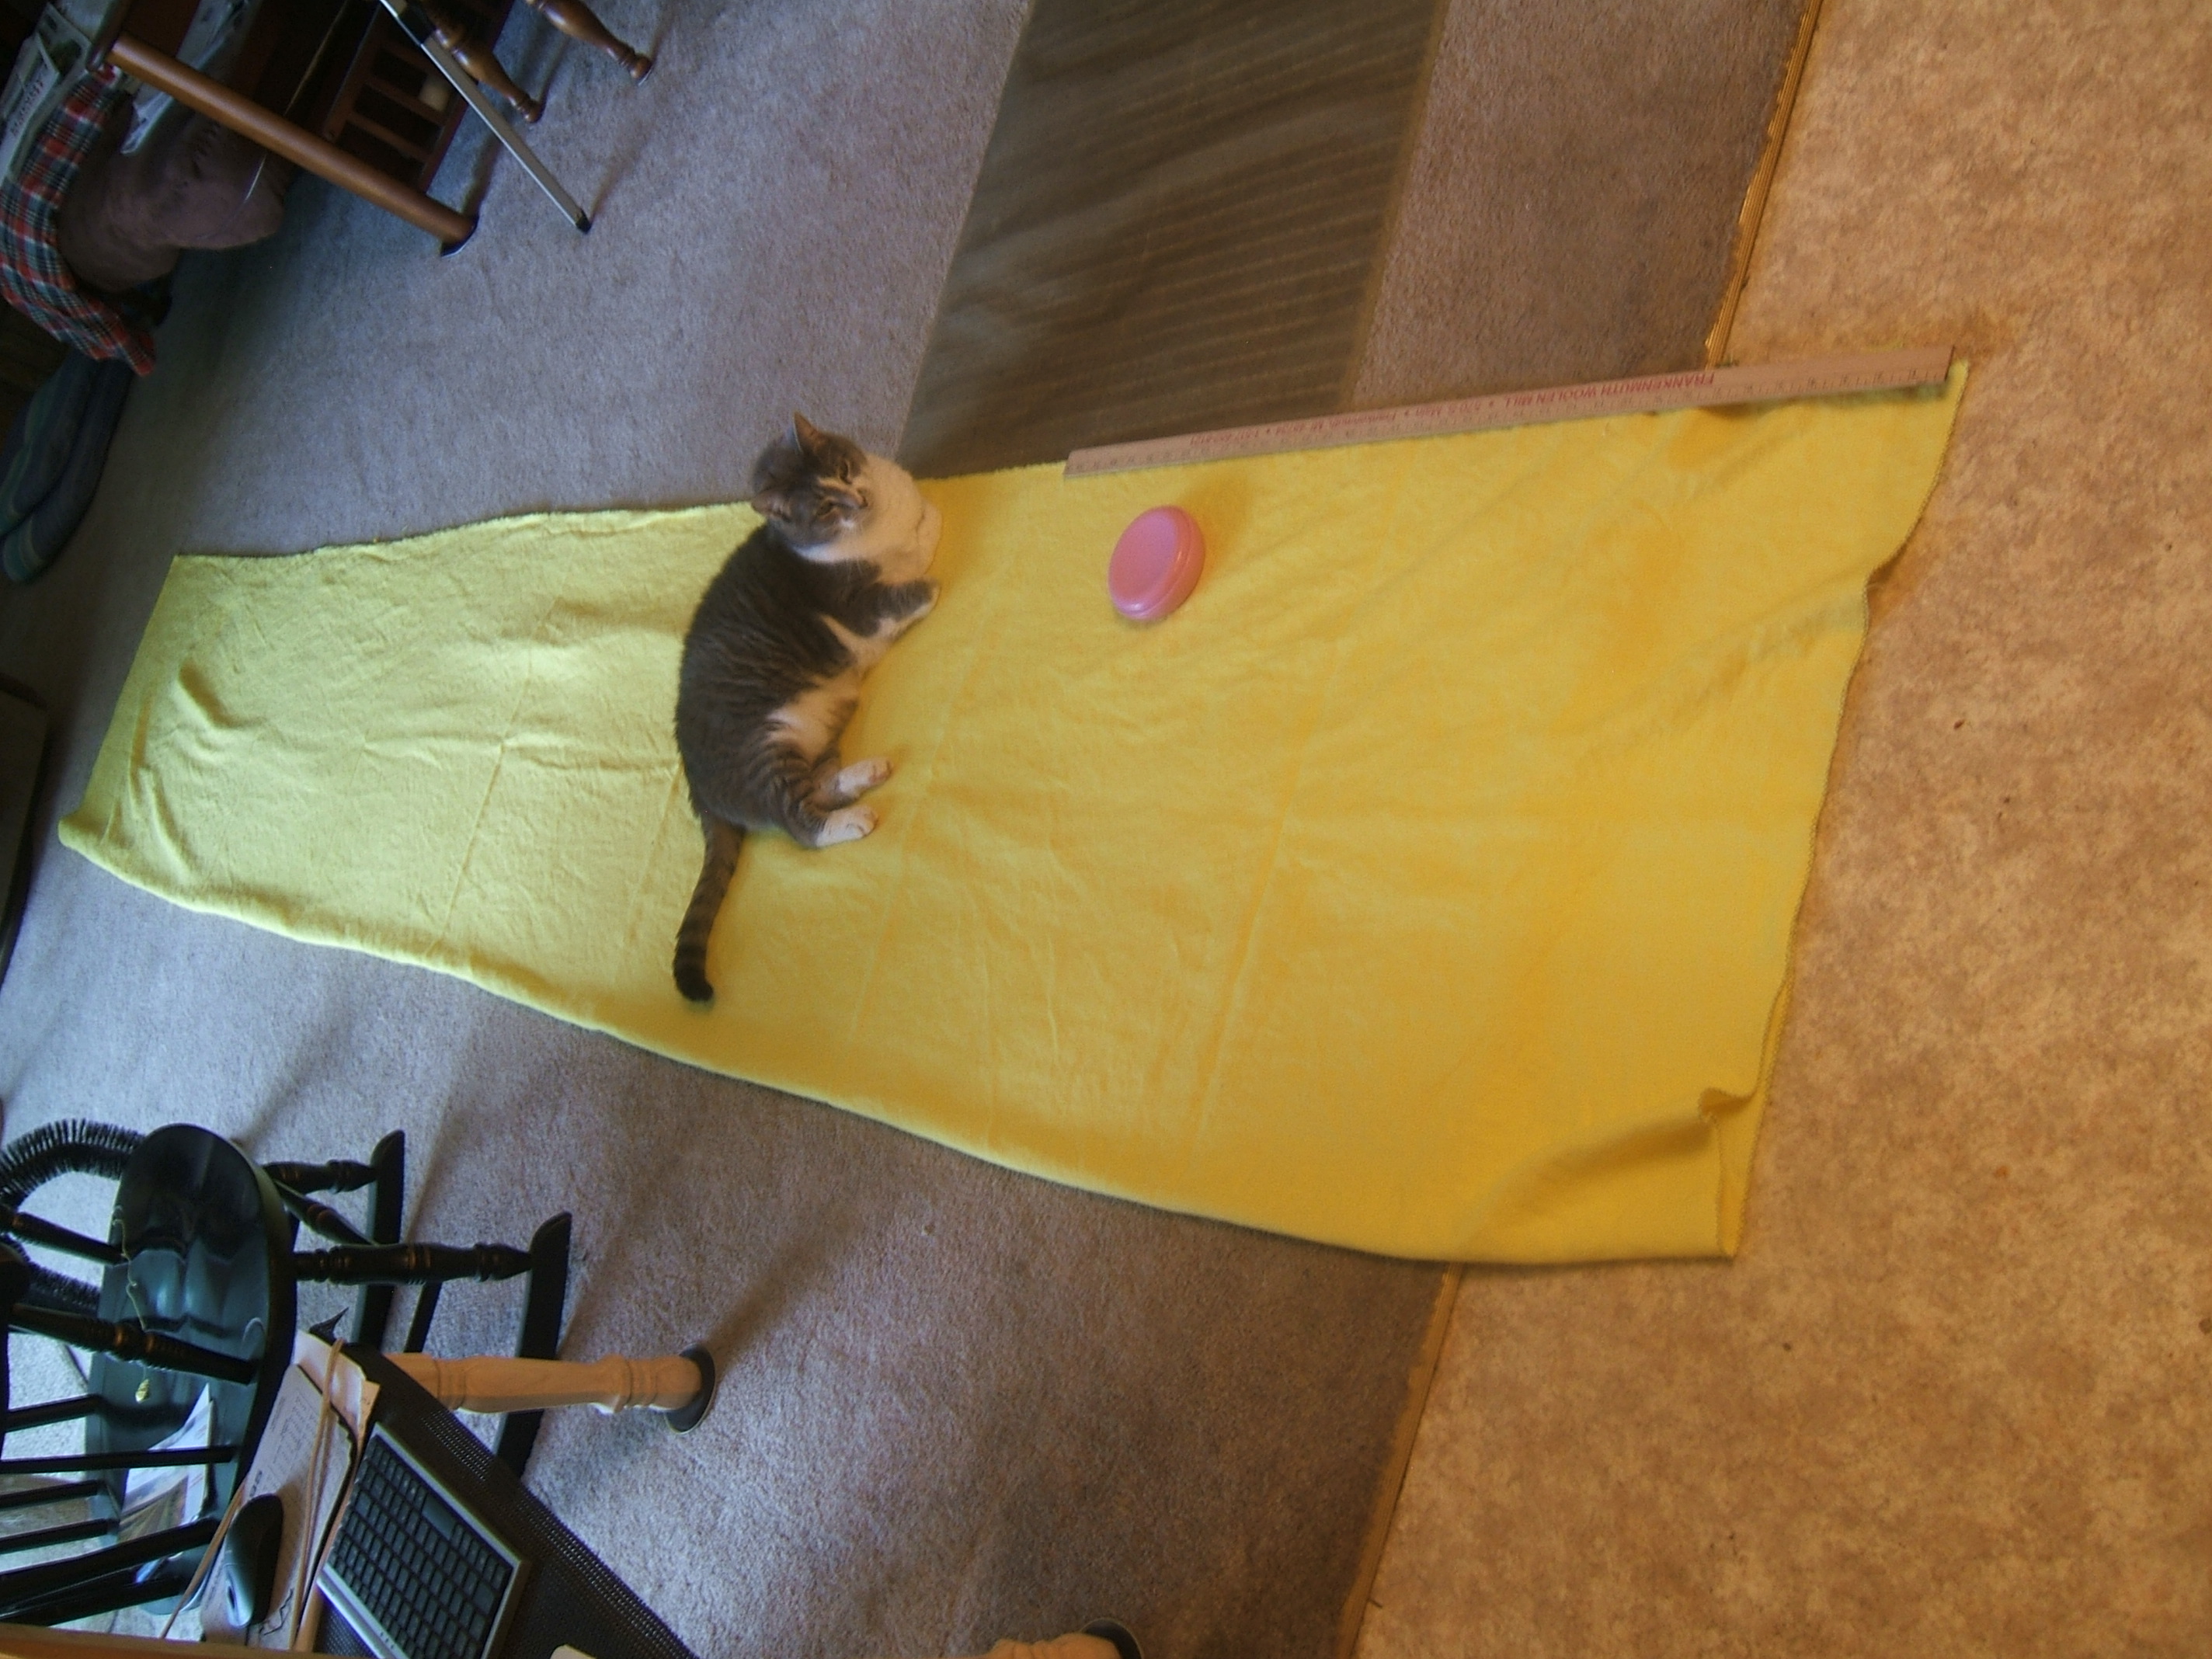
One selvage is four yards and elevem inches, the other is four yards and nine inches.
During the first measurement, I kept saying "how did I ever get along without wash-out markers. This time I used pins to mark off yards, because I didn't want confusion with marks made later. And pinning the sevages together made it possible to measure both at one time.
buy yellow linen to make new summer
jersey. I think that I can
scratch that off the list now.
⁂
I cut a ten by sixteen piece of the old mattress pad, rounded two corners, zig-zagged around it twice — worked out rather neatly, I thought — and pinned it to the arm of Dave's chair.
I had to fish the worn and filthy armrest cover out of the trash and measure it.
Before putting the mattress pad back into the stash closet, I marked where to cut to make another when it's time to wash this one.
It was hard to pin tightly enough at the back to keep the cover from sliding forward. I'm planning to thread a needle with string and use a surgeon's knot next time.
While changing the thread, I discovered that there was only a needleful of thread left on the last no-provenance bobbin, so I threaded it into the needle stuck into the cone of basting thread and put the bobbin into the bobbin box. Now I can resume using deprecated thread off spools!
While clearing the floor for Roomba, I found the missing leg board. There is a *lot* of sorting to be done in that corner.
Between loads of wash, I read the fabrics-store.com blog about box pleats. They made it complicated — and missed a point. In discussing inverted pleats, they said that inverted pleats don't do well in groups, but failed to notice that when box pleats are arranged side-by-side, you see box pleats and inverted pleats alternating. And when you turn it over, you see exactly the same thing, off by one. It isn't that inverted pleats don't do well in groups, it is that they don't group at all. Adjacent inverted pleats always have a box pleat between them, and the box pleat is going to dominate.
I presume it was in the interest of conciseness and not confusing the newbies that they failed to mention that knife pleats facing away from each other make a box pleat whether the folds underneath meet, overlap, or are spaced apart.
Given enough time — and a promise of pay! — I think I could re-write it to avoid saying "pleats are three layers thick" so many times without giving a clue that these many different things are just one thing applied many ways.
I wonder whether I've discussed the pleat (inverted or box doesn't matter) in the back of a shirt somewhere? I'm pretty sure that I've written a discussion of pleats in general, but I don't think this was included there.
It's easy and obvious. Spread the back of the shirt by the amount of ease you want to add. Mark the exact center of the top of the back. At assembly time, pin the ends and middle of the yoke-back seam, then adjust the pleat to use up the excess fabric. Helps to have a thin, narrow, pocket ruler to stick inside the folds.
One procedure will make a box pleat or an inverted pleat, depending on whether you pin it to the yoke or the yoke lining.
Writing what that procedure is will have to wait until I make something with one centered pleat, so I can be sure I'm not talking nonsense.
There are, of course two procedures: inverted on top and box on top. I suspect that one is not intrinsically easier than the other, but any given worker will feel that one is much easier.
⁂
When my bras were dry, I put them on the skirt hanger in the order of their labels: brown/1, red/2, orange/3, and yellow/4 are in the closet, and I'm wearing blue/6, so it's green/5 that is missing.
Which doesn't get me any forwarder in finding it. I'm sure I didn't take my bra off somewhere and come home without it!
This evening, I basted the turn-unders on the smock pockets I cut out a few days ago, just to say I'd touched a needle today.
And today I hemmed the pockets and basted the rest of the turn-unders, which I plan to press before appluquéing.
Tomorrow is Roomba day. So I'm sure to clear off the ironing board. I've got about three weeks of wash to iron, as well as pockets to press.
For the next pair of pockets, I plan to remember to press around the template for rounded corners instead of drawing around it and cutting.
I started to pick out the stitches holding the waistband to my pre-worn-out garden pants, with an eye to putting in a casing instead, so I don't have to fold the waistband down. Might use the left-over binding strips for a facing, but it turns out that the multiple rows of stitches on the waistband are chain stitches that unzip easily, so I may use part of the old waistband to make the facing.

I stopped as soon as I'd established that all the rows of stitching unzip, because I want to photograph the pockets for the essay on patch pockets, and the "stonewash" pants show more contrast than the dark brown pair.
I now see the logic in making the pockets too shallow to trust: the bottom of the pockets comes just to the fold of the hip; longer pockets are uncomfortable to sit in, if you are using them. And the pants do have a small but functional flap pocket on the left thigh, so valuables can be stashed.
Whatever, I rarely want anything in the pockets of my slopping-around pants except my knife, and a valet-parking key chain with a safety pin on one ring and the knife on the other keeps the knife with the pants. I'm trying to get into the habit of carrying my cell phone whenever I leave the house, but a pocket on my shirt is more convenient.
The linen remains neatly folded on the ironing board. I haven't even sorted out the pattern for the woven jersey.
My do-rag is getting worn spots. Perhaps I should make one to match my new jersey. (added to to-do list)
make arm covers for Dave's chair
Forgot to strike that when I did it. Only one cover made, and I need two, but the sight of the dirty cover is more likely to remind me than an entry on the to-do list.
Deleted a couple of items. One was to put pockets in sweat pants that are no longer around, and I've already forgotten the other.
Ripped the waistband off my "stonewash" slopping pants this morning. Ironing board is up again, and there is nothing on it that doesn't need to be ironed. Spending all day tomorrow on the bike.
I think I had more hair when I made my white linen do-rag. Luckily, Dave still has a do-rag made from each of my patterns, so I can try them on. I'm seriously considering one to match my new woven jersey. Which will take all summer, but I think my sheer, patched-up jersey will hold out.
Caught up on the ironing, pressed the pockets I made for one of my slopping shirts, and dry-ironed the body of the gauze-lined linen gown. After trying to make the underlining line up with the linen, I decided that I'm going to have to hem them separately, and that means unpicking two seams twice the width of the hem, and when I made the flat-felled seams, I cleverly wrapped the gauze around the linen instead of turning the linen under — and, as always, I didn't use the longest stitch that was short enough.
Because of the softness of the gauze, the roughness of the linen, and the smallness of the stitches, it's nearly impossible to cut a stitch on the surface and I have to separate the layers and pick at the stitches between them, but I do have one seam opened nearly far enough.
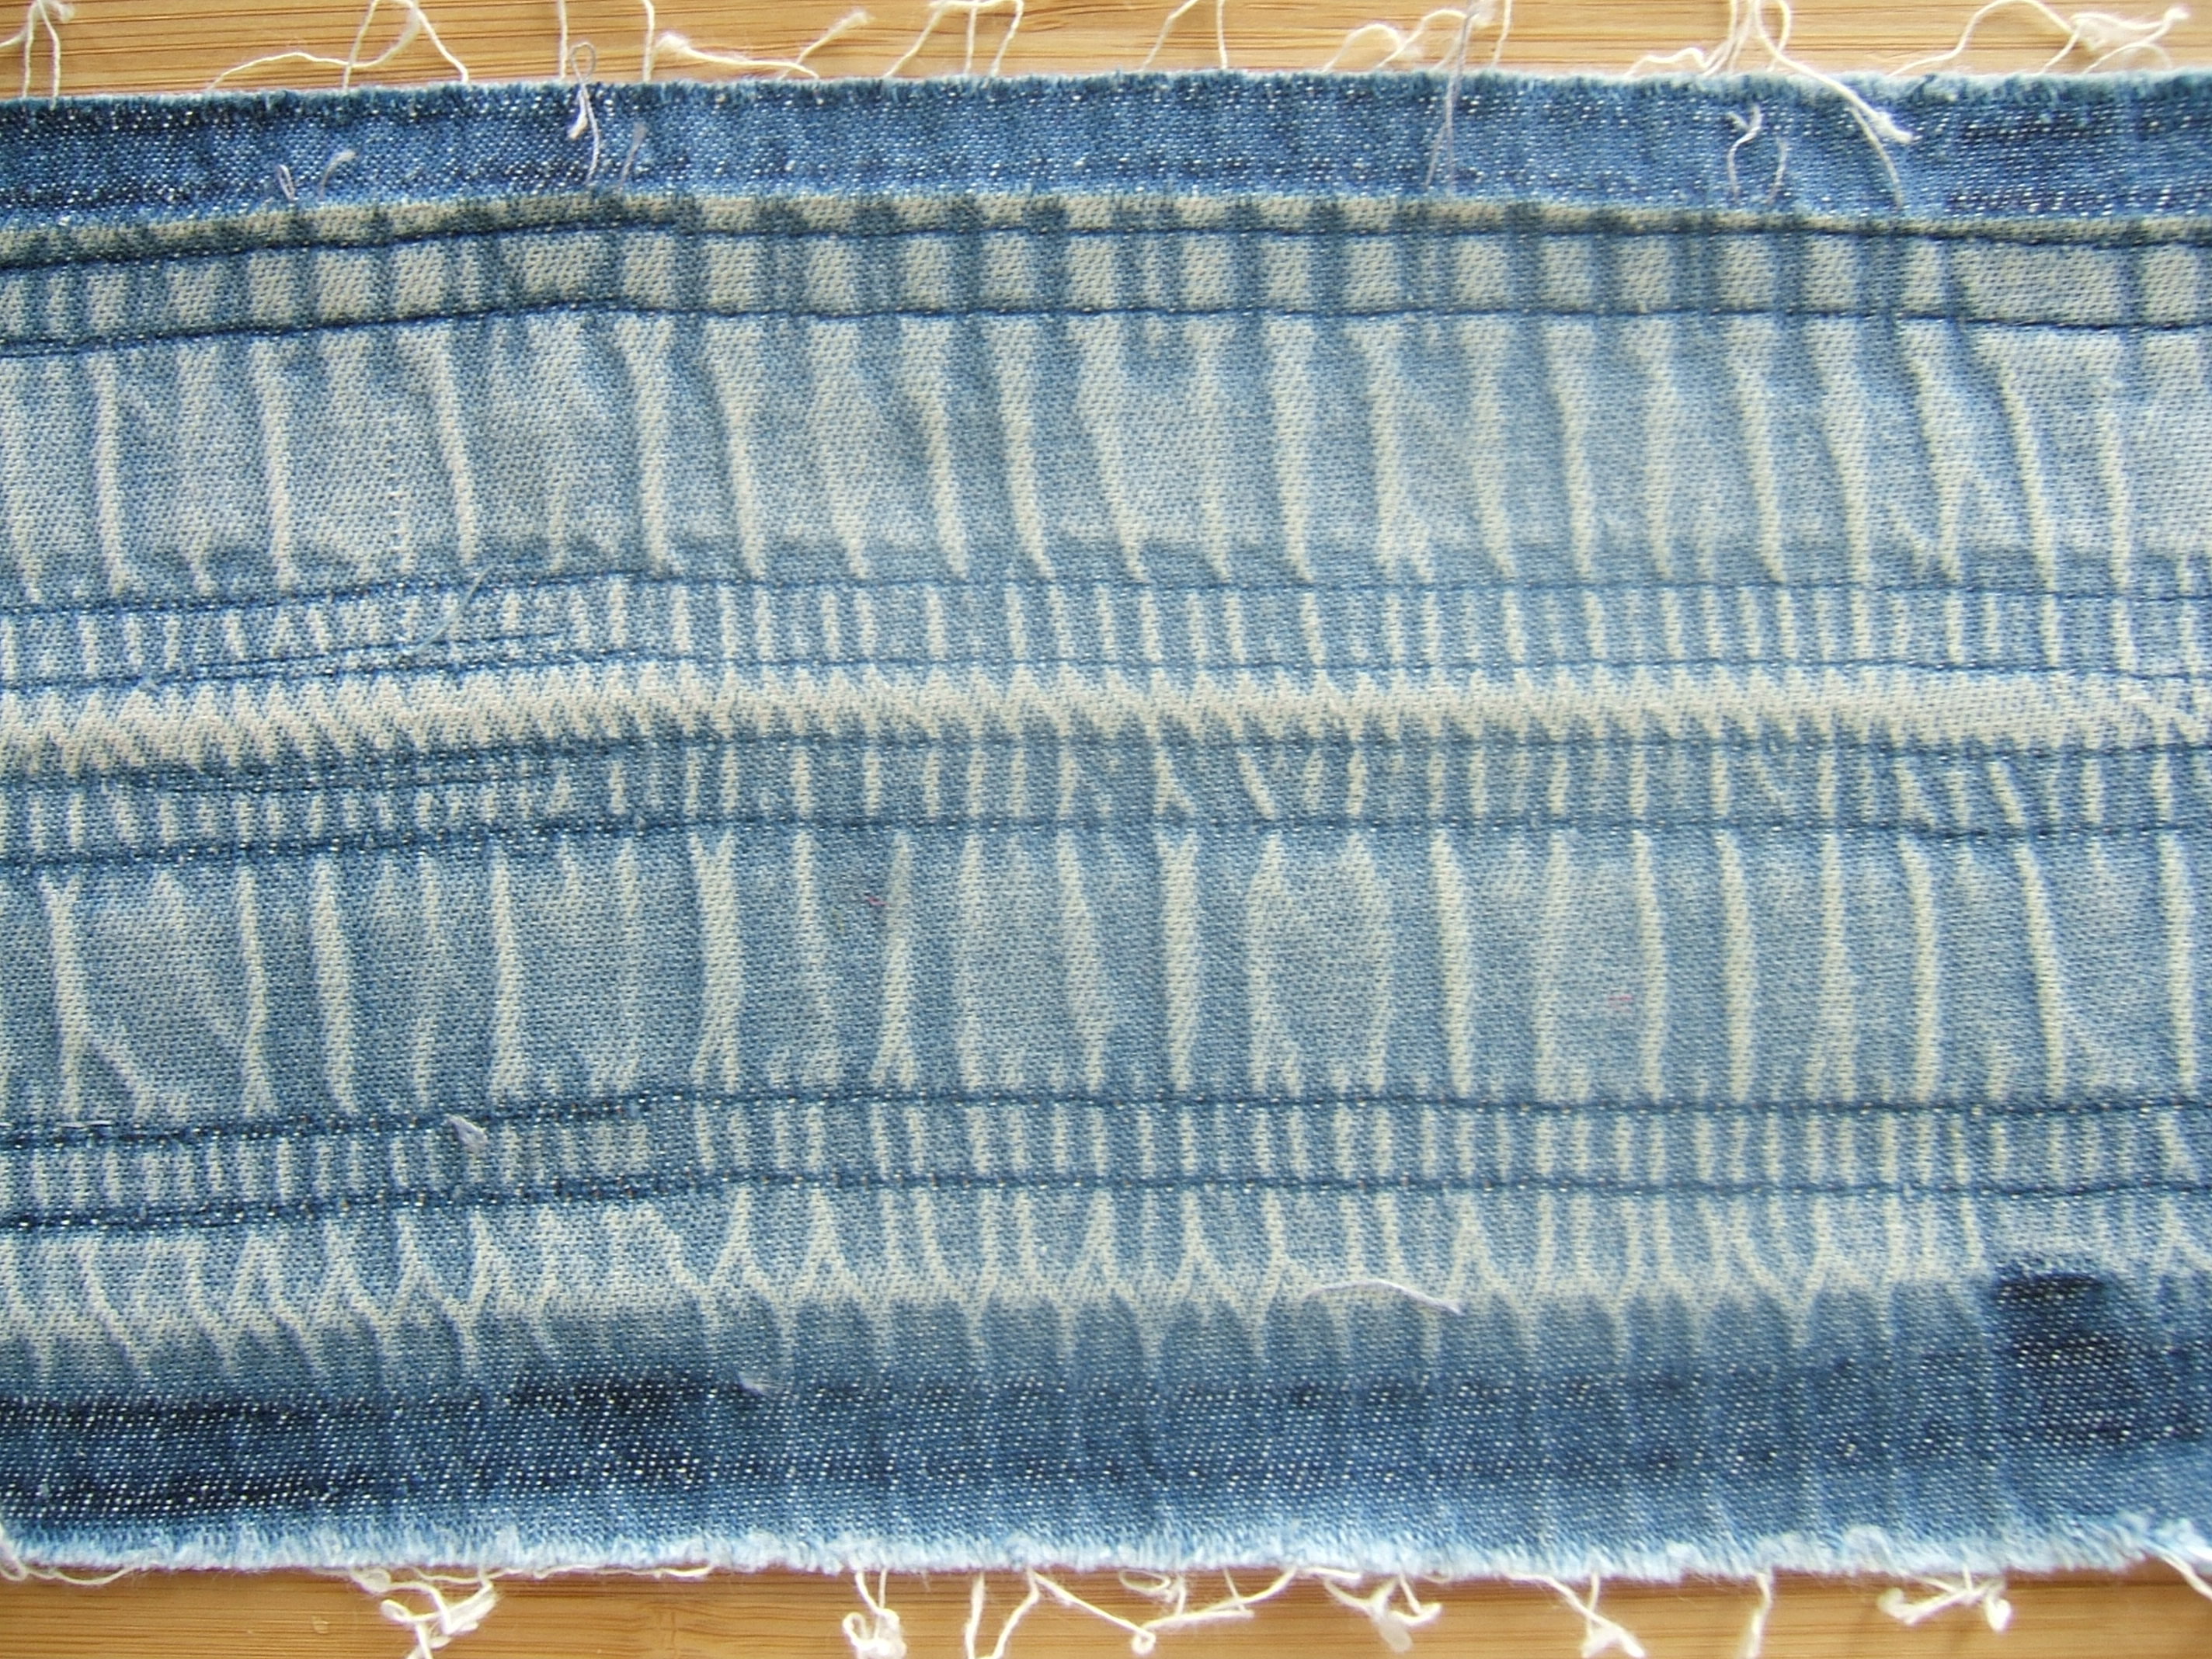
Also pressed my stonewashed pants and the waistband I picked off them. I was disappointed that the pattern on the waistband isn't nearly as cool in the photograph as it is in person. My first idea when pressing the pleats out revealed the pattern was to turn the facing to the outside, but the gathering when I put elastic in the casing would conceal it — and I always wear my T-shirts hanging out.
The fabric is as soft as my muslin, and not all that heavy, but I think I'll use the left-over binding strips to make the facing anyway. For one thing, they are already torn to the correct width and already have one edge pressed under. And I suspect that the grain of the waistband isn't perfectly straight.
Yesterday I cut out two more pockets and basted the turn-under for the hem. Probably wouldn't have if this computer hadn't been busy defragging all day. I drew around the template again.
⁂
This evening, I hemmed the pockets and basted the turn-unders. Need to be pressed and attached.
I can't strike "tighten elastic in right knee of bike knickers" off the list because it wasn't on it. I think I deleted it last summer when I noticed that the loose knee dragged less than the other, but it's the other way around this year, so I opened the casing, cut the knot off, re-tied it, took a ride on the flatfoot, cut the new knot off and retied, took another ride, and mended the casing. The knickers need washing in the worst way. Well, not the *worst* way.
Job was made easier because I'd basted the turn-under at the opening with contrasting thread and left it in. Easy to find the stitches to be taken out, no disarranging the turn-under when fidding with the elastic. After picking out the worn-in stitches, I vowed to replace them with three-millimeter stitches, but used the White and I've never figured out the relationship between the marks on the machine and the length of the stitches. When it's set on "7", the stitches are five to the inch, which is a bit longer than the four-millimeter maximum length on the Necchi. So I just shoved the lever up a bit.
I meant, having opened the machine, to sew the binding strips I'd pinned to my stonewash-color slopping pants earlier in the day, but something or the other distracted me.
Didn't do any gardening today either. Did ride to Owen's and buy lemons and yogurt for Saturday's party. And took more than two laps on the Flatfoot.
Continue to Part Two of 2018
Back to Part One of 2017
Back to Part One of 2016
Back to Part One of 2015
Back to Table of Contents
Back to cover page, which has a list of my
other sites