That was clever of me.
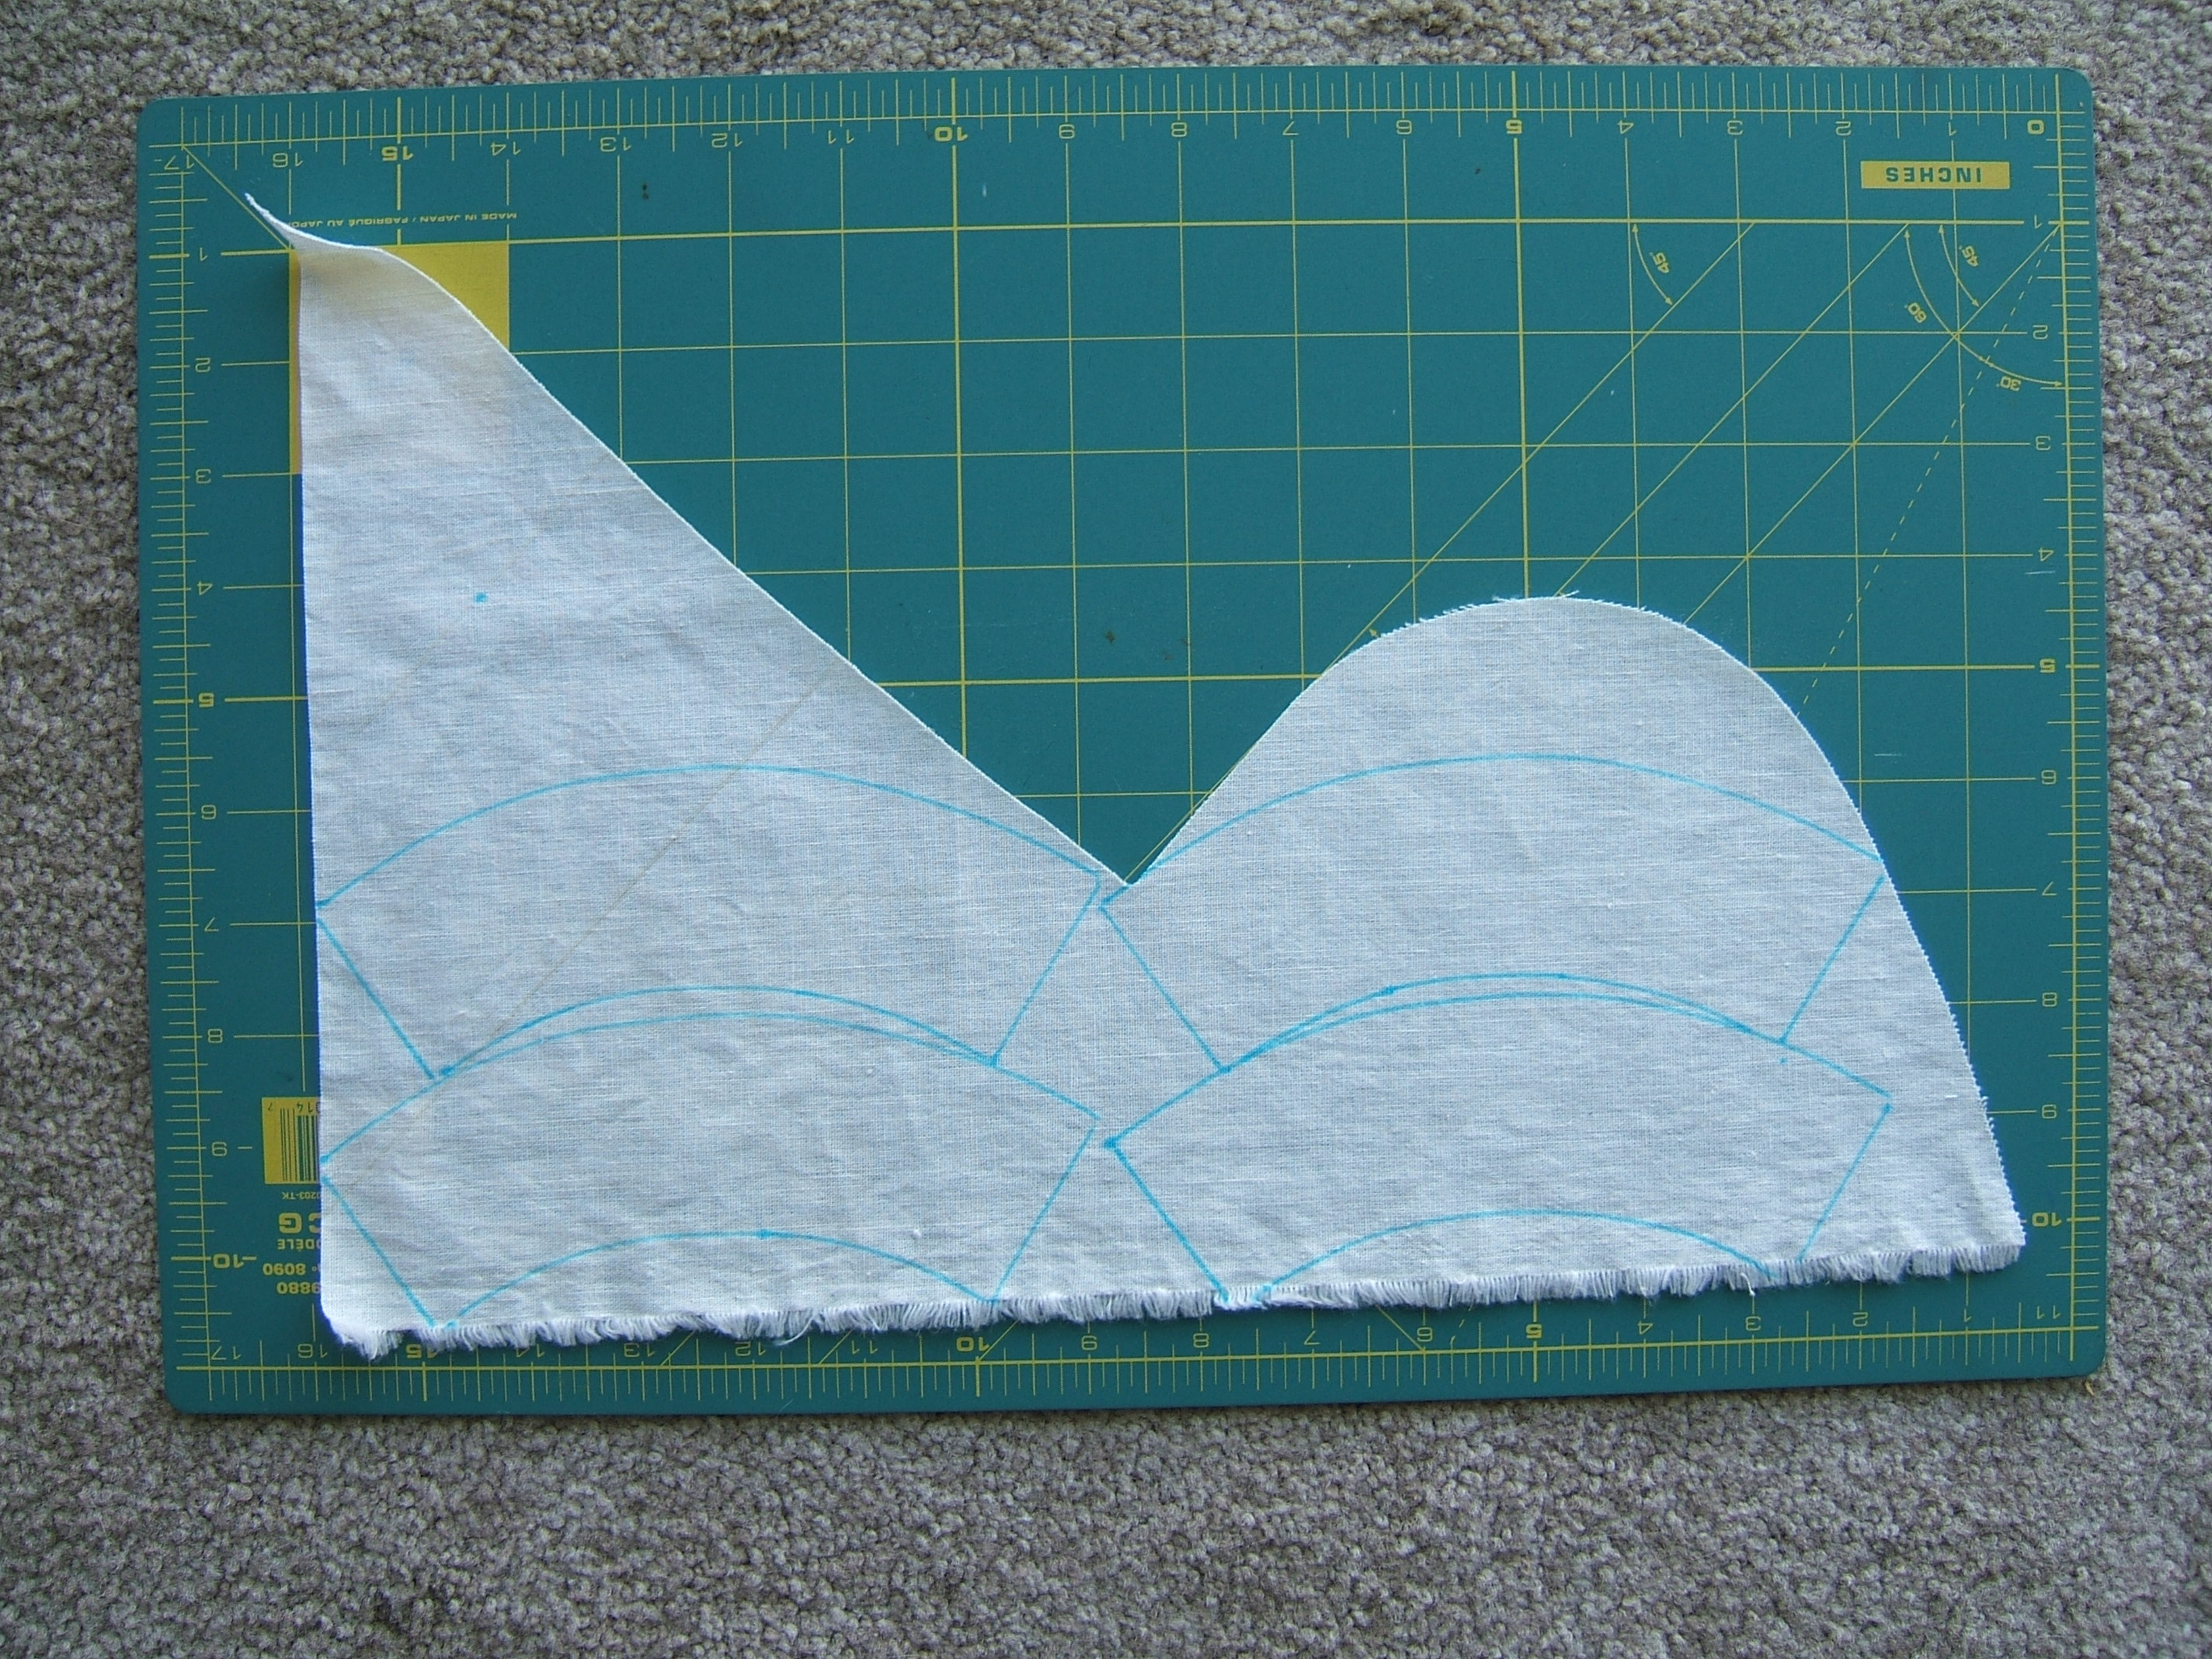
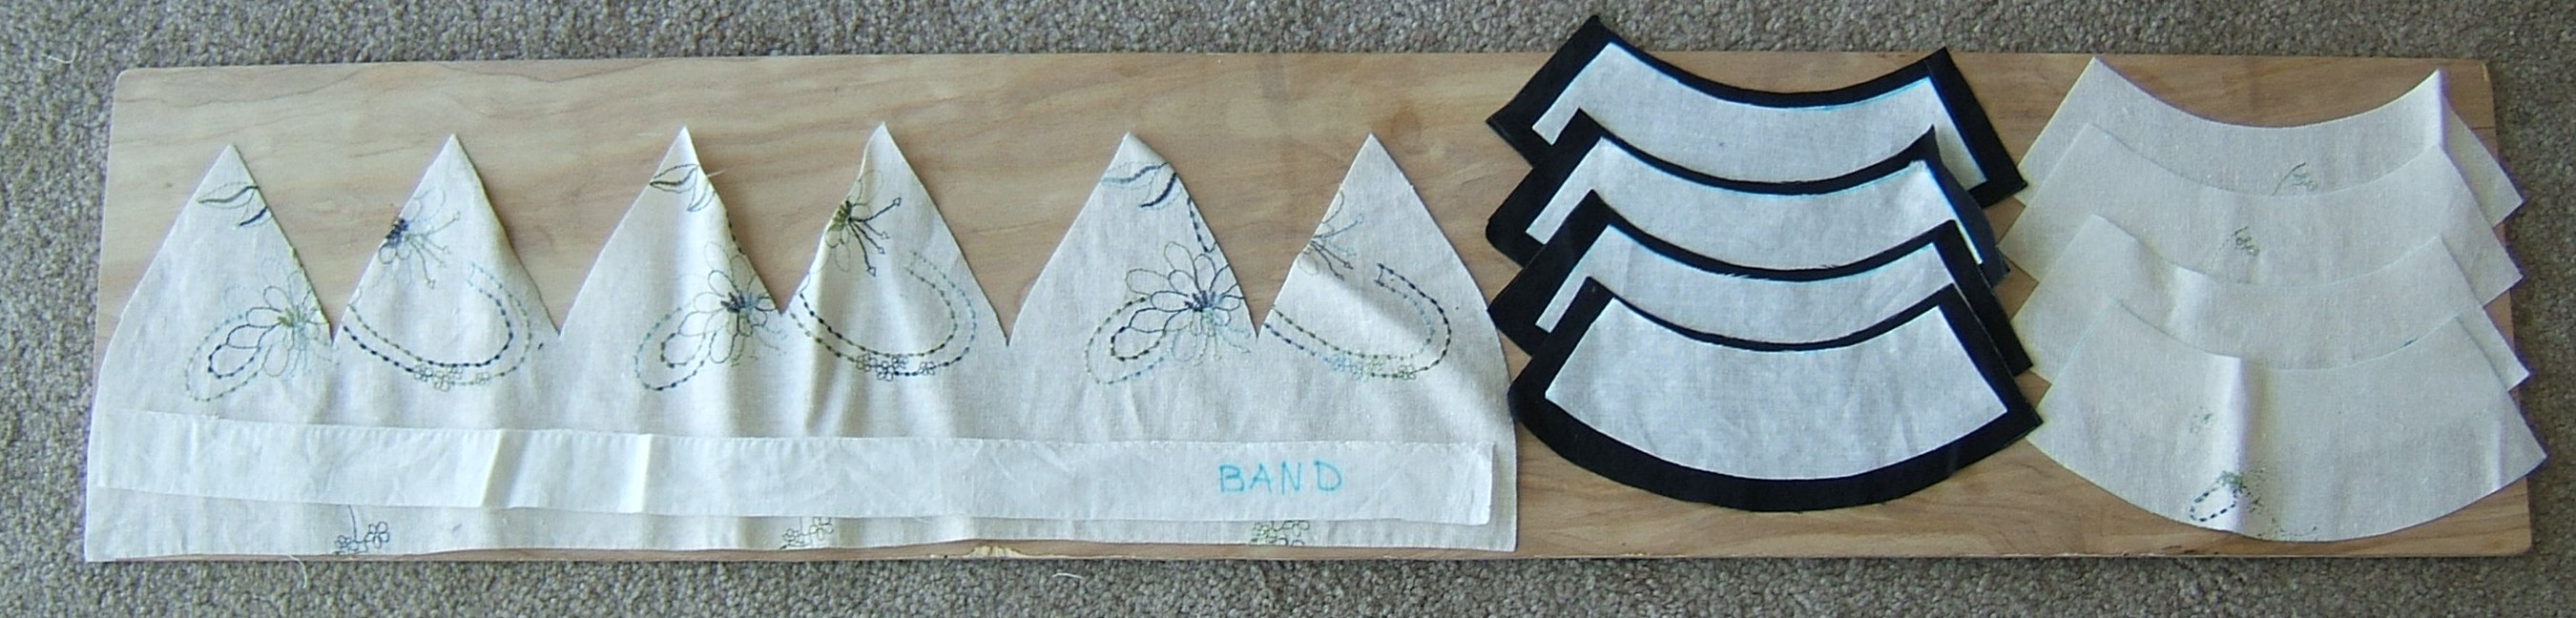
I'm finally cutting out slippers from the villa-olive scraps. I had drawn lines and dotted flower centers to mark the grain, but on one scrap, I'd used a long thread instead of a wash-out marker, taking a tiny stitch into each flower center with long floats between. This was useful when I cut a sole and a heel from that scrap.
Next up: where did I put the banana wool for the midsoles?
Actually next up was cutting four vamps, as I learned when I returned to the kitchen with a pile of banana-colored wool scraps. But I'd already selected the scraps to cut them from, so that didn't take long. Nor did finding two scraps suitable for midsoles.
I cut the vamps with the long grain running crosswise; I cut all others with the long grain running fore and aft.
Instead of quilting the midsoles to the insoles, I ran a line of zig-zag down the middle to hold them still while I zig-zagged around the edges. Now the insoles and outsoles are carefully aligned and amply pinned; the opening chore today is to cut some elastic and make uppers.
Oops: checking the elastic notes, I find that I didn't mark the patterns for the vamp and heel pieces for the black interlock. Easily remedied, since the date was on the sole pieces, and while I had the pencil in hand, I marked the cutting done yesterday. I added a quarter inch to each end of the right heel. (Is there a technical term for the back end of an upper?)
[looks up "vamp" in Wikipedia. No data on the non-vamp part of the upper, but I learned the useful terms "medial" and "lateral". Article needs some copy-editing, but I had a traumatic experience the first time I tried to correct a typo on a Wikipedia page, and I'll never click "edit" again.] [Harrumph! Wiki says that a style that looks exactly like what I wore for gym class in the forties wasn't introduced until the seventies! It does say that one pricey brand of it started in 1917, but doesn't say that the style had long been the cheapest available shoe when fashionable shoes began to imitate it.]
Whatever the right name of the "heel piece" is, I cut the right one a quarter inch longer on each end.
The right shoe of the previous pair falls off a lot, so I'm cutting 9 1/2" elastic for both slippers. I think that cutting the slippers with the cross grain of the vamps running crosswise is a bigger factor in the falling off than the length of the elastic.
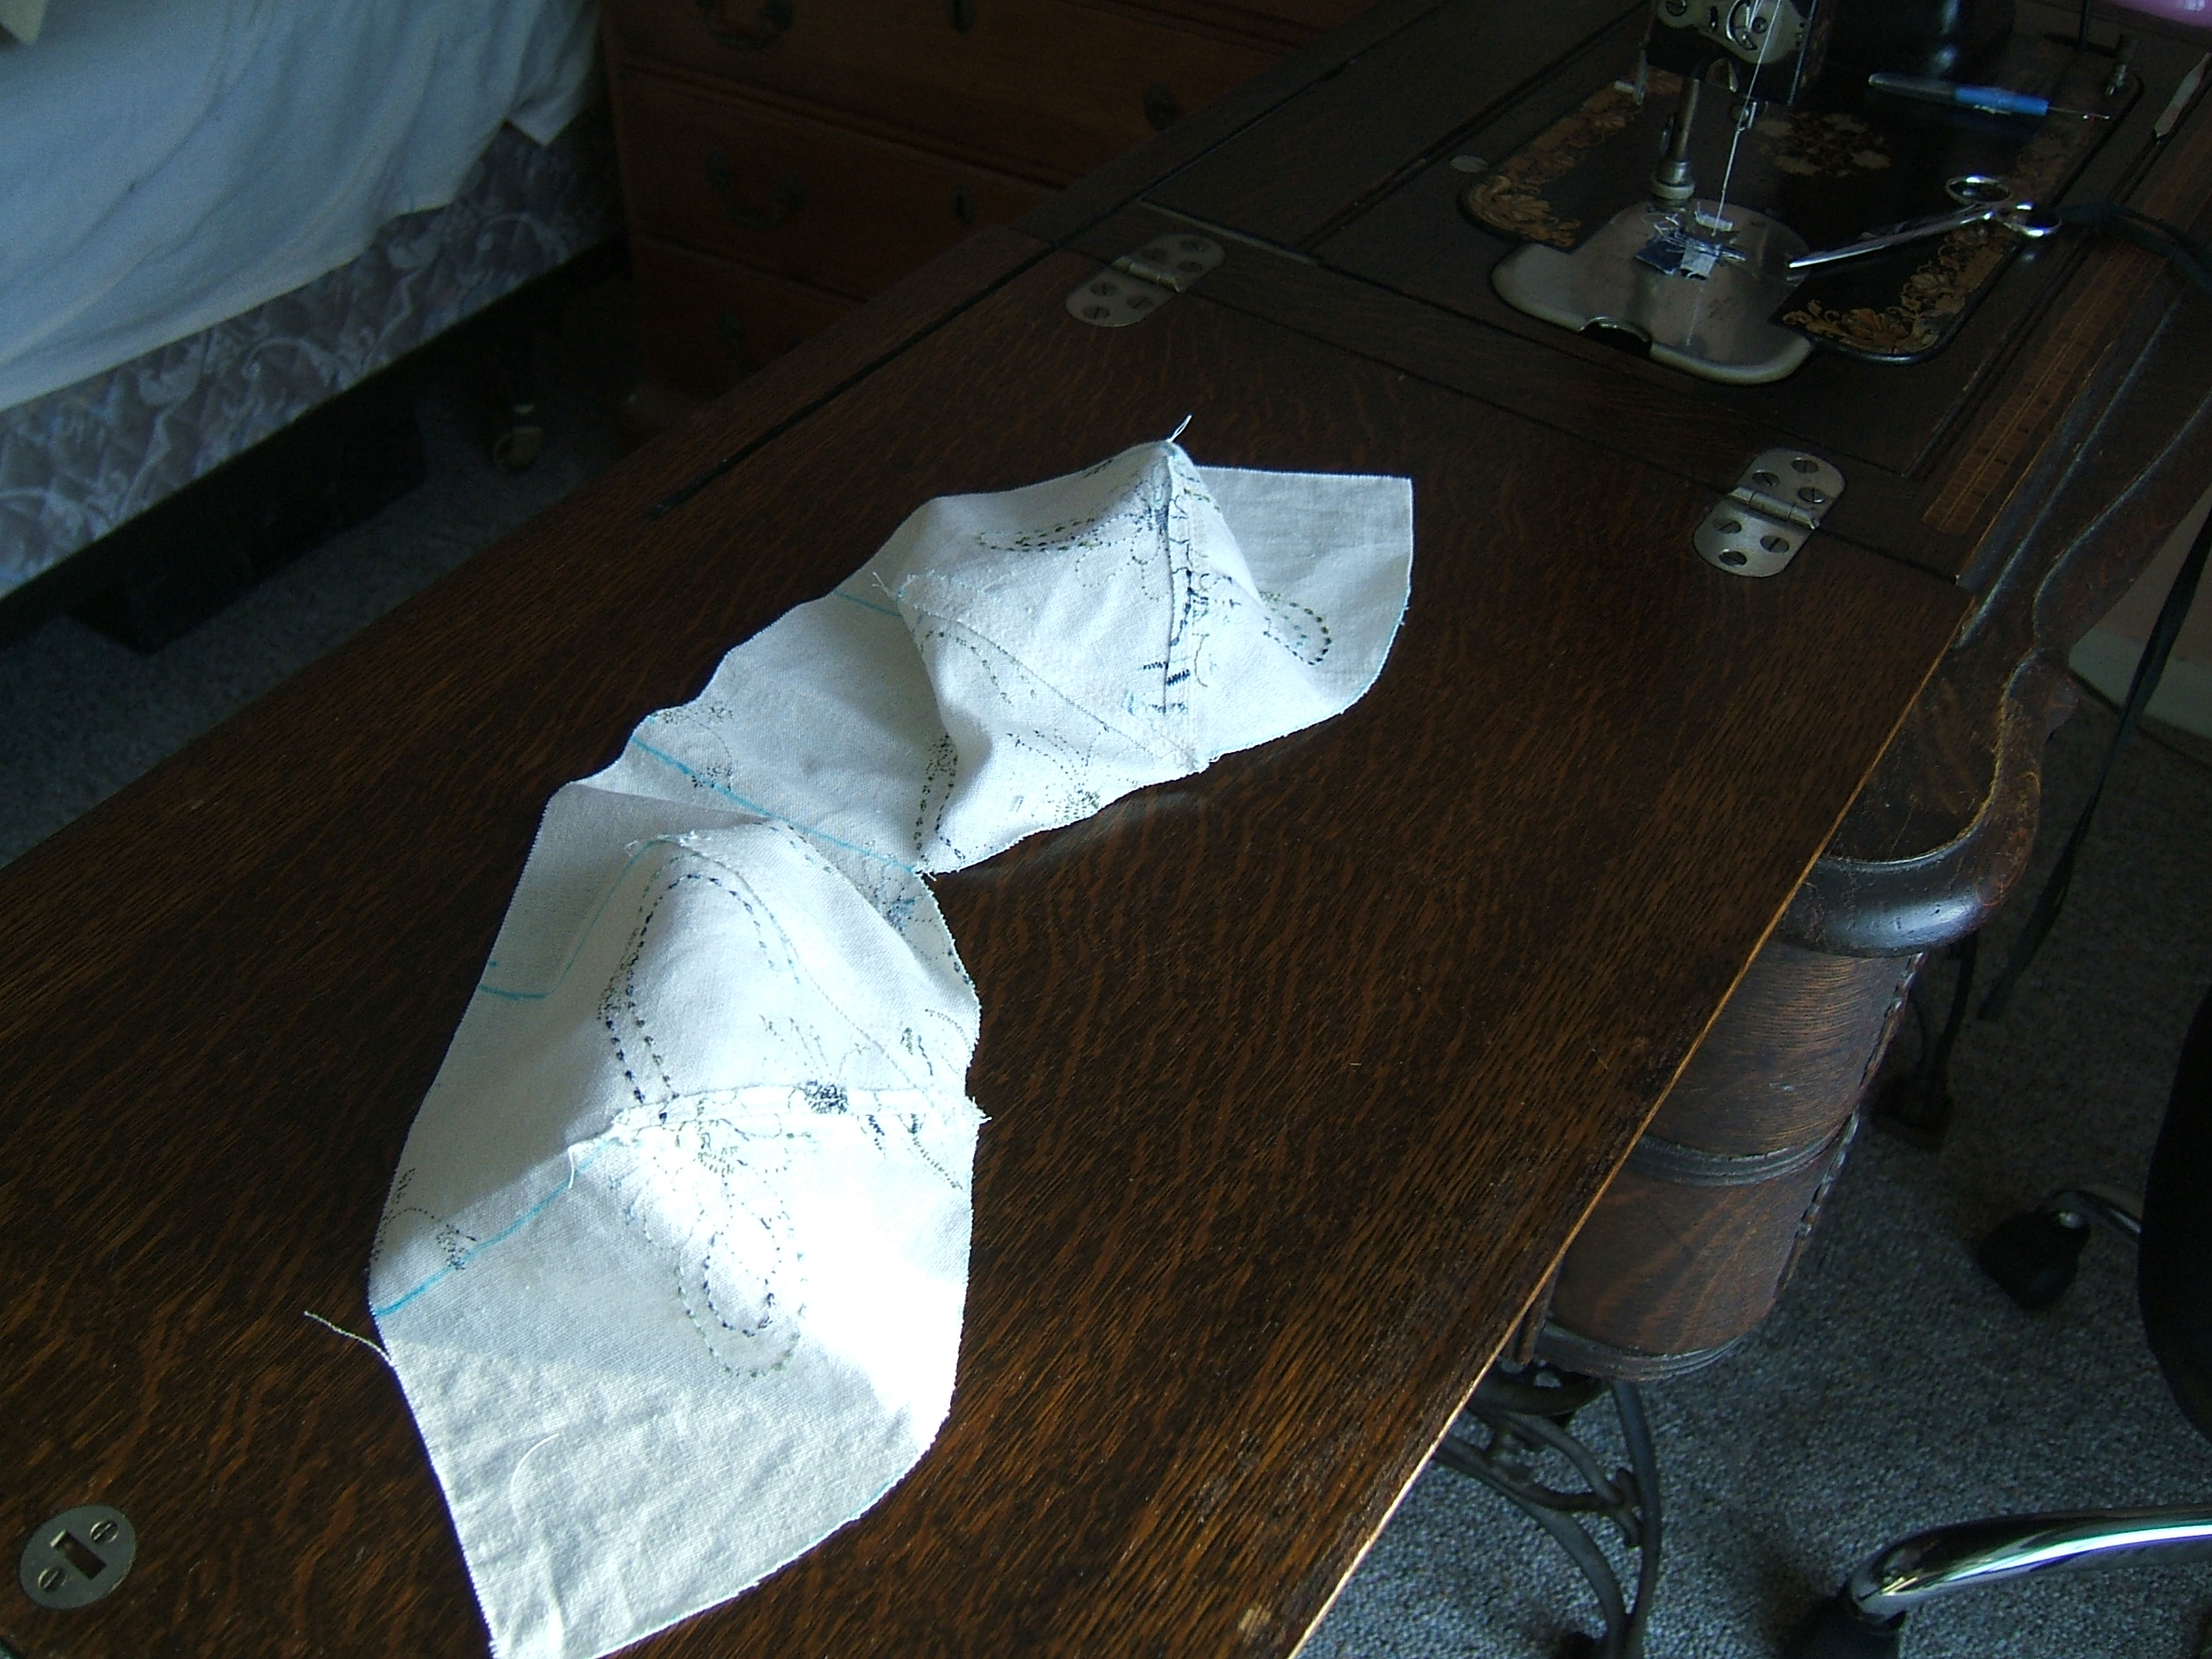
Just had a panicky moment when I remembered that I'd carefully made inside and outside versions of the vamp pieces, but paid no attention to making the assymmetrical vamps right and left. Duh! They are reversible; I make two identical vamps and turn one of them over. But I've got to make sure each vamp is the correct way up when I sew them to the right and left heel pieces.
In my next incarnation, both feet are going to be the same size.
I thought that making a bar tack would be easier than sewing back and forth to secure the ends of the elastic, and it was, but I don't think it works as well. I'll revert to the old method when I make the left upper.
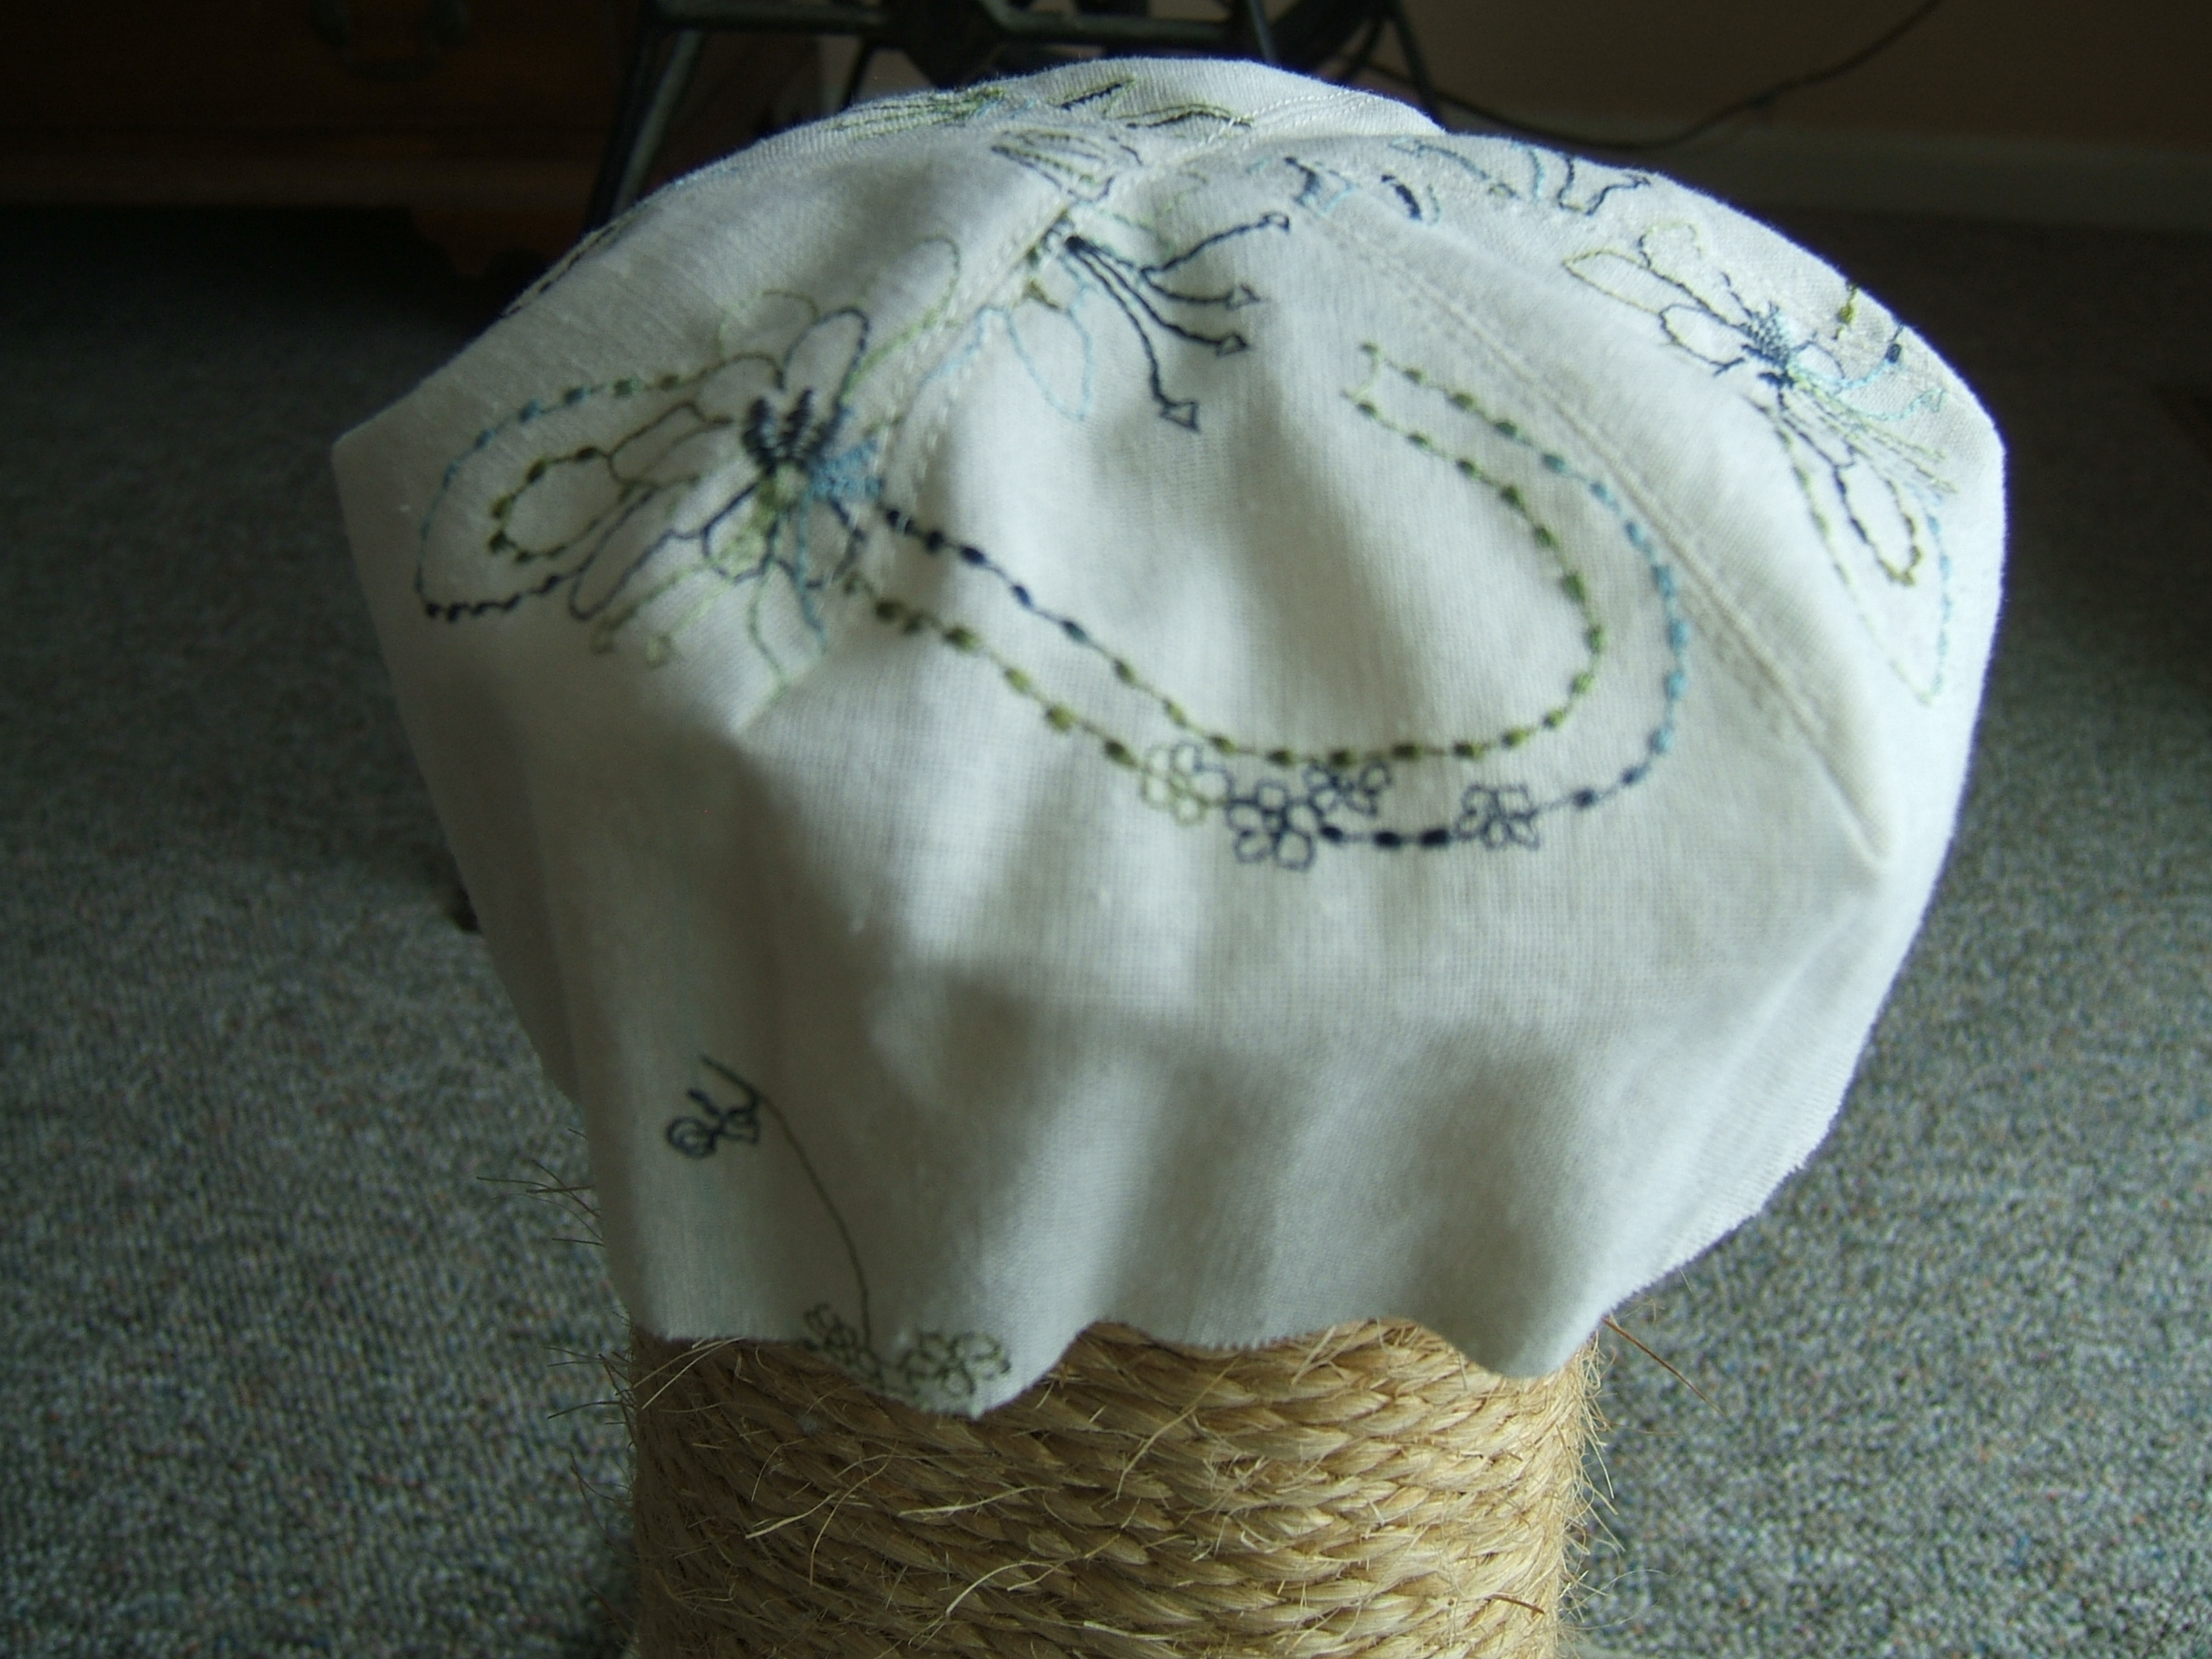
Right slipper all done; could use a bath because some of the blue marks show through. It isn't as nice as the wool slippers, but I think I'll wear these slippers the next time I wear one of my villa-olive dresses.
I was rather surprised that the purple line from cutting the heel piece a quarter inch longer still showed; air-erasable marks often fade away while I am still using them. It is, of course, on a concealed raw edge — and wouldn't be visible from eye-to-floor height if it did show.
I did have trouble getting the marker to mark, and went over the line several times.
And now it's nap time.
Up until the last seam of the second slipper, I used the built-in thread cutter and grabber of the sewing machine instead of stitching onto and off of a scrap. This didn't work as well, but not so badly that I'd get up and find a scrap.
Stitched across the end of the elastic; still lumpy. Then the dime dropped and I turned zig-zag off before stitching the other end.
Easing at the toe was altogether too easy; I think I have been stretching the sole too much at the back of the slipper. Indeed, the upper ought to be stretched ever so slightly behind the vamp seam.
Last night, while chilling my feet despite wearing my new insulated slippers, I thought that I should have cut four midsoles for the Villa Olive slippers instead of two.
This morning, after stepping out into the snow to dump the coffee grounds while wearing sandals over my black slippers, I shook the slippers — and noticed that the right slipper is already worn into holes. The twinkle-twinkle slippers are doing fine despite being older and being worn more often.
I think that I should gather up those black scraps and throw them away.
not- All finished, and in the
pocket of my long-sleeved villa-olive dress.
I was planning to remove only the "not" from "make
not-black slippers" before I learned that my new
black slippers are worn out. "Make black
slippers" will stay on the list until I find black
wool interlock, or decide to experiment with woven
wool cut on the bias.
examine DH's tan slacks to see why they
are on the mending hook That
didn't take long. All they need is new
hems, and they no longer fit. I hung them
at the back of his closet in case they fit again
some day.
While I'm looking at the mending hook — that piece of challis I bought to make a scarf can go into the stash of wool fabric; I don't like the print and I have a nicer scarf. The wool shorts can go into the closet under "winter"; I wear linen knickers in hot weather these days, and there is a bold pink tag on them saying they need repair. Some fall I might patch them up to wear under tights that I might want to peel off.
That leaves tights that need darning, and a pair of linen pants I won't need until summer and don't like very much. Now there is room for the shirt that needs to have its sleeves lengthened, and two pieces of ironing.
And that left only four pairs of pants in the hallway. The blue pair is preserved only as a patch donor — I have a shirt and a hat made of the same fabric — so I moved it into the stash.
Which is getting really crowded; I should sort out the fabrics I'll never use and give them to Jeanie for her theater costumes.
The two wool pairs — darning all those moth holes isn't honestly possible. Back to the closet to be worn only under long skirts.
Which leaves in the hallway only the gray pair of pants. On one hand, they only need a crotch patch [Mending, search for "One way to patch the crotch in pants" (hoohah does this file need work!)], on the other I don't like them at all. They can just hang there until I need to wear them.
Now back to selecting my next project:
It's time for lunch.
I suppose I could catch up on the ironing today. It's only two shirts.
Next up: alpaca shawl, so I can wear it next Sunday. The missing button is in my jewel box. I don't have a matching yarn to graft the hole with, but it's a very small hole; I think that darning silk thread through the stitches on the back should do.
First: find a thread strong enough to hold the button on that wouldn't cut through the hand knitting. The button had been originally attached with a narrow strip of thin brown leather. I didn't think of cutting a strip from my scrap of black leather — and it's too thick, so I wouldn't have done it anyway.
I found a package of darning yarns and selected a gray persian. The gray didn't match either the buttons or the shawl, but it harmonized. I used all three strands.
False starts suppressed, I cut a short length and used sewing thread to pull the ends through the holes in the button. I took a threaded needle from the bottom of the paper-maché cone of basting thread (which hangs upside-down in the window, providing a handy place to stick old machine needles and needles used for hand basting), used the needle to poke a loop through the hole in the button, and stuck the end of the yarn through the loop.
Then I used a crochet hook to pull the persian through the knitting without piercing the yarn, and tied the ends together in a square knot.
In the process I noticed that the button above the bottom button that I had just replaced was still attached only because the leather adhered to the button, so I broke that off and attached it the same way.
Before beginning work, I noticed that the leather strip on the top button had worked loose; pulling gently on the end in an attempt to tighten it broke it. But the strip was long enough that I could simply shift it a bit and tie a new knot.
Well, I complicatedly shifted it; I used the toothpick on one of my "fine flossers" as a fid.
I settled on duplicate-stitching the hole with gray buttonhole twist, reasoning that since it was thin, it wouldn't show much. It doesn't, but the spot looks dirty. But it won't unravel, and now I can wear the shawl.
When I tried it on to check the darn in the mirror, I discovered another broken yarn in the middle of the back. I can put off darning that until I've regenerated some mental energy and still get the job done by Sunday. I think I'll use white buttonhole twist.
Didn't darn the shawl, but I did get some sewing done. In the evening, DH was looking on the Web for a dam to lay beside the truck to keep melting snow where it belonged, and said "Hey, we can make these!"
So I tore an eleven-inch strip off one selvage of a dirty old sheet and sewed the two long edges together. Tomorrow he'll fill it with ground corncobs.
I opened up the treadle, thinking that whatever thread was on it would do, but it wasn't threaded. I put in a bobbin of white 100/6, saw the spool of ecru 100/6 on the Necchi (from making the Villa Olive slippers), jumped to a contusion, and got out a spool of beige basting thread because I didn't want to unthread the Necchi. I used the White's longest stitch, which is longer than the Necchi's longest. Um, 5 per inch vs. 4 mm . . . an inch is 25.4 mm — the White does 5 mm stitches.
Now I need to locate the white 100/6 and the black upholstery thread. But DH is asleep next to the White, so I can't go rummaging through its drawers.
Both are in the top left drawer of the White, as I expected.
I made another snow-melt dam yesterday evening. DH has yet to fill it with ground corncobs: the first one dried enough to put back and we haven't taken the car out since.
There has been much less melted snow on the garage floor after DH brought the big squirrel-cage fan in from the barn. There's just one spot where I have to be careful when going out there in my cloth slippers.
My reason for using long stitches is that the sheet I used to make the dams was worn clear out; I had to tear a hole out of the strip I tore yesterday, and sew the strip back together. A large stitch takes a bigger bite of the fabric, so it takes a harder pull to tear it.
I left all seam allowances on the outside. That makes it easier to stuff, and the ragged edges provide more surface for absorbing and evaporating.
I had to wear my second-best shawl to church yesterday, but I did bake bread and go shopping on the days that I meant to darn the alpaca shawl. Probably won't do it between loads of wash today, either. I'm short of spoons this morning, in the afternoon I plan to make Associated Press five-spice pork bolognese sauce for spaghetti, and after supper the light is artificial.
Laundry wasn't quite all the fabric work I did today: I tore a few sub-par sweat rags into skillet wipes.
Five-spice powder does less than nothing for pork.
refurbish alpaca shawl
The white buttonhole twist is, indeed, much less conspicuous than the gray buttonhole twist. I'm not about to pick out the other darn and do it over!
Next, I think, the ironing. More complex than it looks, because the ironing board is piled high with minuscule chores that aren't on my priority list.
A case in point: there was a pile of stuff that needed to be put back on the top shelf. So I fetched the step stool. Whereupon I saw that the newspapers protecting the floor from the iron kettle that I store under the step stool were intolerably messy. So I gathered them together and put them into the recycling bin. Whereupon I saw that the cupboard floor was in dire need of sweeping. So I had to move out the rack holding the stash of paper towels, and the glass light-fixture cover that we stashed under it one day when we didn't want to put it back up. When the floor was swept, I needed to empty the dustpan, and that meant sweeping a path through the snow that fell last night (Either that or put my boots back on!) At five degrees, the fluffy snow swept quite well.
Fresh newspaper fetched and everything but the step stool back in the cupboard, I did get the piles of knits put away. While I'm up here, perhaps I should put the hemp blend jersey with the PFD jersey, since I plan to use them together. No, bring the hemp down and run it through the washer a few times. Perhaps "zig-zag hemp blend" is next on my to-do list.
The ironing board still isn't cleared, but I cut out a pair of briefs today, plus an extra back. I meant also to cut an extra third piece, but I goofed and spoiled the scrap. Threw out a lot of small no-provenance scraps of black knit. I don't plan to cut a third-piece lining until I've re-washed the hemp-blend scraps.
Jersey doesn't need to be zig-zagged before washing.
Found a spot in Edge Finishes that needs a minor correction while composing a post to the Creative Machine mailing list.
Ended up doing some major copy-editing. I don't think anyone reading before and after will notice anything, though.
Didn't even think about any useful work today. Took a good long walk, though.
Must have been sleepy tonight. I added a lot of non-breaking spaces to rough005 before I noticed that it wasn't HTML. So I guess I'll have to HTML it the next time I have a bit of left-over time.
And I think I'll go to bed early.
Searching out my hat pattern, I found a few long, narrow strips of paper with pencil lines on them. Ah, my sew-through guides for embroidering hook eyes on my pants. (It's as easy to make a bunch as to make one, so I made them up ahead of time.) I won't be using those any more — I've finally bought some bar-type wire eyes. Left the guides in the pattern trunk anyway.
Some of the hat patterns are marked "embroidered linen blend"; I don't recall ever having such a hat. I vaguely recall the gray mystery-fiber crepe hat, but don't recall wearing it out. I must have lost it. None of them are marked "blue twill". Perhaps I used the merely-dated pattern for that. It appears to be the oldest, but that blue twill hat has been around a while.
Urk. I haven't seen it lately. [It was under a scarf on the coat hook.]
DH found a hole in his lobster-claw mitten — and I had to darn it tonight because I want to borrow it tomorrow. While hunting for mending yarn, I found one of the missing socks-in-progress. This doesn't mean that I can resume knitting, though, because the needles I need to change to are in one of the other missing socks-in-progress.
And, come to think of it, I'm not 100% certain that that isn't the cuff of a glove!
I'd sure like to know how a bundle of yarn and needles can stay out of sight for months trending into years. This sock/glove had very little yarn with it, and was in a sandwich bag in the furoshiki of mending yarn. I know I've got unopened skeins of black persian somewhere.
Washday, but I didn't put the hemp-blend scraps in. While hunting out scraps to make a new linen hat on Saturday, I found that I had one more pair of worn-out hemp-blend briefs.
I've settled on embroidered rayon-linen for the crown and the top of the brim, and black linen-cotton for the lining of the brim. I'll probably use Super Crisp for the interfacing.
And might up and hand-quilt the brim with some of the embroidery thread I ravelled out, if it hasn't gotten too tangled to use.
I think I'll code the pattern "emb ray lin".
I was sure that I got three liners from each back when I cut up the other two pairs of panties, but two was the best I could do this time. I drew both, but cut only one out. Then I sewed it to the front and back — inside out. I'm not 100% sure that the rough side of the lining isn't the more-comfortable side anyhow. Certainly not worth picking out the seams.
Two side seams and three hems to go, but I'm making macaroni and cheese this afternoon, and the beautiful off-the-snow light will be gone after supper.
Lunch was chicken salad on rye muffinlets; now it's nap time.
Finished the black briefs this morning, but I didn't take them off the to-do list because I plan to make more after I make black bras.
The fabric is interlock, but I didn't heat up the iron. I finger-pressed the seams before sewing the leg hems, and before sewing the waist casing, I remembered my advice in Edge Finishes, and zig-zagged down the seam allowances inside the casing.
I forgot to leave a gap in the leg hems to put in the baby elastic, but they fit without elastic, perhaps because the interlock is stretchier than the PFD jersey I used last time. It's also a lot finer.
When I have marked it properly, I plan to put the pattern into the linen-scrap box with the extra back and the hemp blend jersey that has a third-piece liner marked on it. I've already added a label to the box, and put in the pattern pieces that I didn't use this time. (I want that spot on the wall to be empty, so that when I want the pattern again, I'll remember that that is where it isn't.
In the elastic box, I found a piece of cord elastic I salvaged from a discarded pair of briefs, and used that instead of cutting a new one. The cord had been tied with a weaver's knot, and was very difficult to untie because the elastic had deformed inside the knot, so I tied a square knot this time. You can untie a square knot just by pulling on the proper ends. Not that the elastic will be worth using a third time when the pants have worn out, even though this is a flimsy fabric that probably won't last long.
Today was supposed to be a sewing day, but I wrote an essay on pleated ruffles instead. Started out as a Creative Machine post, so it isn't ready to link to yet.
Poked at the ruffle essay a little, and ripped the seams of a pillowcase. Shuffled the hat pieces and the mitten that needs darning around as we ran the new Roomba in different rooms. I think that I have everything on the ironing board now. (They started out on the seat of the chair where I sit to darn.)
I've also been searching for black persian wool to darn the mitten with. Brown would do, but I don't think I ever bought any brown. (But I do have lots of onion skins . . . )
One of the linen pillowcases has a hole in it, which bodes ill for the longevity of the sheets. I poked around a little among my sources of cheap linen, but didn't find any wide. (Some said "wide", but meant sixty inches.) I should shop at intervals while I still have time to be fussy.
It's at least possible that the hole was occasioned by mechanical damage or a flaw in the goods. Of course, that second also bodes ill for the longevity of the sheets.
Since I don't need sweat rags at the moment, I plan to wash the pillowcase gently and put it into the box of linen scraps. The needle holes are inclined to close up, and the creases come out when wetted; this case hasn't seen much wear at all.
Darned the hole in the index/middle finger of the split mitten —a bottle of lens cleaner proved just right for a darning egg— hid the end and cut off, stuck the lens cleaner into the fourchette of the thumb intending to use the tail to darn a little snag I had noticed, found a very large strained area that reached to the edge of the hole I'd just darned. I was about half-way through darning that when it was lunch time.
So I got the other mitten out of DH's pocket, intending to wash both when the darning was done — and found a hole in the thumb.
Both mittens expertly darned, and soaking in a bucket of water that promptly turned brown.
Turned out that the snag that had caught my eye only wanted to be drawn in with a crochet hook. The lens cleaner was too big for the thumb, but a bottle of Fenofibrate worked pretty well.
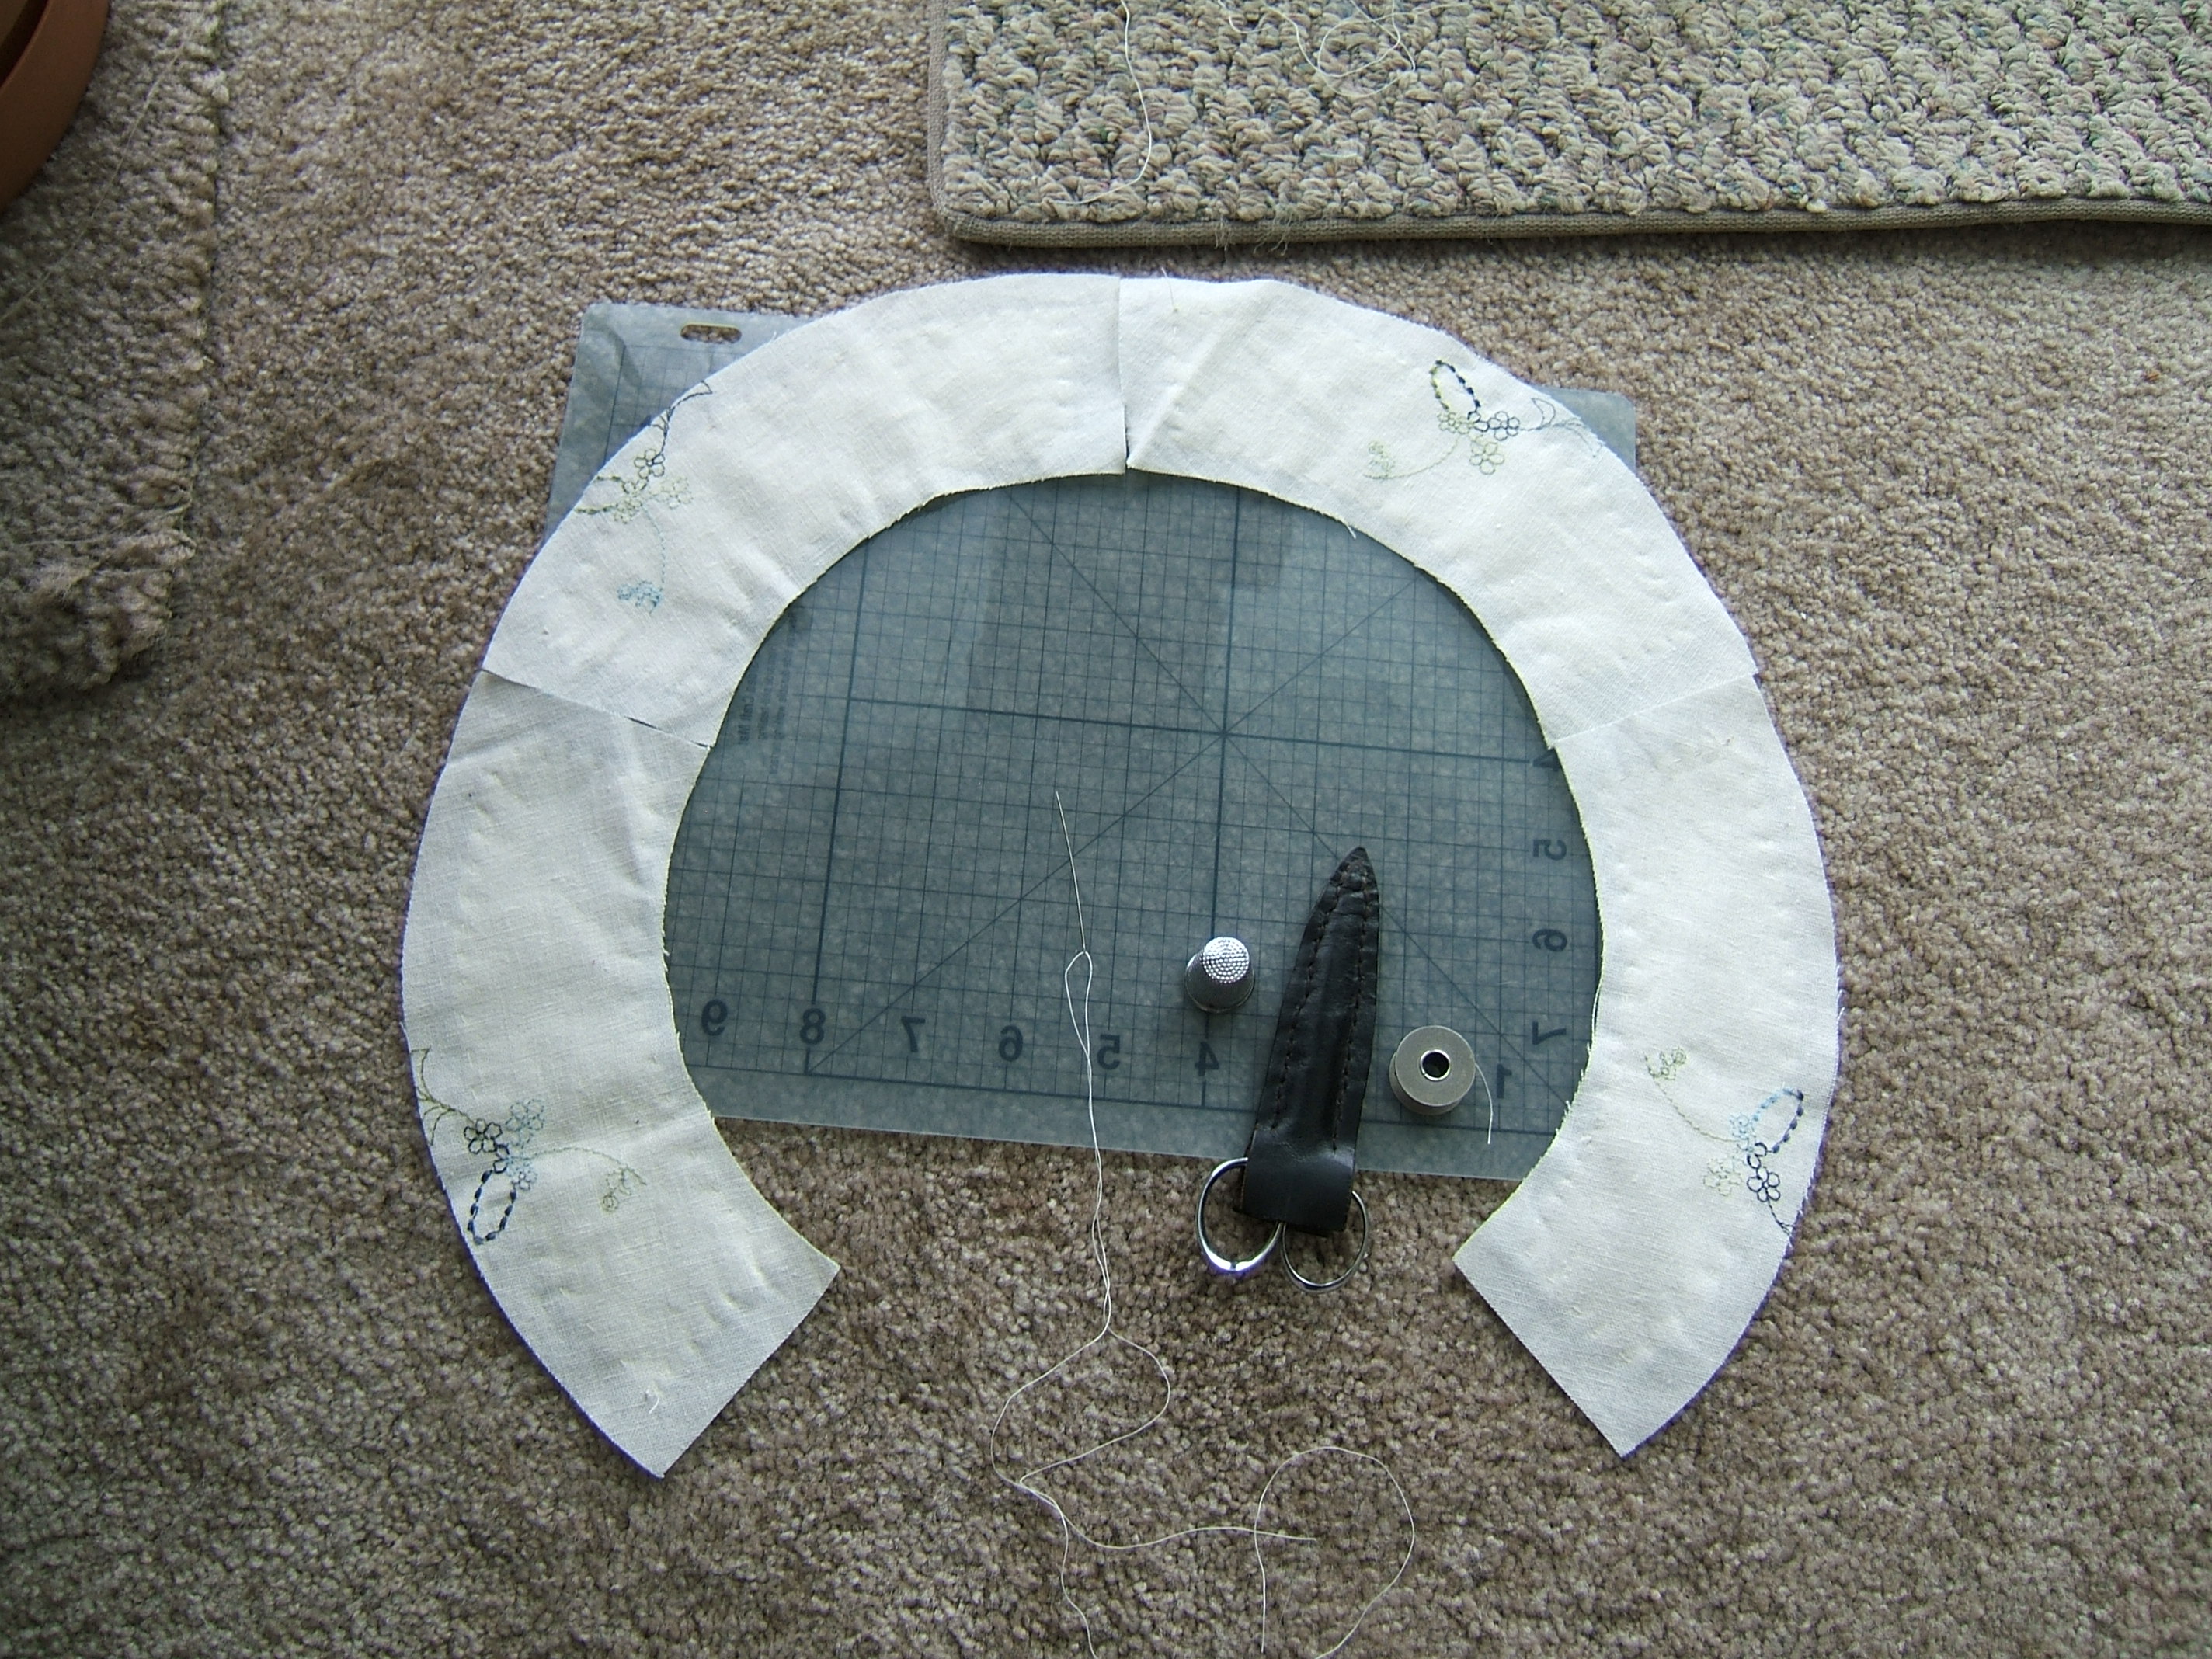
The hat is in progress again. During some unrecorded session, I very neatly marked the four pieces of the brim on four little scraps I found — and then realized that I'd used the pattern for the interfacing; for brim segments, those scraps were no use at all. So I found two big scraps that I could put two segments each on, marked one of the segments, and then wet the other scrap and hung it to dry because I'd had a world of trouble with the seam-allowance crease in the other. (These scraps appeared to be from straightening the ends of fabric that had been washed with the ends sewed together.)
Upon resuming work today, I discovered that the second scrap would afford only one brim-liner segment. For the fourth segment, I was obliged to use a scrap that was still attached to the main body of fabric. Luckily, the scrap had a thread-straight edge long enough for easy layout.
So I put away the black linen-cotton, cut out all the marked liner segments, disposed of the scraps (I'd been throwing them into the garbage as they came free), and started on the brim and crown. I had found only one scrap of the "emb ray lin"; could I have been that efficient when I cut out the shirt? And it doesn't look like a scrap from a shirt.
One of the protrusions has a selvage; I'll cut the brim pieces here — and hey, the other side of this protrusion is thread straight, I can cut the crown pieces side-by-side with the straight sides already cut. And if they are side by side, why not overlap them, matching the seam lines? That will turn five of the six seams into darts.
So I marked those, using a light-card template that matched the crown pattern, and started cutting. Um, getting into the points of the darts requires scissors. Scissors fetched, crown cut out, ready to take the brim from the other side.
Since there was worlds of space, I considered cutting by the half pattern, but that would have arched the brim up into an area of heavy embroidery; cutting in quarters would let it all lie close to the selvage where there is hardly any embroidery, and none of it in seams.
So I folded the brim pattern and marked around it as I had for the lining — save, of course, that I used a blue wash-out marker instead of the white Nonce pencil. It was much easier to refrain from stretching the fabric, because a marker doesn't require any pressure.
At this point I realized that multiple tracings would be much easier with a card template such as I had used to mark the crown, so I stopped and made one.
All the visible pieces cut out and stashed, it's time for the interfacing, but by the time I persuaded the interfacing box to come off the shelf —I required my grabbers, a yardstick, and an ammo box that appears to have been left over from WWII— I was too tired and stressed to cut. But I can look out the required stuff and get ready to resume later.
Oops, I don't keep the SuperCrisp in the interfacing box; it's too big to fit and I don't want folding creases in it, so I store it on a hanger. Hanging in the hallway, but I cleaned the hallway, so it's on the to-do hook. Not there, must have filed it under cotton in the closet. Nope, but I glimpse it in the other half of the closet, on the blouse-hanging rod. (I really ought to get DH to revise that half so I can use it for fabric.) Nope, that's opaque drapery liner. Super Crisp is wide, but surely not wide enough that I would have hung it in the laundry room — and I didn't.
Gave up, looked to see whether the piece of Super Crisp in the swatch set I bought was big enough, found the same thing in a sew-in variety. That would be much better; fusibles don't stick to rayon.
So I put everything away and wrote this, and now it's late enough that I can eat lunch and take a nap.
It's snowing again. No walk, but I can't use the treadle for sewing the hat because I want to zig-zag the crown seams open. But I could set up both machines . . .
Incident that fits into the middle of one of the above sentences: When I was getting the bag of cutter out of the pocket of the bag I keep my smaller cutting mat in, it dragged out the other cutter —the one I reserve for paper— and it hit the floor neatly blade first, impaled in the linoleum. Those "safety covers" don't do a thing even when they are rubber-banded shut.
I wonder whether I've put a warning about that into the section on cutting tools? Anyhow, I've put the older cutter into the bag with the newer cutter, so it can't get dropped the same way. I sometimes end up cutting paper during a cutting session anyhow — as I did today, making the light-card template.
Still haven't found my Super Crisp, though that search is on the back burner now that I've decided not to use it. And I've also decided not to use the sew-in version in my swatch set. The brim of my beta hat (still around even though I wore holes in the crown mopping my face with it) is plenty stiff even though it has no interfacing at all, and a stiff interfacing is likely to crease when I stuff the hat into my pocket.
So down comes the box of linen scraps, with no fuss or struggle. (I did stand on the ammo box and use the grabbers.) And there's a neatly-folded bundle of white linen of just the right weight. But I appear to have mislaid the pattern for the interfacing; it wasn't with the hat pieces, and it wasn't in the trunk with the rest of the hat pattern.
But a light-card pattern is easier to use anyhow. I laid my brim template on my old desk calendar, drew around it, took half an inch off the ends and outer edge, took a quarter inch off the inner edge, and cut it out with my older rotary cutter. I think that the pattern that I'd lost had a half inch off all around, but I wanted to be quite sure that the black lining didn't shine through the brim.
A little false starting as I sorted out scraps
that were just right, then realized that those
straight edges were on the true bias. But
once the correct scrap was selected, it was quick
and easy to mark it for cutting:
Then I cut the interfacings and took a picture of
all the pieces:
I intend to baste the interlining pieces to the brim, but they photograph better when laid on the lining.
And sewed up the four short darts in the crown,
leaving one seam-and-dart to sew:
The battery in the camera gave out just before I found a good angle to shoot from. And, alas, this was the back-up battery; the camera hadn't been used for a while, so both batteries were low.
I had planned to zig-zag over the seams to make
them stay pressed open, but a line of straight
stitching down the middle of each seam allowance
looks much nicer, and isn't much more
trouble. (Less, considering that I hadn't
set up the Necchi, and hadn't yet wound a spool of
thread for it.) It turned out that 55%
linen was enough to make finger-pressing suffice,
so assembling the crown went quickly
Later, I wound the spool. Without shutting the door to the sewing room, because DH was keeping the cat occupied. He came in when I was about halfway through, and I commented that there must be a better way than using a hand drill. He suggested his battery-powered drill, and persuaded the hand drill to let go of the chopstick that held the spool of thread. (The chuck hadn't been moved in years, and had gotten used to staying put.) Using the electric drill left me a hand to guide the thread with, so it wound more neatly, and without strain from resisting sideways forces on the drill. (Hmm . . . the hand drill would work better if the shimmed spot were well down on a long piece of chopstick, with the pointed end resting in a dent in something, so that one could turn the drill the way it was designed to work.)
I ran down the battery in the drill — that made three battery sets he had to recharge: two in his camera and one in his drill.
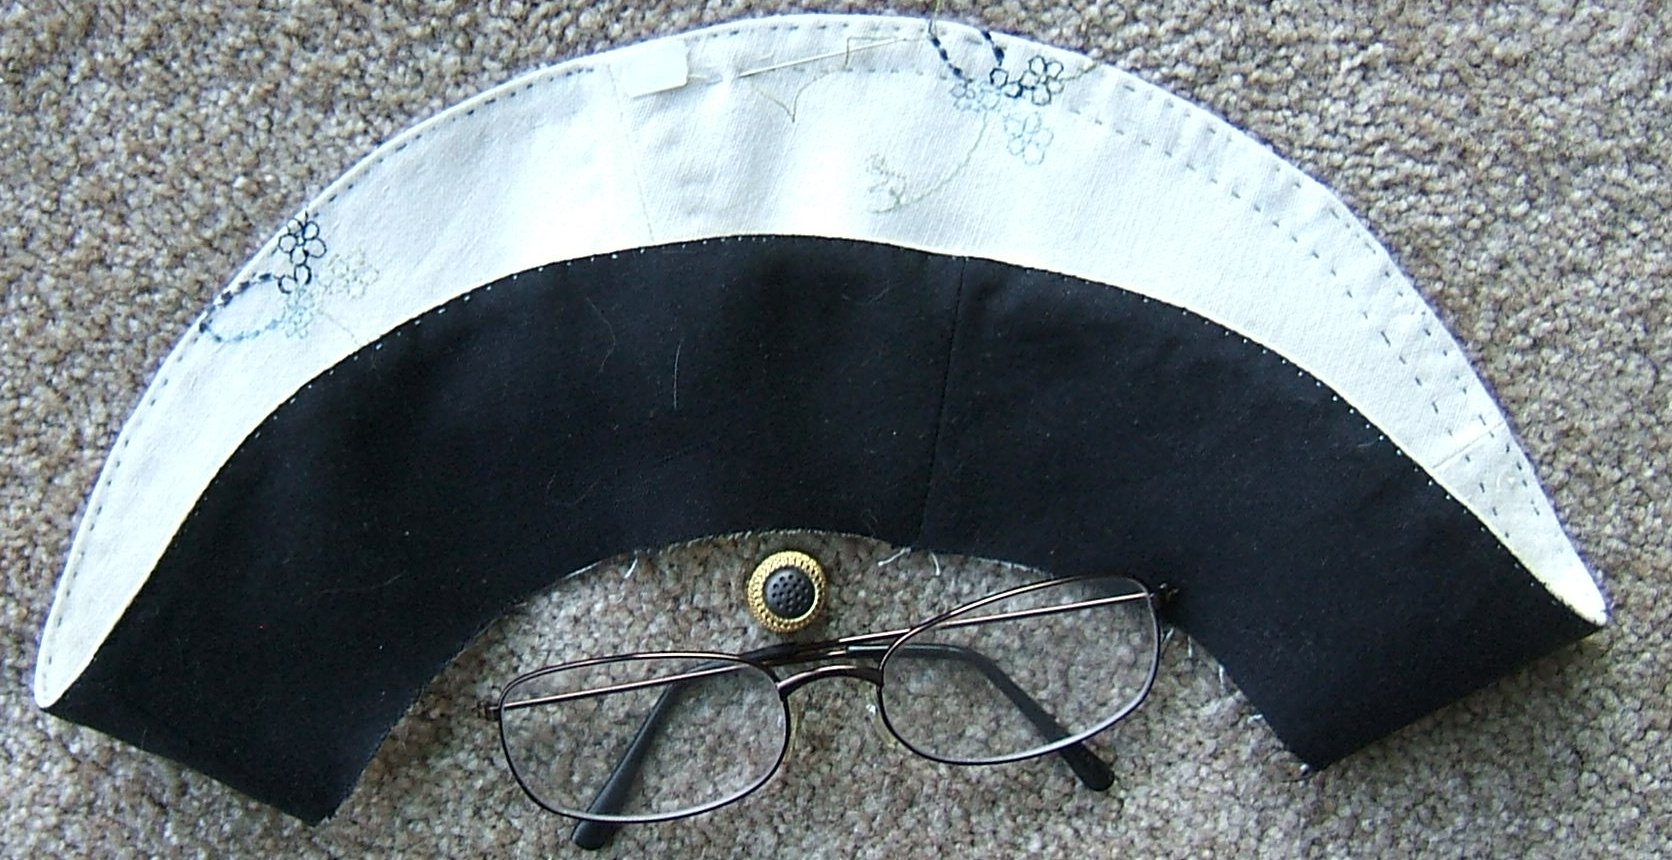
Wasted most of the morning playing with photographs. In the afternoon, I basted the interlining to the brim pieces, then assembled the brim and the brim lining.
All the while I was hand basting, I reflected that
it would be easier to keep everything flat and in
register if it were lying on the flat bed of a
sewing machine, but hand basting shows less and is
easier to get out. A sheet of plastic
labeled "Fiskars two-sided craft mat" was a great
help, by providing a sort of table on my
lap. (It was among a bunch of things I
collected to take to the Goodwill when my neighbor
moved.)
I carefully arranged the pieces of brim so that the embroidery was as evenly-spaced as possible, then wondered how to keep them in order: but of course, if I pin two of the four seams, there will be only one way to sew the two resulting pieces together.
Ironing board cleared, now I'm too tired to iron.
Made the bed and found that "make pillowcases" is moving from "urgent" to "desperate". I've got two more old muslin sheets, but I'd like to buy new material. But I was disappointed when I bought supposedly high-class "pima" cotton yardage; the stuff desperately needed ironing after every wash, and rumpled again before I could get it onto the pillows. That was not at all like the Pima cotton ready-to-wear that one used to be able to buy. The available linens are coarse and loosely woven. Might be something among the quilting cottons at Lowery's.
Light lunch and a nap, and on with pressing the seams. I propped up my pressing ham with a rice bag and did a good job of ironing the crown, because odds are it will never be ironed again — and that embroidery needs ironing.
Then the laundry. I'm most definitely not going to make any more shirts out of PDF jersey; not only does it desperately need ironing after every wash, it's a bear to iron.
After I finished the shirt, I had just enough time and energy left to touch up my red silk-crepe underdress — there was a puddle on the floor. My spray bottle had fallen off the board and, because the sprayer and the bottle were not made for each other, the water immediately ran out. Took three rags to mop it up, but despite the clutter on the floor, it didn't spoil anything except a cardboard hem gauge that had fallen off the ironing board — and I could dry that out and use it if it weren't easier to make a new one from a better piece of card. Not to mention that I don't foresee needing that set of widths any time soon.
I'll continue playing with the computer during the remaining time before we go out to the Japanese place.
Despite a housekeeping cascade, I sewed the brim to the brim lining and pressed the seam this morning. Then I looked at the thread I salvaged when picking embroidery out of seams and bias tape while making an embroidered linen-blend shirt. The thick ornamental thread was sort of couched on with a very thin bobbin thread, so it peeled off whole and I put the longer pieces into the zippered sandwich bag where I keep my balls of 100/6 cotton. Much to my surprise, the salvaged thread is bright pink and pale blue where the embroidery on my hat is green and dark blue. The shirt was made from the other piece of embroidered rayon-linen. Fortunately, I had saved some bits that were particularly thick with embroidery out of the garbage when I cut out the hat. Unfortunately, this embroidery is harder to pick out than the other. Or, rather, I don't have the additional reward of wanting the fabric. But I got one needleful out, and I'm catching on to how the thread runs. I need stronger magnifiers — perhaps I can use my readers together with my neck-hung magnifier.
But now it's nap time.
Neck-hung magnifier plus readers works, but it turned out that readers plus high-intensity lamp in not-too-bright general illumination did the trick. That and catching on to which threads to pull and when to cut. The second needleful of thread ran out a couple of inches from finishing the hold-the-crease round of top stitching, and I decided to call it a night.
I hope I don't regret pressing embroidery thread into a structural rôle — and second-hand embroidery thread at that.
After reflecting that I need to press the brim before making the second round of top stitching, I took the brim-in-progress into the laundry room and sprayed it with bottle starch. Should help the inner layers hold their places after they have been pressed into them. But that will also make it harder to take the basting out. But the basting thread is very fine and nearly matches the outer brim; if some doesn't come, I can just leave it until after the hat is washed.
Pressed the brim and my calf-length silk crepe blouse this morning, then that was quite enough pressing. Long garments are a lot of work, pullover garments are difficult and tedious — and I'd mostly forgotten how to iron.
Just as I got set up to embroider the brim, it was time to attend to the laundry. Like a durn fool, I left my thimble on the rocking chair with my other tools, knowing full well that there was a cat in the house. But I didn't have to look far to find it. I put it into DH's grandmother's sewing stand.
And the washer just stopped again.
Here is where I began work today. Note the
use of a bit of two-line repositionable correction
tape to keep my stitching parallel to the first
row. I kept the stitching evenly spaced by
loosening the definition of "evenly spaced".
(Hey, it worked for Mussolini and the
trains. For a while.)
I should have tipped the thimble over before taking the picture — viewed from straight above, it looks rather puzzling.
I ran out of thread just an inch before completing the job. I made it reach the beginning by re-threading the needle for every stitch.
Because I'd felt the fabric shifting around while sewing, after I'd pulled out the basting that was between the two rows of topstitching, I thoroughly wet the brim with diluted bottle starch (which I keep in a spray bottle), and plan to press it again before further quilting.
Because I like the appearance of the two rows of stitching close to the edge, I plan to do any further quilting with white thread. The inside edge of the interfacing does need to be held in place. After examining my blue hat, which has held up well, I think I need at least two more rounds.
Loose seams on red silk
shirt/underdress Since no
further work can be done on the hat until the brim
dries, I thought it time to take care of the half
inch of ripped seam I'd noticed while
ironing. Didn't find any more ripped seams,
but as I was putting it back on the hanger, I
noticed a hook working loose. I ignored it;
no more often than I wear that dress, it could
take years to fall off — and I'd already put
the tools away.
I checked my collection of vintage silks and none of them would show any less than white thread, and all would look odder. I couldn't find a spool of #50 white Tire, just black and white 100+. But it's plausible that I haven't yet opened what I bought in my last order of silk, and sure enough, there were two spools of white #50 in the box the silk came in, and I think that I ordered only two.
There were also two spools of medium-gray thread I'd bought for just such a situation and forgotten all about, so I opened one of them and did half an inch of back-stitch. Now I've got the gray thread and the threaded needle in the snack bag of jersey-darning supplies. I should put one of the unopened spools of white in there too.
Which I did.
This morning I finally got around to ironing the hat brim, and while I had the iron hot and the board cleared, I ironed the white linen-blend jacket and pressed the creases out of the previously-opened hems of the black sleeves I mean to lengthen. Then, as long as I'm in hand-sewing mode, why not baste the hems back into the jacket? It's getting on towards weather to wear a heavy shirt for a coat.
(I take the hems out of the sleeves before washing to make it easier to get the dark line out, and to prevent the edge from fraying.)
I use linen weaving thread for basting hems in floral-damask cotton-and-linen; after heavy waxing, it didn't drift apart. I put only an inch and a half through the needles eye, twisted the threads together, and waxed them some more to make them stay twisted. The wax and twisting wore off in a few stitches, but I didn't have trouble with the needle coming unthreaded — perhaps because the worn section at the eye bent more easily than the rest.
Thinking about how to handle linen thread reminded me that I have a spool of linen lacemaking thread, and I thought that would be better than cotton thread for the remaining rounds of quilting. But that thread is no finer than the 100/6 cotton, which is easier to handle. (And it's a cop, rather than a spool.) But while remembering where I keep linen thread (at the back of the drawer under the Necchi, in the third box from the left), I found a spool of fine white embroidery thread that's still around because it's too weak to sew with, but it should make nearly invisible quilting stitches. And those won't be under any strain unless I pull the thread too tight.
But now it's time to mix up a batch of bread dough, eat lunch, and go to bed.
I wanted the remaining rounds of quilting to be more than a third of an inch apart, so the correction tape will no longer do. My first thought was to use my steel six-inch ruler, which is half an inch wide, to mark a stitching line parallel to the second round of stitching. But errors accumulate, and the last round would have been sure to lie at varying distances from this inner edge of the brim.
So I got out my packet of slips of marked cardboard, looking for something to measure from the edge of the brim. A little sheet-plastic advertising premium proved perfect: when I held the 5/8" tab against the edge of the hat, the edge of the half-inch tab was just one inch from the edge, so I marked on both sides of the half-inch tab and marked both rounds at once.
The first marker I pulled out of the pencil mug was my chalk pencil, which I knife-sharpen to a chisel edge. This proved perfect for the job. The chalk didn't rub off the least little bit until after I'd stitched over it, then mostly came off as I held it in my right hand making further stitches. And my fingers didn't come anywhere near the second round of stitching while I was working the first. An old fabric-painting brush I found in the pencil mug removed the remaining chalk.
So I'm all set to assemble the hat tomorrow.
The bread is delicious, by the way.
hem sleeves of cot-lin damask shirt, iron
it
I began today by sewing the name tag inside the crown of the hat. If I'd thought of it sooner, I could have caught the tag in the stitching that holds the seam allowances down, which would have been both easier and neater.
Then I trimmed the brim lining where it stuck out beyond the brim, trimmed the corners of the seam allowances, and tried to stitch down the middle of the fold-under at the edge of the sweatband. For some reason, my stitching kept wandering too close to the raw edge for security, so I said "oh, all right" and stitched around at the raw edge, then continued around again close to the fold.
Now I'm pinning the crown and brim together. My first thought was to divide the crown into four parts and pin them to the four seams of the brim, but when I looked at the brim, I thought it better to put pins half-way between the seams and divide the crown into eight parts.
I'll offset the crown marks a little from the seams, since only two would serve as markers anyway, and it's better not to pile up lumps.
Oops, I forgot that the crown has only one seam. The blue marks would have been of use, but using pins arbitrarily was easier.
Now that the crown and brim are pinned together, I see that I'm going to have to trim the black lining again after stitching. I thought that I'd have to ease the crown onto the brim, but it came perilously close to being the other way around.
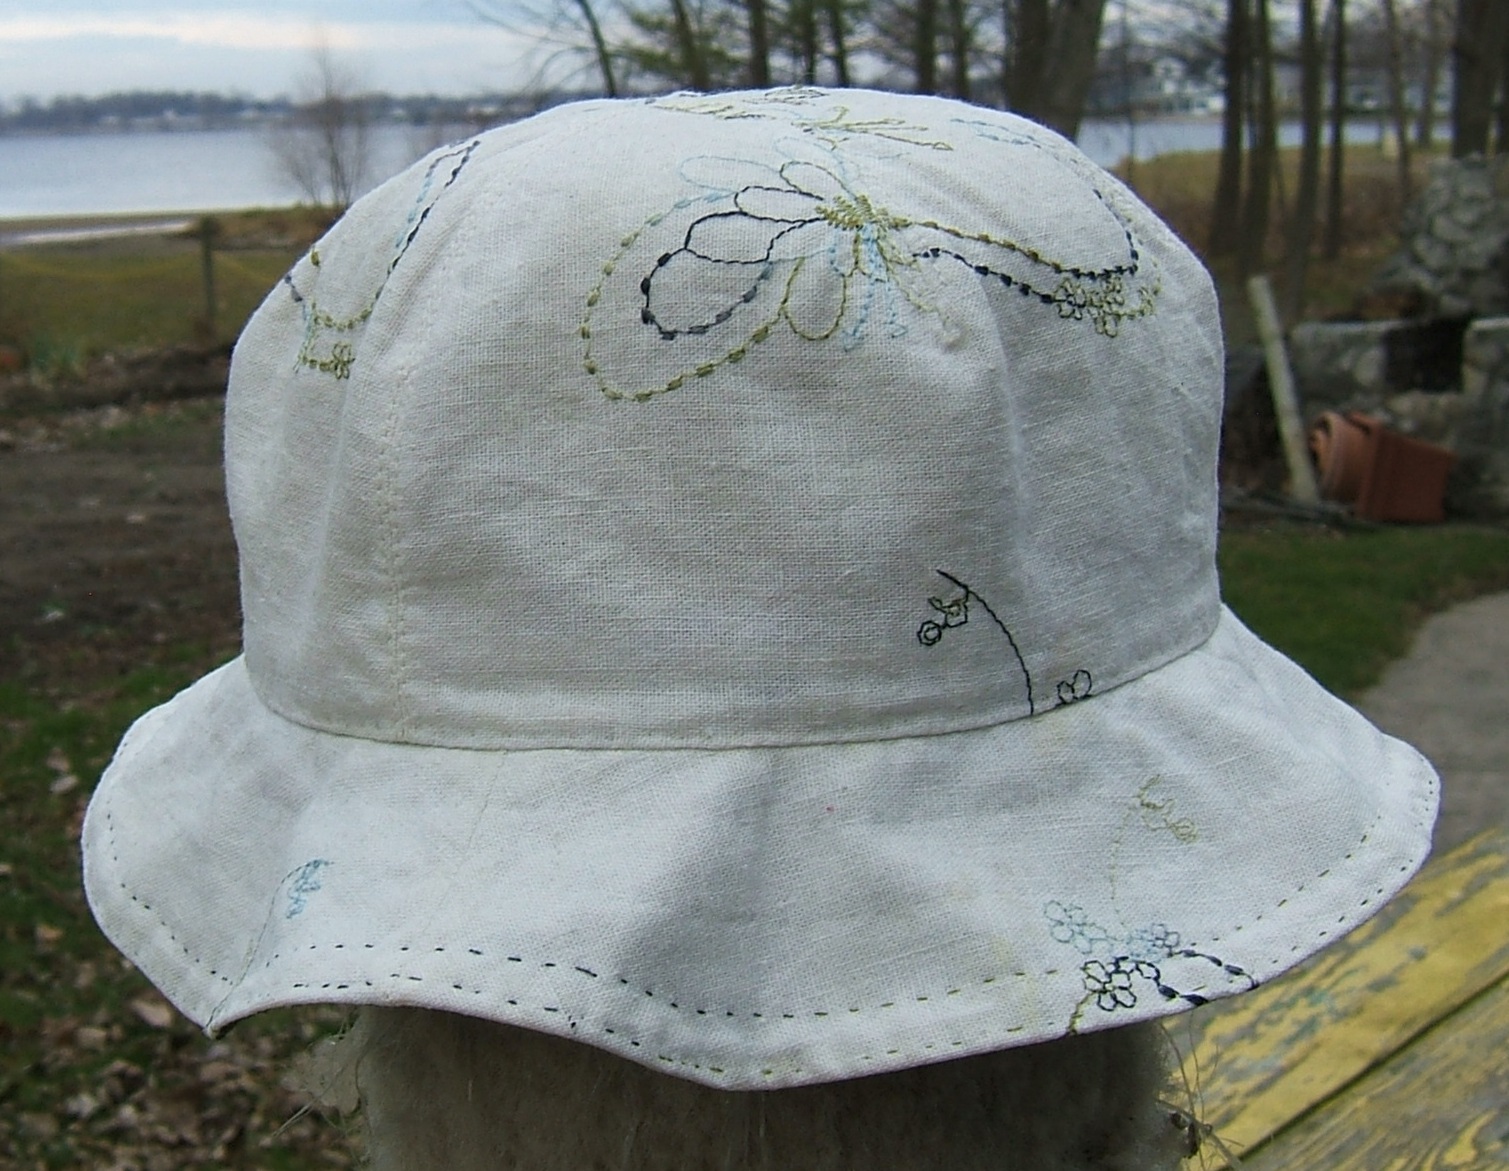
linen gilligan hat so it's a
rayon-linen blend — it's a replacement for
the hat with the flowers washed off and the crown
worn through.
I didn't need to trim the seam allowance again.
On some of my hats, I stitch the sweat band to the crown to fully enclose the seam allowances; on this one, I just worked spaced back stitch — the stitches catching two threads, the spaces about a quarter of an inch — to keep the folds folded. which is, of course, why it was necessary to stitch the folded edge of the band.
I took out the interfacing basting that ran parallel to the piecing seams, but left in the basting that paralleled the crown-brim seam. It's needed to hold the interfacing in place when the hat is washed — and I couldn't find it.
I'm not sure that I like the corners produced by changing seams into darts. On the other hand, I'm not sure that I don't like them. I doubt that any onlooker will notice them at all.
Another item added to the to-do list: DH burned a hole in his split mittens, and on inspecting the damage, I see that there is also a hole worn through the thumb. No hurry because he has another pair. And it's getting warmer.
Darn lime-yellow mittens More of
a neon green, actually, and it's narrow lime
stripes on a brown background. I found a
skein of crewel wool exactly the color of the
brown ground. I vaguely recall buying a
skein of Appleton crewel to see whether it was
fine enough to substitute for the discontinued
Medici, but the only label is a tag with what I
presume to be a color number, so I'm not sure this
is it — nor am I sure that Appleton is the
crewel reputed to be fine.
I intend to put all darning wool into the basket I found this skein in — the one illustrating Sewing Kits.
Hmmm . . . at the end of the roll-kit page, I should change "coming soon" to "coming Real Soon Now". Fen who remember paper fanzines will know what that means; the rest of you don't care.
I think it's nap time.
"make pillowcases" jumped to the top of the priority list when, while getting ready for my nap, I took a dirty case off a pillow and didn't have another to put on it even though I washed yesterday.
Since it will be some time before I can get to the fabric store, I took a false hem off a worn-out sheet this afternoon and evening. Old sewing books inveigh against pinning the work to your knee because it puts you in an un-ergonomic position, but I found that pinning it to a linen bra (through my T-shirt) has the opposite effect. This beat pinning the work to the nearest upholstered furniture! I had to shift the pin often to keep the threads being razor-bladed in the focus of my magnifying glasses.
The razor blade doesn't work at all well on a narrow hem. I'm using a seam ripper.
The sheet was 91" long and I wanted to make the cases 45" wide to fit the double pillow DH uses, so this morning I tore a strip as wide as a pillowcase is long, plus seam allowance, off the still-hemmed side, tore it in half, and made two pillowcases.
For the first time in I can't remember when, I made a back-tack. Short of handwork, there isn't any other way to secure the end of the seam, the doubled fabric under the back-tack is unlikely to tear, and this fabric isn't going to wear long enough that it will matter.
I can tear two more pillowcases off that side without hitting the hole in the sheet (which is conveniently marked with a ring of zig-zag stitches), and I can tear a 23" strip off the other side that also misses the hole in the sheet. I haven't measured to see how wide the scrap will be. I doubt that I can get any sweat rags out of it.
The fabric is worn nice and soft, which probably means that it isn't long for this world even though the hole appears to be an enlarged claw snag.
I have another worn-out sheet, but it is thinner and has bigger holes.
I tore a 23" strip off the other side of the sheet, tore it to a little over 80", and then noticed that I'd tear only four inches off the remainder, and decided to use all of it — a little extra length in a pillowcase is all to the good. So I ripped the false hem off and tore it in half. All three pillow cases have been sewn, but still need to be hemmed. So only one small almost-square has been added to the stack of sheet-weight cotton on the rag shelf, and I'll probably rip the false hem off and make it into a sweat rag when it gets a little warmer. I tore all the false hems into skillet-wiping size pieces, and have already used some. They dry skillets quite well, having been washed until the edge wore through.
I'm making all of the used-fabric cases fit the double-stuffed pillow, partly because I change that one the most often and I can, at need, use the large cases on smaller pillows. And partly because that pillow accumulates blood stains, so it's all to the good if the cases wear out before they get icky. I'll make the new-fabric cases to fit the standard pillows.
So it will be really irritating if all the suitable fabric is 45" wide! When we scheduled freezer cleaning for tomorrow, I said that I'd go shopping on Saturday whether we need anything or not — I might go to the fabric store. But I need to go to a big-box store too so that I can take a long walk.
Took my long walk in a supermarket; I doubt that I made the requisite mile even with two extra trips across the parking lot. Neither blunt needles nor pillowcase fabric at the fabric store, but I bought a set of plastic thimbles in case I do the embroidery gig again, and a pair of doll needles just because they are cool.
Later I realized that I could get five pillowcases out of two yards of 118" muslin economically — as little as 103" would do. So I'll have to look closer at the quilt backings the next time I go there. (And check out the prints when my intestines aren't distracting me from inspecting the fabric.) Such wide fabric would have a lot of straightening loss, but I could tear lengthwise first and straighten the ends after. Still, I'd better buy two yards and a quarter.
My order from Van Sciver Bobbin Lace came by mail today: six balls of white 100/6 DMC Cordonnet Special. $22.50 for the thread and $8.95 for the shipping. It's a pity that Van Sciver doesn't sell anything else I want. (And yes, it's a capital "V" on the invoice.)
Cold-weather note: lifting three skirts and dropping four pairs of pants isn't much trouble. Putting them all back in order, however ⋯
Resew side seams of formerly-red
bra Had a little time after
putting the chicken into the oven for supper, and
repaired the red bra. I used the Cordonnet
Special that was already on the White; the red
cotton I originally sewed with wouldn't match any
better. (Just checked the drawer in the
Necchi's typing table: I still have two
bobbins of that thread.)
I'd thought the darts had held, but in some spots the bobbin thread was merely clinging to the fabric, so I topstitched those seams too.
Aside from fading, the fabric appears to have held up well — I don't see thin spots when I hold it up to the light — and it feels nice and smooth. And I do believe that I have more of it. When "make bras" gets to the top of my priority list, I may well make red instead of black.
The chicken was delicious, by the way. One game hen stuffed with a quarter of an onion in a small iron skillet with three fingerling potatoes (zapped just before putting them into the oven), one sweet mini-pepper, one carrot, and a few pea pods, baked one hour at three fifty Fahrenheit.
In the afternoon, I hemmed the three pillowcases. I used a business card I picked up at Duck Down & Above last summer as a hem gauge — lengthwise on the two great long pillowcases, and widthwise on the one I'd cut to 36".
This will hold me for a while, but I don't get to strike "more pillowcases" off my list.
If only because I don't have any standard cases. And I really ought to change the case on the double pillow every day.
There's a pair of "twinkle-twinkle" underpants that every washday, I say "I must either repair these or cut them into cleaning rags."
This morning, when I looked into my lingerie drawer, I found nothing but nice new PFD-jersey underpants. ??, says I, I washed on Monday. And on Tuesday I shoved a drying rack of underpants and socks into the closet to get them out of my way. This isn't as daft as it sounds, because it's a walk-in closet and the first thing I did when we moved in was to take the door off and put it into the attic, because I hate the smell of sealed room in my clothes. Then later on we acquired an air cleaner, and usually direct the wind into the closet to keep it from blowing on us. (And the stuff was thoroughly dry anyway.)
And while sorting and folding the lingerie, I threw the briefs in question onto the Necchi, because it was already set up with black cotton thread. Eventually, I sat down and sewed up the two spots where the leg casings had come unsewn. The fabric is downright sheer along the fold lines.
After that, I threaded a needle with brown thread and made two bar tacks. Somehow I got two pairs of black knee hose into the wash —that means that I'd been outside the house twice last week, but all I recall is shopping on Saturday— and the pair worn less often had never been marked front and back. I chose brown thread because the other pair had been marked with orange, and I wish to keep them paired. I wanted blue, but I have no dark blue. On the shelf, that is; there's plenty if I care to dig into the box of embroidery floss in the foot locker.
(I've already spent more time talking about this morning's sewing than doing it.)
When I get a new pair of cheap knee hose, I lay them out flat and make a tiny bar tack in the middle of the edge of the cuff. From then on, that side is the back and the stretching at the heel is in one place instead of all around the ankle. I use the same trick to mark cheap gloves right and left so that all the dirt accumulates on one side of each glove, and doesn't show as much. This makes me much less hesitant to use the hand rail while wearing white gloves!
Just read yesterday's entry and got up to change the case on the bloodstained pillow. I went to the bottom of the pile for the first case I made, and found that fabric from the edge of the sheet feels entirely different from fabric taken from the middle. The middle feels much nicer, but I doubt that it will last very long.
So I invested more time in making the middle-torn cases — they didn't have pre-existing hems.
Just got the box of cotton-print scraps down. I think my next project is lengthening the sleeves on my garish black-and-brown blouse. (I ordered fabric to make a fading-into-the-background suit, and it turned out to be spectacular. Ah, well, I needed a dress-up outfit too.)
I had just discovered how convenient three-quarter sleeves are when I made that outfit — and never stopped to think that three-quarter sleeves on dress-up clothes don't make any sense. Eventually, I thought of hiding the seam in a tuck, and a long time after that I took the old hems out. And then it started hanging on the hook.
I still don't have a fading-into-the-background set of clothes. Being inconspicuous doesn't appear to be an option anyway. (And nobody will say why I stand out.)
I measured the sleeve against two different sleeves that fit: they agree that it is only three inches too short, and the let-out hem adds only one inch to that. [checks] But my arm is only ten and a half inches from elbow to wrist, so I guess three inches ending up in mid-arm is reasonable.
Now I need one inch for seam allowance, one inch for a half-inch tuck to hide the seam in, and an inch and a half for the hem, or three and a quarter if I decided to make a ruffle at the wrist, as I'm half inclined to do.
Further thought: a half-inch tuck would be barely enough to hide a pressed-open quarter-inch seam. But if I take half an inch off the seam allowance and add it to the tuck allowance, that makes a three-fourths inch tuck, which would be ample, so I can simplify by adding 3 + 1 + 1 + 3.5, which is 8.5 inches. The extra quarter inch on the hem is for "in case of error".
The bottom of the sleeve is eight and a half inches wide, which I can stretch to eight and three quarters. Double that, it's seventeen inches, an inch for seam allowance makes eighteen. I can allow for the stretch factor by sewing the seam a little skimpy.
On to the box of printed scraps! (Which I got down off the shelf yesterday, to verify that the brown flowers on black print is in it.)
I was leaning over the Necchi to open the drapes when something caught the corner of my eye. I looked back, and it was! The long-missing bodkin that Grandfather made for Grandmother, which is my favorite tool for smoothing fabric under the presser foot, was between the task lamp and the back of the sewing machine, half under the machine.
I knew it had to be within arm's reach — though how it fell behind the machine I'll never know.
Got the extensions torn out after that. And cut — I did draw threads some. Discovered that one of the pieces I'd selected was only seventeen and a half inches from selvage to place where a corner had been cut out, and not eighteen as I'd thought when selecting pieces. But by then all scraps were back in the scrap box save several small pieces that I wanted to flatten when I had the iron hot, so I decided to piece it.
Come this morning, I realized that piecing something only a seam allowance short isn't honestly practical, but in a rare moment of sanity, I held the pieces to the sleeves, and found that it would be quite wide enough if I sewed the seam carefully to make it as narrow as a flat fell can be. Well, it's once and a half what a flat fell in fine sewing would be, but I'm not about to sew that carefully in anything short of fine silk or real handkerchief linen. The seams in my white linen do rag are narrow, but they are mock fell.
So the seams are sewn and the extensions are attached to the sleeves, though not yet pressed. There were up-arrows on the scraps and I very carefully copied them on to the extensions, then today I forgot about them and couldn't find them after the seams were sewn. I think that I got the extensions right way up by accident — and if I didn't, it doesn't matter. At any rate I'm reasonably sure that the extensions match each other.
Yesterday I pressed the seam open. pressed the turn-under for the casing, and pinned the tuck. I was minded at first to baste the tuck with the White, since it has a longer maximum stitch, then while pinning I reflected that this sort of job is what free arms are for, then later on realized that the sleeve is quite wide and the narrowness of the free arm would add as much fiddling as it saves.
I'm planning to baste the tuck, finish the ruffle-style elastic casing, adjust the length of the sleeve (if necessary), and hand-sew the tuck with running stitches close to the basting. The stitching is going to show no matter what, and I figure that top-stitching will hold the tuck flatter. I'm stitching by hand because a thread that isn't quite the same black gets more and more conspicuous as I keep catching glimpses of it on my arm, and ends up looking navy blue. But I'm not so opposed to the continuous line that I'll hand stitch the casing!
Oops, I should have marked the stitching for the second casing before putting elastic in the first casing. I'll do the other sleeve the other way around.
I sewed the first line of stitching half an inch from the fold using the edge of the needle plate for a guide (needle in the middle; when I want it on the left, I have a bit of correction tape on the bed to mark a half inch.
I had a sleeve on the sleeve board about to reach for a chalk pencil to mark the second line when I remembered that the aluminum bed of the sewing machine is frosted so that one can write on it, so I used my wash-out marker and six-inch stainless-steel to draw a line clear across the free arm, and that worked beautifully. But it appears that the line was a bit more than an inch and the needle plate was a bit less. Fortunately, I don't care much about making the casing precisely half an inch wide.
Just ran the spell checker and it snagged on "daft". I added it to the dictionary; I suspect that I'm going to use that word again.
I didn't touch my sewing yesterday because I went shopping in the morning, made pizza in the afternoon, and was too stupid in the evening.
So this morning I was annoyed to see that I'd left off just before sewing the ends of the elastic together, which requires no brains at all. On the other hand, it was nice to have natural light while sewing black on black.
When I got my box of elastic down intending to cut two pieces of black quarter inch to my exact wrist measurement, I found that I'd already done exactly that, and rejected the pieces for some reason. (Probably decided that they were too short.) I figured that overlapping them a quarter inch, then putting a bunch of bunched-up fabric under them, would provide the required negative ease, but the wrists are a bit loose. On the other hand, any time that it would matter, I'd push the sleeves up anyhow.
So I've sewed the elastic together, and I marked the stitching line for the second casing before threading elastic into the second sleeve, so off to the free arm. The sensible thing to do would be to cut two pieces of black elastic to the exact measurement of an inch above the wrist, but I'm planning to use the two wreathes of pink elastic released when I took the old casings out.
Just tried the loops on. They are a couple of inches too long to draw the wrists in enough — I'm not that stubborn. So I've put them into the elastic box, and I've cut two pieces to put in the easy way. I think I explained the hard way in Edge Finishes.
I've tried the shirt on now. There is plenty of negative ease in the elastic, I got the tuck right the first time, and it looks just fine with only one round of elastic. But I think I'll like it better with two rounds.
Since we're having canned soup for supper, I might get this finished this afternoon and wear it to church tomorrow.
lengthen sleeves of blouse that matches black
skirt I got it down to the handwork in
the afternoon, and hand sewing doesn't take much
thinking if it's all laid out ahead of time, so I
finished it after supper. And I do like the
cuff effect of the second round of elastic.
It works much better in lightweight cotton than it
did in heavy raw silk.
I got a complement on my newly-refurbished outfit at church last Sunday.
All of my black knits are too thin to make good slippers. I found some gray wool scraps that would make a good change of pace if I already had black slippers. And there doesn't appear to be anywhere to buy doubleknit.
So I got down the "flowered cot jersey", as it says on my pattern pieces. After all, the first flowered T-shirt is in the laundry, and short-sleeved shirt season is bearing down upon us. I used the garden hose today.
I cut out the T-shirt this evening. Front, back, two sleeves, two pockets, one neckbinding — that's all of it, right?
There was a crossgrain strip left over from the previous shirt (I cut it the full width of the fabric) but I haven't cut it to length yet.
Found a note of how long (20") to cut the neckbinding, on the pattern for the back. You'd think I'd use the front pattern for that, or make a neck-binding pattern. Nope, a tiny pattern would get lost. Notes on a major piece can be found.
Hand-basting the turn-unders for the flat-felled seams was just right for doing between loads of wash — no thinking required, and no harm done if I drop it to attend to the washing machine. Since the fabric has been starched, I probably could have pressed them over templates, but only probably, and pressing doesn't save all that much time.
In the morning, I sewed a half inch of broken seam that I found while hanging wash yesterday. And then took a few basting stitches so I could say I worked on the T-shirt. Don't know what I did with the rest of the day.
Just discovered that if I notice how skillfully and automatically my fingers are twiddling over the keyboard, suddenly the wrong words start appearing on the screen.
Does sorting the bag of window hardware that was in the end table, and putting the pleater hooks and pleater tape into one ammo box stepstool and the rest of the stuff into the other, count as sewing? I did unpin the last pattern piece from the T-shirt, label it, and put it back on the nail.
I also added a link to "Edge Finishes".
And now it's nap time.
I did take one stitch this morning. When dressing yesterday, I rejected a pair of socks with perfectly-good legs; today I tried one on my arm and stuck my thumb out through the hole in the heel, then sewed a note that said "Make into writing mitts" to them and put them in the off-season clothing drawer.
Hemmed the pockets and sewed the darts.
Disruption in the laundry room brought the grey linen that's destined to be bike knickers to my attention. I moved it to the "to be done" hook.
Also moved the pile of stuff on the dryer into the sewing room until after the new washer is delivered tomorrow. There are some neglected chores in it. Also two cotton sheets. I moved one to the pile of worn-out sheets. one to the pile of sheets. But I suspect that it's mis-folded, rather than not worn out.
Between garden chores one day, I pressed the pocket & darts of the new T-shirt and ironed the old one.
I think I'll cut out the knickers before finishing the T-shirt, unless I get energetic and finish sewing before I get around to cutting. I plan to sew them with the same thread as the T-shirt, so it will be easy to interleave the work.
You'd think I'd get a lot of sewing done when it's raining and I can't go outside — but the rain made the light gloomy and I spent the morning fiddling with the computer. But I did find and delete an erroneous "at least" in Edge Finishes.
In the afternoon, when I got around to attaching the pockets to the front of the T-shirt, I'd been reading the a handkerchief-hem section of Edge Finishes, and mitered the first corner by overcasting from point to raw edge; you get a nicer shape to the corner of an appliqué by overcasting from the inside to the corner.
Used one of my beading needles for the first time. Nice and thin, but long enough to bend when pushed. On the other hand, it's long enough to pull instead of pushing.
#10 crewel would have worked better than beading needles for this job, but I must remember that I've got the things.
I still have un-polished boots on the dryer. (The shoe polish is on the shelf above the dryer.)
I wandered into the living room and said that it looked really good — both the new futon and the order imposed by having a sweeping robot have improved it a lot. DH expressed discontent with the polka-dot cases on the two bed pillows I keep on the sofa. Aha, says I, finally a use for my black cotton twill. Then I meant to throw my orange duck over the sofa just as a joke — he likes yellow, but that duck is a bit much. I can't find the duck; I'm reasonably sure that I didn't give it away, and quite sure that I didn't use it up. Where can an eye-searing orange passing itself off as yellow hide? But I found two pieces of upholstery fabric and about twelve yards of red madras. He liked the madras, so I tore two yards off and threw it over the end of the sofa where the pillows are
Table opened, linen laid out. I customarily make two pairs of pants to economize on fabric — but can I use two pairs of bike knickers? Depends on the knee. If I ride my "pedal-powered wheelchair" to church all summer, I can't wear my white linen knickers with pink rick-rack around the ruffle under my dresses, so I'll be wearing the bike knickers as underwear as well as as bike knickers.
On the other hand, if the knee does heal, I'll go back to riding quarter centuries, and the pale gray knickers will probably need washing more often than the black ones.
Do I cut generously? The current pair are hard to pull on, but I made them of a blend with less give than pure linen has . . .
Then again, the knickers are fussy to assemble, I have worlds of that fabric, and I use small pieces of it for interfacing.
Thought for a while there that I'd lost the pattern for the back pocket, but noticed that patch pockets for my pants are on a different nail from patch pockets in general. So why is the pattern for the strip of three back pockets of my jersey also on this nail? Everything gotta be someplace, and it's large enough that it can't hide under the other pockets.
Hokay, everything on the table but cutting tools and the pincushion. Back to work.
And, it develops, one copy of the knickers cuts more efficiently than two copies of the jeans — the gusset eliminates the sticky-out bits that need to be interlocked.
Got them all cut (despite going to First Friday before I got going good) and on the ironing board, but haven't marked anything except for a few "wrong side" arrows. Nor have I closed up the table, but the table is cleared and everything is put away.
I forgot to plant the onions yesterday, but . . .
⁂
I got some sewing done. All parts of my new T-shirt are attached, and I've basted the hip pockets of my new knickers together. I'm trying Kathleen Fasenella's "twin pockets" — you baste around the pockets, turn them right side out, press them well, then take out the basting and have two identical pockets. But I've left the hems for later; I think that her method twins the hems too. Do you think that I should look up the advice before I try to follow it?
⁂
Again, a score of seven at Hexavirus! Perhaps I should play only when I'm falling asleep.
assembled T-shirt, basted pockets, on Monday.
Table is still open — DH is using the extra space.
Was struggling into my wool bike jersey that's too tight to wear over anything but a silk undershirt because felted jersey stretches less than cotton jersey, plotting ways to loosen my bike jersey pattern in case I manage to find some yellow wool jersey somewhere, when I realized that I was un-doing the changes made to make a woven shirt pattern into a jersey T-shirt pattern. Since I want the jersey very loose, to be worn over variable numbers of warm shirts, all I need to do is to cut it by the woven-shirt pattern! But the woven-jersey pattern has yokes that won't be needed in a knit pattern; I'll have to copy its features onto a shell pattern. Or perhaps I should start with the pattern for my overshirt, which opens down the front. Substitute a separating zipper for the snaps . . .
And if it fits loosely, I could also use wool flannel, if I find that first.
Too late to expand Tuesday's notes, so I'm pasting in part of the Beeson Banner's Monday entry.
The gusset is easier to sew in with a mock flat fell if I turn the edge on the convex side —same as setting sleeves— but if I turn the edge to the right side, the patch ends up on the inside, and if I turn it to the wrong side, I get three rows of stitching on the right side. I made the black pair with the patch on the inside, and don't like it. I briefly considered risking a flat fell with only two rows of stitching on a reinforcing patch, but it would be more difficult to make the third row without the second row.
Pity I have no strong gray cotton thread. I'm half inclined to use ecru — it's the wrong hue of "unbleached", but it wouldn't be such a strong contrast.
Decision made: sew the gusset on the inside. This means that I have to pick out the turn-under that I basted on the small rectangular patch and fold it the other way. The patch isn't symmetrical —it was cut to match the grain of the back, and it's very slightly curved at the lower end of the edge that's to be caught in the gusset seam— so I can't simply turn it over.
AAAARRRRGGGGHHHH!!!! This morning I went outside, combed my hair, put the comb in my pocket to start braiding — the parts of my new T-shirt are not all attached! And I've put all the rest of the fabric back on the high shelf,
At least I noticed the missing pockets before sewing the side seams.
Yesterday I pressed the twin pockets of the knickers, the neck seam of the T-shirt, the rectangular patch, and a recently-laundered shirt. The pressing of the pockets appears to be trying to come undone even though I ironed it through a wet rag on both sides.
Folded the binding and stitch-in-the-ditched around it. It's long enough that I can put the shirt on without much trouble, but may be too long to do without elastic inside. It may stop pooching in front after I trim close to the stitching and press it.
Then off for a "pedal-powered wheelchair" ride to the supermarket, and now it's nap time.
I've been riding said pedal-powered wheelchair to church ever since acquiring it, because it keeps my weight off my sore knee (except for the steepest stretch of Chestnut Street). When it was cold, changing clothes wasn't a problem: I just peeled off my sweat pants and the silk long johns underneath did fine as drawers.
But it's too warm now to wear long johns, and my linen knickers are too loose to wear under my tight-fitting sweat pants. The loose sweat pants are too warm. So I had to put on drawers in addition to peeling off sweat pants, which is somehow more than twice as involved. Perhaps because I could, in a pinch, remove my sweat pants right out in public without revealing anything man was not meant to see, but donning and doffing drawers requires a closed door.
And, I realized when dressing, wearing my bike knickers won't work because they don't cover the tops of my knee hose.
But how about the "pedal pushers made of linen-cotton shirting" from my to-do list? For the first time in my pedal-pusher-wearing life, I could push pedals while wearing pedal pushers!
Blue plaid drawers wouldn't do at all when exposed by hiking up my dress, but I have a lot of black linen-cotton left from my current bike knickers. It isn't anywhere near as cool as the shirting, but would do, and would look all right —at least, all right enough for the garden— with my blue-plaid gardening shirts. The pattern I drafted for my linen drawers would do nicely; all I have to do is to leave off the drawstring casing and the rick-rack.
But the rick-rack is covering a raw edge and the hem is rather narrow — I'd need to cut at least half an inch more hem allowance.
I'd best run a tape through the hem, too, so that I can hike up the pants under shorter skirts.
sew tie on rocking-chair
cushion It was harder
than I expected; it's hard to aim a needle through
such a thick fabric, particularly when the needle
is little longer than the thickness of the
cushion. I'm not sure it will hold.
Perhaps I should have used one of the doll
needles, though they are *too* long, and very
coarse.
The cushion is tied with buttons made by covering circles of batting or some-such with circles of self fabric gathered tightly along the edge. Two of the pairs of buttons have twill tape sewn under the button on one side, and one of those tapes had torn loose. I don't recall having that much trouble making the cushion in the first place.
Then I decided to get on with making the T-shirt, and hunted out the pocket pattern. Huh, it says here that I did cut out the pockets — so where are they?
They are finished and attached to the shirt. Now that I'm seventy-three that sort of thing worries me more than it did when I was twelve.
At least I hunted for the pattern *before* dragging in the step stool and climbing up to fetch down the left-over fabric. That's harder than it sounds because of the cluttered condition of the sewing-room floor. Every time I get something off the floor, some other room gets de-cluttered by throwing stuff in here.
The madras pillowcases are on the sofa pillows, but they are still on the to-do list because they haven't been hemmed. That won't need doing until they need washing, and I can't remember the last time I washed the upholstery-cloth cases those pillows were wearing before.
The last time I wore my black blouse-and-skirt set, I decided that the sleeves were too short, so Real Soon Now I'm going to let the tuck out and just let the seam show. It's less conspicuous than the tuck anyway.
Just added a "back burner" category to the to-do list. I may move such things as the Gilligan hat down into it. Preparing to go out, I put my attaché case into the basket of my "pedal-powered wheelchair", then thought, why am I putting this big thing into my basket when all that's in it is my portable desk? Said portable desk is a flat plastic bag containing several letter-size sheets of paper and a letter-size piece of corrugated cardboard. The cardboard keeps the paper from getting rumpled and provides a firm place to write if there is no table around. I could make a duck pillowcase to keep the thin transparent plastic from getting snagged, and carry just the desk. Maybe I've got such a bag already? There probably is a usable bag in one of the suitcases in the attic, but I pretty soon found that a Cheese Factory bag left in the attaché case from some previous trip —perhaps my lunch was in it?— fit the desk reasonably well.
But now I'm marinating a scheme to make a duck portfolio to be a portable desk. But the place where I can buy extra-thin plywood closed a few months ago, and there are no scraps left of the piece I made the leg board from.
Later I sat in the rocking chair to do some handwork and heard a snap when I shifted my weight. This morning I inspected the cushion and found that *both* tapes had broken free. Perhaps the one that was attached was only basted and I had intended to re-stitch with button-and-carpet thread. Whatever, the cushion is standing in its place; I'll un-strike the repair job in "back burner", and move the portable desk to a new "fantasy" category.
Just moved "propeller hat" from "back burner" to "fantasy". I do seriously intend to make it; I don't seriously expect to ever be able to buy a solar-powered propeller. And solar-powered toys are so cheap! Less than the shipping charge on Amazon. But all oscillate, and I don't know where to buy a model-airplane propeller.
I think that binding —hong-konging, to be specific— a neckline would work better if the main fabric were thicker than the binding. I'd like to use this almost-sheer flowered jersey as a binding on something stout in a solid color.
It's also a factor that the jersey that the binding is sewn to tends to curl outward at the center front and center back. But the center back lies nice and flat, partly because it is hardly curved, but mostly, I think, because the hanger holds the allowance that I haven't yet trimmed down, and that counter-acts the tendency to curl. So a second row of stitching an eighth of an inch outside the first should make the binding perfect — but it would show terribly if done by machine, and I'm not enthusiastic about doing it by hand. Perhaps the feeble embroidery thread is about to get threaded into the sewing machine?
My next flowered-jersey T-shirt will have long sleeves, and a half-inch neckband with elastic inside.
I started out sewing properly, with the toe of my right foot pushing the back of the treadle and the heel of my left foot pushing the front of the treadle. When I'd sewn about three-fourths of the second seam, I noticed that once again I had the heel of my left foot on the carpet and its toes curled around the ridge at the front of the treadle. I may lose the ability to operate this machine with my shoes on.
Back to the side seams: time to turn the shirt right-side out and make the second row of the three that constitute a flat-felled seam.
Stayed up until side seams were finished; now just need to hem the sleeves and hem, and trim the neck binding.
After supper, I shuffled the to-do list around, putting things closer to priority order. But "cut out pedal pushers" is next up even though "mend old silk scarf" is at the head of the list. Or I should say, I wrote "scarf" at the top even though "pedal pushers" is next.
I have forgotten whether I cut the knickers with the wrong side on the inside or the outside. I *think* I folded with the wrong side inside, but I didn't put any blue arrows on them. On the scraps, but not on the pieces! I guess it's a case of "I couldn't possibly forget that". I supposed I could lay out the scraps and deduce, but I arbitrarily decided that the inside was the right side and drew arrows with a chalk pencil (so that I wouldn't confuse the marks with any blue marks that I find later) on the outsides of all the pieces, which still have their patterns pinned to them.
I can't tell one side from the other anyhow. And if it turns out that the pockets (which *were* marked, and have been pressed accordingly) look odd, my jersey always covers them.
I found a neat tutorial for making a string of prairie points while I was looking for something else: http://modalissa.blogspot.com/2010/03/prairie-points-and-pillowcase-tutorial.html
I must add it to OUTLINKS.HTM.
A chore scratched off the list before it got on: I was scratched by a closed safety pin while putting on my old ragged slippers to shake the rugs, and I never take out the safety pins — originally they were to keep the buckles from slipping on the worn straps, and I stuck them into the ends of the straps to keep them handy, and they keep the straps from slipping out of the buckles altogether, so I just slip my feet under the loose straps. Since I never remove the pins, I could sew the straps to the buckles instead, and I did. But the left slipper is a bit loose; I was too afraid of not being able to put the shoe on. I'll probably have to unpick that one and do it over, but I'll wait until I see whether it annoys me.
A lesson for pin-cushion construction: the slippers are cotton, and the offending safety pin was difficult to remove because it had rusted into place. Cain't say that's anything new — I was a teenager when I first learned that lesson — but I was moving the pins frequently when they were first stuck into the slippers.
Late in the morning I pressed the turn-unders for the hems of the T-shirt, and had started to press the turn-unders —ah, turn-ups, since they are on the right side— of the side seams of the knickers when I became so hungry that I couldn't focus. So I sprayed the side seams and inseams of the knicker fronts with starch, scrambled an egg with cheese and capers, ate it on a slice of griddle toast, and took a nap.
After supper, I pinned and stitched the hems of the T-shirt, then marked around the neck and trimmed off half an inch of the binding. I found that my stainless-steel pocket ruler was just the right width to mark by. Since I don't want to sew the allowance of the hong-kong binding down, I sprayed the neck heavily with diluted bottle starch, pinned the front part of the allowance into place, and hung the shirt up to dry. It will be ready to wear when I've pressed the neck and rubbed the blue marks with a damp rag, and the other one isn't dirty!
Both fit rather tight. I've got to exercise more and eat less.
Eh, it needs pressing, but that's laundry, not
sewing: another T-shirt to perfect
bound neckline
In progress: grey knickers and black drawers. Well, so far I've only reflected on the black drawers, but the fabric is on the "in progress" hook —I've decided that that is a better name than "to-do hook"— I've located some #40 cotton thread to sew it together with, and the pattern I made the white-linen drawers from is hanging on the nail I got the knickers pattern off of. So I must take that down before I start hanging the knickers pattern back up.
I see that the pattern for the rectangular patch is already back on the nail.
I bought a headlamp today; I wasn't transferring the old one from machine to machine. The new one swivels: no shim needed!
I was disappointed to see, when I opened the package, that it had a cross-strap over the top of the head — better for use as a head lamp, but at first I thought I'd have to cut it off. I hate to do that when it's conceivable that I might someday want to use it for a headlamp. But a while after I mounted the lamp on the Necchi, I realized that I could tuck the cross strap under the main strap at the back, so it's no trouble at all.
Which is more than I can say for the swiveling: the hinge makes the lamp stick out so far that it comes within an inch and a quarter of the bed of the machine. I suspect that it's right where I frequently want to put my right hand. We shall see whether it's more trouble than help.
I came up with a clever way to attach the lamp. The old lamp, I fold the headband in half and fasten it with a clothespin when it's on the White, and when it's on the Necchi, which has a thicker throat, I tie the ends together with a shoestring. When I wrapped the ends of the headband around the Necchi, I found that the folds exactly met — so I looked into the bag where I keep clothespins I don't use, and one of the dolly-peg clothespins was a cheap one that had been sawn from a flat board instead of being turned on a lathe. This made a perfect clip to hold the ends of the headband together, and it lies nice and flat against the top of the machine.
Oops! Tomorrow is Easter and my Sunday stockings are getting a little picked and worn, so when I laid out my clothes, I decided to break out the new pair. Found them, made wee little bar tacks near the edge of each cuff to show which side is the back — then discovered that I'd already done that on the other side, probably when I bought the stockings many months ago. But one set of bar tacks is white and one is red, so I can just put white in front and red in back, and not have to strain my sieve-like memory or pick out one set of bar tacks.
The springliest dress I have is one that I don't like to wear because it musses very easily. So I made the rest of that piece of fabric into pillowcases, it made good pillowcases, and I wore them out. When I washed last Monday, I set aside a sweat rag I made from one of those pillowcases to wear tomorrow, just on general principles. While pressing the dress today, I noticed that in the pocket is a spectacle-cleaning rag also made from one of those pillowcases!
A spectacle rag might show, but because it matches the dress, it isn't going to show much.
I pressed my new T-shirt and rubbed out the blue marks so that I can change into it after church tomorrow.
Washed said T-shirt Monday. I didn't like the way the neckline stood up in the back, and hoped that it was starch rather than insufficient dart-easing.
So now I have two pieces to be ironed on my
in-progress hook.
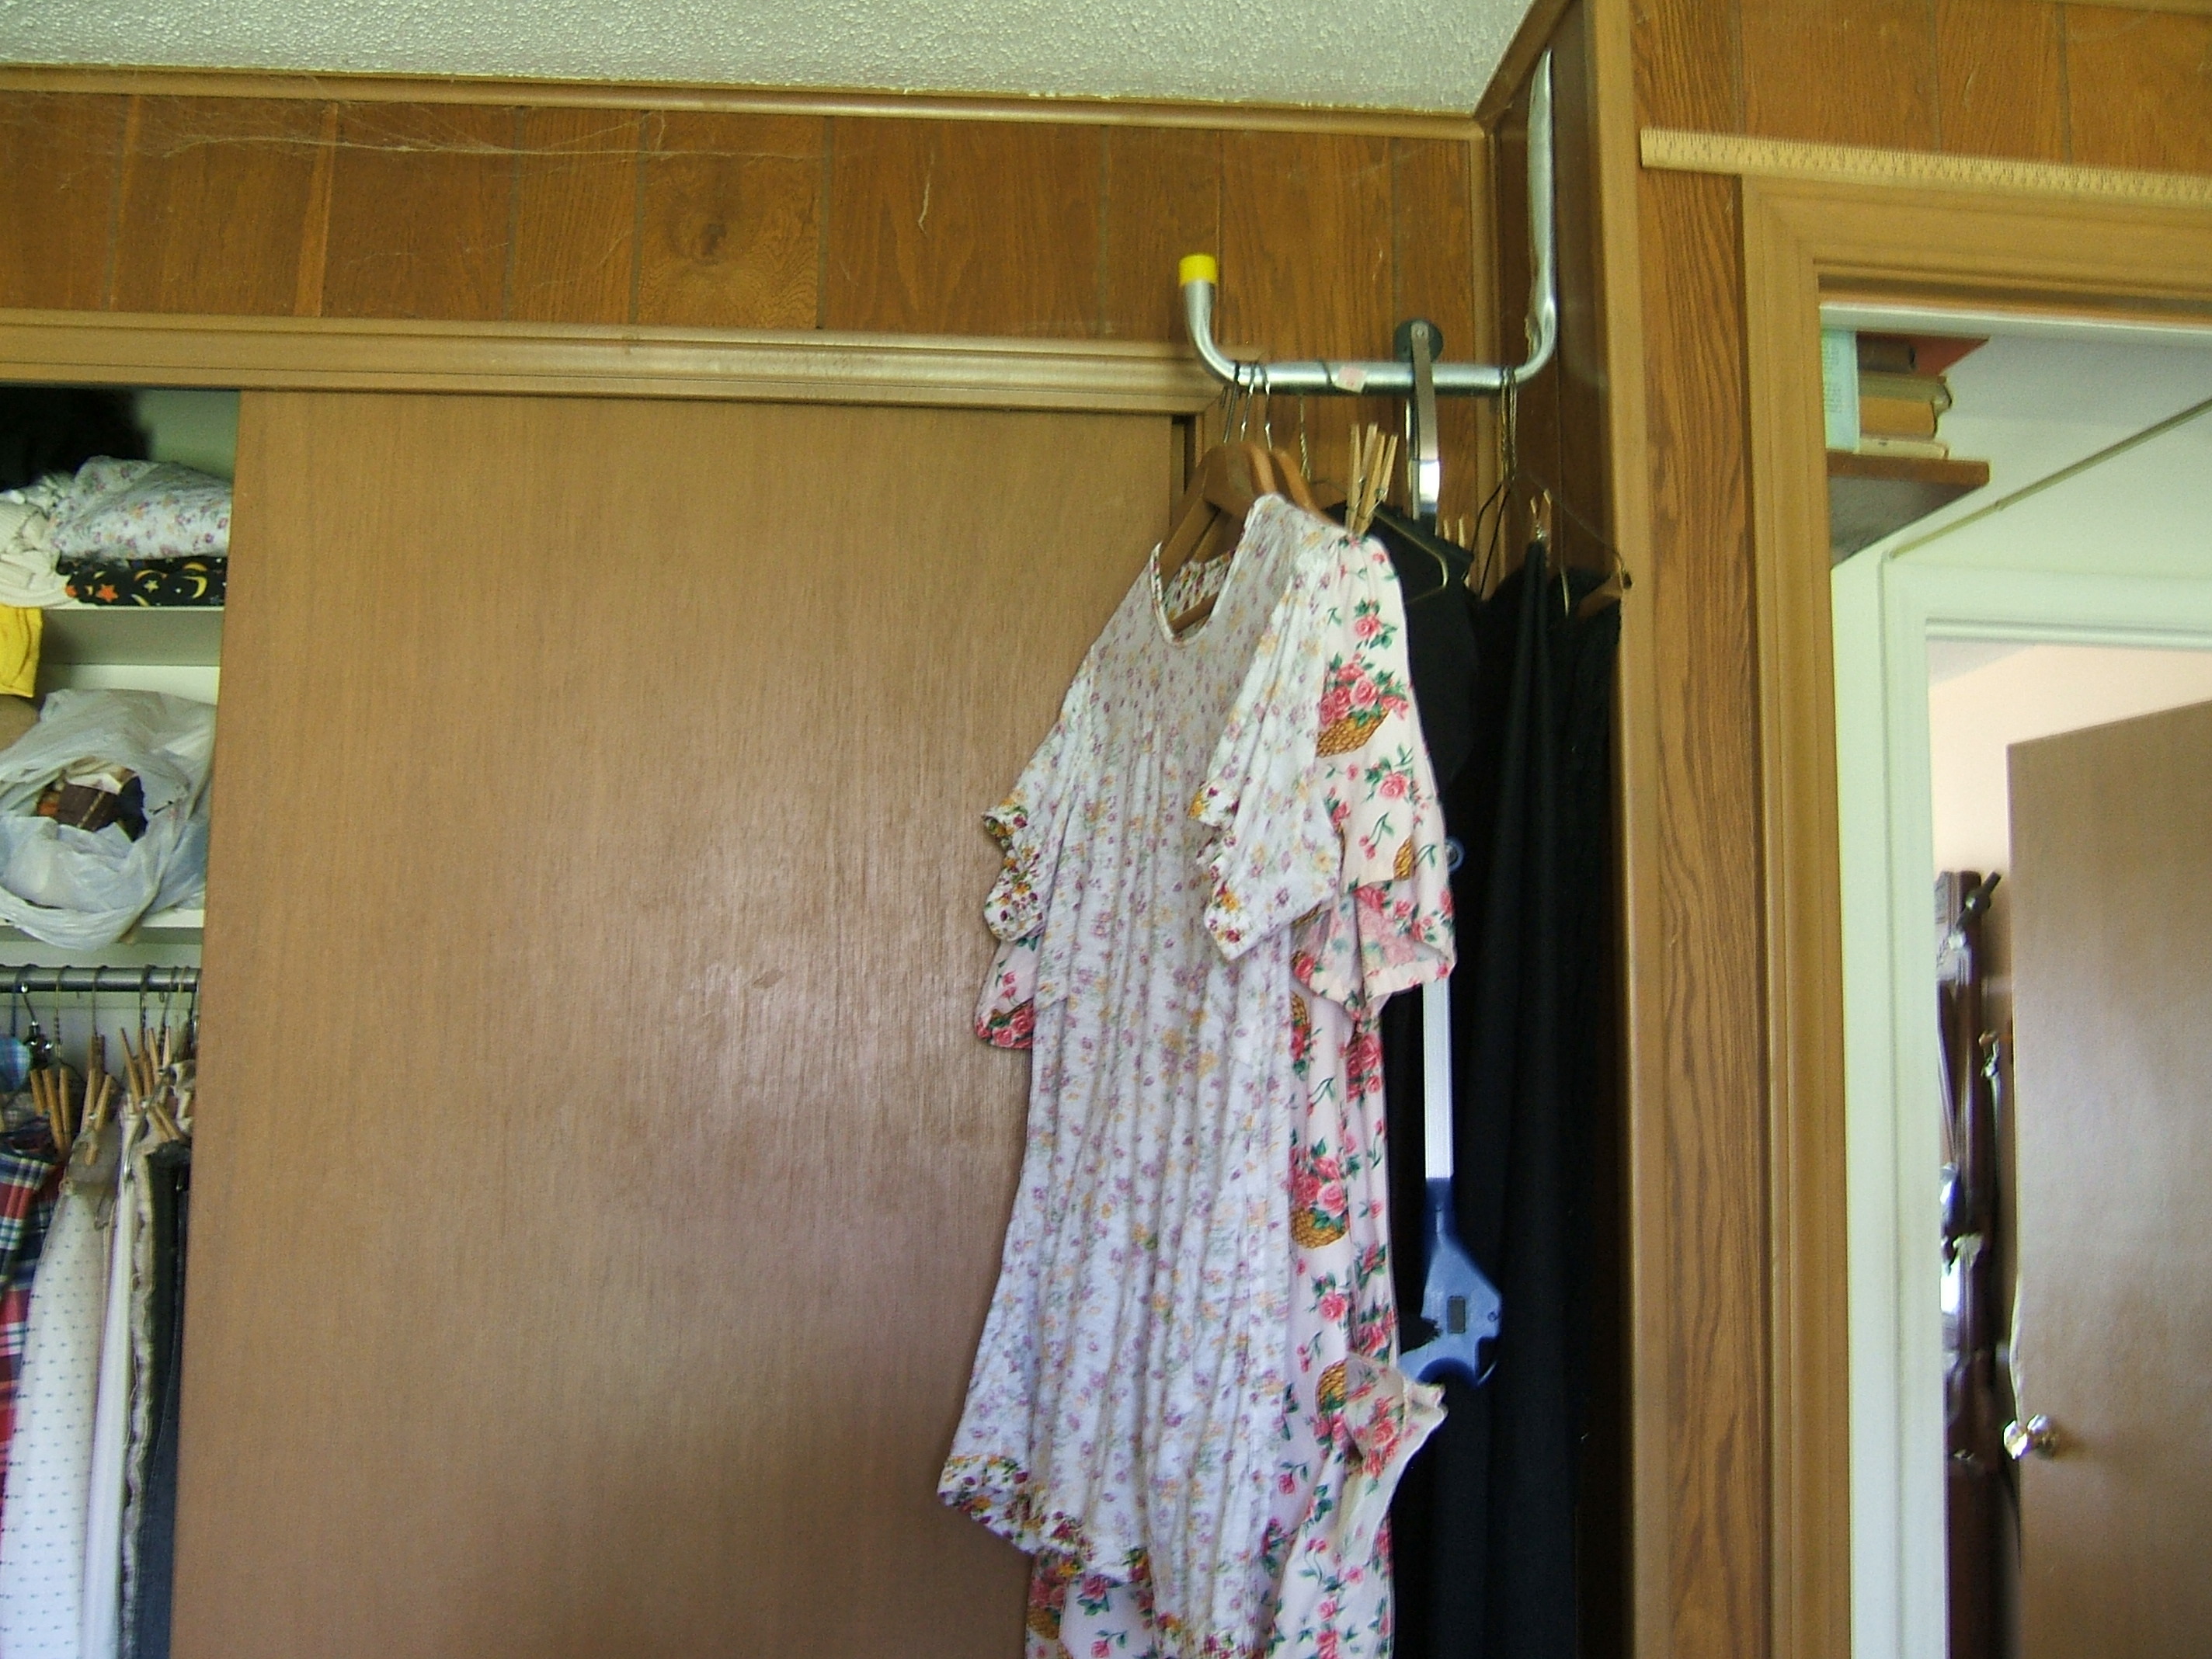
The black blur is a pair of
tights that needs darning, a pair of slacks that
needs to be patched, and the fabric I intend to
make pedal-pushing pedal pushers from. The
blue-handled dingus is a grabber for getting
things off the top shelf. The door to the
stash closet doesn't ordinarily stand open —
at least it's not supposed to; I don't
want light to fade my fabrics.
This morning was deck-clearing. I made bar tacks to mark the backs of the white gloves I carry in the pocket of my safety-yellow night-walking jacket, mended the waist hem of a pair of panties that I re-tied the elastic on a while back, and re-stitched the sole-upper seam of the right slipper of my twinkle-twinkle pair. None of that was on my to-do list.
Began this morning by making a desktop icon for the next file that needs attention, selected one that should be converted into hypertext, then lost the morning to actually doing it. Awkwardly, because I've forgotten the steps. It's going to require a lot of organization; some of the current organization comes of dividing some of the paragraphs into sub-paragraphs and hypertext does not support that. Also, I thought that I was getting off easy on the Table of Contents and had it half done, then realized that I had only done the h2 headers and I also have h3 headers. Might be some h4 in there.
Did look at my gray knickers. Started getting ready to appliqué the back pockets and rectangular patch to the back, thought that while I was making patches I should do the watch pockets, egad I don't remember cutting watch pockets — or passport pockets, for that matter. Searched among the pile of pieces.
duh
Bike knickers don't have watch pockets or passport pockets — they don't have broadfall pockets to sew them to!
A couple of small patch pockets high on the front of the hip might be useful, but I'm going to pretend I never thought of that.
Besides, I no longer carry a watch.
But more pockets might be useful in the black pedal pushers. Passport size, mid-thigh, with a flap or tape to snap or Velcro down. Centered over the side seams, I think.
Hip pockets are now hemmed. Next step is to sew the pockets to the back pieces, and sew the rectangular patch to the inside of the right back piece.
The points of the pockets are a little off-center, but since they are mirror images, that is going to be just fine.
I think that I recall how the Fashion Incubator pockets go: first hem a scrap of cloth, then fold it right sides together, hems matching, stitch the pocket shape, cut out the pockets, turn right-side out, press, remove basting, appliqué. But that leaves corners of raw seam allowance in the upper corners of the pockets. This is perfectly standard, and all the best shirtmakers make their pockets with that raw corner inside — but I don't like it.
I hemmed by the method given in Pockets, which I see should have been my choice for next file to revise instead of Fabric. But I've left Fabric in a bit of a mess, so I have to finish that job before starting in on Pockets.
Running around in the morning and gardening in the afternoon, but I basted the rectangular patch and the pockets to the back pieces in the evening. I backed the raw edge of the rectangular patch a tad away from the raw edge of the hole where the gusset will be sewn in.
Also pinned the gusset underlining pieces to the gusset pieces but didn't baste. When I do, I think I'll sort of quilt them together.
There's a bit of white selvage on one edge of one underlining piece; I greatly fear that this will not be completely covered by the flat-fell seam, and the gusset lining is to be on the right side.
I absent-mindedly started basting without a thimble, and didn't bother to fetch one when I noticed. My finger got a bit sore, and now I feel a rough spot, as if a callus had started to form.
I used to have a good, knotty callus on my middle finger from writing a lot, and I can still feel where it was even though there is no objective difference from my other middle finger.
Any calluses I got from writing now would be on my fingertips.
Now the knickers are in four pieces and a two-part gusset. But tomorrow is Sunday.
I've about made up my mind to decorate the hems of my black pedal pushers with a red-linen hong-kong binding on a hem turned to the right side. I've also decided to put in the casing, as for the drawers, in case I wear them under a short dress. Whether red linen or self fabric, I can't decide. Various schemes for making the ends of the drawstring decorative will probably give way to not putting the string in until after I get to church. I certainly wouldn't want an underwearly ruffle on it while I'm pedalling!
I began the sewing day with a little deconstruction. While coming back to the house after tending the lily bed, I noticed that my twinkle-twinkle shirt was hot on my back even though the temperature is quite pleasant and reflected that a short-sleeved black shirt isn't such a bright idea. Then I noted that the pockets were peeling off, the hems were half undone, and the fabric had worn thin along the seams — so I carried my pocket knife in my hand and ripped those pockets right off. When I came inside, I threw them into the bin of dirty cleaning rags, then took off the shirt and tore it into its components. Though the thread was old and had been three-ply cotton to begin with, the shirt had been mended a few times, so I needed to encourage it with a seam ripper here and there. With so many folds worn into dotted lines, I was surprised that there was only one short place where I tore off the seam allowance.
Then I put on the linen shirt that I made for our trip to Australia. And rolled up the sleeves.
Nothing done on the knickers, but I sewed a twill tape to DH's white shirt and sewed a button on the tape so he can wear a tie to the wedding.
Didn't iron the shirt or the dress on the in-progress hook, but we aren't taking those. (Though I wore the dress for easter because of the flowers, I don't expect to want it again before July.) I think maybe I'll put the dress back into the closet with those that I washed and put away un-ironed last fall.
The dresses (one for hot, one for cold) that I am taking could use a little pressing, but they'll probably pick up some wrinkles en route, and hotels usually have an iron in each room.
Read some of the current Threads yesterday. One of the tips is from someone who also unvented the twinned-pocket technique. The tip suggests also using it to make one pocket symmetrical (fold it in half), and says to use soluble basting thread so that steam-pressing automatically removes the basting.
Since steam doesn't wash away the thread, I presume that this leaves gunk on the fabric, but it would be inside the crease where it will never show even if it doesn't come out in the first wash.
It's ripping outside weather! Just throw snippets of thread in all directions, literally casting them to the wind.
I picked half the hem around my white bra out; it had frayed through at one spot in the back and was threatening to tear. Since it's still my only white bra, I decided to re-hem instead of zig-zagging around it.
Also took out a lot of basting as I assembled my gray cycling knickers. Sewed the back pockets on, sewed the rectangular patch on, flat-felled the inseams, installed the right-side gusset — and progress came to a screeching halt when I realized that the reason I couldn't make the underlining fit the left side of the gusset was that I'd turned less than a quarter inch to the right side. So I picked out the basting, but have yet to press out the crease so that I can do it over.
Since the edge is well starched now, I think I'll try pinching the fold instead of basting it.
Some of the edges that I starched have marks like water stains. I presume that the starch will wash out.
Started a file of notes on the knickers at BIKEKN14.HTM.
What a difference folding the turn-unders a teeny snitch wider made! Instead of it being hopeless to stretch the liner far enough, it's almost too big.
At naptime, the knickers are in two pieces, if you don't count the elastics. I was halfway through pinning the right side to the left side when I wondered whether I'd sewn that third row of stitching for the gusset seam that I'd left undone for convenience in trimming out excess seam allowance on the gusset liner on that side. Nope; unpinned. finished sewing in that — gusset? half gusset?
And now I deem myself too groggy to pin; better sleep first. Another last-minute dinner; can I get away with serving sliders three nights in a row? [We had spaghetti.]
Good thing I was interrupted: I want to sew the side seams before joining the two legs together.
Oh, man, it is awkward flat-felling the side seam after the inseam is sewn, and it would have been nothing at all to sew that very short inseam after the side seam was sewn. Just how hard can it be to install the gusset after the leg is a tube?
Peeling a trimmed seam allowance out of one row of stitching is easy. Picking it out of the edges where the seams cross one thread at a time is a royal pain. Must make note in my knicker notes to trim the seam allowances out of the seam allowances (how will I state that to make sense?) before sewing the gusset in.
While picking out basting, I discovered a place where the gusset liner hadn't been caught in the seam. Another advantage of the pick-out-the-first-stitching method: if that flaw had been on the inside, I could cover it with a piece of twill tape. Now my choices are disassemble everything and start over or let the knickers begin life with a conspicuous patch on the seat. And it will have to have turned-under edges because I have no tape —I rather suspect that there is no tape— that matches my linen.
grey linen bike
knickers Yesterday I tucked a
spectacle-cleaning rag made of blue-plaid
linen-cotton shirting into the back pocket of my
new knickers and hung them in the closet.
The weather bureau says it will be a while before
I can try them out. Fortunately, when I
washed my winter clothes and put them away for the
summer, I missed a pair of sweat pants. But
I may have to move the silk tights back to the
front of the closet.
Yesterday's chore was only inserting elastic, but I made a complicated deal out of it. Took me quite a while, for example, to think of tying the cord elastic to a shoelace to keep the end from pulling inside and making me start over.
A really-thick shoelace that had been the waist drawstring of a pair of store-bought sweat pants was the only string handy, but it worked very well; the knot was too big to pull inside. I used a sheet bend, but I think that a square knot tied by the same "rabbit comes out of a hole and sees a dog" technique I use for sheet bends would have worked. There is a special knot for tying a light line onto a heavy line; if I still remember when I go on Usenet tonight, I'll go to rec.crafts.knots and ask.
The fooling around didn't undo the fold-unders, because I basted them in place with a rusty-orange 50/3 cotton thread. That made it easier to find the holes, and I left the basting in (after trimming it a bit neater) in case I have to re-open the casings some day. When the mend isn't marked, I sometimes give up searching for it and cut a new gap.
I settled on a darn for the uncaught raw edge. I stitched close to the raw edge, then turned and stitched again a stitch-width from the first stitching, then yesterday, when I was done with the treadle, I moved the thread to the Necchi and made two rows of zig-zag, one barely catching the fold of the seam that should have caught the raw edge, and one that was intended to barely link with the first one. It missed, but only in places where the raw edge *had* been caught, but I feared that it might be just barely. Spaced stitching there is better anyway, said the fox.
I'd be better pleased with my mend if it were not adjacent to the rectangular patch — that is, in a place of high stress.
Nothing done today; I wasted the whole morning writing a response to a Dear Abby column — a classic waste of time, since Miss Phelps gets so many letters that mine is unlikely to come to her attention, and very likely to duplicate what someone else has said better.
I sewed around a ragged armhole on one of my curry-linen bras. This linen was one of the left-over goodies that Stephen used to find; it's a pity that I have no idea what sort of linen this is or where it came from. I was impressed with the quality when I made the curry jersey. and I remain impressed now that the bras made from the scraps of the jersey are wearing out.
On the other hand, I've made only one bra and a triangle scarf out of the "lipstick" linen I bought from the same offer; I might be able to get three bras out of it. I'm not at all sure that I need that many red bras, but who sees my underwear?
I've a pair of panties and a white bra to repair when I get around to replacing the ecru thread on the Necchi with white thread.
Yesterday I came back with my jersey sweaty, ran it and a curry bra through a rinse cycle, when I hung it up, I found a hole worn through in the middle of the front of the skirt — a place where there is no wear at all. Perhaps the "softened" process overdid it at that point. I haven't gotten the box of linen scraps down yet.
And when I started to put the bra into the closet, I found that a couple of inches of stitching on the elastic casing need to be resewn. Might do some prophylactic stitching on the armholes while I'm at it.
No new sewing started, but I got three jobs of mending off the ironing board. First, with the ecru thread already on the machine, the bra mentioned in the previous entry. I repaired the edge stitching in the casing, decided not to replace the missing stitches between the rows of elastic. It would be difficult, the bra hasn't a lot of life left in it, and the gaps are short enough that they don't matter much. Then I stitched down the exact middle of the bias facings on the armholes with a wide-spaced zig-zag, to keep the raw edges inside from flopping around when the edge wears through.
Next a pair of panties; it would appear that one of the pieces of well-worn hemp knit I used for lining was a bit too well-worn, and was fraying loose along one seam. I changed the spool, forgot to change the bobbin, and zig-zagged over the fraying seam with white thread on the ecru side and ecru thread on the white side. Oh, well, it is underwear, and I have trouble telling that shade of ecru from white.
So I changed the bobbin and took up my only white bra. It was too far gone, and I wanted it to remain nice if possible, so I had undone the entire front of the hem from shoulder seam to shoulder seam, starched, and pressed it. Now I carefully put blue dots equally far from the shoulder seam and trimmed along the crease nearest the raw edge, starting at each blue dot, I trimmed only fuzz at first, then angled very slowly onto the crease. Then I pinned a shirt-tail hem, using the second fold as a first fold where I'd trimmed, and blending into the original first fold as I approached the shoulder seams. The fold was thin in spots because of having been the edge, and was quite raw at two points.
It turned out that the hem fit quite neatly inside my widest zig-zag, so I overcast from shoulder seam to shoulder seam.
But I really, really need to start making new bras. The pedal pushers can wait, as I can wear my old bike knickers as drawers. They won't hide the tops of my knee hose when I hike my skirts up, but I could wear black knee hose. Or perhaps I could cut both projects out at the same time? But I'm inclining toward making the pedal pushers full-fledged outerwear type broadfalls, with eight pockets. That takes ages to sew; I'll be lucky to have them for next summer.
Yesterday I shook out the red linen — about four yards, and 41" wide. (What's with forty-one inches? A meter I dig, a yard and a quarter I dig, but why forty-one?)
Judging by the shapes left by cutting the first
bra, I'll get one bra per bias strip. It's
just a little too wide to mark on any of my
tables, and the carpet is squishy. The
fabric was cut off the bolt almost straight; I
appear to have drawn a thread halfway across
before deciding to cut my scarf off the other
end. Thinking I'd finish drawing the thread
so I'd have a place to measure from when I took
the fabric to the church, I threw the fabric on
the sofa to free my hands to move my rocking chair
into the good light, then realized that I could do
this job outside and set off in search of
sunscreen and a hat. Somewhere along the
way I got distracted, and when I finally came
back,
it was too late.
I did get the thread drawn later, and was much impressed with the quality of the cloth. I was able to draw the thread all the way across, and was obliged to cut it to release the puckers — and it wasn't slick, it was strong. And quite uniform; the slubs in the fabric are few and small. And there is an excellent selvage, not the least bit puckered or dented. I do wish I knew where Stephen found it and what the maker called it! (Though if I did find it, I imagine that I'd look at the price and say "gaack".)
Then I rolled the fabric up to fit into the basket of my "pedal-powered wheelchair", and discovered that the batteries in my laser level had gone weak since I last used it. Probably the last time I made bras! Then the first two AA cells I put in it were defective, but the next two worked and I put the electric chalk line into the bag with the fabric. (I guess it's called "laser level" for alliteration — and it does incorporate a bubble level.)
Was that before or after my nap? Who cares?
When I was undressing for my nap, a hook came off my old jeans, and I had to re-sew that before I could dress after my nap. My spool of polyester upholstery thread, by the way, is in the drawer of the White. I wonder what I machine sewed with upholstery thread?
This morning was devoted to getting my passport renewal ready to mail, and getting to the post office before noon. Whether that was necessary, I still don't know — I was so concentrated on getting the letter mailed that I didn't think to look at the hours. Having been forethoughty enough to pack everything needed to mark bias lines (except for two tables and a hymnal) on the day before, I proceeded from the post office to the church. There was an awk-scrickle moment on the way when I remembered that I'd forgotten my key — but a moment later I remembered that I store it in the pocket of the pants I was wearing for just such a situation. (Brief pause to take key out of pocket and put it into jewel box, since I don't want to take it to tomorrow's barbecue.)
After cleaning the fridges, I moved two tables together, spread out the fabric, and put wash-out marks along the selvages to divide it into squares. I could have done this on my home table, but I wanted the marks to be fresh — I wanted to use them while I still remembered what they were. I found that I couldn't see the end of the drawn thread clearly, so I began by making a mark there. Then I put wash-out "notches" along the selvages the length of the drawn thread apart.
I set the laser level on a hymnal so that the light would shine slightly downward on the fabric, which keeps a slight variation from shadowing the entire rest of the line. Since I hadn't pressed out the wrinkles from storage and made fresh wrinkles folding it to fit the basket, there were a lot of inch-long gaps in the line. I discovered that the "watch the sparkles on the pen" trick enables one to hit the line precisely even when one can't see it!
Also found that pulling the current square up close to the end of the table made it easier to mark the second half of the line. When it gets so far in that one can't reach, going around to the other side doesn't work, because one's hand shadows the line one is trying to follow. But going around to the end works fine, and gets one's hand at an angle at least as comfortable as working from the far end.
And putting the marker at the far end, lying right on the (extension onto the bare table of) the line I want to draw, made a good target, and more than half the time, I found, upon going around to inspect, that no adjustment at all was needed and I could start to mark right away. Could be I'm getting the hang of this even though enough time elapses between practices for an AA cell's shelf life to run out.
Pity I've just now thought that I could have put the camera into the basket too!
I should add "patch jersey" to my list of things to do. I found a perfect thread-straight scrap just the right size and shape in the box of linen scraps.
Then after wrestling the box back onto the top shelf, I discovered that I'd set aside a layer of scraps to sort through the orange gauze, then forgotten to put it back in after re-folding the orange gauze. I've not yet climbed up to take the box down again. But it will be easier this time because it's the top box. I will no doubt do it just before pressing the patch, because the layer of scraps is on the ironing board.
I know where I got the orange linen, and I'm not at all inclined to go back.
Didn't remember that today is the day to cut out my bras until DH called me to help move the kitchen table into the living room — it kitchen-cleaning day. Oh, well, the weather is lovely and I'd rather cut out on the picnic table anyway.
The table is back in the kitchen as I type. The fold marks in the lipstick linen needed to be flattened a bit, and that meant clearing the ironing board. And that meant zig-zagging a couple of pairs of panties that had loosened a bit in Monday's wash. Then I needed to press that patch I found for the orange jersey, and the spot where the patch will be sewn, and get the linen scraps back down to get rid of the layer I forgot to put back last time and to find a thread to sew the orange patch on with. (To my surprise, the weft threads of the scraps appear to be sound enough to sew with, if I wax them.)
And four shirts hung on the in-progress hook in need of ironing, and I was running out of shirts — I'm wearing a pajama top today. Turned out that the fourth shirt had just wandered in somehow; didn't need ironing and I couldn't find anything that needed mending. So I took the practice epi-pen out of its pocket (that gave me a moment of puzzlement; it felt like a reading-glass case, and both of those are accounted for) and hung it in the closet.
Finally flattened the red linen a little — couldn't dampen it because the bias lines on it are water erasable. Draped it over the ironing board so it wouldn't get new wrinkles, then took the box of linen scraps off the bed and set it on the linen, because it's time for my afternoon nap.
(Actually, yesterday was the day to cut out, but I felt dueless, so I finished reading The Beasts of New York instead.
No such thing as an empty ironing hook. While hunting for a shirt to put on this morning, I found two white shirts that were washed and put away un-ironed last fall.
I feel dueless again today. I think I'll patch the orange jersey instead of cutting out. Cutting out takes a lot of thinkum.
Yay! Finger-pinching did just fine to miter the corners of the pre-pressed patch.
It's lucky that I didn't feel like cutting out. It would have been a pain to open up the table, lay out the fabric, and then not be able to lay out the pattern and cut! But feeling unambitious and getting a backache probably have a common cause.
Patch hole in orange jersey

I put the skirt of the jersey over the ironing board, stuck an old plywood blocking board under it to provide a firm surface, and laid the patch up against the waist casing intending to eyeball centering, then pull it down to up-and-down center over the hole. But this position amply covered the hole, and looked much less patchly than a lower position would. So I measured the centering —needed only a very small nudge, then I un-nudged half of that— and basted it where it lay. I basted the edge touching the casing first, so I could needle-encourage it to lie exactly fold-to-fold.
I also back-stitched this edge first, to further needle-encourage it.
I ravelled a thread from the piece that I cut off to straighten the end while making the jersey, cut it in half, and swapped ends on one piece to make the nap lie in the same direction, just in case it had some. Waxed thoroughly. The first piece got a lint-knot while waxing that I finally gave up picking at and broke off; the second needleful got a lint knot while sewing that caused the thread to break while I was trying to pick it off. All other lint knots yielded to needle-point and very cautious scissors.
I forgot about pulling linen threads by the very end, and treated both needlefuls as if they were cotton — until the second needleful broke, and I moved the needle to the end. That may have aggravated the lint knots. The lint appears to wrap around the thread in a cylinder. A sufficiently-fine pair of scissors (viewed under a microscope!) might snip the wrapping off — except where the lint knot is actually the end of a sub-thread that will keep skinning back no matter what you do, short of cutting the rest of the thread to match or peeling that sub-thread out entirely.
When I finished sewing on the patch, I split the doubled thread into two single threads and worked outline stitch —the back side of back stitch— over the hole to replace the missing warp threads. The weft threads are all intact; perhaps it's lucky that I didn't find a lengthwise strip to get my ravellings from, and settled for the strip that I cut off to straighten the end of the fabric before making the jersey.
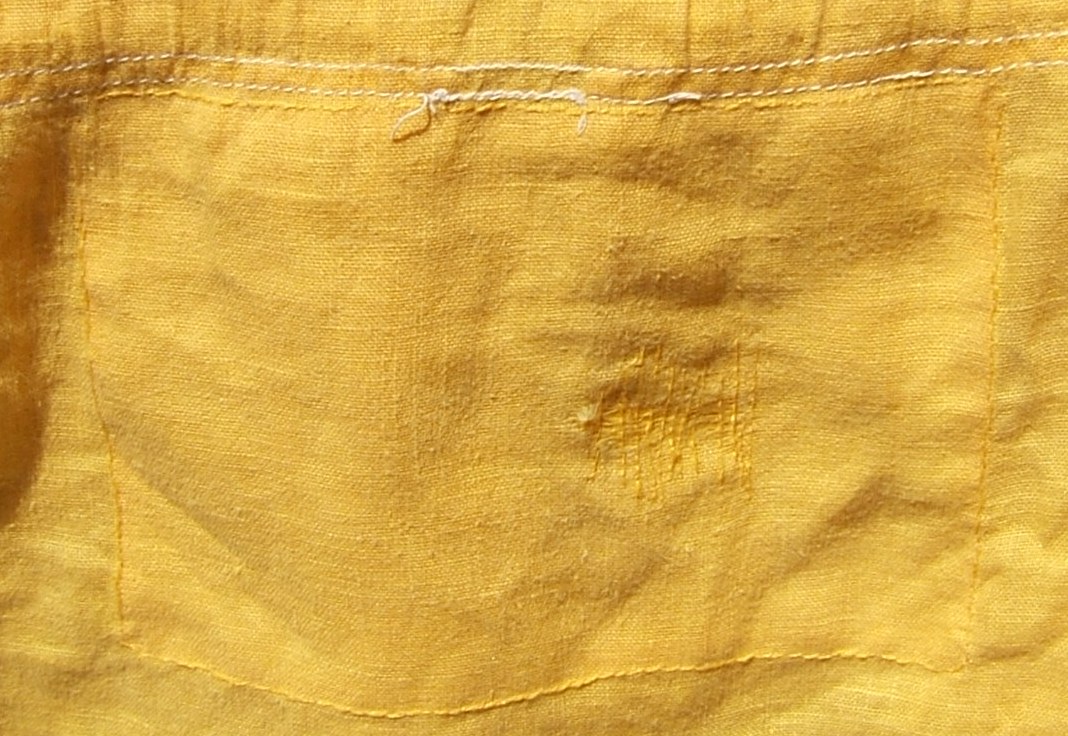
This showed very little on the outside.
I thought I'd use the linen-drawers pattern to make my pedal pushers, and just restore the pockets. But on inspecting it, I see that I made it from the knickers pattern, copying the "My Pants" pattern to fill in the hole left for the gusset. There were a lot of changes in that pattern to make it suitable for an elastic waist, and some incidental to the gusset removal. So I'll use My Pants to make the pedal pushers, copying the length and casing placement from the drawers pattern. The pants I have on were made from My Pants and I can ride the flatfoot in them just fine, so it should all work out.
Except that I let DH go off to get a shot before I got around to opening out the dining table into a cutting table.
It isn't all that hard for one person to open the table: pull on one end until it skids, then pull on the other end until it skids.
But I didn't get any farther than spreading the fabric out and determining that there was plenty of fabric to make two pairs, but only if I cut both at once, so making just one would waste enough fabric to make another whole pair. Oh, I also sorted out all the needed pattern pieces except for the waistbands, which I ought to get off the nail in front of my nose and put on the pile of pattern pieces.
Done. I selected the ones I used for the black bull denim.
Today, it's noon and still nothing cut.
I wanted to iron the black linen blend before cutting it, and that meant clearing off the ironing board, which meant removing the red linen destined to be bras — why not cut the bras first?
So I put the red linen on the table and confidently reached for the current bra pattern — it wasn't there, it wasn't anywhere. Much frantic searching and up-cleaning later, I found it underneath the deprecated bra patterns. The pattern says it was last used in 2011; I guess that's time enough to wander out of line. It says that my scarlet bra is my newest.
Now all the old linen patterns are on the same nail with the jersey patterns and interlock patterns, and the current linen pattern is on a nail by itself. On top of two envelopes that belong with patterns on the south wall. Good a place as any for them, as I doubt that I'll ever again fold up a pattern and put it into an envelope.
Now to lay out, but the table is narrower than the fabric. Oh, well, I plan to cut a strip at a time, so let's put a couple of chairs behind the table to keep the fabric off the floor and rotate it ninety degrees.
And a front and a back laid side by side along a bias line just will not go. Half an inch hangs over no matter what I do. I suppose that I got the existing bra out of this by letting a quarter inch on each side hang over in spots where the missing fabric would be inside a seam allowance, but I'm jolly well not going to cut the whole piece in such a fiddly-fussy way. So I folded the red linen up, hung it back in the closet, and put the red ramie on the "in progress" hook. That's fifty-five inches wide, and should be quite easy to cut.
After I take it to the church and mark bias lines on it.
Next, I ironed the black linen-cotton blend, left it draped over the ironing board, and altered the My Pants pattern by folding up five and three-quarters inches at the bottom and marking the place to put the casing. Marking the casing was a surprisingly complex task that involved getting the knickers pattern down off the hook. While I had it down, I added a table saying what pieces to cut to make knickers, and how many of each. (Two of everything but the patch.)
I should add check-lists to all my patterns.
Surprising that the pattern needs to be shortened by so little.
Finally laying out!
I made a neat discovery. I'm measuring from the white line woven into the "selvage" to the grain line with a transparent ruler — but I can't read the numbers on the ruler against the black cloth.
So I wet the back of the ruler, then colored under the desired number with my white Nonce pencil. Of course, this did entail waiting for the paint to dry.
This should wash off easily, but I don't think I'll bother, since I colored only the number, and never colored two adjacent numbers.
The two back waistbands will easily come out of the fabric beside the two fronts, once it's unfolded (and assuming that my grain measurements aren't way off), but I may have to cut the front bands out of the middle of a scrap.
I'm cutting on the fold; no worries about right and left. So far I've pinned two front patterns and one back pattern, and I'm about to begin pinning the broadfall-pocket pattern that will jog the other back enough to fit beside the already-pinned back.
Ta Dah! If, instead of nesting the second broadfall pocket beside the second back to correspond with the first one, I move it to in line with the second back, the space where I meant to put it leaves two selvage scraps that are plenty long and worlds of wide.
Back to pinning the last piece. I've already cut out the fronts and the up-arrow broadfall pockets to make space to pull the rest of the fabric onto the table.
While finishing the cutting out, I thought of a contribution I ought to write for the "work cut out for one" thread on alt.usage.english — based not on my sewing, but on my father "cutting out lands" when he plowed his fields. He taught me to do the same when mowing a lawn, and it usually is easier than trying to mow in a spiral. (In practice I used all three: spiraling in, back and forth, and up the edge of one land and down the edge of another.)
I noticed that the front waistband was one folded pattern and the back was two half-patterns, but didn't realize that the two half-patterns didn't match until I was laying them on the stack of pieces and noticed that the top pattern was marked "black bull denim/down arrow" and remembered embroidering permanent arrows inside the pockets of the black bull denim pants so that I could tell which waistband fit better.
I switched from the down-arrow pair to the up-arrow pair and back again during our trip to Michigan, and didn't notice any difference. Whatever difference there is, the pedal pushers will split it, because I used both halves to mark off the length to cut for waistbands.
Things will go on hold for a while, because I have to go to the library tomorrow to find out why my on-line account no longer works, and I want to make an excursion out of it.
After my nap, I cut out the remaining pockets and split the back waistband, which I'd cut to length and double width in the morning. The afternoon sun was *much* easier to cut along drawn threads by than the noontime sun! Then I put stuff away and closed the table, and shot six photographs to try out the newly-discovered close-up mode on the camera. (And then I noticed a dial on top with a lot of mysterious symbols; it was set for "auto", and I left it that way.) One picture was hopelessly fuzzy, and one was unrecognizable. Here are the other F O U R. When I'm feeling energetic and have nothing to do, I may crop and scale them and write comments.
When I laid my jersey on the picnic table, it was surprisingly difficult to point a camera at it without getting my shadow or the camera's shadow in the picture, and quite impossible to see anything useful in the viewfinder. But the sixth picture, of my watch pockets lying in a patch of sun on the living-room floor, was easy to snap. Well, duh, lay the object flat, not square on to the sun, and stand on the other side!
I had had no idea that the blue lines on the spreadsheet paper I made the watch-pocket pattern from were dotted! And you'd think the pencil scribbles would look terrible when magnified; compared to what I expected, they look like calligraphy!
Another comment on picture R — it looks as though I make one set of jeans every year.
A hole has worn through under one arm of the shirt I have on. Should I patch it, darn it, or tear the shirt up for cleaning rags?
Shirt is still in abeyance.
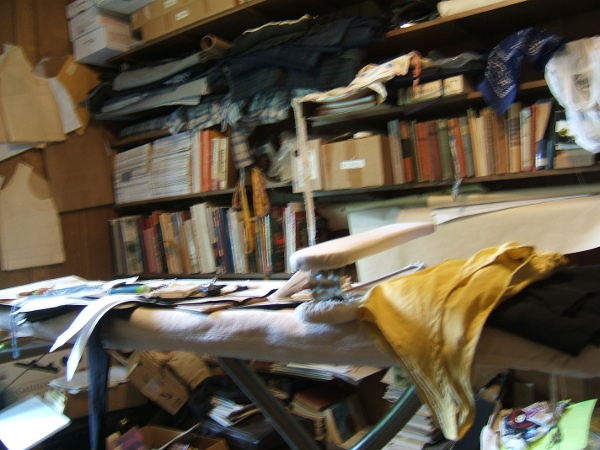
The orange blur is a bra that came out of the washer with a frayed spot on the neck when I washed clothes yesterday. After examining the fabric, I've decided to repair it, but I've not yet decided how much effort to put into it. I could just trim off the hem and bind the entire neck. [looks into "linen tapes" box] I do have a roll of matching bias tape, presumably left over from making the bra. Facing with bias hasn't worked very well on the necks of bras, but binding should be a different matter — and there isn't enough wear left for me to get too excited about it folding out in the front. [Must remember to pull the binding tight while pinning it to the front.]
But the bra goes onto the "in progress" hook. It was the only bra in the wash because I've taken to washing them in a bucket while the sweat is still wet, and I need those pedal pushers.
Before naptime, I ironed two shirts and pressed turn-unders for the to-be-hemmed edges of all sixteen pockets. Then I slept until it was time to cook supper.
Just realized that the curved edges of the broadfall pockets should have been turned to the right side, which will be the inside of the pockets. That settles my indecision as to which tape to use: red bias, to match the turned-up hems, so that it will look as though I did it on purpose.
I hope that I don't have to cut more red bias tape. Since the bundle in the linen-tapes box is basted, rather than pinned, I haven't unrolled it to see how much.
All the time I was ironing the flower-print shirt, I was vowing that if I make another shirt from this fabric, it will be long sleeved, since long-sleeved shirts don't have to be washed as often. While ironing the embroidered-blend shirt, I was just complaining; I'd long since decided that I'd never make anything that wasn't perfectly flat out of embroidered blend. Though I did make my new hat out of it, I have every intention of just leaving the crown puckered when I finally have to wash it. I do need to make an all-linen hat. [adds note to to-do list]
The remaining un-ironed shirt is also embroidered blend, but it's a different piece that has smaller spots that are easier to stretch flat, and it's a poncho shirt, so there will be less use of the sleeveboard.
Both embroidered shirts were washed and put away un-ironed last fall.
cut out pedal pushers for some
reason, that was listed separately from "make
pedal pushers".
Oops, I've already frittered away most of the morning reading e-mail and reading about cytoplasm, sorghum, and corn on Wikipedia.
Yesterday was shopping in the morning, but after supper I set up the treadle sewing machine and sewed the ends of the hems on the back pockets, the watch pockets (one end each), and the passport pockets. It being cloudy, black-on-black wasn't much fun. I did turn on the lamp, but it helped only a little.
Today: iron the poncho shirt, turn and press the hems, press the turn-unders of the patch pockets, sew the hems.
Or go back to bed.
Shirt ironed and pockets pressed. Couldn't iron the shirt double, as one ordinarily irons poncho shirts, because the embroidery has to be ironed from the back. Learned that I should have done the sleeves first — 100% on the sleeveboard on account of ironing from the back — because sleeves rumpled from ironing the body are easier to touch up than a body rumpled from ironing the sleeves.
Finally opened up the red linen bias tape. I have two pieces of one-inch tape about a foot long, and a piece of three-inch tape (already marked for cutting into thirds) about five feet long. Hems of pants are about twenty-two inches, that's forty-four to pipe the hems and another forty-four to make the stripe/casing. Eighty-eight divided by twelve: seven feet and a fraction. I can easily afford to use some to finish the four broadfall pockets. About a foot per pocket; I'll use the two one-inch pieces on one pair.
Off to sew the hems on the twelve patch pockets. (Well, four patch, four patch‐caught‐in‐the‐side‐seam, four patch‐caught‐at‐the‐bottom.) The partial patches are fully pressed; I left the bottom turn-unders of the back pockets to do after hemming. And I need to miter one corner on each of the watch pockets.
At time to start attaching the back pockets to the backs, I decided that I was burned out and closed the sewing machine.
First step was to attach the two pieces of bias tape to the oops, four broadfall pockets. I decided to do just two pockets and see how it went. It went rather badly, I thought, though the second pocket — which I pressed, then sprayed with water, then pressed again before sewing — is better. I think I'll reverse the fold on the other pair of pockets and cover the raw edge with quarter-inch twill tape.
I have blocked access to the tapes boxes; I'll check to see that I actually have black quarter‐inch cotton tape tomorrow.
While I had the iron hot to press the bias tape, I finished pressing the back pockets, and pressed the hems and touched up the turn-unders on all the other pockets.
When I'd basted the bias tape in place and pinned the watch pockets and passport pockets, I paused to take a picture. I had to reset the computer three times before I succeeded in uploading it, then it turned out to be fuzzy. By then I'd begun sewing one of the pockets, so I faked that stage by putting the first-pinned pocket on the pinning board and laying the partly-sewn pocket where it had been.
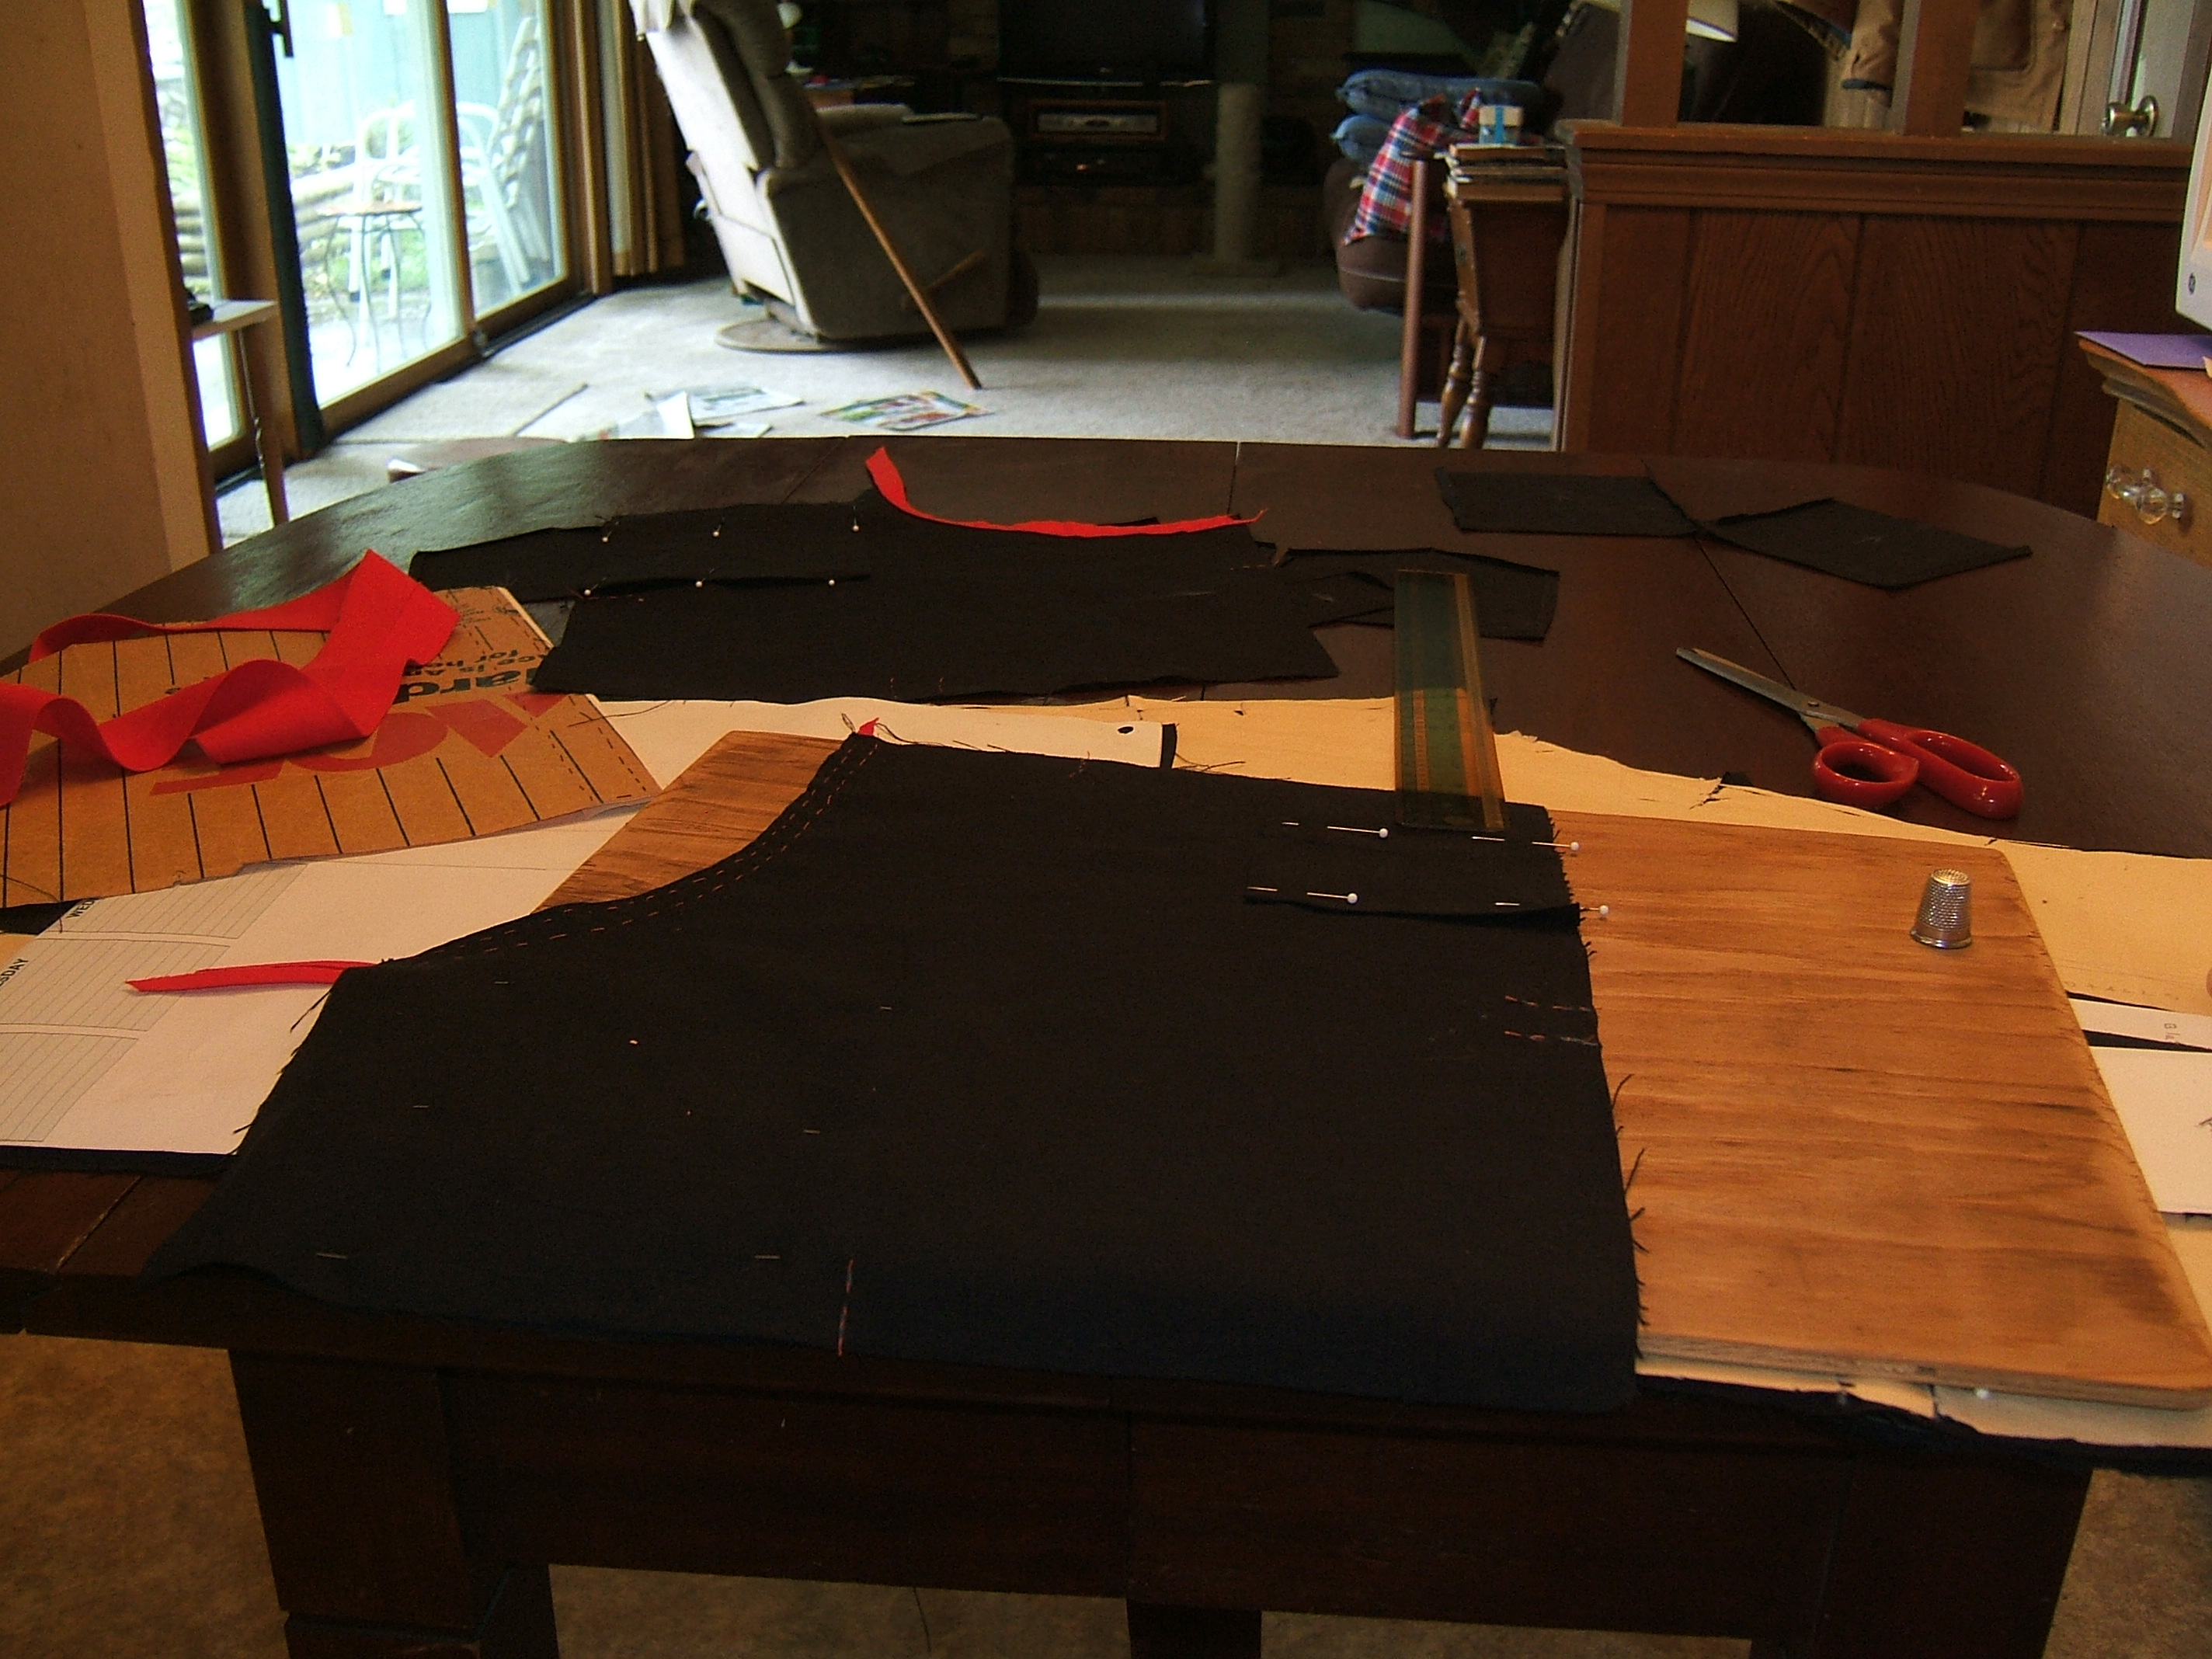
I had also discovered, to my delight, that the clothespin I used to secure my new headlamp on the Necchi also works on the White.
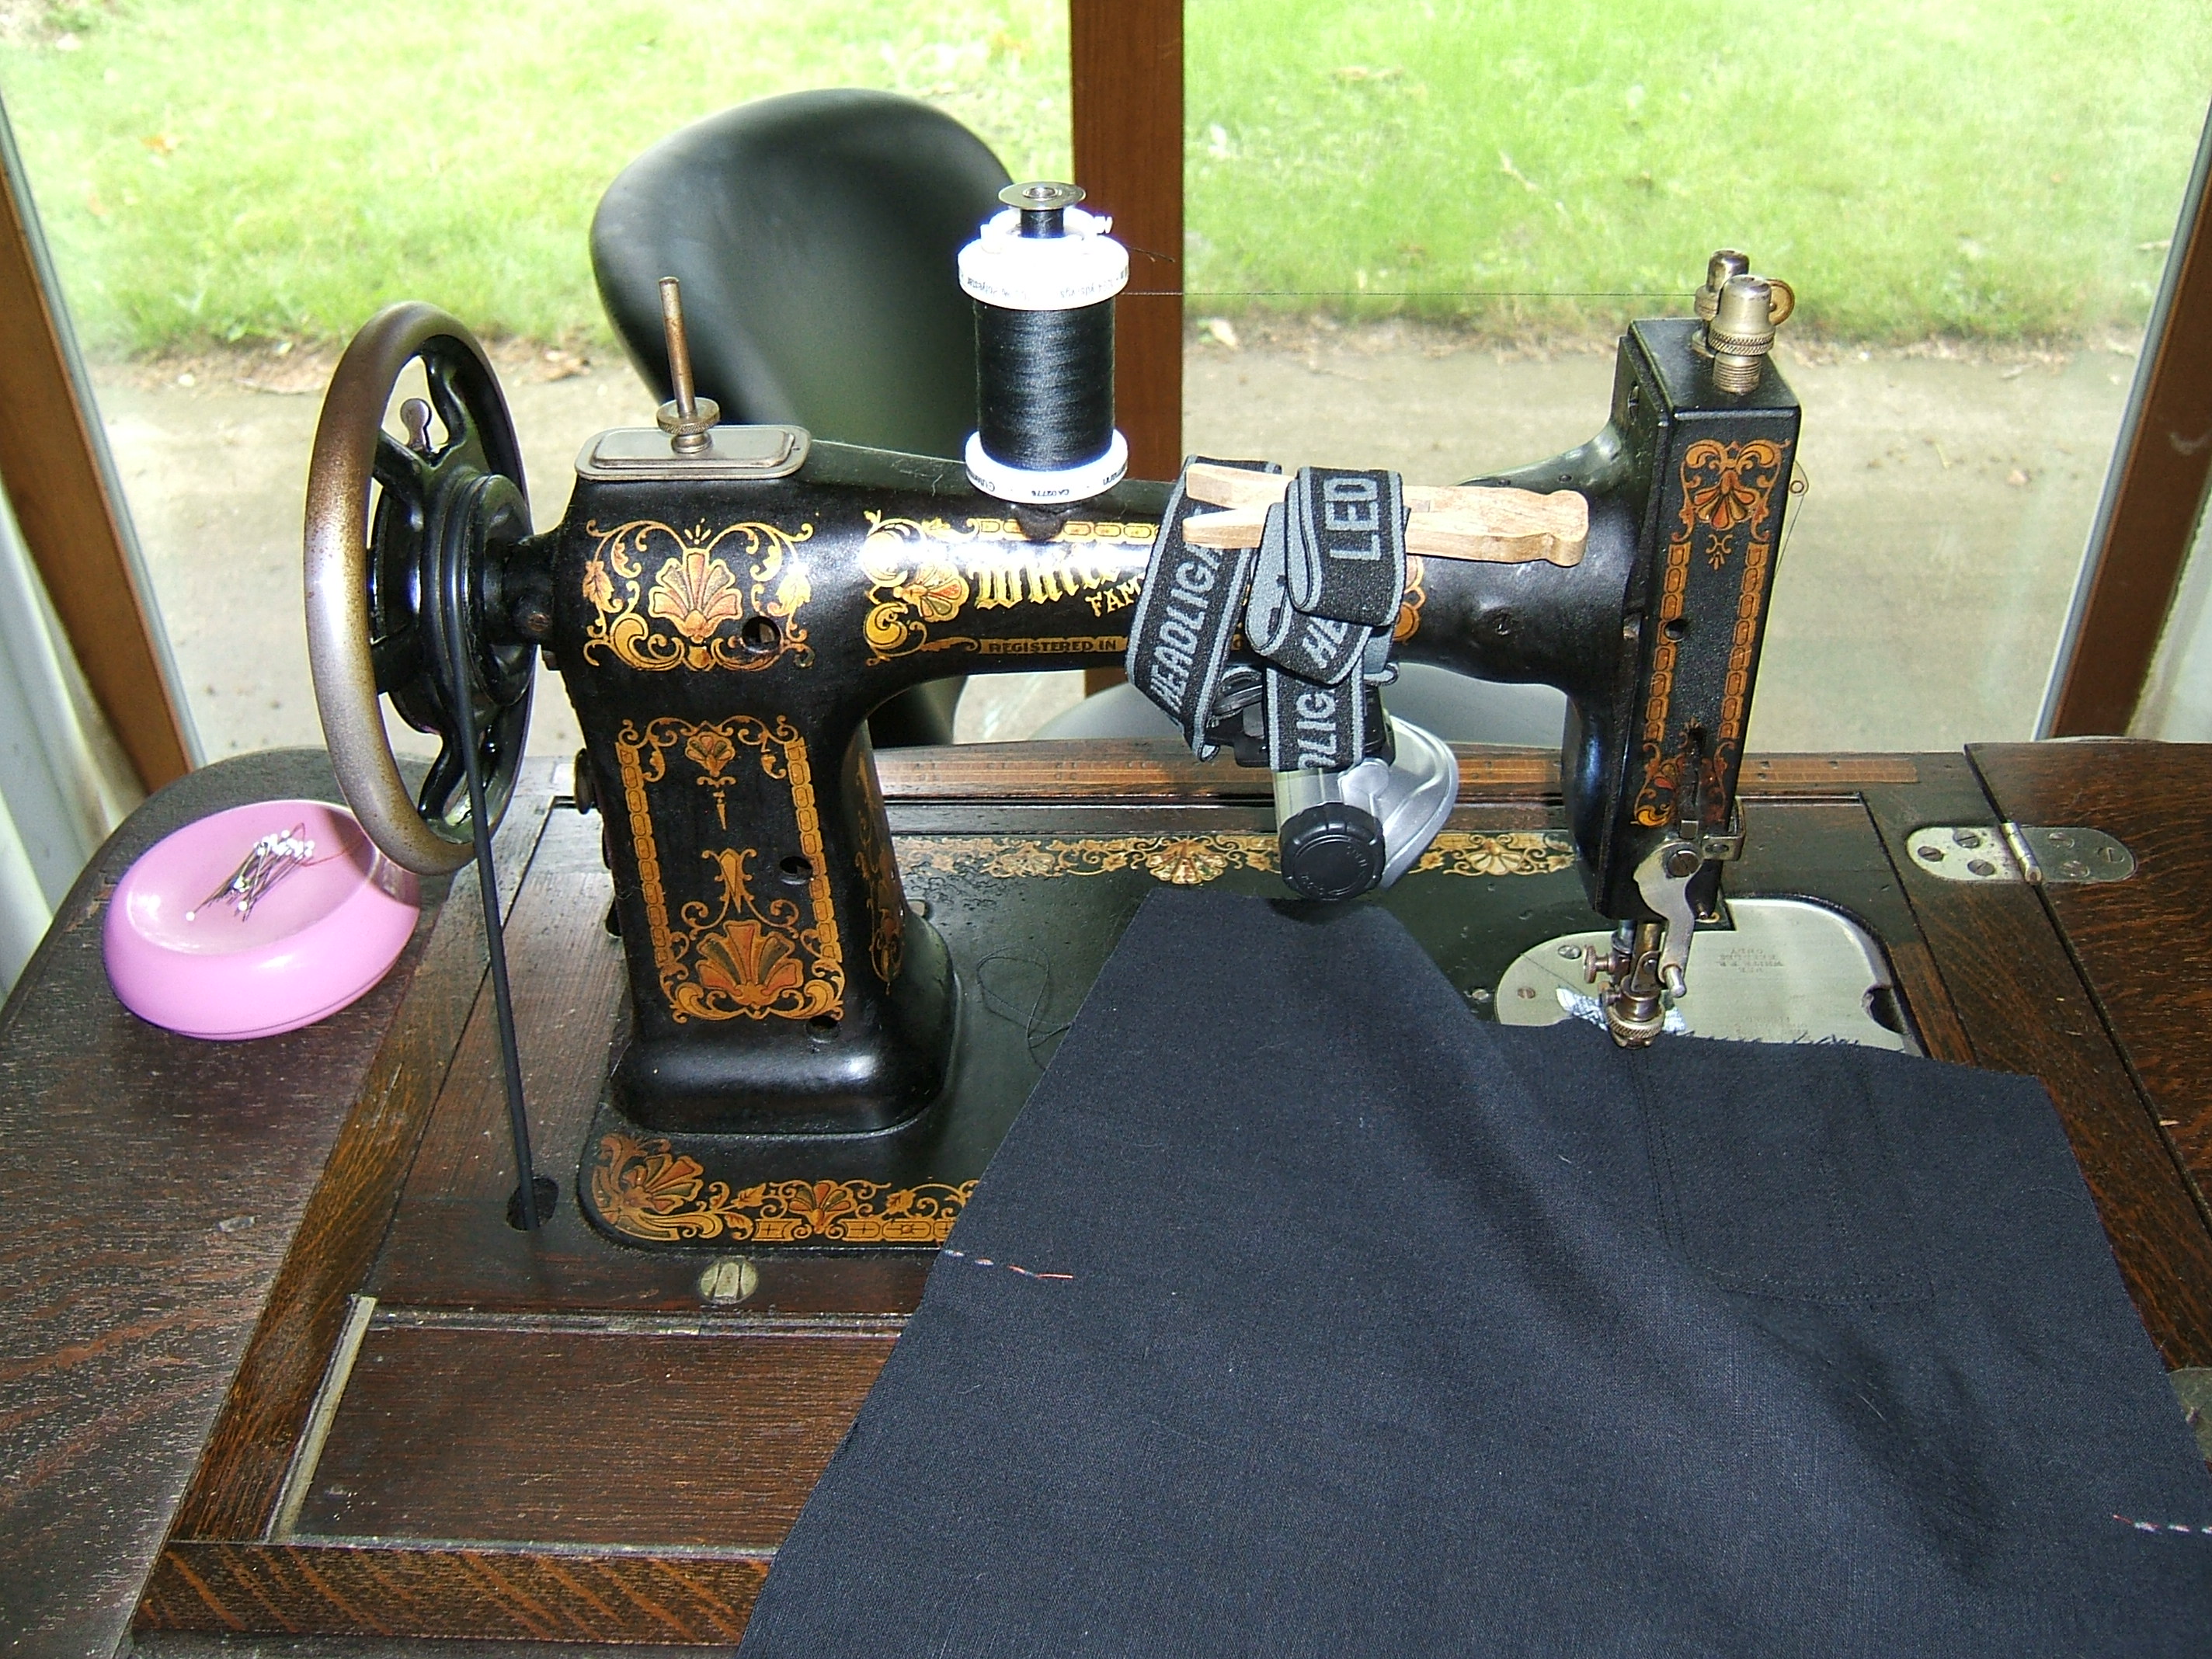
So one pair of pockets is ready to baste to the front as soon as I get around to hemming the pocket opening. I thought I could get more done than that with a whole day to work in.
All back pockets attached. I've been photographing the stages for the benefit of "Assembling Broadfall Pants", but I'll be surprised if the pictures turn out, photographing black on black in dim light.
When assembling the up-arrow broadfall pockets, I decided to finish and wear the up-arrow pants before sewing on the down-arrow watch pockets, then mark the proper location of the watch pockets on the broadfall-pockets pattern. As many years as I've been using this pattern, why haven't I marked that before?
But there isn't any reason not to sew the passport pockets on, and it's a really good idea to pin the watch pockets so that the tiny things don't wander off. I did that after appliquéing the back pockets. Now all the pattern pieces are back on the nail except the fronts.
Since the fabric is thin, I think I'll turn under the edges of the hems on the pocket openings on the fronts. Haven't decided whether to stay them with twill tape, a strip of the gray linen I made my knickers from, or self fabric. The selvages on the blend aren't selvages, but they will be fully enclosed.
Then after supper, while laying out my clothes for the all-day bike ride tomorrow, I remembered that I don't like sticking coarse safety pins into my jersey, so I ravelled out a thread of "taxicab" linen, snipped it in half, switched ends on one piece, inspected it carefully for lint knots and trimmed one away, then waxed it. It all went beautifully, so I saved the left-over thread by sticking the needle into the base of the cone of basting thread hanging in the window. Meant to stick the needle into a snippet of wool pinned to the curtain, but that curtain is covered with unidentified dangling objects already.
Whatever. I put a line of basting into the pocket where I carry my cell phone, in lieu of the brass safety pin. Sat on the glasses I keep in the living-room sewing stand in the process. I bent the frame more-or-less straight and forced the popped-out lens almost in — getting both lenses very fingerprinty in the process — but I'm going to have to go back to checking every display of readers for strong ones.
Also the toothbrush-case readers that alternate between my jersey pocket and the little bag of stuff in my go bag are in neither place; I think I'll have to buy another pair before I find them. In the meanwhile, I'm carrying the battered old toothbrush-case readers that those replaced.
I didn't need magnifiers to stitch along a thread to keep my basting straight; that fabric is really coarse.
The fabric over the elastic on my keys/sunscreen/lipstick/knife/pillbox/misc. pocket is wearing through. Time to browse yellow linen a bit less casually.
Frittered away the morning polishing some verses that I knew from the beginning wouldn't take a polish, then ironed a hot-weather Sunday dress and my white poncho shirt with the diamond of embroidered ribbon around the neck. Well, it's a woven design, but it *looks* embroidered.
While the iron was hot, I pressed out the erroneous creases on the down-arrow broadfall pockets, then started pressing side-seam and inseam creases on the backs. It was pushing naptime, but I figured that I could do such a simple job while sleepy. Got to the last back and saw that the pocket had been sewn to the wrong side. Decided to press in the creases before picking off the pocket, picked up the needle of marking thread to guarantee that the chalk marks didn't rub off, discovered that there were no chalk marks — I'd forgotten to mark the notches on this piece.
At that point, I decided that it was naptime. Didn't sleep, but feel alert now. And hungry. It's almost time to serve supper.
After my Saturday ride, I discovered that I should have made the darn in the gusset of my knickers a couple of inches longer, and two other places had torn loose. So yesterday evening, I put ecru thread in the Necchi and made three rows of zig-zag all around that half of the gusset. I took a long ride today, and it seems to be holding.
Also decided that the knickers are due for their first bath come Monday. I don't include the knickers when I undress into a bucket after a ride. Did include my socks today; I was pretty wet when I came in.
I haven't been noticing discolored water when I soak my black gloves, but I think I'll continue to soak them in a separate bucket.
I must have been verbose this year — loading this file takes long enough that I have time to wonder whether something is wrong. (That isn't long, as these old programs load as near instantly as a human can tell.
Also discovered that the stitching on the cell-phone pocket wasn't quite long enough and worked a bar tack. (I seem to recall having written that before, but don't find it above. Perhaps in the Banner?) Then on Wednesday's ride, I learned that extending the stitching clear to the edge of the pocket was a mistake; I should have noted where the pin went and stitched no more than that. With the closed end, it is difficult to extract a starlight mint that has been pushed to the back of the cell-phone compartment.
I suspect that references to this pocket have been confusing. When I started carrying a cell phone, I started sticking a safety pin into my shirt pocket to make sure it doesn't fall out — a wise precaution, because my notebook has fallen out of the matching pocket once or twice. (Usually when I was putting the shirt on and flapping it around, but still.) And I put the pin off-center so that I could reach past it, rotate the phone, and pull it out without undoing the pin.
This has worked very well, but pins of a suitable size are coarse, even fine pins wear fabric, and it's a nuisance to take a pin out and put it back when I wash the shirt — which is after every ride in weather that requires a linen jersey.
To avoid wearing the shirt out in the washing machine, I soak the sweat out in a bucket, then spin the water out. No soap is required if the sweat is still wet, so no rinsing is required.
A moment of epiphany: all these years I've been stamping solid lines to mark the gathering stitches — they should be dashed lines, each dash as long as a stitch should be. After thinking over several plans when I should have been listening to the sermon, I have concluded that the best way would be to mark radial lines on a sheet of typing paper, and lay the tracing paper over them when marking around the coaster I use for a gathering-line template.
Now to think of some way to dash the lines on pre-existing embroidery patterns. Pity I don't have an eighth-inch hole punch.
Did I mention that I spent most of Friday refurbishing my embroidery-gig backpack, and on Saturday I found an opportunity to use it? With no advance work except for putting the backpack under the table, it was rather ad hoc and messy, but it worked.
Sudden thought: I don't think that I marked the place where the red stripe should be appliquéd on the pedal-pusher pieces.
Continue to part two
Back to 2013
Back to Rough Sewing
Back to the writing page
Back to the links page
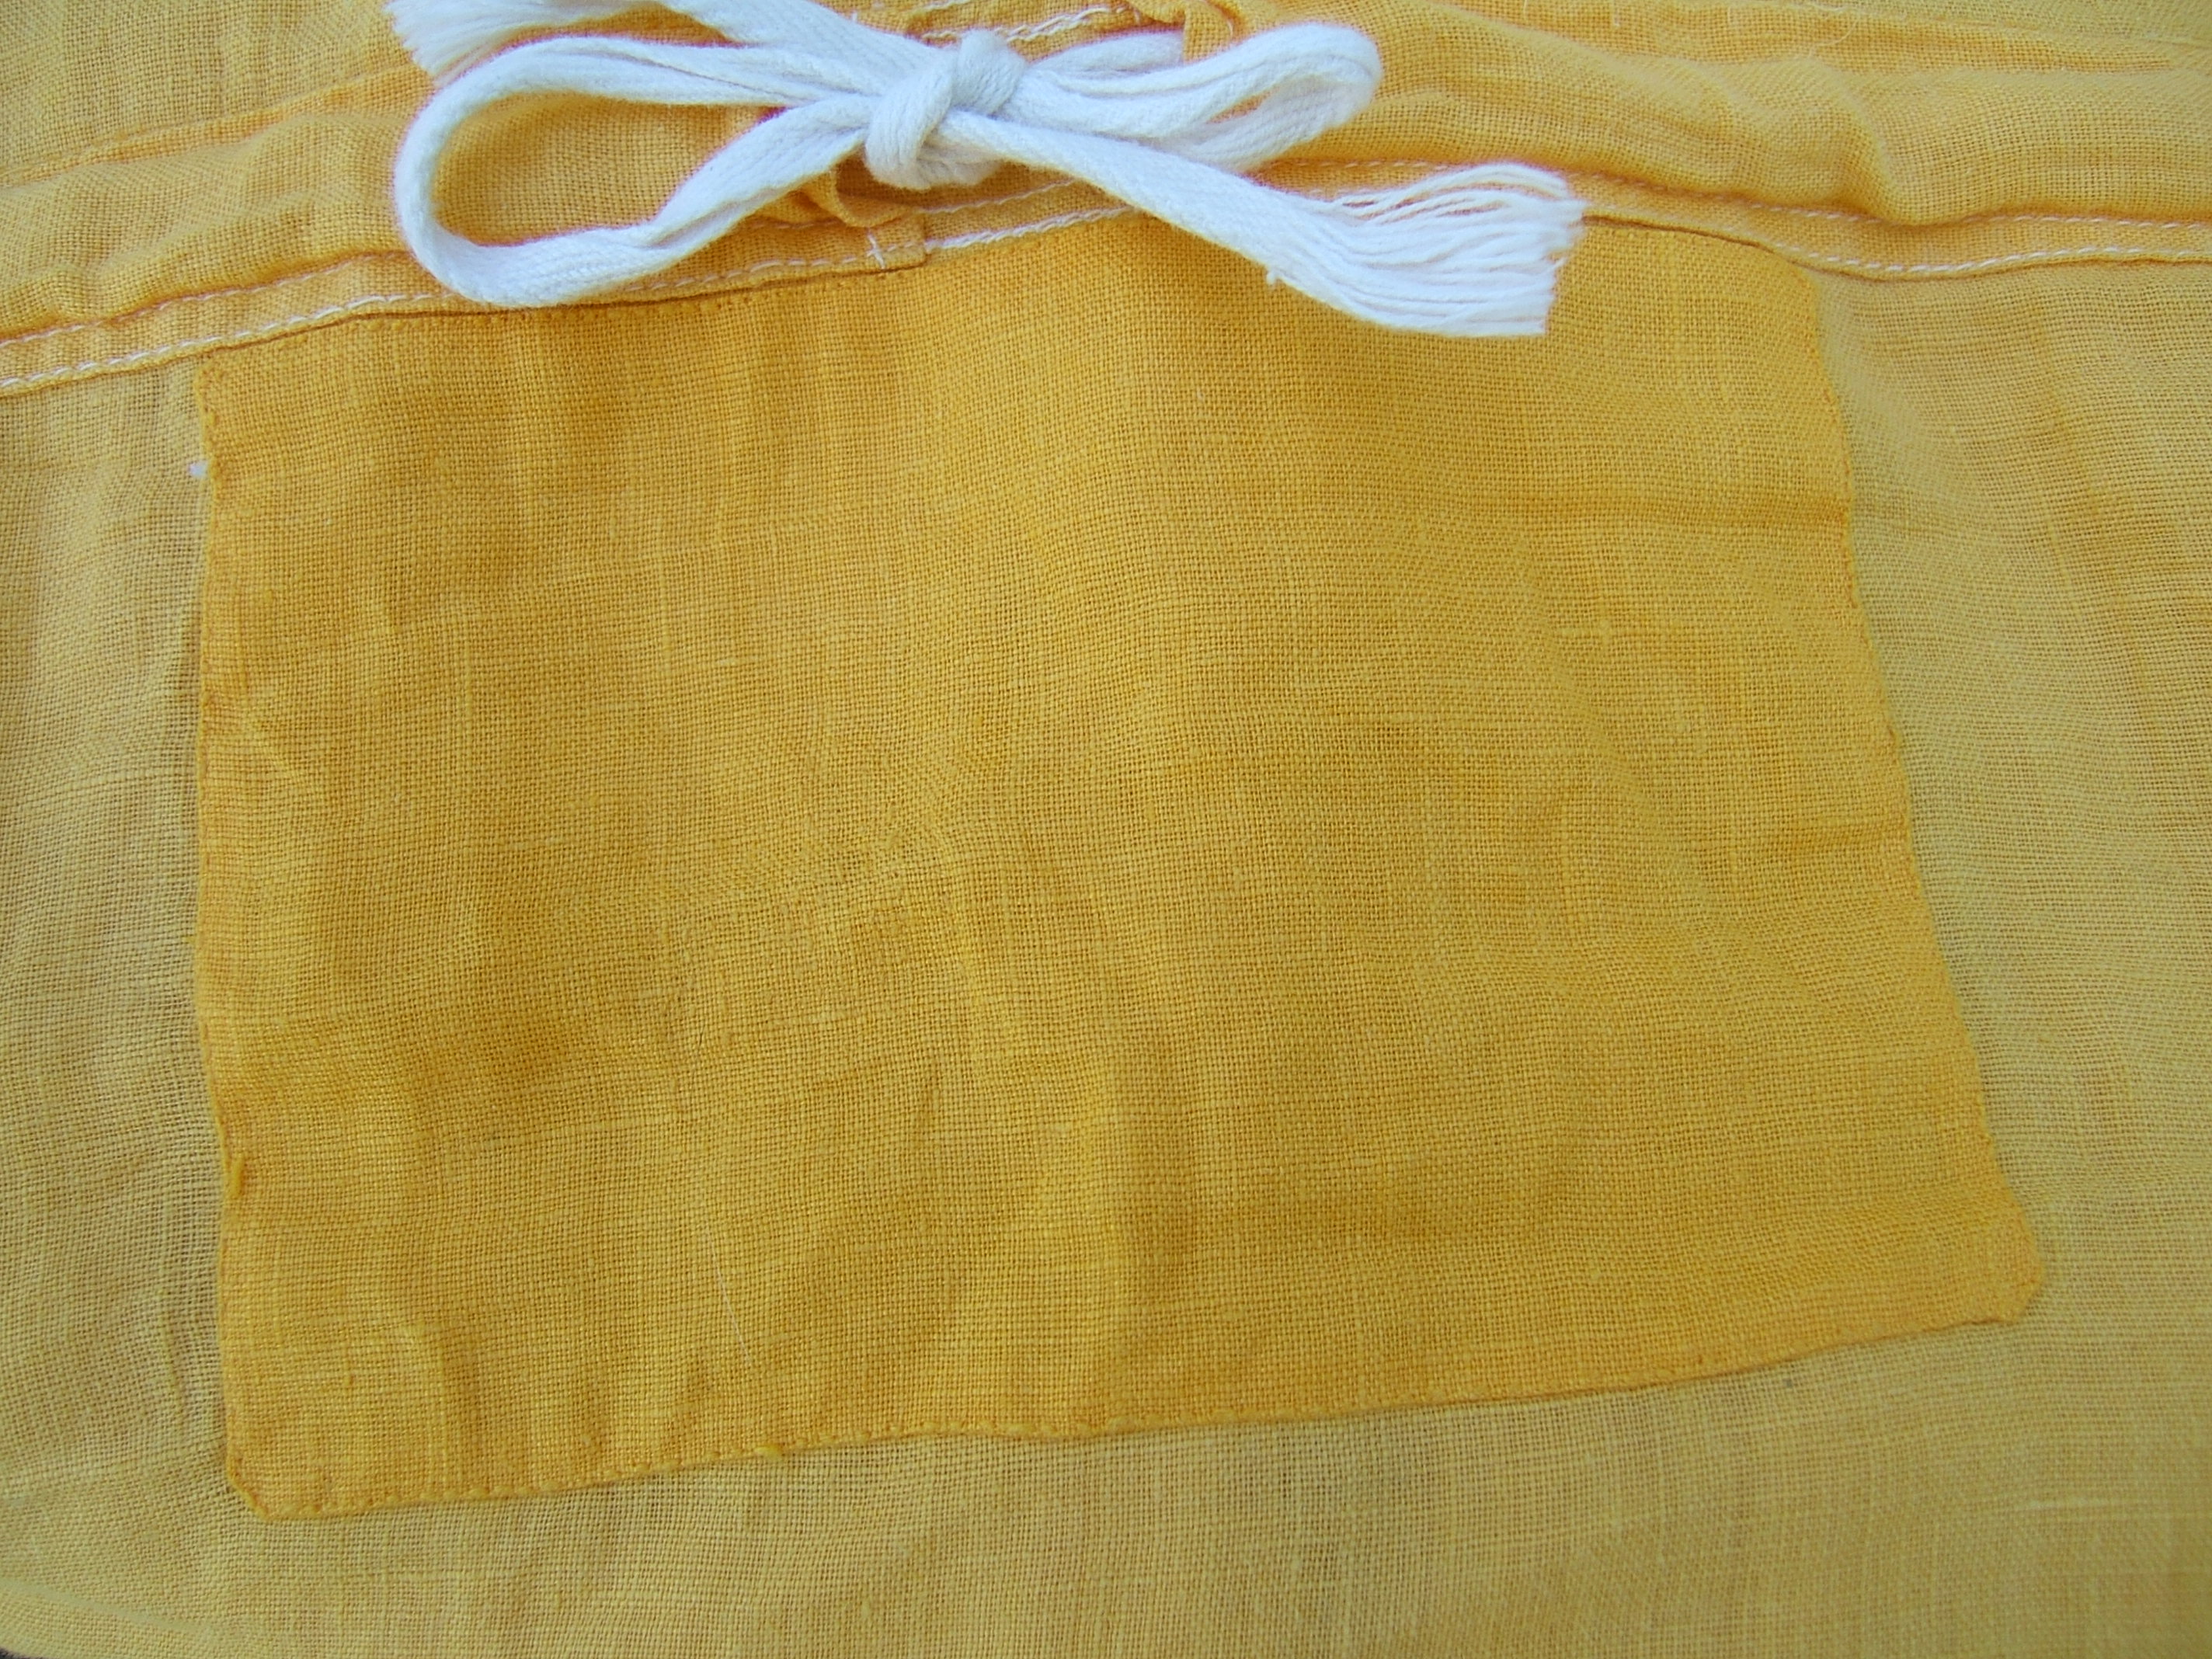
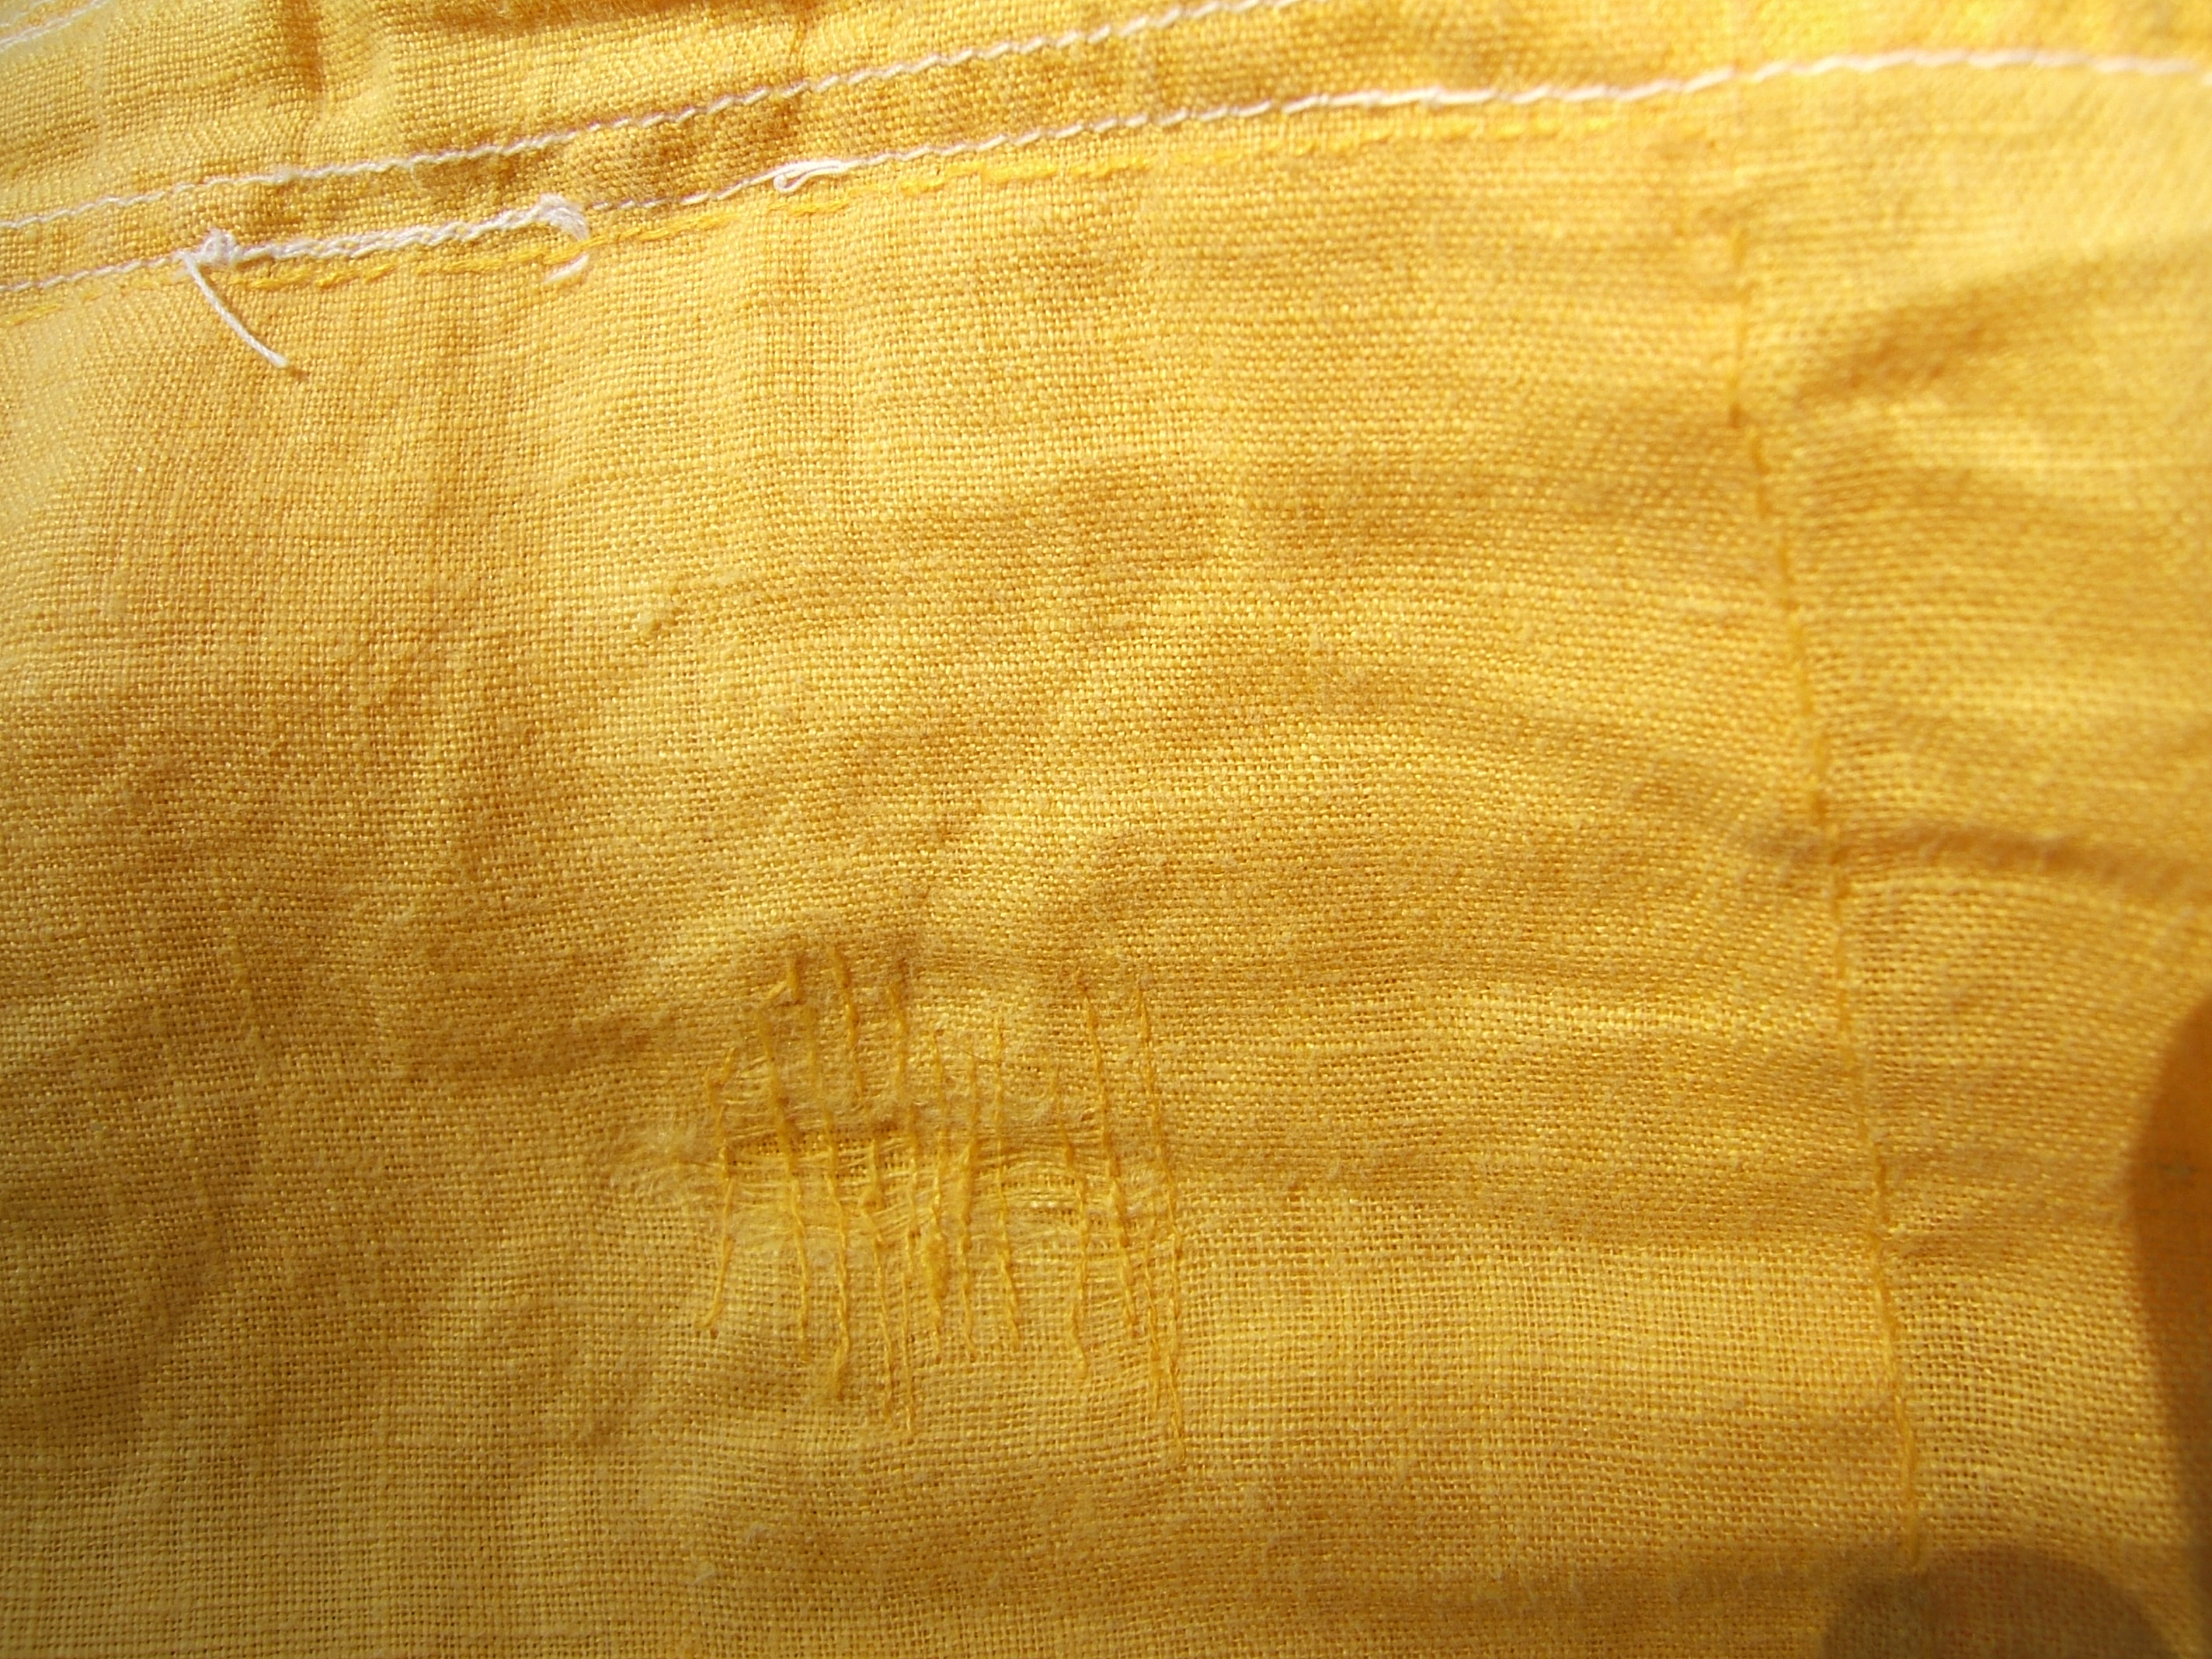
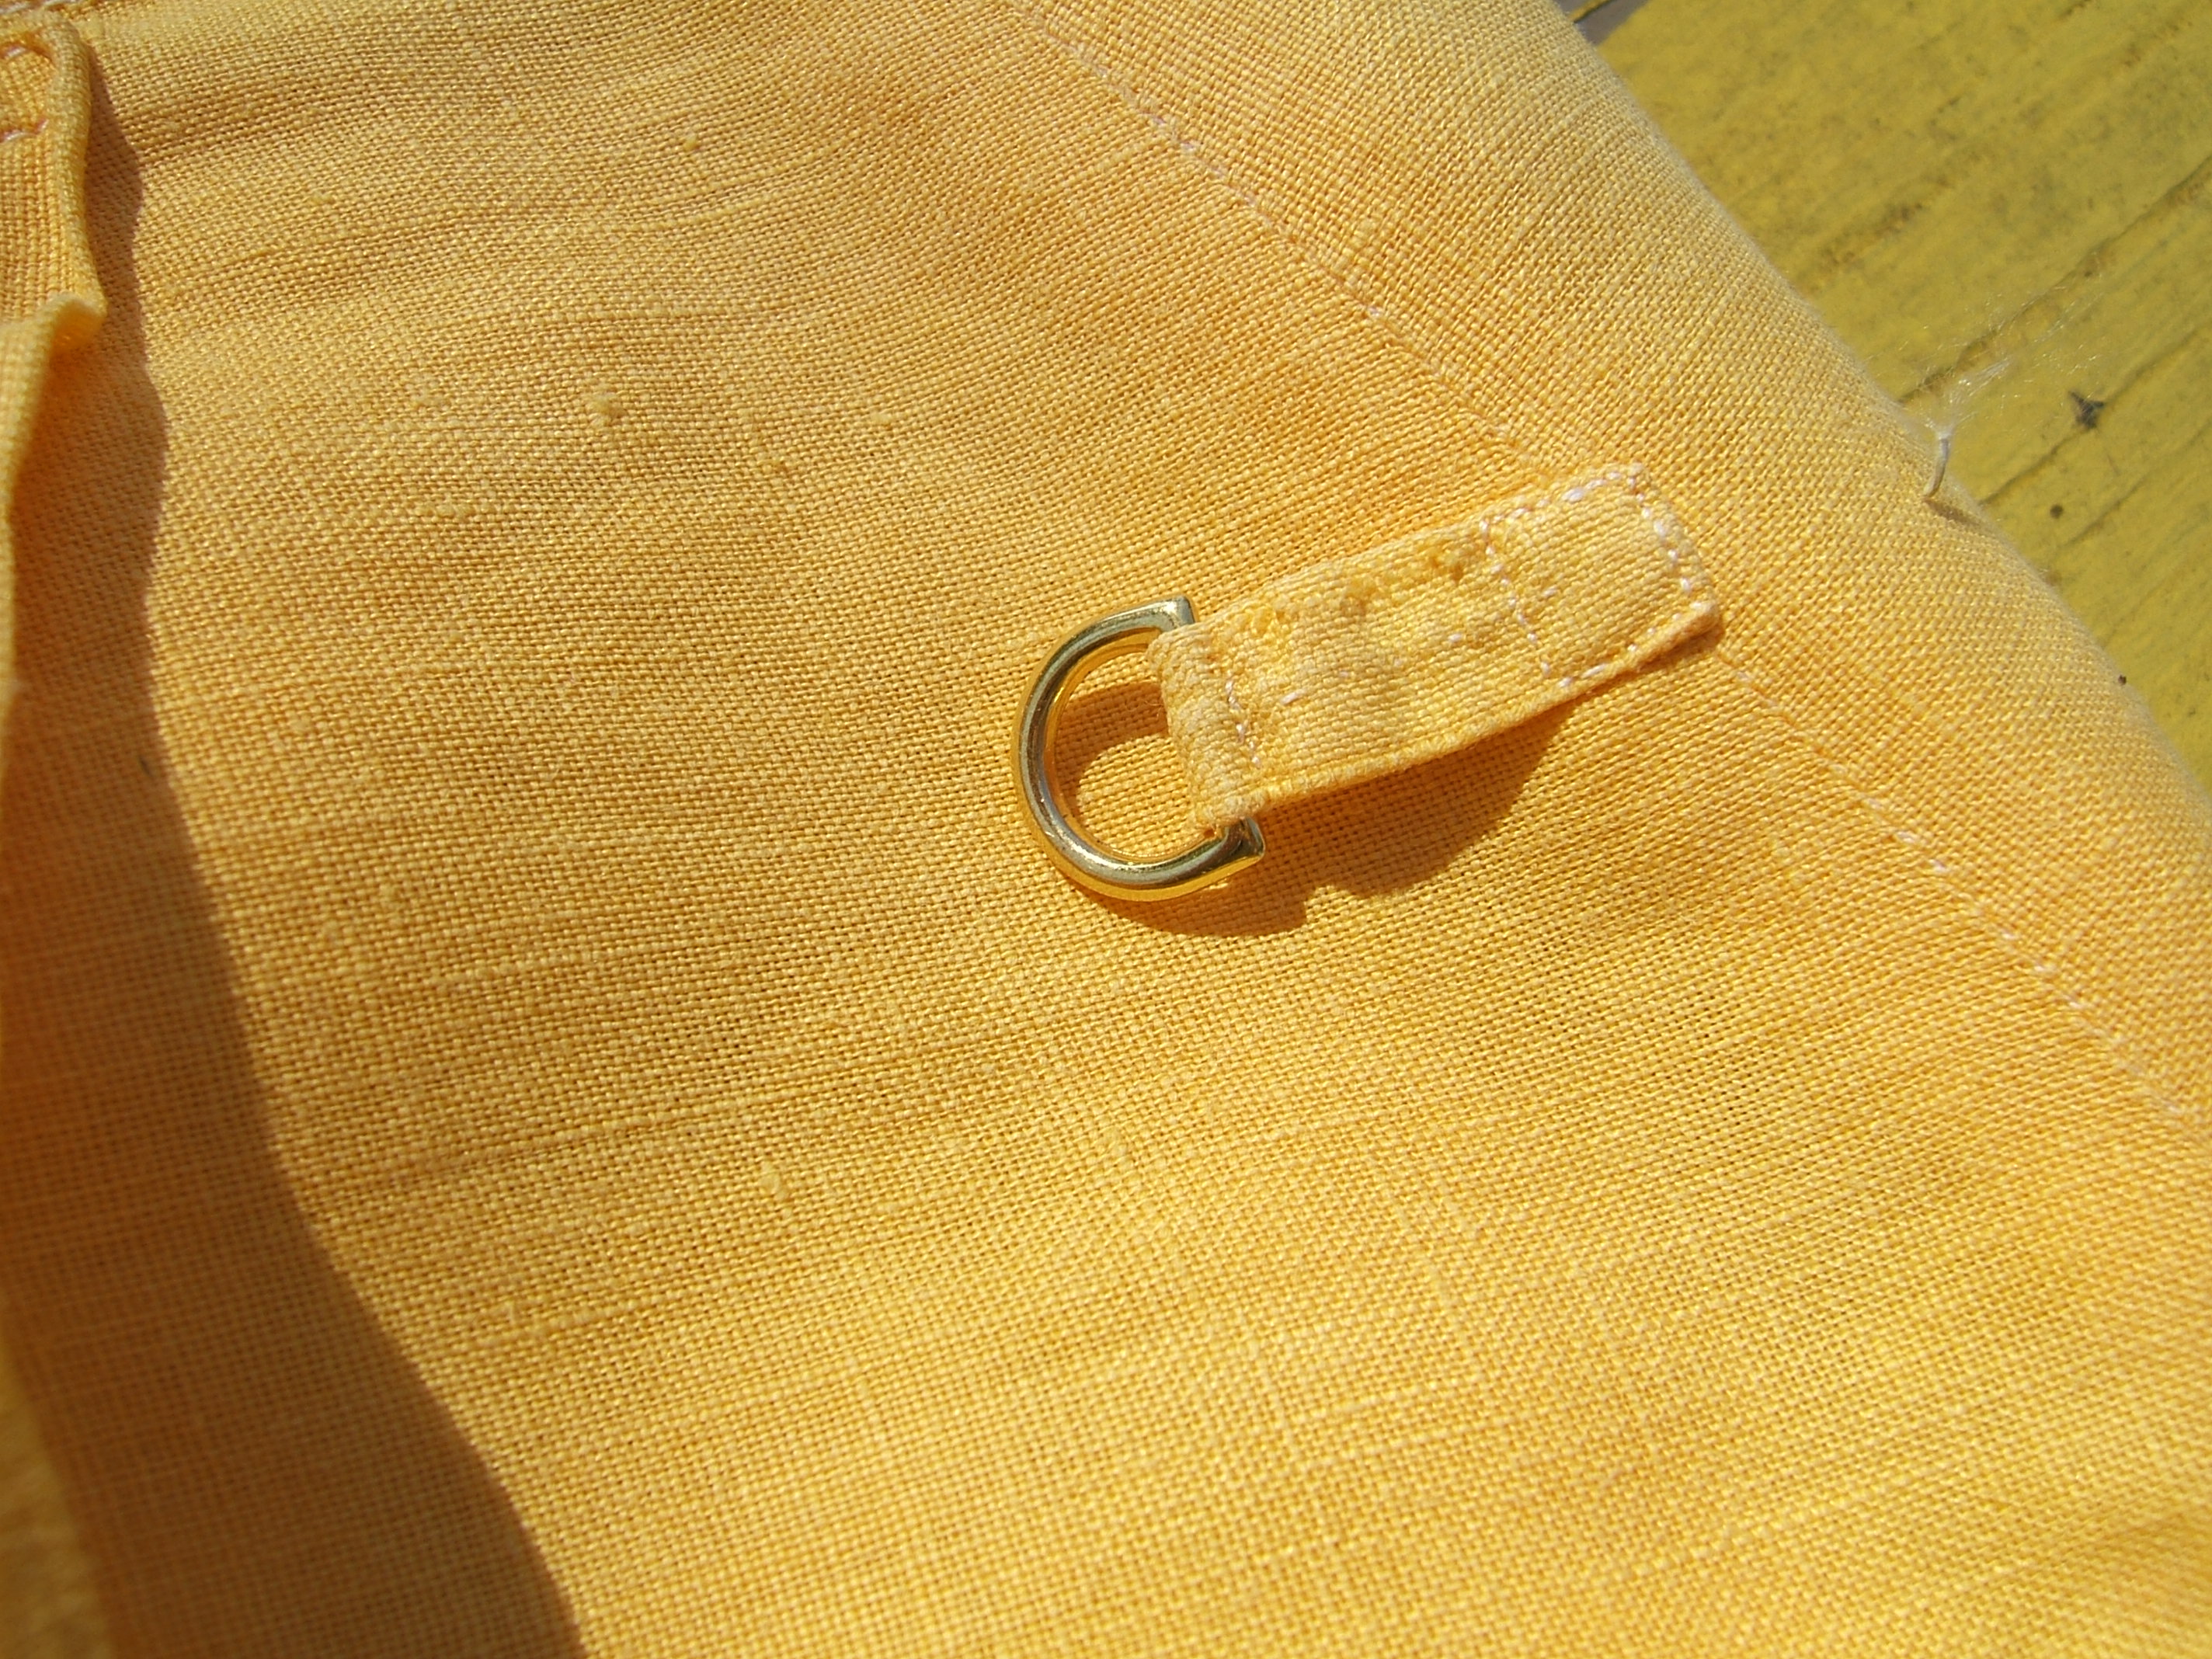
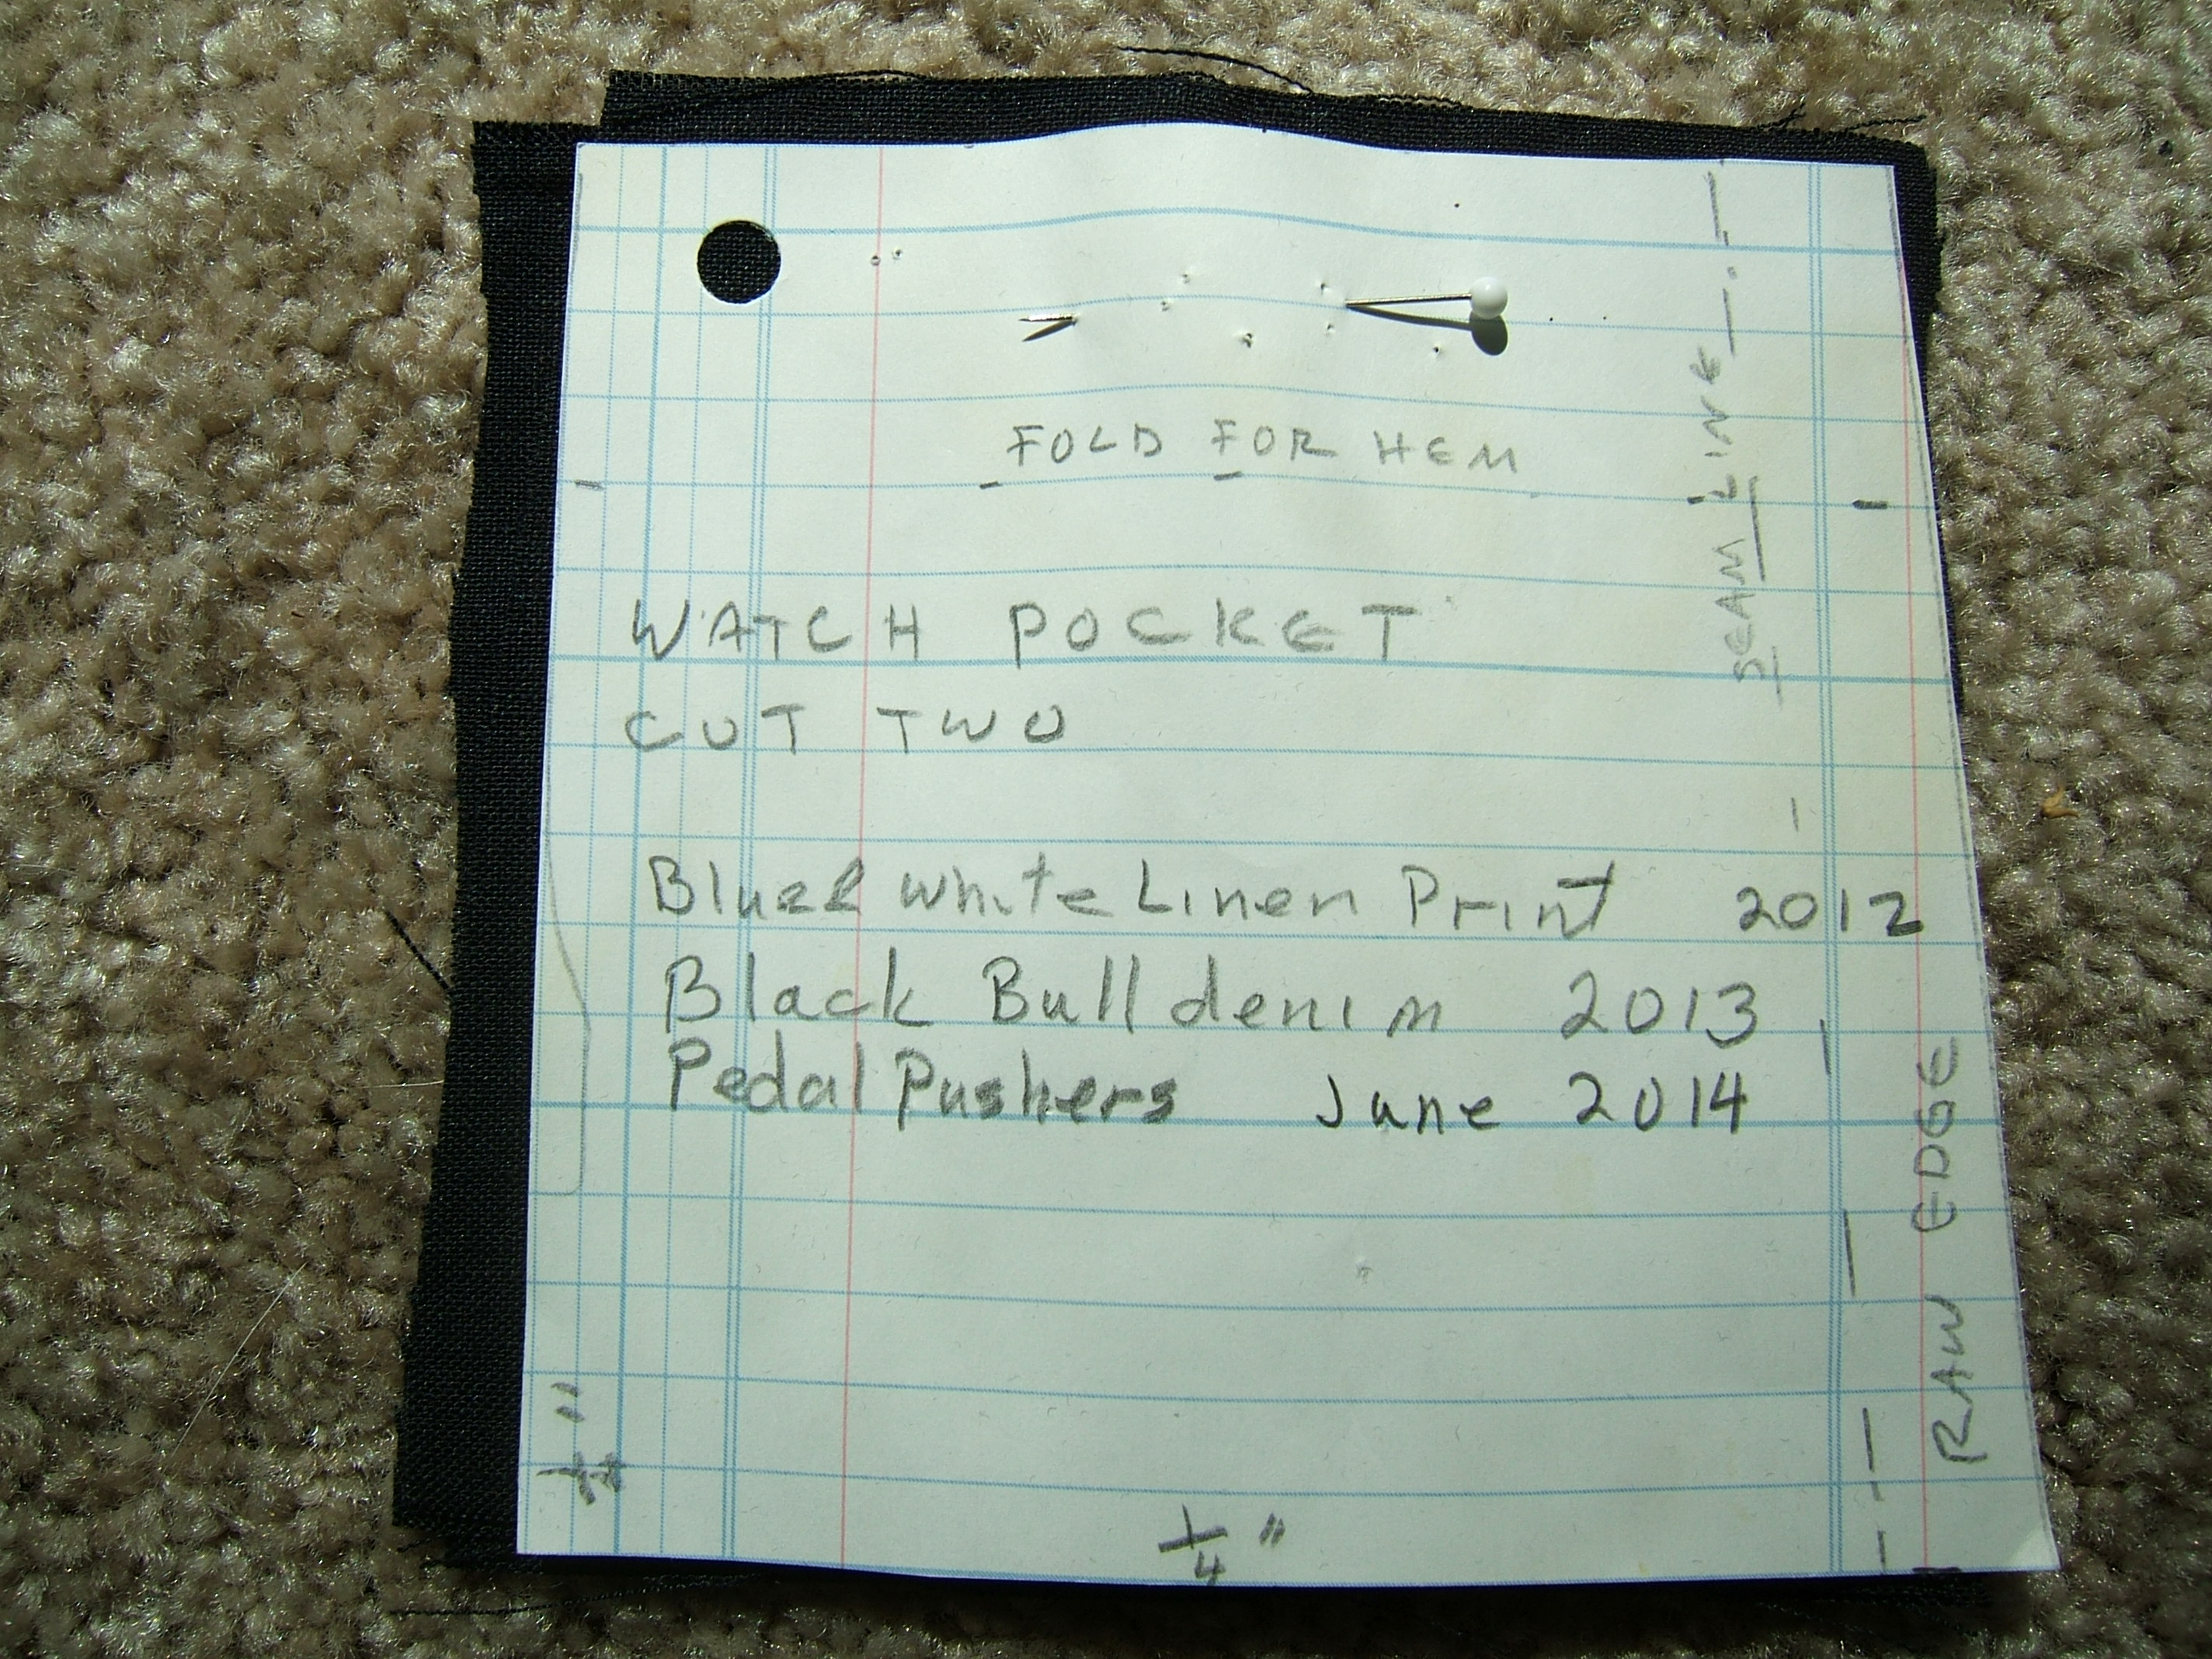