Measured the casings on my two linen jerseys, then read my notes on making them. The curry casing was one inch measured fold-to-fold, and made as a flattened tube — probably cut two and a half inches wide. The taxicab casing was cut single and applied with a fold at the top, like the fold-bottom pockets. My notes say "I should have cut the casing strips two and a quarter inches wide, maybe two and a half. But I think I can make two inches work."
Two inches worked very nicely, so I shall cut a strip of spreadsheet paper two inches wide, tear off one end (to indicate incompleteness), and write the lengths of the casings on it.
I might up and make the casings on the wool jersey ripstop too, since jacketing is a bit thick to make a casing of.
Well chirp twitter twitter! The spreadsheet paper has a printed line exactly two inches from one edge!
I think I'll cut the casings first, since that will square up one end. Ripstop has woven-in lines, so I won't need to draw any threads.
Did cut the casings, left them all in one strip, turned under one edge. Today I'm finally getting around to cutting the other pieces. (Yesterday I got lost in an old manuscript I found while picking up the sewing room for the robot vacuum cleaner.)
Since ripstop ravels, any edge that is supposed to
be turned, I turn and baste immediately after
cutting.
Doing the top of the back pockets (one strip sewn seam-to-seam, then divided), I learned that one doesn't need a thimble when one never pushes on the end of the needle — and that when one never lengthens the thread while sewing, it's a very good idea to make the doubled part short enough that one is sure most of it will pull out at the end.
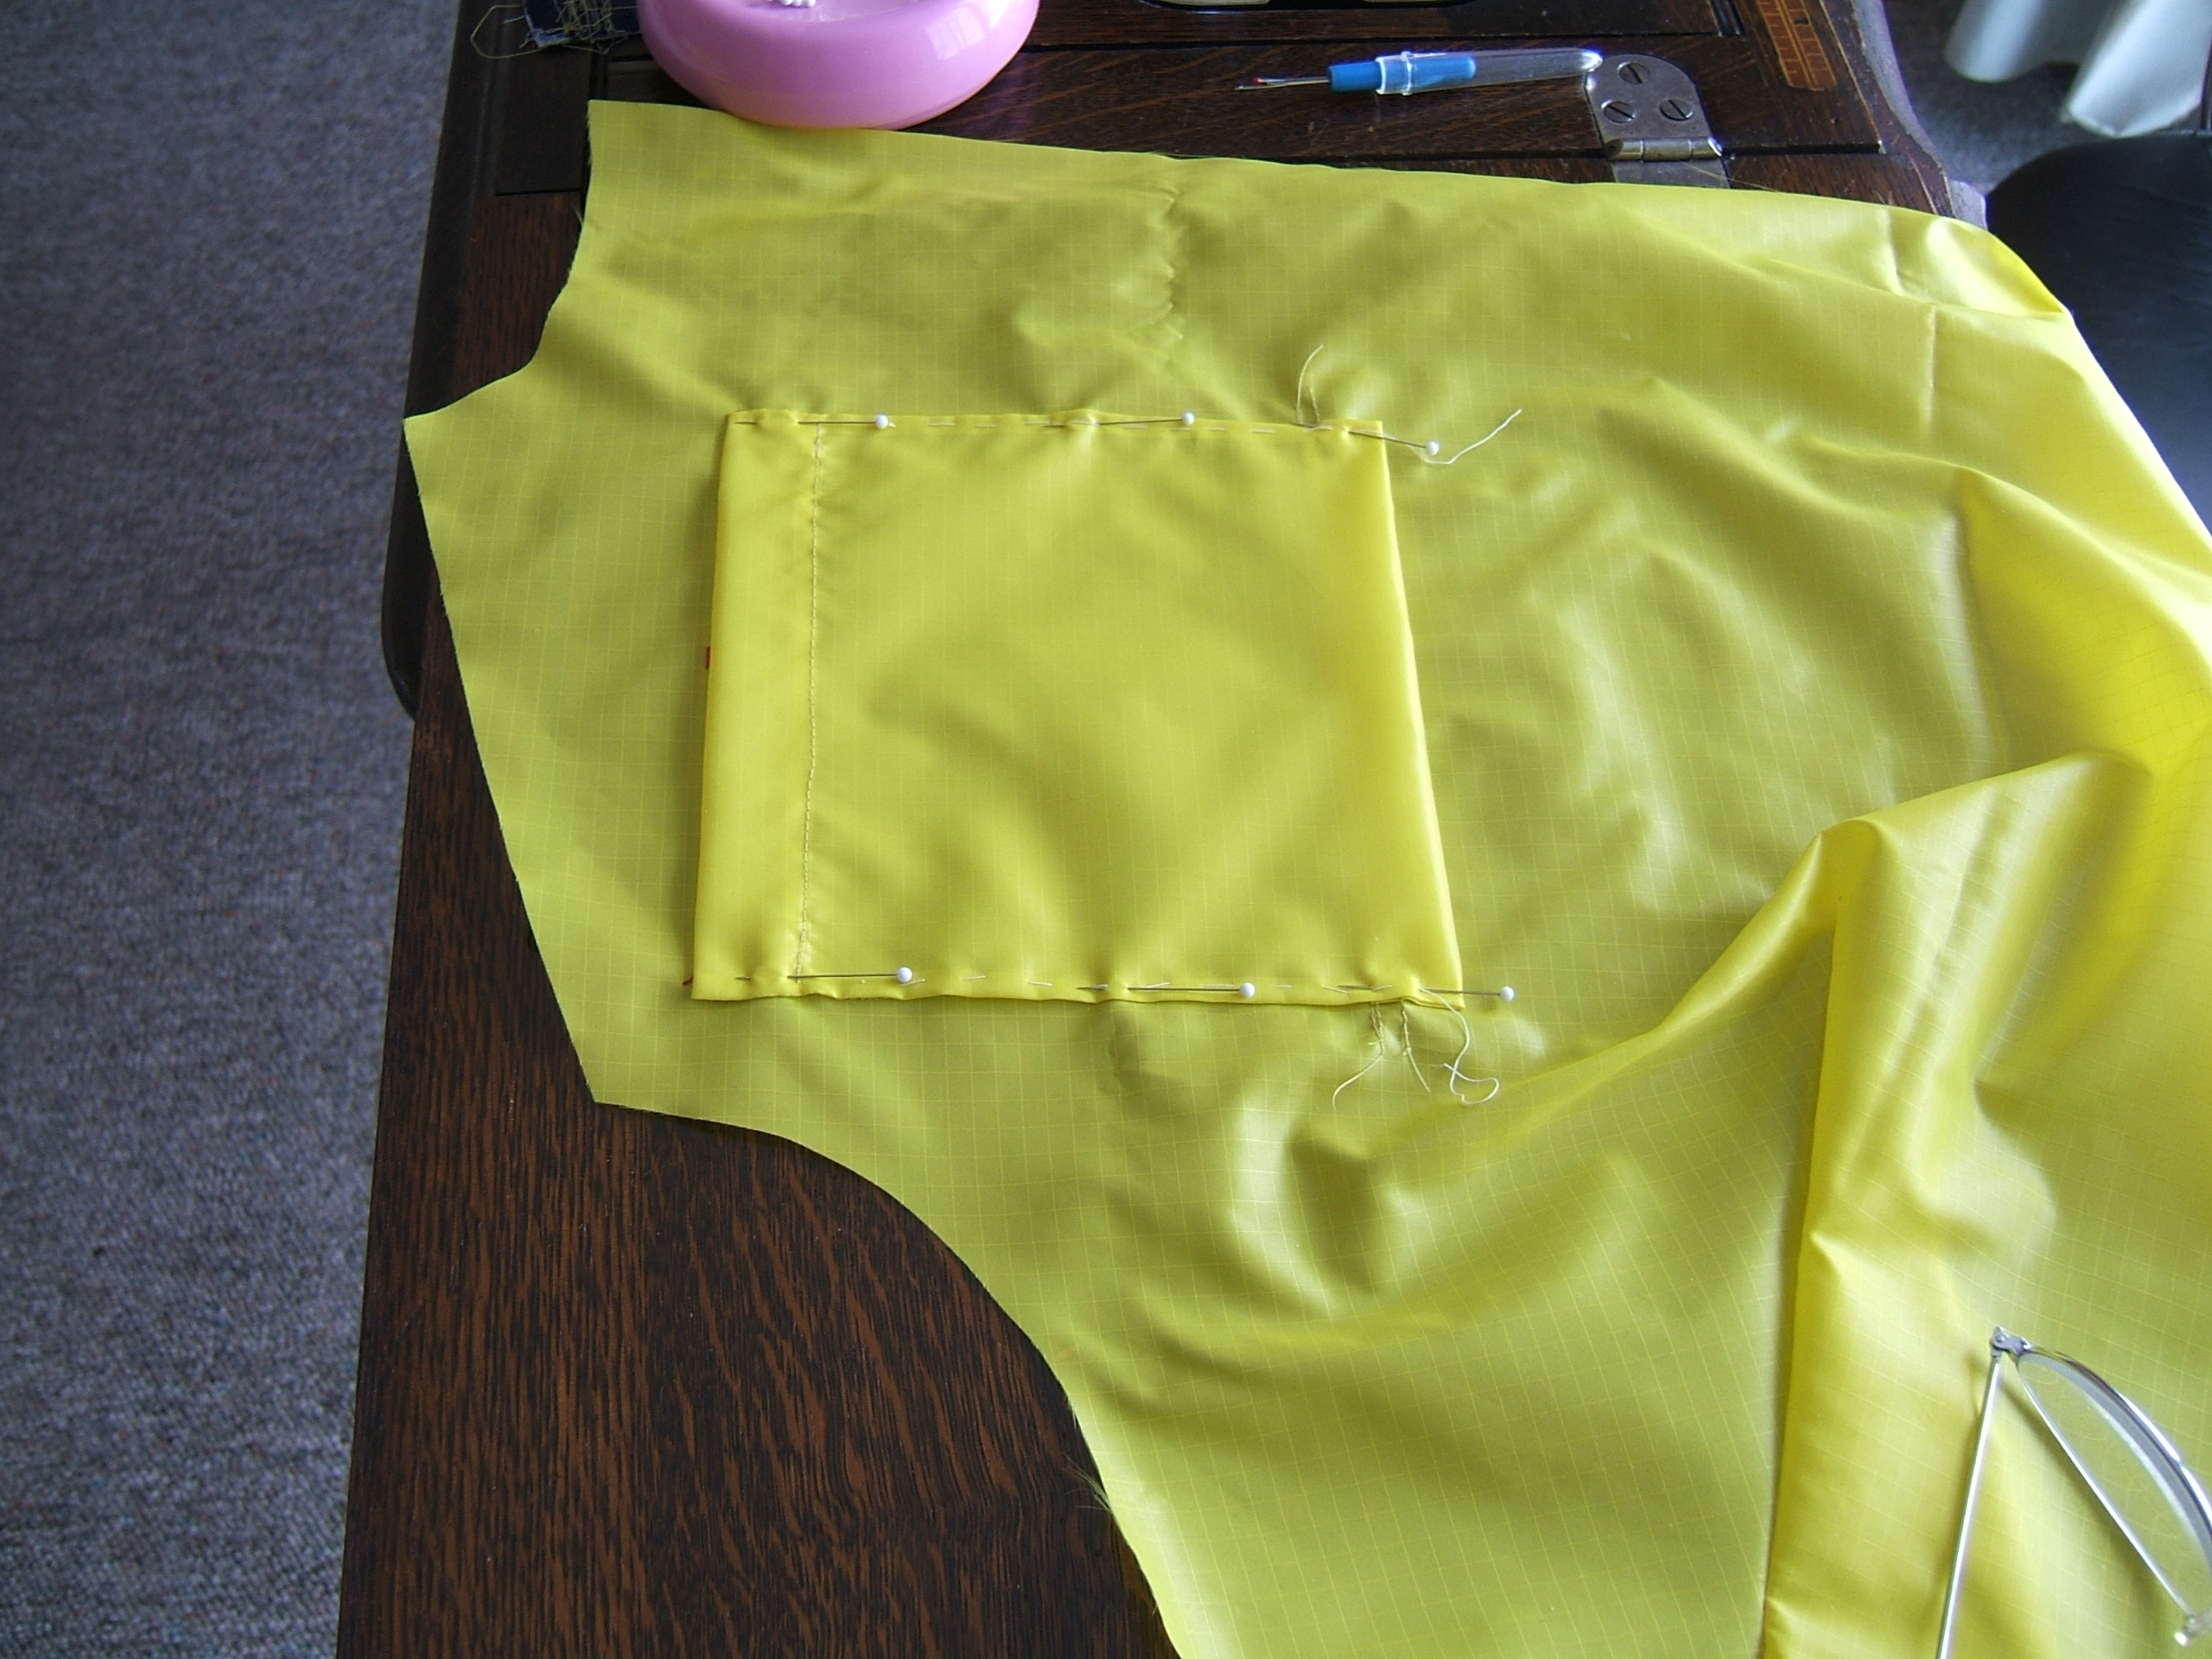
I'm about to apply these lessons to the front pockets. Good thing I stopped to type this up, because I was going to turn the edge before separating them. While typing, I realized that there was no reason to separate them before the front was ready to receive them (see "ripstop ravels", above) — and then I remembered that these are patch pockets and need to be turned on the sides too. So I'd better separate them and turn three sides on each pocket. The fabric is so thin that I don't think I need to miter the corners, but I might miter them anyway.
The bottom won't be turned because I'm planning fold-bottom patch pockets. I wonder whether I've written that up in the chapter on pockets?
Don't write — sew! Mem: turn the fold allowance a bit more than the rest of the edge, to keep it under the part folded over it.
⁂
Decided to turn the top before cutting the pockets apart, then miter the corners with the tail from turning the sides. Good thing; about halfway through, "Whhaaait a min-u-ette! These are not appliqués!"
Left a long tail, cut the pockets apart, pulled on the cut end to center the basting thread with a short tail at each end. Mem: next time, pull a loop out at the point that I'm going to cut.
But there is nothing else cut in pairs in this pattern and I'll forget by the next time I cut out a pair of pockets. Don't anticipate using a slippery synthetic for a long, long time either.
And now it's nap time.
I did check the drawer, and I do have #11 stretch needles. I've read on alt.sewing or Creative Machine that needles that are even finer would be desirable — 75/11 is a lot coarser than the #10 needle I'm hand basting with. Must check the next time I'm in Lowery's.
I have only one spool and one bobbin of nylon thread, and the bobbin is for the Necchi. I think I'll wind the spool onto a White bobbin; both bobbins can be used as spools.
Must check at Lowery; they have more kinds of thread than they used to. But I don't think anyone quilts with nylon thread.
Flame-tested a scrap. It doesn't smell of perfume, so it's probably not polyester, so it's likely to be nylon. It doesn't burst into flame, but deforms first, then burns at a reasonable rate. But it definitely melts and drips down in flaming globs that stick firmly. I must be careful not to wear the jacket near a source of ignition.
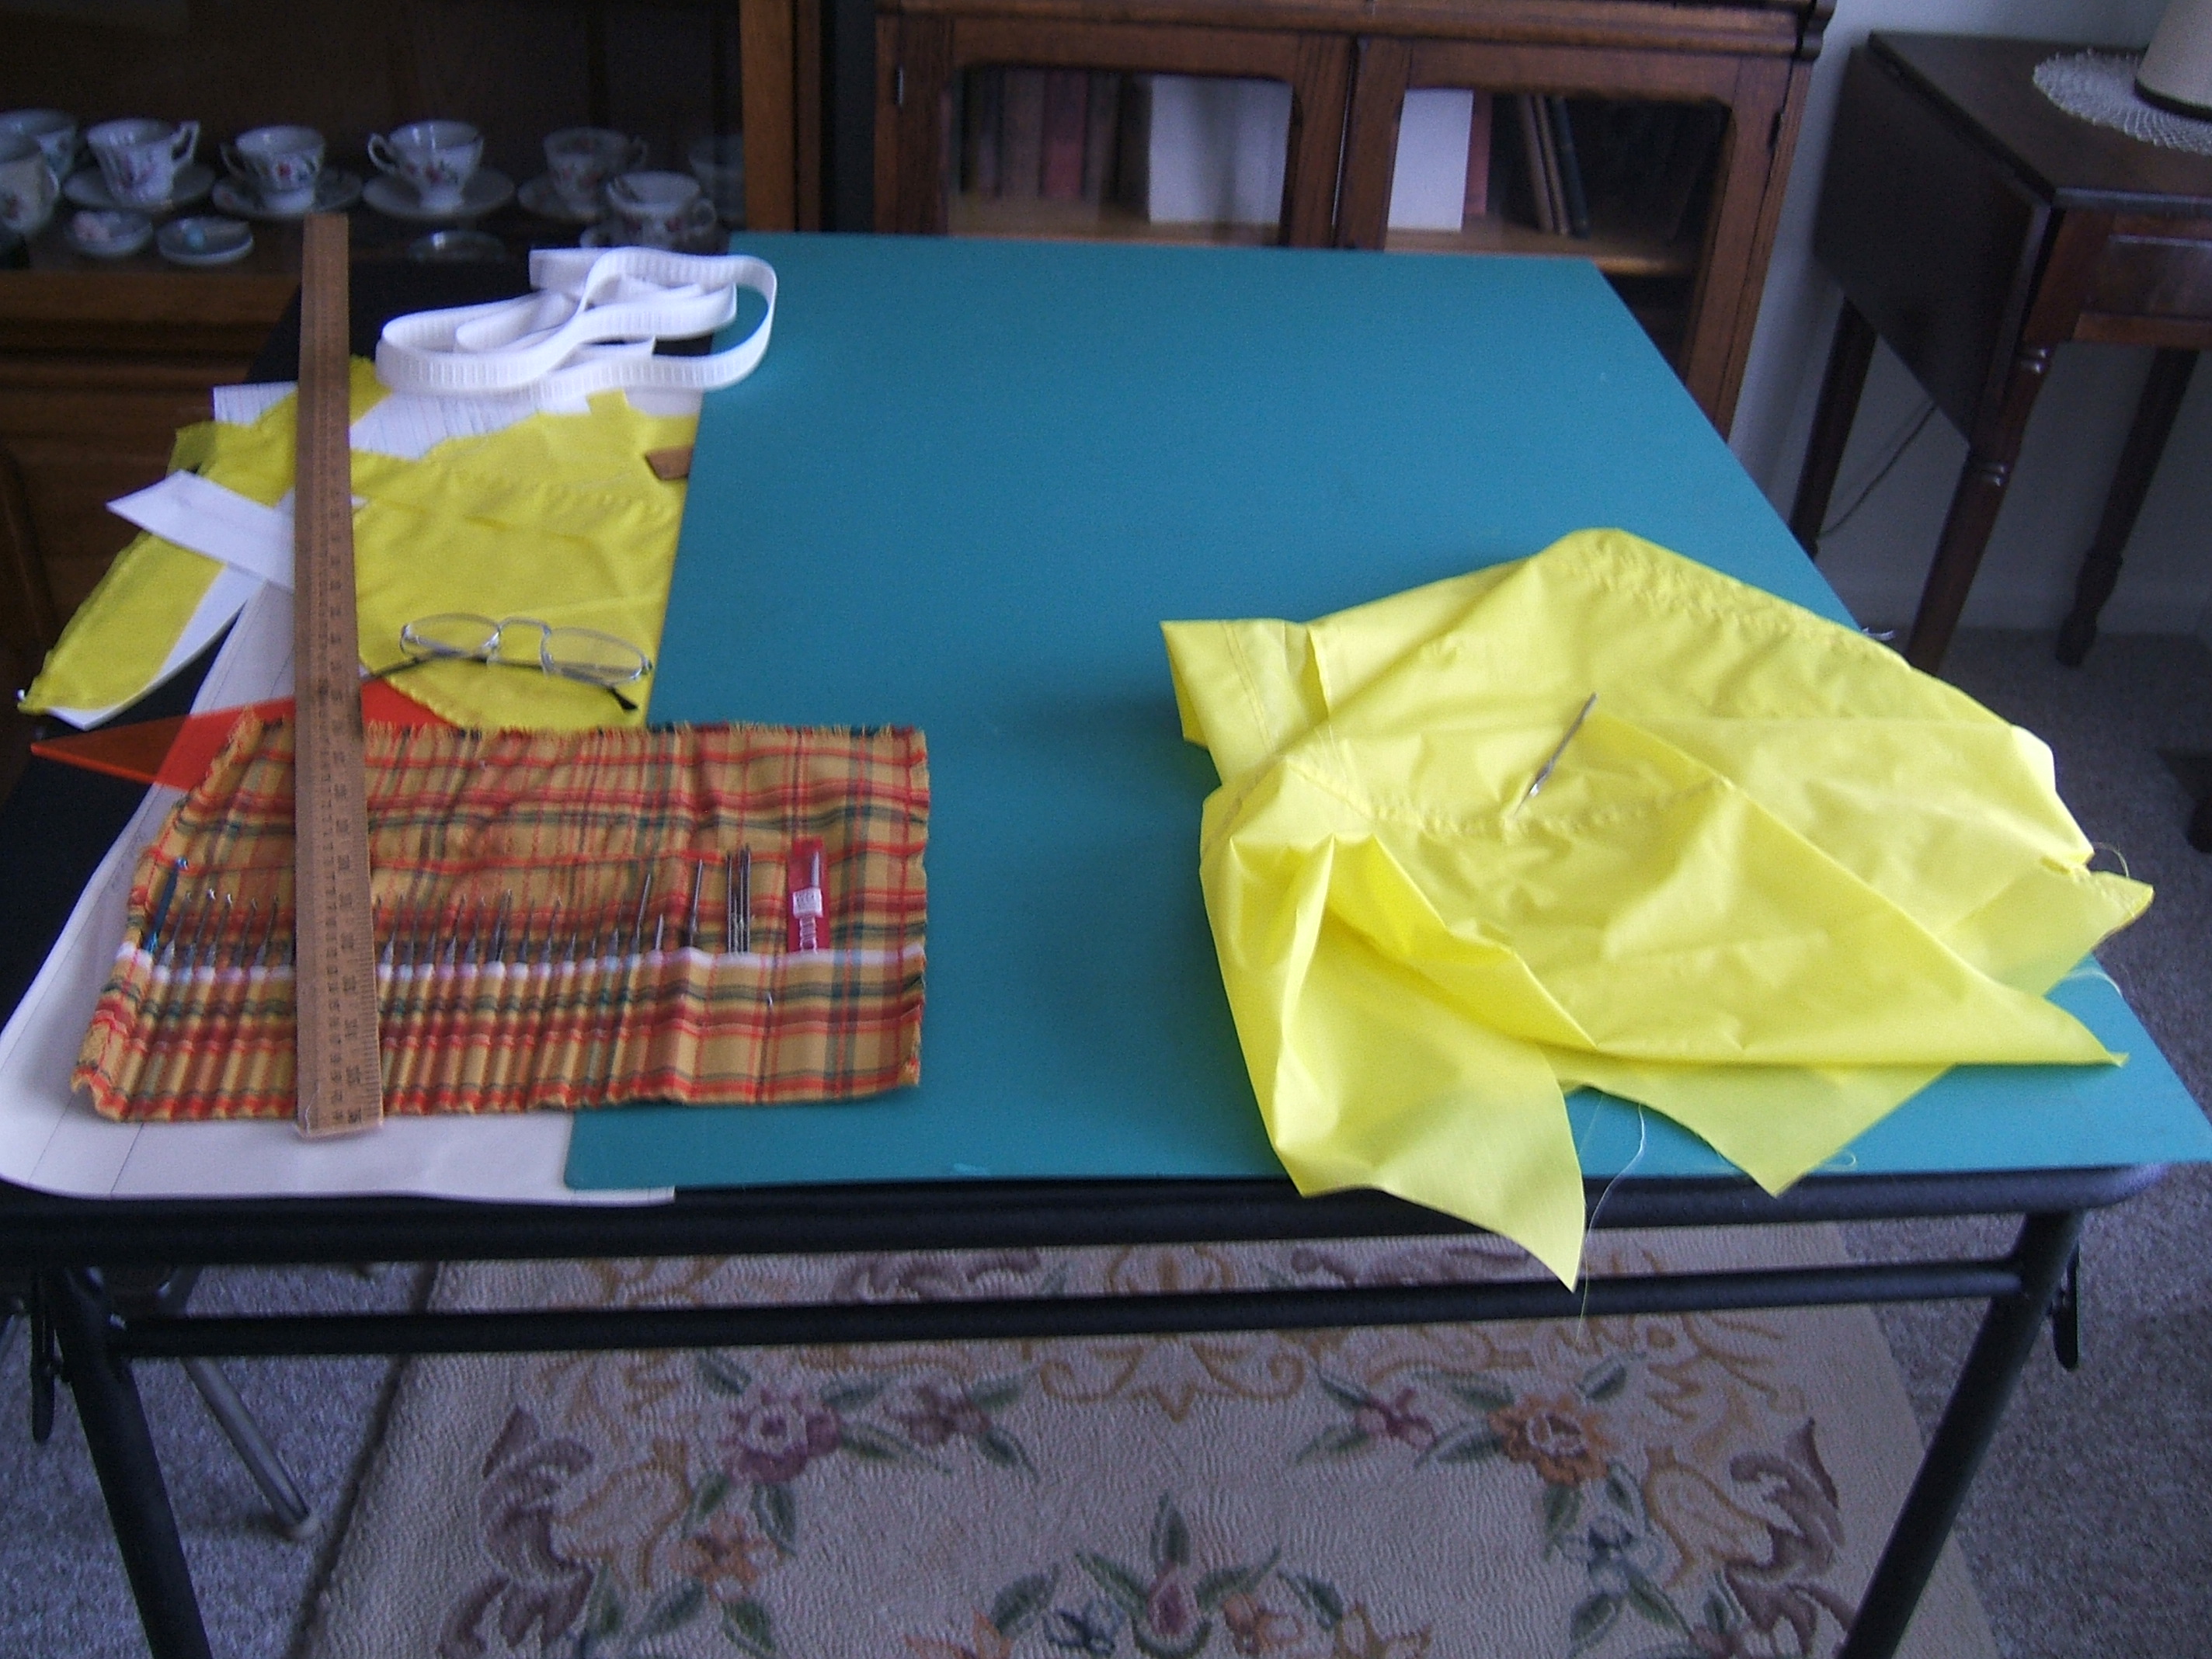
I'm beginning to cut the back now — along the lines of the ripstop. I had to turn the cutting mat over, because the yellow lines on the mat make it impossible to see the yellow lines on the ripstop. The lines are handy for checking whether the fabric is square, so I'll probably turn it back before long.
An oddity: pulling the fabric square seems to charge it up — at least it sticks firmly to the mat after I have done so. Which was rather convenient when I was cutting the collar out of the piece left from cutting the pockets.
Small pieces are easy to pull square; the main body of fabric is less compliant. But luckily, the edges of my pieces lie mostly on the grain, so I can cut a piece away from the main body, square it up, and then cut the curved edges.
Ripstop: a double-edged sword. It makes it easy to cut thread-straight — but anything that isn't straight shows terribly.
I put in a fresh blade before starting to cut, and was surprised at how much easier it is to cut. I sew so slowly that I don't notice how dull the blade is getting until it's truly horrible — I have the same problem with stainless-steel razors; when razor blades were meant for one shave only, I could use one two or three times; now that they are meant to change once a week (and I shave, at most, three times in a week) they last so long that I can't remember how long a blade has been in service and don't think to change it until I get a bad shave. (And, come to think of it, I haven't shaved since Sunday. My beard probably shows. <dashes off to lavatory>)
But by good luck, I thought that a tough and delicate fabric should have a fresh blade.
My wash-out marker won't stick to the ripstop. Good sign for the finished jacket, but it means that I have to use a marker that is merely not guaranteed fast, and keep all the marks in the seam allowances. I suppose I'll have to use tailor tacks for the bust darts.
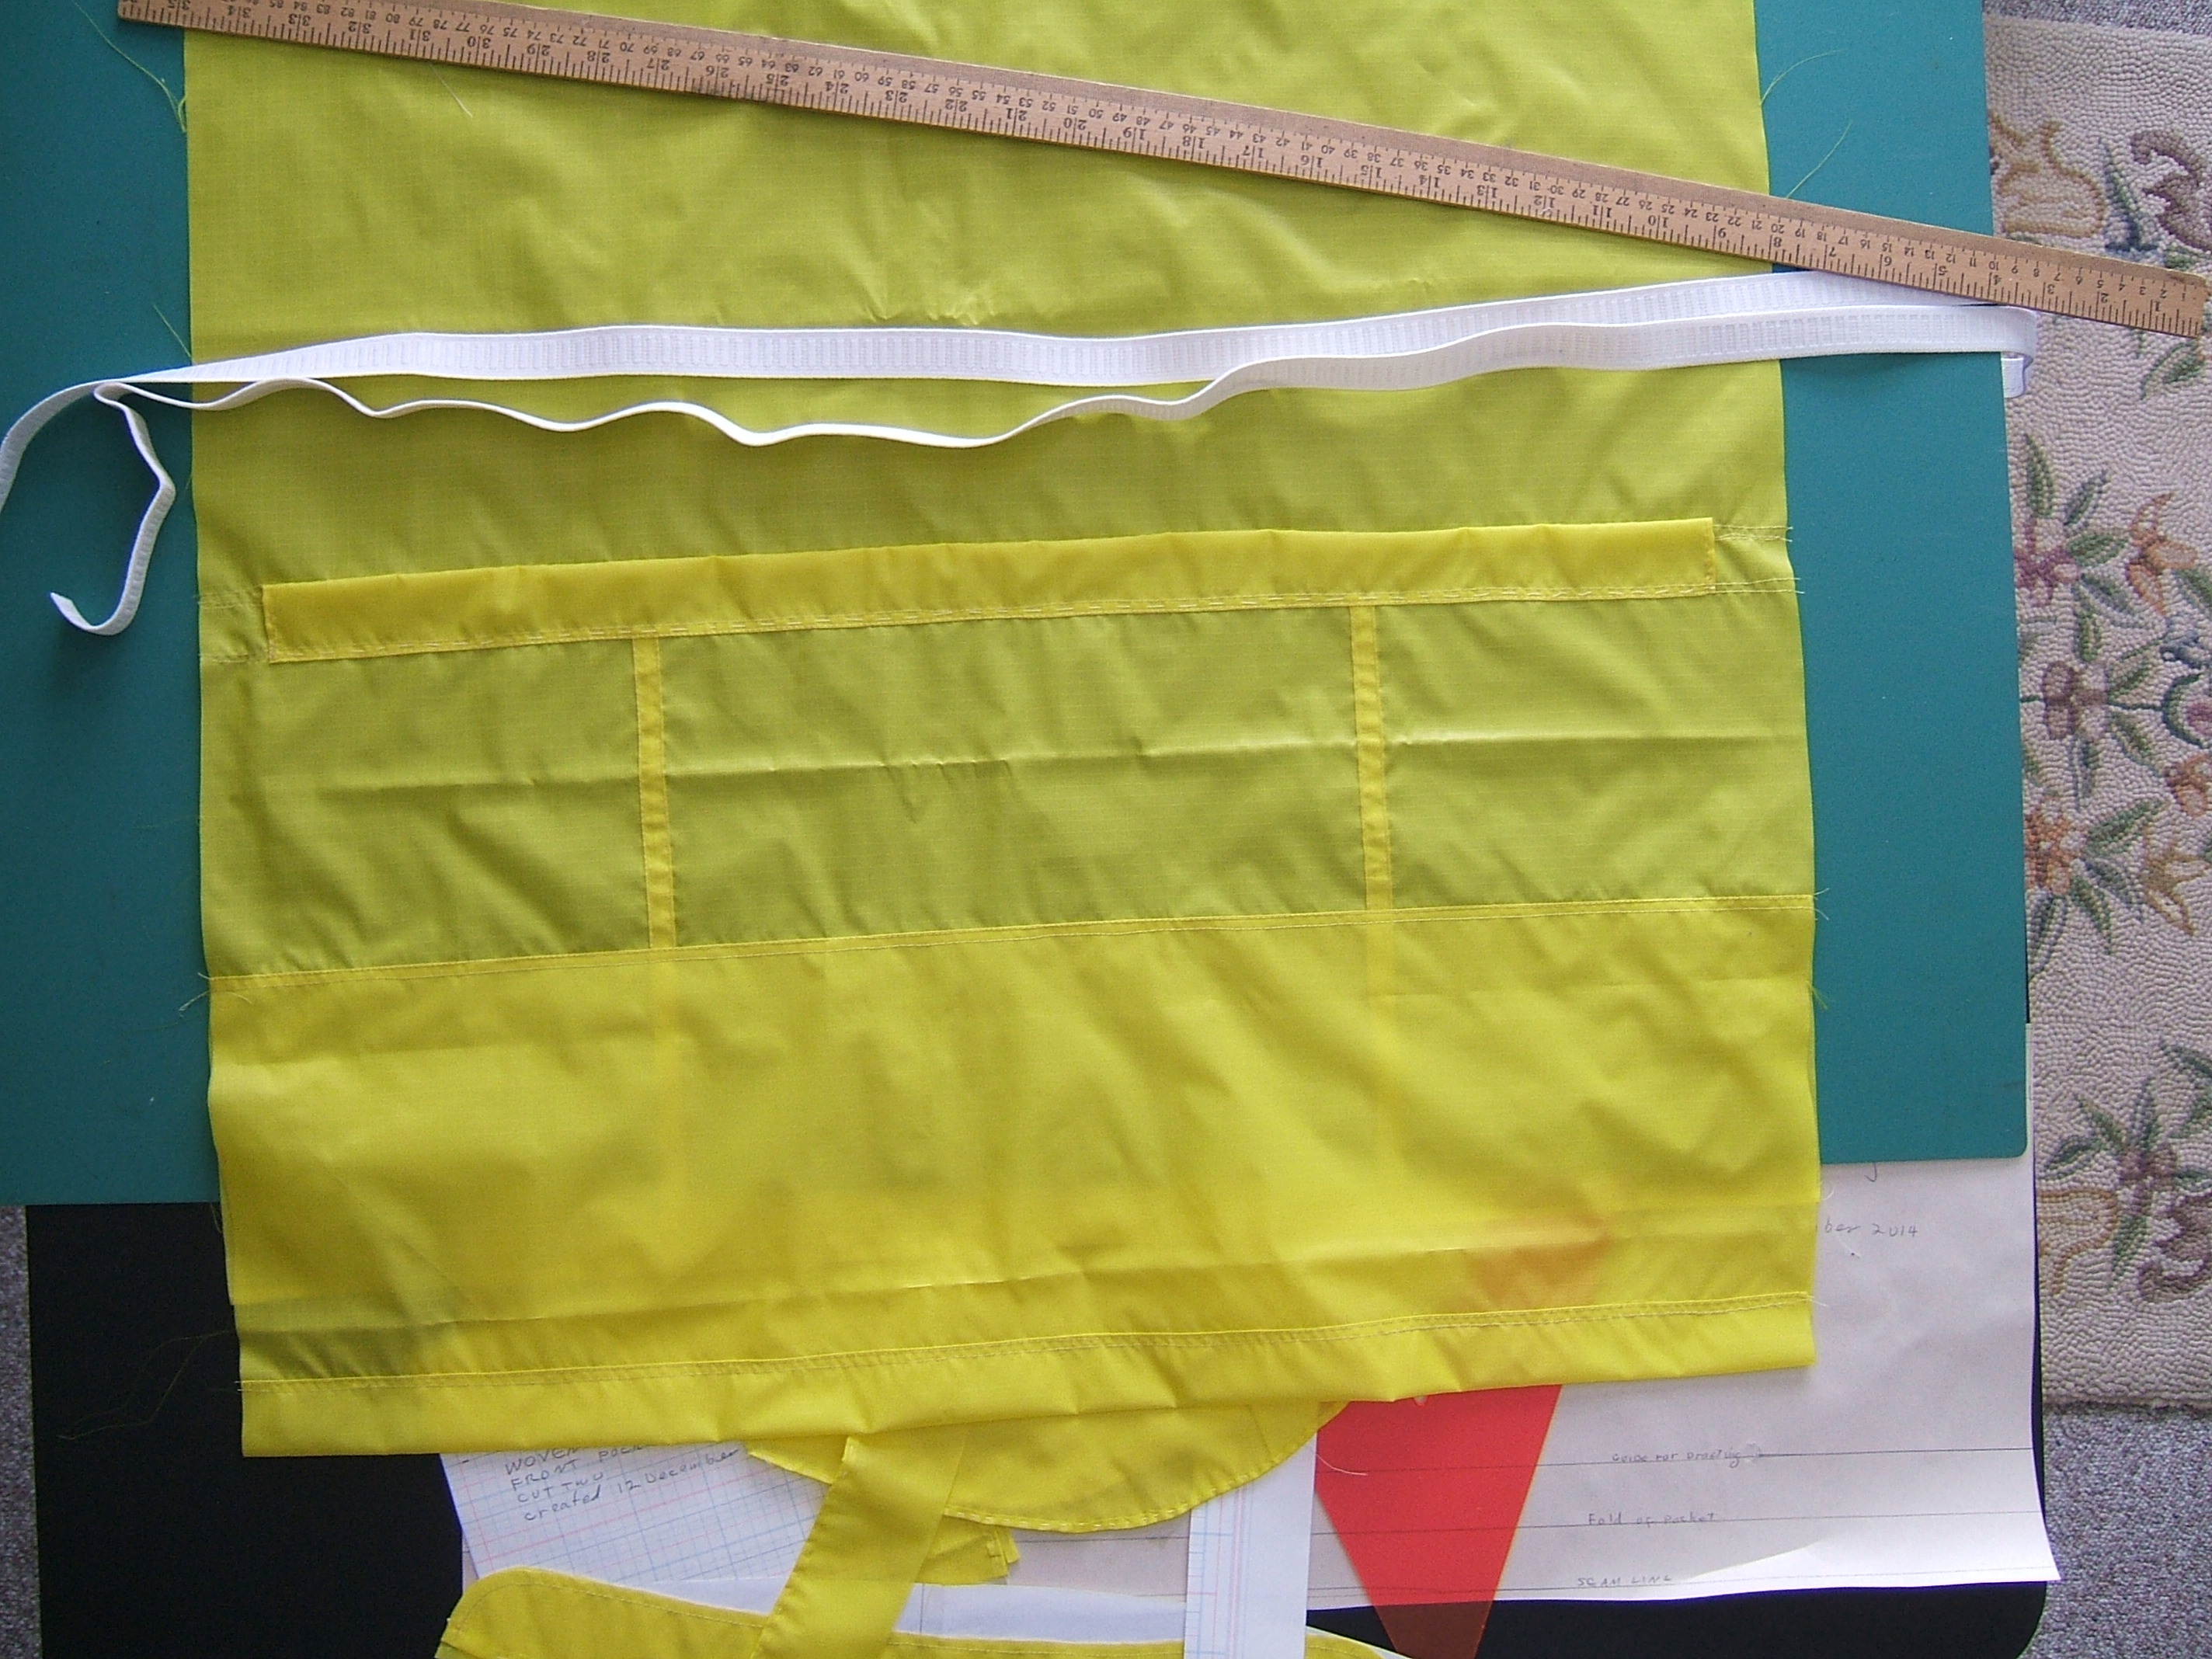
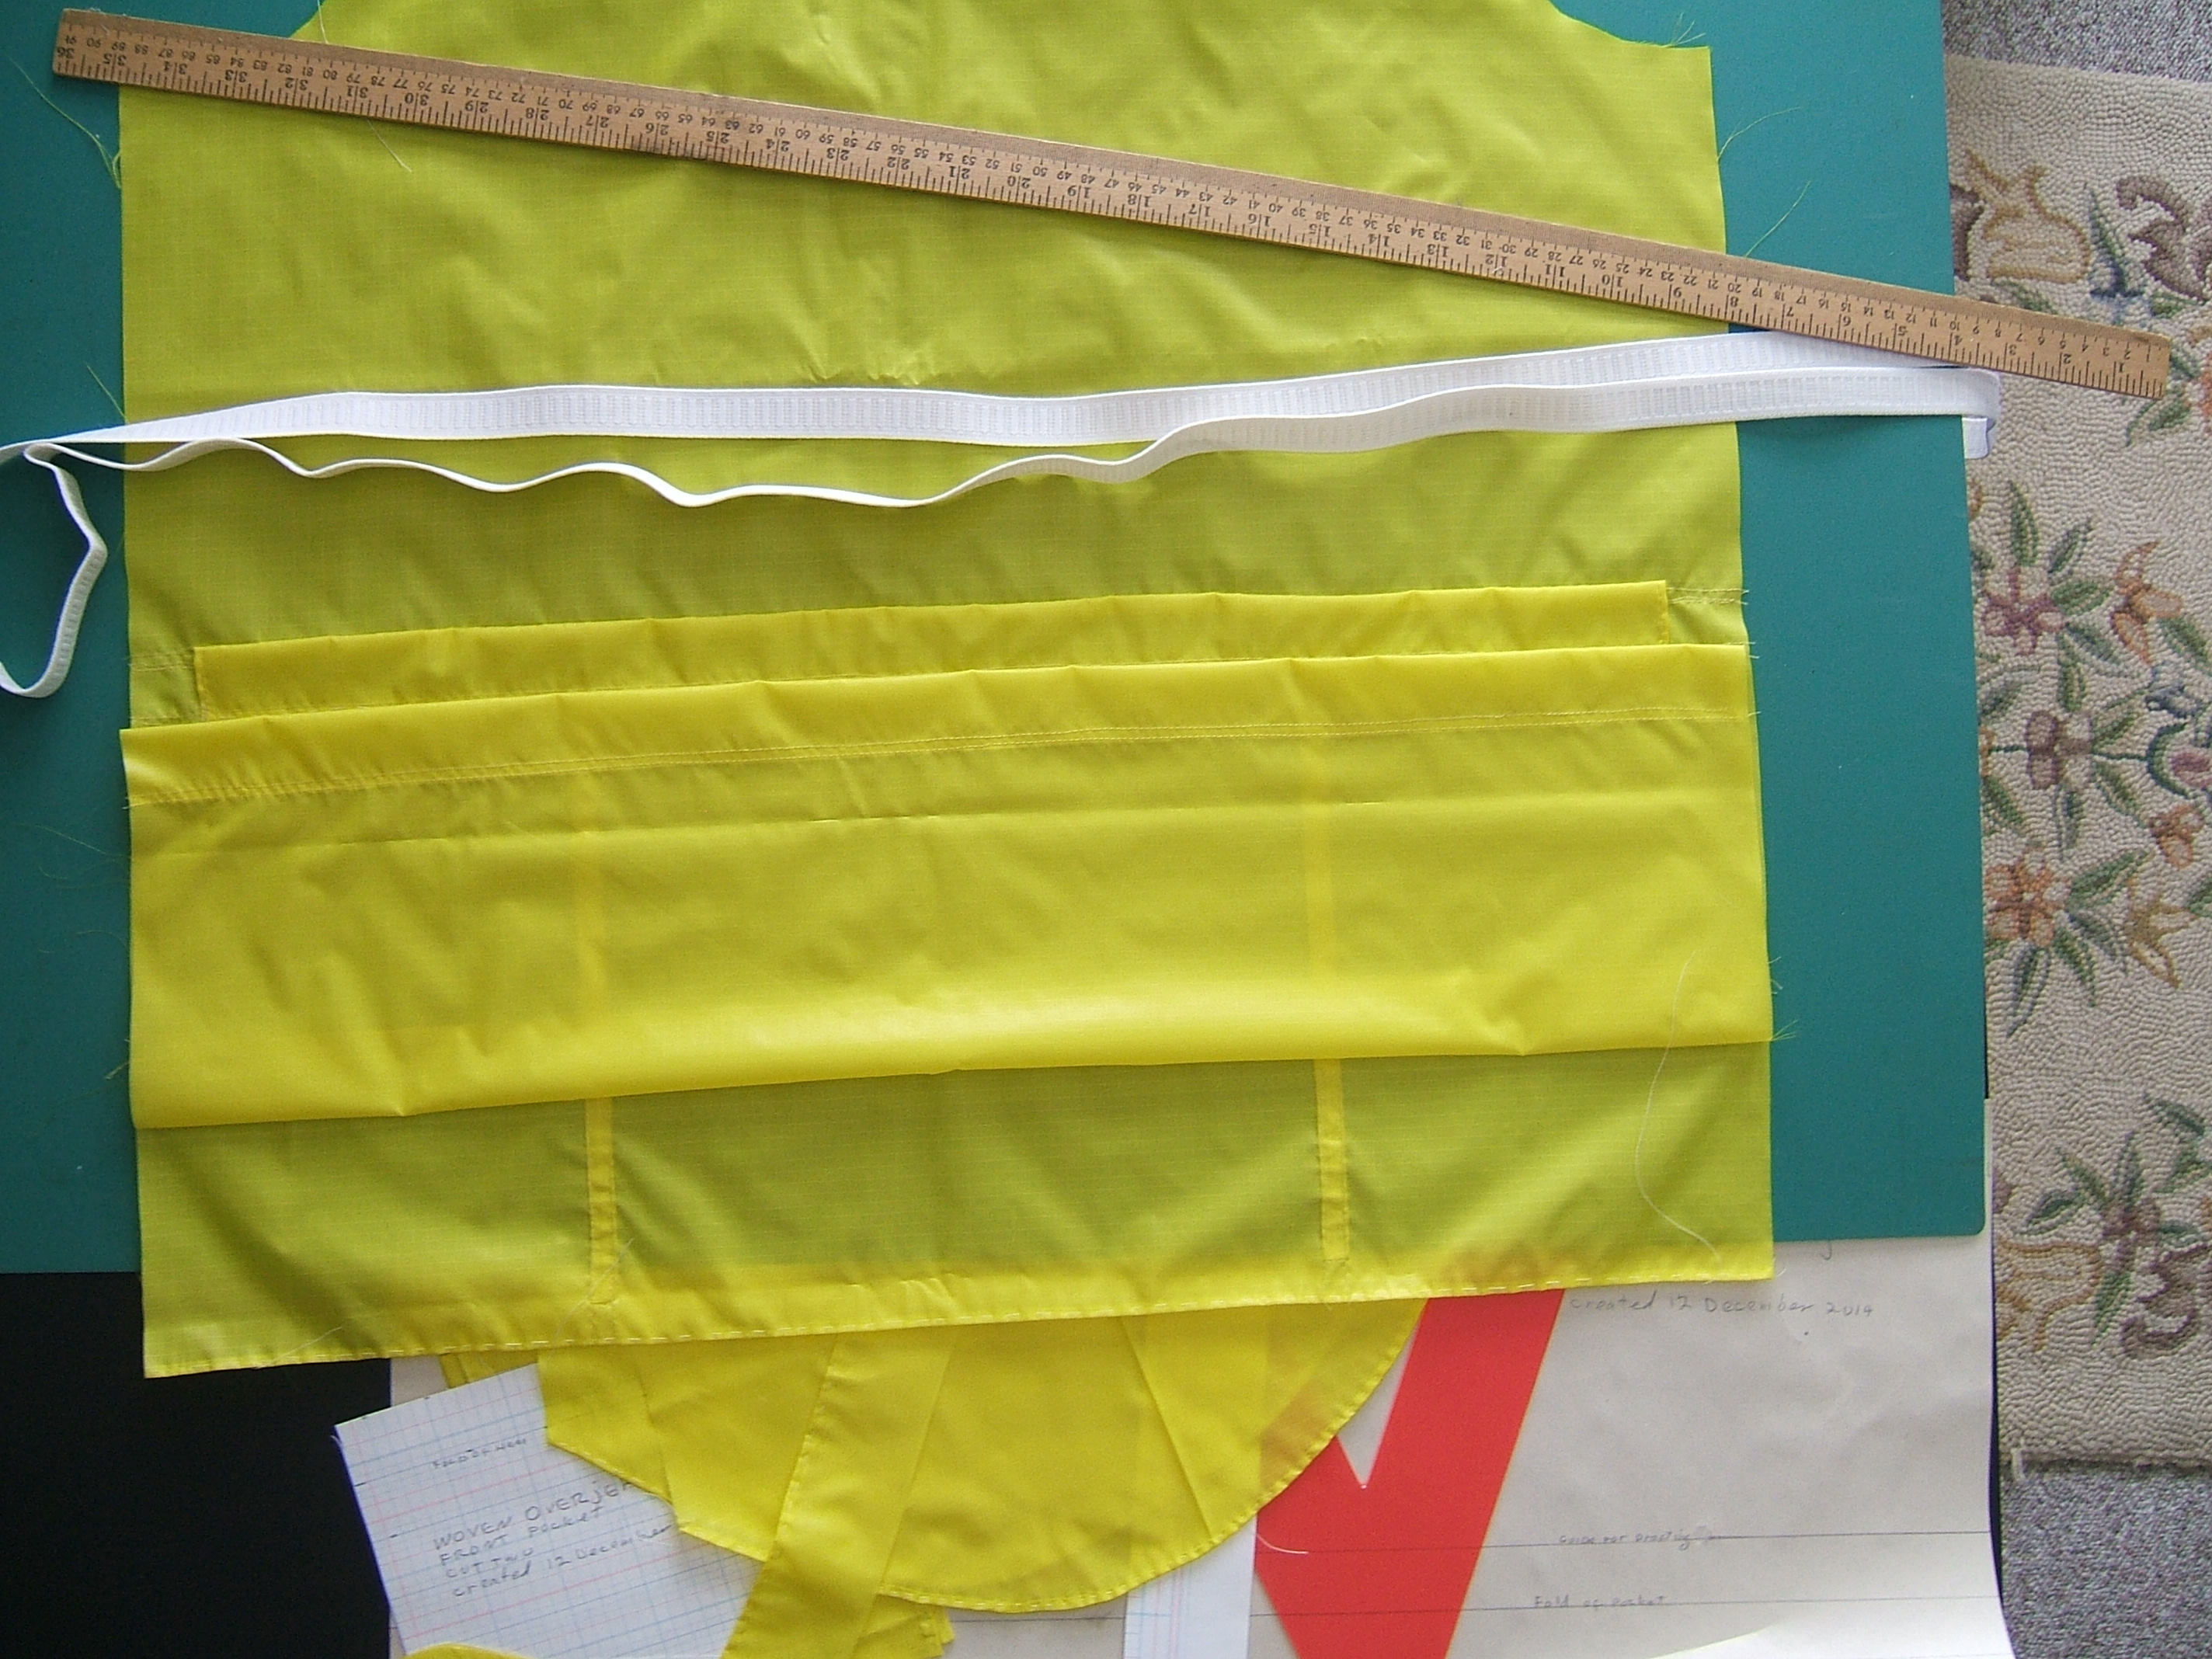
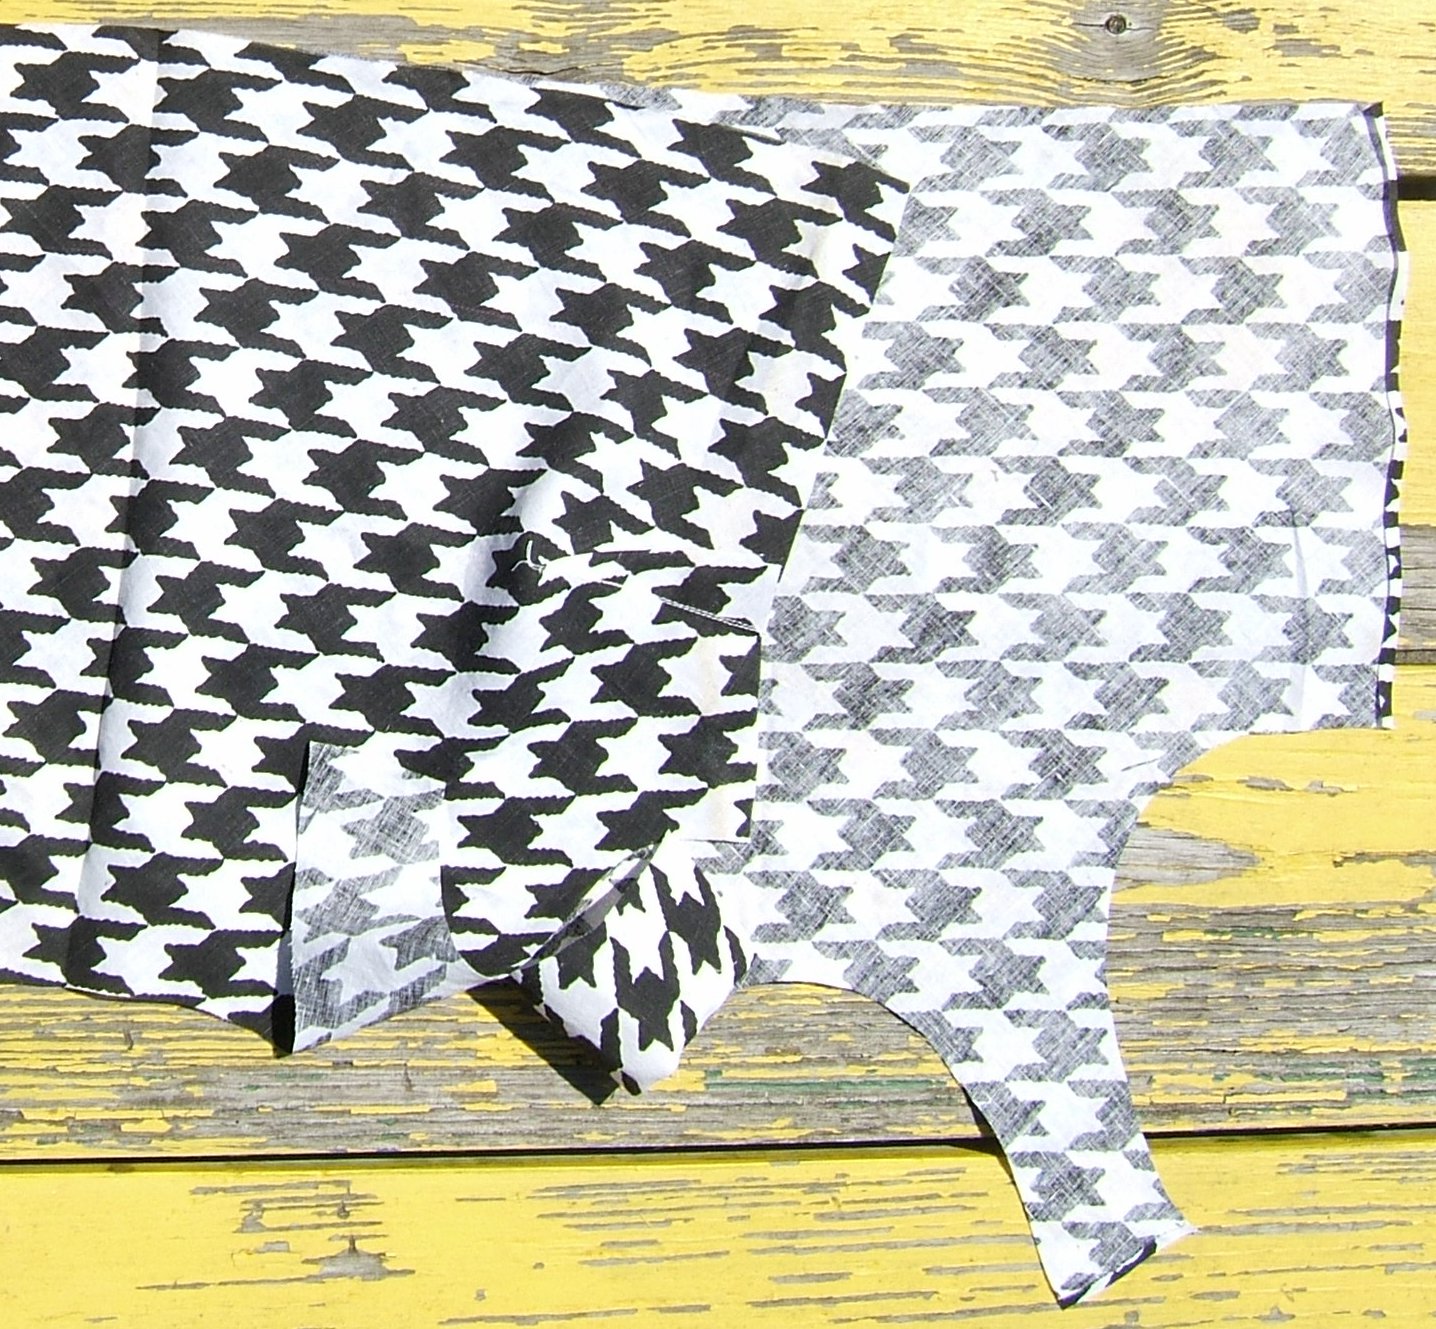
Cut off a piece to cut the two fronts from before lunch. The width from cutting off the back was a bit more than twice the width of the front pattern, and I thought that I hadn't allowed enough seam allowance down the center front — after all, the stitches holding the zipper on will be set back a quarter inch from the folds, and I want to turn under the edge of the seam allowance to make it a facing. So I cut the piece as wide as possible, and will split it down the middle for the two fronts.
I plan to cut only one yoke, and attach it with a pre-graded flat-fell seam on both edges. May regret not having the windbreaker double over the shoulders, but if it's warm enough to ride when there's a chance to get wet, I'll probably carry the old one.
Which, come to think of it, isn't double over the shoulders.
The only design decision I may regret is making the pockets of ripstop too — they may hold water when worn in a heavy rain.
Last sleeve cut out — time to set up the sewing machine.
The grid on the cutting mat was a major help in making sure the fabric was square — as was ripstop's habit of sticking firmly to the board. The sticking also meant that when I pulled the fabric away from a newly-separated piece, it refrained from falling to the floor with only a few inches lying on the table. But it was sometimes difficult to remove and discard the smallest scraps.
The static was a nuisance when I folded up the biggest scrap. It turned out that there wasn't enough to make another jacket, but it was a large piece of fabric, very thin — and highly charged.
I need to buy two zippers — one for the wool overjersey this windbreaker is a beta for — and look for nylon thread and finer needles, but I have a meeting this afternoon.
Yesterday I basted the turn-under for the hem of one sleeve just to say that the shirt was still in progress. Today I folded up one of the two card tables I'd been cutting on.
Threaded the treadle machine, then spent the rest of the day fiddling with pictures of tools.
Since half the nylon thread was on a Necchi bobbin, I thought that I'd put all the thread on bobbins, and use the one that didn't fit the machine I was using for a spool. But it turned out that not all the thread would fit onto a White bobbin (I should have remembered that they don't hold very much). so I'm using the spool for a spool.
I had to unwind some thread that had lost its provenance to get an empty bobbin, so I suppose I'd better get to Lowery's and buy some more.
I wound it onto a plastic bobbin by hand because the bobbin had lost its grip on the bobbin winder. There were so few yards that it wasn't any more trouble than getting out a steel bobbin; the job was nearly done by the time I got enough winds on to hold. I hope I remember to throw out the plastic bobbin when it is empty.
While I was fiddling with the Necchi, I unthreaded it and held the foot control down for a while, since I can't remember the last time I used it. Machines tend to gum up if none of the gears move for a long time.
I must remember to compare the poly thread that is on the Necchi with the poly thread I took off the White, and put them into the same bag if they are the same thread. I think they are — wasn't the last thing I sewed black slippers that used both straight stitch and zig-zag?
Note: when at Lowery's, look for black fleece.
Yesterday I darned DH's 1980 Winter Games stocking cap — the pom-pom is a trifle faded — then started looking around for one of the plastic eggs I bought a dozen of one easter so I could mend a broken thread in one of my thick wool socks. I last remember a whole bag of them hanging over the edge of one of the shelves on the south wall of the sewing room, but they have been put in a more logical place. While hunting, I discovered that the corn-meal and oatmeal boxes are full of tightly-wound balls of hand-spun weaving thread, probably real wool. I don't recall how I came by them, but do remember that that is what they are. They were dyed in an era when faded, dirty colors were "natural" and all the rage, so I've never skeined and washed any of it for knitting.
(Yarn in tightly-wound balls gets stretched, so that it is necessary to shrink it before using. Unless a puckered look is what you are after, and anything from tiny to huge will do fine.)
This morning I picked up a furoshiki-wrapped bundle labeled "pink socks/darn heel/Medici present/NO greylock present" and felt an egg inside, so I put the bundle on the arm of the futon that I stashed the sock and the threaded needle in.
Should a needle threaded with yarn be called a "yarned needle"?
Might even darn the pink socks, if a TV show that I can stand to be in the same room with happens along. There's a good lamp beside that end of the futon, so I can work at night.
When did "futon" change meaning from "kind of Japanese bed" to "kind of sofa"?
⁂
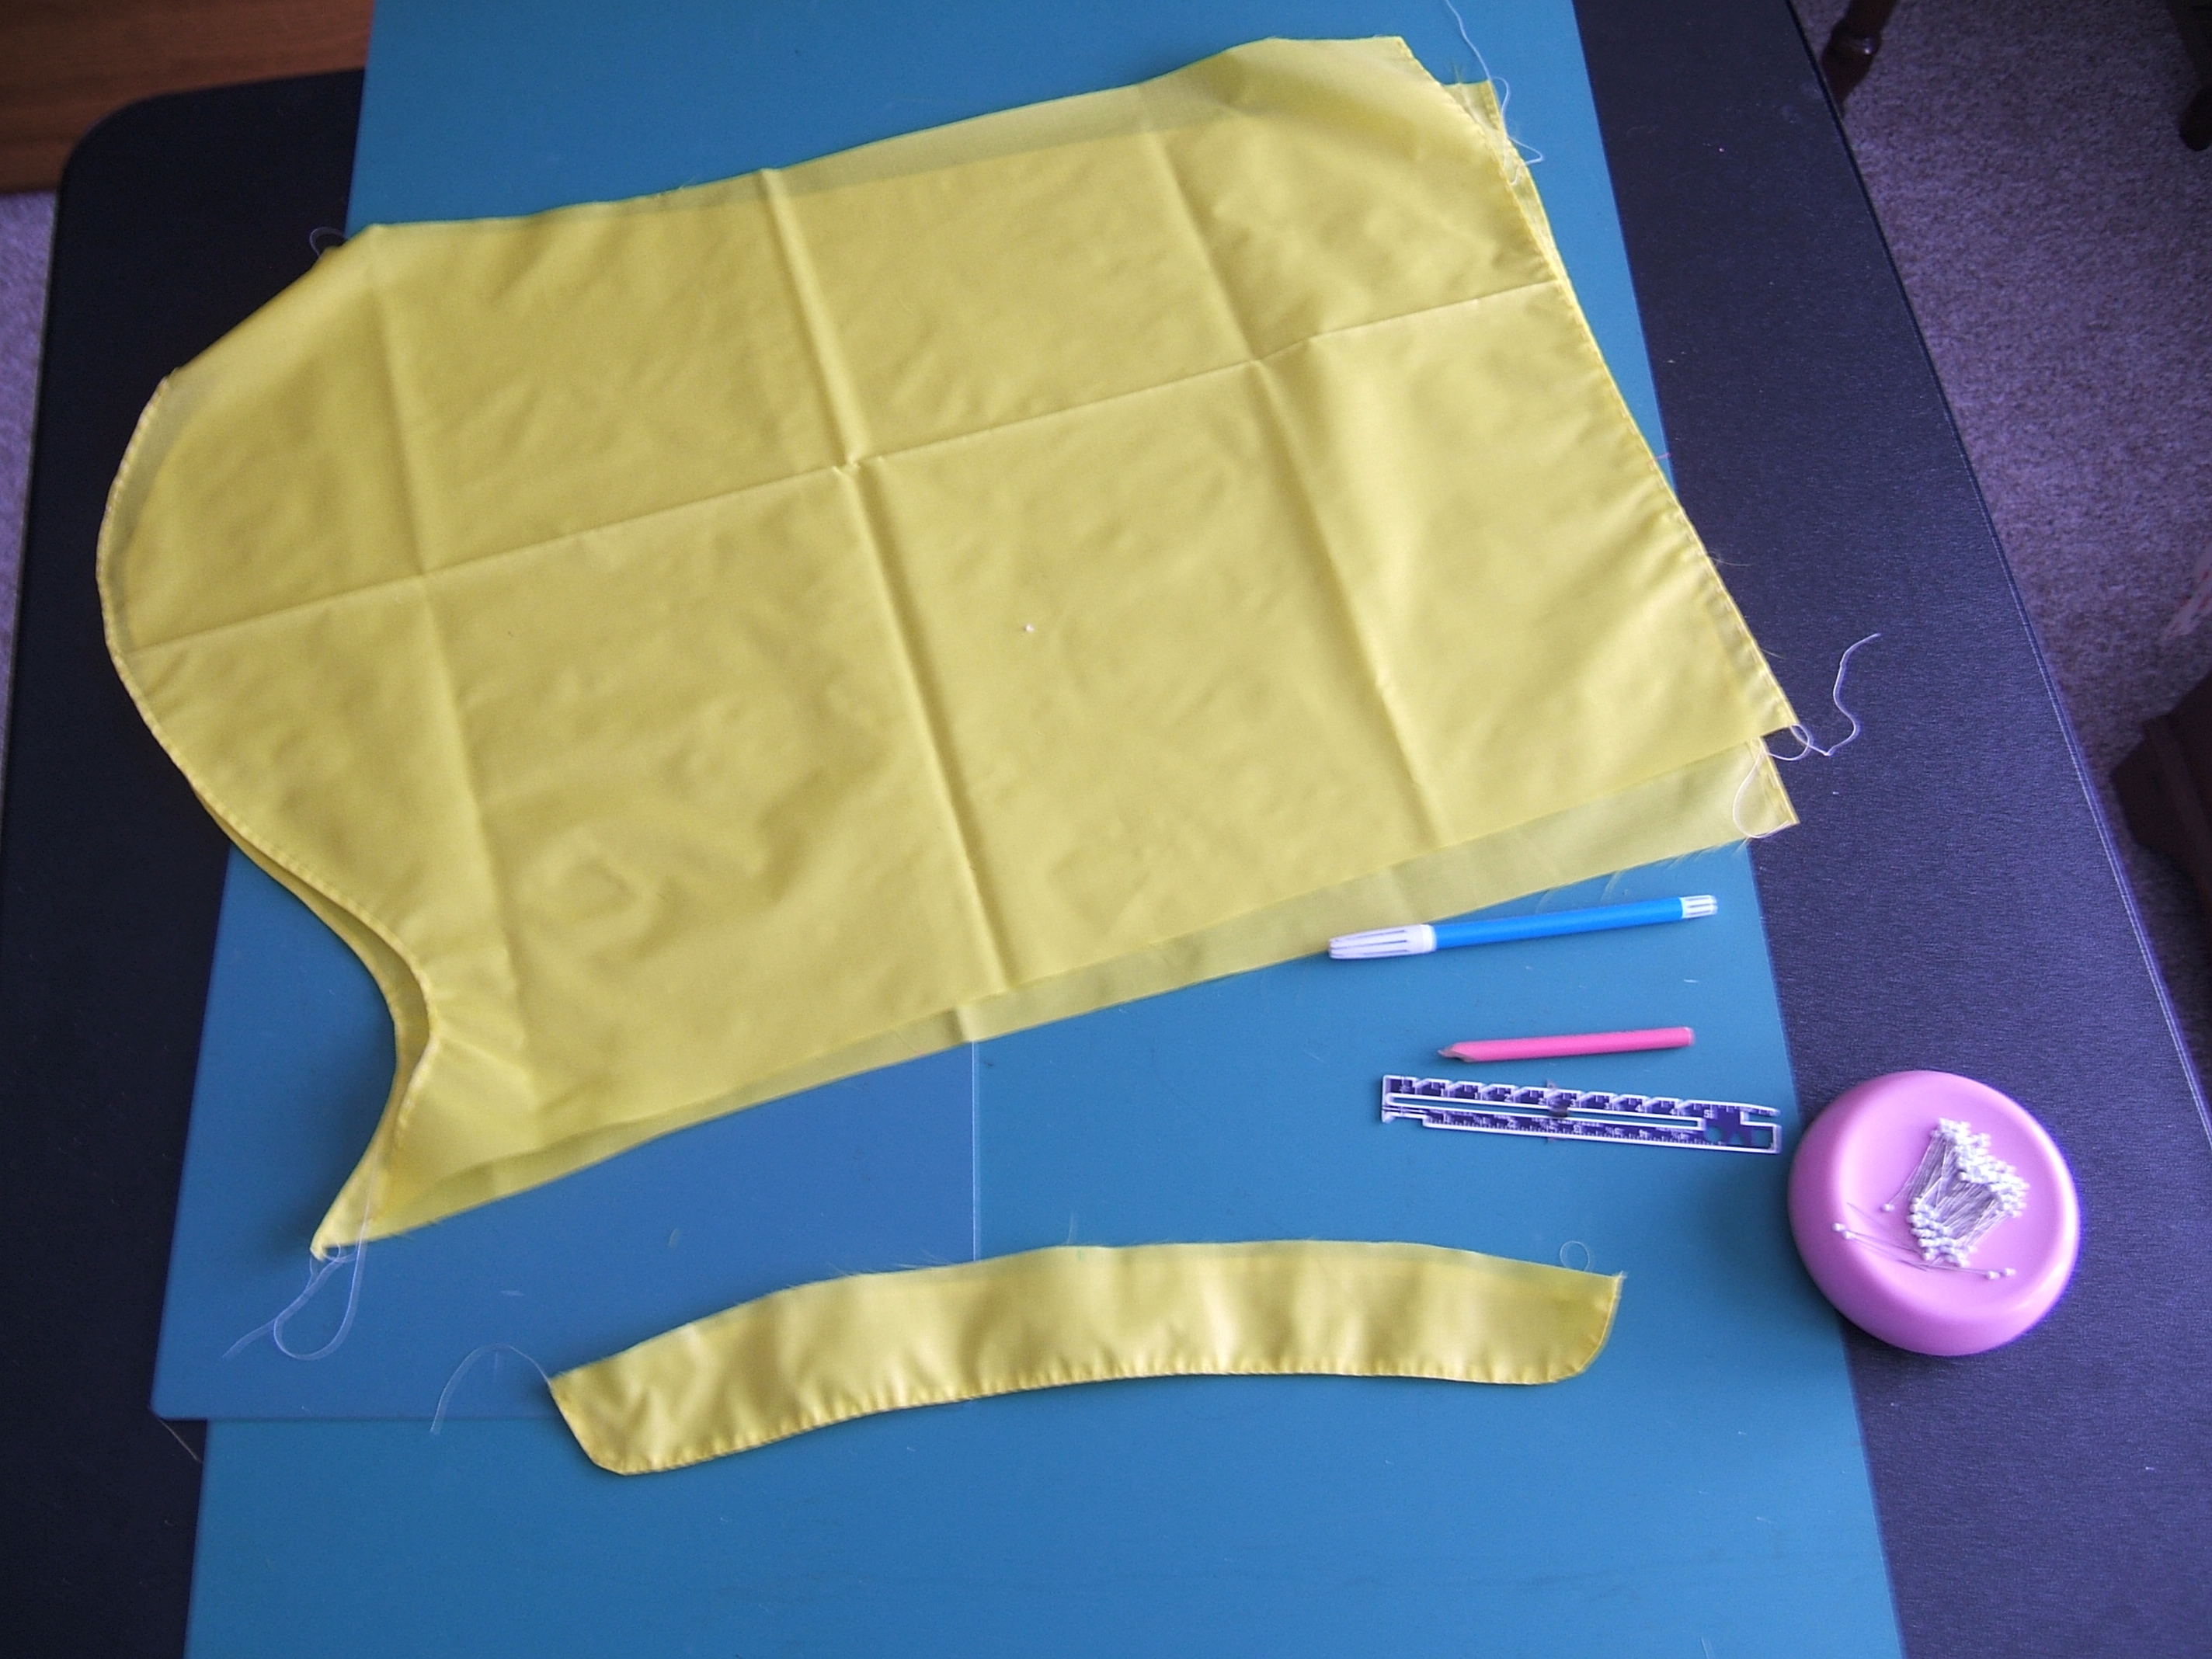
Fiddled away most of the morning, but sewed the collar together so I could say the shirt is in progress. No interfacing, since this is to be a shell.
I'm going to want to install the zipper early on; had vague memories of buying a yellow zipper for the Jones Cyclewear jersey, then changing my mind and buying a black one. So I opened the "Zippers" box — hey, two matching yellow zippers right on top! Uh, seven-inch neckline zippers. Not one separating zipper among the clutter, and it's a fairly-large box, nearly full.
Oops! Selected elastic today, reached for the box of tapes to see whether I had the correct width for making thin ends to sew into the seam — all my tapes are pure cotton, except for the reel of mystery tape and some rayon seam binding. I do have a box marked "synthetic tape", but none of it is tape in the sense that I want now. More than half of it is webbing!
Last time I checked Lowery's, the polyester tape was imitation cotton and came only in half-inch. I could scroonch tape that's a tad more than seven eighths, but not tape that's less. I'll hold off on the elastic until I get to Lowery's, then use a piece of the main fabric. The edges will be fully enclosed, after all. I think I'll cut a strip a tad more than fourteen eighths, and fold the raw edges to overlap in the middle.
Meanwhile, I started by swearing I'd hem the pockets before playing with the computer, so I'd better get back into the parlor. Need to take my nap early today because I have an appointment in the afternoon.
Monday was shopping — I bought a zipper — Tuesday was washing. Before putting a coat into the washer, I noticed a zipper coming undone in one pocket and hastily backstitched it with nylon thread from a box of bobbins I got at a garage sale or flea market somewhere. Discovered that all of my poly thread is black — either that or I have thread stashed in a project bag I've forgotten about. I thought I had some red thread somewhere, but it probably wouldn't have matched the coat any better than the white nylon anyhow.
I don't think there was any twill tape in the packets at Lowery's, though I saw some seam binding.
darn heavy wool socks before washing
them I finally got the sock,
needle, wool, and darning egg all in one place at
the same time. In the process I found a
pair of pink socks that I'd like to wear, in a
package marked "darn heels". But they won't
fit into the arm of the Futon. I did get
the egg and the Medici into the arm.
Re-wrapped the socks and balanced them on top.
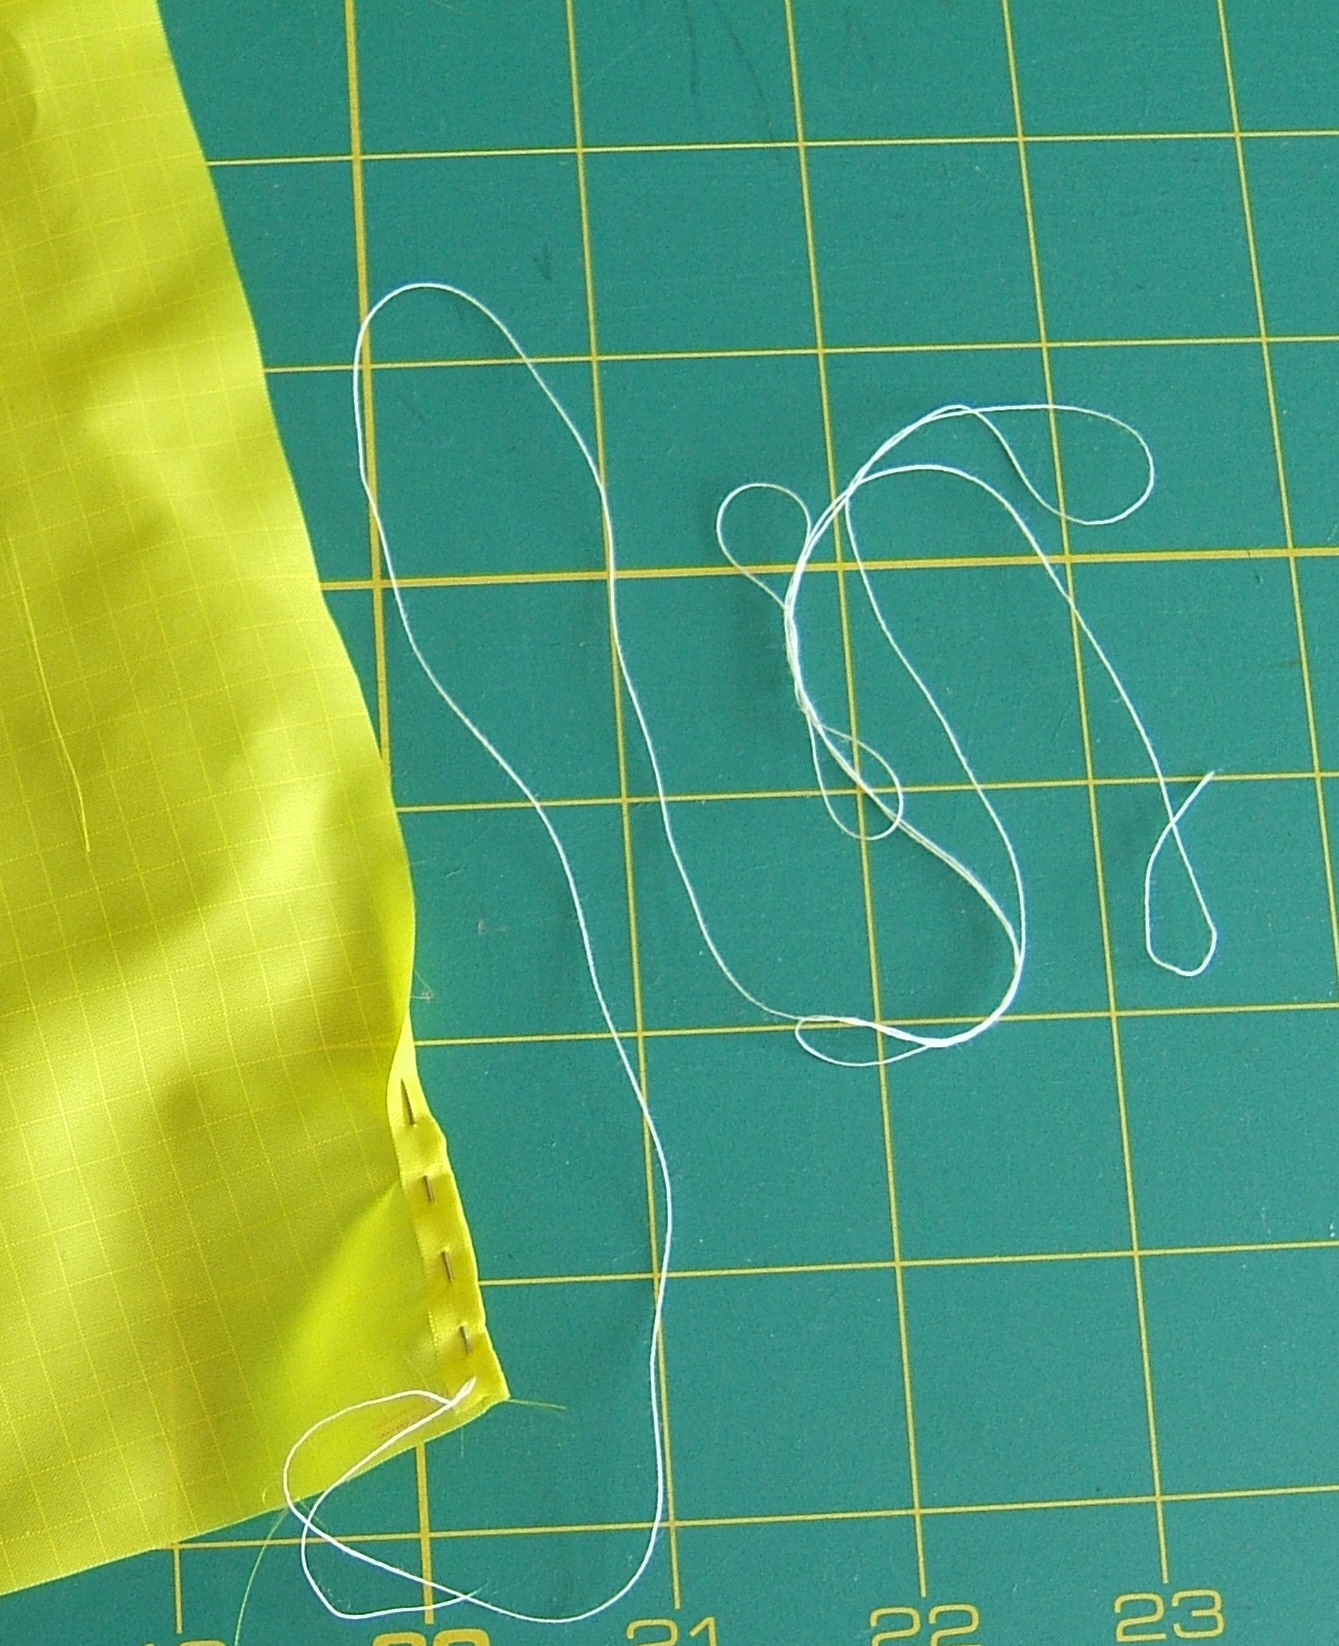
Used a #14 crochet hook to weave in the ends of the thread where I inadvertently cut the stitching on the hem of the back pockets and had to mend it. It being nylon thread, simply overlapping would not have sufficed. Took a picture of the hook, since I don't think I have "crochet hook" on my list of useful tools.
I hemmed the front pockets this morning, and looked at the other pattern pieces.
Since nylon loves to come unsewn, I backtacked the ends of the hems and tucked the ends inside with a needle. There won't be any stress on the ends of the hems, so I don't have to worry about the backtack tearing the cloth.
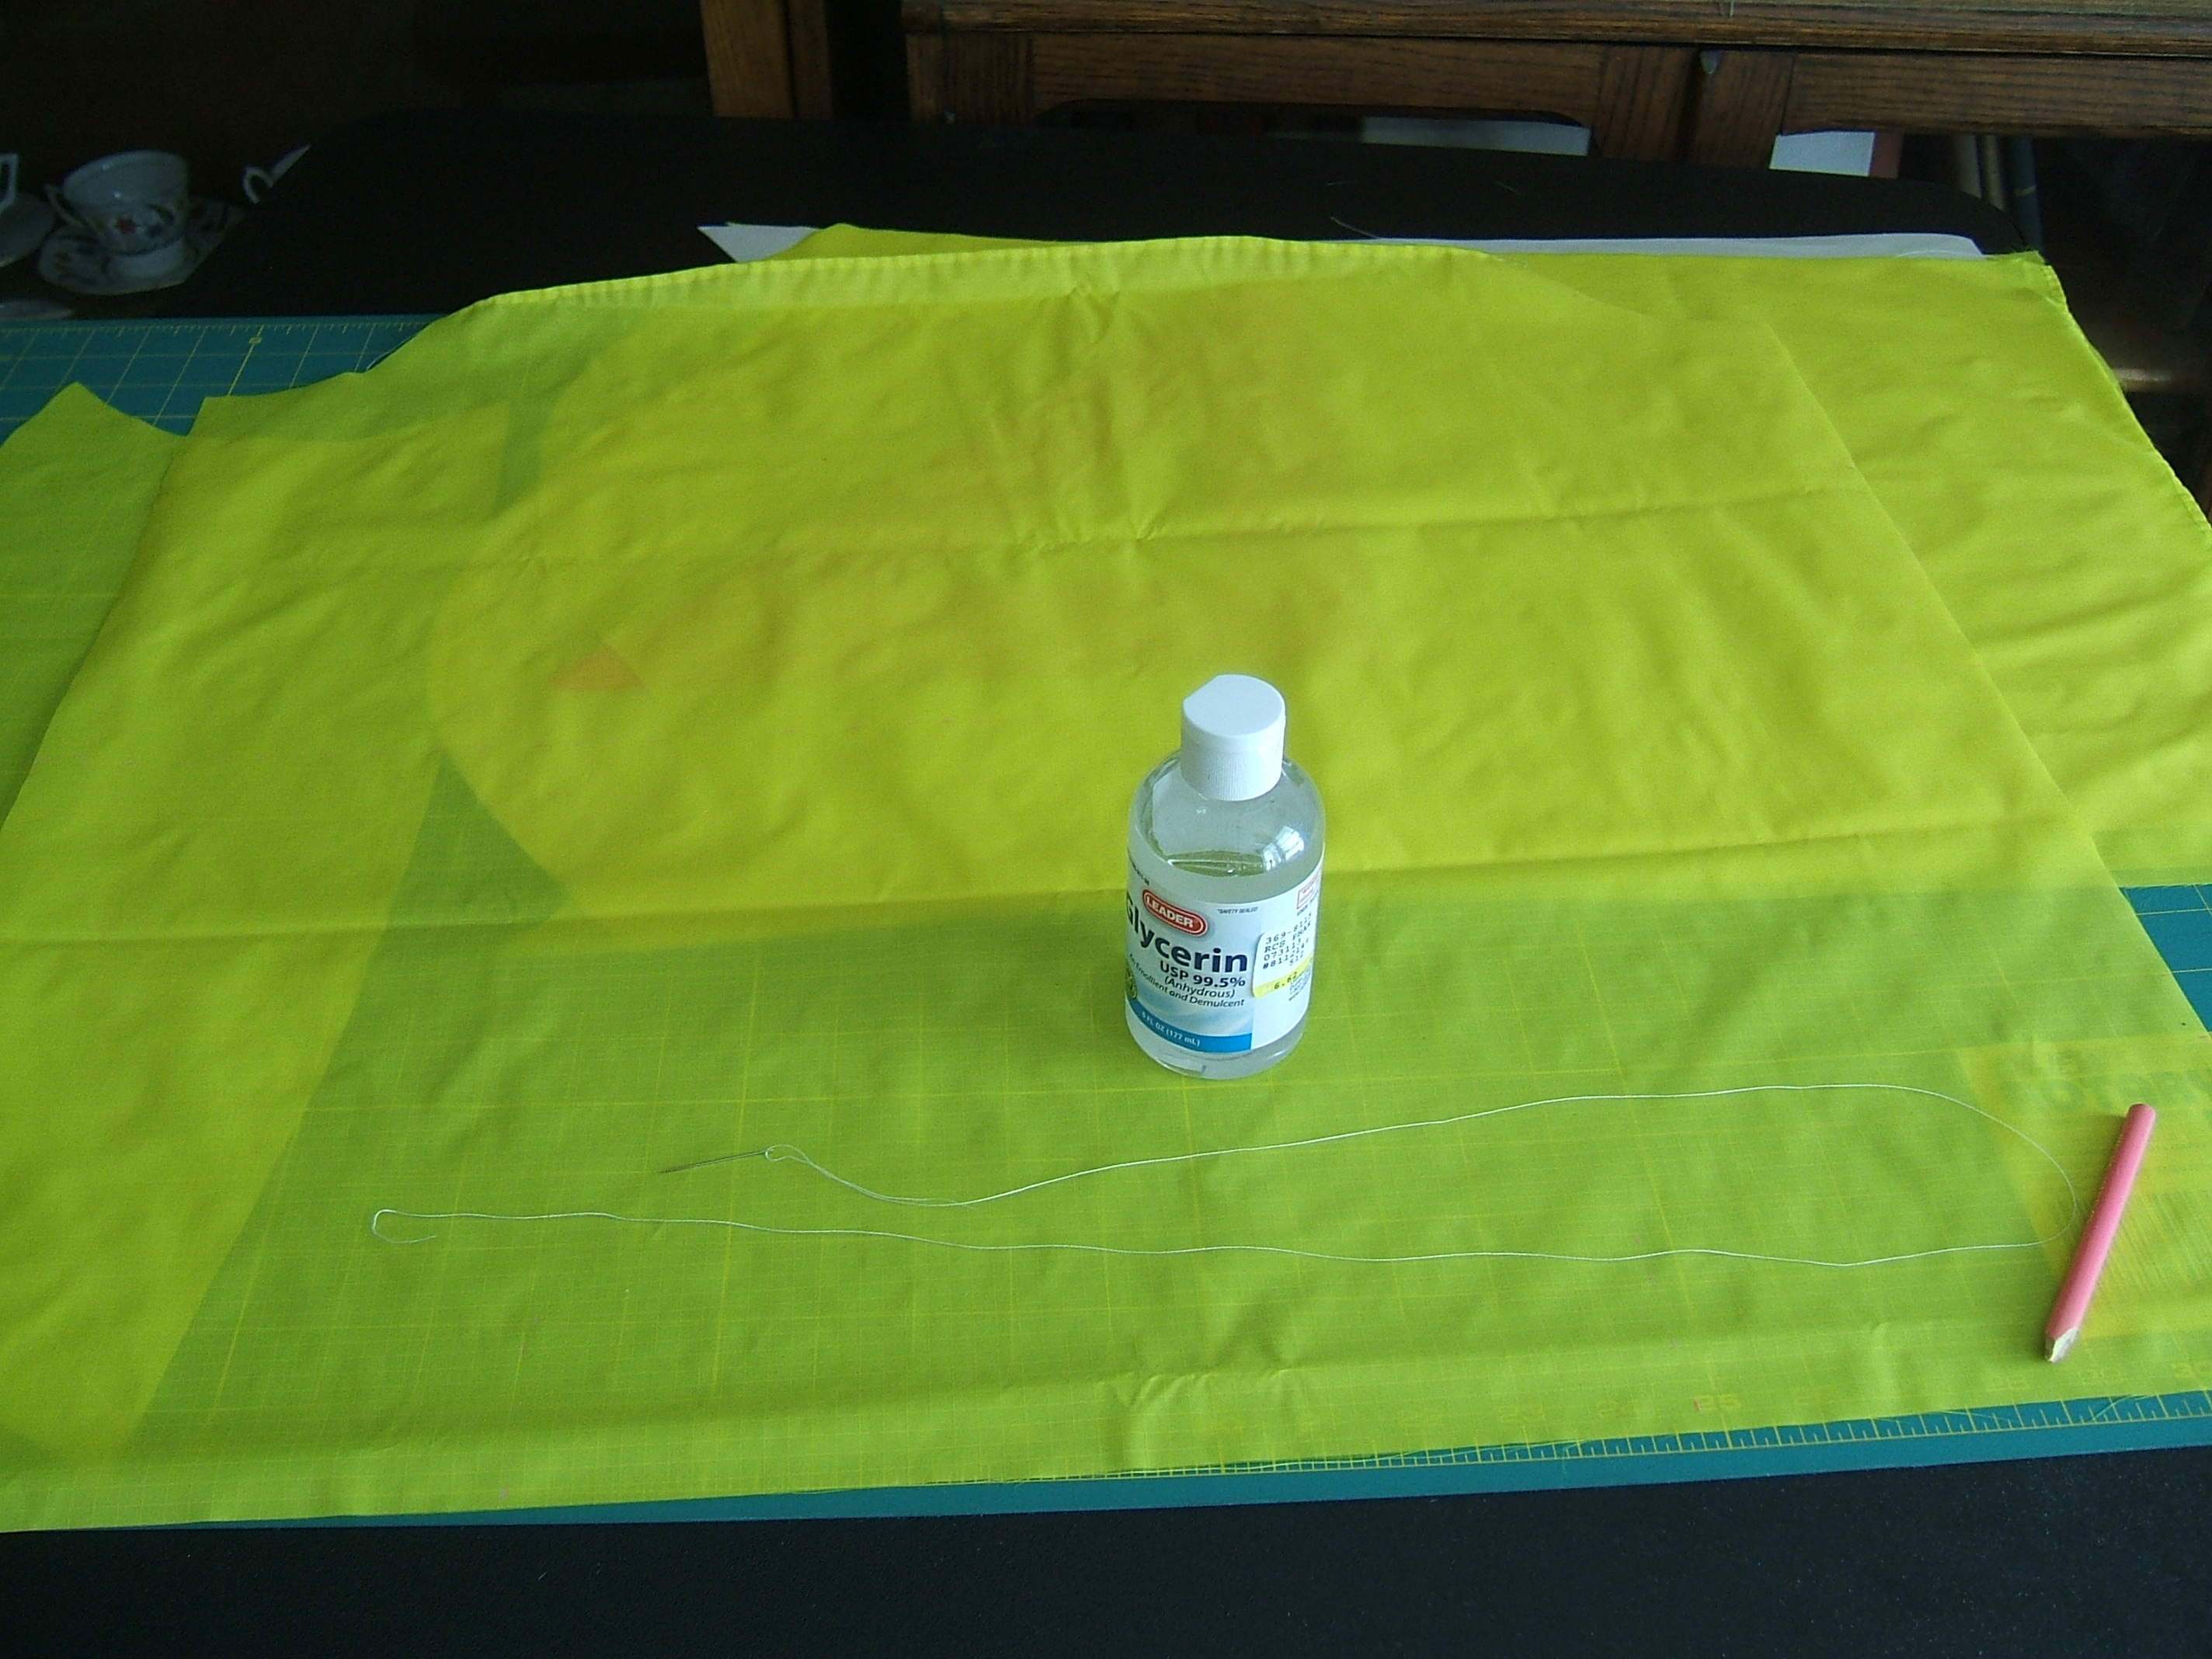
Also photographed my box of tapes and created a "NOTIONS" subfolder for RUFFTEXT. Then I photographed a bottle of glycerin for the Tools folder, but didn't crop and scale it yet. Did mirror The RUFFTEXT branch onto Drive E, but only the photograph I cropped and scaled has been backed up on JOYXP.
I should update WebLog Real Soon Now.
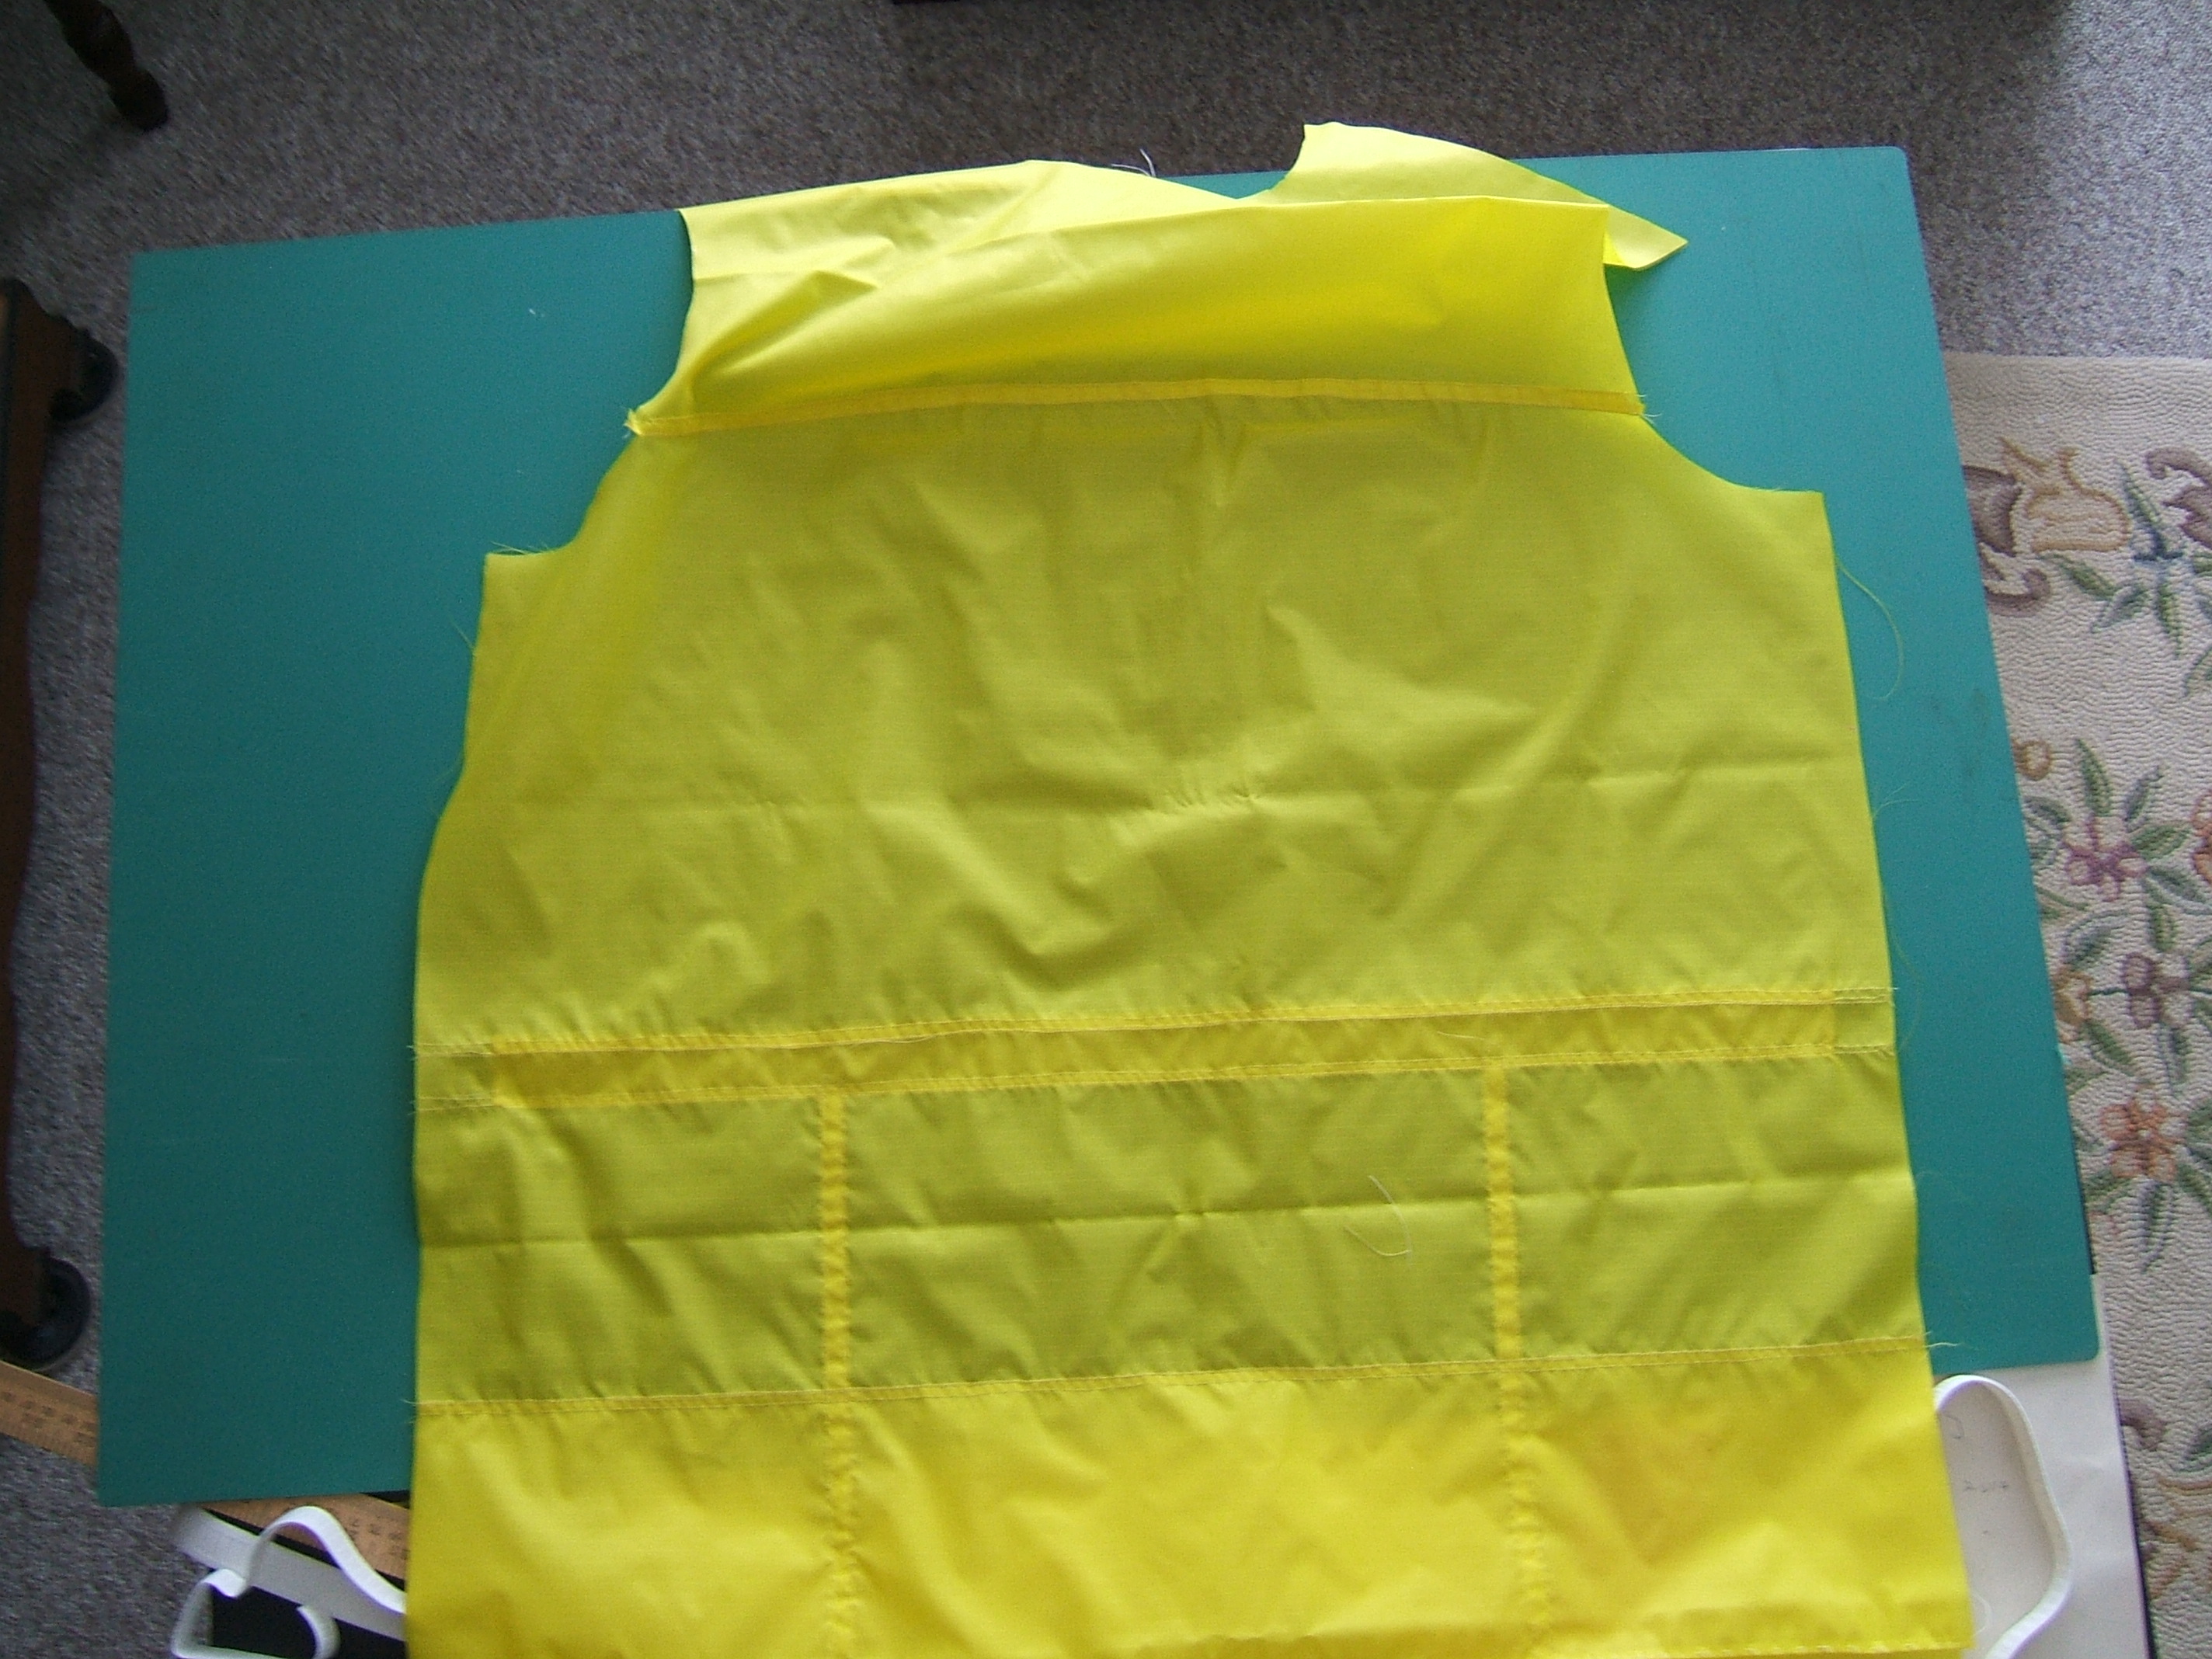
I basted the flat-fell fold into the top of the back yesterday. Have stuff sorted onto two tables now.
After I washed the wool for the overjersey, I hung it over the rod where I dry sheets to keep it from getting creases. Today I washed a sheet, which obliged me to take the wool down. (Must remember to put it back before the folds settle into creases.) After folding it in half, it measures forty-three inches, which my handy-dandy solar calculator says makes the piece two and a third yards long. Should be worlds a plenty, since I've decided that fabric that heavy doesn't need to be double in front.
Between loads, I've begun basting the fold for the hem of the back, and taking pictures of the process. Camera says it needs a flash, but it's been doing fine without. Last time I let it have its flash, the picture was all washed out and I had to take another. (It isn't all that cold, but I'm not going outside to take pictures)
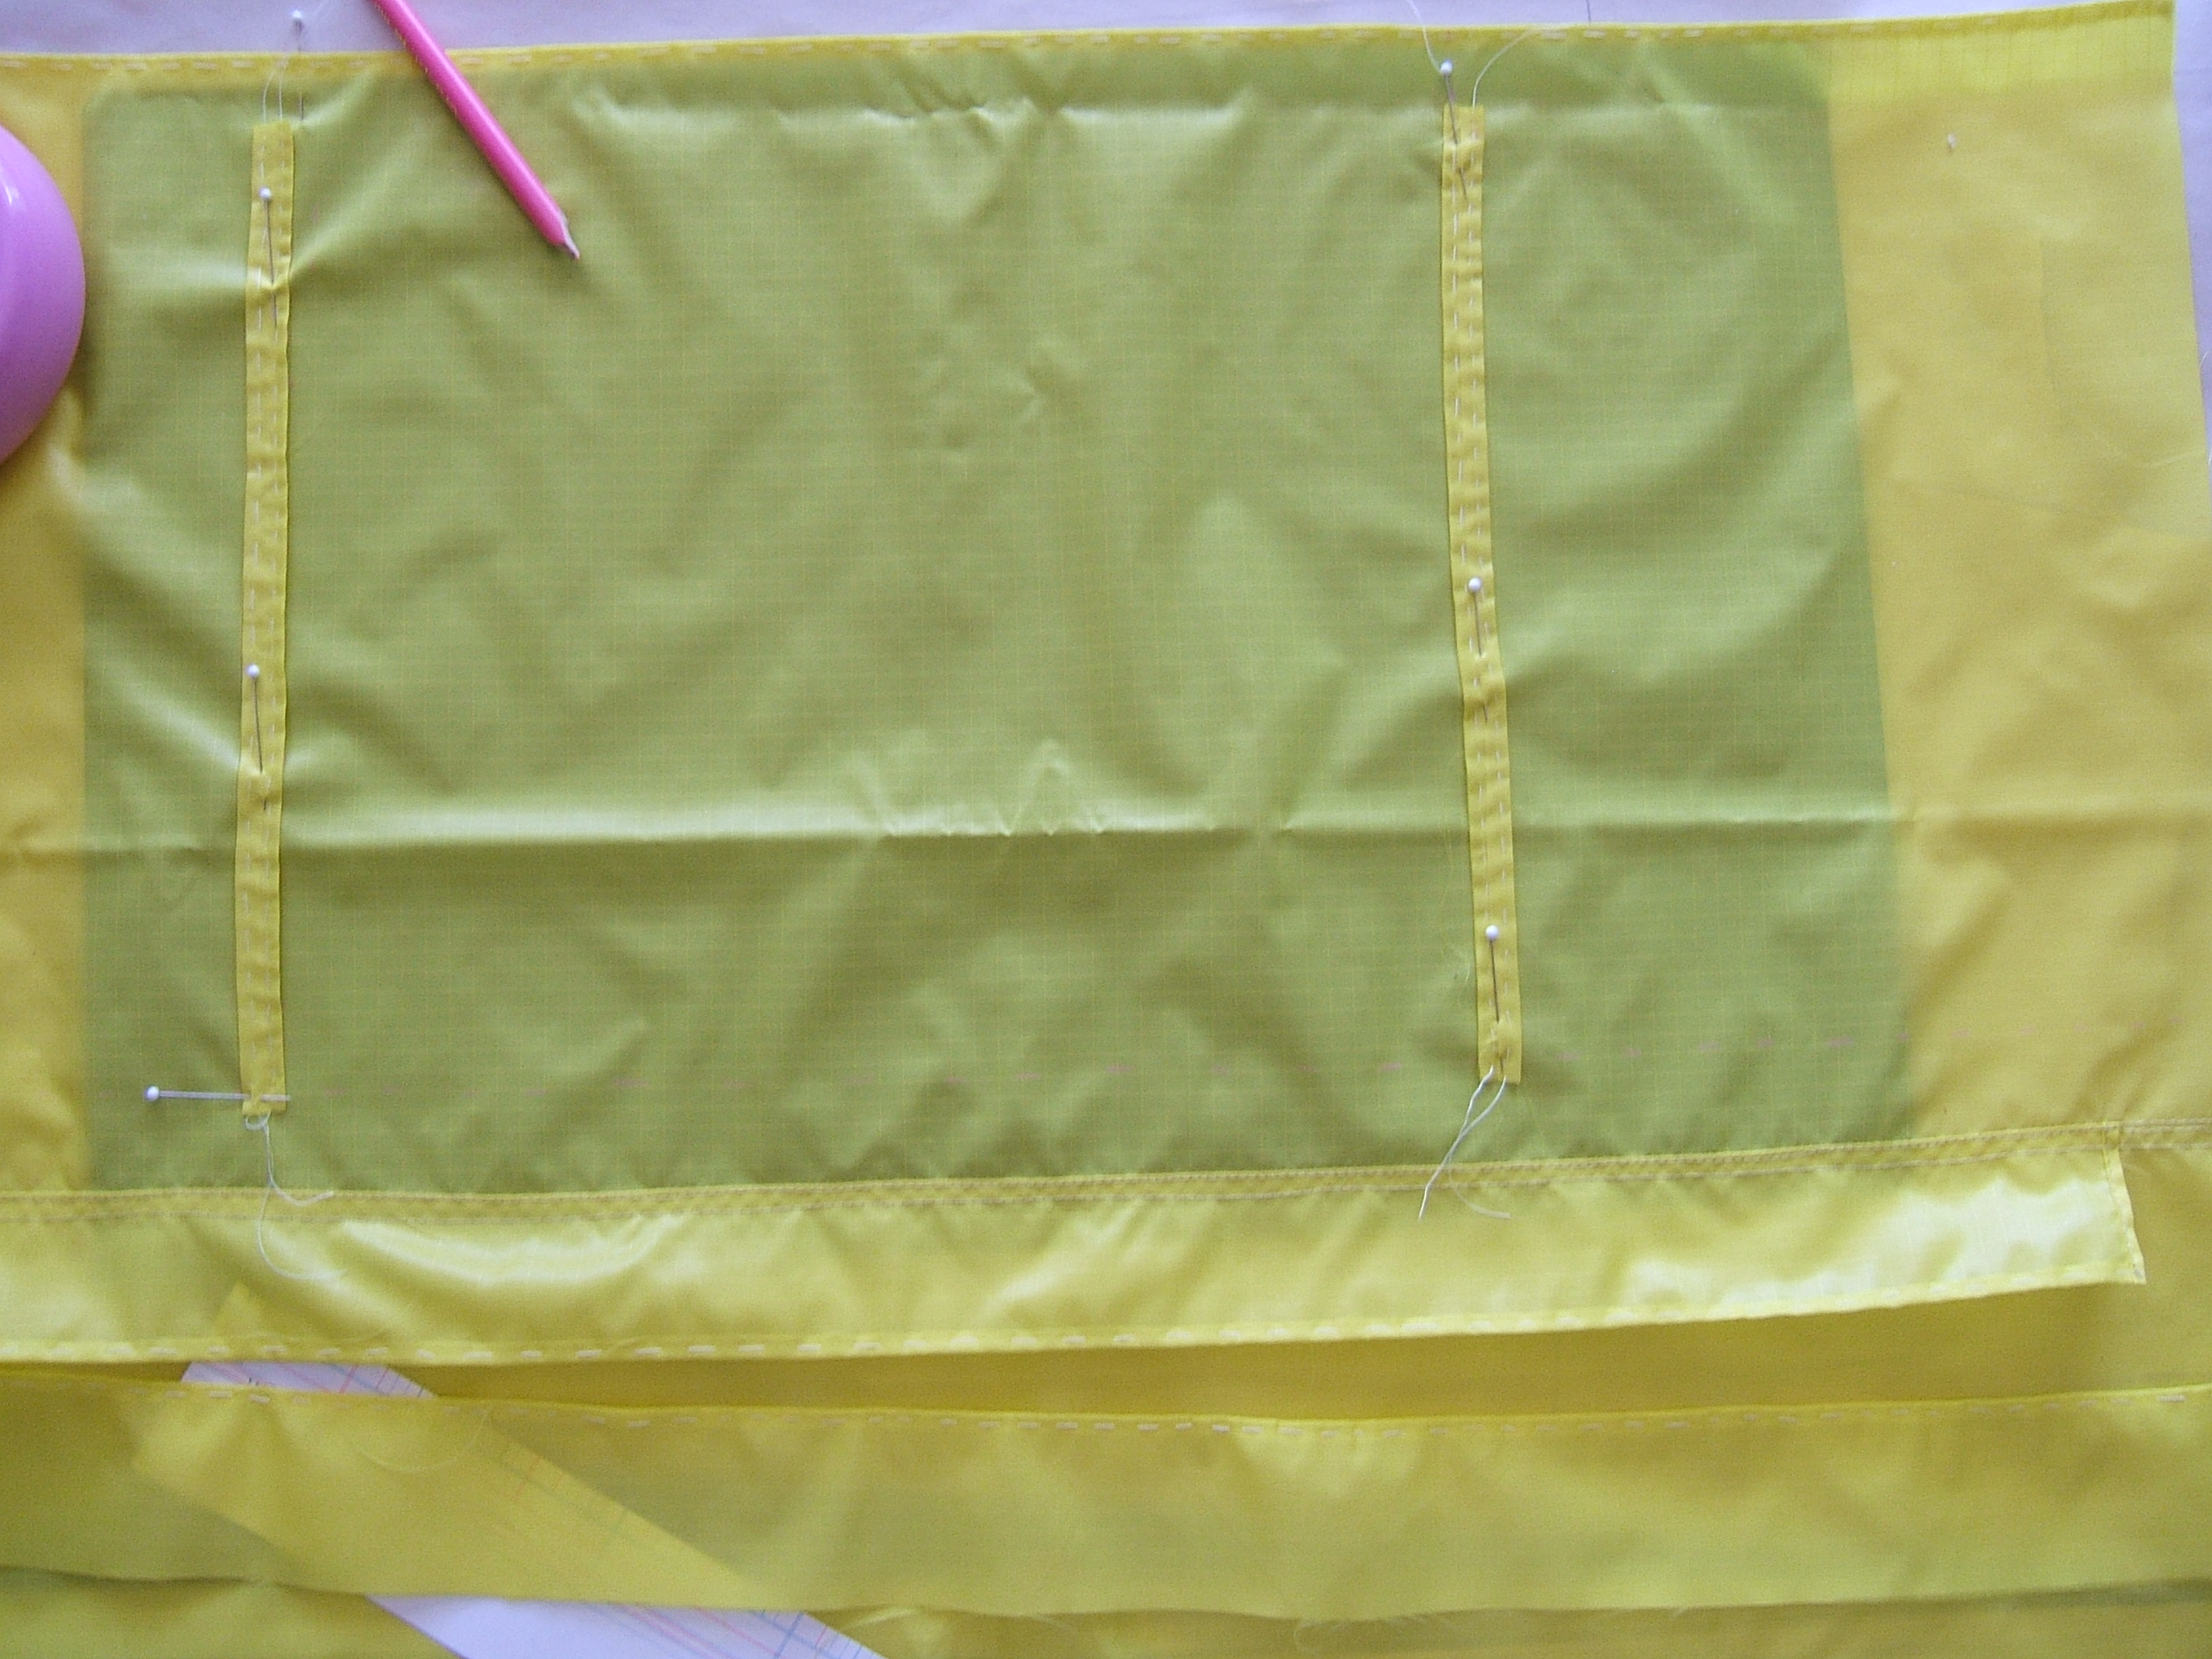
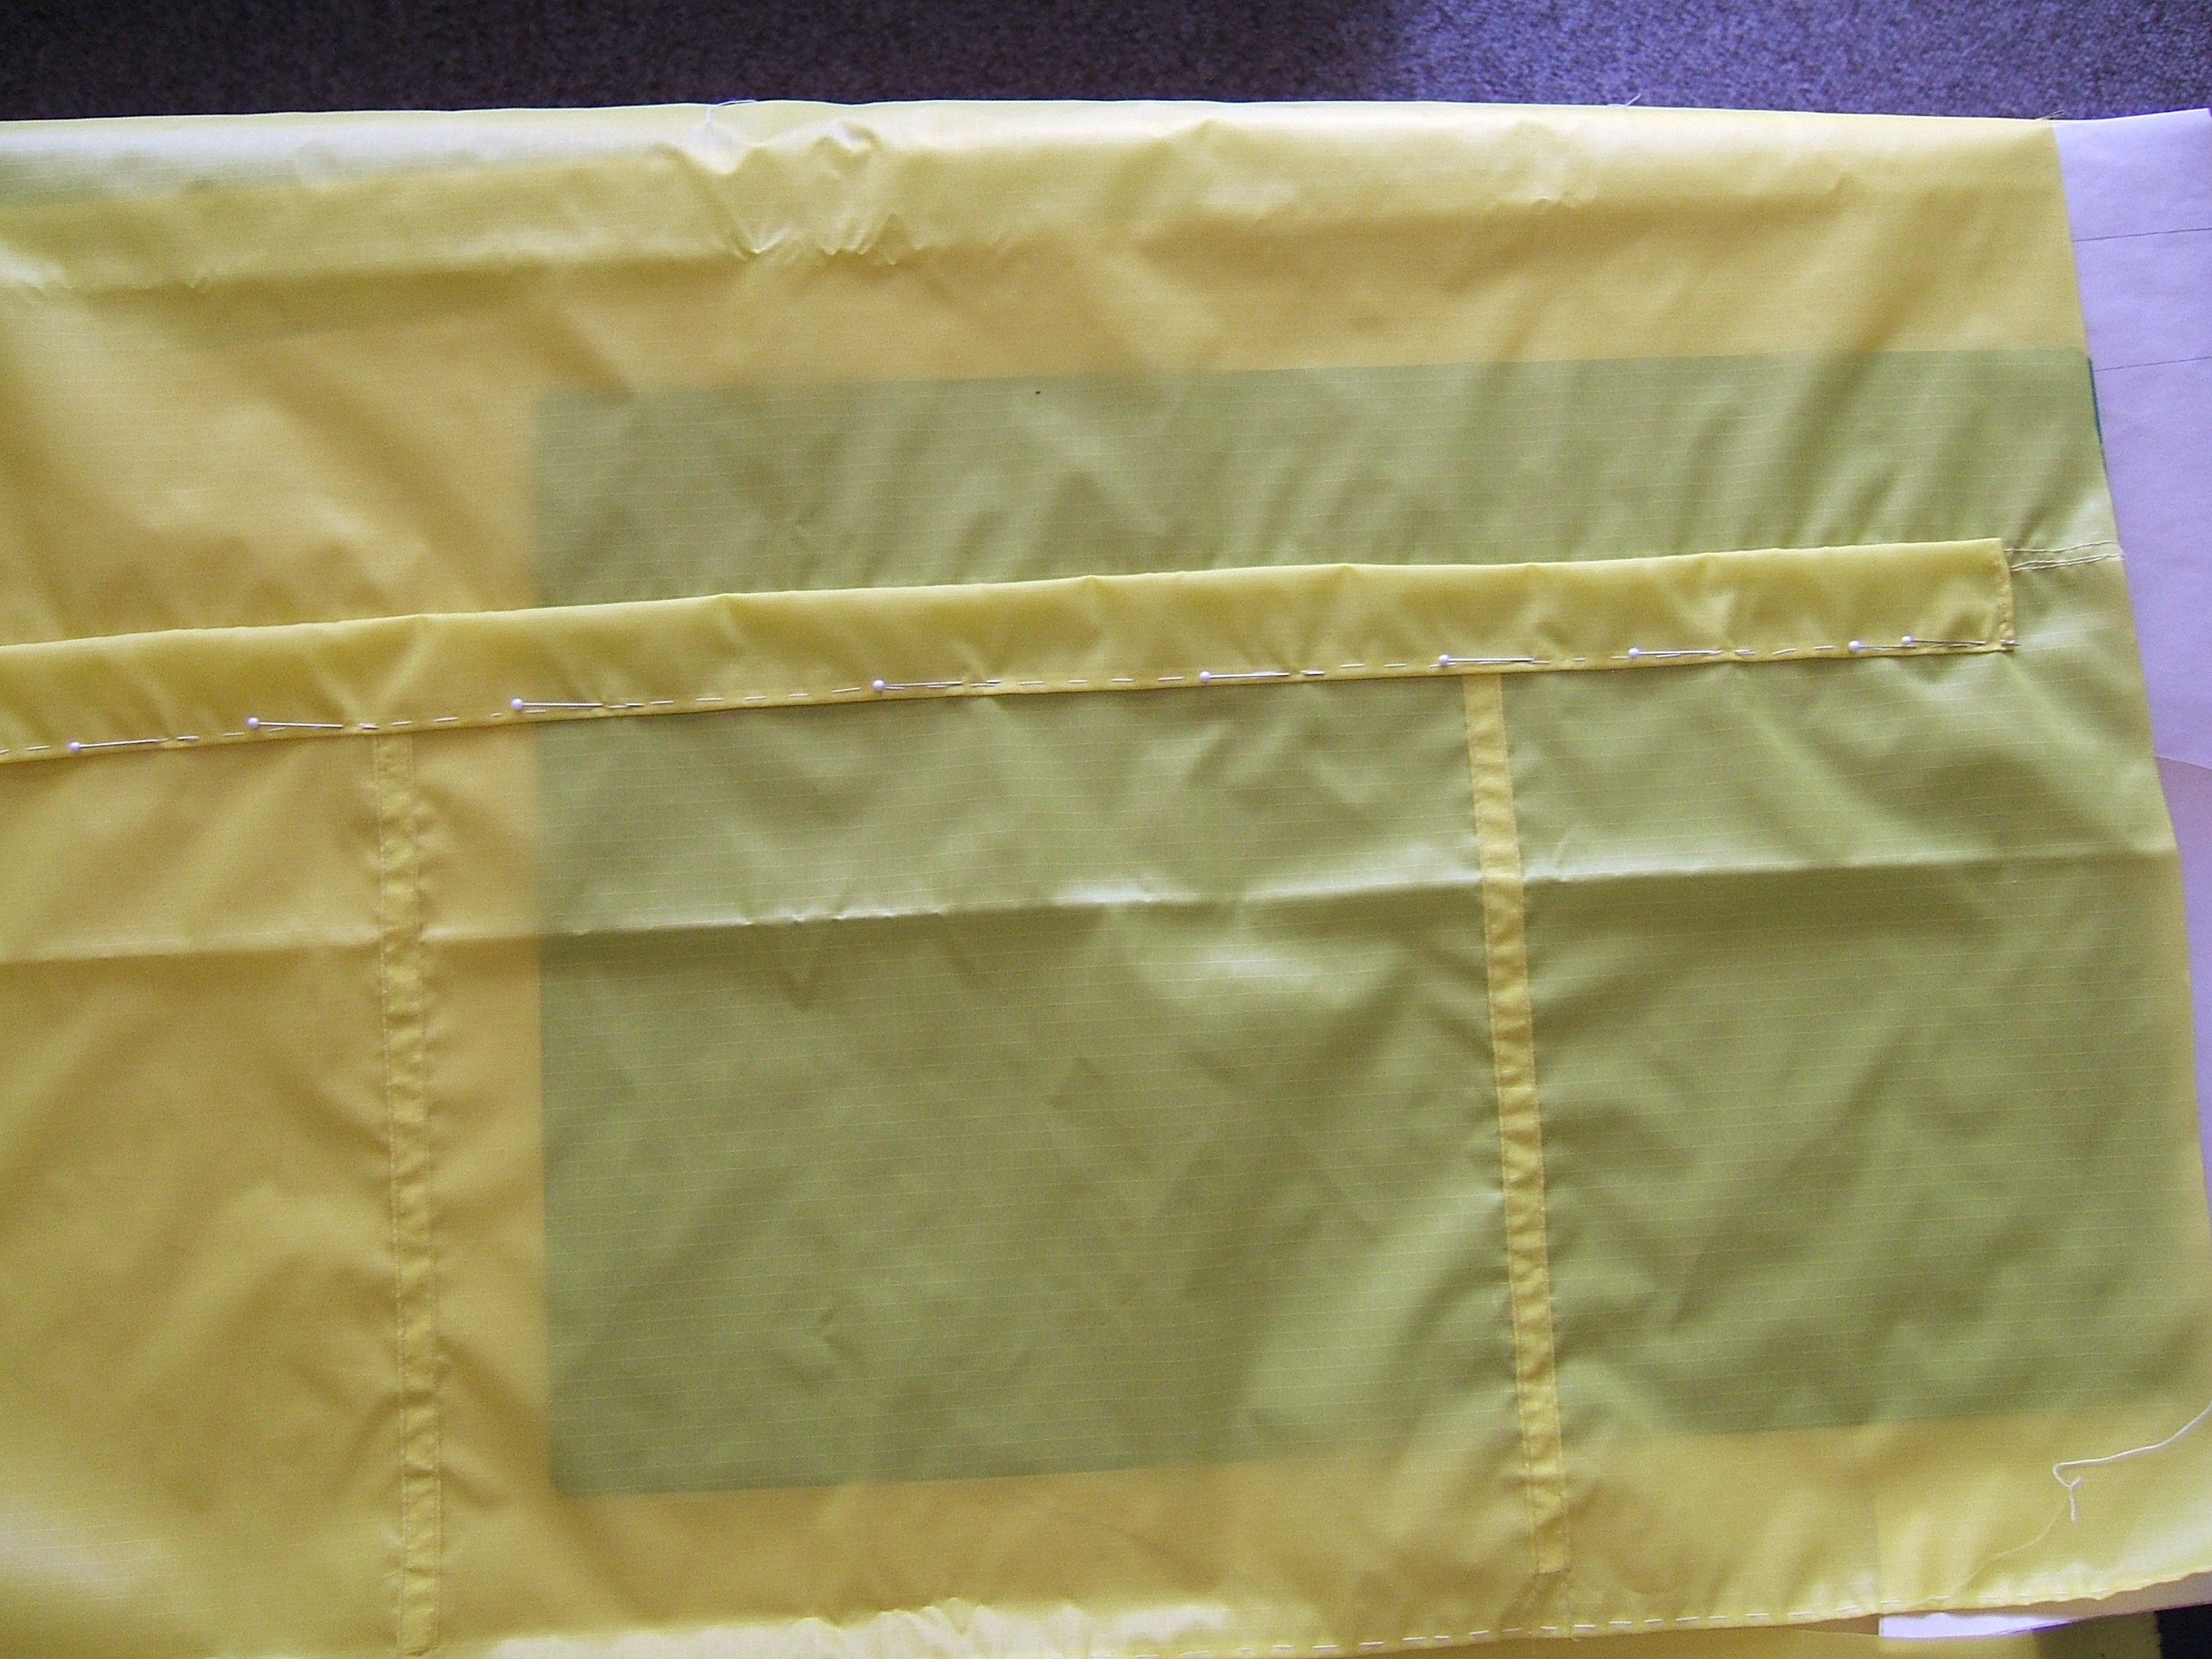
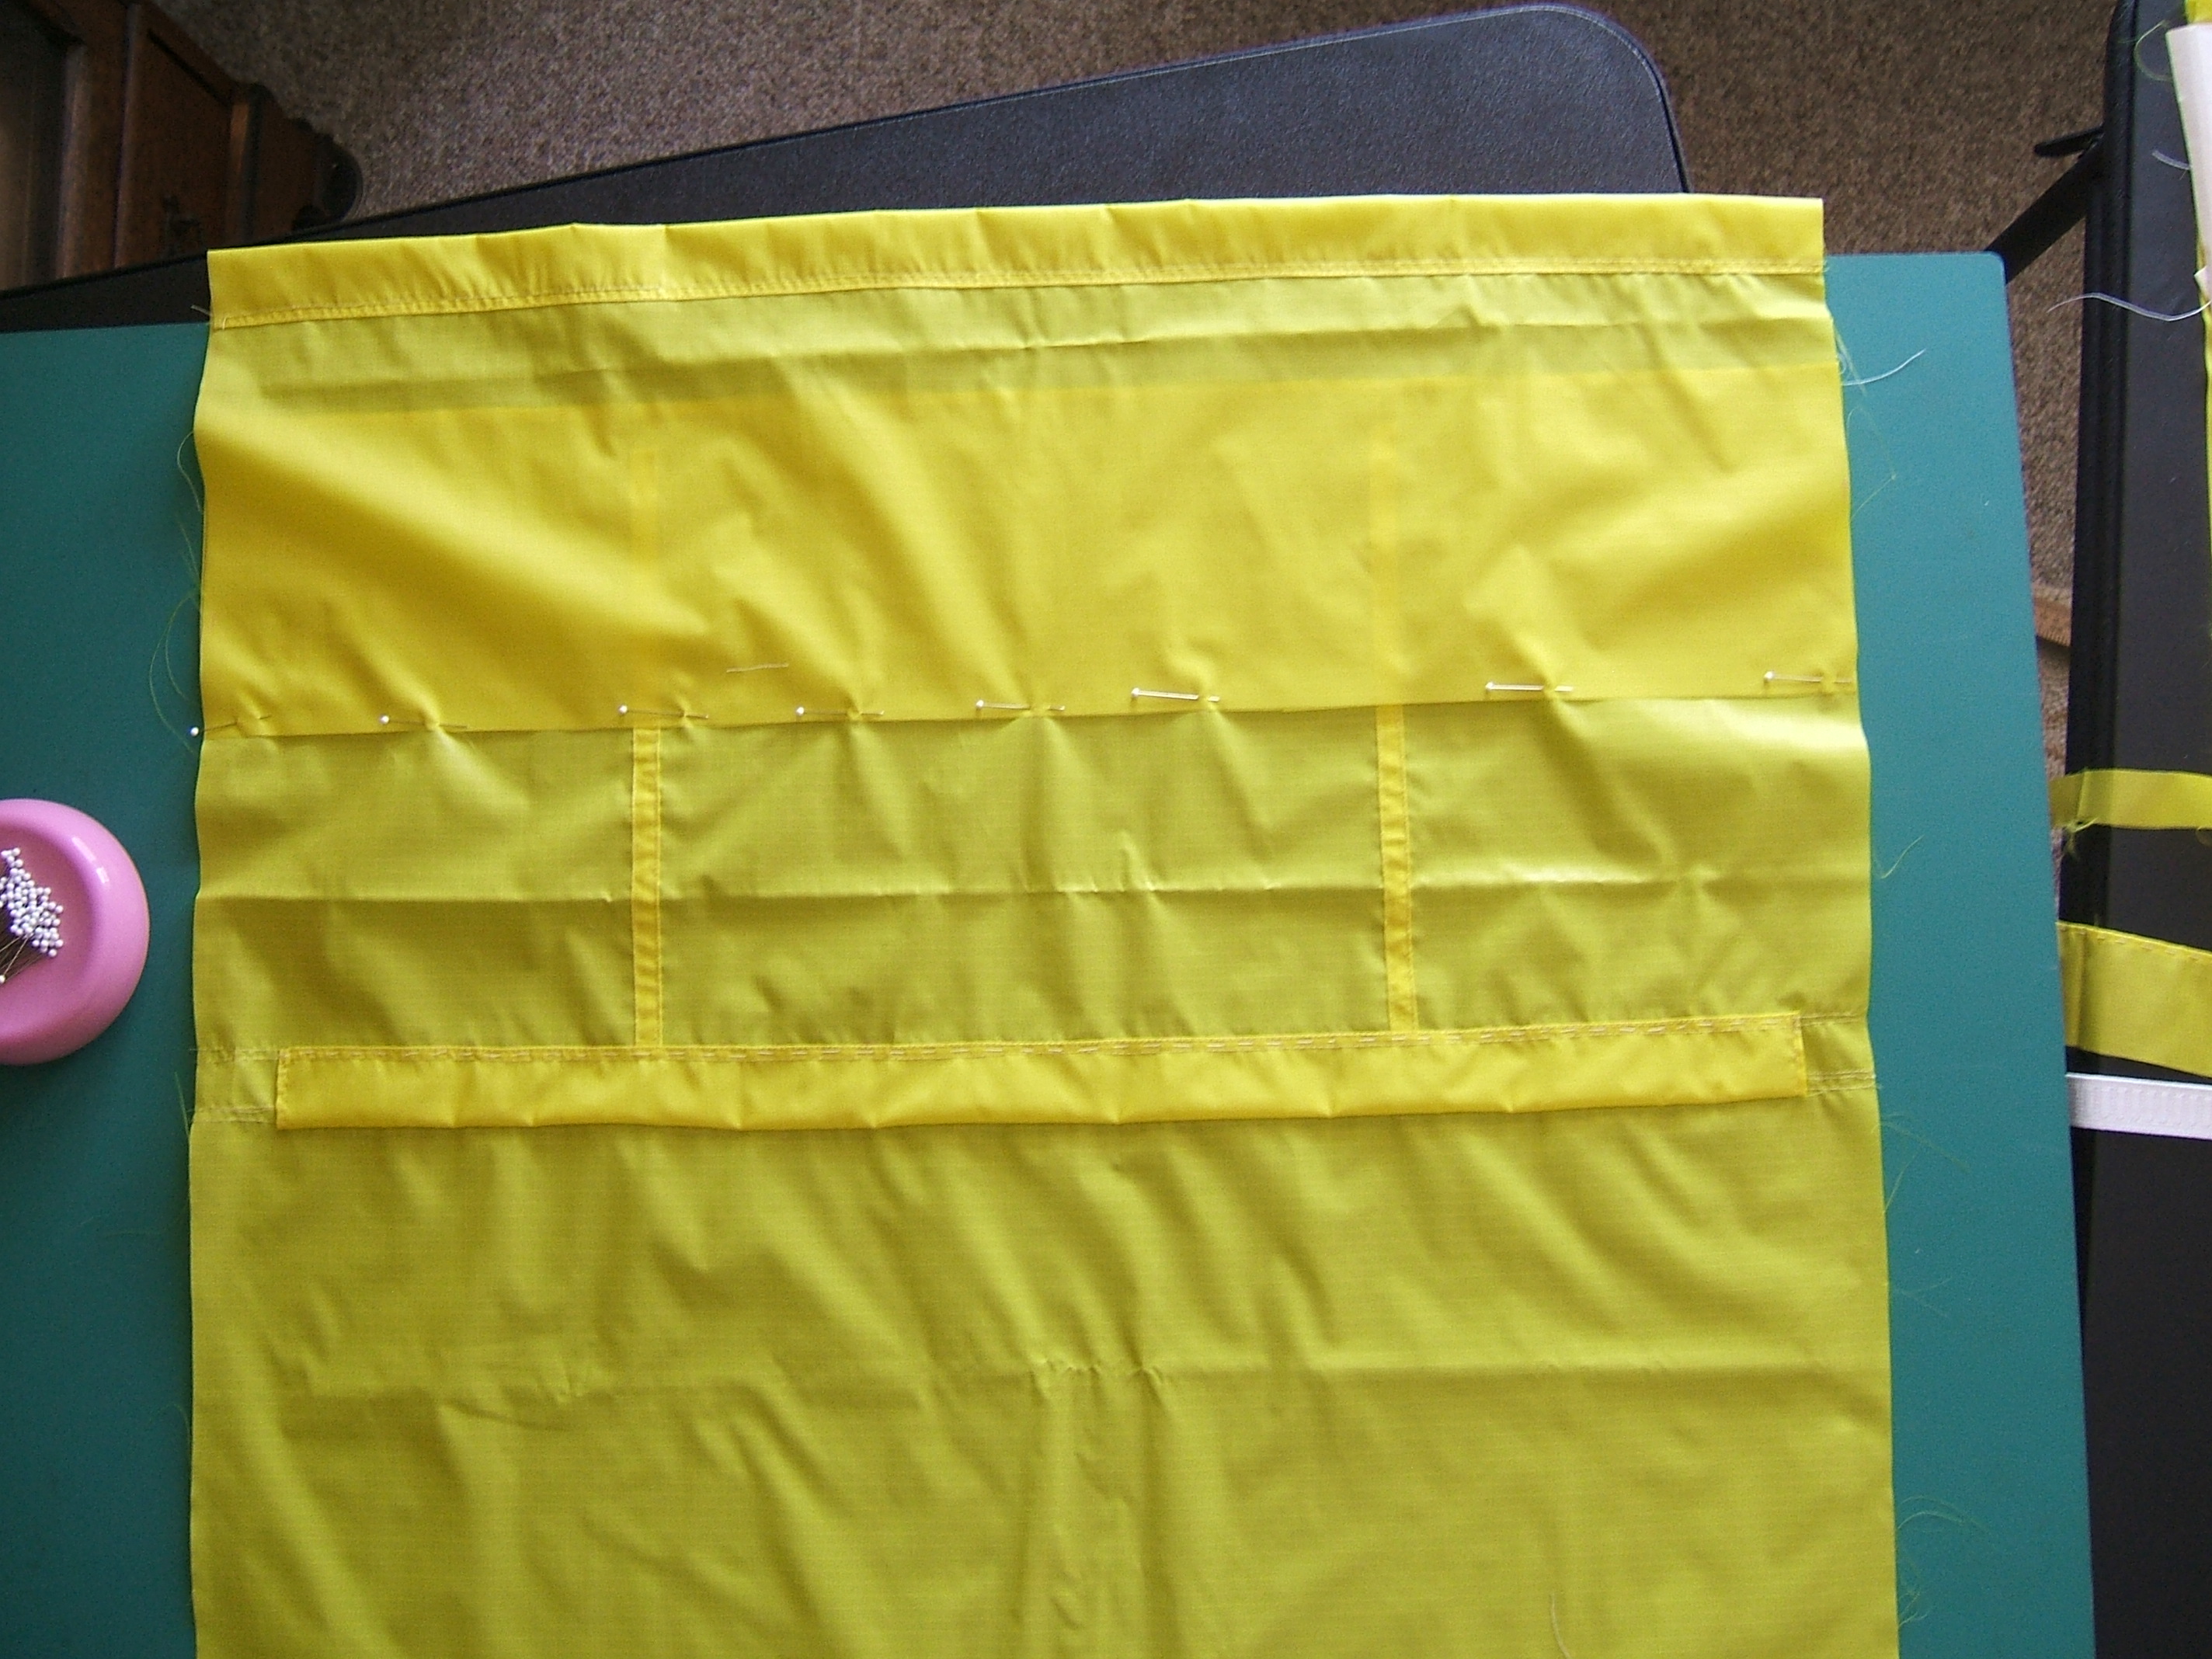
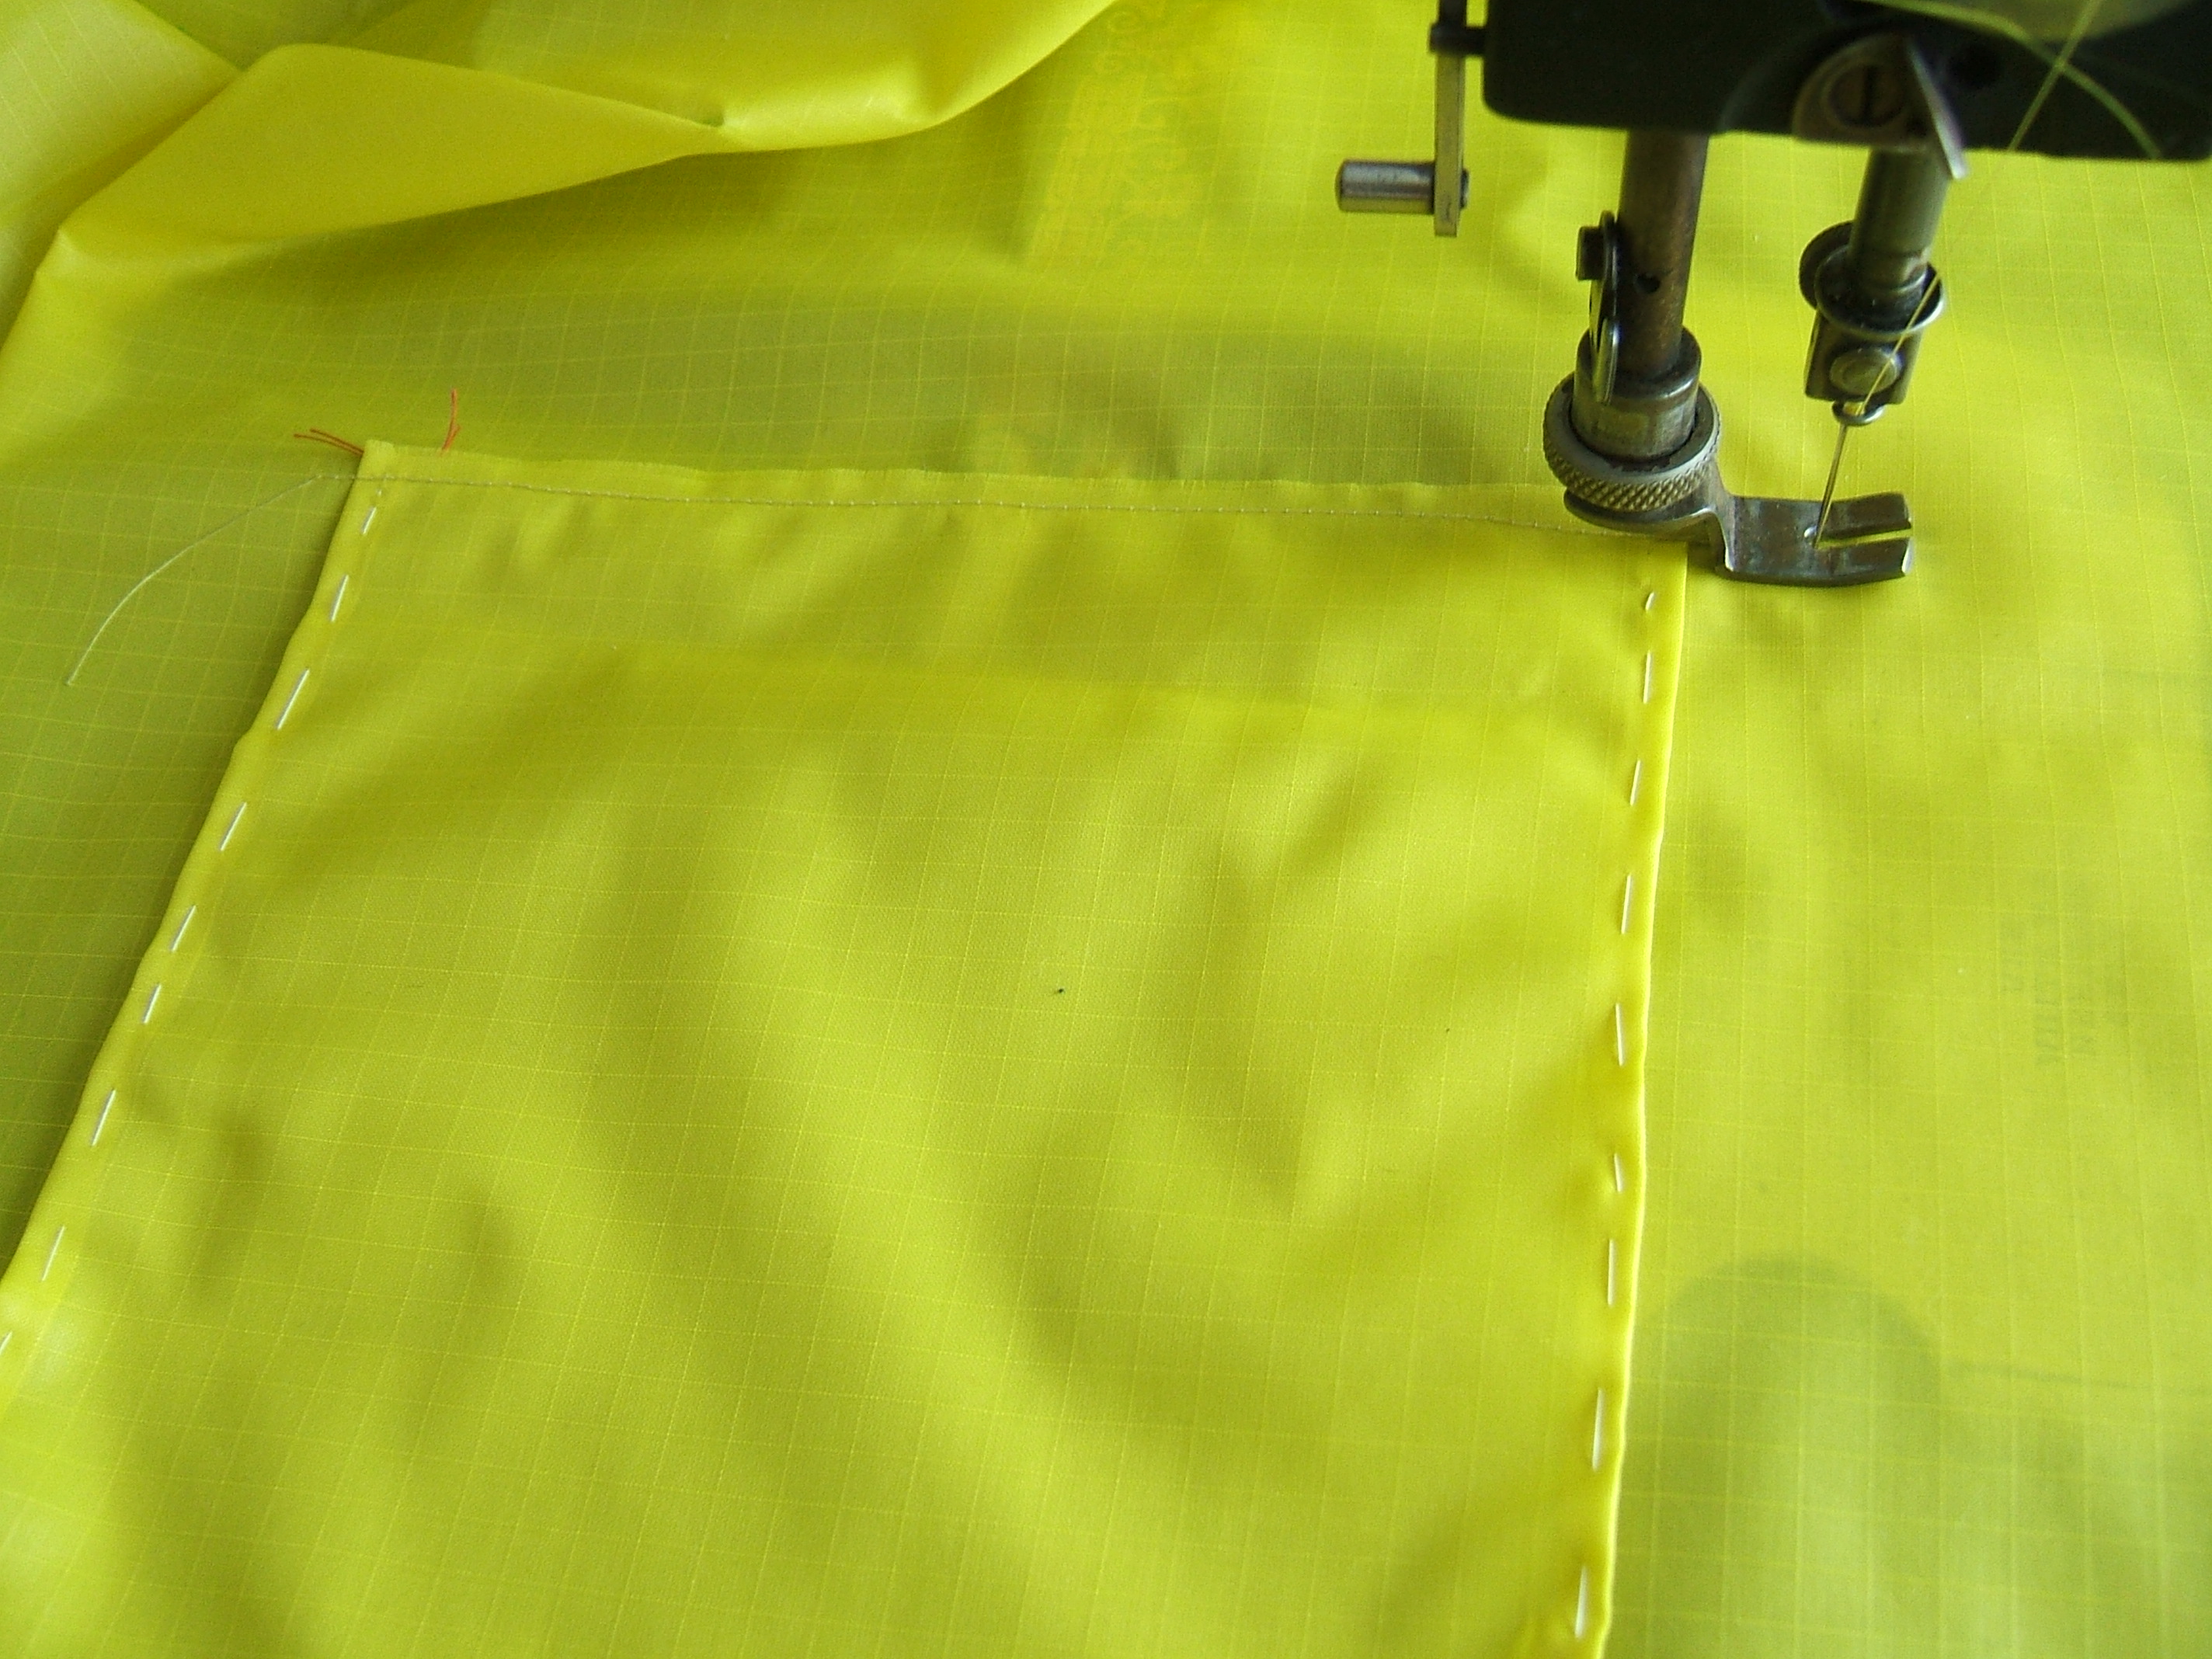
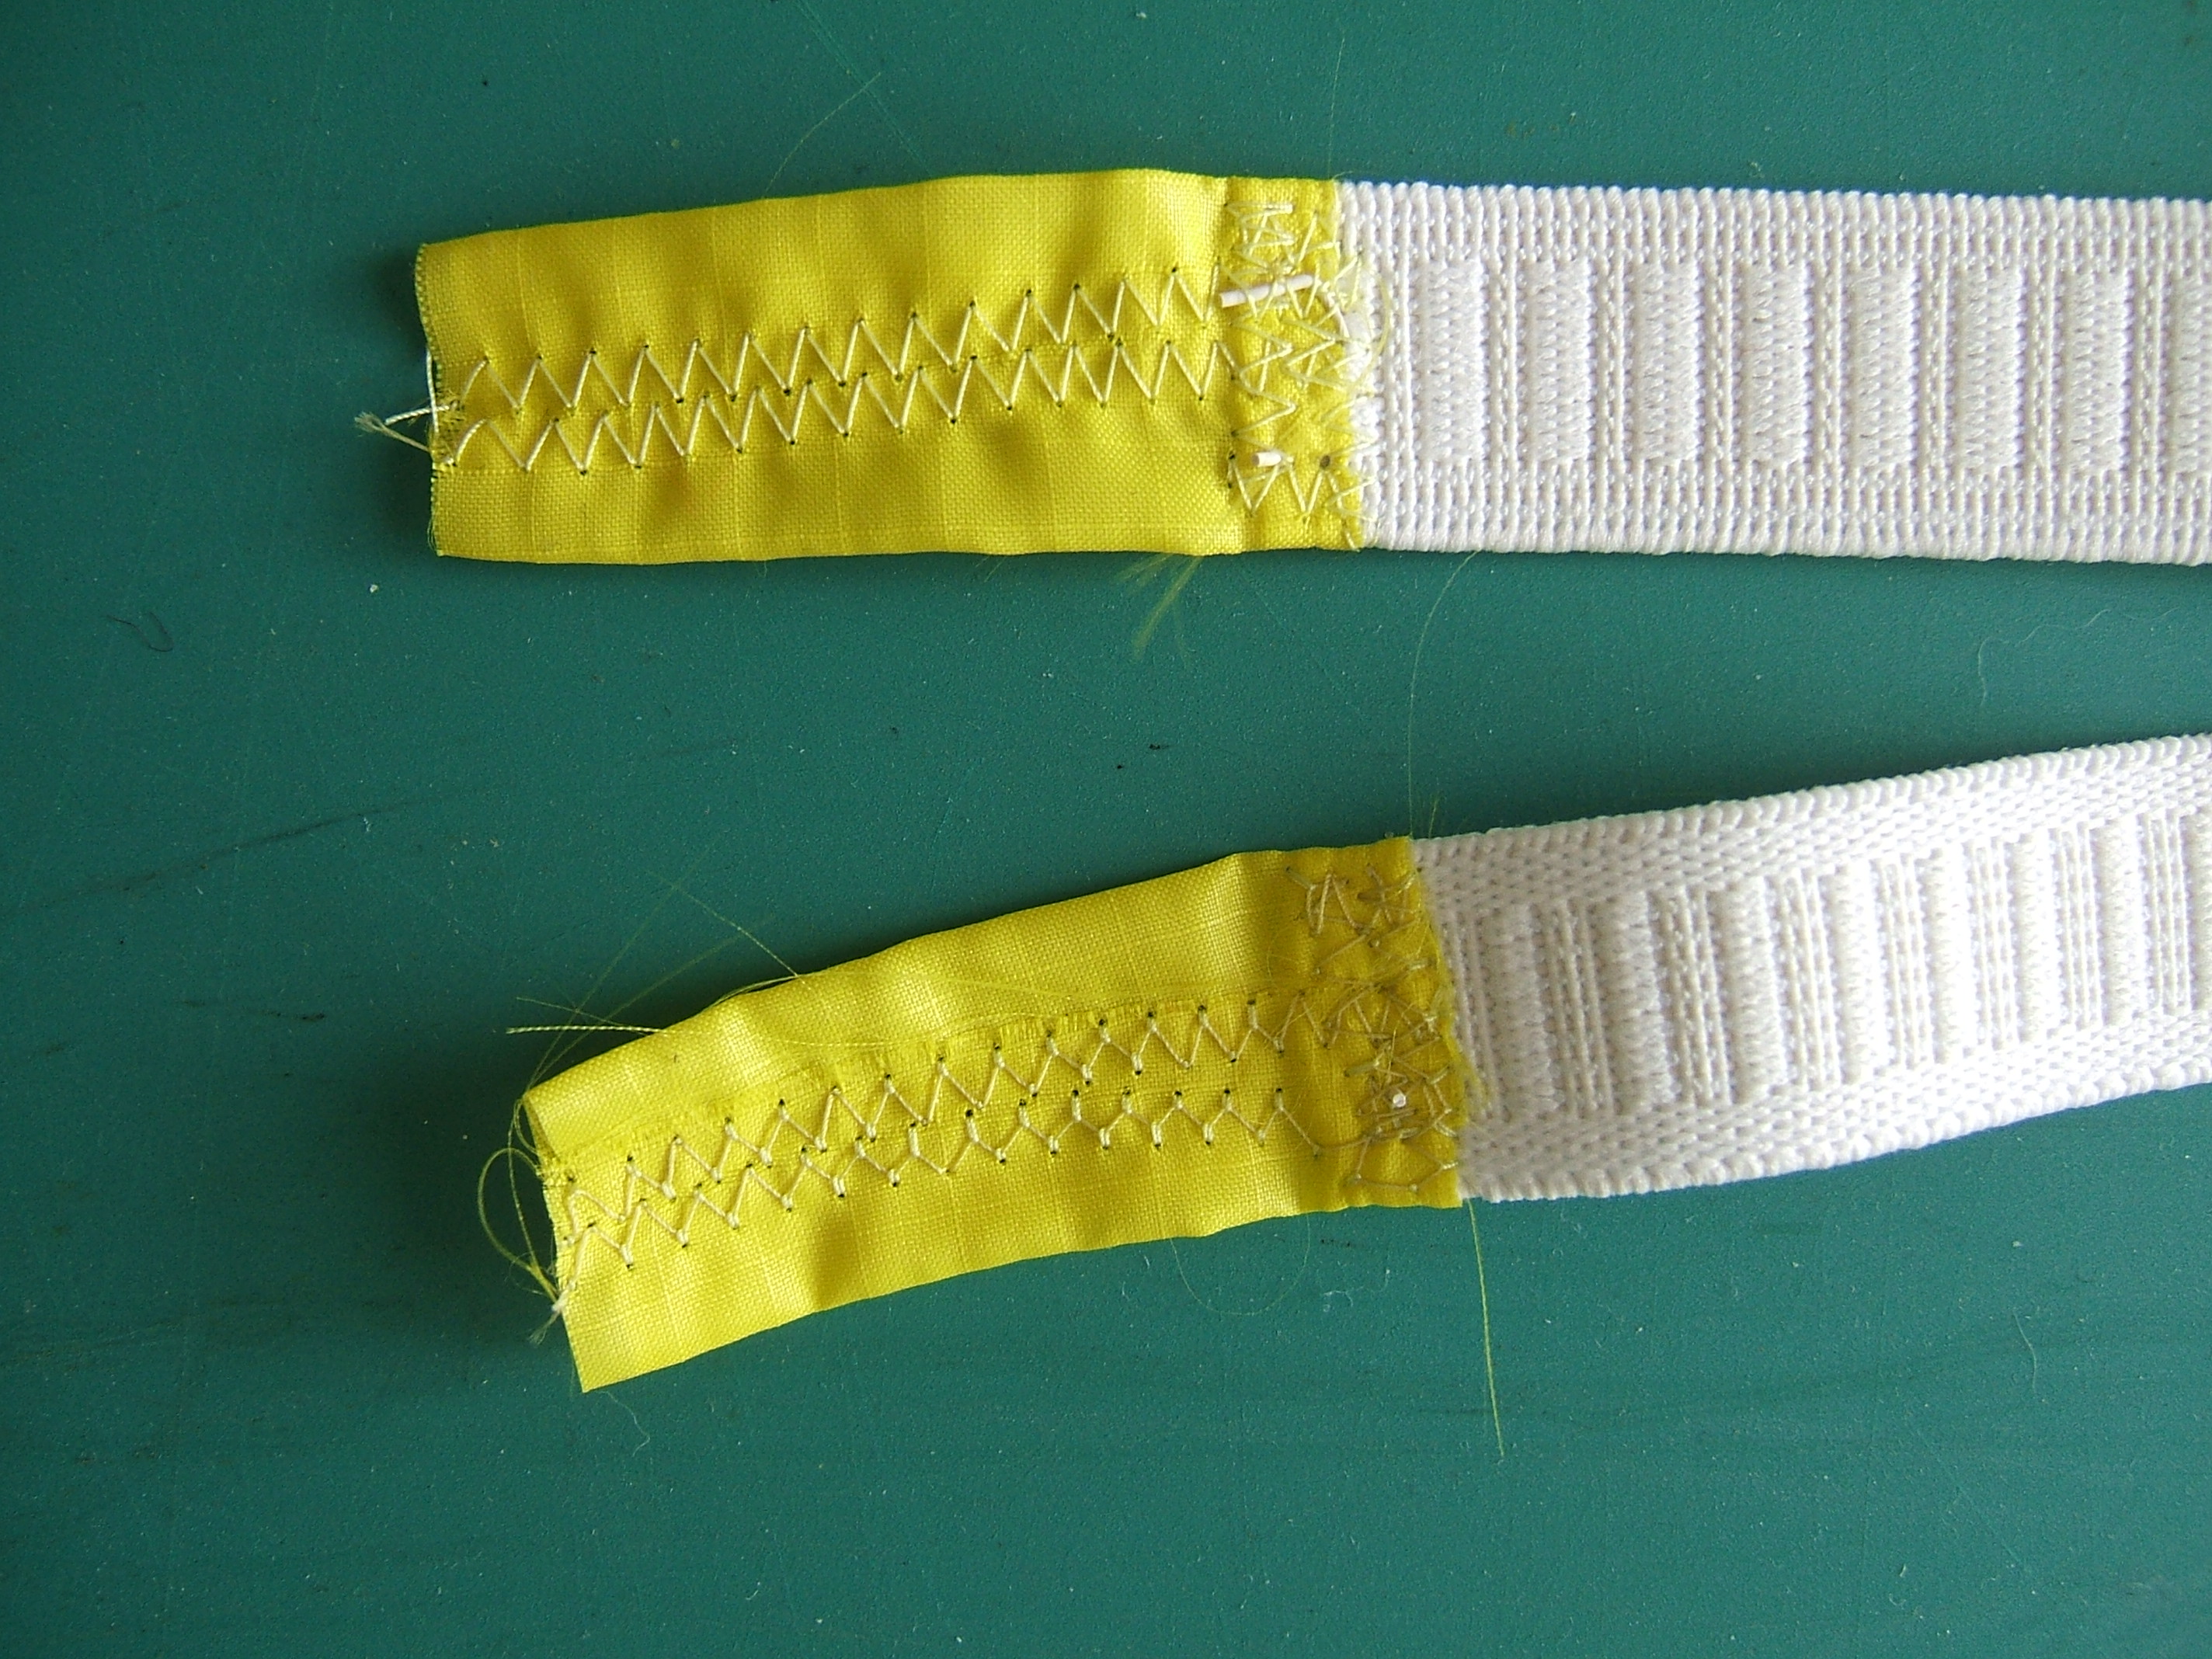
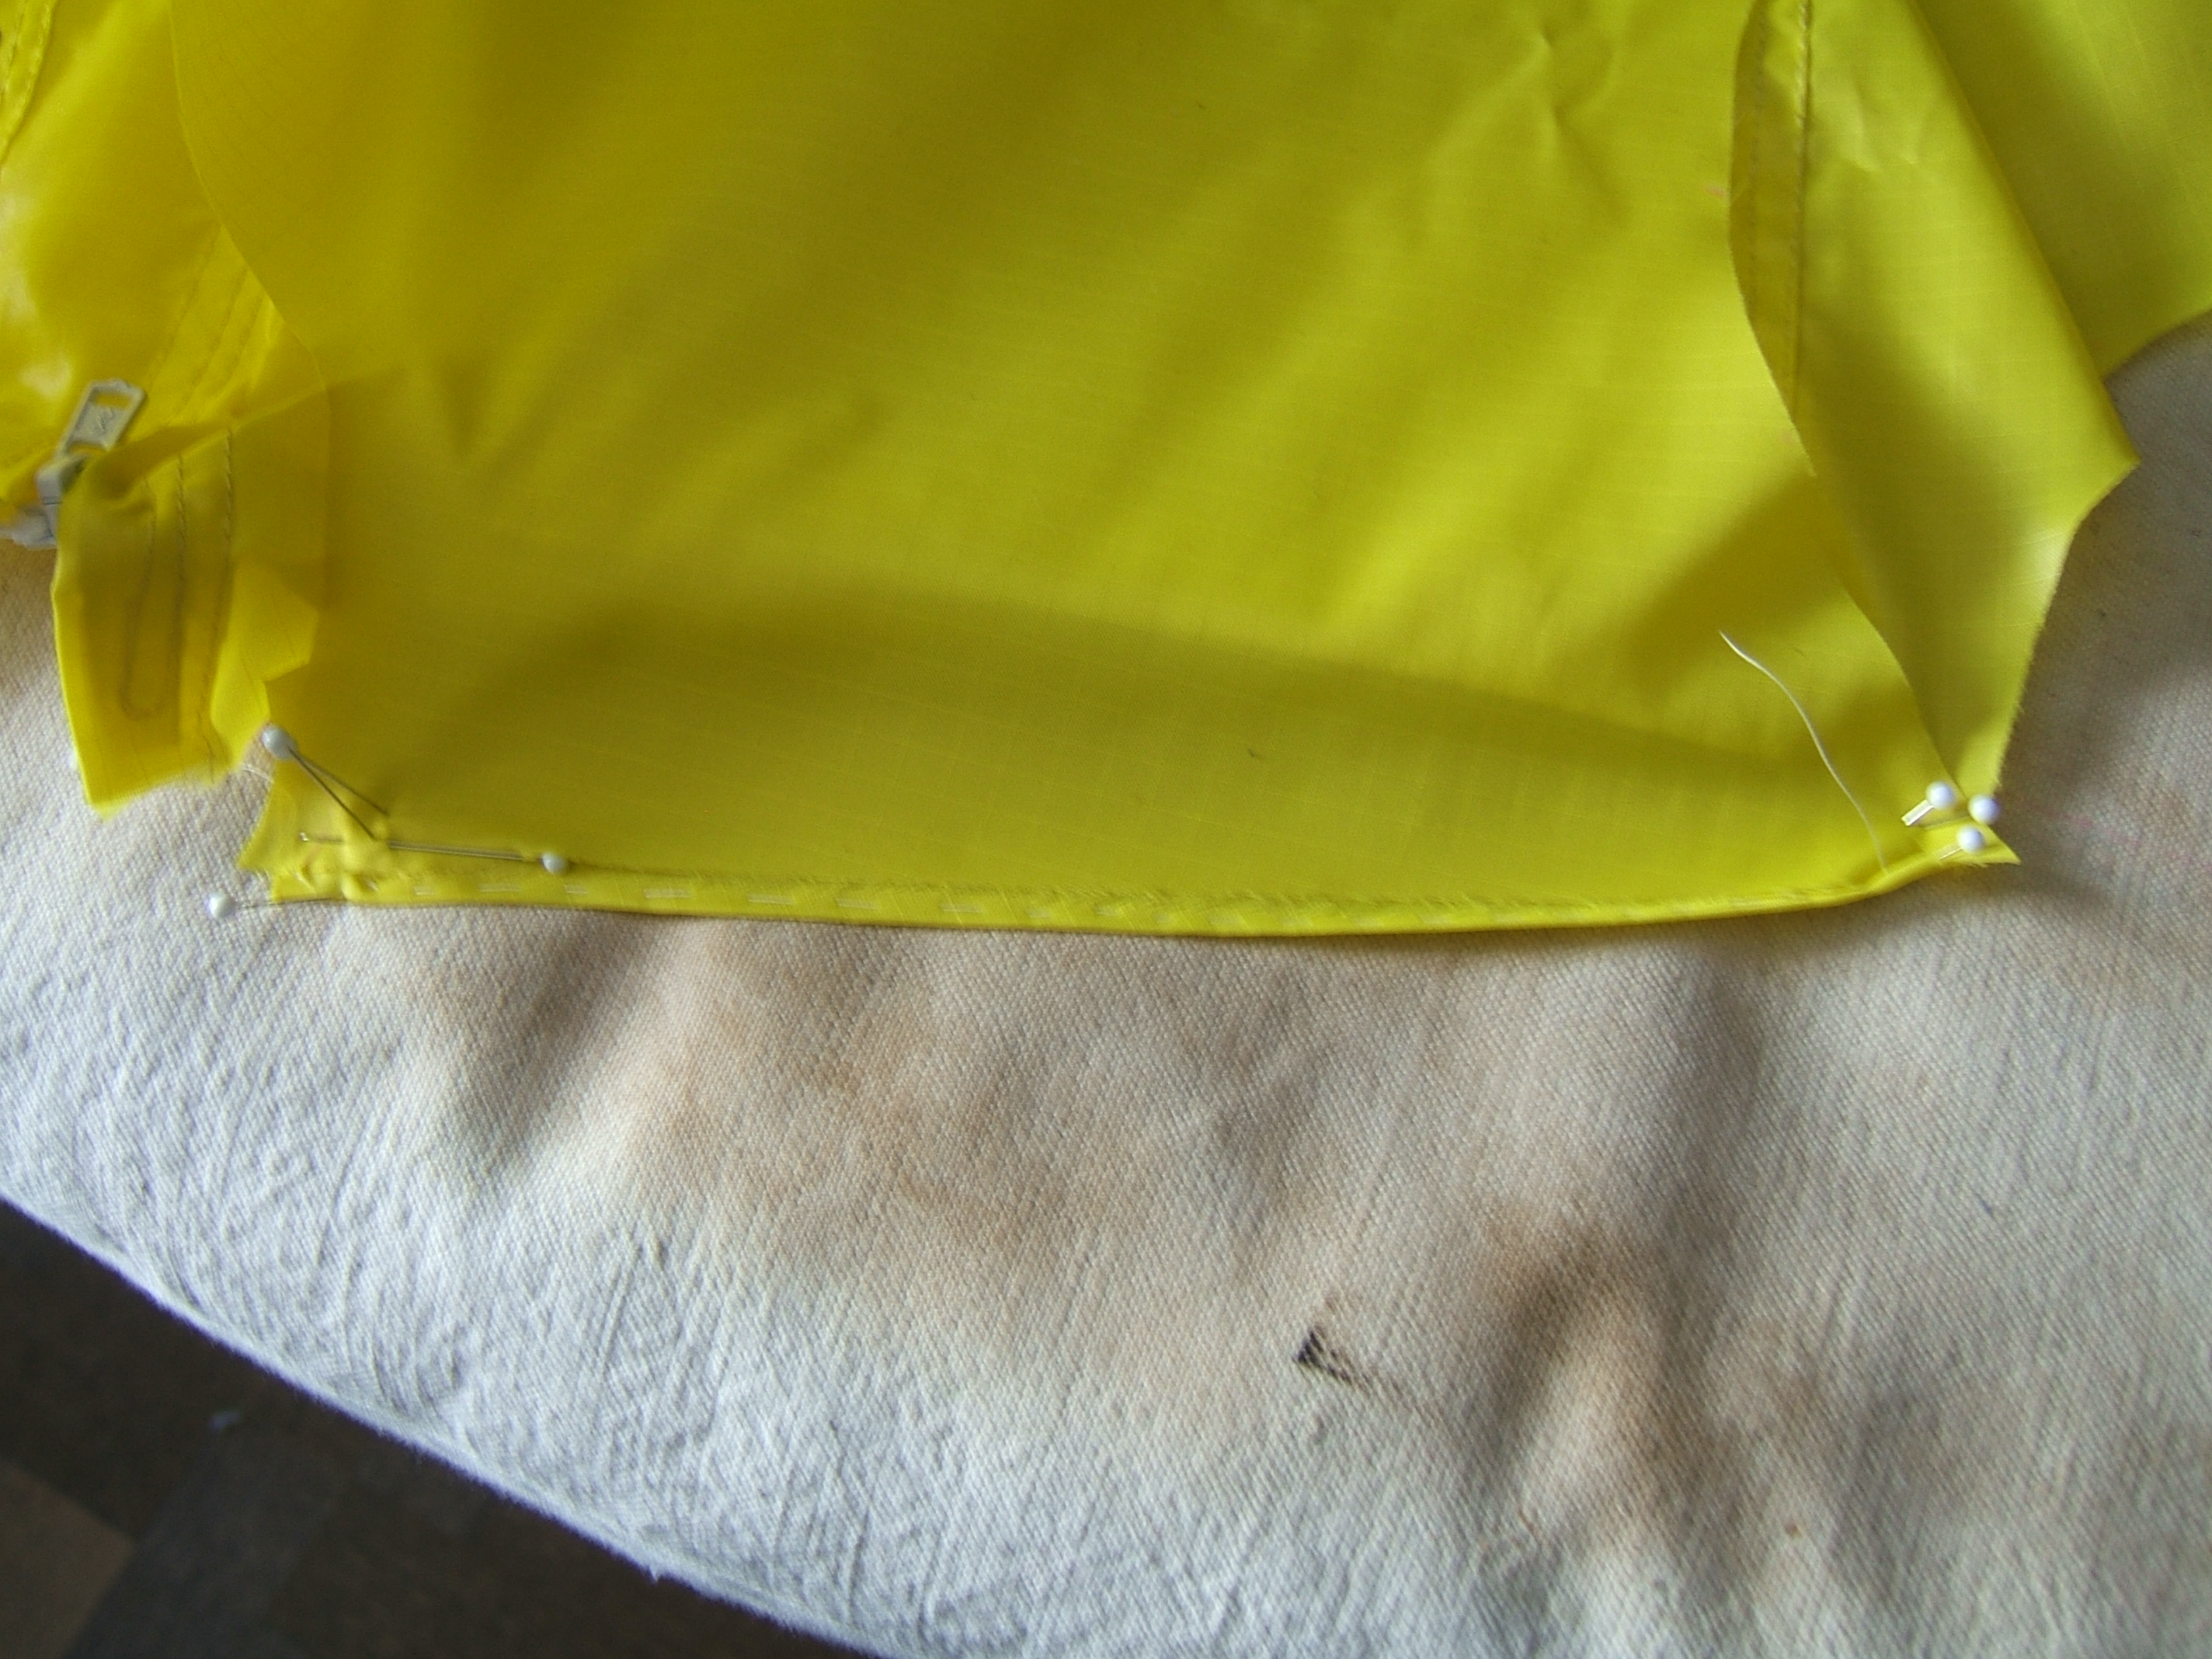
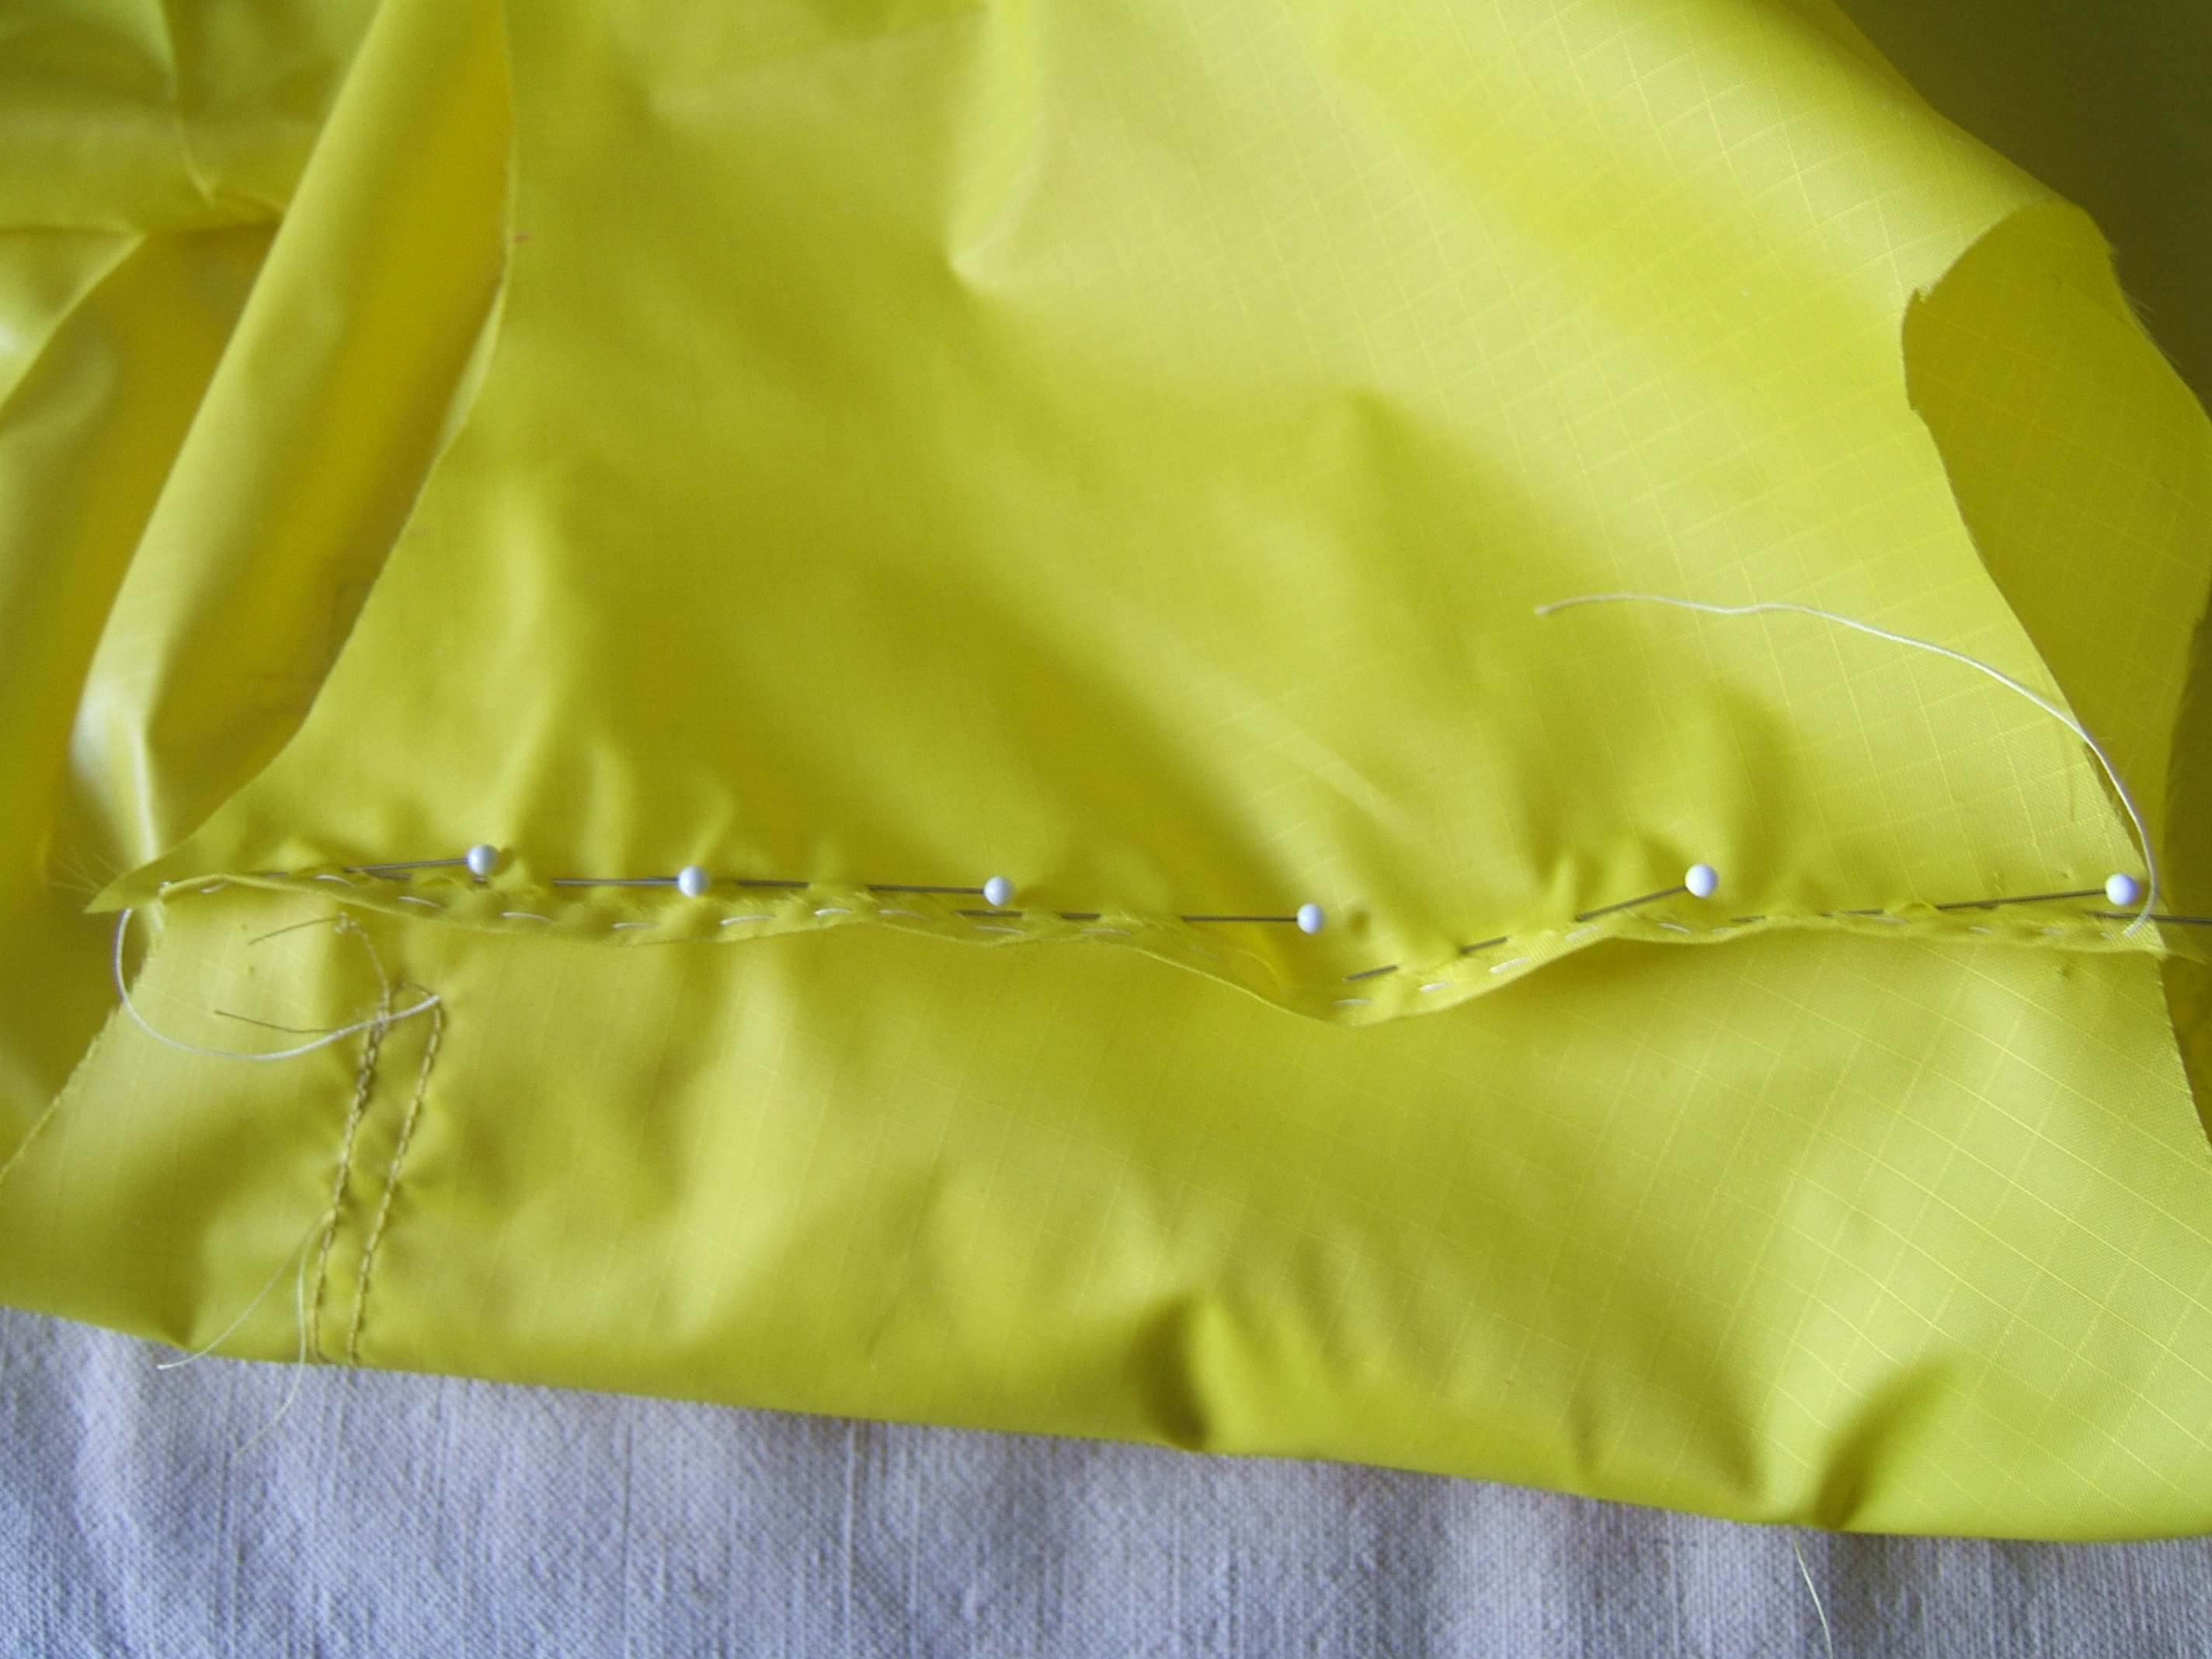
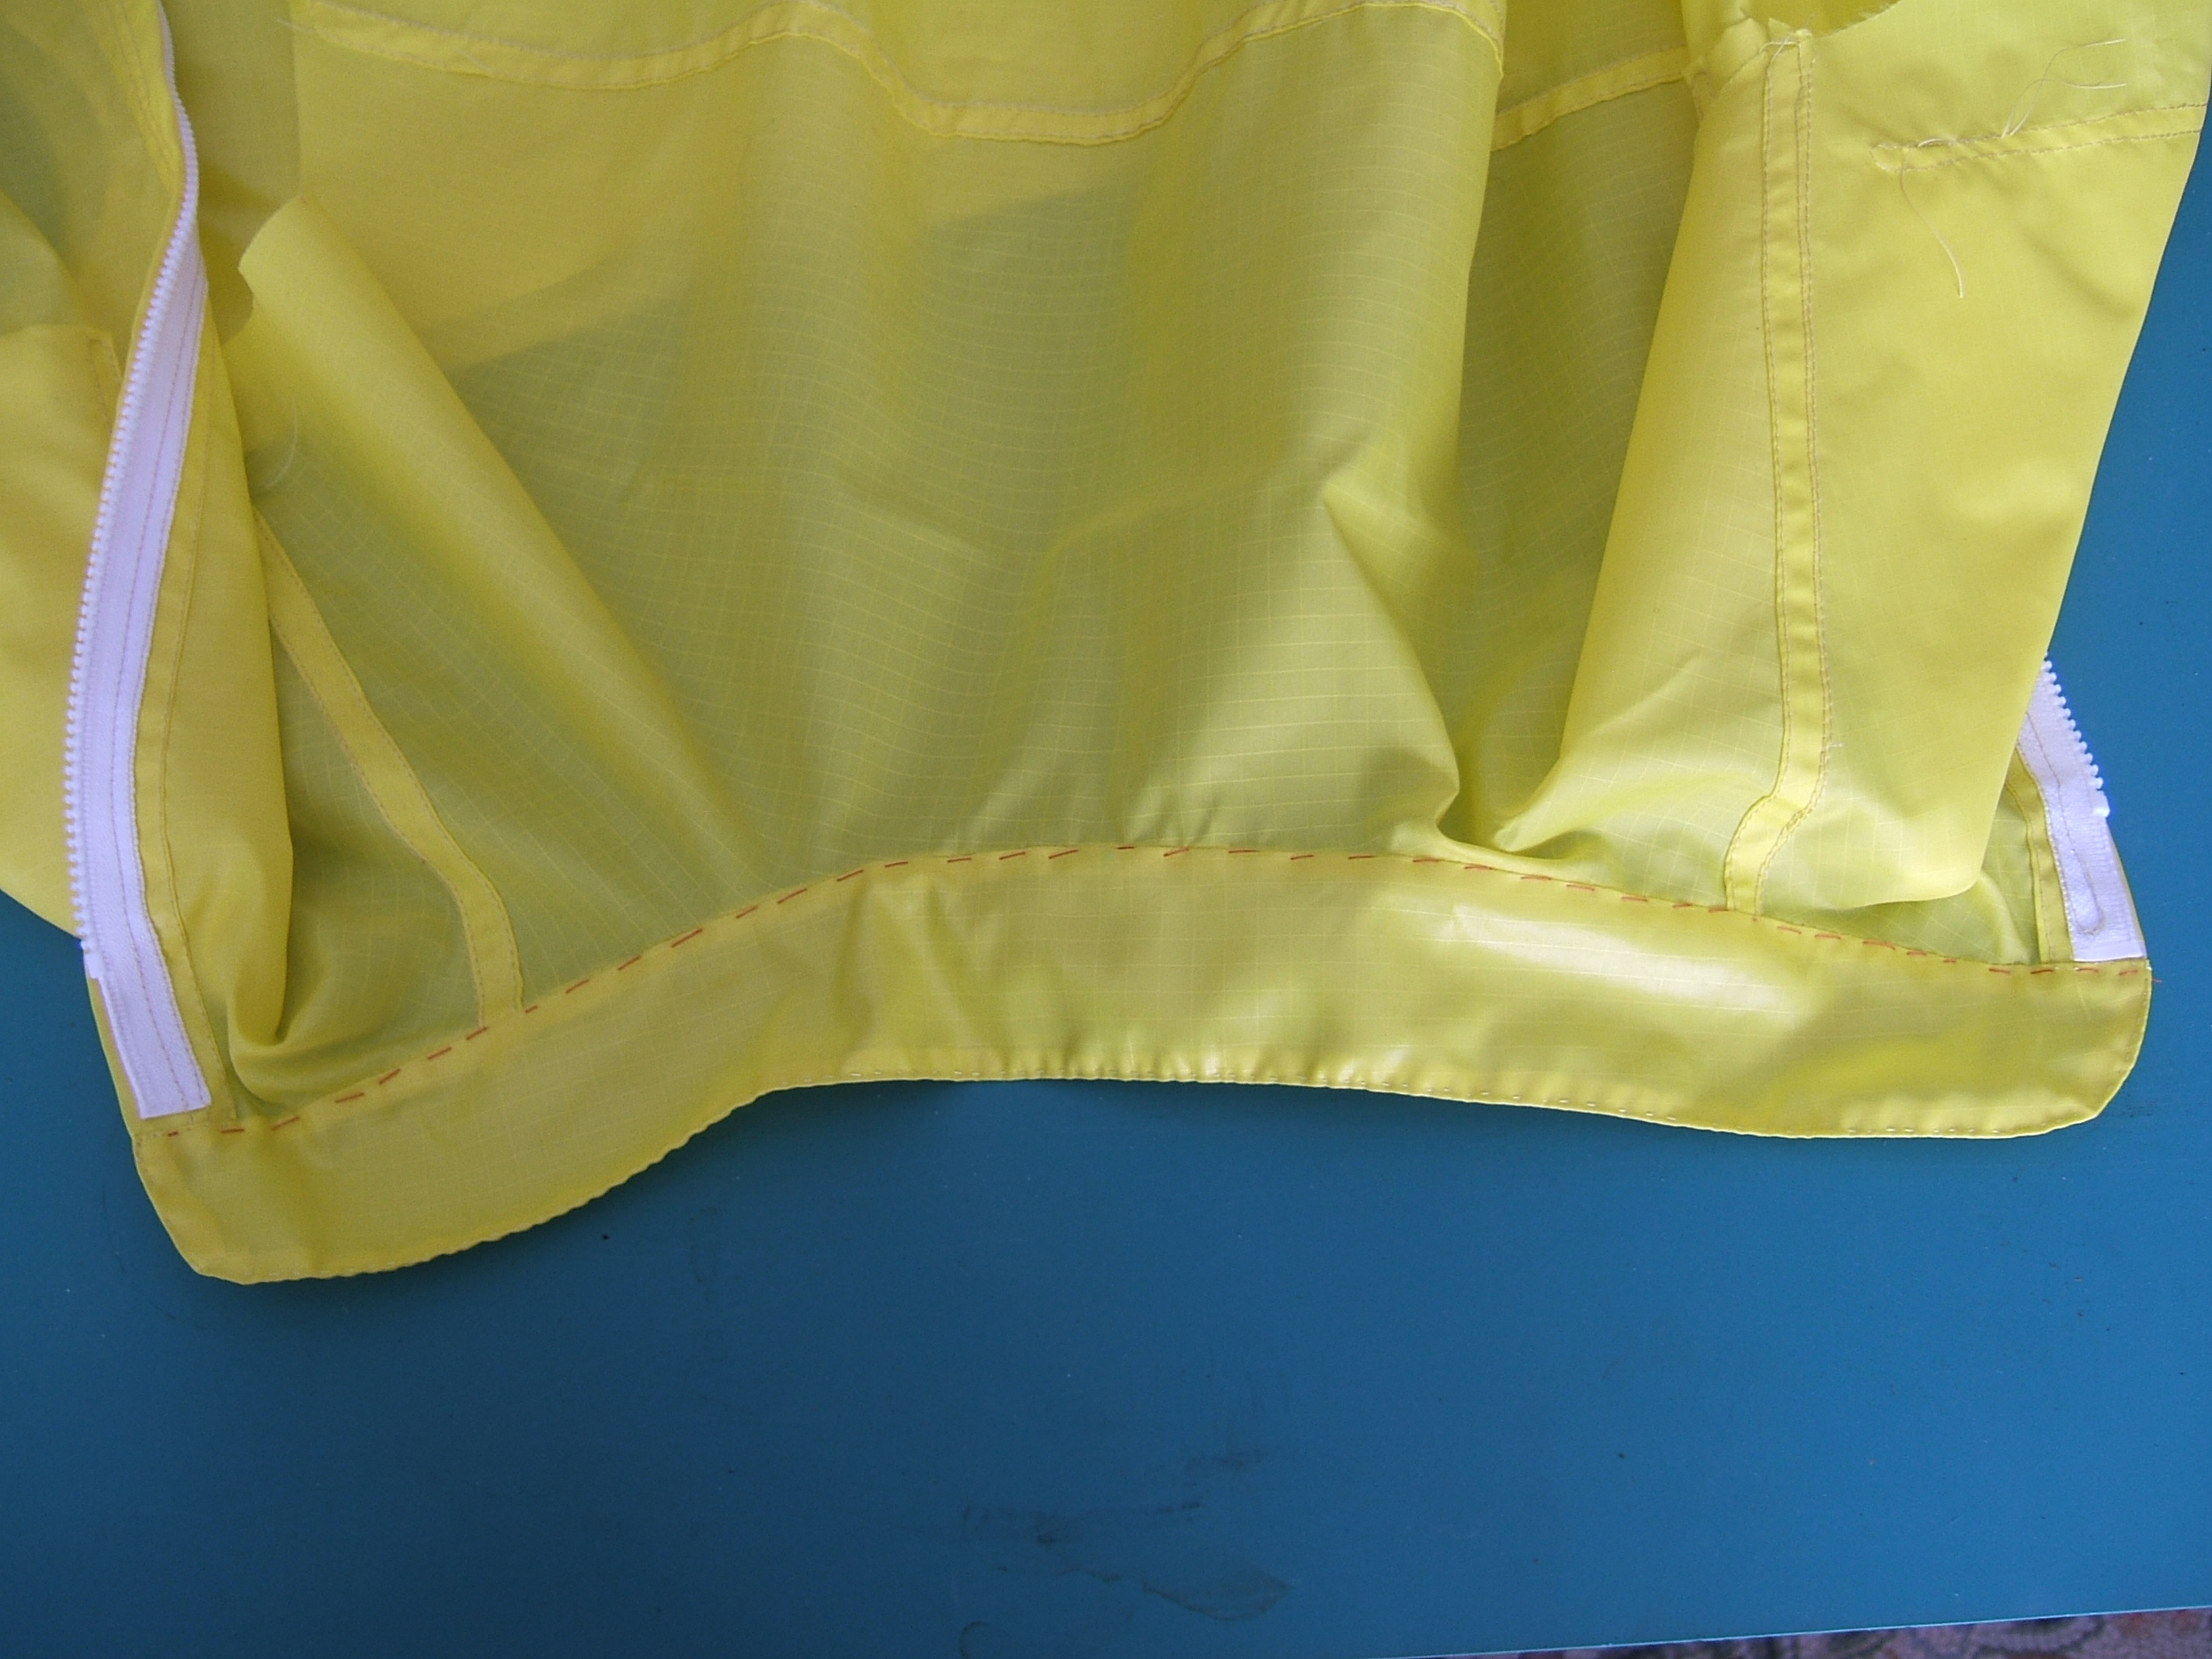
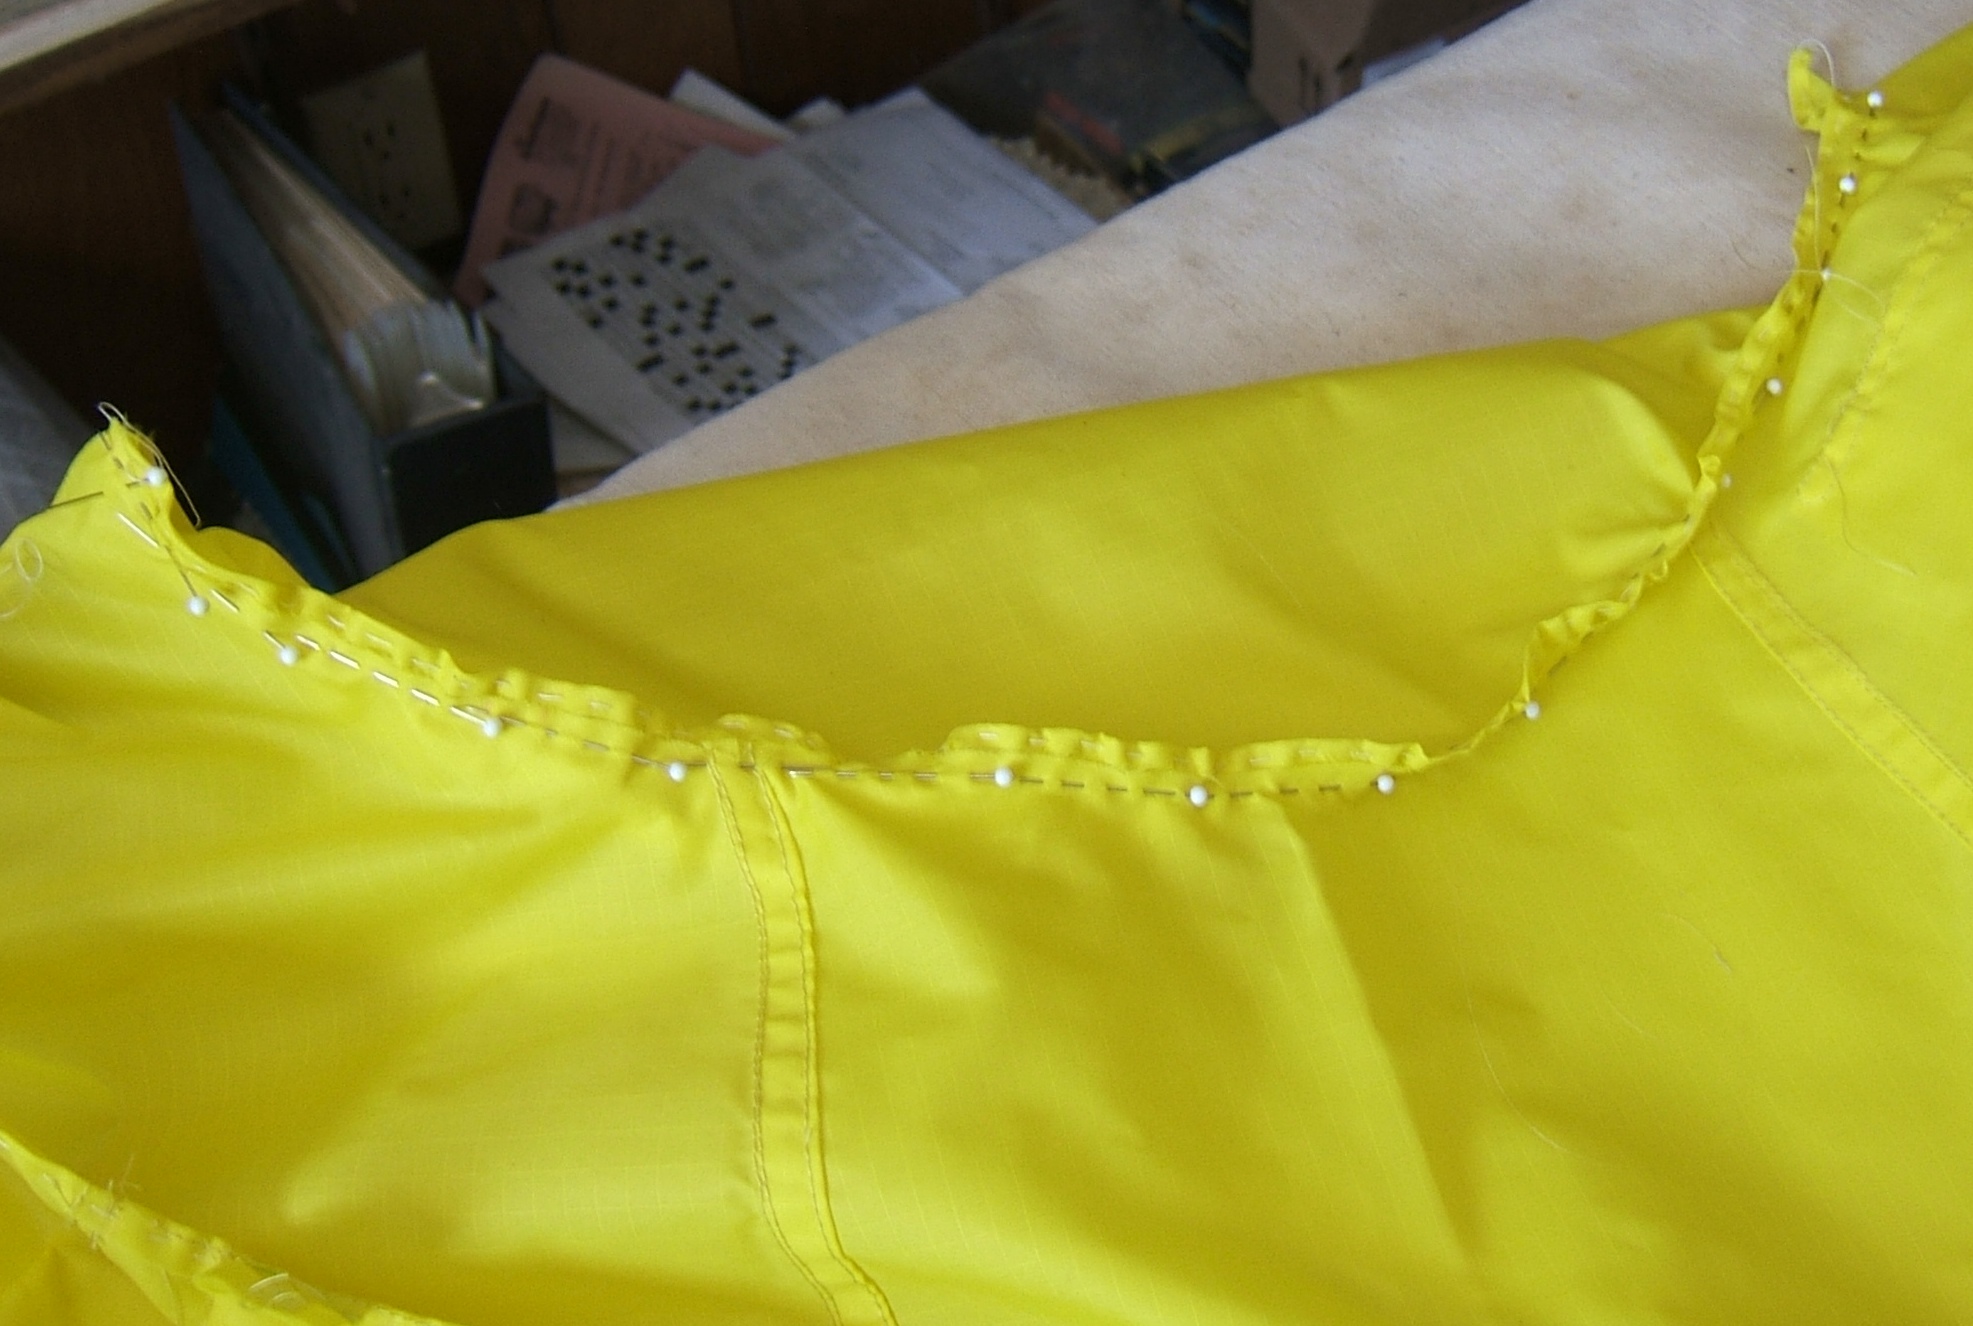
Attached the back casing today. The narrow hem at each end was another occasion for back tacking, but since there will be stress on the ends of the seaming stitches, I secured the seam threads by sewing all the way to the raw edge. I hope they won't unsew beyond the place where the flat-felled side seam will secure them. After the first stitching, I had the wit to sew off the end for a quarter inch before sewing onto the postage-stamp of linen I'm keeping under the foot.
I made this appliqué like a flat-felled seam: I sewed the casing wrong side to right side along the waistline, turned it up and top-stitched the fold while holding it flat, and stitched again a toe-width from the fold. This put it right on a line in the ripstop; the weaver and the machine maker must have been using the same ruler.
About halfway across the first time, I found that I'd switched from one line to the next. I pulled each pin early and let the edge follow the line it had started on; I don't think making it a quarter inch high will hurt anything. Just in case, I'm making the fold at the top a quarter inch narrower than I'd planned on. I'll compare the front to the back when it's its turn, instead of going by the pattern.
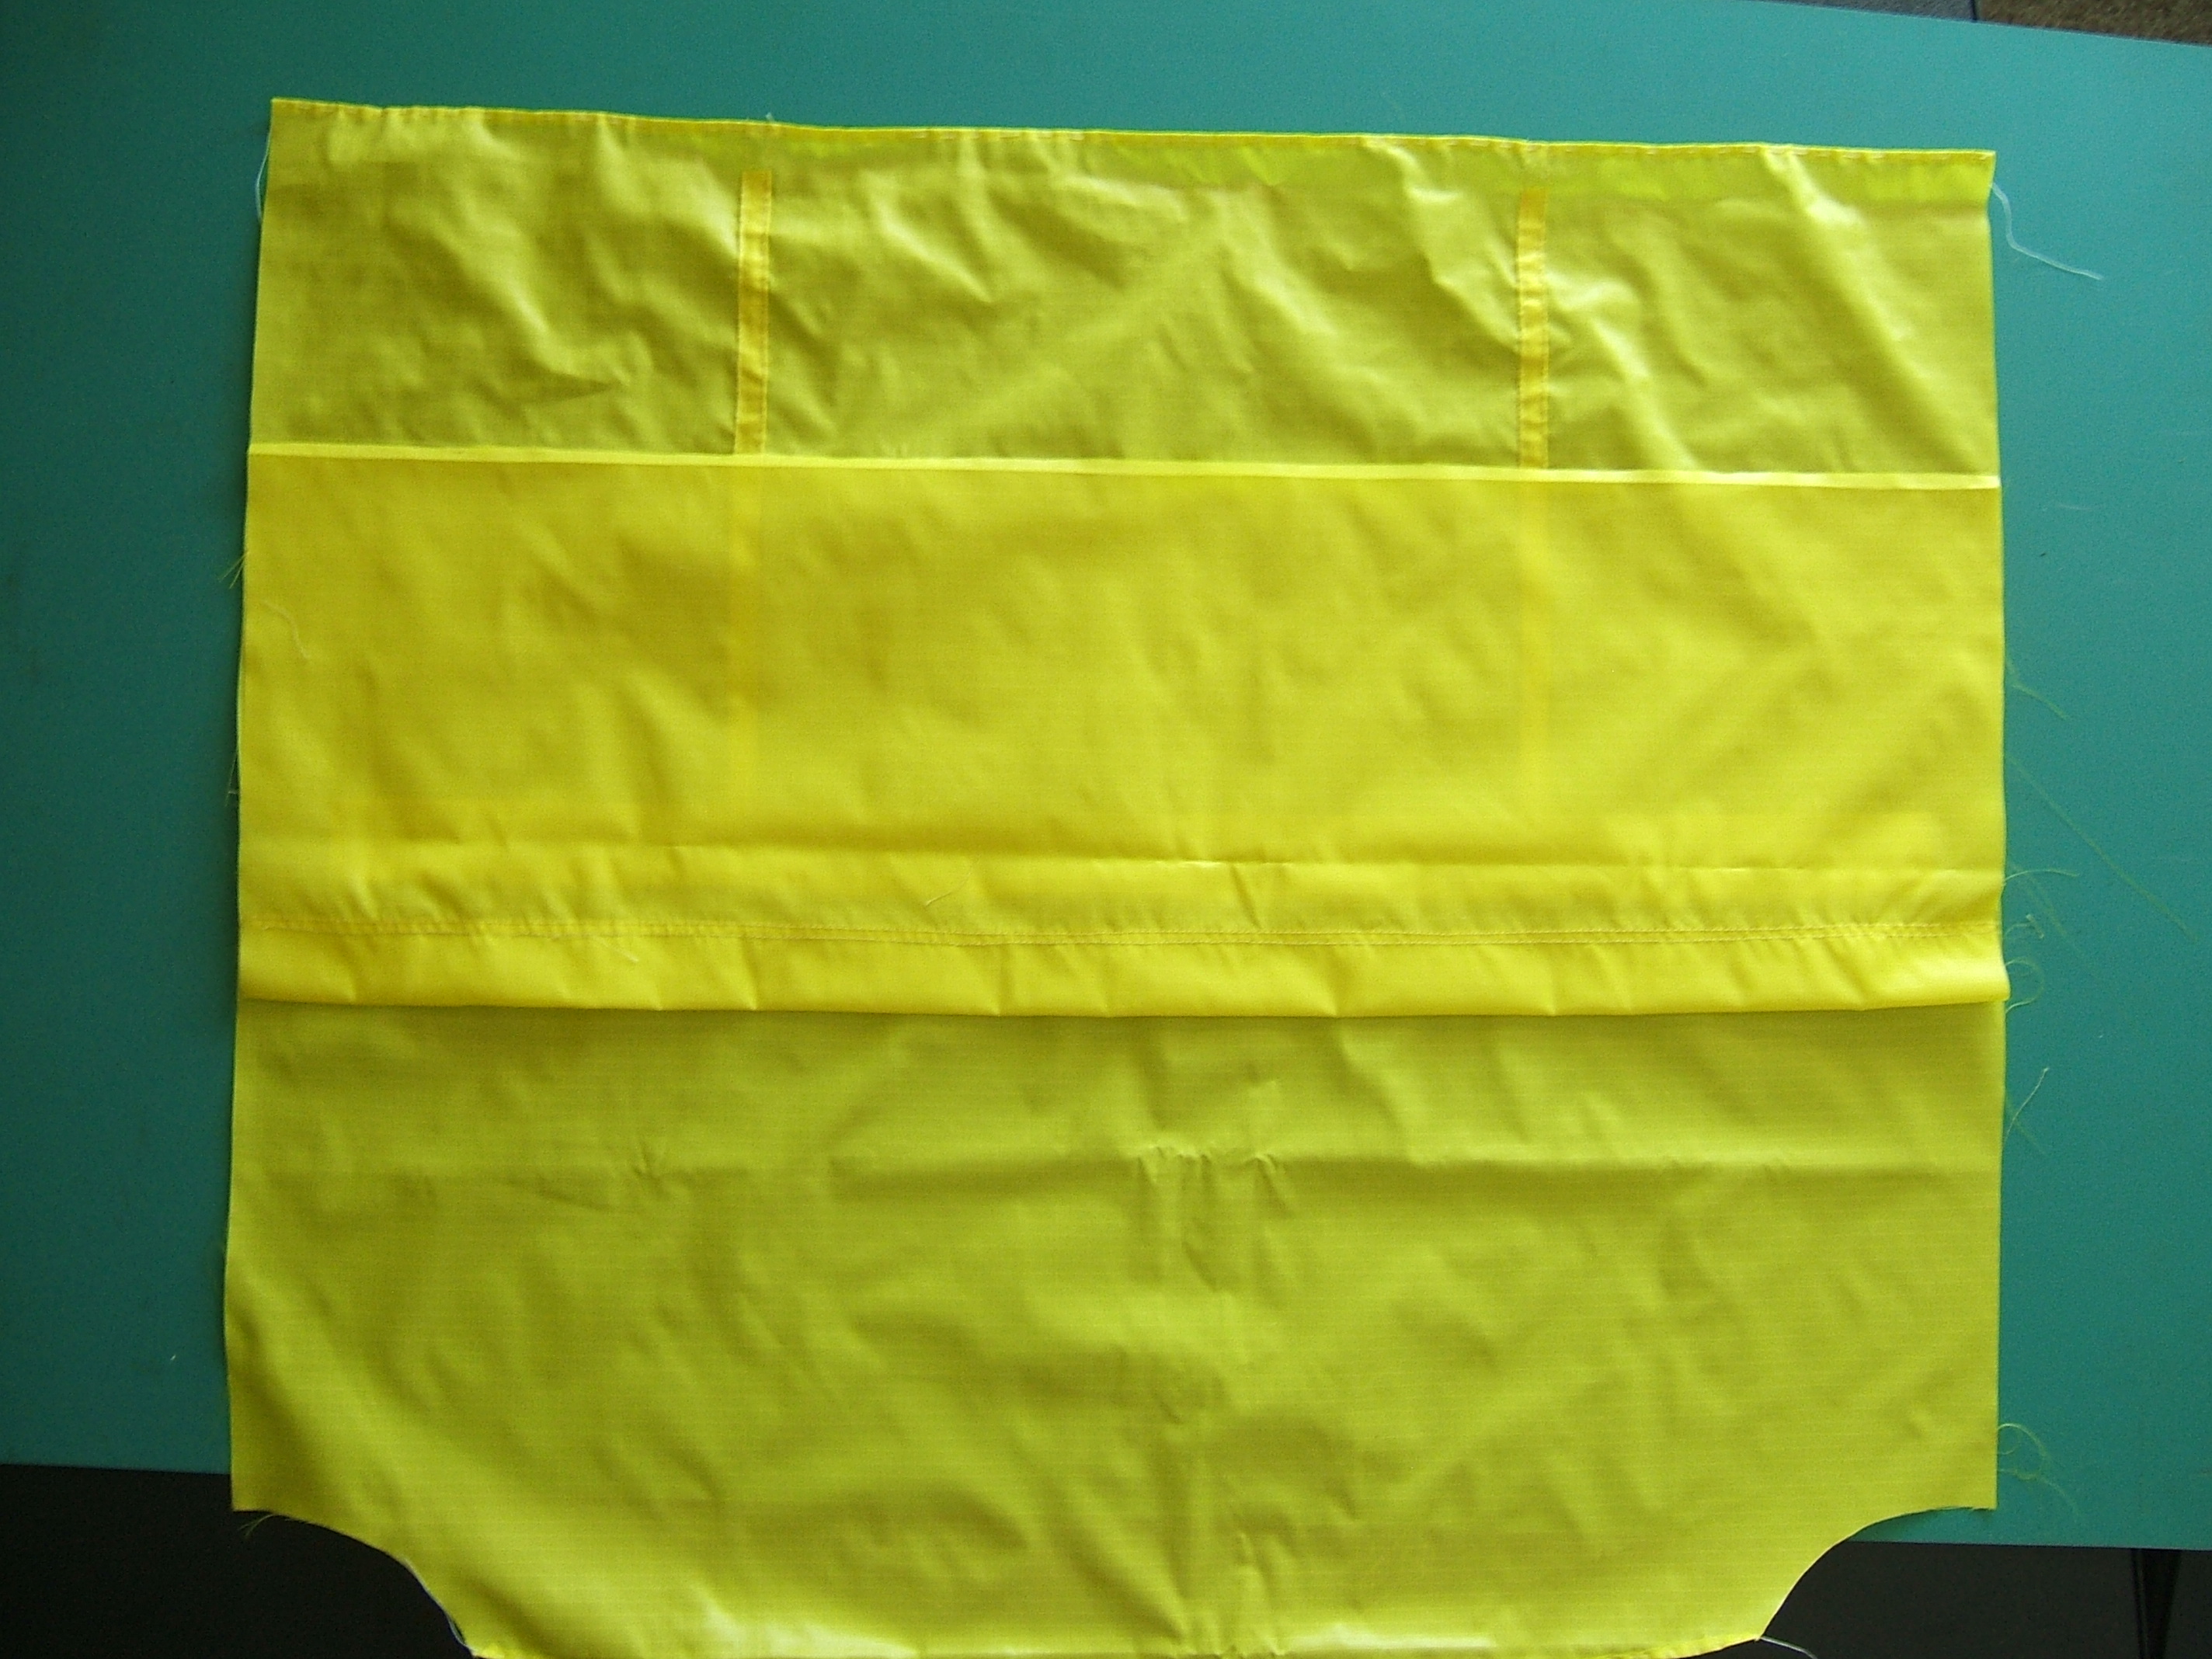
Now it's time to cut two one-inch strips, fold the edges in, and appliqué them over the lines where I'll sew to divide the back pocket into three parts. I thought I'd use the strip cut off to straighten the fabric for this, but when I held it to the back to see whether I had enough, I realized that this would put crossgrain where the long grain belongs — and the lines make it obvious that ripstop is not a square weave.
I don't think that the ammo box is high enough to let me get the box of synthetic scraps down without scrambling the boxes above it. I do think that it's time for my nap.
I think I'll fold up the White before I lie down, as I want to cook this afternoon.
Got the box of synthetic scraps down, felt too stupid to do anything with them, hand-basted the folds in the remaining sleeve. I think that that is all the fold-basting there is to do before I cut out the front. When cutting out, I cut a thread-straight piece for the front, and left separating it into two fronts and carving out arm- and neck-holes for later. Fewer cut edges is less ravelling.
Having warmed up, I went to the box and right on top was a scrap of the correct orientation, wider than the desired length of the pocket-divider reinforcements.
So I cut two strips that were four squares wide, sat down to baste one, found a small cut right where I was folding, trashed that strip, basted the other, went back to the box (which is still on the floor) and cut and basted another strip.
Instead of breaking off a piece of cone thread for each side of each strip (as I had done for the sleeve), I used a different thin, weak, undyed thread right off the spool, cogitating about a tutorial for bodkin-style basting all the while.
And then it was time for lunch and a nap.
I badly need a new picture for the contents page of Rough Sewing — I also need a splash page that is all decoration, so I won't have to re-make index.html every time I change the table of contents. I've got a camera, I've got a scanner, I've got a drawing program and a photograph editor. What I don't have is even a faint idea as to what sort of picture I should create.
But a close-up of a patch in progress just doesn't cut it.
On Saturday, I attached the re-inforcement strips for the pocket stitching, attached the pocket, realized it was wrong before making the third row of stitching, and picked out the first two rows.
Caught a corner of the yoke in the last row of stitching for the flat-felled seam. Because of the slippery nature of nylon thread, I considered taking out the entire row, but snipped the thread on each side in the middle of the catch, then pulled on the corner to release it with a minimum of gap to mend. I made the gap a bit bigger in the process of pulling the bobbin thread to the wrong side, then tucking both threads inside the seam. Some stitches undone because the easiest way to get a thread to the other side is to pull on the other thread, some inadvertently while trying to work inside a small gap.
Then I stitched from an inch to one side of the gap to an inch from the other, pulled the ends of the bobbin thread to the wrong side, and intend to weave the ends in with a #14 crochet hook. (I was sure I had a #16!)
And now it is nap time. I wonder what I'm serving for supper?
⁂
While fiddling with the pictures I took this morning (and others that had been uploaded previously), I noticed that I never took the basting out of the drawstring casing. And it's probably cotton. So a tiny bit of sewing will be accomplished this evening.
Next step is to put elastic in the pockets hem. I didn't make note of how long the elastic should be on the pattern for the linen jerseys, and I rather suspect that searching "My Linen Jersey" won't turn up anything either. Ah! "6 July 2010 / Oops! Only eight or so inches of 3/4" elastic in my stash, and I need 3/8 yard."
I had held the elastic side-seam-to-side-seam over a T-shirt, and marked twenty and a half inches as the minimum length. That's a tad different from thirteen and a half inches.
The back pockets of my "taxicab" jersey measure seventeen and a half inches when pulled not quite tight enough to stretch the elastic. I guestimate two inches of twill tape at each end. That makes about three-eighths of a yard between tapes! I figure the elastic on an overjersey ought to be a little longer than that, and I'm planning to have less than two inches of non-stretch at the ends. Twenty inches might not be all that far off.
Found and corrected a small grammo while searching linjersey.htm for "elastic".
Moved stuff out of the sewing room so Roomba could clean, moved some of it back. Wove in ends of repair to yoke seam. Took pictures of process, spent rest of morning fiddling with pictures. Updated PIC.HTM in RUFFTEXT/TOOLS, did not fiddle with the pictures in this file. Or even re-copy ED.DIR to the space between "pre" tags below so as to include the new pictures in my list of pictures to be fiddled with.
Moved stuff from bedroom back to sewing room, determined to find out what was in all those boxes. To my delight, I found four boxes that were sorted, full, and ready to be taken to our storage locker. But that leaves about a dozen scattered around the floor. And there's an unlabeled box on a shelf, together with piles of papers that ought to be sorted into boxes.
Unlabeled box appears to be old manuscripts. First cut, I think, should be to sort all boxes of manuscripts into a pile, then frisk the other boxes for manuscripts.
Separated the piece for the front into two halves, then ran into a little snag:
I'm planning to baste along the edges and have at it vigorously. I wonder whether a warm iron would help?
On second thought, that little bit of skew is important only because I want to cut both pieces at once. I'll just separate them and cut twice. Much less trouble than basting the edges while not certain that it will work.
Laundry today; I think I'll work on editing the pictures and putting them in their proper places instead of sewing. There are some that I can't remember why I took them.
⁂
Got all the pictures that had been scaled in place.
Began sewing today by driving a brad to hang the pattern for Woven Overjersey on, a perilous undertaking that required me to put my left foot on the monitor stand, because the printer stand prevented me from getting the stepladder close enough. I hasten to add that the monitor is on an old TV stand quite strong enough to be sat on by someone tall enough to to consider twenty-six and a half inches a reasonable height for a seat.
Then I sorted out the pieces that I'm through using, ironed patches of sleazy woven interfacing onto them, punched holes (borrowing the hole punch in the other room for most because, though it doesn't cut as well as the one in the drawer under The Necchi, it will reach in farther from the edge), and hung the pattern pieces on the newly-driven brad. The stepladder sufficed, without aid from the monitor stand, for hanging the patterns. I don't think I can get them down again without bringing the stepladder back in. But the ammo box might be high enough; the paper is stiff enough to lift from below. Definitely not back up, though.
Just checked to see why the ammo box is so heavy — it's full of pleater-tape drapery hooks.
The pink pencil that had been lying on a card table vanished sometime during the clear up for the Roomba and the following paper-sort for the new nail. I found a green one and put a mark on the wrong side of the lower end of the center edge of each front piece; I'd been planning to write "F", but with it being a different color from the other marks, a dash sufficed.
Then I was hungry, and now it's nap time.
When I tried to line up the pattern, I saw that that little bit of skew mattered a whole bunch. But the first piece I cut had to be straightened repeatedly, and the second was close enough to start with. If I had continued to try to straighten them together, I would never have gotten anywhere.
They are cut out and I have tailor's tacks marking the bust darts, but I think I've used up my thinkum for the day. I'll spend the rest of the morning sorting manuscripts out of the other papers and piling them in the corner. Today was Roomba day, but I couldn't let it in because of the mess on the floor.
Didn't get the mss. sorted. The pink pencil turned up again.
I must have tried the blue pen on the right side of the ripstop, because it worked just fine when I used it to mark stitching lines on the wrong side for the bust darts this morning.
Also started the pockets, and finished one of them in the afternoon. I "secured" the ends of the flat-fellish part of the fold-bottom by starting half an inch into the fabric and pulling all ends to the inside. I'll trim the ends when they ravel back to the stitching that holds the sides on.
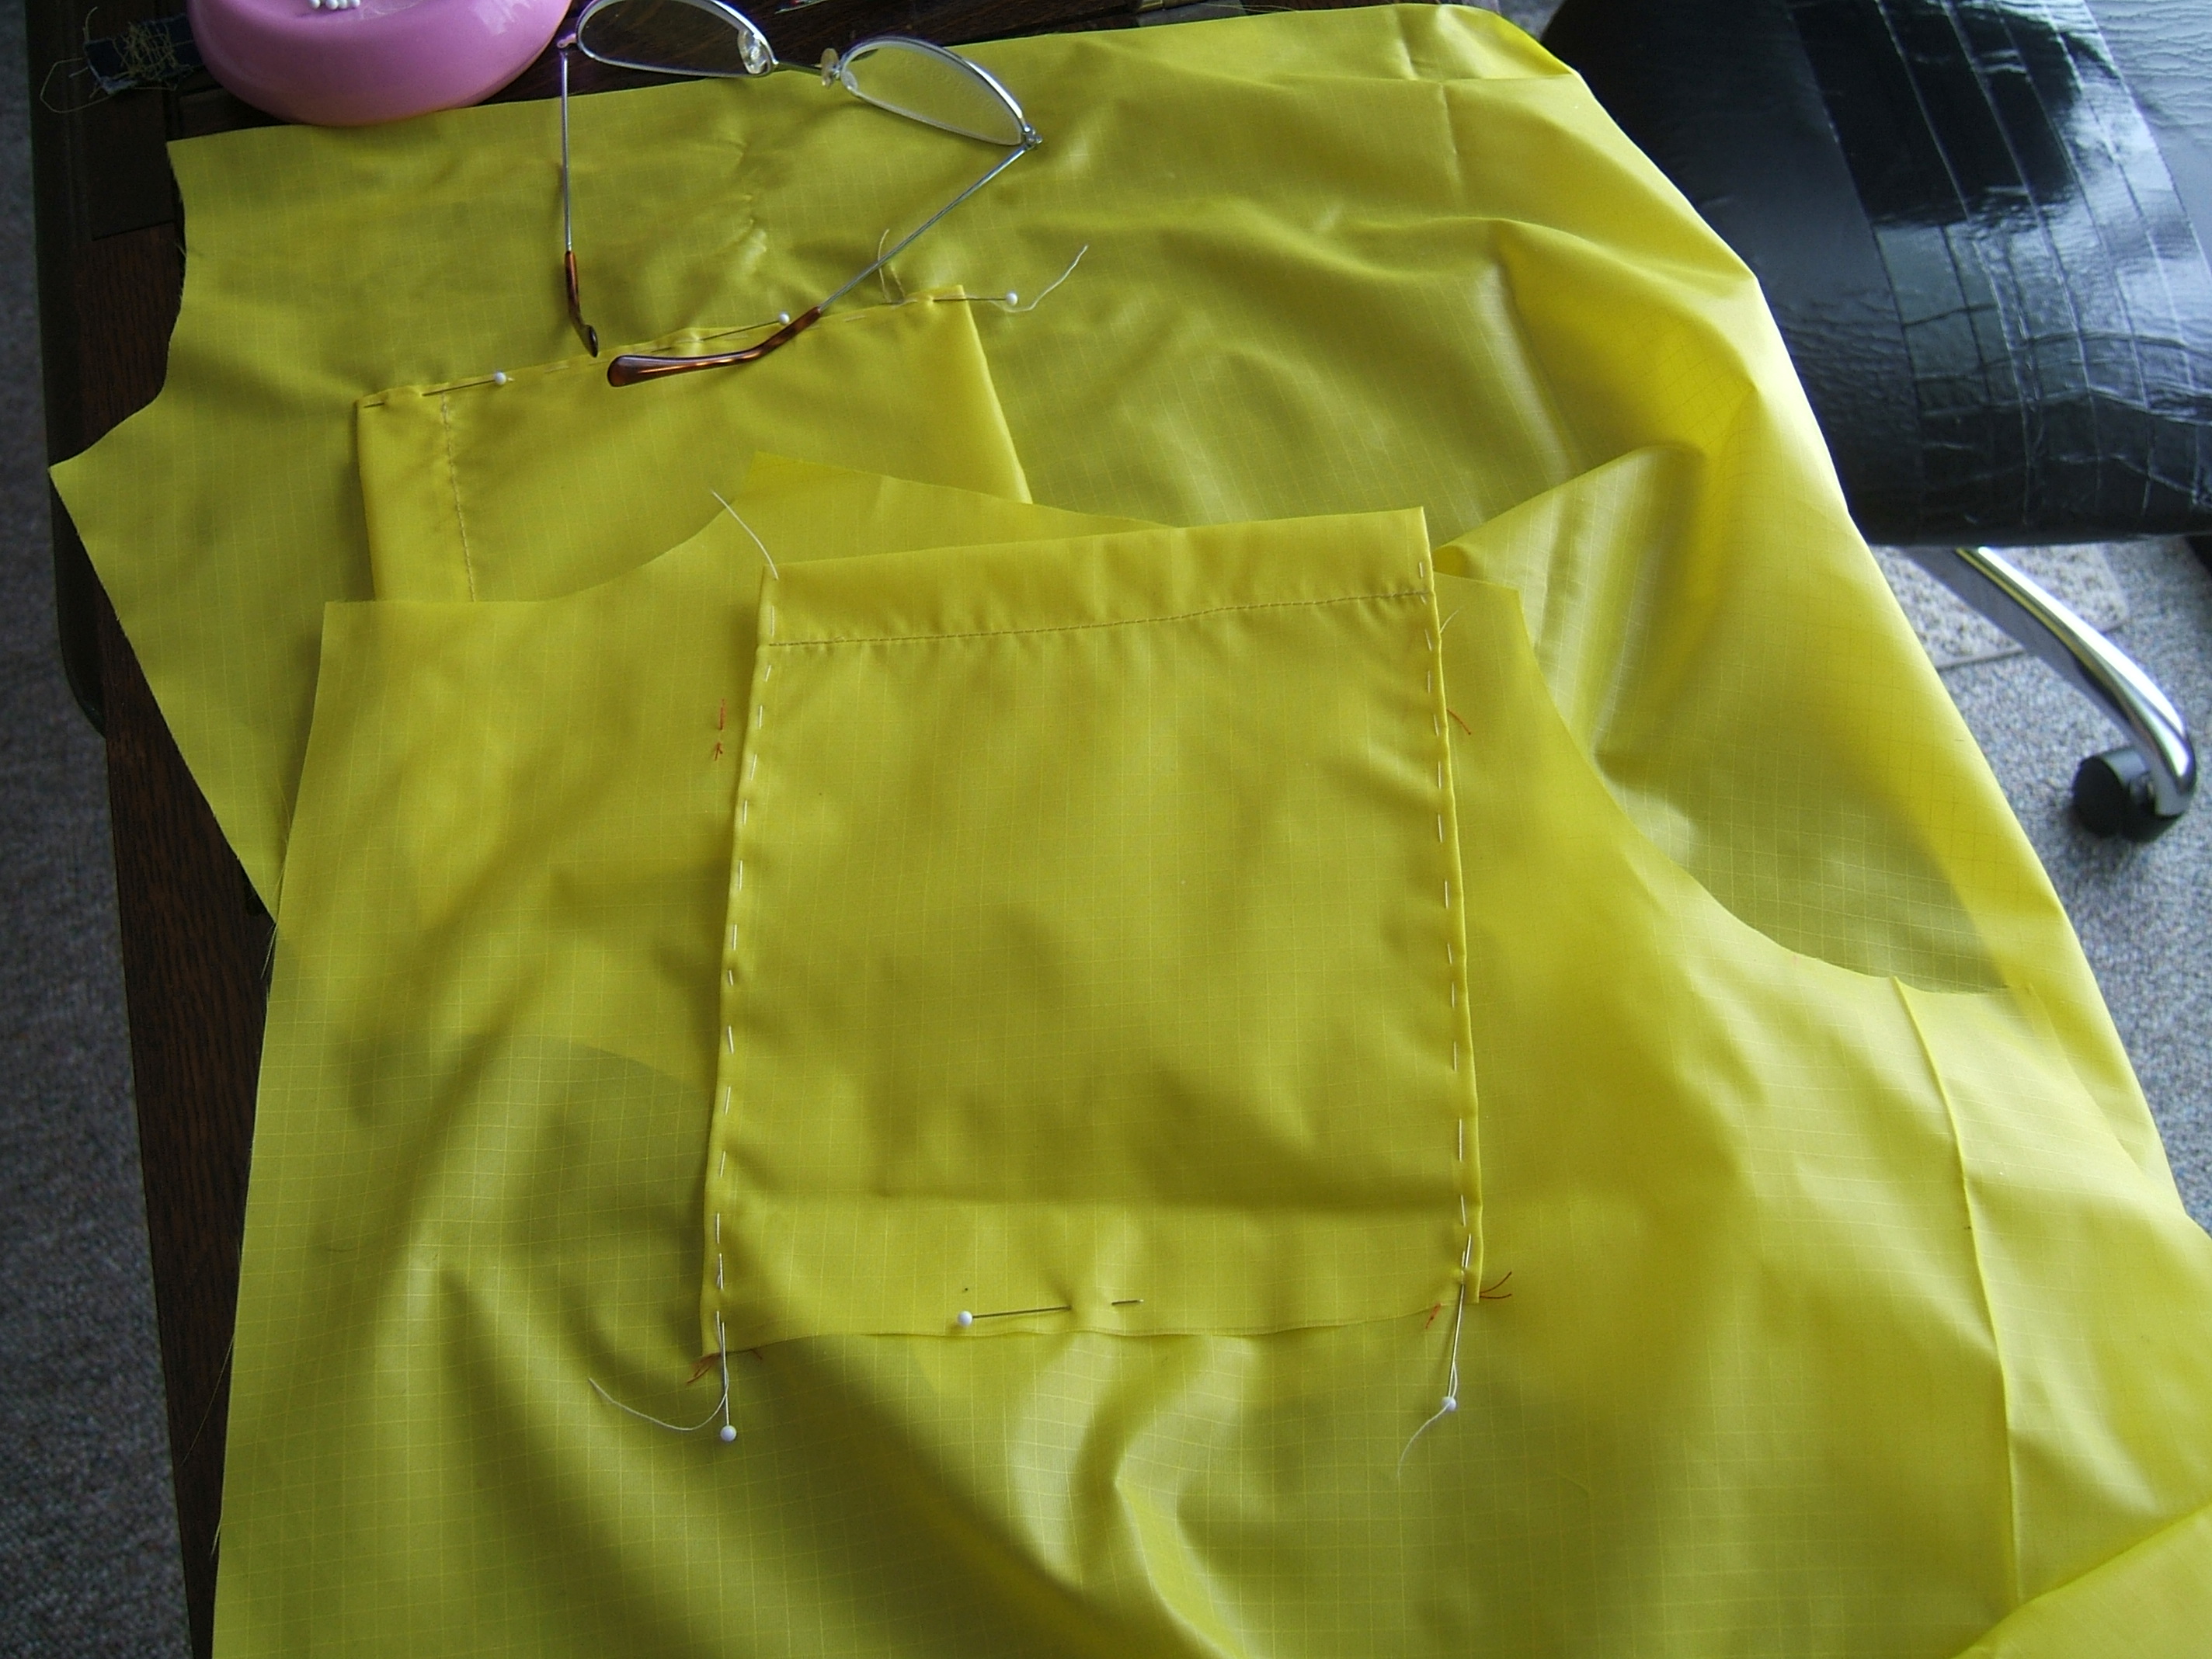

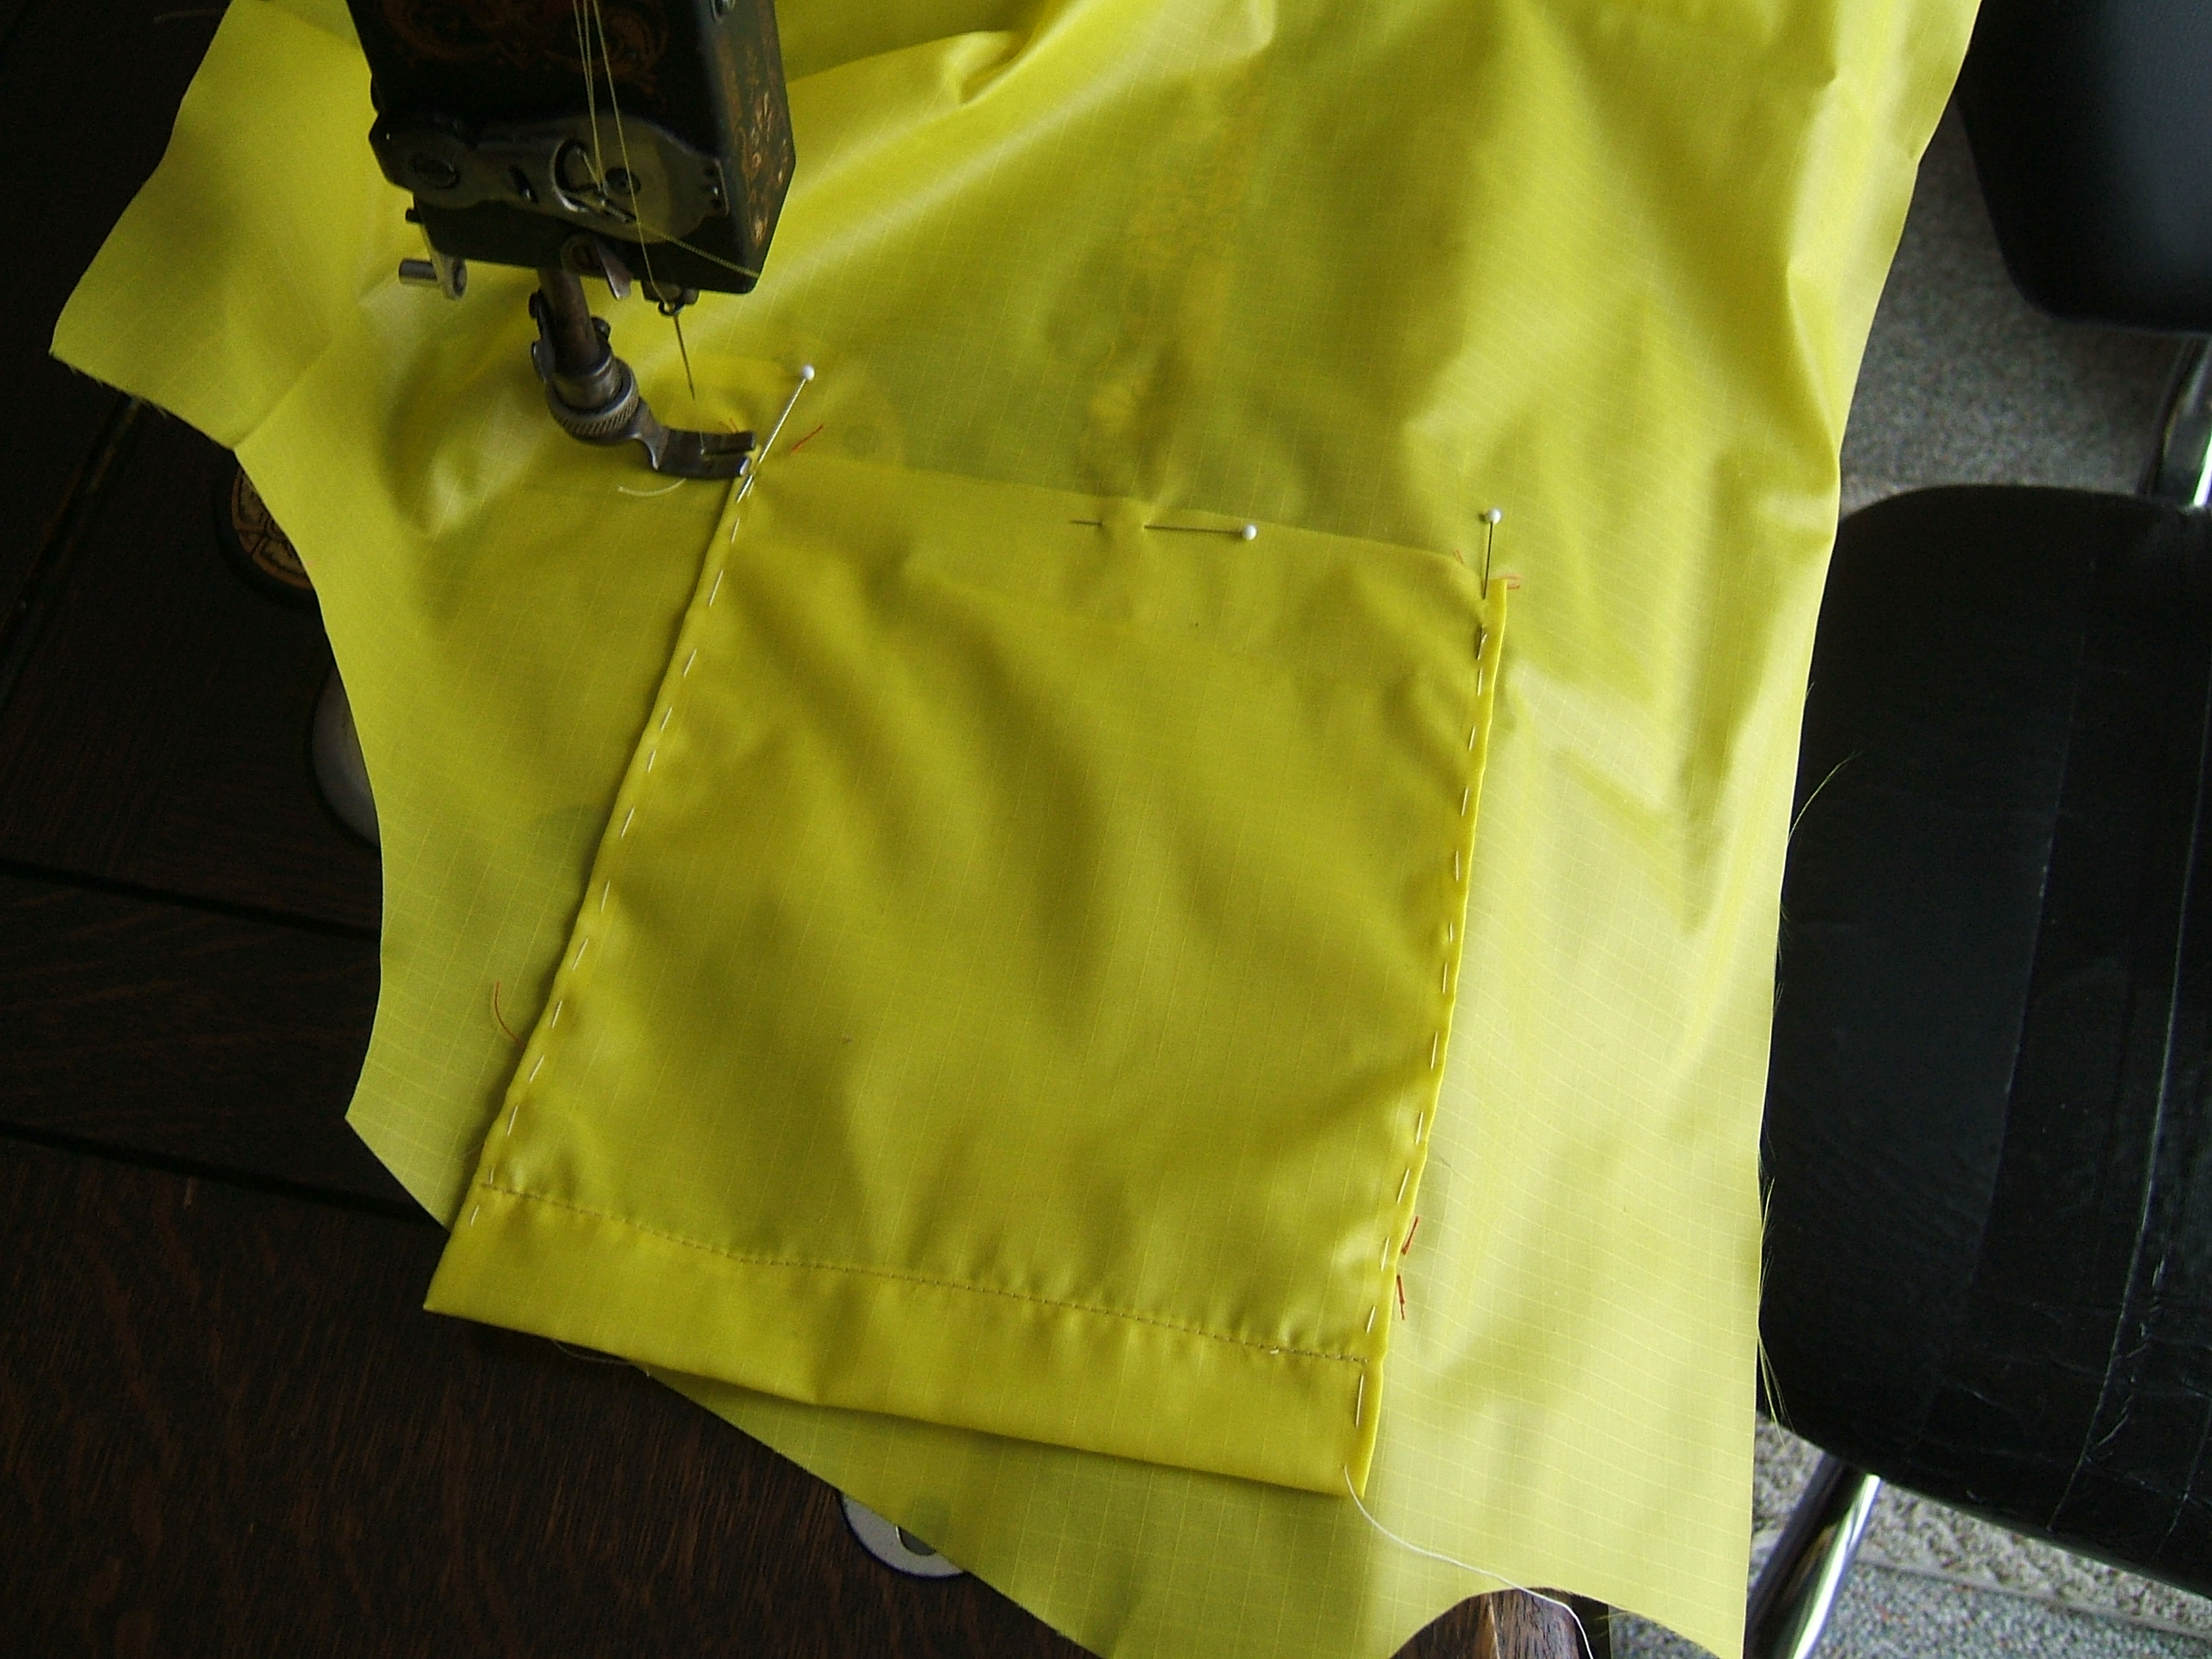
                ***

JACRAW92.JPG  1596481   2-13-15  12:48p front pocket pinned for final stitching
JACRAW93.JPG  1535008   2-13-15  12:49p other pocket pinned for first stitching
JACRAW94.JPG  1644150   2-13-15  12:50p White sewing machine, shot from doorway
JACRAW95.JPG  1574738   2-13-15   5:01p other pocket about to begin first stitching
JACRAW96.JPG  1641279   2-13-15   5:04p /fuzzy shot with light on -- shows fabric well in puddle of light
JACRAW97.JPG  1563320   2-13-15   5:04p beginning first stitching, closeup
JACRAW98.JPG  1568236   2-13-15   5:06p just finished first stitching, closeup
JACRAW99.JPG  1562262   2-13-15   5:09p almost finished second stitching, closeup
I took some pictures, but didn't think of documenting the stages for the chapter on pockets until I was ready to start on the second one, which is why I'm typing instead of sewing now — the light for taking good photographs is gone. Documenting my progress is supposed to embarrass me into sewing faster!
On the other hand, twilight isn't all that hot for sewing either. I think I'll go shopping — by car — tomorrow, so I won't finish this jacket any time soon.
It would be nice to have it on Tuesday.
The weather varied between nasty and hazardous — a blizzard warning went off while I was typing that. I looked out the window and decided that we could do without carrots and celery for a while.
JACRAW00.JPG+ 1602051 2-14-15 10:28a pocket sewn on by bottom; shadowy, only pocket shows
JACRAW01.JPG+ 1553690 2-14-15 10:34a pocket pinned, under presser
foot to sew sides — basting removed
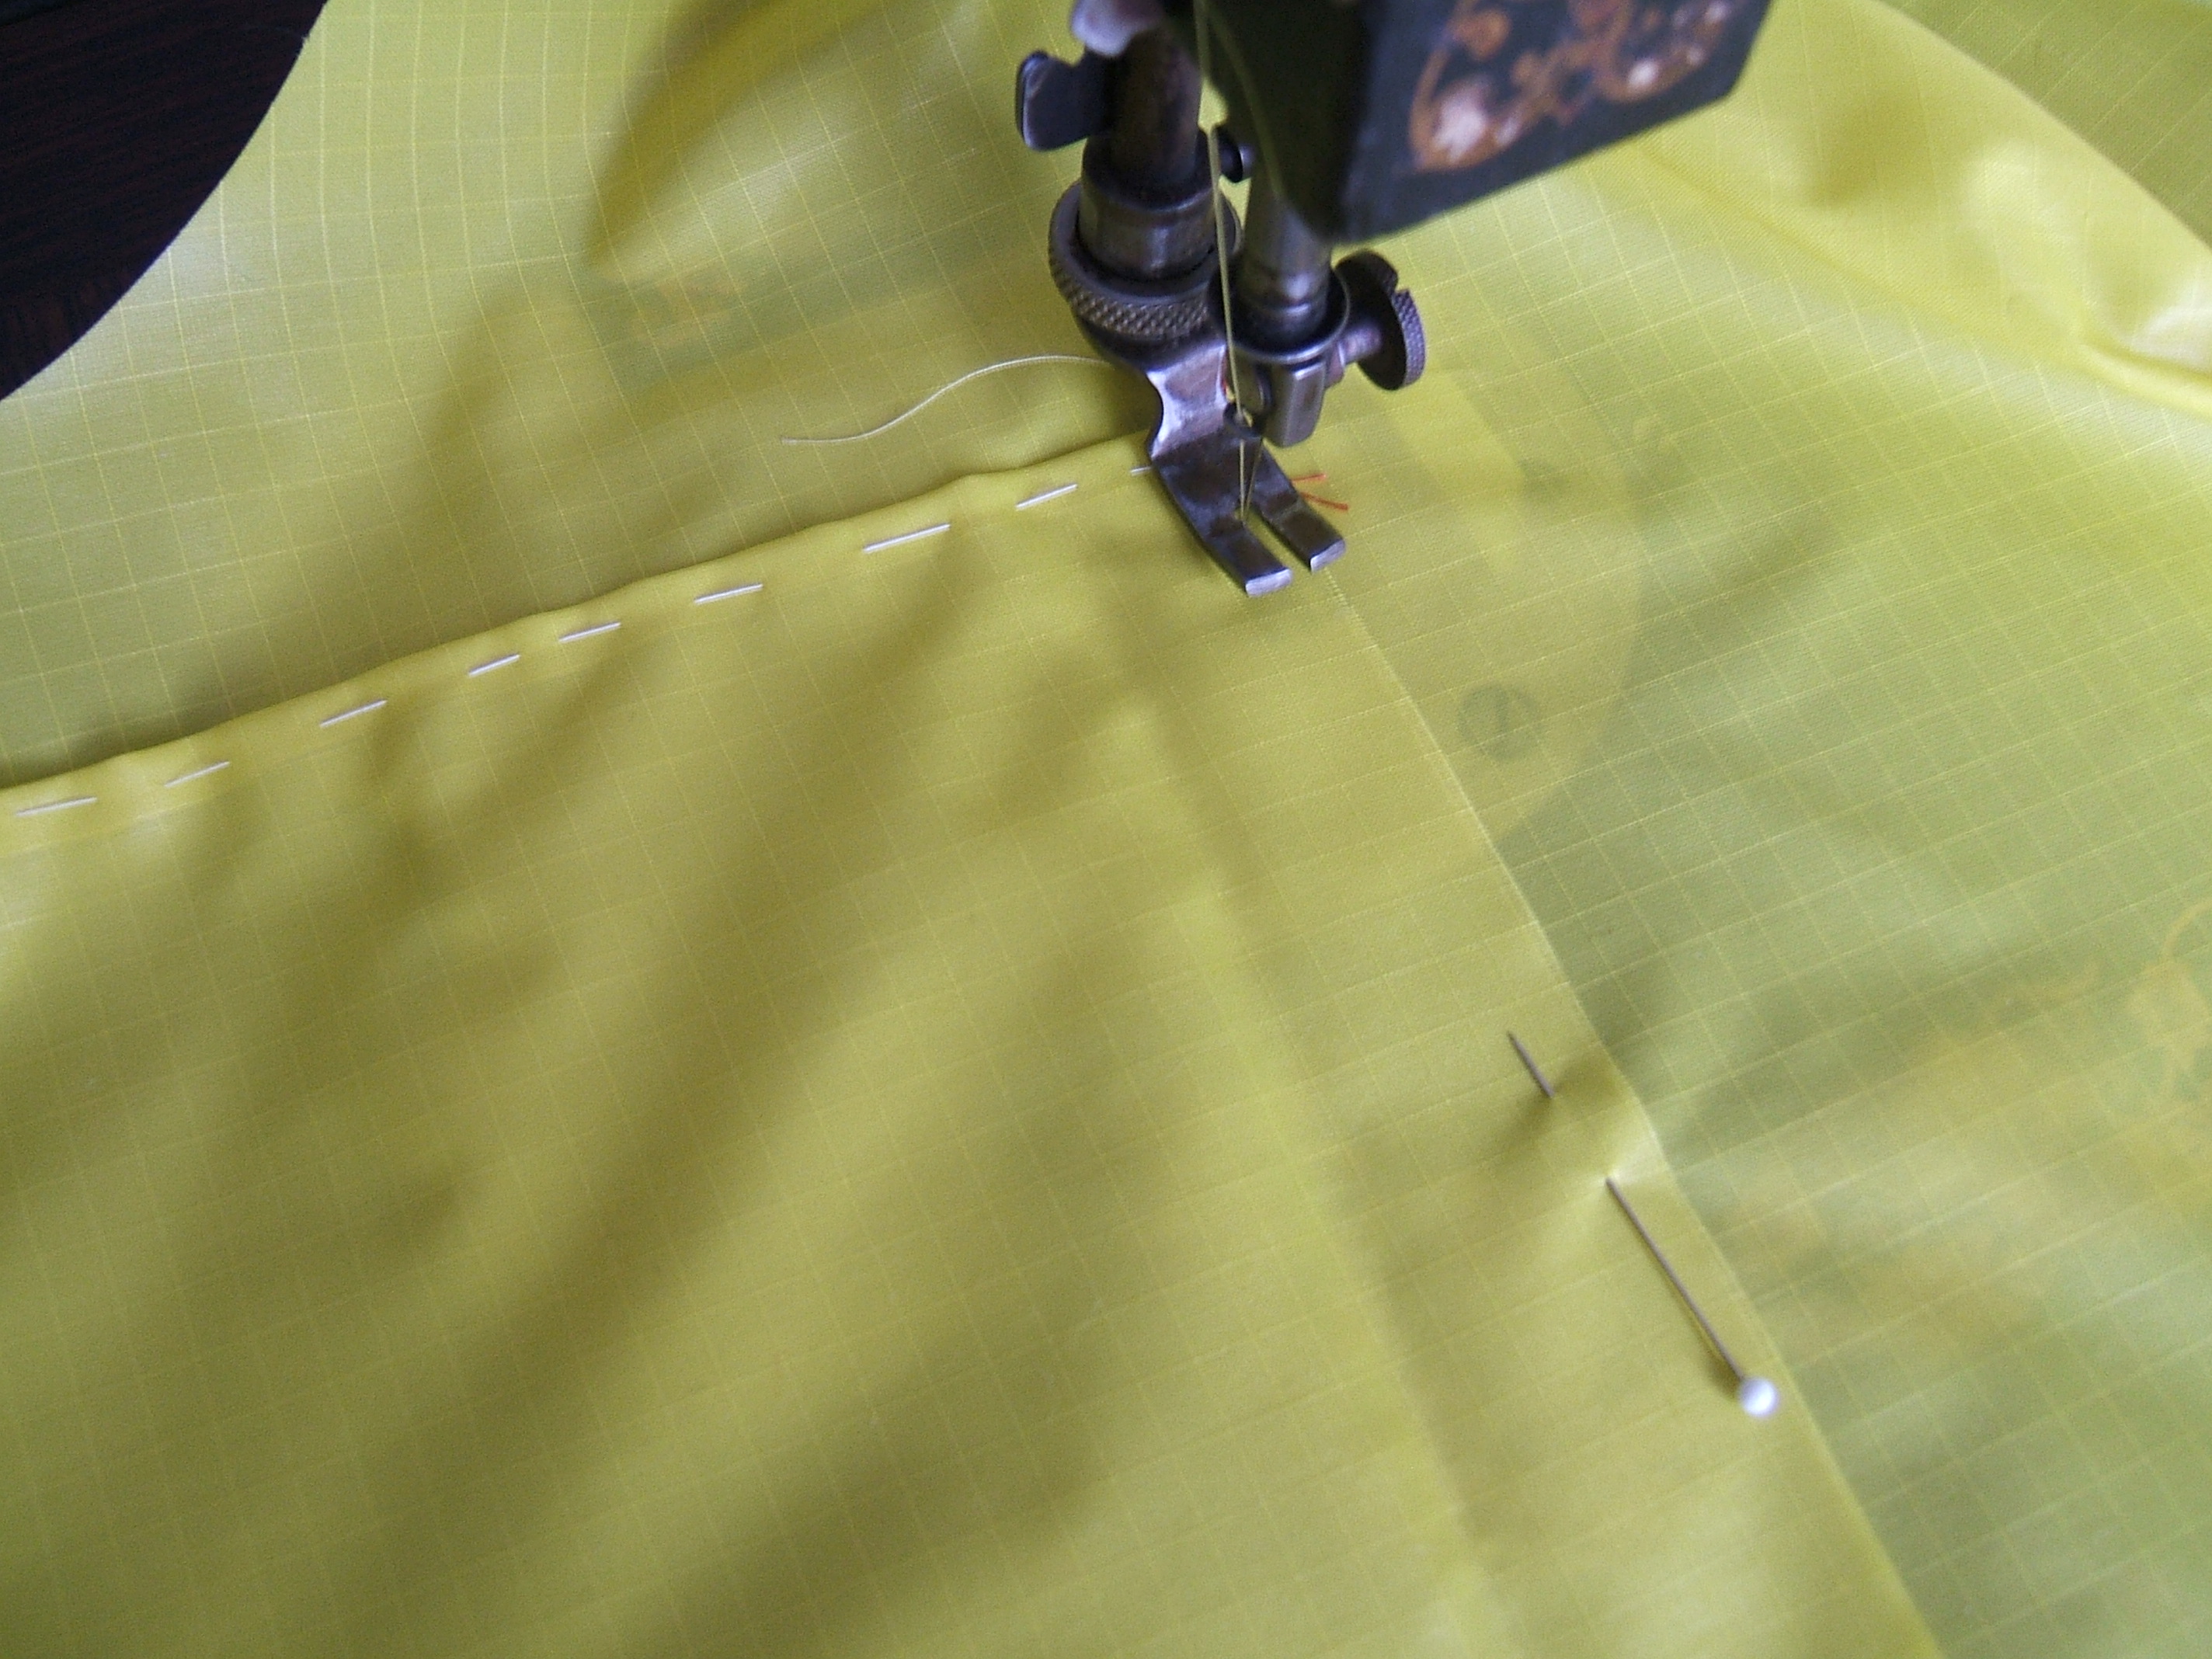
JACRAW02.JPG+ 1536352 2-14-15 10:38a closeup of presser foot ready to sew side -- basting removed
JACRAW03.JPG+ 1549086 2-14-15 10:40a turning corner at bottom of side of pocket
JACRAW04.JPG+ 1564363 2-14-15 10:45a starting to sew other side, basting being pulled back as needle approaches
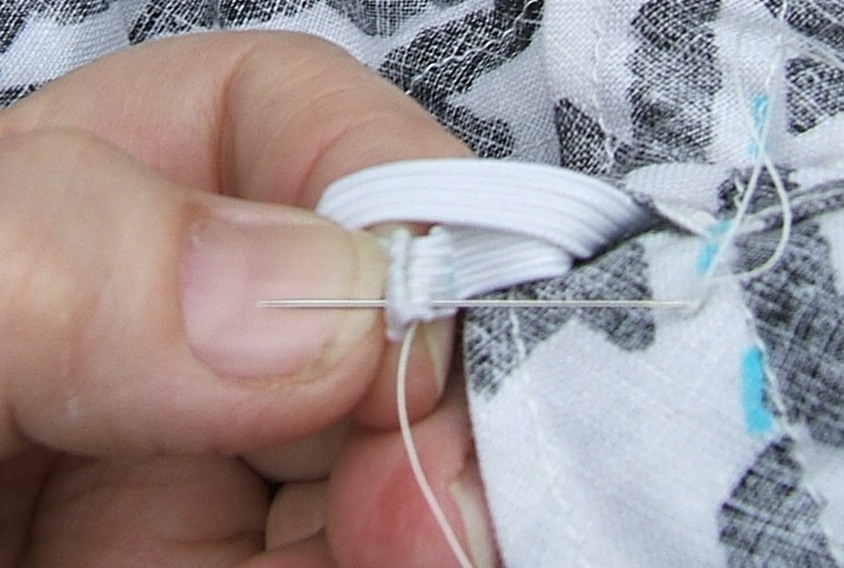
JACRAW05.JPG+ 1505072 2-14-15 10:52a threaded needle and spool, ready to begin basting hem, shoulder already basted
JACRAW06.JPG+ 1516476 2-14-15 11:16a above, backed off to show arm of chair and cat
JACRAW07.JPG+ 1568977 2-14-15 11:16a closeup of spool and needle, not as good as 05
JACRAW08.JPG+ 1525601 2-14-15 11:17a spool, needle, and cat
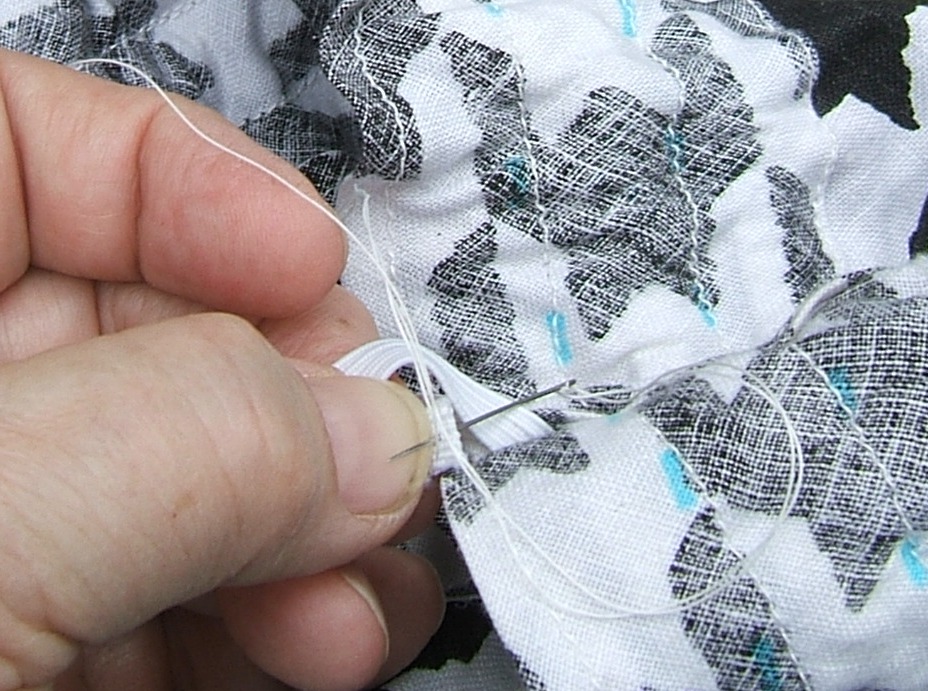
JACRAW09.JPG+ 1611200 2-14-15 11:18a closeup, first gathers on needle
JACRAW10.JPG+ 1569217 2-14-15 11:19a closeup, first gathers stroked off needle
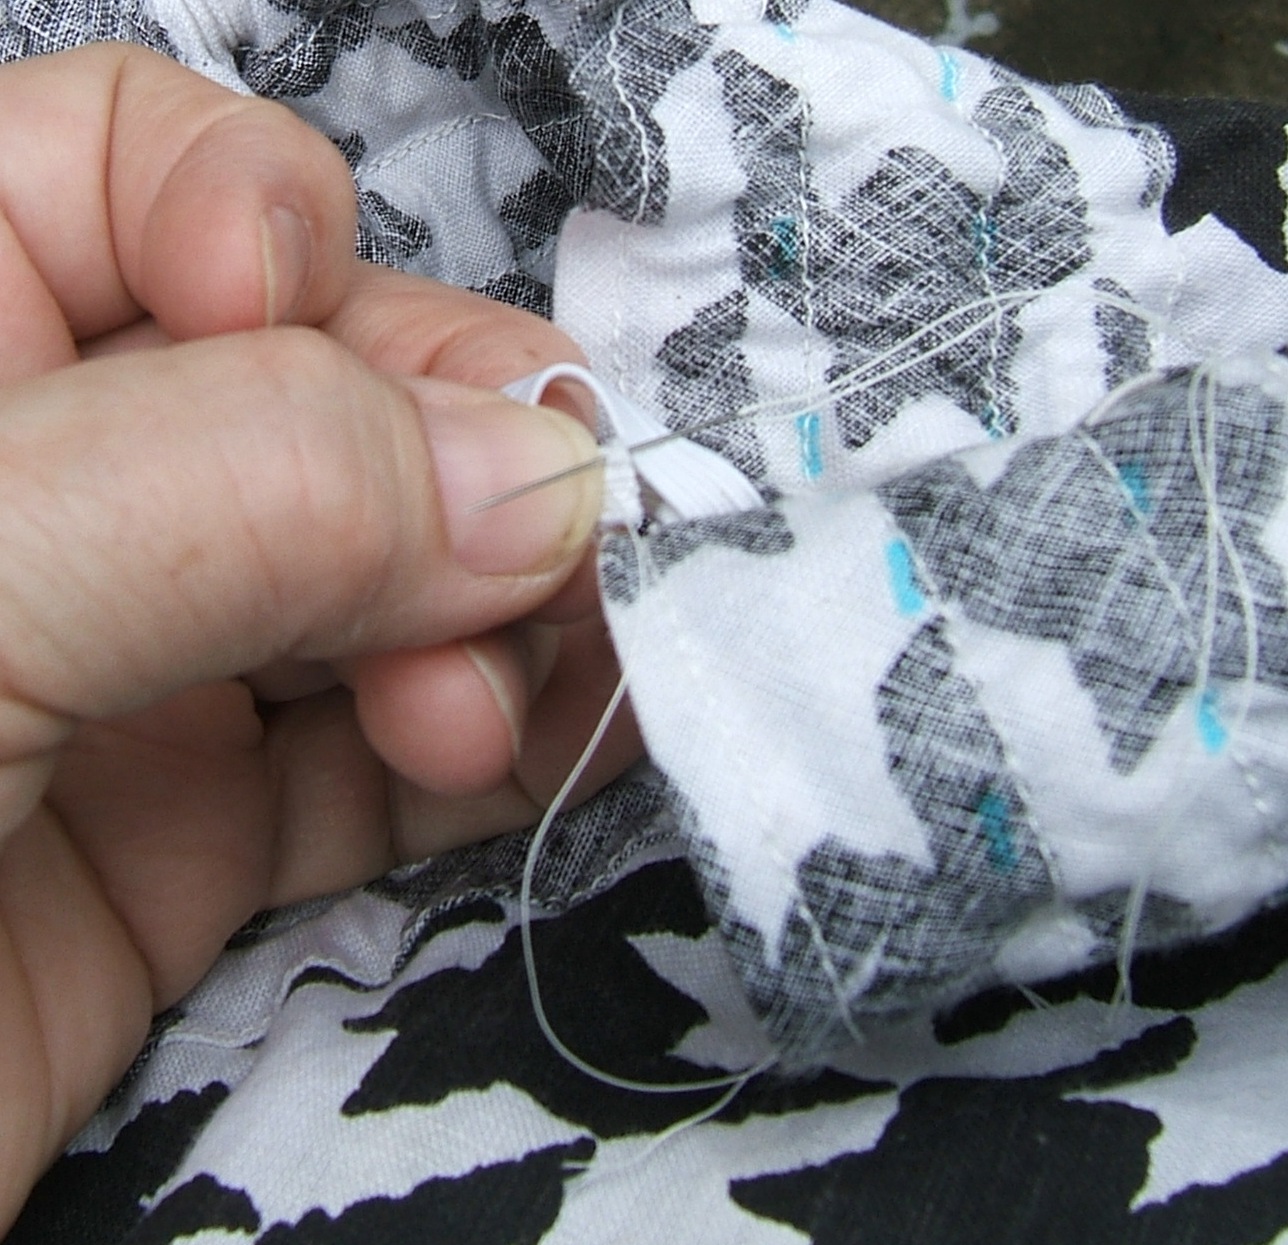
JACRAW11.JPG+ 1507932 2-14-15 11:23a needle at end, with gathers, snowy window in background
JACRAW12.JPG+ 1511335 2-14-15 11:24a above, closer, not as good a shot
JACRAW13.JPG+ 1510124 2-14-15 11:24a ditto, background underexposed
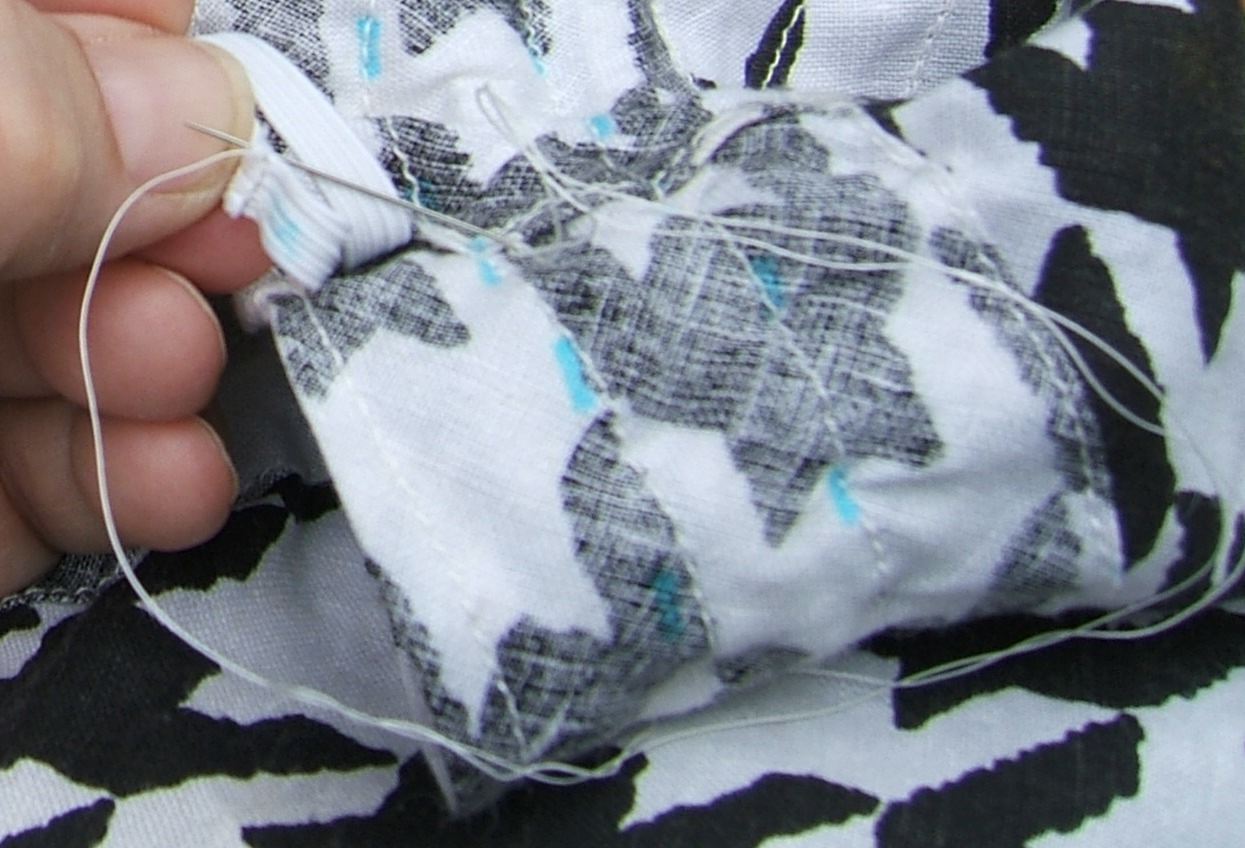
JACRAW14.JPG+ 1639307 2-14-15 11:26a finished basting, good clear shot on arm of chair
In the morning, I finished the other pocket, taking copious pictures, then basted the fold for the shoulder seam and the first fold of the hem, taking more pictures for the essay on basting that I plan to write.
Not clear woke up this afternoon; I think I'll upload the new pictures and maybe scale some of the old ones instead of installing the zipper.
Now I know why I haven't stumbled upon bodkin-style basting before — or, at least, haven't used it often enough to recognize it when it happens again. It's good only for basting in creases, and I nearly always press in creases. When bodkin-basting is used to baste a fold to a line, the fold gets eased onto the line. It's fortunate that I was using ripstop, so that I noticed before I'd done more than one needle-length of work that had to be taken out — and I backed the needle out of it, so I didn't even have to re-thread.
This morning, between loads of wash, I studied the fronts, observed that the facing allowance on the fronts is ten squares, then basted a crease that folded three squares to the wrong side — just enough more than three squares that the line I was folding along showed.
Then I folded that crease to the fold line of the facing, just enough short that the line showed all along. I wore my magnifiers for both operations.
When I fold around the crease, the line is at the edge of the fold, and the facing is just wide enough that a little of it will extend beyond the zipper tape, ensuring a firm place to stitch the edge of the tape. The raw edge comes surprisingly close to the fold; when I made one-third of ten equal three, I thought that a third of a square-width would be only two layers thick.
I'm really grooving on the convenience of the woven-in quadrille paper; I wish I could buy cotton and linen in this weave.
Hope I have time in the evening to baste the other facing; when the zipper is in, this thing will begin to look like a jacket.
We dragged the rocking chair back into the house; I'm too old to sit on the floor, and it irritates the cat when I put things on the floor and won't let him play with them. He grumped off and went to sleep on the back of the recliner, which hasn't been set back up after being tipped onto the futon so that Roomba could clean in the night. We left it partly because it won't be wanted until evening, and partly because the cat was on it.
⁂
Basted the other front between naptime and time to serve supper. Took a few pictures:
JACRAW15.JPG+ 1665814   2-16-15   4:24p long shot of front, window, chair, tools
JACRAW16.JPG+ 1600889   2-16-15   4:24p just front, first fold basted
JACRAW17.JPG+ 1643061   2-16-15   4:25p reshoot of JACRAW15
JACRAW18.JPG+ 1600251   2-16-15   4:52p second fold basted, toes in shot
JACRAW19.JPG+ 1651816   2-16-15   4:53p above without toes, corner of neck cut off
JACRAW20.JPG+ 1593437   2-16-15   4:54p above, other side to light, toes croppable, best shot
I took one shot twice because I pushed the wrong button for "look at the picture before this one" and thought it hadn't taken.
And that was the last of the good light, but it's still light enough to walk outside at 6:34/18:34. Great improvement over late December!
Thought over how low to put the zipper: well, there are these bare tapes at the top: match the raw edge of the tape to about the middle of the seam allowance of the neck. If I later decide that that is too much of a V neck, I can add a hook and eye.
Or put a snap on the collar, if I left tabs on the collar. I recall widening it to match the widening of the neck, but don't recall shortening it to match the no-overlap. Duh! The original collar had no overlap.
⁂
OFFGR600.JPG+   51426   2-14-15   5:54p
OFFGRAIN.JPG+  555635   2-14-15   5:52p
STILL600.JPG+   56139   2-14-15   5:59p
STILLOFF.JPG+  807767   2-14-15   5:58p
I seem to have cropped and scaled a couple of pictures since the last time I opened BLOG1XV/ED.DIR. <checks> those pictures have been linked to in the proper place; must edit ED.DIR to reflect this.
sew snaps on raw-silk shirt
Had a dental appointment; decided to go early and take some sewing. To my surprise, only one snap was off, and it was firmly gripped by its other half, so it was a quick fix — once I'd found needle, thimble, and so forth in my little bag of stuff. Dropped the first piece of silk I cut and never did find it — and it was size B silk! Should have showed up against the carpet just fine. I'd have finished, but my cell phone notified me of a text message when I was in the middle of fastening off — a notice that I had a dental appointment in three minutes. I meant to tell Dr. Hollar that he needed to adjust the timing on his reminder robot, but didn't find a suitable opportunity. Before I'd figured out where I left off, I was summoned to come inside. I finished and put the shirt on before leaving afterward. No problems detected, except that a particularly hard-to-reach spot needs extra brushing. (Brief pause to rub the back of a tooth with a flosser.)
Well, the bottom snap on the shirt is missing a half, but I decided to leave it, as I need to undo that snap when I sit down, and it will look better without the undone snap.
And maybe it's all to the good that the zipper for my new windbreaker isn't quite as long as I wanted it. That part of my linen jersey gets scrunkled when I ride; perhaps it is good that the windbreaker can fall to the sides instead.
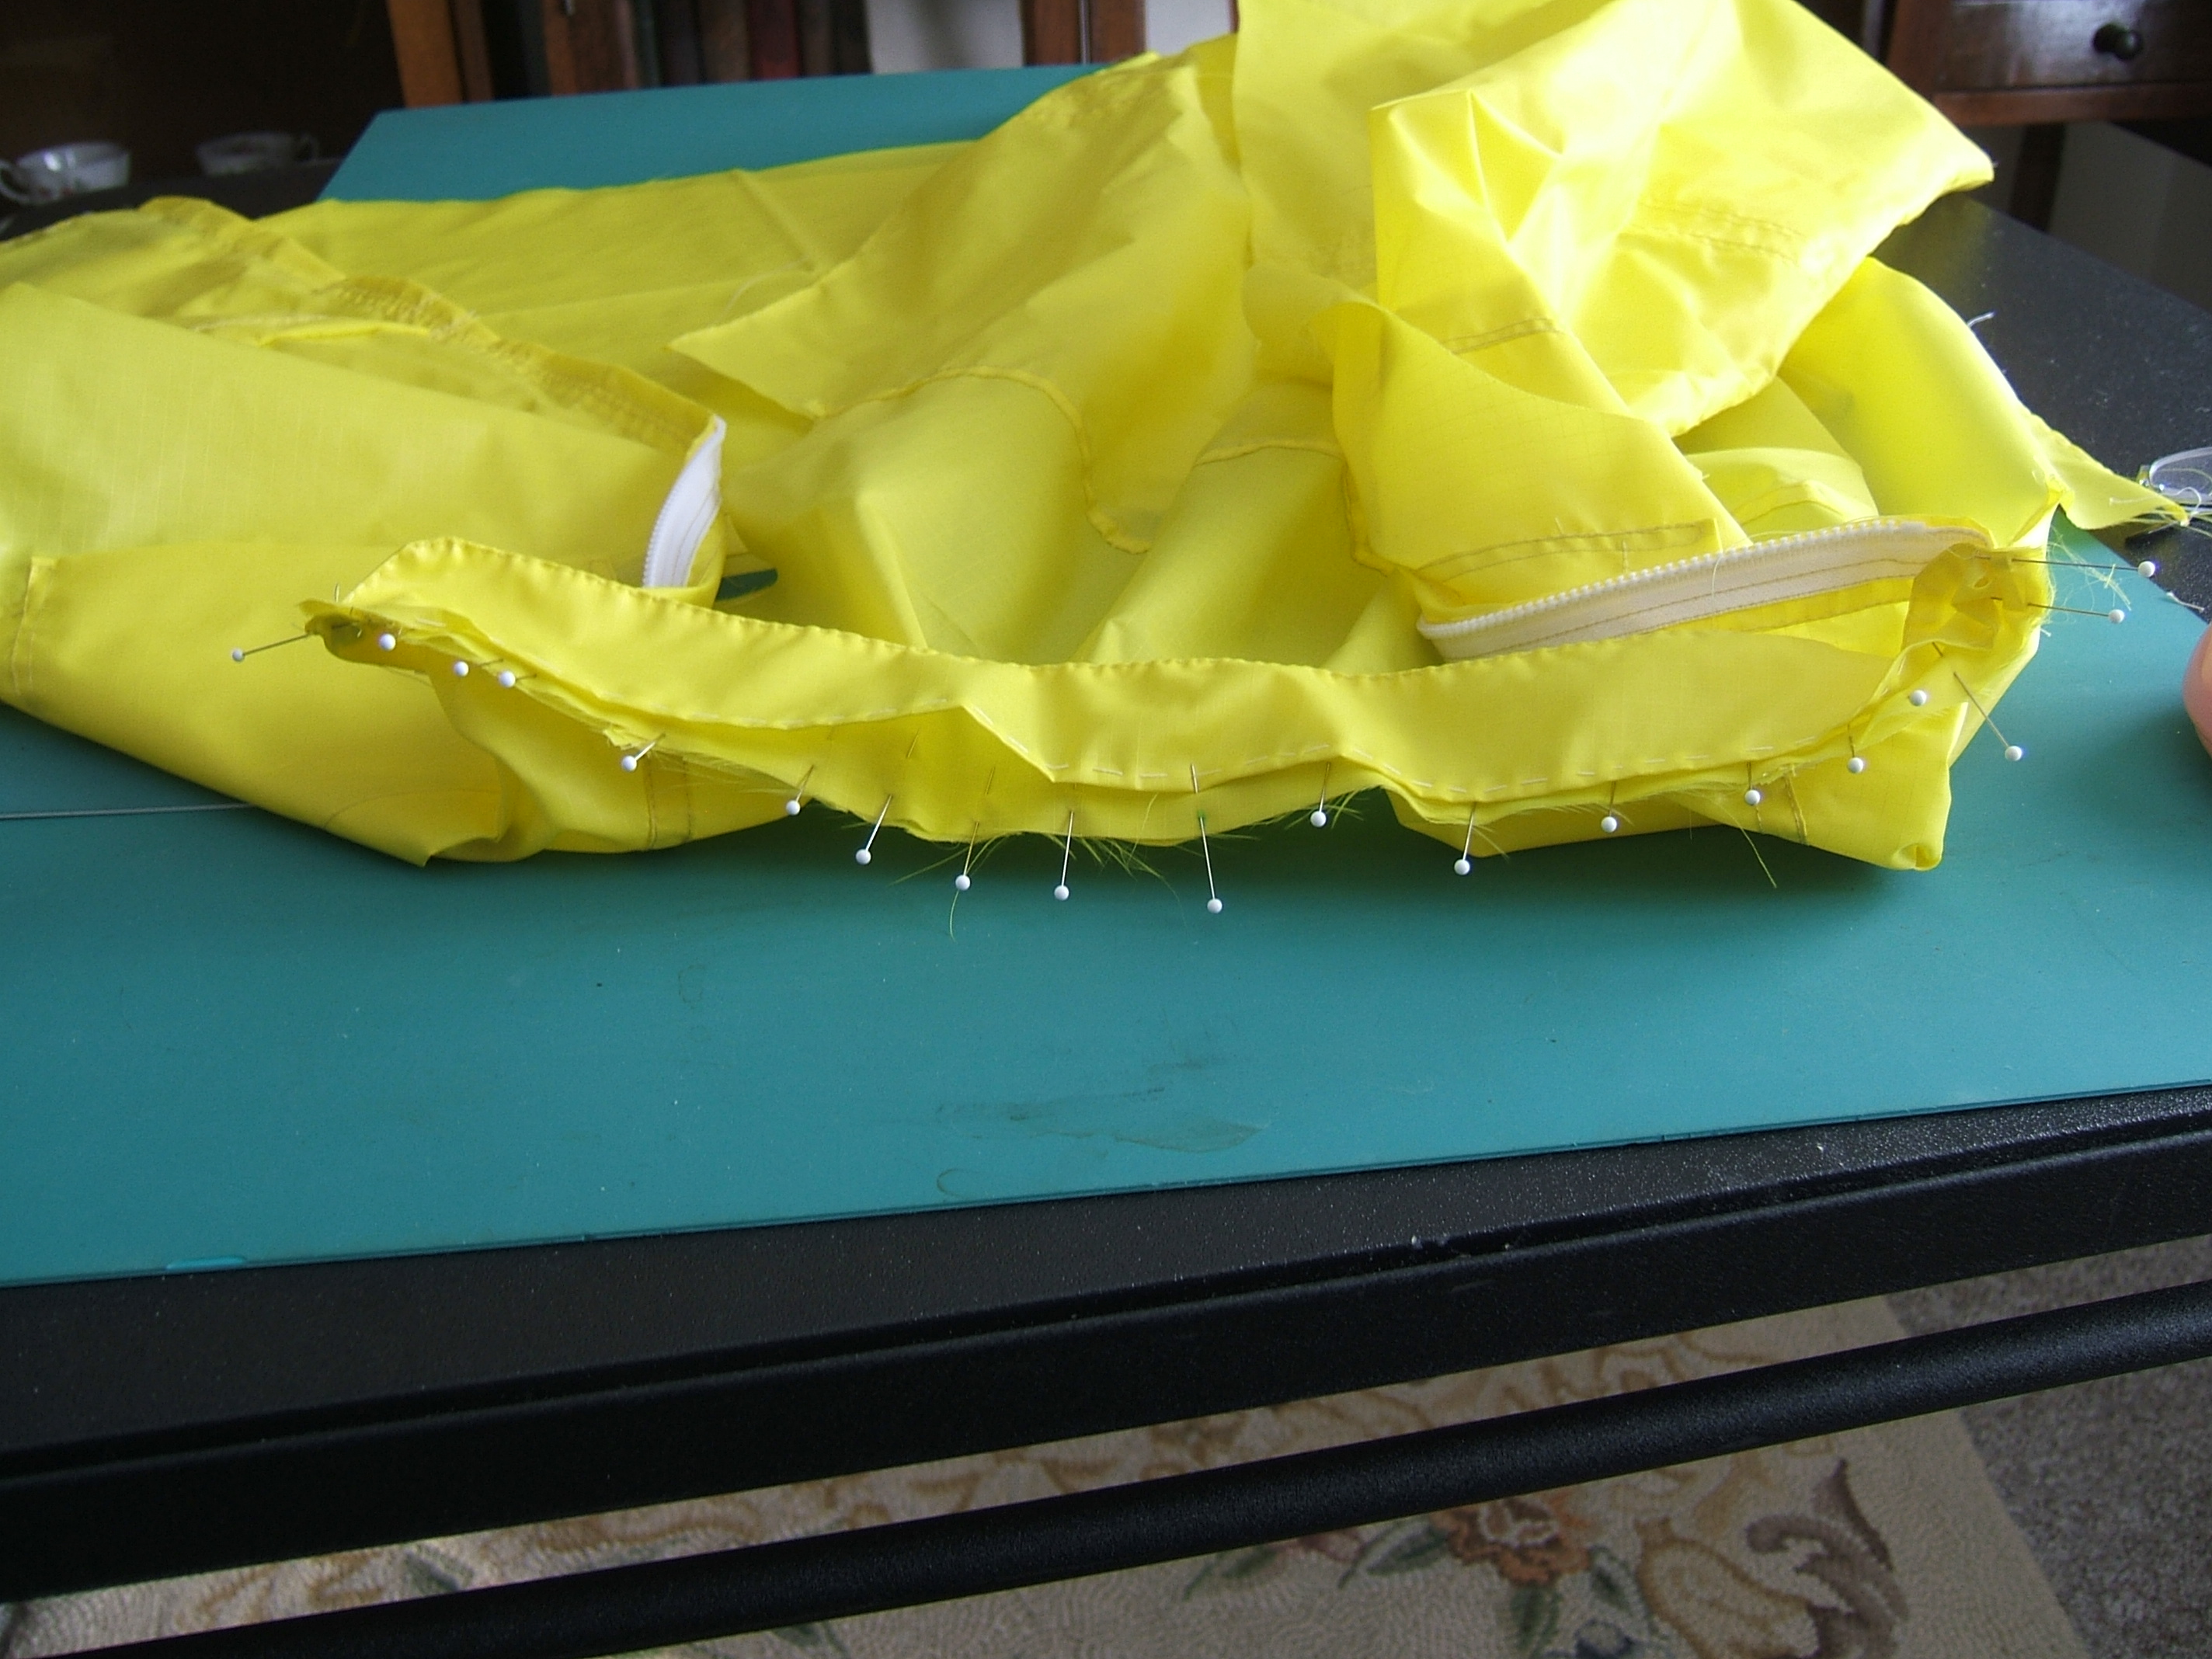
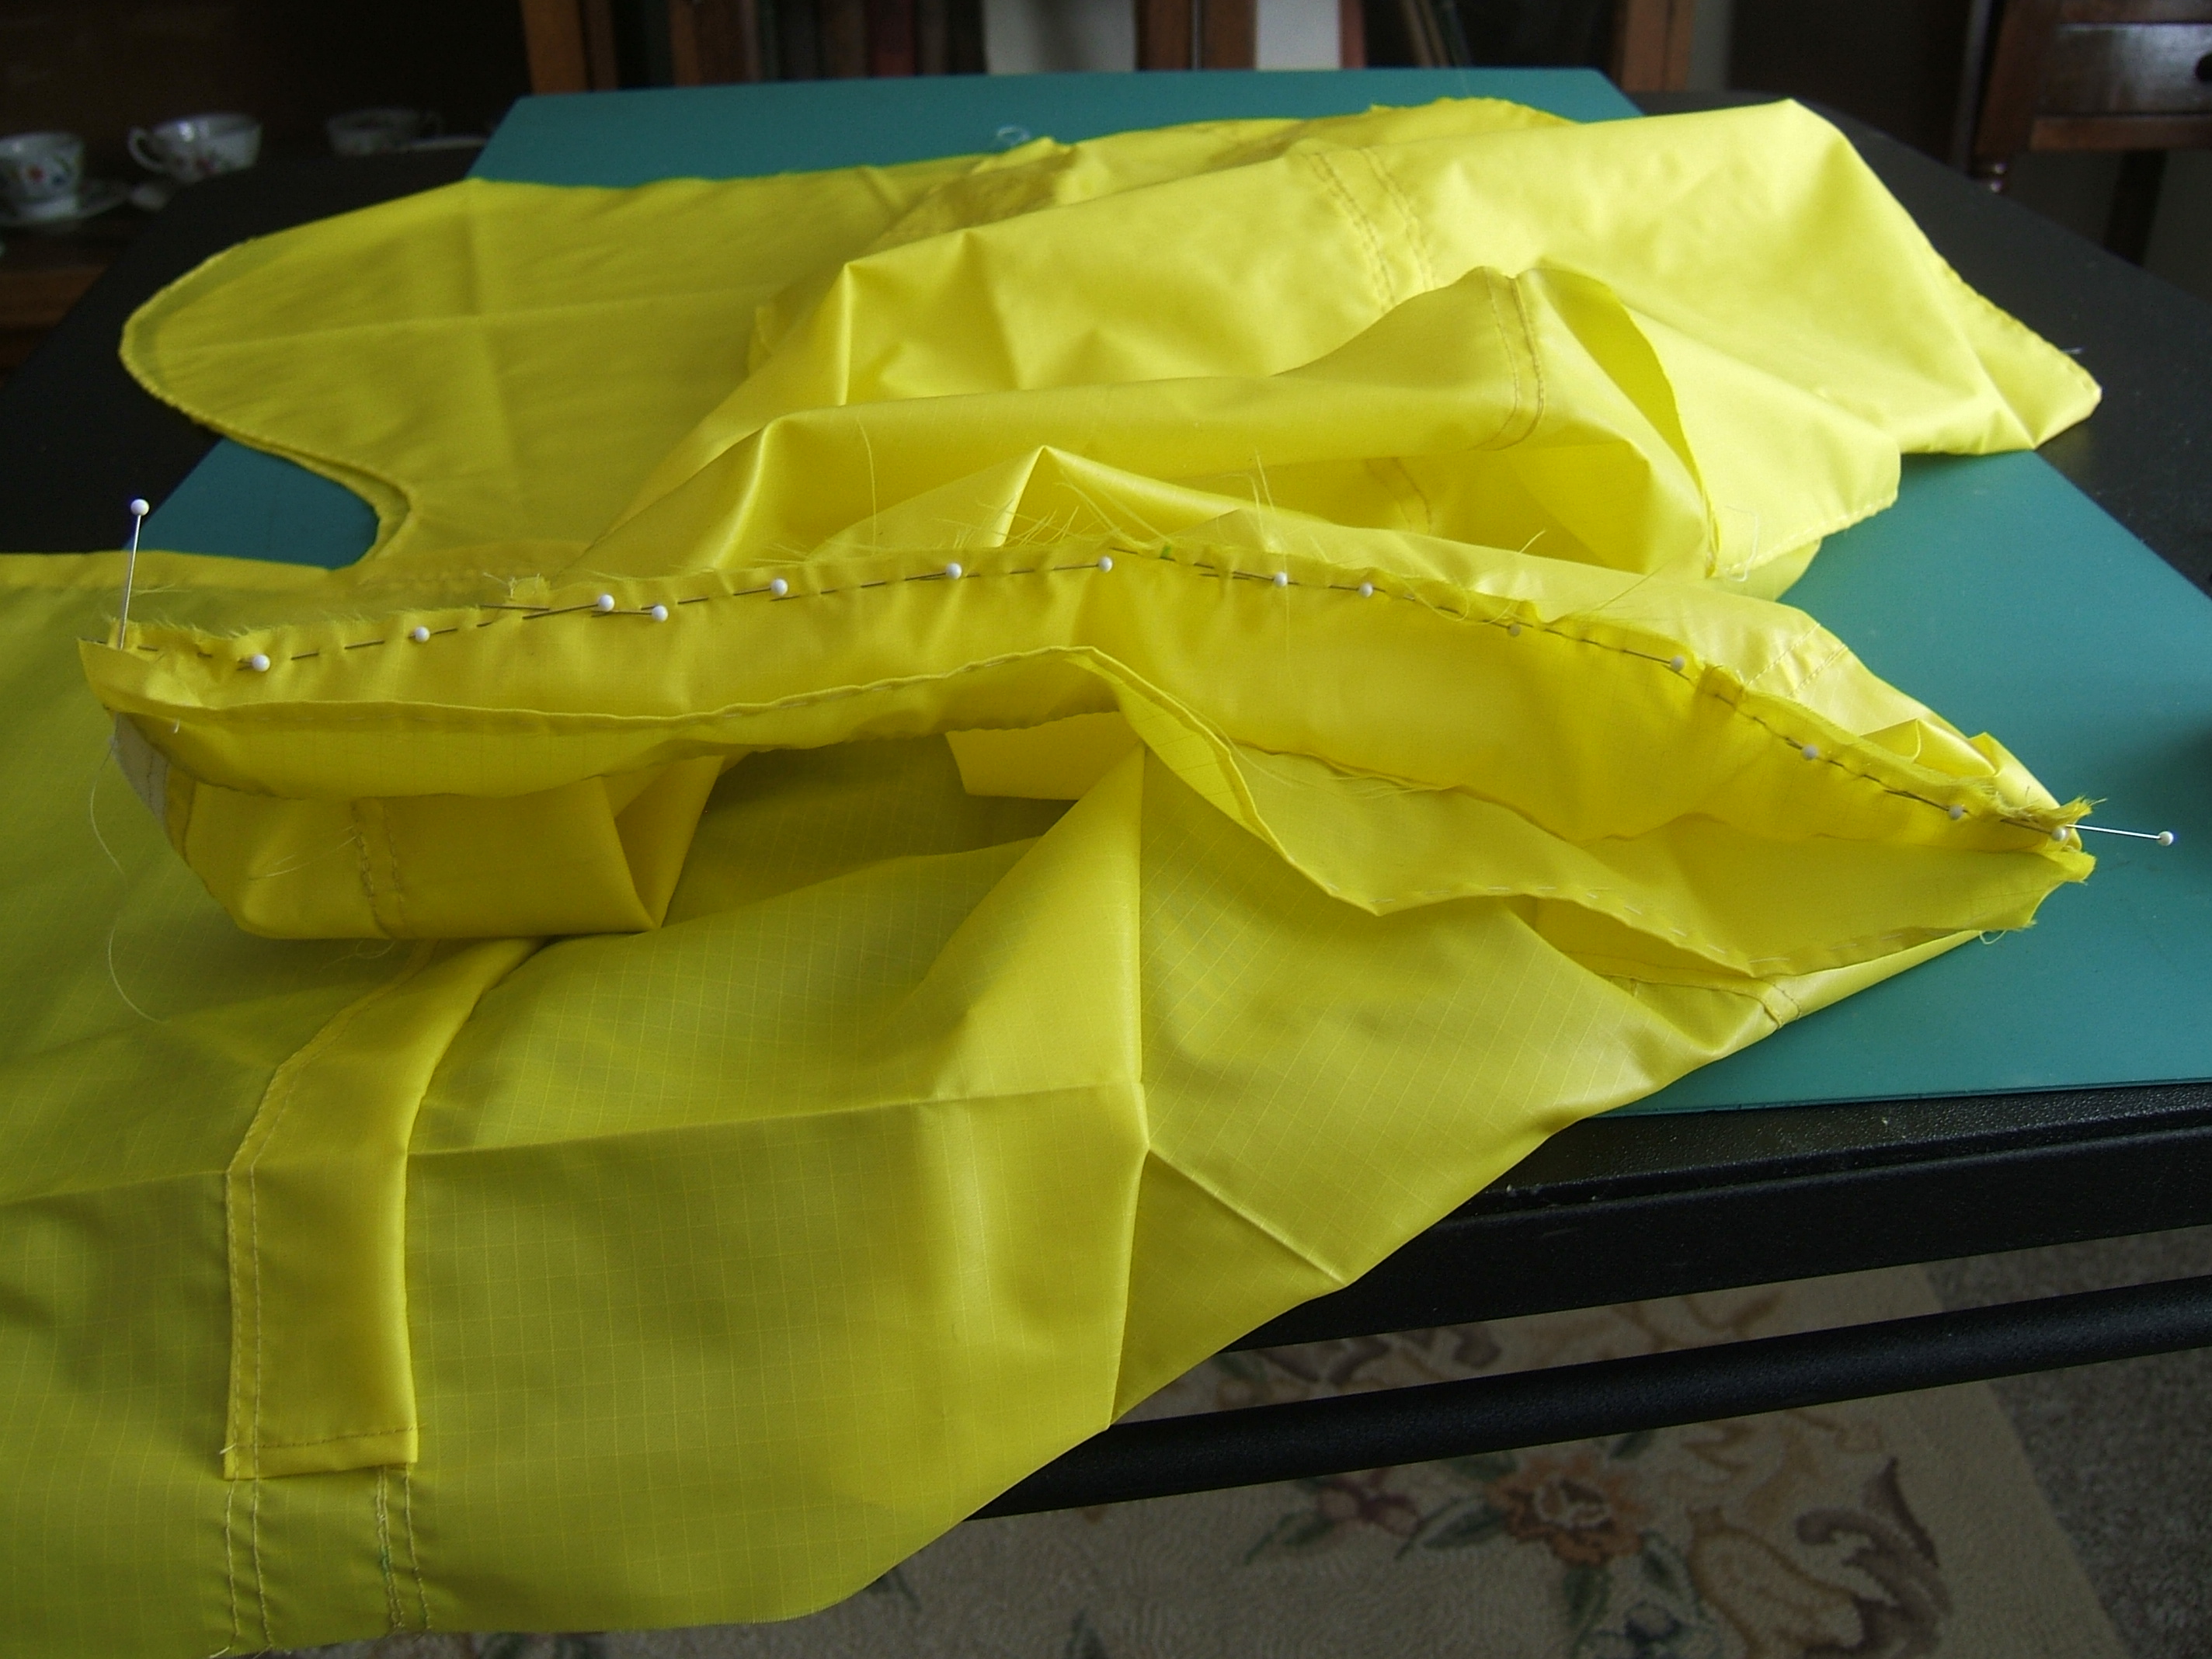
JACRAW21.JPG+ 1721262 2-18-15 10:20a fronts on sewing machine, one sewn, one pinned, from North, window in background
JACRAW22.JPG+ 1631922 2-18-15 10:21a above from south, wall and bed in background
JACRAW23.JPG+ 1547494 2-18-15 10:21a closeup of pinned casing, toes in shot
JACRAW24.JPG+ 1582078 2-18-15 10:30a stitching off one casing onto the other
JACRAW25.JPG+ 1608617 2-18-15 10:30a closeup of stitching off one casing onto the other
shows that one casing is inside out
JACRAW26.JPG+ 1517574 2-18-15 10:39a full-width close up of pinned casing
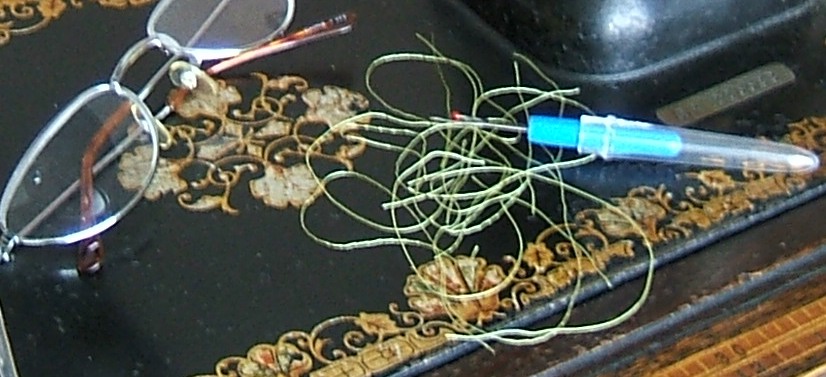
JACRAW27.JPG+ 1634444 2-18-15 10:43a pile of thread on sewing machine
JACRAW28.JPG+ 1623064 2-18-15 10:43a closeup of above, with camera shake
JACRAW29.JPG+ 1550764 2-18-15 11:48a zipper pinned, bottom cut off
JACRAW30.JPG+ 1558207 2-18-15 11:48a zipper pinned, top cut off
JACRAW31.JPG+ 1543654 2-18-15 11:48a zipper pinned, more bottom cut off
JACRAW32.JPG+ 1558276 2-18-15 11:49a zipper pinned, more top cut off
JACRAW33.JPG+ 1568947 2-18-15 11:49a zipper pinned, from side, all in picture
But the spool still seems to be holding out, I still have a half-full bobbin that could be as much as fifty yards of nylon that isn't too much greener than what I'm using now, and if all else fails, there's a spool of white polyester around here somewhere — though I truly hope that I don't have to resort to staple thread.
I put off installing the zipper by attaching the belt casings to the front, thinking after a bit that I could say I'd done that so that the zipper would cover the ends of the stitching. The zipper covers the stitching only on the inside, of course, so that won't fly.
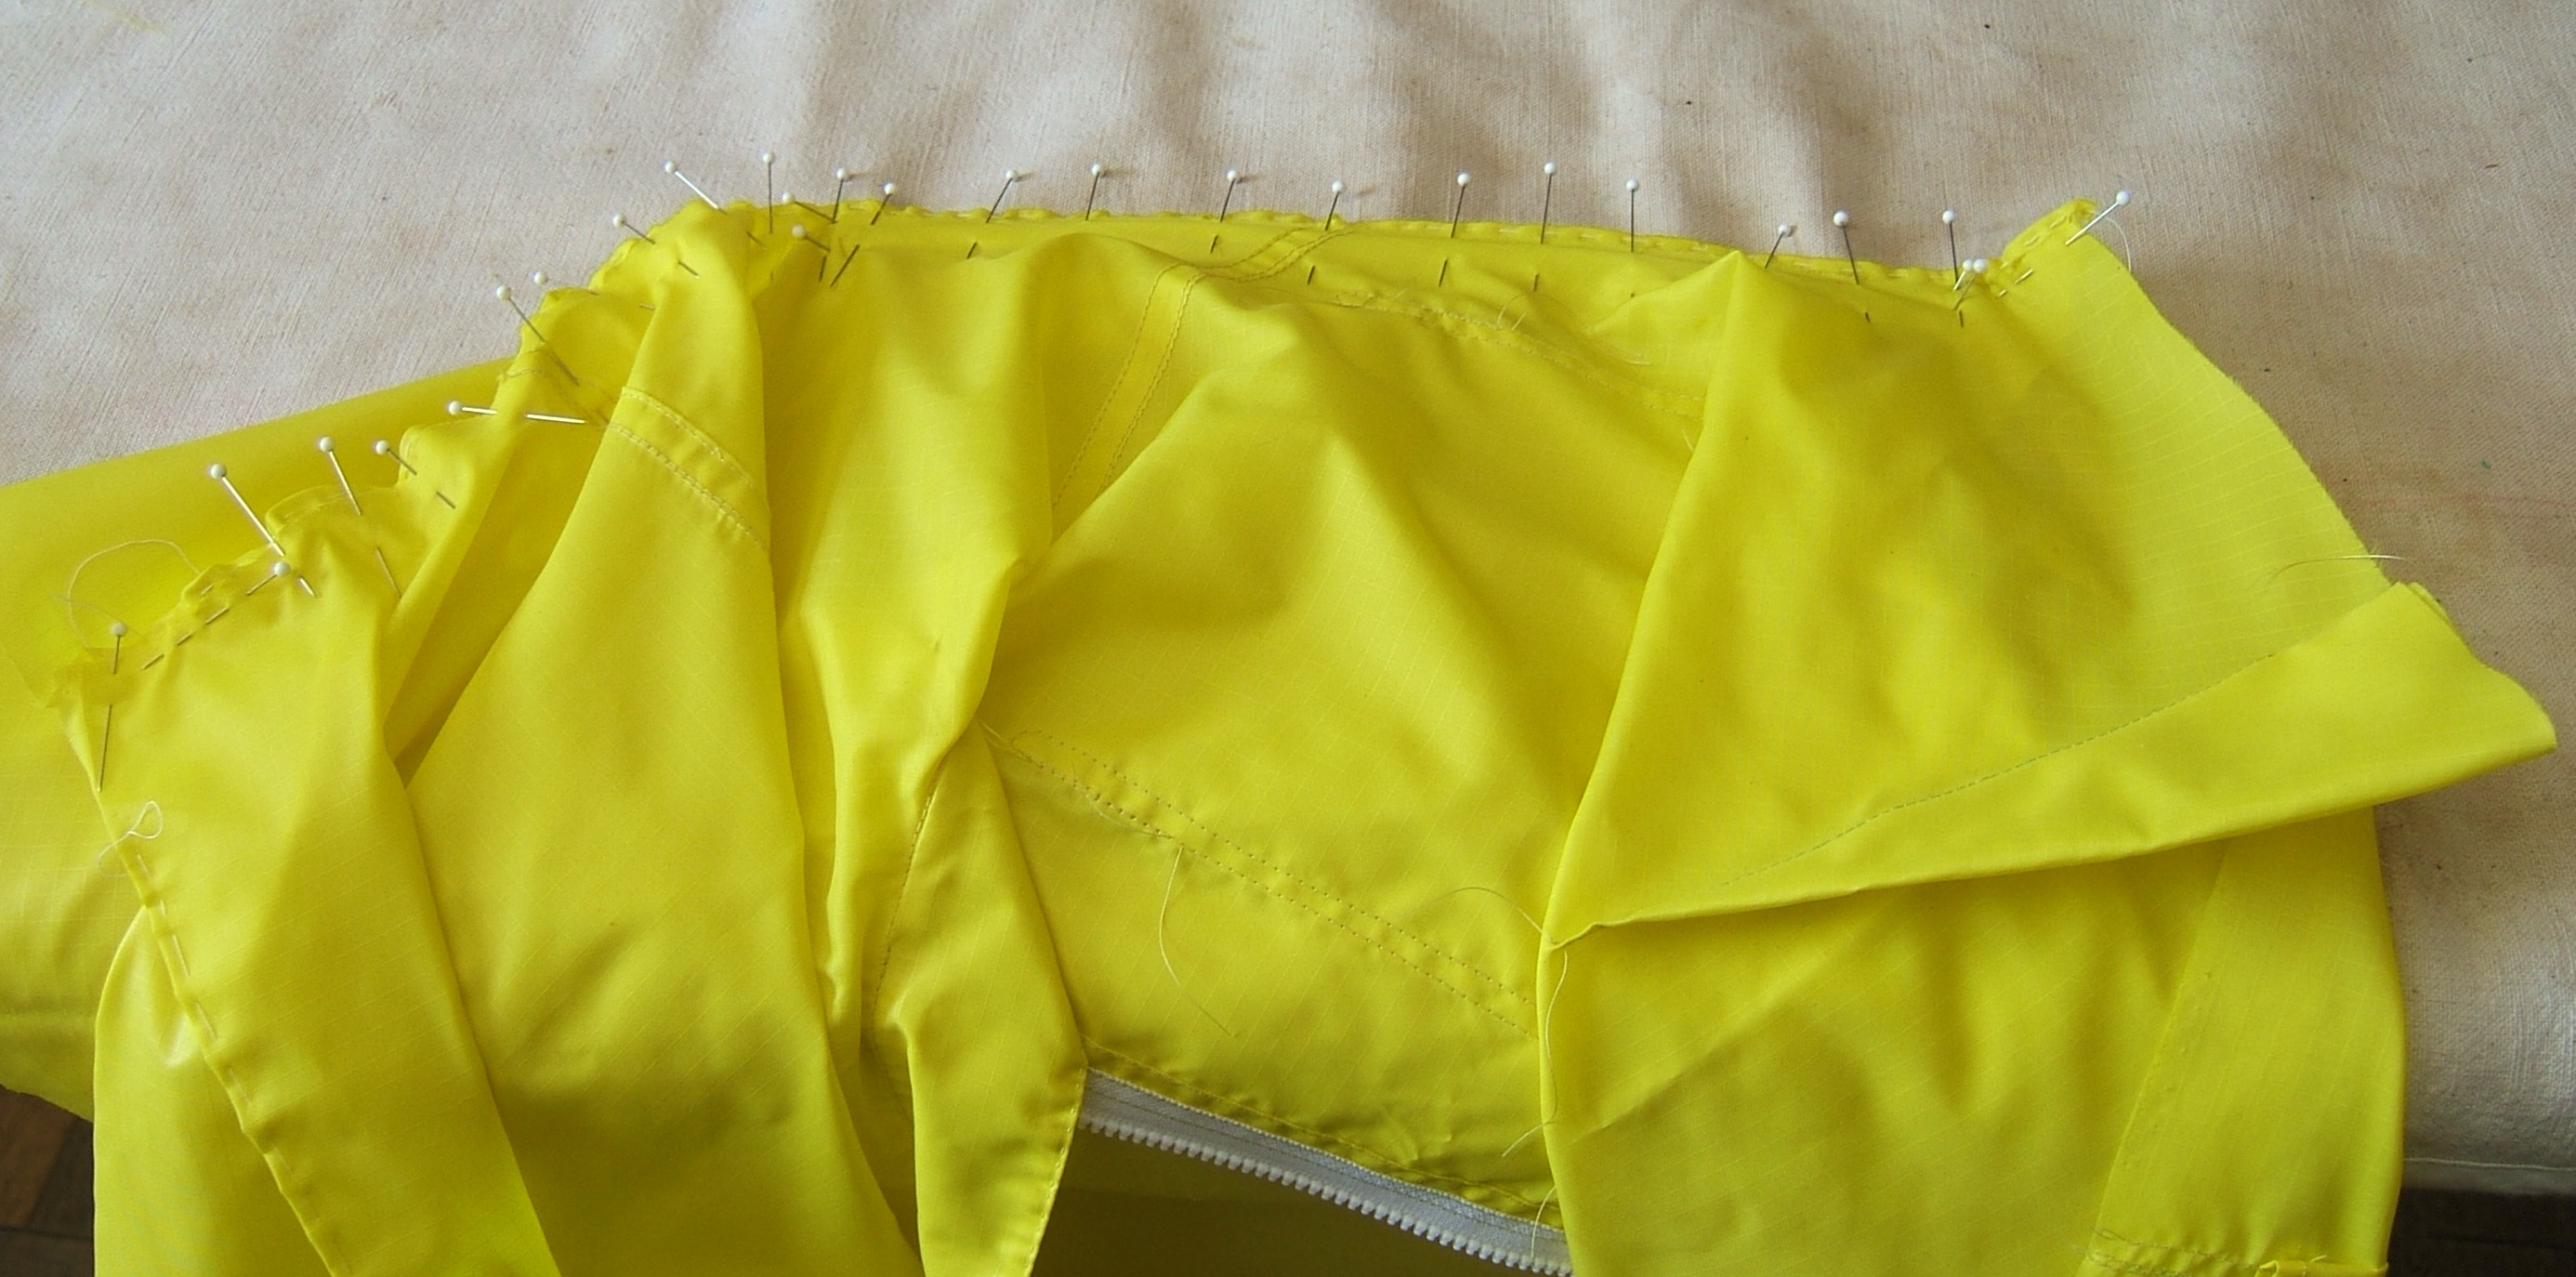
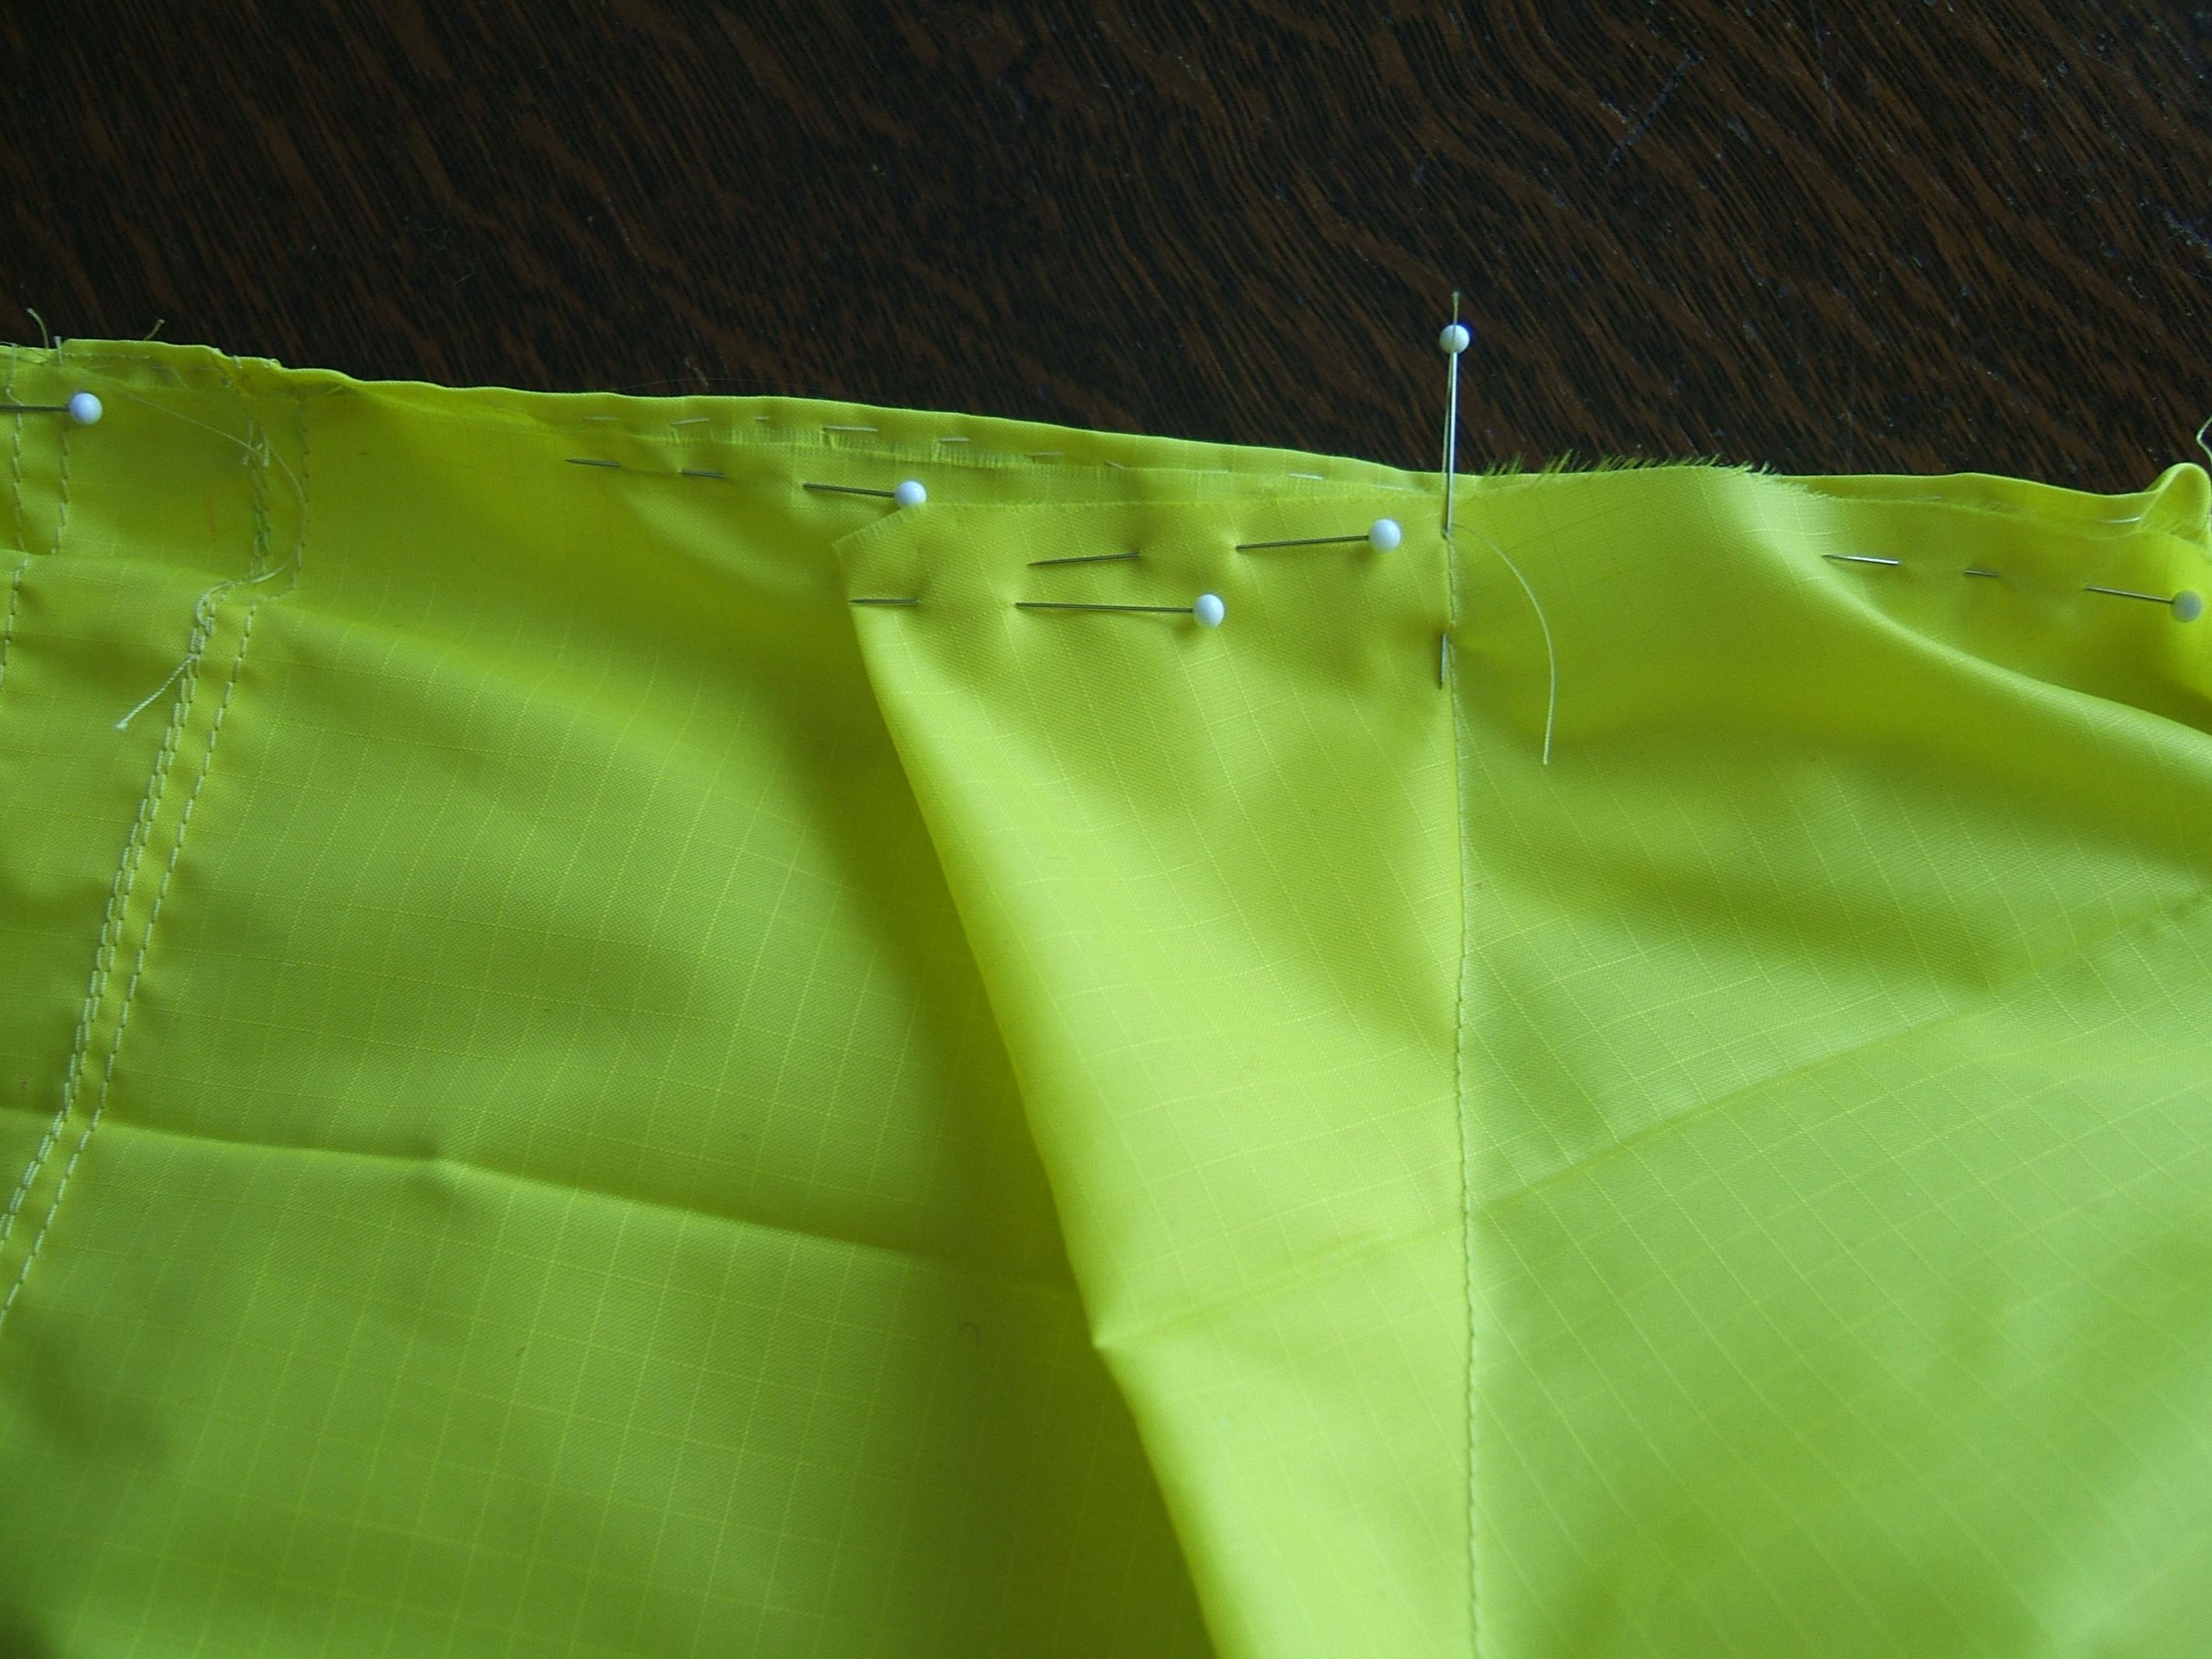
Did a beautiful job of pinning the casings exactly along a thread — much facilitated by the woven-in grid on the ripstop; I wish I could buy linen woven that way. I think some sheer linens are, but I'm pretty sure that no shirt- or sheet-weight linens have reinforcing threads.
Then I realized that I'd pinned the casings on upside down. Congratulated myself on catching it before sewing, then attached the casings and got nearly done with the first topstitching before I noticed that I'd sewn them on inside out. Picked out that casing, re-pinned it properly, came back for the other and was halfway through picking out the topstitching when I realized that this one was sewn correctly. Sheer fabric makes it really hard to see which way an edge is folded! I pulled out the rest of the stitching and re-did the whole row. Should have started on the pinned casing first, for convenient alternation when stitching off the end of one seam onto the beginning of another.
But I got the three rows of stitching at the top and the two rows at the bottom done, pinned in the zipper, zipped it up to make sure it was right, and started sewing a quarter inch from the edge of the tape.
Vat der dumboozle? The teeth that are supposed to be entirely behind the fold are hanging out way over. Figured out that a quarter inch from the edge of the tape was less than the width of the presser-foot toe from the teeth, so I was shoving them over. Stopped sewing and pulled the thread out of the three or four inches of stitching that I'd done and re-wound it on the bobbin and spool. That's why I'm so fussy about securing the ends!
All in all, the zipper went in easily. Or, rather, went on; I merely appliquéd it to the wrong side.
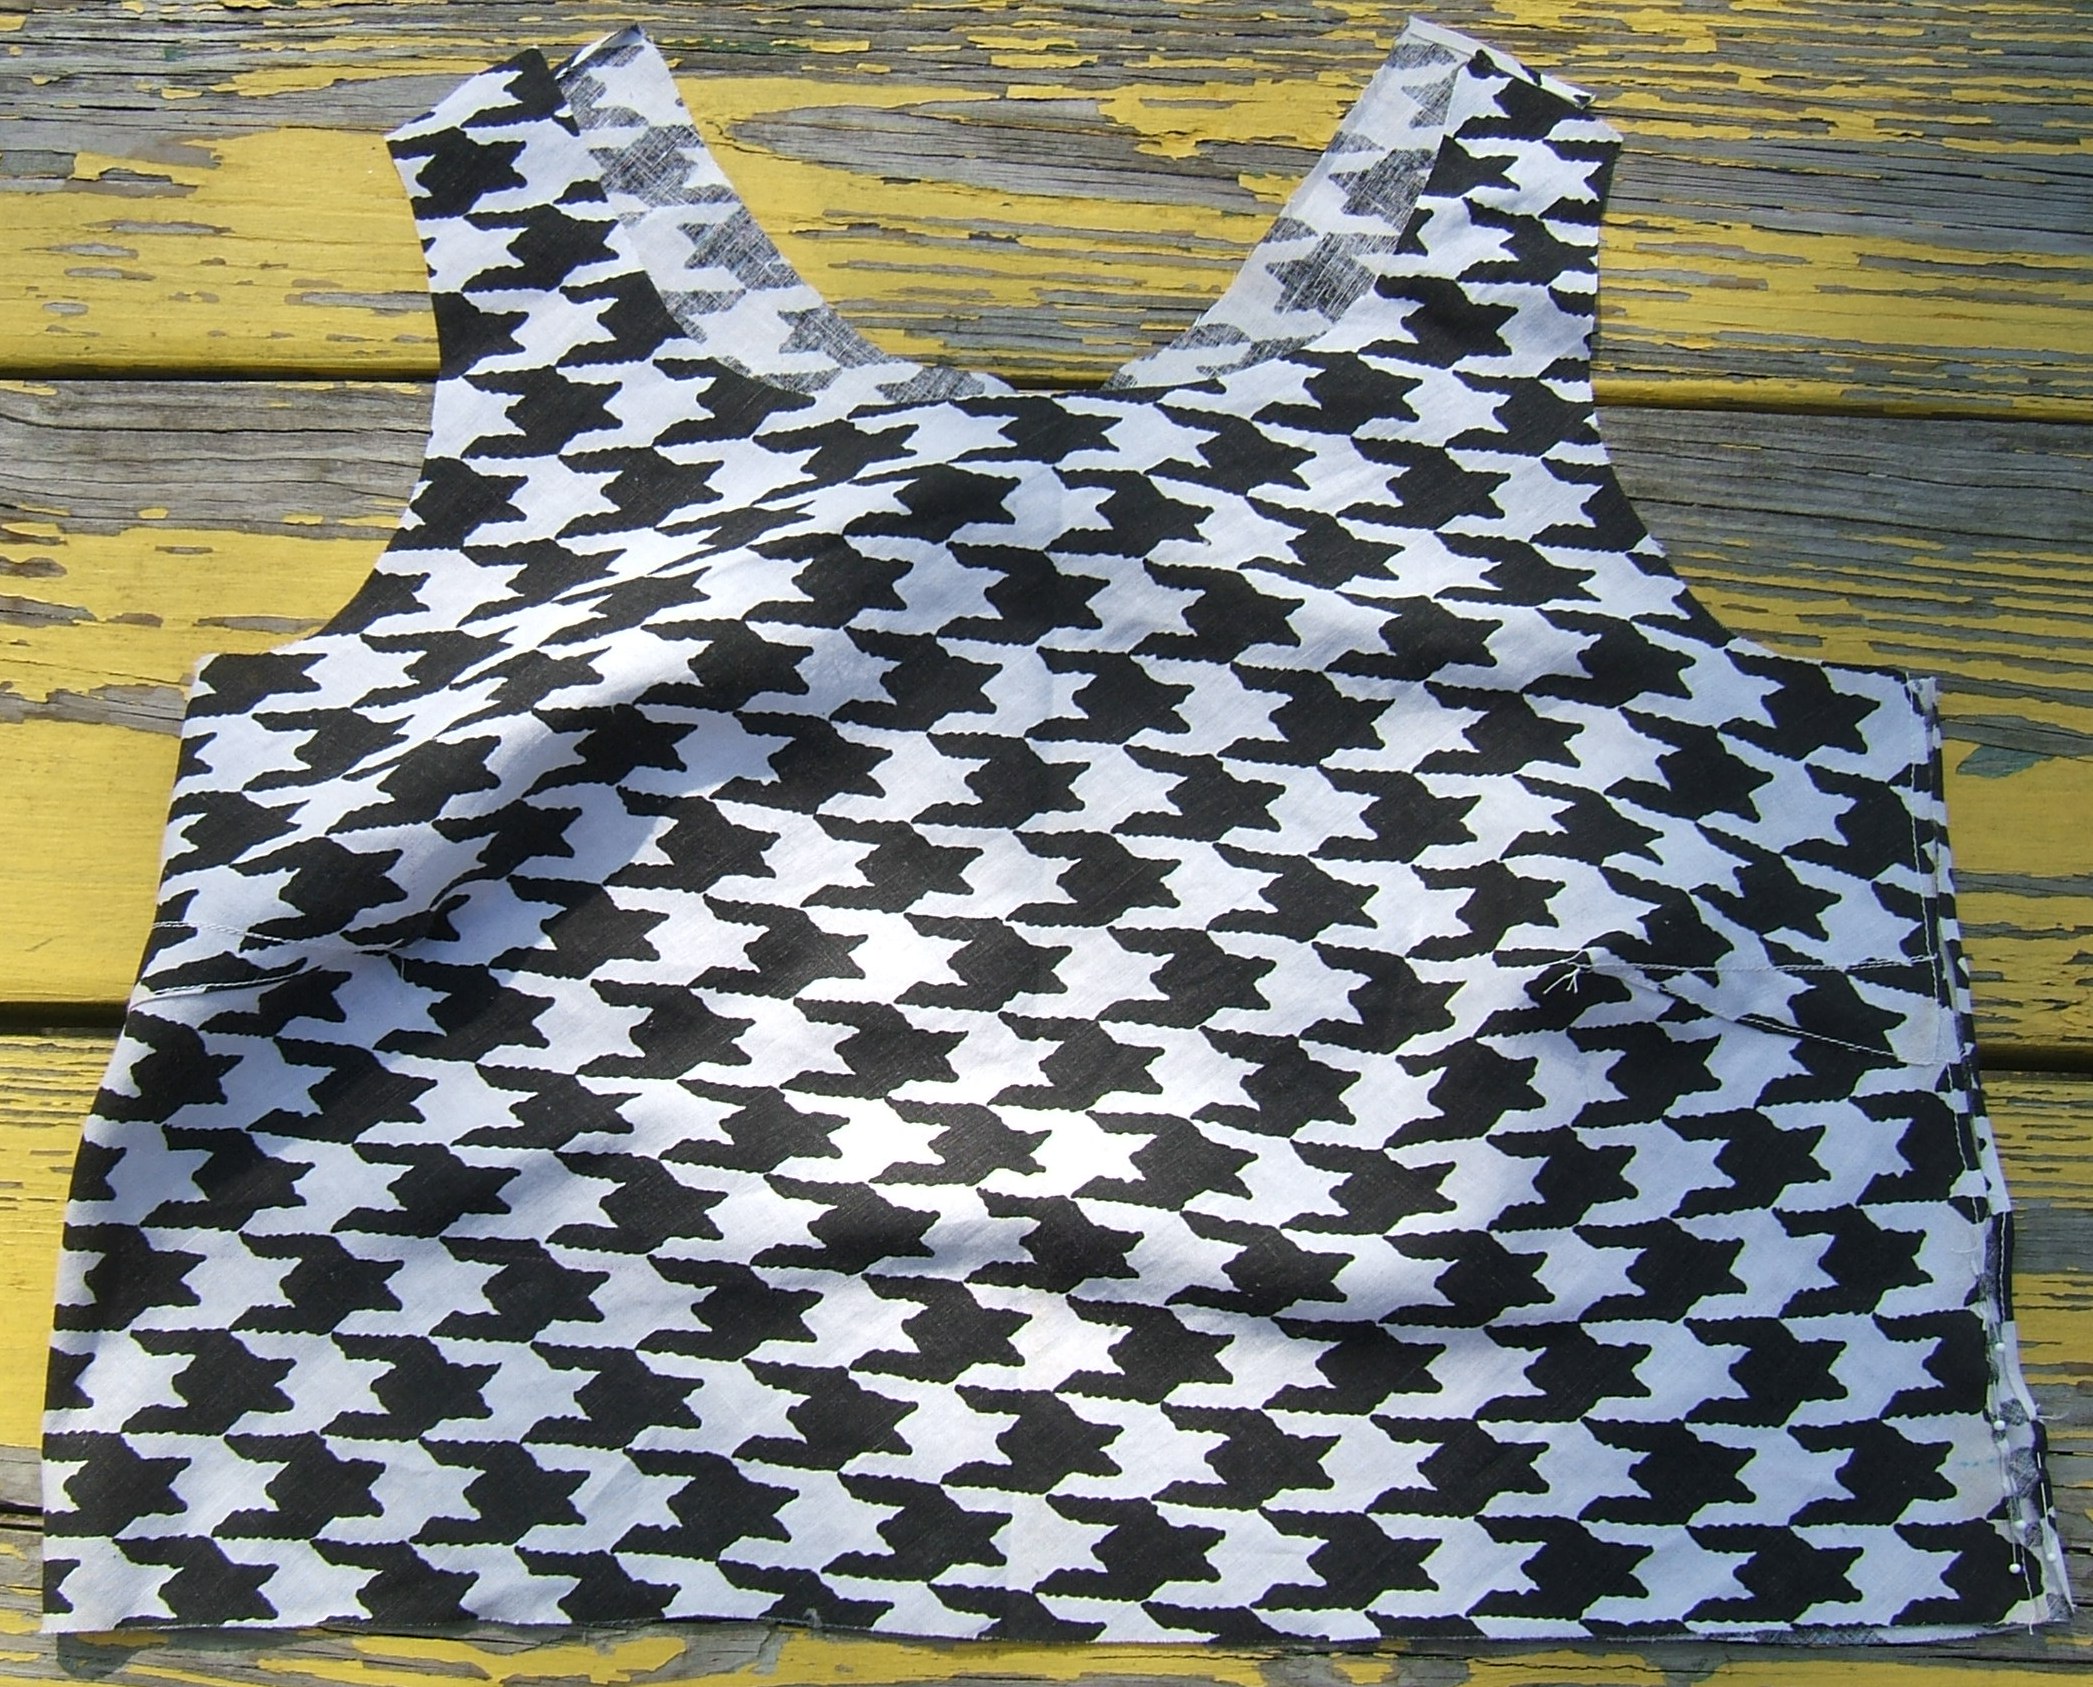
So now I have a complete back (save for installing elastic in the pockets), a complete front, two sleeves, and a collar. It is starting to look like a jacket. Getting on to time to find a suitable ribbon or tape for the drawstring.
I sure hope it fits.
I need to move bra-making up on my list of things to do. Another curry bra died this morning.
Told Dave that I wished Nymo thread hadn't died forty years ago; he found a whole bunch on the Web. I have yet to determine that it's the same stuff, but his first hit was an industrial-size cone, which sounds promising. The other hits were for stringing beads, though.
Ta Dah!! I remembered that I bought two spools of yellow polyester to alter uniform shirts with, and it turned out that the boys didn't want their shirts altered, so I should still have them. I do, and while looking for them, I found an un-opened spool of yellow nylon thread. And also a spool of lavender nylon thread, but I'm definitely not going to use that. Not on the windbreaker, anyway.
⁂
torn hem on striped shirt
Druther have sewn the snap on my flannel gown, but it wouldn't fit into my bag. I arrived early for a meeting, and mended the hem while my supper was baking. (I normally finish eating supper just at the time the meetings start — and we meet in a kitchen, so I baked a little frozen pie.)
Satisfactory day all around, despite high winds and crunchy cold. Glad I didn't have to drive anywhere. Wore silk long johns, polyester long johns, sweat pants, and ripstop wind pants to walk to the meeting — all store-bought except the wind pants. (Well, the silk long johns were mail order.)
Wish I could buy washable wool jersey. I'd settle for Merino!
Cut twenty inches off the elastic, put the rest back into the shoe box. The piece I trimmed off to straighten the fabric overlapped when wrapped around the elastic, but not by very much, so I cut a strip one square wider off another scrap, and cut two squares pieces that were nine squares long and eleven squares wide. Egad, I knew the squares weren't square, but I didn't realize they were that far off.
The extensions are two and one-eighth inches long, and overlap the elastic by three-eighths of an inch. 24.25 - 3/4 = 23.5, laid out on the yardstick it measures twenty-three and five eighths; for elastic, that is spang on.
Now to find the Necchi bobbin of nylon thread, take the spool off the White, and thread up the zig-zag machine.
⁂
They included two "yellow-band" ball-point Singer machine needles "with special features for sewing knits", still sealed in a $1.20 bubble pack that originally held three.
So the sewing room is a bit neater, the Necchi is only half threaded, and it's nap time.


I was puzzled for a while over how to keep the stitching of the permanent basting at the ends entirely inside the quarter inch that would be folded in. Duh! I need to use straight stitch, not zig zag. Been using the White so much I almost forgot how to set the Necchi to stitch straight.
I stitched beyond the edge of the casing to help the basting hold. Of course, that leaves the point of greatest strain completely raw, but this stitching need hold only until the pocket is basted to the back.
⁂
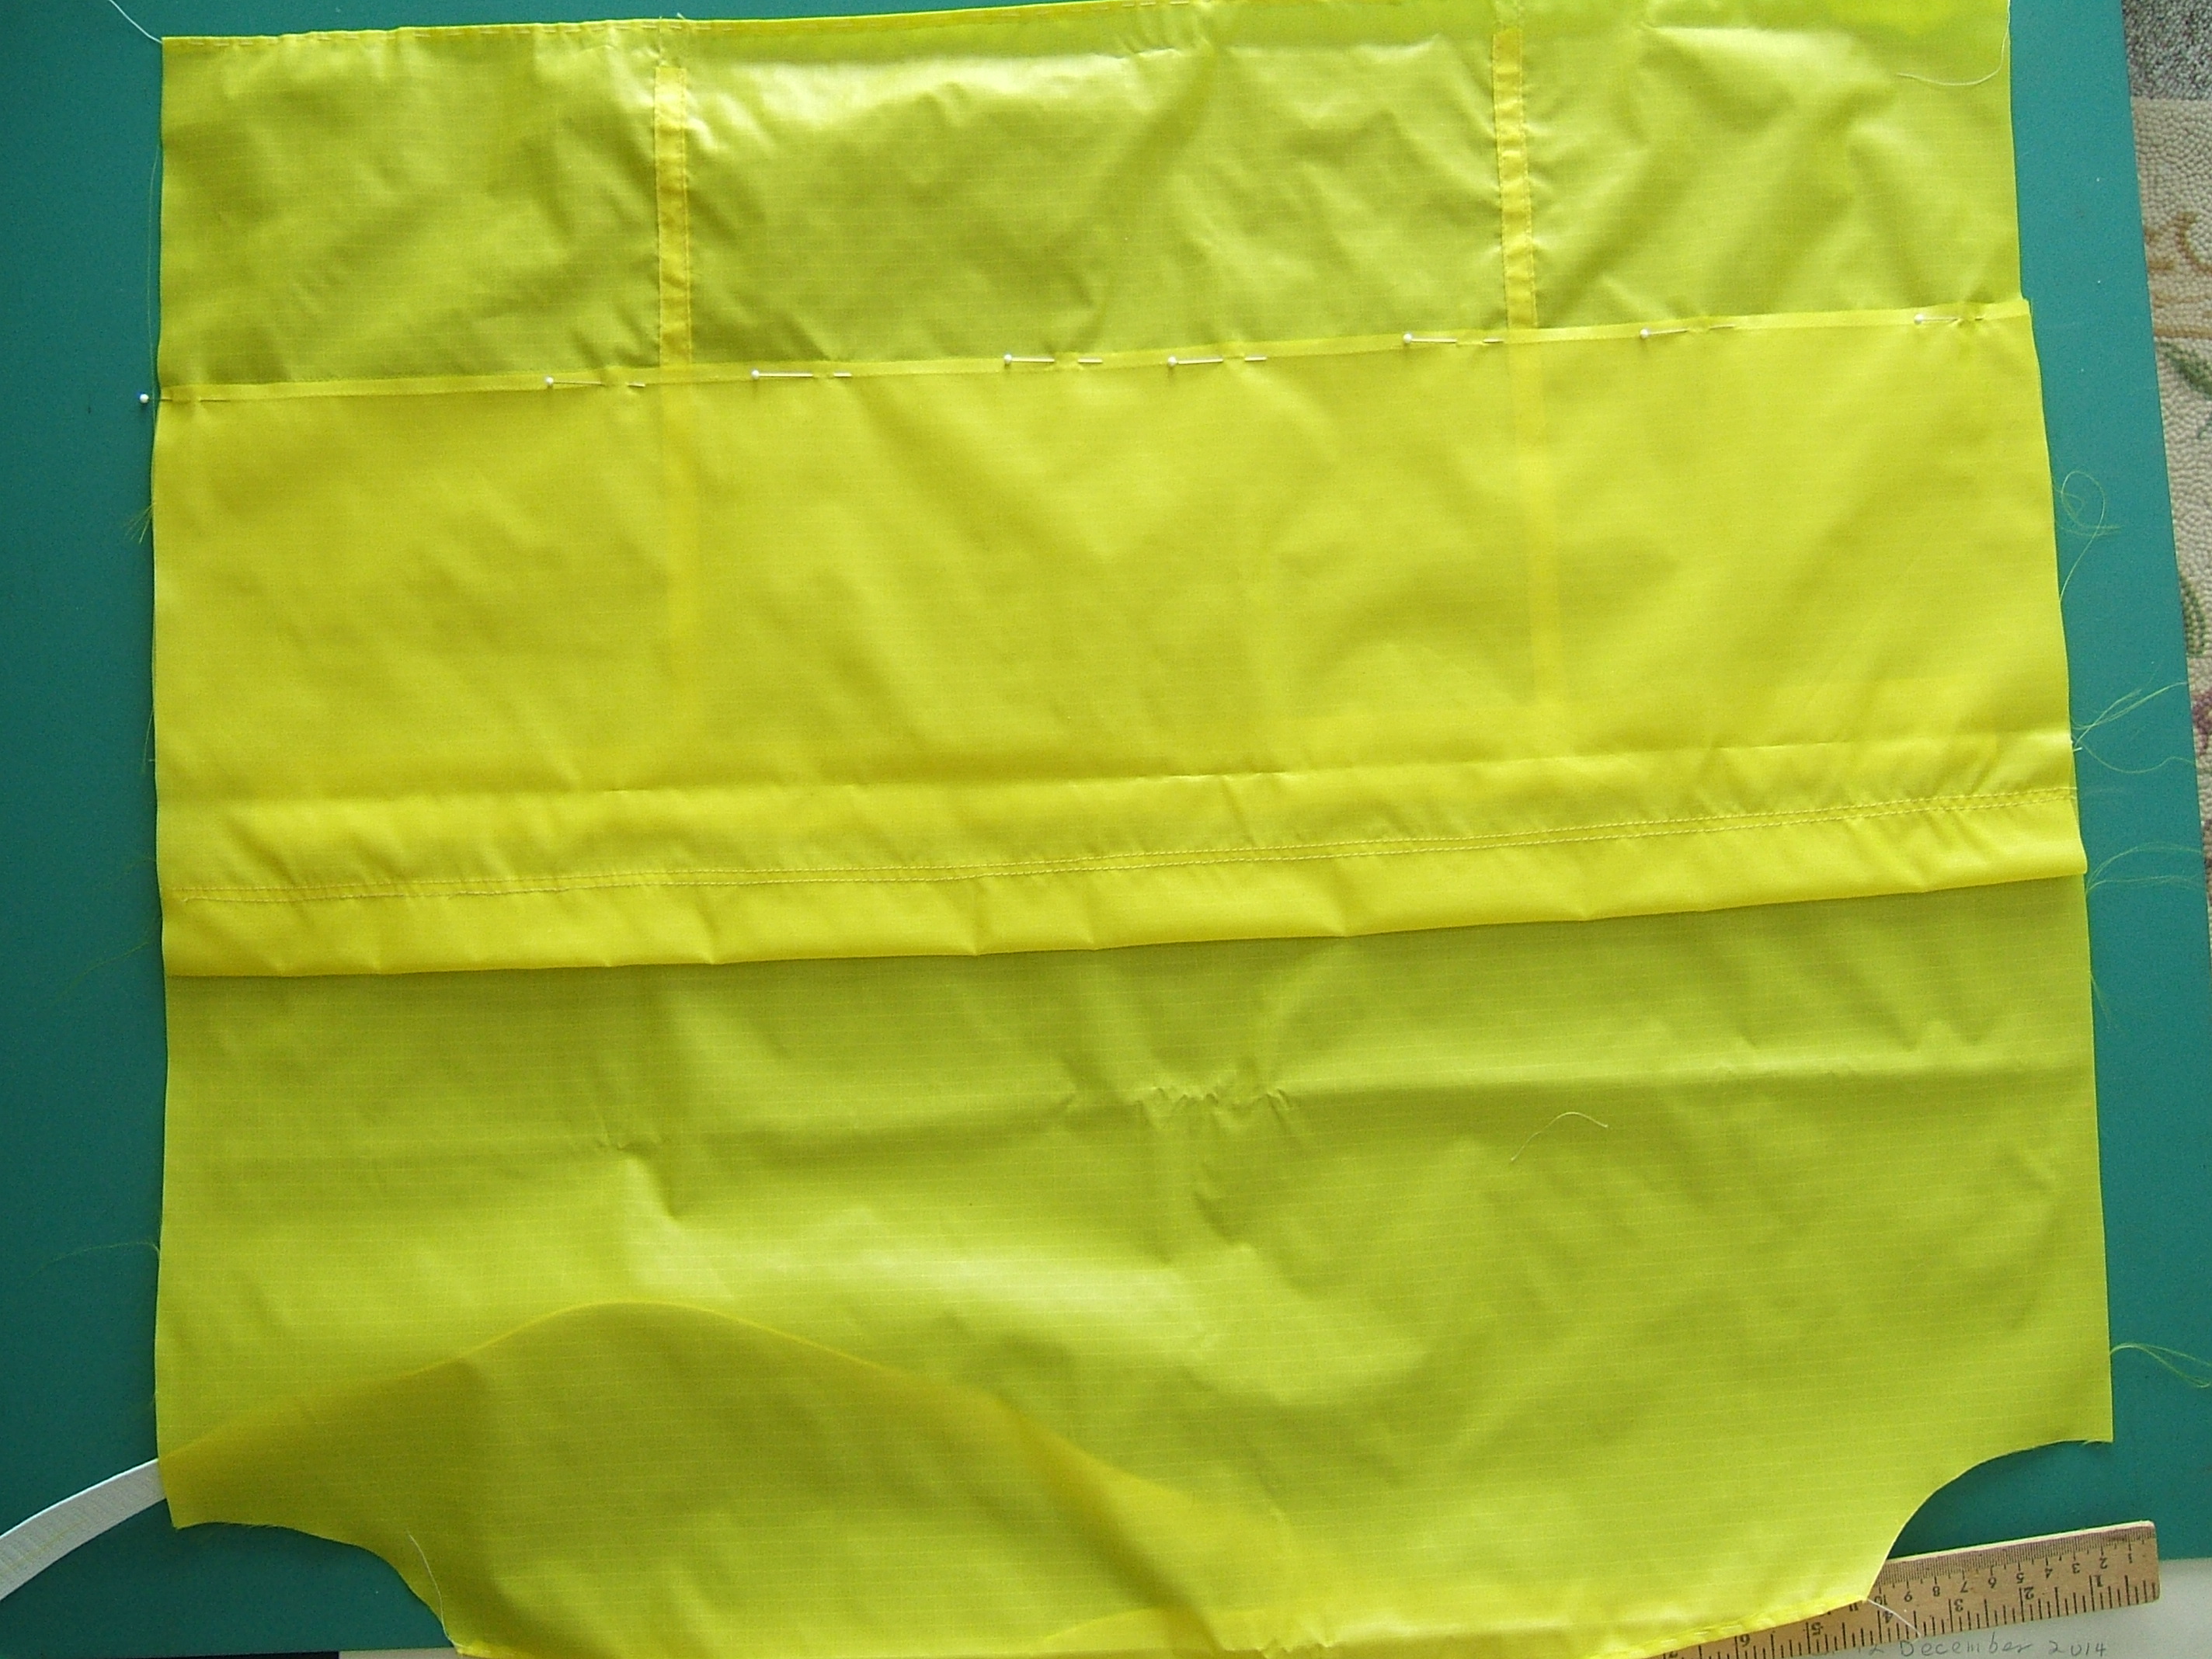
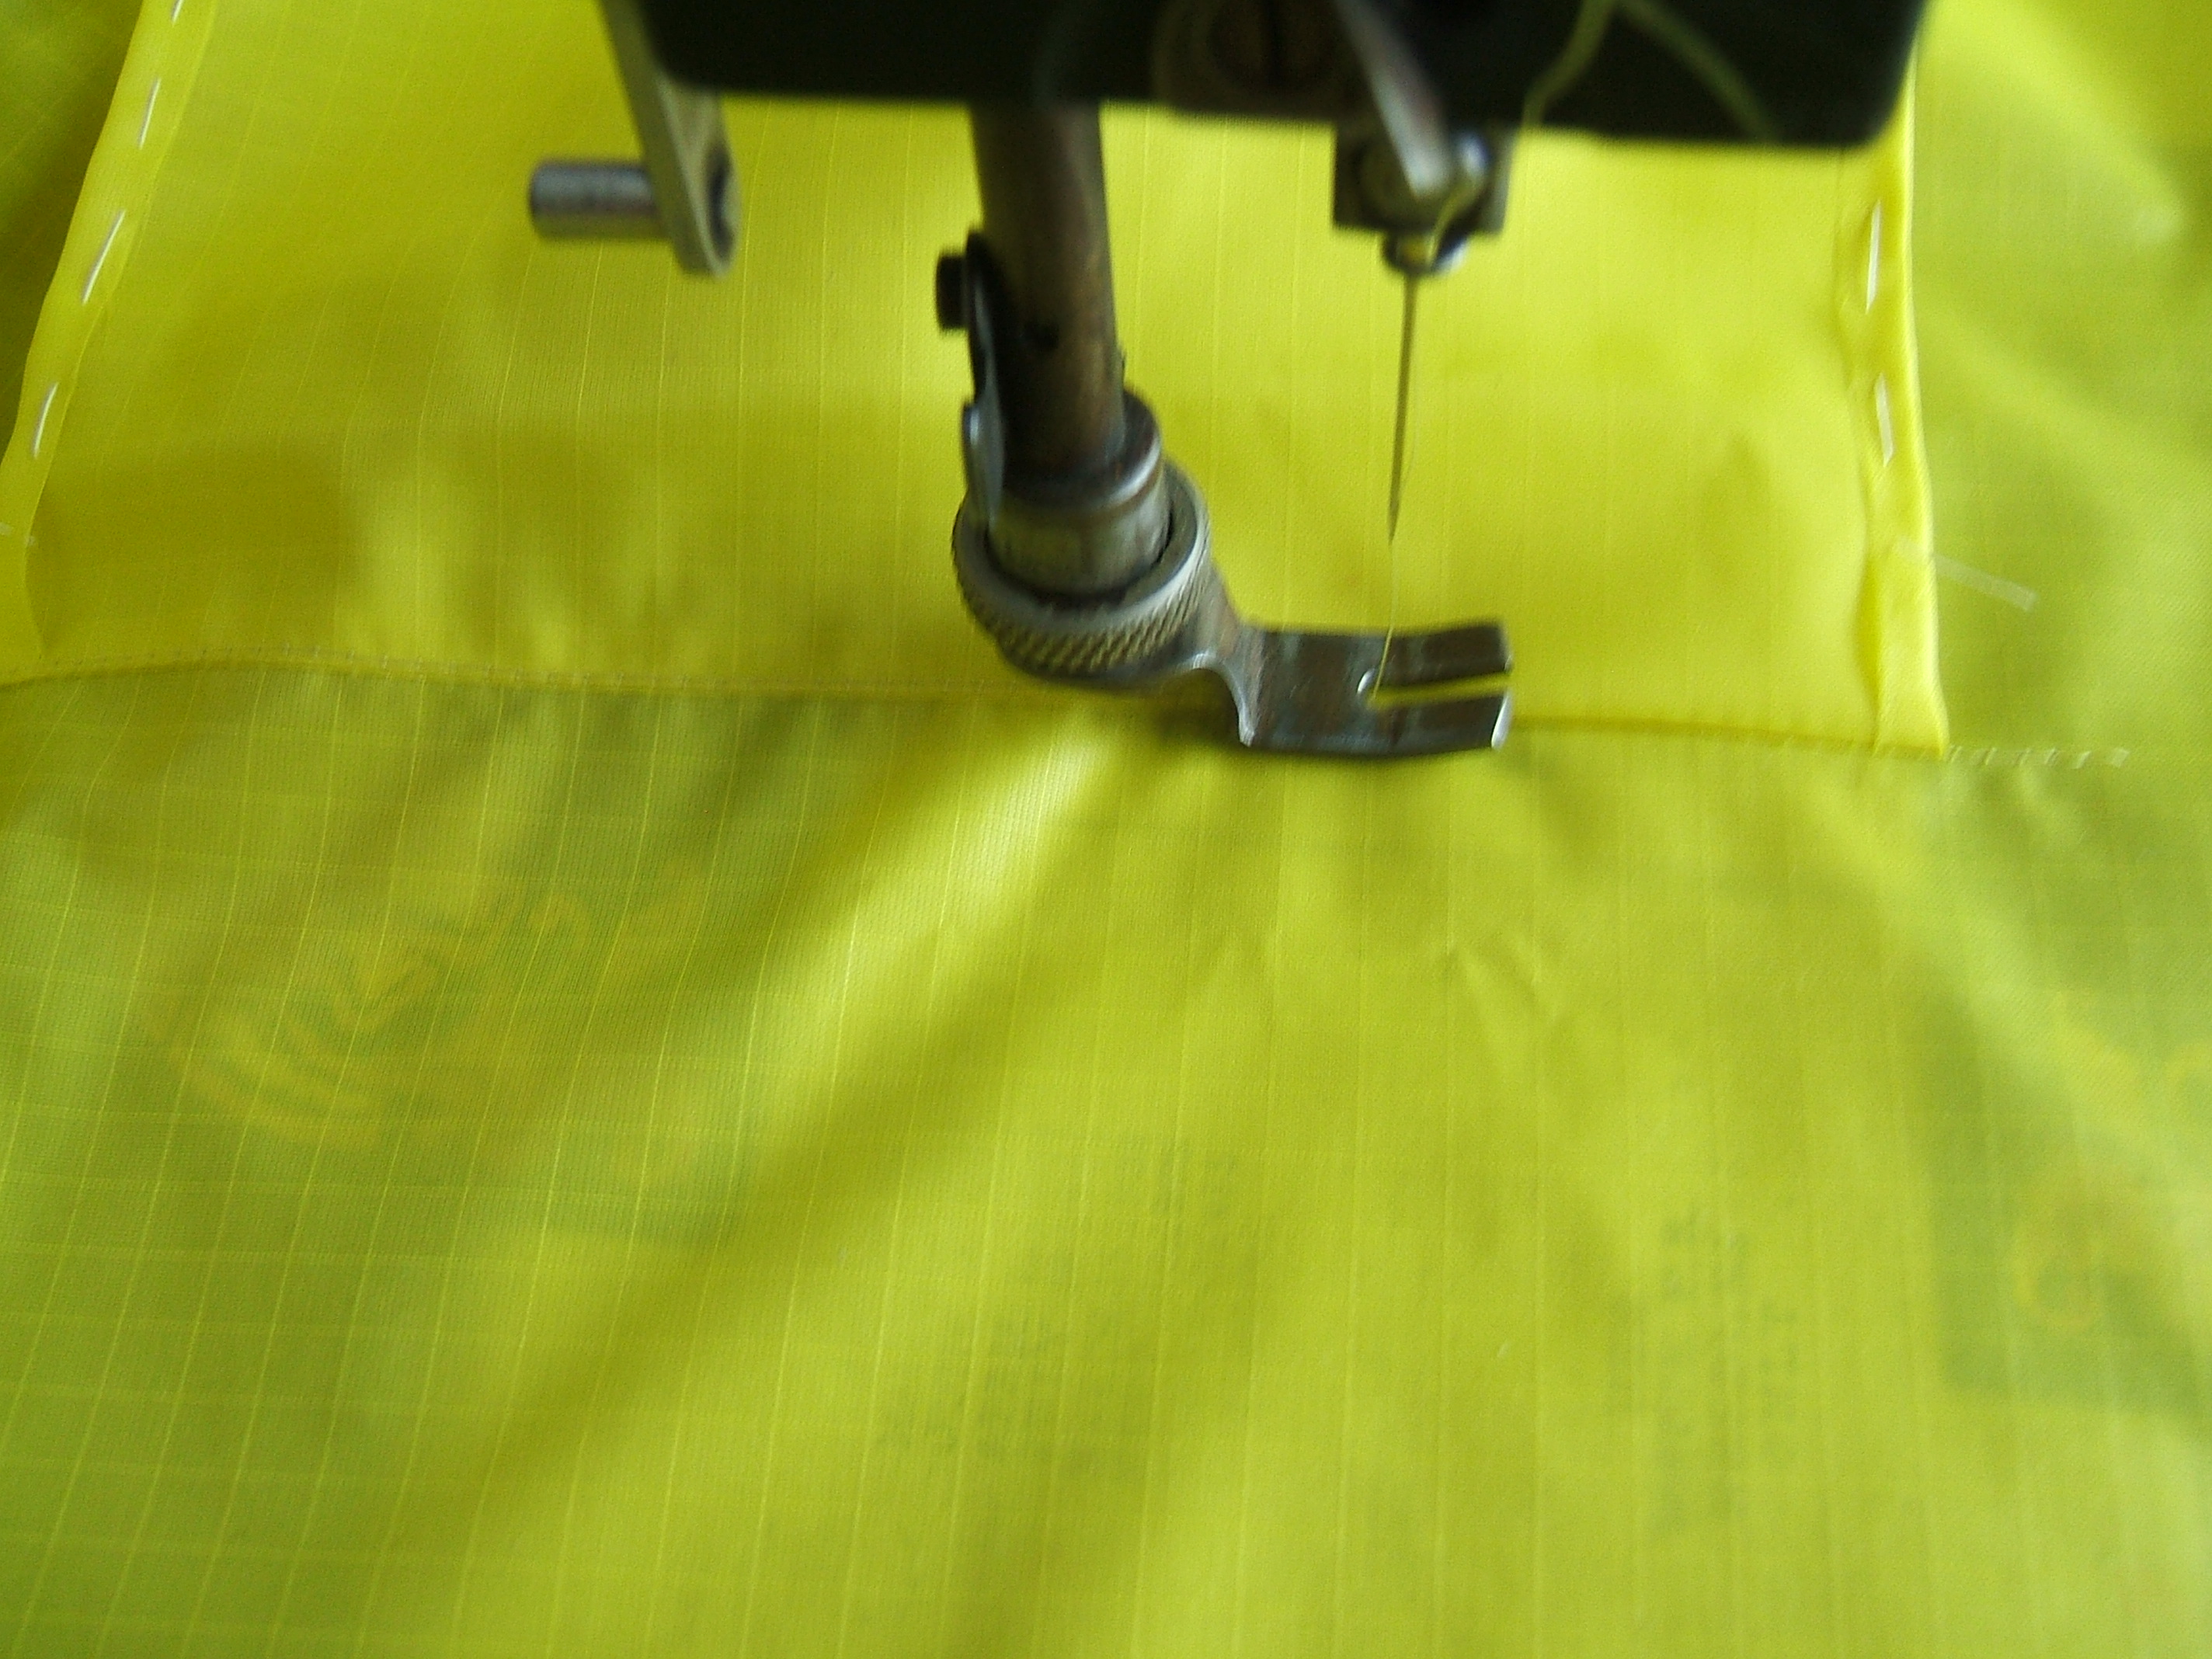
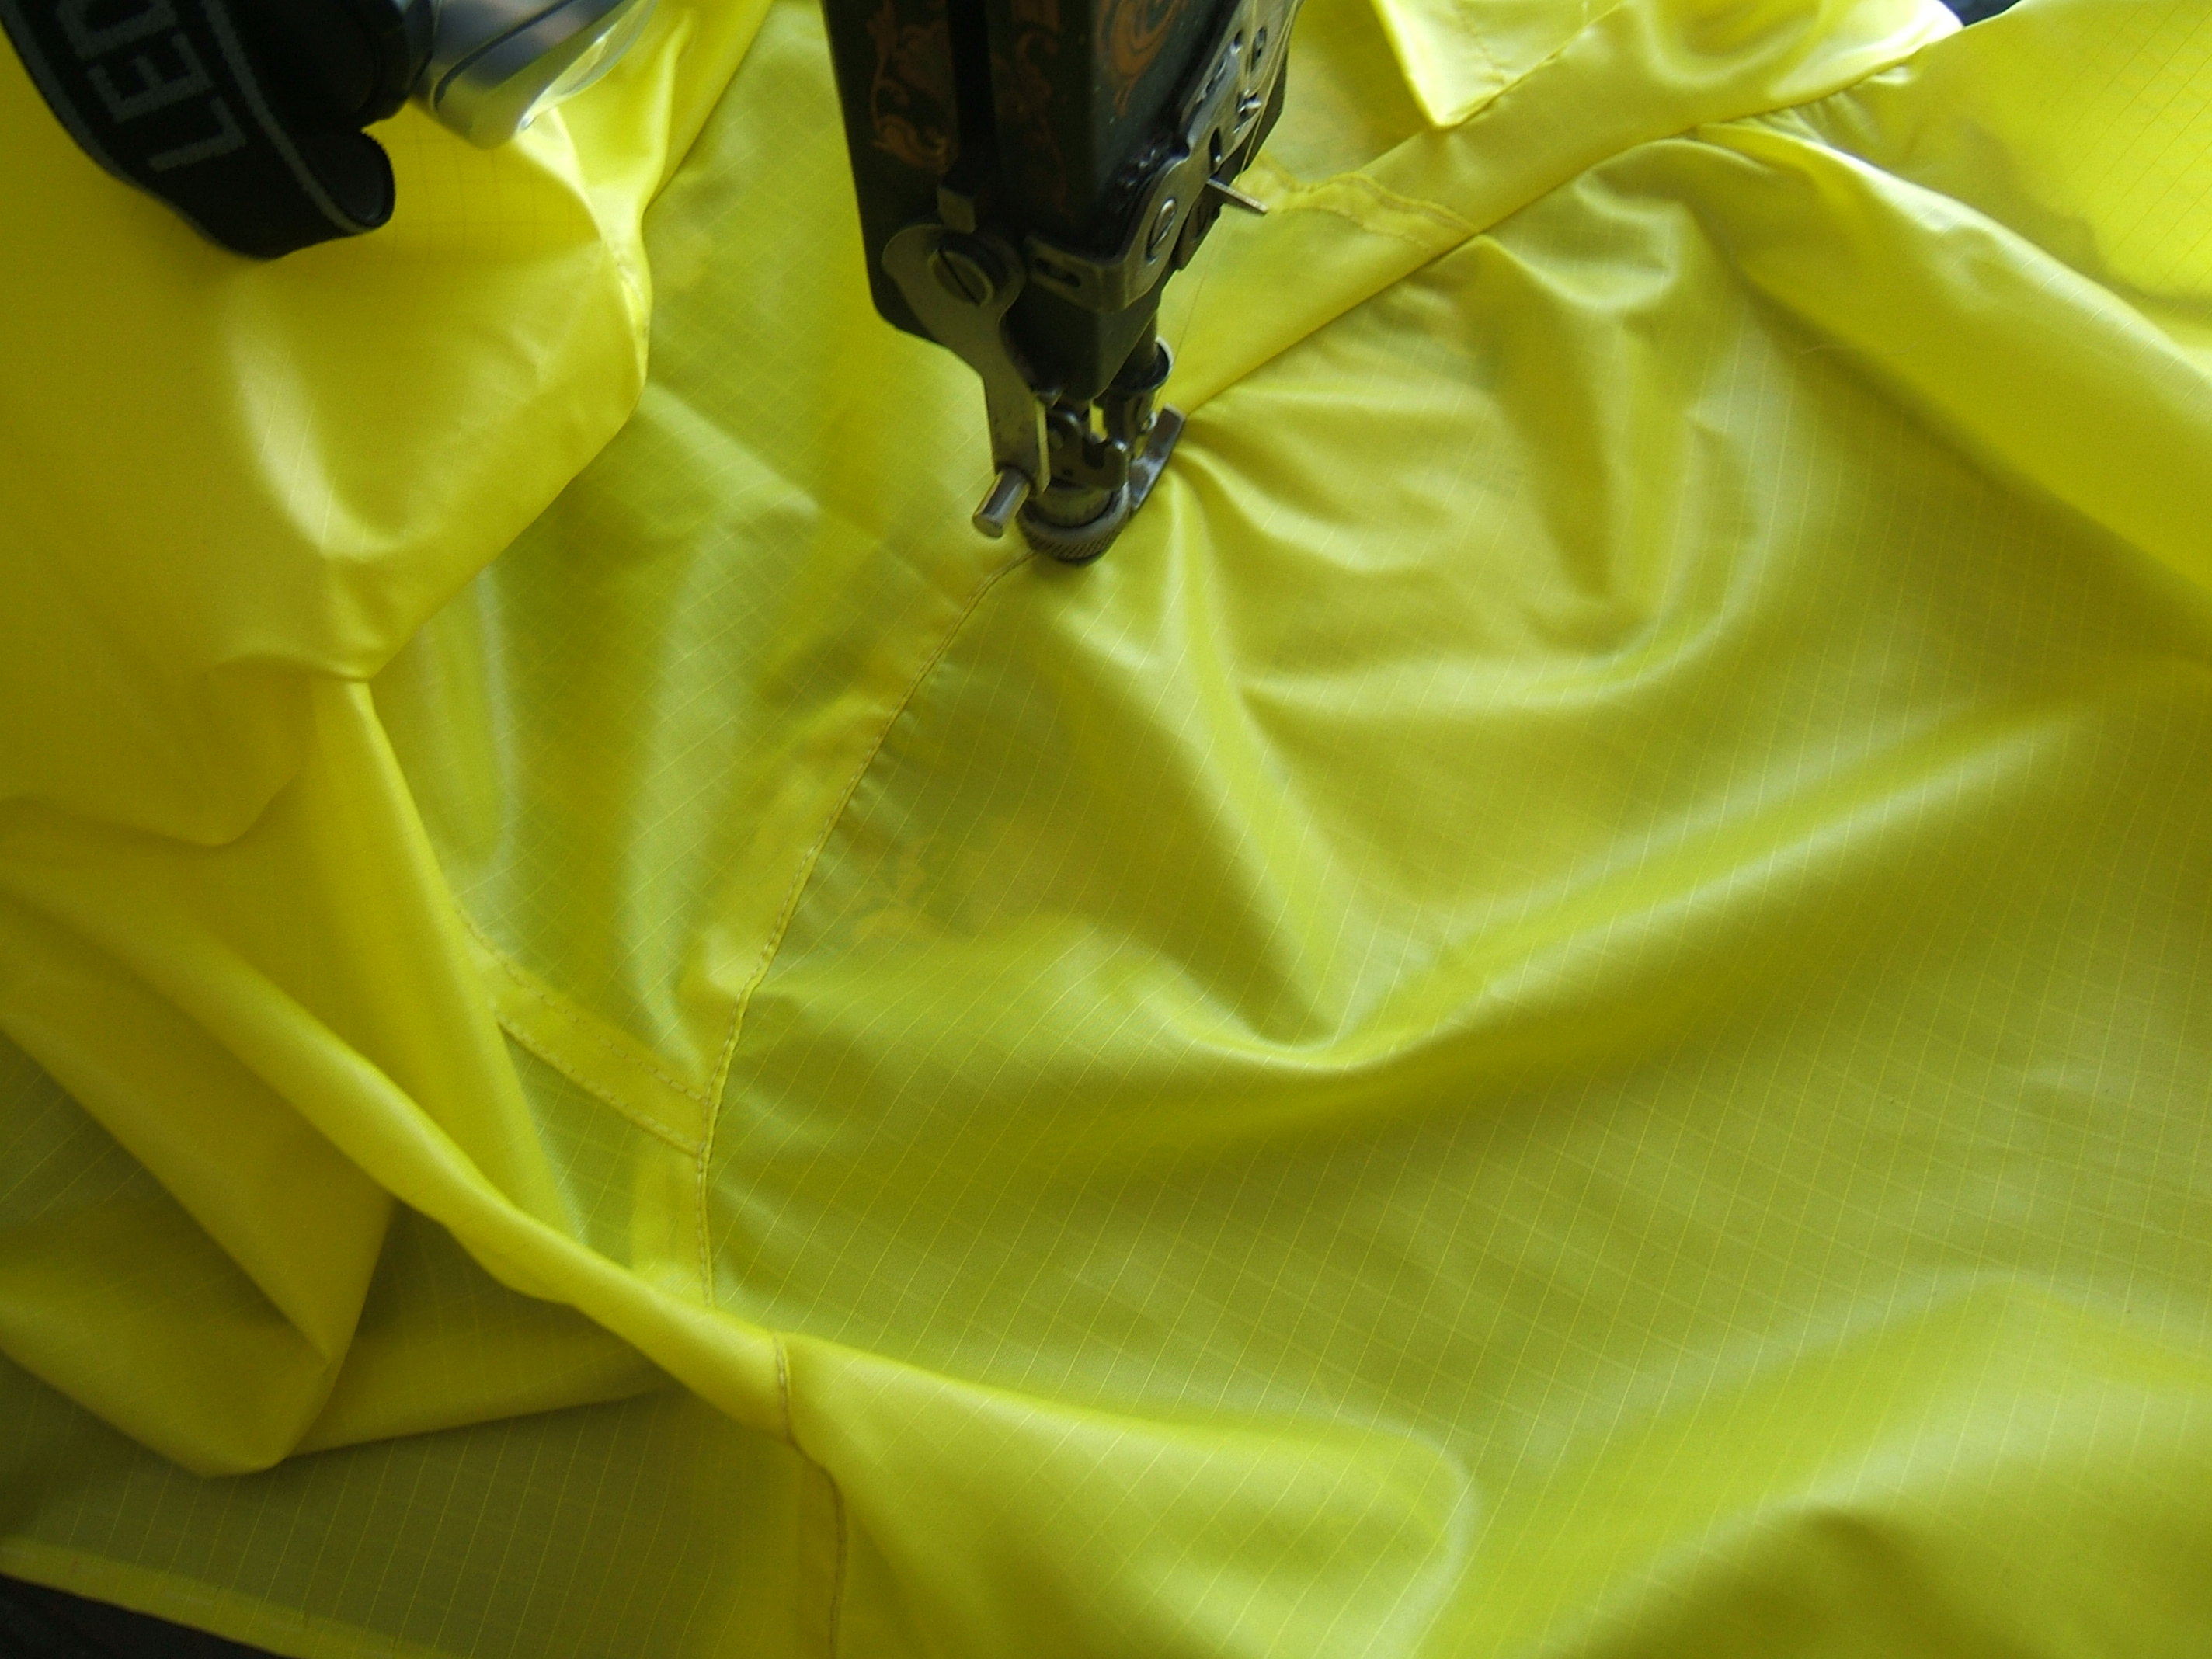
When stitching the pocket divisions, I stitched along a line in the ripstop for one; the stitching line for the other was between lines, but I could see the reinforcing strap through the sheer fabric, and stitch up its middle. I began the stitching inside what will be the hem, to save securing the ends. I left the upper ends raw, about an inch of each on the right side, to be taken care of when I make the bar tacks. I won't secure them toowell, lest they tear the fabric. The bar tacks will be through the elastic, through the reinforcing straps, and through the folded-under edge of the casing; I don't think I need to worry about them too much.
When I finished that, the good light was gone, but lamplight sufficed for permanent-basting the pocket to the side seam. When I fold the edge to the right side for the pre-graded flat-fell seam, the stitches will run right along the fold.
I'll change "pre" tags to comment tags as I complete the links; the nosy may wish to "view source". To see a photo that isn't linked, remember that they are all in subdirectory BLOG1XV. I shouldn't have given it a name that looks so much like BLOGIXV. But in June, that will cease to be a problem; BLOG2XV is quite clear. Unless I find a reason to create BLOGSXV.
The elastic, 20 February 2015
JACRAW36.JPG- 1565744   2-20-15   9:53a overexposed
JACRAW37.JPG  1512219   2-20-15   9:54a whole mess on two card tables
JACRAW38.JPG  1519532   2-20-15  10:30a closeup of ends of elastic -- needs cropping
JACRAW39.JPG  1548989   2-20-15  10:38a closeup of ends of elastic, linked, may change to 38
JACRAW40.JPG- 1567168   2-20-15  10:59a badly-aimed shot, resolved by standing on chair for next shot
JACRAW41.JPG  1570315   2-20-15  11:01a bodkin sewn to elastic
JACRAW42.JPG+ 1603365   2-20-15  11:09a elastic inserted, pinned at the ends
JACRAW43.JPG+ 1576067   2-20-15  11:27a elastic tacked at pocket divisions, fuzzy in full size
I was of a mind to go straight to sewing the shoulder seams, but really, I ought first to baste the turns of the side seams, to reduce fraying while I'm flopping pieces around to sew the shoulders.
So I found the spool of white embroidery thread in the arm of the futon — I've been leaving a needle on the thread, under several wraps of thread to keep it from sliding off — and commandeered the Lazyboy. My rocking chair is better, but being a lighter chair, it tends to wander away from the patio door. At the moment, it's in the garage and a telescope is in its place.
Turns out that I have to switch to regular basting in the place where the elastic-tags are turned back, making fourteen layers, and also at the fold at the bottom of the pocket, even though it's only eight layers at the thickest point. Since the ripstop is sheer, I don't expect any trouble with the side seams.
Then, as I was about to pin the shoulder seams, I noticed the zipper facing. It can just flop around where it sticks out from under the zipper, but between the bottom of the zipper and the bottom of the shirt, it's a hem and ought to be secured. Which means securing the whole length.
I'd been intending to sew it down by hand for a nice look down the front, but at this point I thought "Hand-hem a windbreaker?"
So my next step is to unzip the front and edge-stitch the facings.
⁂
Done. I fell off the fold for one stitch while stitching the second side, but decided to live with it. I pulled the basting out as the needle approached it, and for the last inch on both sides, I held the end of the basting thread and let the machine pull the fabric off it, as when stitching up to the last pin in a seam.
lunch eaten, it's nap time.
When using this pattern with linen, cotton, and
spun silk, I never noticed that I was easing the
back of the shoulder seam onto the front.
⁂
I left the ends of the thread long enough to thread into a needle and hide after the collar was attached. Luckily, this was just enough to re-sew the bits that I had to unstitch to make neat corners on the collar.
And then it was time for lunch and a nap. When I wake up, I'll take one more picture
to show the ends of the zipper. I put the ends in the middle of a half-inch seam allowance, forgetting that the collar was to be attached with a quarter-inch seam. Oops! Fortunately, the ends of the zipper tapes are fused. Harder to stitch through than the pinked cut zipper makers used to end tapes with, but a lot more convenient when you don't hide the end of the tape.
⁂
Finished sewing the collar on in the afternoon. I cut the thread-ends long, pulled them to the wrong side, tied each pair in half a square knot (i.e., merely twisted together), threaded each into a needle and hid it between the layers of the collar.
Spent most of the morning fiddling with yesterday's photographs, then pinned one sleeve to the jacket.

I used right-angle pins to divide the ease as evenly as I could. Note that there is much less ease at the front, particularly below the lowered shoulder seam.
I'm beginning to see why my store-bought windbreaker has raglan sleeves. Raglans also have vertical seams, that direct rain down and off — but this windbreaker is a beta for a wool overjacket, which should have set-in sleeves — and I've never drafted a raglan sleeve. Looks easy in the books, but I don't consider them ornamental, and this is the first time I've made something where raglan sleeves had a practical use. I simply didn't think of it.
Some of the pleats could have been removed by snipping the thread, were it not that each snip requires me to weave ends in with a #14 crochet hook. On other pleats, I was happy if the third row of stitching (second row of topstitching) caught them down flat and straight.
I distributed the ease with more care when pinning the second sleeve, and when I was about half done, the dime dropped and I moved from the card table to the ironing board, where I could keep the section I was working on under tension.
To keep the ease from shifting, I placed the in-line pins nose to tail, and wove each one several times to simulate stitching.
And it seems to have worked. Note that there is the most puckering where there was the least ease, and I hadn't yet felt the need of pinning the work to the ironing board.
After my nap, I started to pin the side seams, realized that though the edges of the back had been turned to the front, the backs of the sleeves had not. So I did that, and tucked in some thread-ends that got in my way. Needed a needle threader to do that, so I also found a greeting card and made a new needle-threader case so that I could leave one in the arm of the futon with the basting supplies. And I took the huge pair of paper shears out of the arm and put them into the pattern chest. I always grab the smaller pair of scissors I keep on the fridge when I want to cut paper anyway; only when making patterns would I need the big ones.
I shuffled stuff out of the sewing room for the Roomba and crochet-hooked the loose threads on the back of the front pockets before starting work, so I'd only done the top-stitching (and some more end weaving) when it was time to eat lunch, walk a mile, and take a nap.
After supper, I hand-sewed a place where a few stitches had fallen off the fold while I was distracted keeping the dart in place. I intended to weave in the ends of the threads on the darts, too, but by the time I'd cleared all the papers off the futon, a yap-yap news show was on the television. I avoid "news" as much as possible anyway; when it's presented by people who think that "engage in lively discussion" means "yell at each other", I'm out of there.
Opened with a little hand sewing today, because I didn't want to thread a machine with white cotton just to make a spice bag for the corned beef. The end I broke off the basting cone was too fuzzy to put through the eye of the only unthreaded needle stuck into the base of the cone. (The cone of basting thread hangs upside-down in the window.) I didn't want to wax the thread even though I use food-grade beeswax for the purpose, so I used a bigger needle. But instead of going into the bedroom to get one of the small darning needles in the drawer of the treadle machine, I grabbed a large darning needle from the pincushion pinned to the curtain.
Laziness causes work. The big needle was hard to push through the muslin, and induced me to take stitches long enough to allow the mustard seeds to escape. But I don't think they will; this bag isn't going into the washing machine, after all. It won't even endure a rolling boil if I keep an eye on the beef and put an iron skillet under the pot at the right time. [It came to a boil, but not a rolling boil.]
Next up: repair the mistakes I made when sewing the side seam. I've already cut stitches to release the elastic tab that I forgot to trim, and then I cut it between the stitch marks and the raw edge that had been turned to the right side. I'll decide whether or not to release the pleats I sewed in under the arm after I've re-sewn the stitches I removed. By hand. Not too much fuss about securing the ends that I cut, as the strain will be taken by the top stitching.
⁂
No more stitches released, but I also had to stitch an inch where I ran out of bobbin thread, and a lot of ends had to be dealt with to keep them out of trouble.
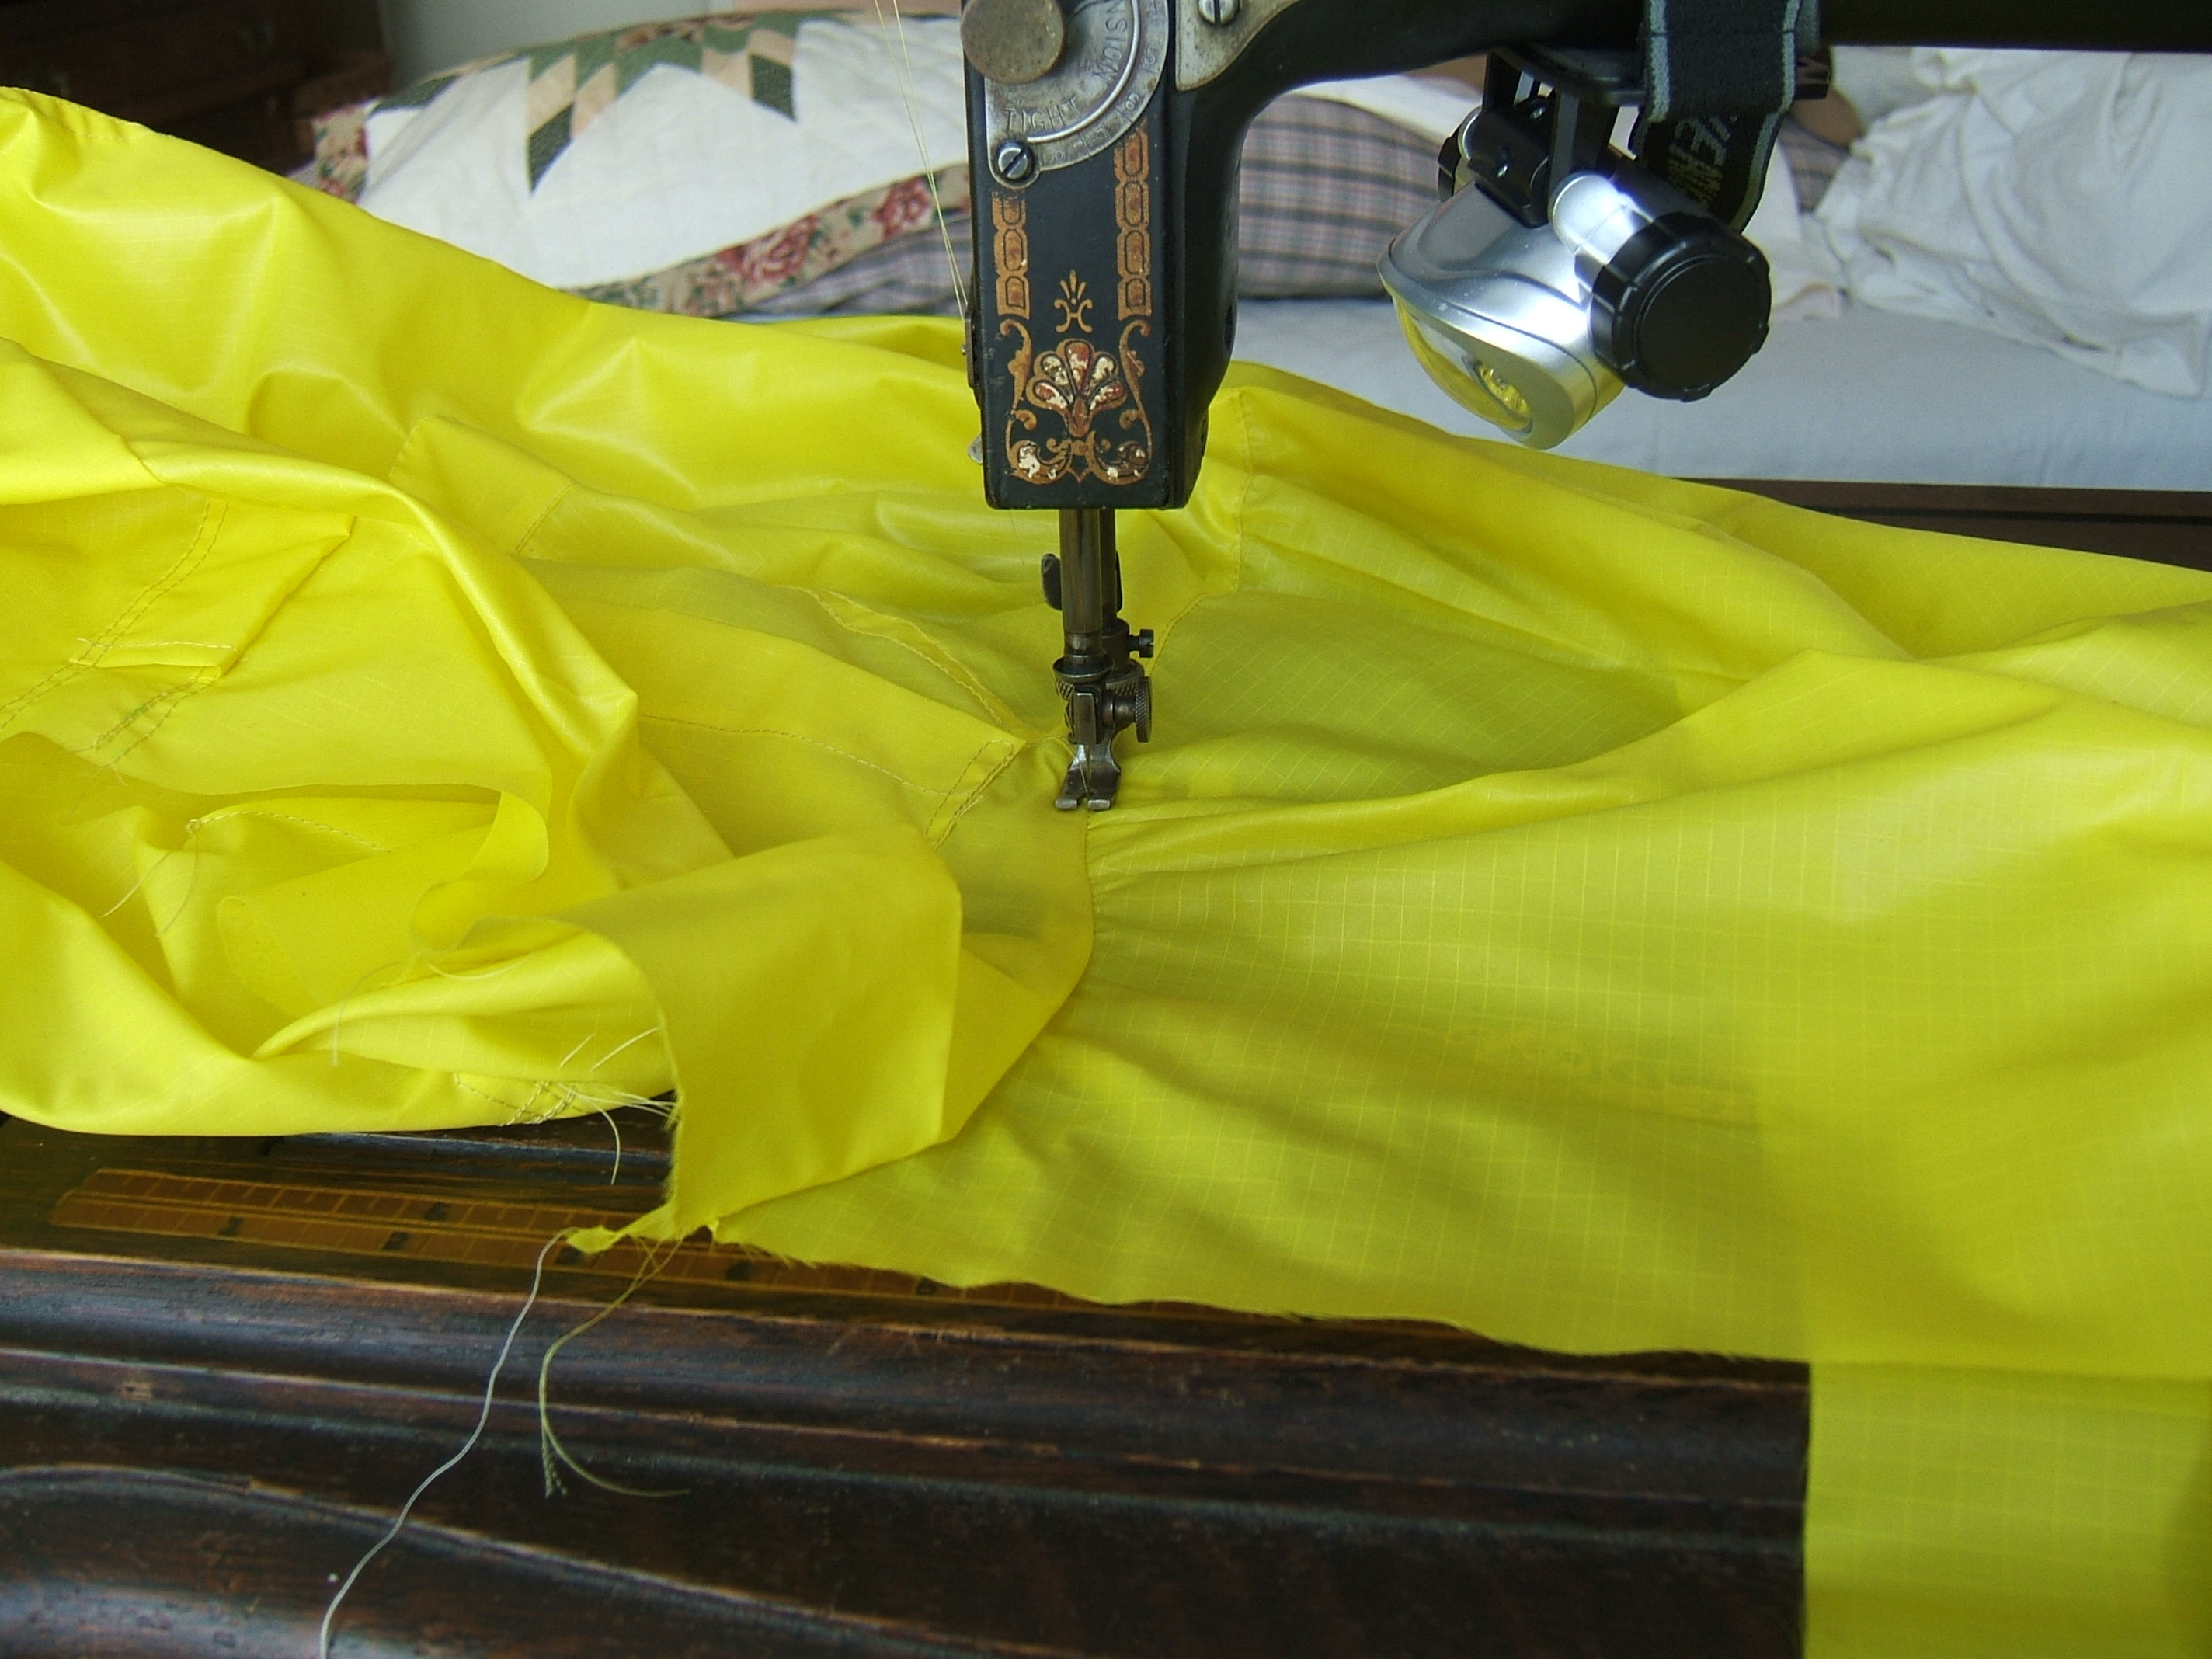
I wonder whether I've mentioned anywhere in the book that the way to topstitch a tube lengthwise on a flatbed machine is to put the work behind the needle in exactly the position that you hope it will be in when you have finished, then draw the seam under the presser foot toward you until you are in the right place to begin. You can get surprisingly far back into a narrow tube, and these wide sleeves easily go all the way. Does entail a lot of advancing an inch at a time.
I should also mention that the side you want up while stitching should be inside the tube. That is, if you want to stitch on the right side, the inside should be out, and if you want to stitch on the wrong side, the tube should be right side out. This appears backward until you try it.
Off to the machine.
⁂
One row of topstitching, and it's nap time. Light breakfast early; too hungry to concentrate.
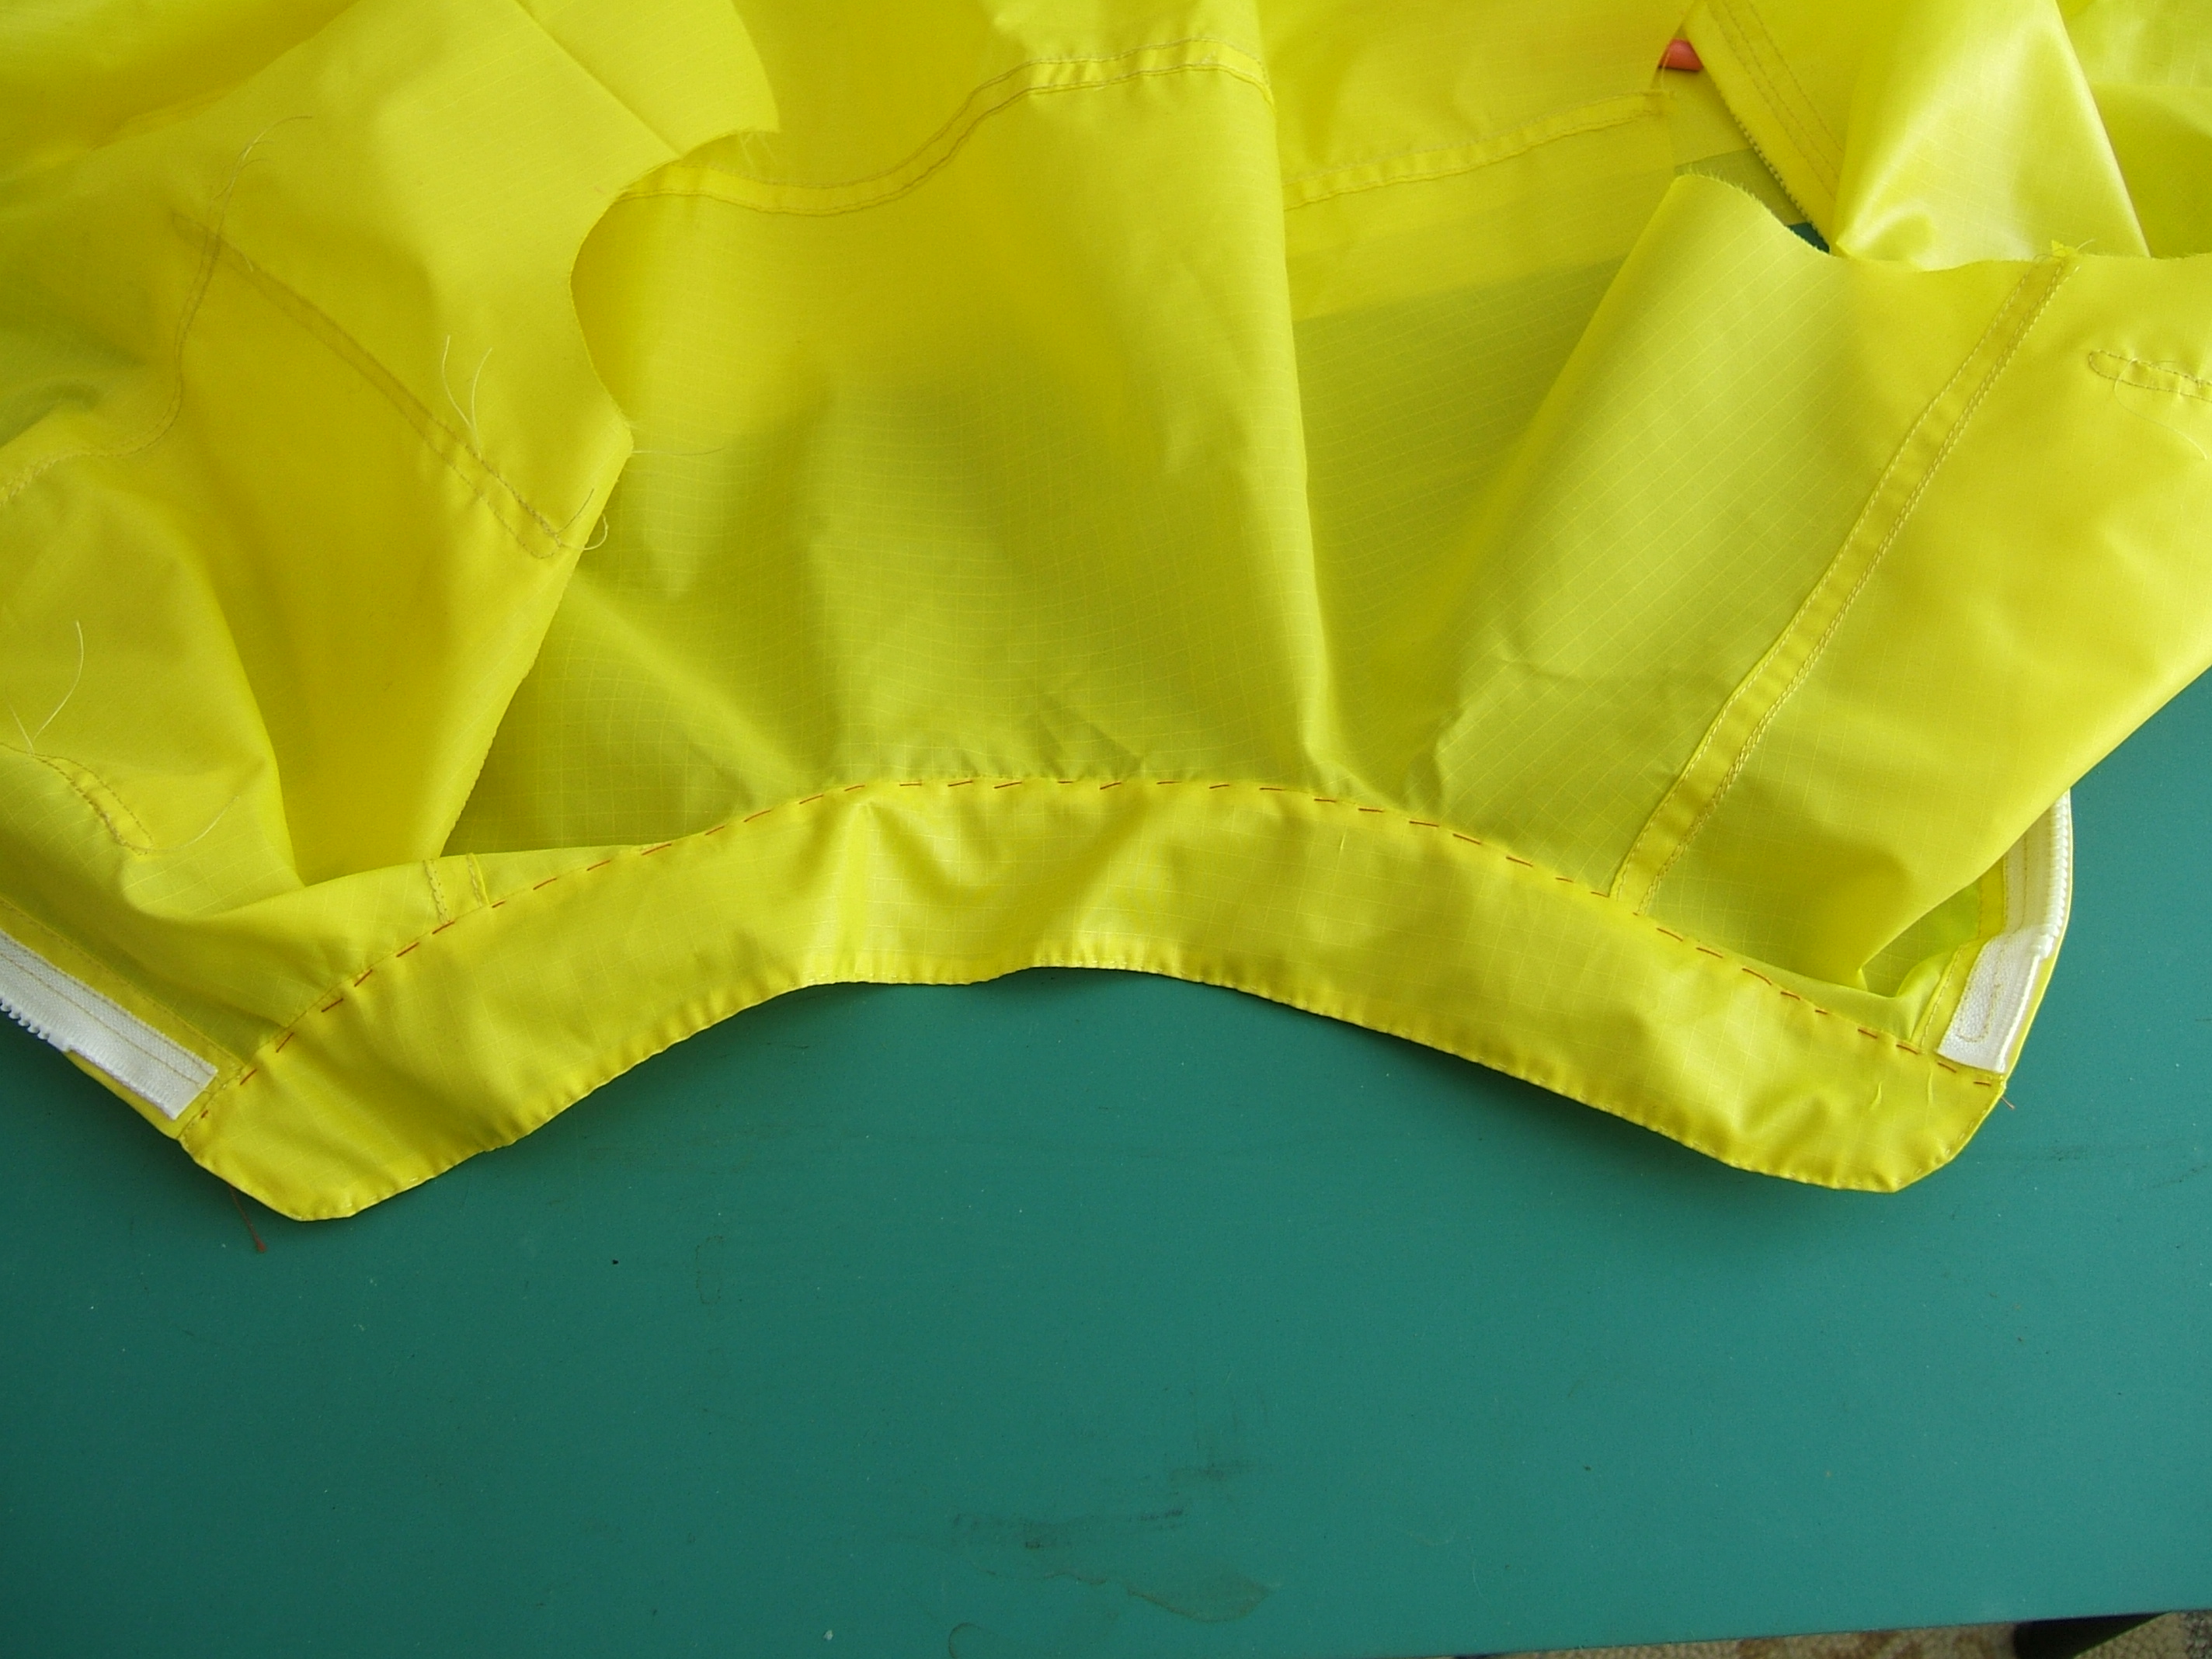
Finished the seam, hemmed the bottom, and started thinking about the bar tacks on the back pocket before supper. When I came back after supper, I discovered that although the light was still good, I was all out of thinkum.
When I tried the shirt on to check it in a mirror, I had visions of bugs flying up those wide sleeves, so I'm going to put in elastic.
Took a look at my old windbreaker. Though it doesn't have elastic in the wrists, there is something in the sleeve hems that used to be elastic.
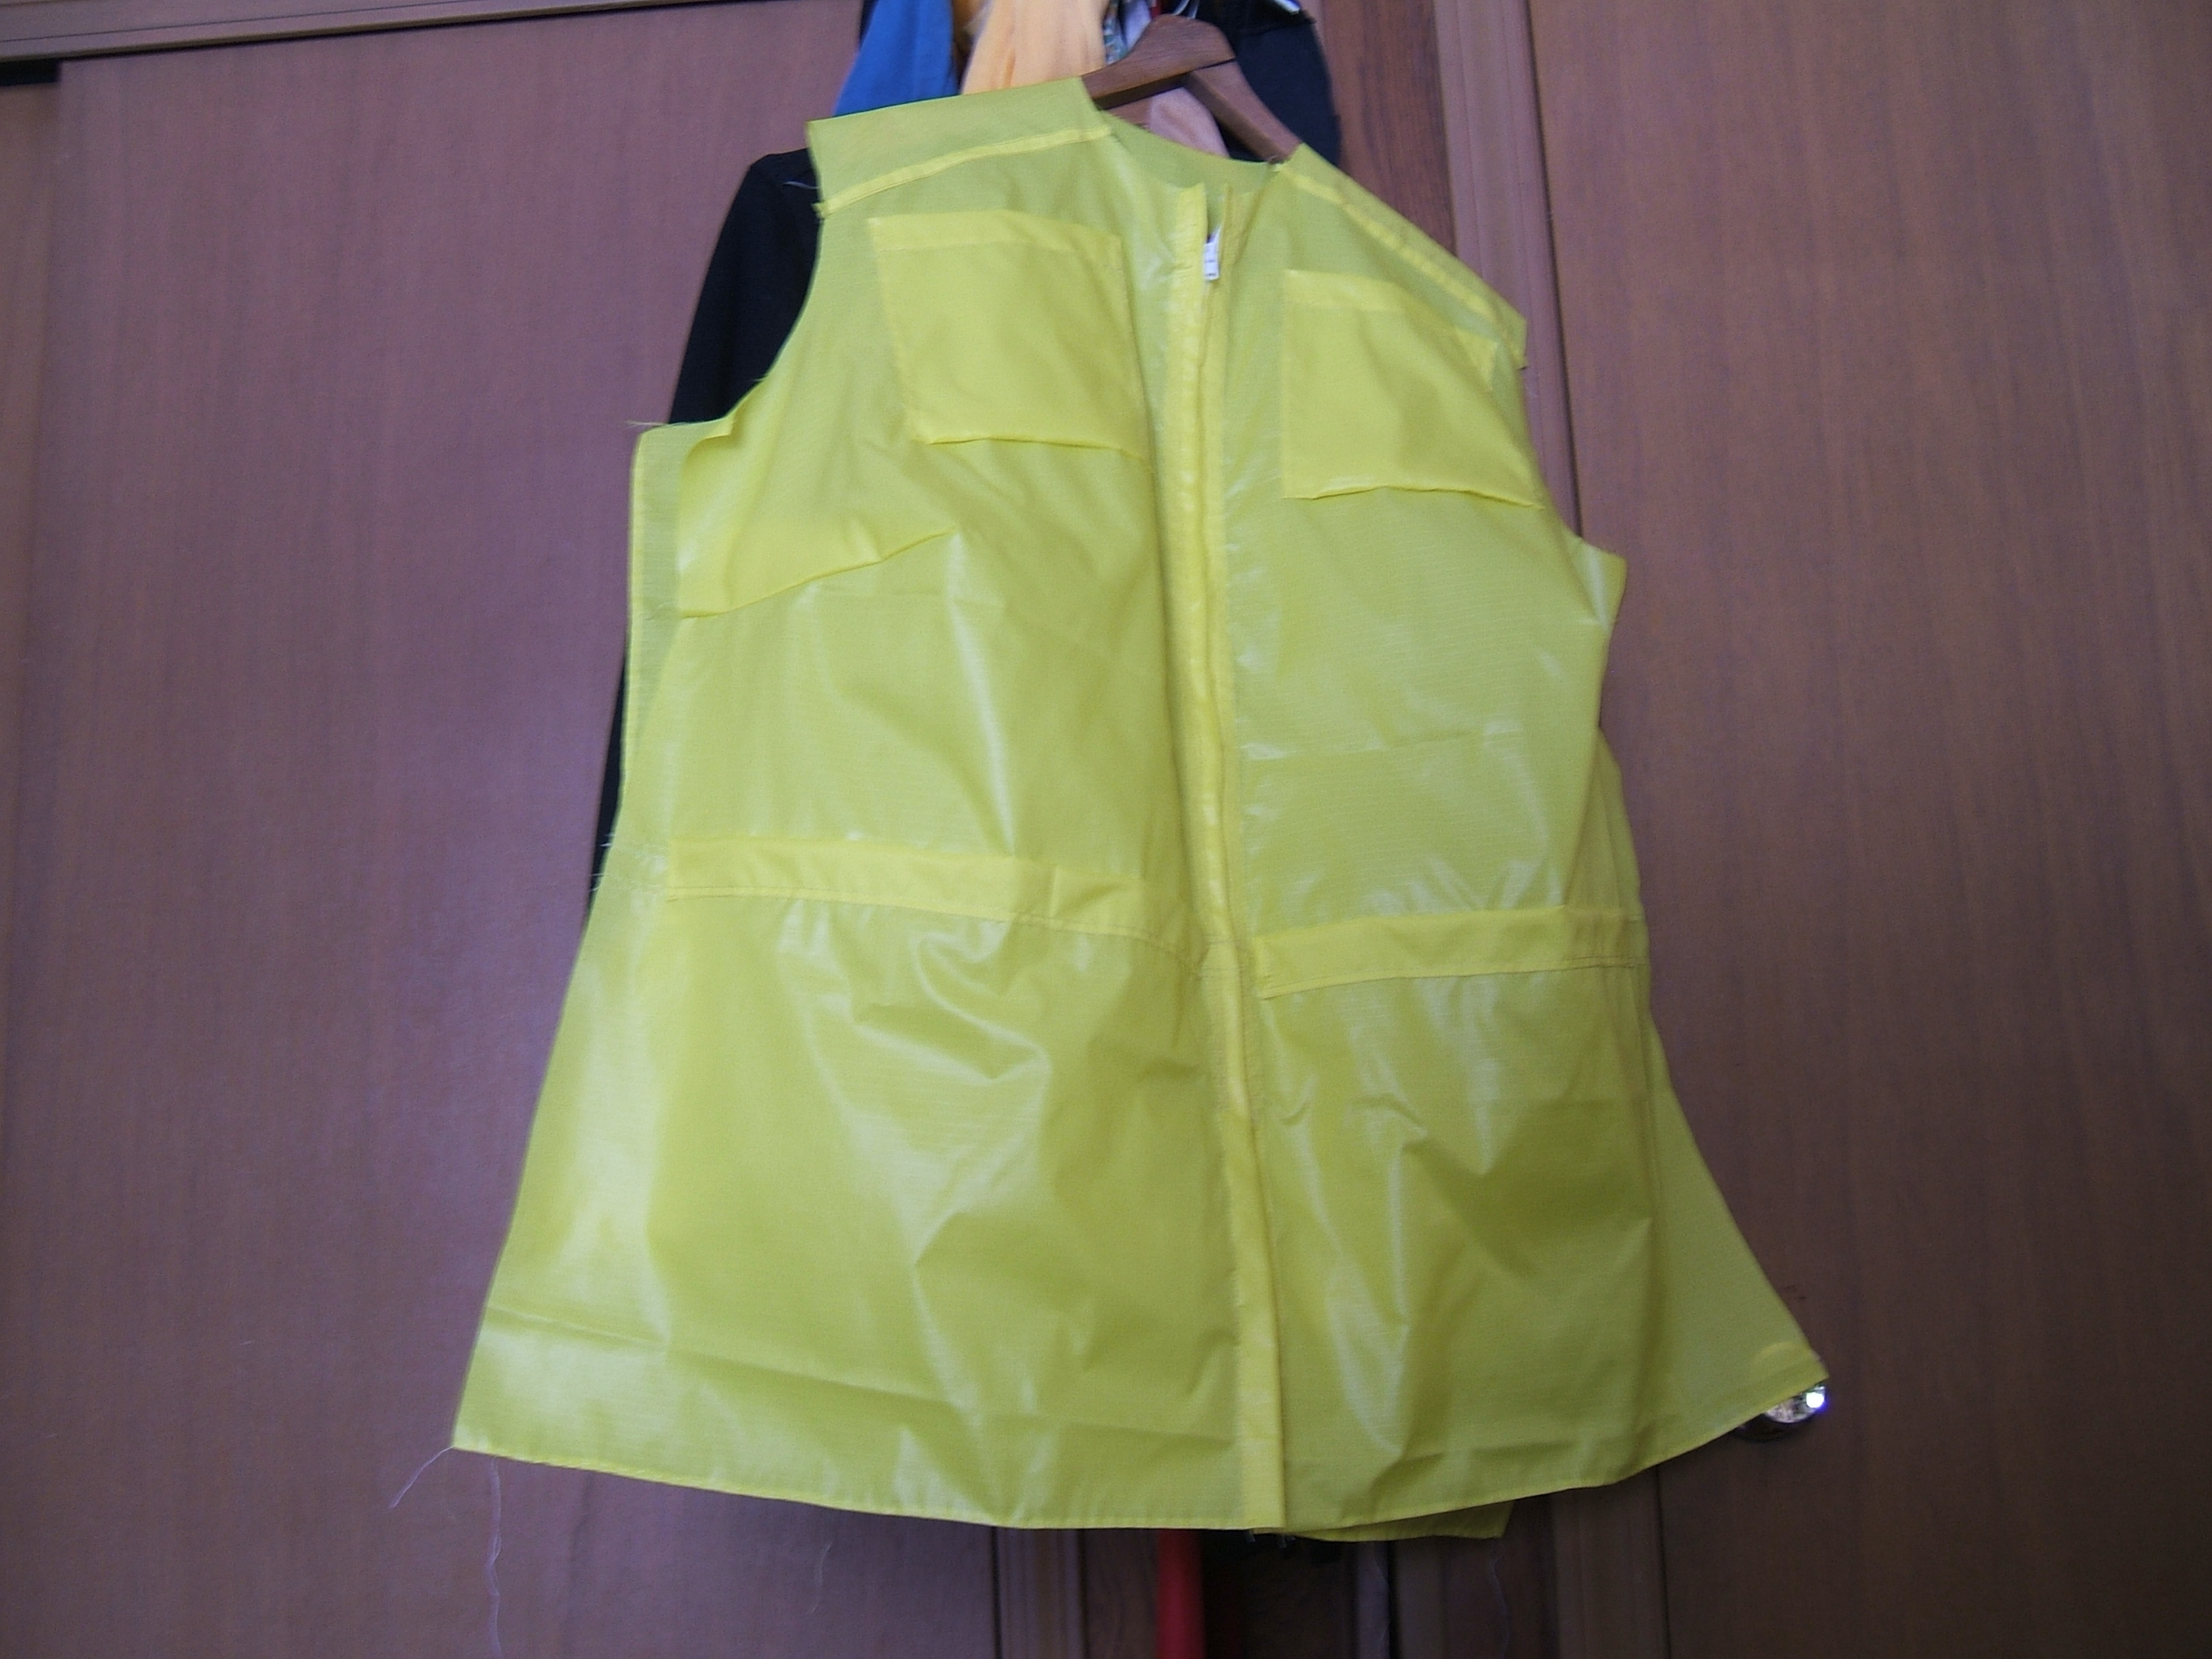
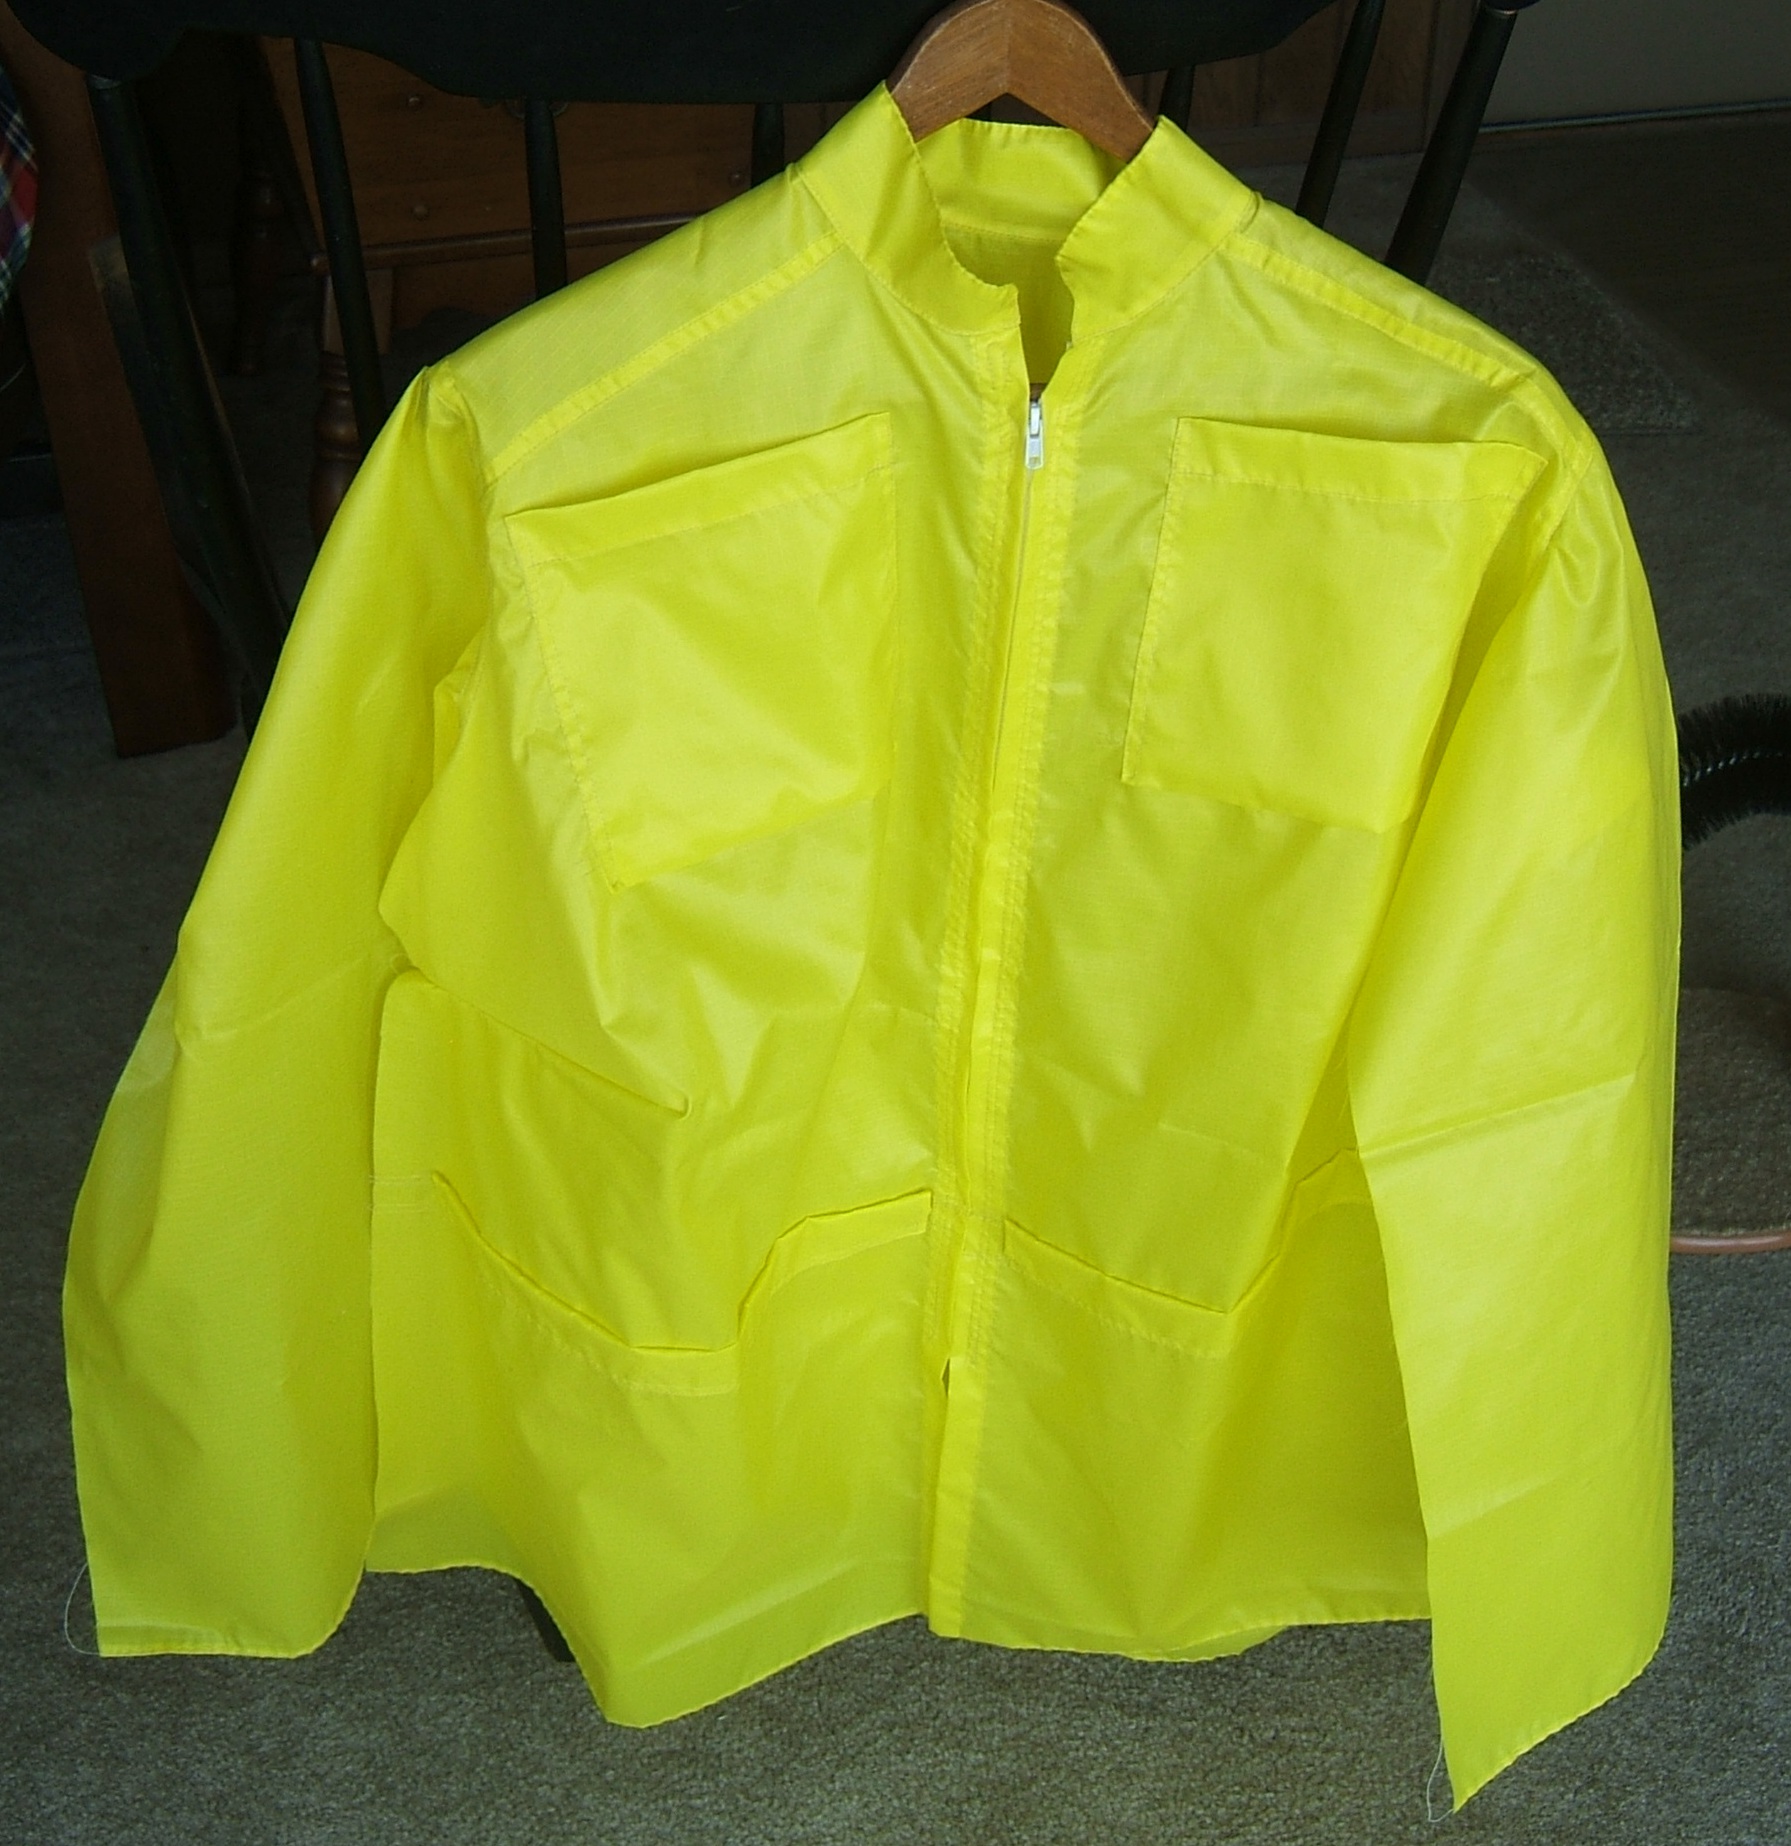
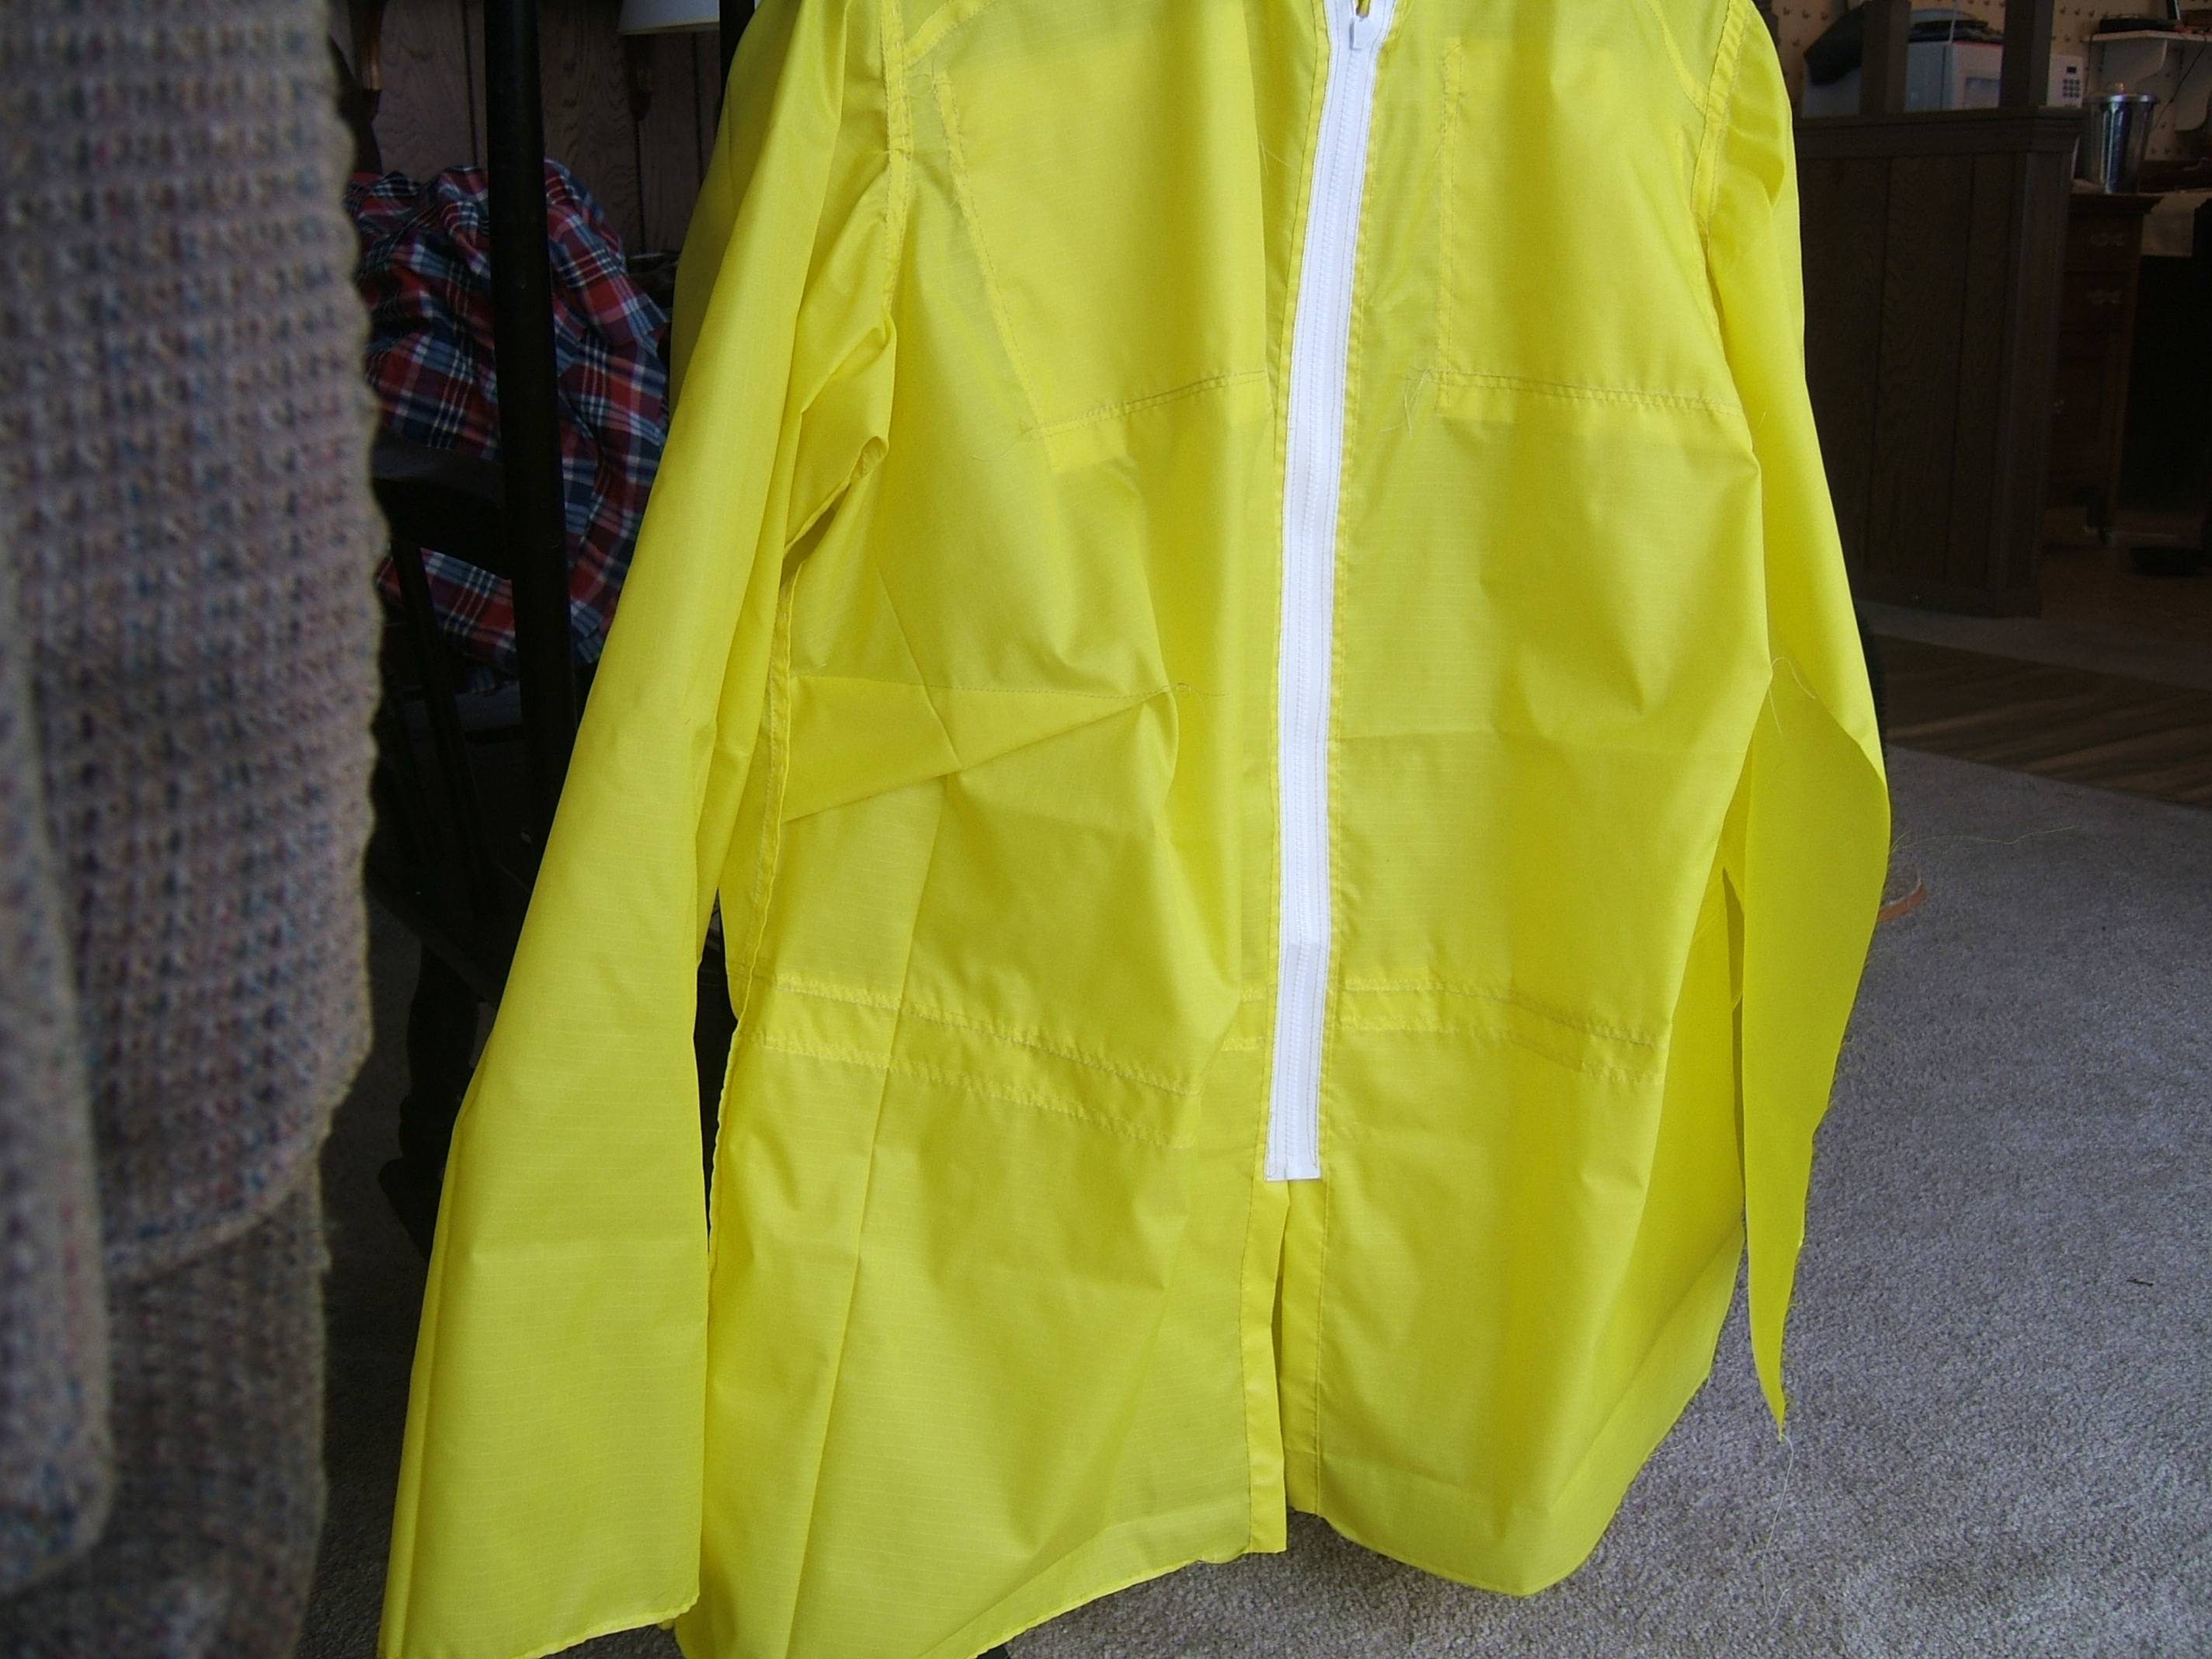
As I glance at the windbreaker, on a hanger dangling from my "to do" hook, I find that it isn't nearly as ugly as I expected it to be. But the low sun shining on the bright yellow probably has something to do with that.
I should have sewn patches where the bar tacks to hold my cell phone will go. With the pocket already applied, it will be just as easy to patch it after it tears — and it might not tear.
Make windbreaker to test overjersey
pattern
I wore my new windbreaker to the grocery store this afternoon. Too many shirts under it; I was eager to get out of it when I got home.
It looks a lot nicer on the hangar than on me. I think the drawstring could be an inch higher.
The drawstring from the sweat pants turned out to be shorter than the casing, so I cut a piece of gray mystery tape after threading it through the casing. I'd been wondering about tape threaders, but when I put the #14 hook away, I noticed the four "weaving needles" I used to use as stitch holders for knitting. (The weaving needles allow me to slide stitches onto string for fitting, then knit them back onto the knitting needles.) They are yarn needles the size of #1 double-point knitting needles; the eyes are plenty big enough to thread with 5/8" tape.
When I was using my Magnetop thimble to get things out of the arm of the futon, I discovered that the cover on the point of the crochet hook is not magnetic. It sure looks like steel, and I'd think you'd want something as springy as steel to hold its grip.
After weaving in all those ends, I'm really looking forward to working with natural fibers for my next project. Should be assorted mending.
I cut the elastic cord for the wrists a tad long; I may be wearing this shirt over multiple pairs of gloves. It's tight enough to block the entry of flying insects.
I solved the problem of repairing the gap where I put in the elastic by cutting the needle thread long enough to thread into a #10 crewel needle and sew it by hand; this saves four ends over using the machine. I wove the other three ends of the threads back into the stitches before beginning to hand sew.
And I've still got an un-opened spool of size A nylon thread. Plus two bobbins, one for the White and one for the Necchi.
So I got up and put the remaining spool of yellow nylon into the bag where I'll stash the bobbins of yellow nylon when I re-thread the White.
top snap on yellow-plaid flannel
gown
Took more time than I expected, because I had to pick out the old stitches. And then I like to never got the needle threaded; when I resorted to a threader, it turned out to be too thick to pull through the eye double, so I took it into the bedroom (where the White lives) and used wax.
I should get a fourth piece of wax for the arm of the futon, or cut off a piece of the bar of wax in the drawer of the White. It's a very old piece of wax, but I don't think it's been in that drawer more than a year or five. I must have found it among Evelyn's things, but don't remember doing so. A very small piece has already been cut off it, but there aren't many thread marks.
buy black fleece
I bought black fleece to make a better pair of slippers yesterday. I thought half a yard would be plenty, but there were only twenty-seven inches left on the bolt, so I took all of it.
I *hope* it's fleece; the bolt wasn't labeled, but those bolts on the table that were labeled were all fleece. Stretches like fleece. Looks like fuzzy felt. Haven't washed it yet.
elastic in leg holes
What's that doing still on the list? I did
it days ago.
Removed "all" from "add pockets to sweat pants"; at least one pair has inseam pockets. Priority just dropped, and "shorten linen bike knickers" just rose on the list. Particularly since the shortening was started last fall, so I have to finish the job before I can wear them. But I still have the two *almost* worn-out pairs.
I think I'll start by picking out the slipped seam in the right broadfall pocket of my second-best black jeans.
⁂
popped seam on front pocket of black
jeans
That was both harder and easier than I expected. Picking out tight teeny-tiny black-on-black stitches, starting in the middle, trying not to mistake floats in the denim for stitches — that was hard. But once the seam was undone, I found that the frayed spot was already backed with twill tape, so all I had to do was to line things up properly and run two lines of topstitching.
I'd didn't get it lined up honestly correctly. There is a slight bubble from wandering seamline, but it's close enough.
Particularly in black-on-black.
Oops. When I was getting ready for bed last night, I saw a spot on the floor: I hadn't turned off the battery light before closing the machine. That's the second time I've done that — with this light. I ran the battery flat with the old light, and it never got back on the machine. I put it into the cupboard where we keep the batteries, and found it useful as a red flashlight in the middle of the night. The flat battery still has ample power for the red LED, but if I push the switch the wrong way, the two bluish LEDs barely glow; I have to look directly into them to be sure they are off. This is almost as good as having a red-only flashlight.
I wore my new windbreaker on a long ride Saturday. The pretty drawstring doesn't hold a knot as well as the ugly one, but it came loose only once.
Still need to work a bar tack to replace the safety pin. I've been carrying my cell phone in the pocket of the jersey, and because the windbreaker unzips in front, it's not particularly inconvenient to do so, so there's no rush. Of course that denied me a check on the fit of the location of the bar tack, but the cell phone *has* been in and out of that pocket.
I may just up and leave that bar tack out, and reserve the windbreaker pocket for candy and lunch bars. I always stop the bike before attempting to use the cell phone anyhow, so I don't need to have it in a can-feel-around-while-riding pocket.
I washed my piece of black fleece. It's still twenty-seven inches long. I didn't measure how wide it was, and there were no marks on the bolt-core, so I have no clue as to whether it shrank crosswise.
I'm in choice paralysis — all my projects are urgent.
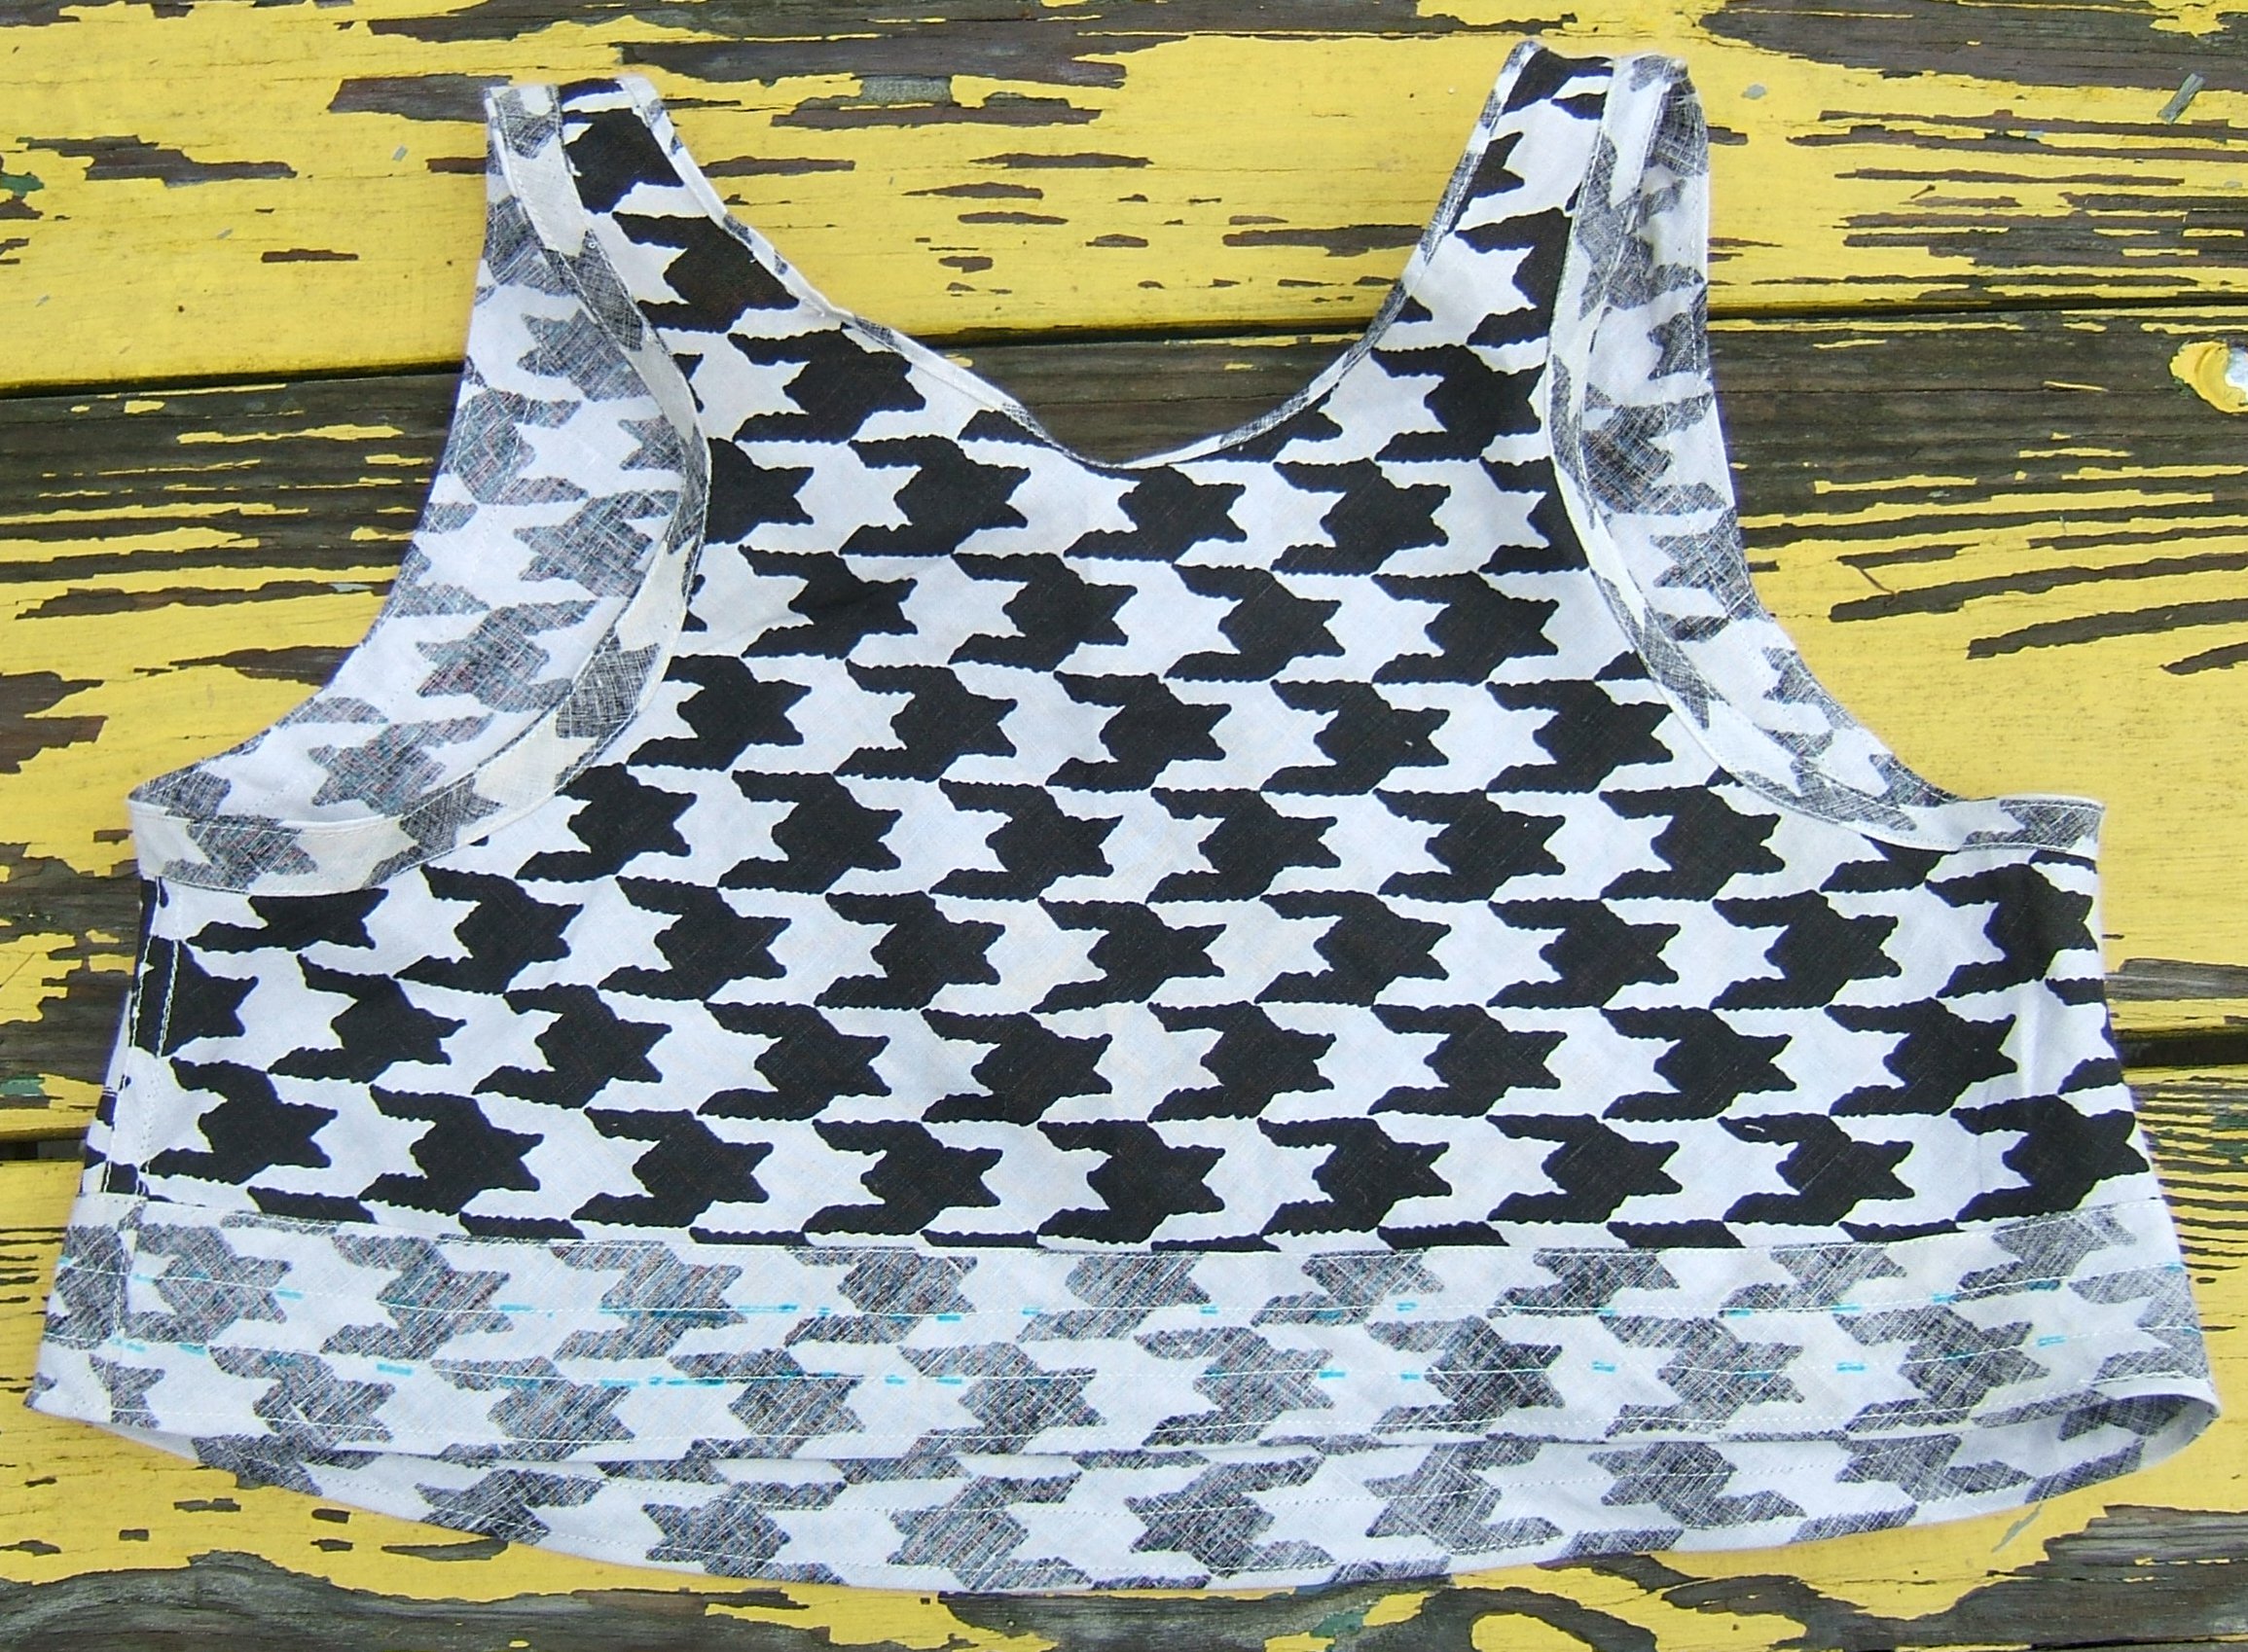
I've settled on the "taxicab" jersey, which I could start wearing now, with shirts under it, and all my jerseys are shabby at best. I put it on the to-do hook last fall intending to take the casing off the back pockets and sew on a new one. Then I thought that if I'm going to that much trouble, I should replace the entire pocket strip. Now, in the interest of having something to wear Right Now, I've selected a scrap and intend to appliqué it over the damage. After all, this shirt was sheer to start with and it's been patched in front; it will be lucky to make it to fall.
<adds "find yellow linen to make new summer jersey" to to-do list>
It will take a long time to find decent linen, so I'd best start now in the hope of not having to settle for indecent linen as I did last time.
⁂
Got the patch basted on one side — I plan to sew it on the outside before folding it to the inside — fetched #10 needle and cut some white thread, sewed a broken seam in some panties I rolled up and put into the arm of the futon several washdays ago, started back-stitching the patch in place. Discovered about two inches in that I'd been catching fabric that ought not to be caught, picked back until it was released, started again, found I was sewing in an unwanted pleat again. Only an inch this time, but I couldn't unpick the thread and had to cut it, got fresh thread, started stitching while inspecting the back at every stitch, realized it was time to put supper into the microwave.
After supper, I found that I couldn't see to continue. It's still well before sunset, but it's overcast.
I unsubscribed from fabric.com's mailing list today. It's been a long, long time since I cared what the deal of the day is. I miss Phoenix Textiles. So I DuckDucked to see whether the hospital-garment company, that spells it without an "s", is still around (it's the first hit) and learned that there are a zillion Phoenix Textile companies. One makes restaurant and barbecue stuff, one makes parts for spinning and weaving equipment, I didn't bother reading the rest.
Then I tried it with an "s" and an ad for fabric.com was above a zillion unrelated hits.
I hope that Amazon paid Stephen enough that he is now comfortably retired. I'd DuckDuck him if I knew his last name.
When to Fabric Mart, searched on "linen", limited it to "yellow": "Bright yellow 100%-linen knit" — PTWANG!! Alas, the description said it was thin and sleezy and needed to be lined.
Now Fabrics-store.com — do I want 3.5, 5.01, or 5.3 ounces per square yard? I'm pretty sure 7.1 ounces is too heavy, and quite sure that 2.8 is too thin. Better send for some swatches. (I hate sending for swatches.)
Oops! Now I remember that that's where I got the "softened" fabric that I'm now patching. (I get out of sending for swatches.)
Made some progress on the patch yesterday.
Summary of so far: I finger-pressed a quarter inch around a rectangle cut from a scrap, drew a dotted line a quarter inch below the stitching on the outside, basted the patch to the outside of the pocket, arranging the bottom to the wash-out line and the edges to the seams, remembered in time that I can't have one edge overlap the flat-felled side seam because it has to be folded to the inside of the pocket, back-stitched close to the fold around the outside part of the patch (careless about how much thread showed on the inside because it will be protected by the patch), started to baste the patch to the inside, realized that the gathering of the casing will really complicate folding it smoothly over the edge.
I'm going to begin this morning by nailing it to the ironing board with corsage pins.
⁂
sewed some hardware cloth
BLOG2XV/
WIRE0491.JPG  1613844   4-05-15   3:42p hardware cloth cylinder
                                           on table, with tools
WIRE0492.JPG  1599047   4-05-15   3:42p from other side
WIRE0493.JPG  1636300   4-05-15   3:44p cylinder, tree, Dave's feet
WIRE0494.JPG  1697634   4-05-15   3:44p cylinder around tree
And I think I took some pictures of the tree-protector I helped Dave make on 5 April. I intended to sew it with wire, but after starting to baste it with twist-ties, we realized that twist ties would do fine.
Sometime after the previous entry and before the back-ache started — egad, only three days ago; seemed like much longer — I decided that even though they are of low priority, the fleece slippers were something I could get off my list quickly. So I dug out the slipper pattern and duplicated the vamp pattern two more times, for a total of four, so that I could lay everything out at once. Then I remembered that adding patch pockets to my gauze-lined linen gown would be even quicker, and I'm going to need that gown when the weather turns warm, so I put the pattern back into the envelope and put the envelope back into the trunk.
And discovered that I have no idea where I put the scraps from making the linen gown. But in the search, I discovered that there is enough left of the linen sarong that I made into a bias tube to make a bra and at least one pair of matching panties. I got as far as clearing off the eating table with that project.
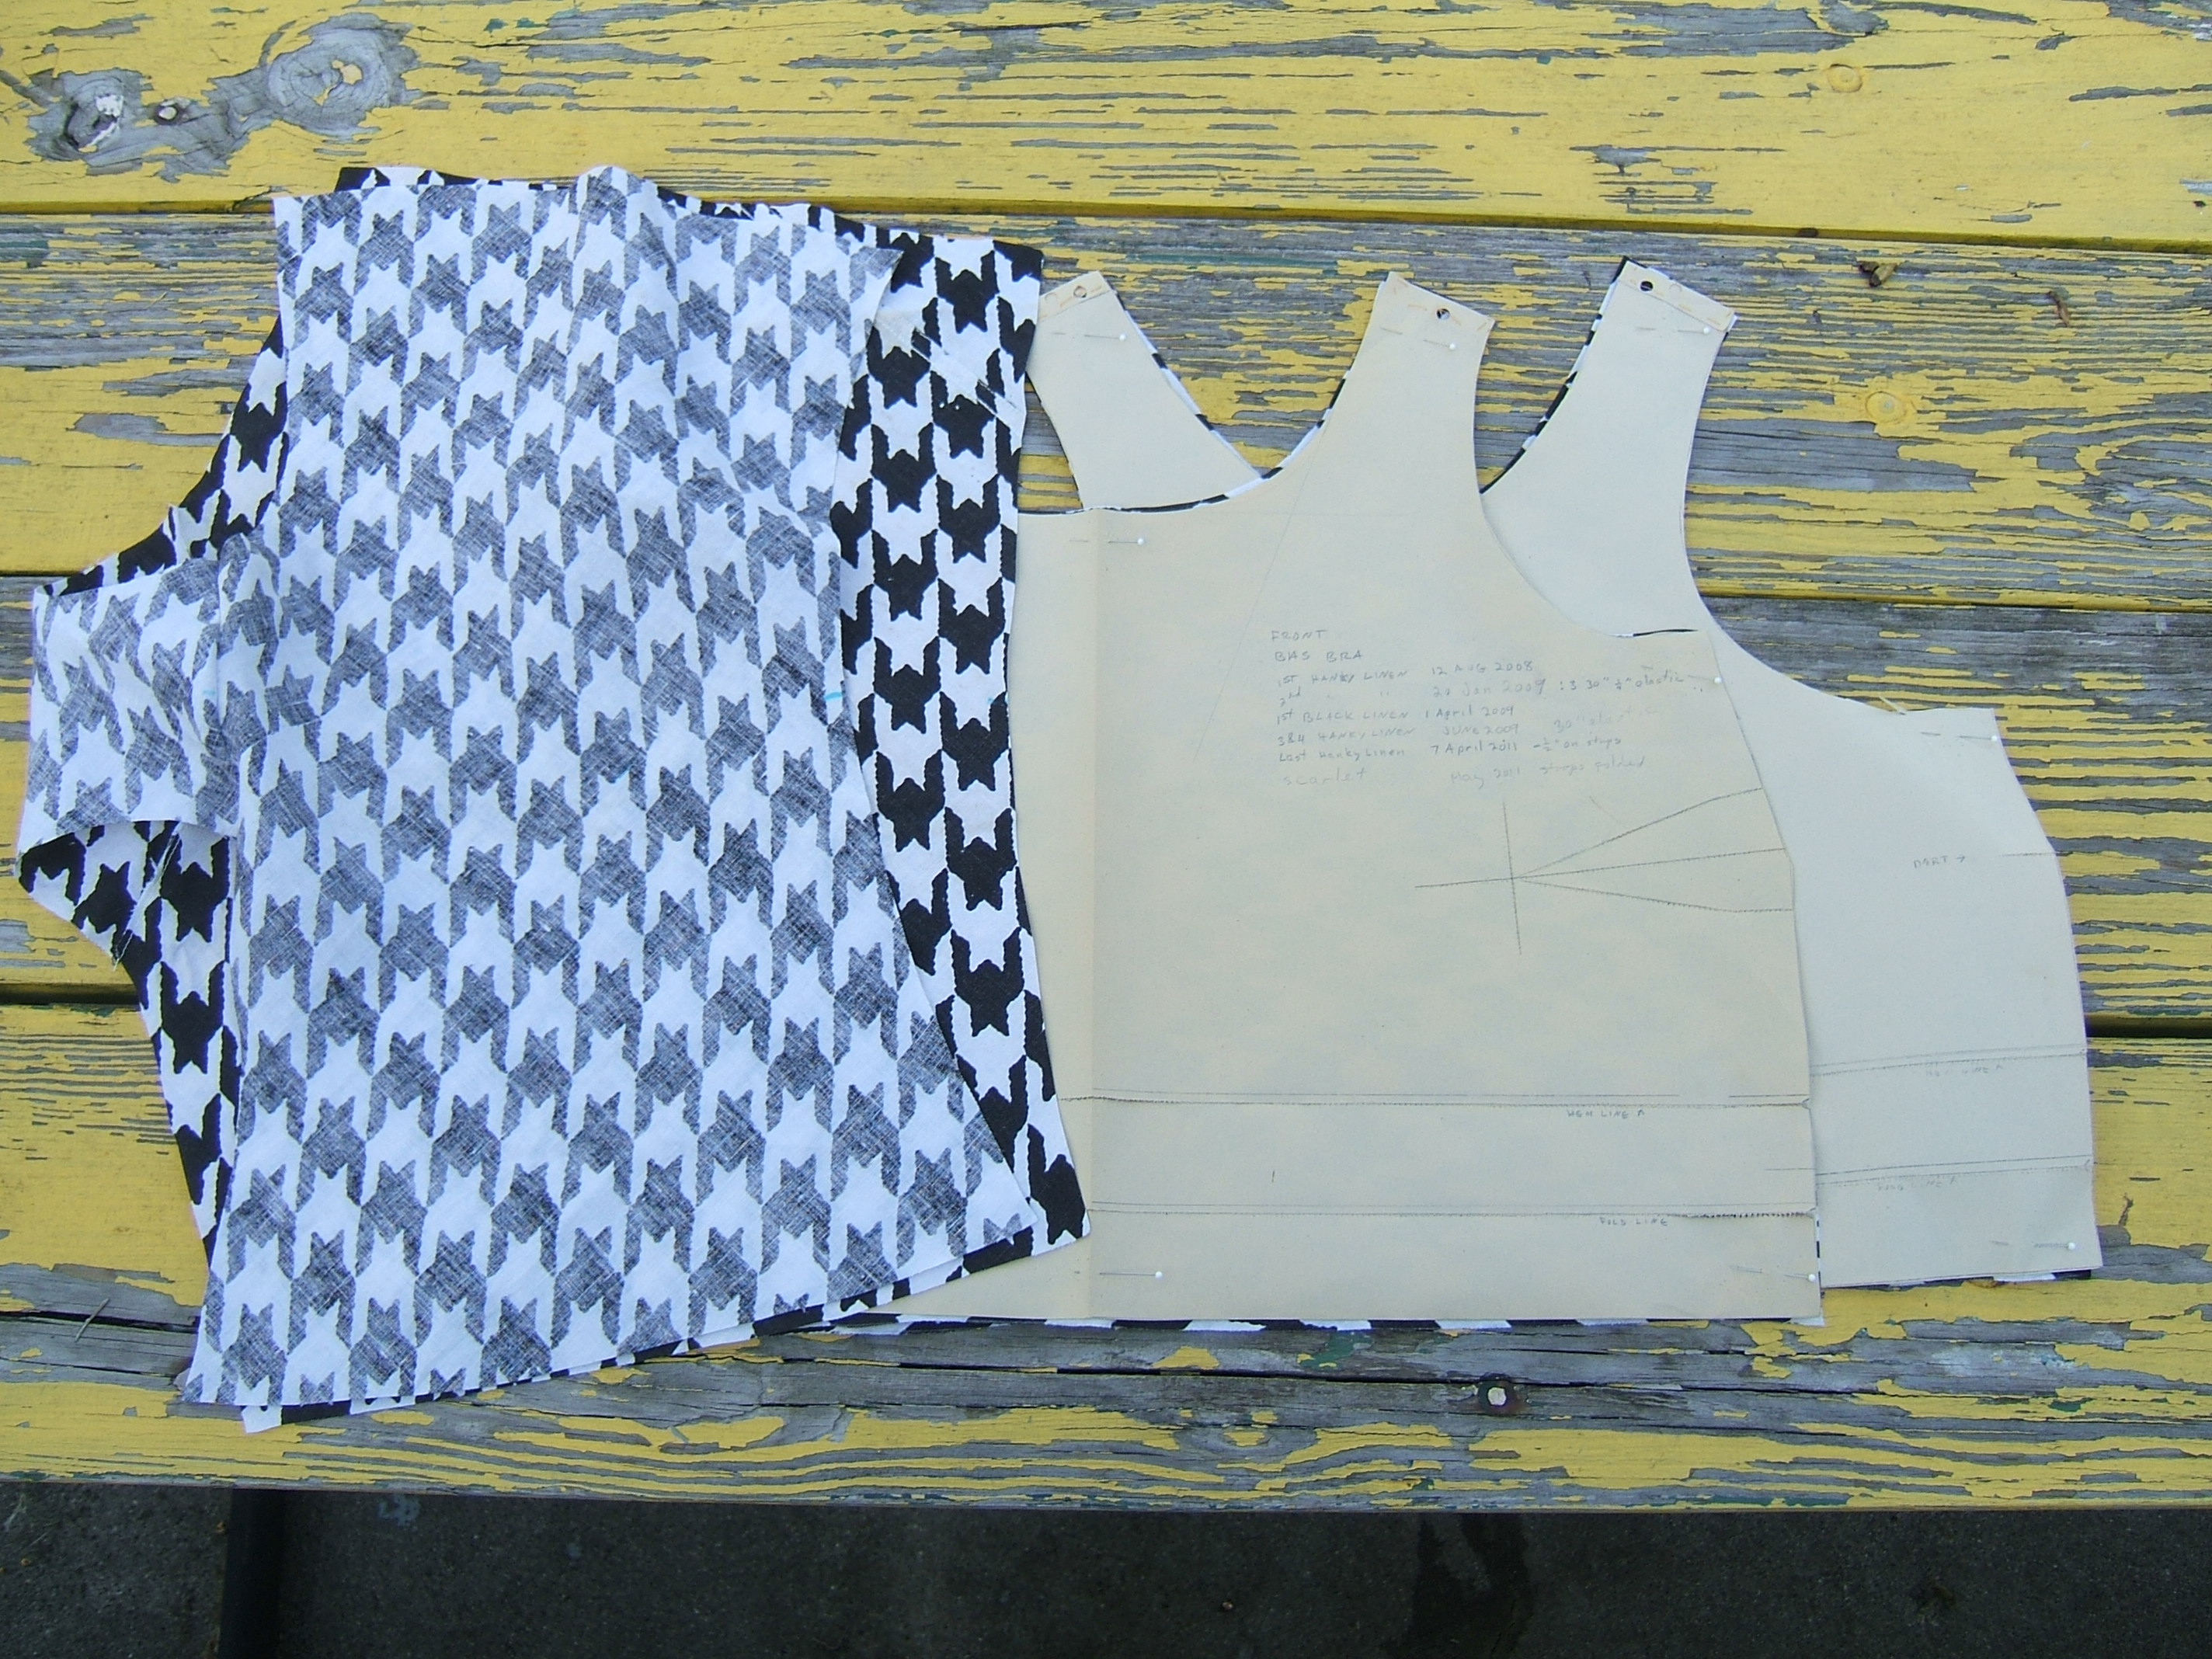
Between loads of wash yesterday, I cleared off a card table in the garage and cut out the back of a bra. This afternoon, I got blown off my feet while trying to cultivate the garden and decided that it was a good time to finish cutting. So I cut out and marked a front, then found the bias-panty pattern and cut out one each back, front, crotch, and crotch liner. I cut a seam across one upper corner of the panty back, but the front is seamless.
It was convenient to cut right next to the burnable-trash barrel, but there were scraps worth putting into the linen box.
And on Friday, I put white 100/6 on the treadle sewing machine. A bit busy with an eightieth-birthday party at the church yesterday and today.
Marked the panty pattern, put it back into the envelope, put the envelope back into the trunk, sewed the crotch and crotch-lining to the front and permanent-basted the crotch to the back. And changed the batteries in my sewing-machine light.
Wore my curry linen jersey, over a T-shirt, to the supermarket. The patches on the sheer-linen "taxicab" jersey will hold through the summer, I hope, and I may replace the back pockets on the curry jersey. I sure hope I can find yellow linen to make a new jersey for next summer, though.
Put the project on the picnic table and photographed it.
Then discovered this file looked funny when viewed with Firefox, and spent the rest of the morning correcting errors that w3.org found.
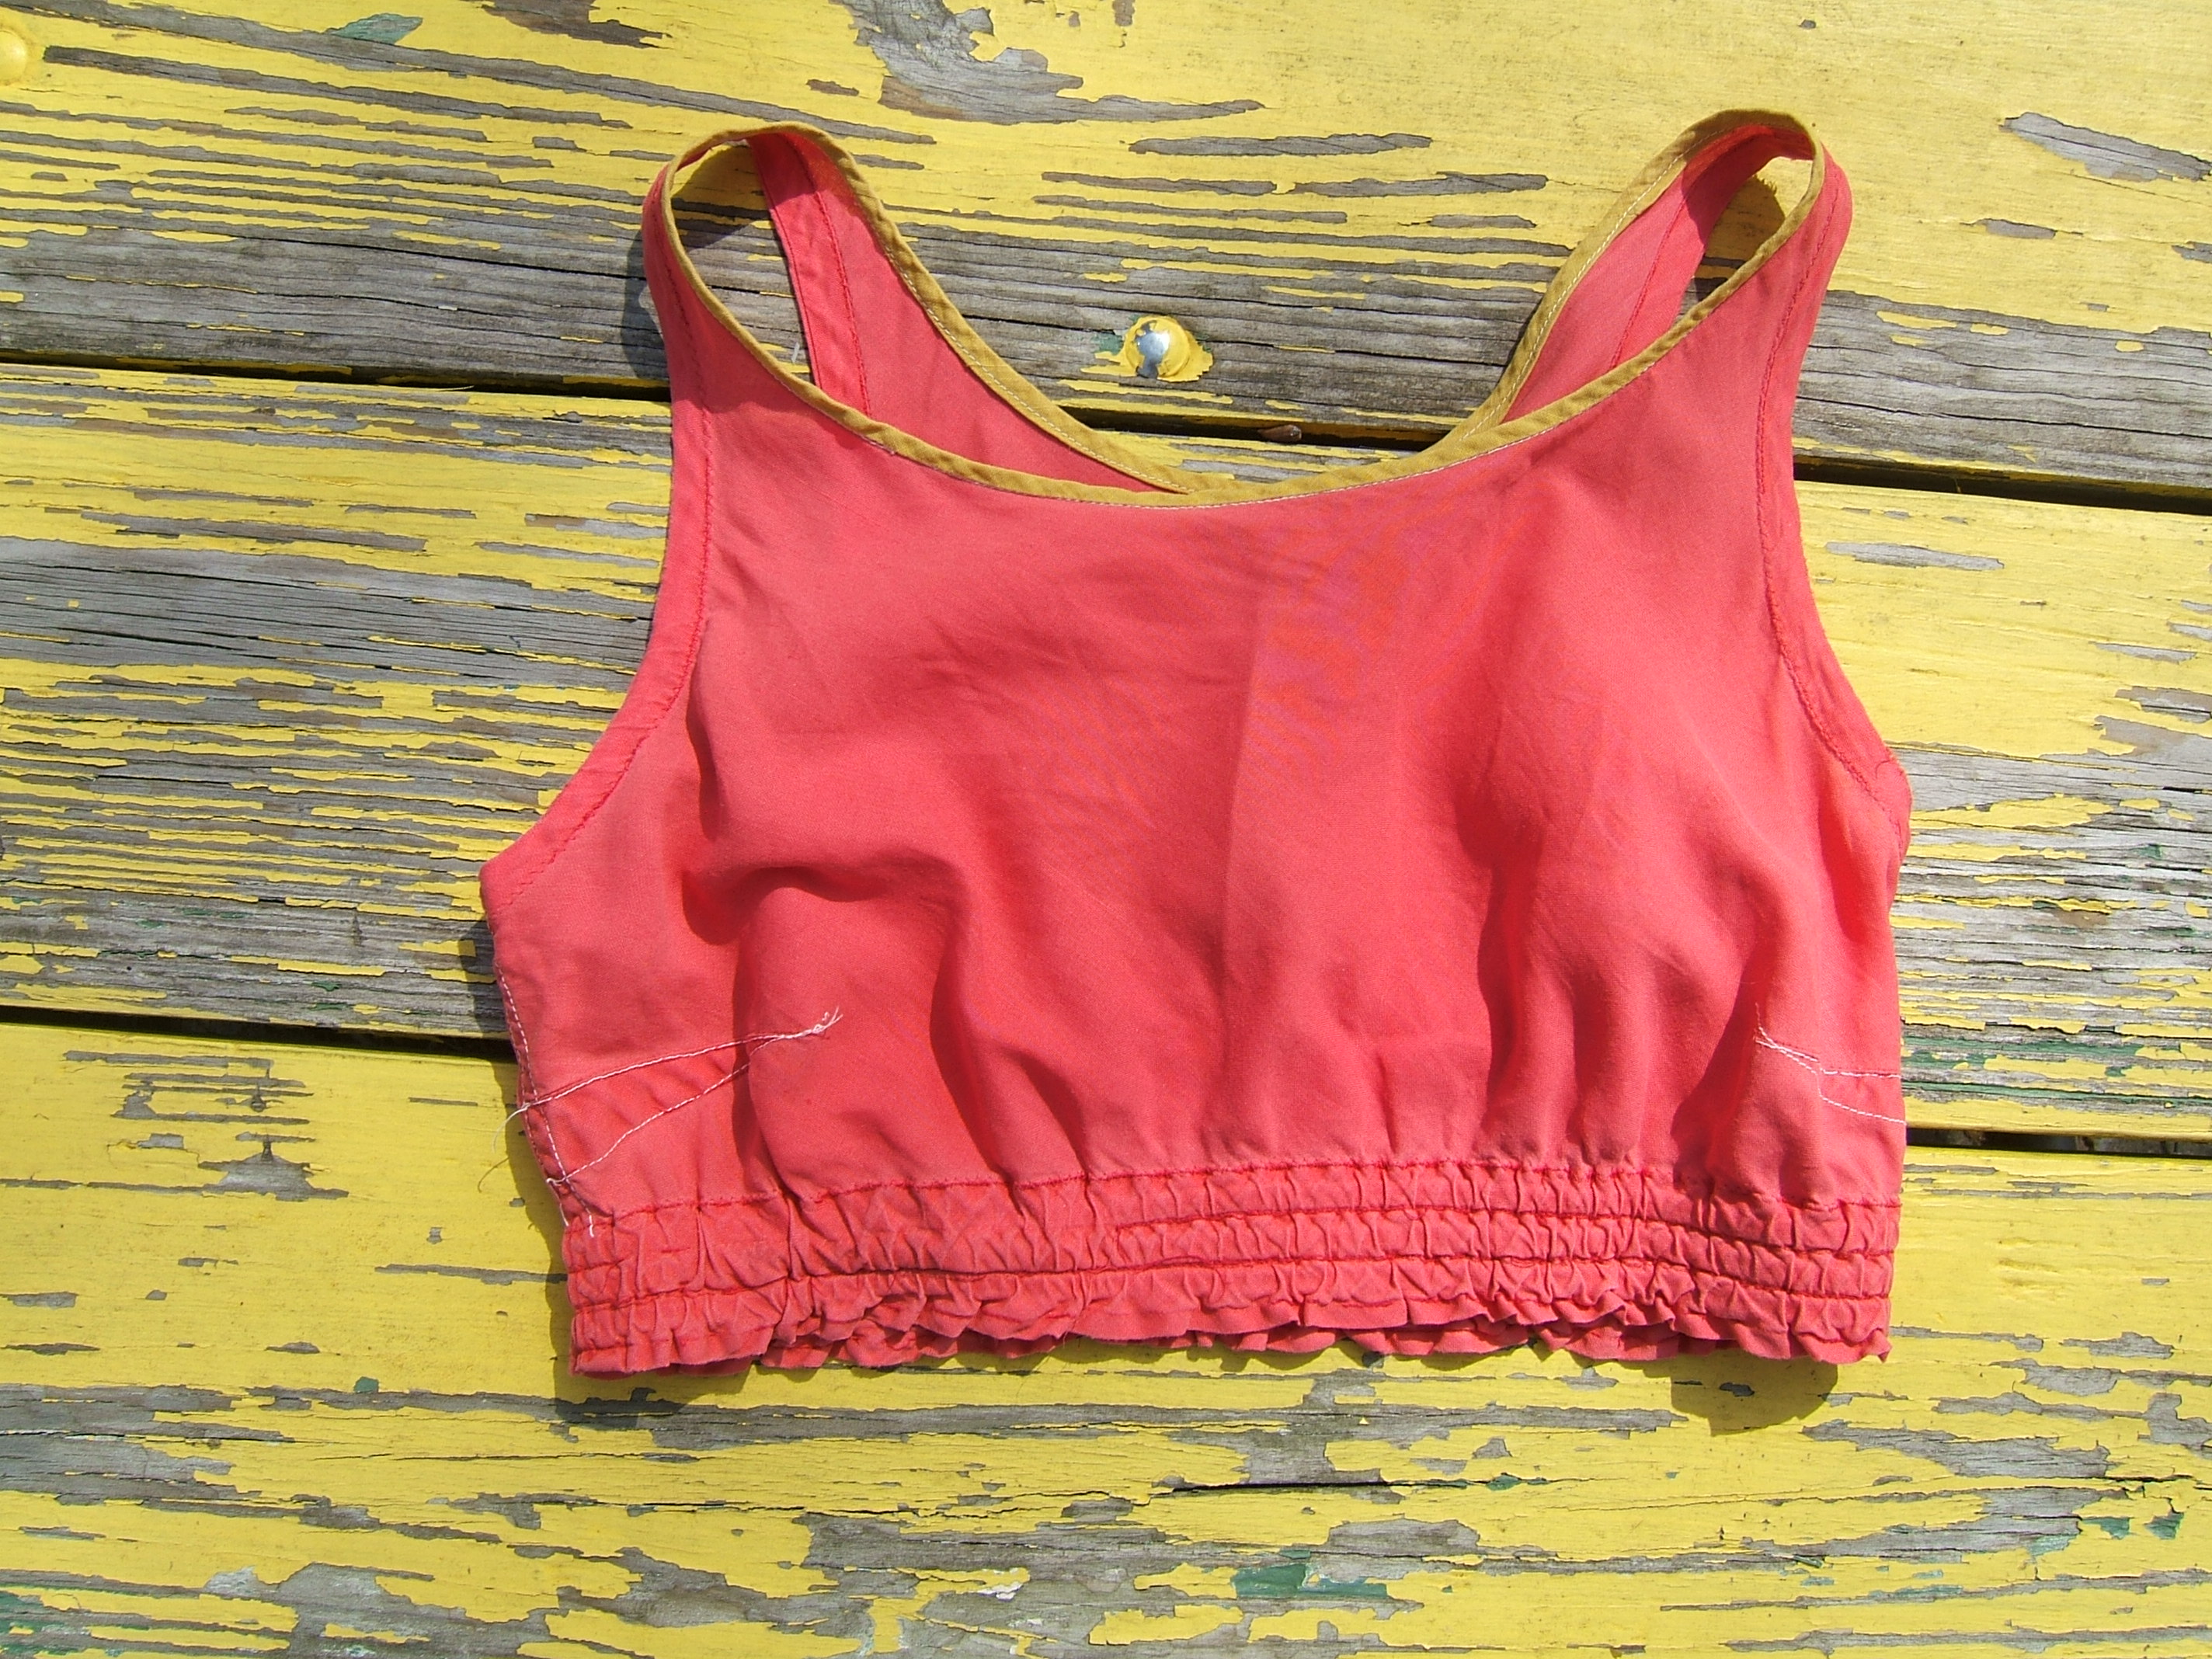
Before beginning to validate, I took another picture of an old bra to illustrate the Creative Machine post that inspired me to take the first picture.
⁂


The wind covered up one dart, so I cropped that side of the photo off.
Pressed the panties and bra, spent a lot of time trying to get the camera to work so I could document the process, gave up and top-stitched the dart, sewed one side seam of the bra to the point where it needed pressing, started the other side seam, got hung up on making the opening for the elastic, left a crease under a cold iron, sewed the first line of stitches on one side seam of the panties.
Sewed the little hem on one side of the gap for the elastic; now it's time to heat up the iron and press all seams as they lie.
old black-linen knickers →
spectacle-cleaning rags On one
or more of the days that I didn't feel like
sewing, I sat around picking threads out of the
knickers until three spectacle rags were marked
for zig-zagging. Must have been "or more"
because I marked along a raw edge with starch, and
it was dry when I zig-zagged yesterday.
After putting the three new spectacle rags into the laundry basket, I threw the rest of the knickers onto the pile of disposable cleaning rags; it's just too hard to draw threads in fabric that feeble.
I got around to pressing the panties and bra today. Then I sewed some. Now the panties have one side seam finished and the other needs to be pressed as it lies before top stitching. The bra has its shoulder seams finished and one side seam finished. The other side seam has the elastic gap hemmed and is ready for pressing: first as it lies, then into final position so that the top stitching can be done in two U-shaped passes, one on each side of the elastic gap.
Oops, I meant to photograph the elastic gap before pressing the side seam into final position.
Ah, well, that's two photographs I don't need to crop and scale. (I would have photographed the briefs if I had photographed the bra.)
⁂
Sun wasn't right to photograph the finished elastic gap on the picnic table, so I reverted to the glass table that can be moved.
There were some small difficulties because I had been obliged to take out the basting part of the first stitching because the seam allowance for one hem was too narrow, but not enough to make me put it back. There was also some difficulty because of the bit of seam I took out after sewing the first hem a little off center.
When pressing the gap for final stitching, I also pressed under edges where I planned to put hems.
When the side seams were finished, I pinned hems around the legs and waist of the briefs, then started to pin the hem around the neck of the bra, realized that finger-pressing was holding fine, finger-pressed around, and stitched it.
I didn't think until today that I will need houndstooth tape to finish the armholes. Checked linen-tape box; it looks as though I have enough that's already cut to the correct width and pressed under on one edge. And, of course, there are worlds of true-bias scraps.
⁂
When I was done for the day, I collected the scraps of bias tape and wound them into a hank, reserving the shortest scrap to wrap around the middle of the hank and fasten with an unsecured bar tack of basting thread. Put the hank into the linen-tape box, returned to close the machine and fetch the chair, found one more piece on the floor.
I threw it into the box loose.
There was a piece long enough to do one armhole; when I'd done that, I briefly considered preparing one of the long pieces that haven't been separated yet, then sewed one of the two pieces that were almost long enough to one of the short pieces.
I went around first sticking pins in at right angles to the seamline, to allow the tape to make its own accommodation to the curve. When I got each segment into the perfect position, I moved my thumb back toward the previous pin a teeny bit, so as to ease on the tape a teeny bit. I quickly realized that I needed a teeny bit of glycerin to make this work, and went off on a Great Glycerin Hunt. (Found it in the shower, where DH had been cleaning suction cups.)
Then, seamline pins nose-to-tail, and sometimes overlapping. Turned out quite easy to get everything smooth, even around the sharpest part of the curve. Well, no part of an armhole that big is very sharp.
When I'd gotten the armholes to the place where I needed to press before I could proceed, I tried to turn up the casing at the bottom, but I need to transfer the marks to the right side first. Hope I remember to put the dustpaper on both sides when marking casing lines on my next bra.
So I sewed the hems on the briefs. Now they are all done except for threading elastic through the casings and mending the holes left to put the elastic in. Tried them on, and they fit! But I might want to add half an inch to the hem allowance around the waist.
Duh! I don't need to copy markings that have mostly worn off to the other side — all I need is a hem gauge. Two, one for 1 3/4" and one for 1 7/8".
In the morning, I ironed a patch behind the hole in the front of my curry jersey so it wouldn't start a tear, and pressed the bias facings on the bra while the iron was hot. In the evening, I sewed one side of the armhole facings the way I sew flat-fell seams, and edge-stitched the top of the elastic casing. I want to press before proceeding further.
Good that the bra is almost done: the last curry bra has a hole and probably won't survive another washing. So I'm wearing it dirty until it tears. Remaining are the formerly-scarlet, now-rose bra and the white one, both well worn.
I thought the hole in the front of the taxicab jersey was a flaw in the goods, but when a hole develops in exactly the same spot on another jersey, something must be rubbing on my belly. The whole front of the curry jersey is very soft.
Finished stitching the armhole facings and the elastic casings today. Now remains only inserting the elastic — and deciding which vital project is most urgent. It would be my linen jersey, if I knew where to buy yellow linen.
Why did "three" have to be the correct number of quarter-inch elastics for my bras? Three is a very hard number of parts to divide something into. Took a business card, marked the stitching lines at the top and bottom on it with self-removing marker, fiddle-faddled around quite a bit before realizing that my Japanese centering ruler was the right tool: I found the center, then marked about two units on each side of it, which left about four units between those marks and the already-stitched marks. Then I put a piece of wallboard on the ironing board and slid the card around the casing, stroking dashes with a wash-out marker.
And, I find, I was forethoughty enough last time to write on the pattern that I had used thirty-inch pieces of elastic.
I moved the rocking-chair cushion down two categories on the priority list.
Opened the sandwich bag of quarter-inch elastic, found elastic salvaged from two previous bras. I didn't want to use re-cycled elastic in such an important spot, not to mention that they would be too short after cutting out the joins. But I took one to be the waist elastic of my briefs, instead of the cord elastic I'd planned to use. My waist, also, is hardly smaller than my underbust measurement, so it was just right after cutting out the join.
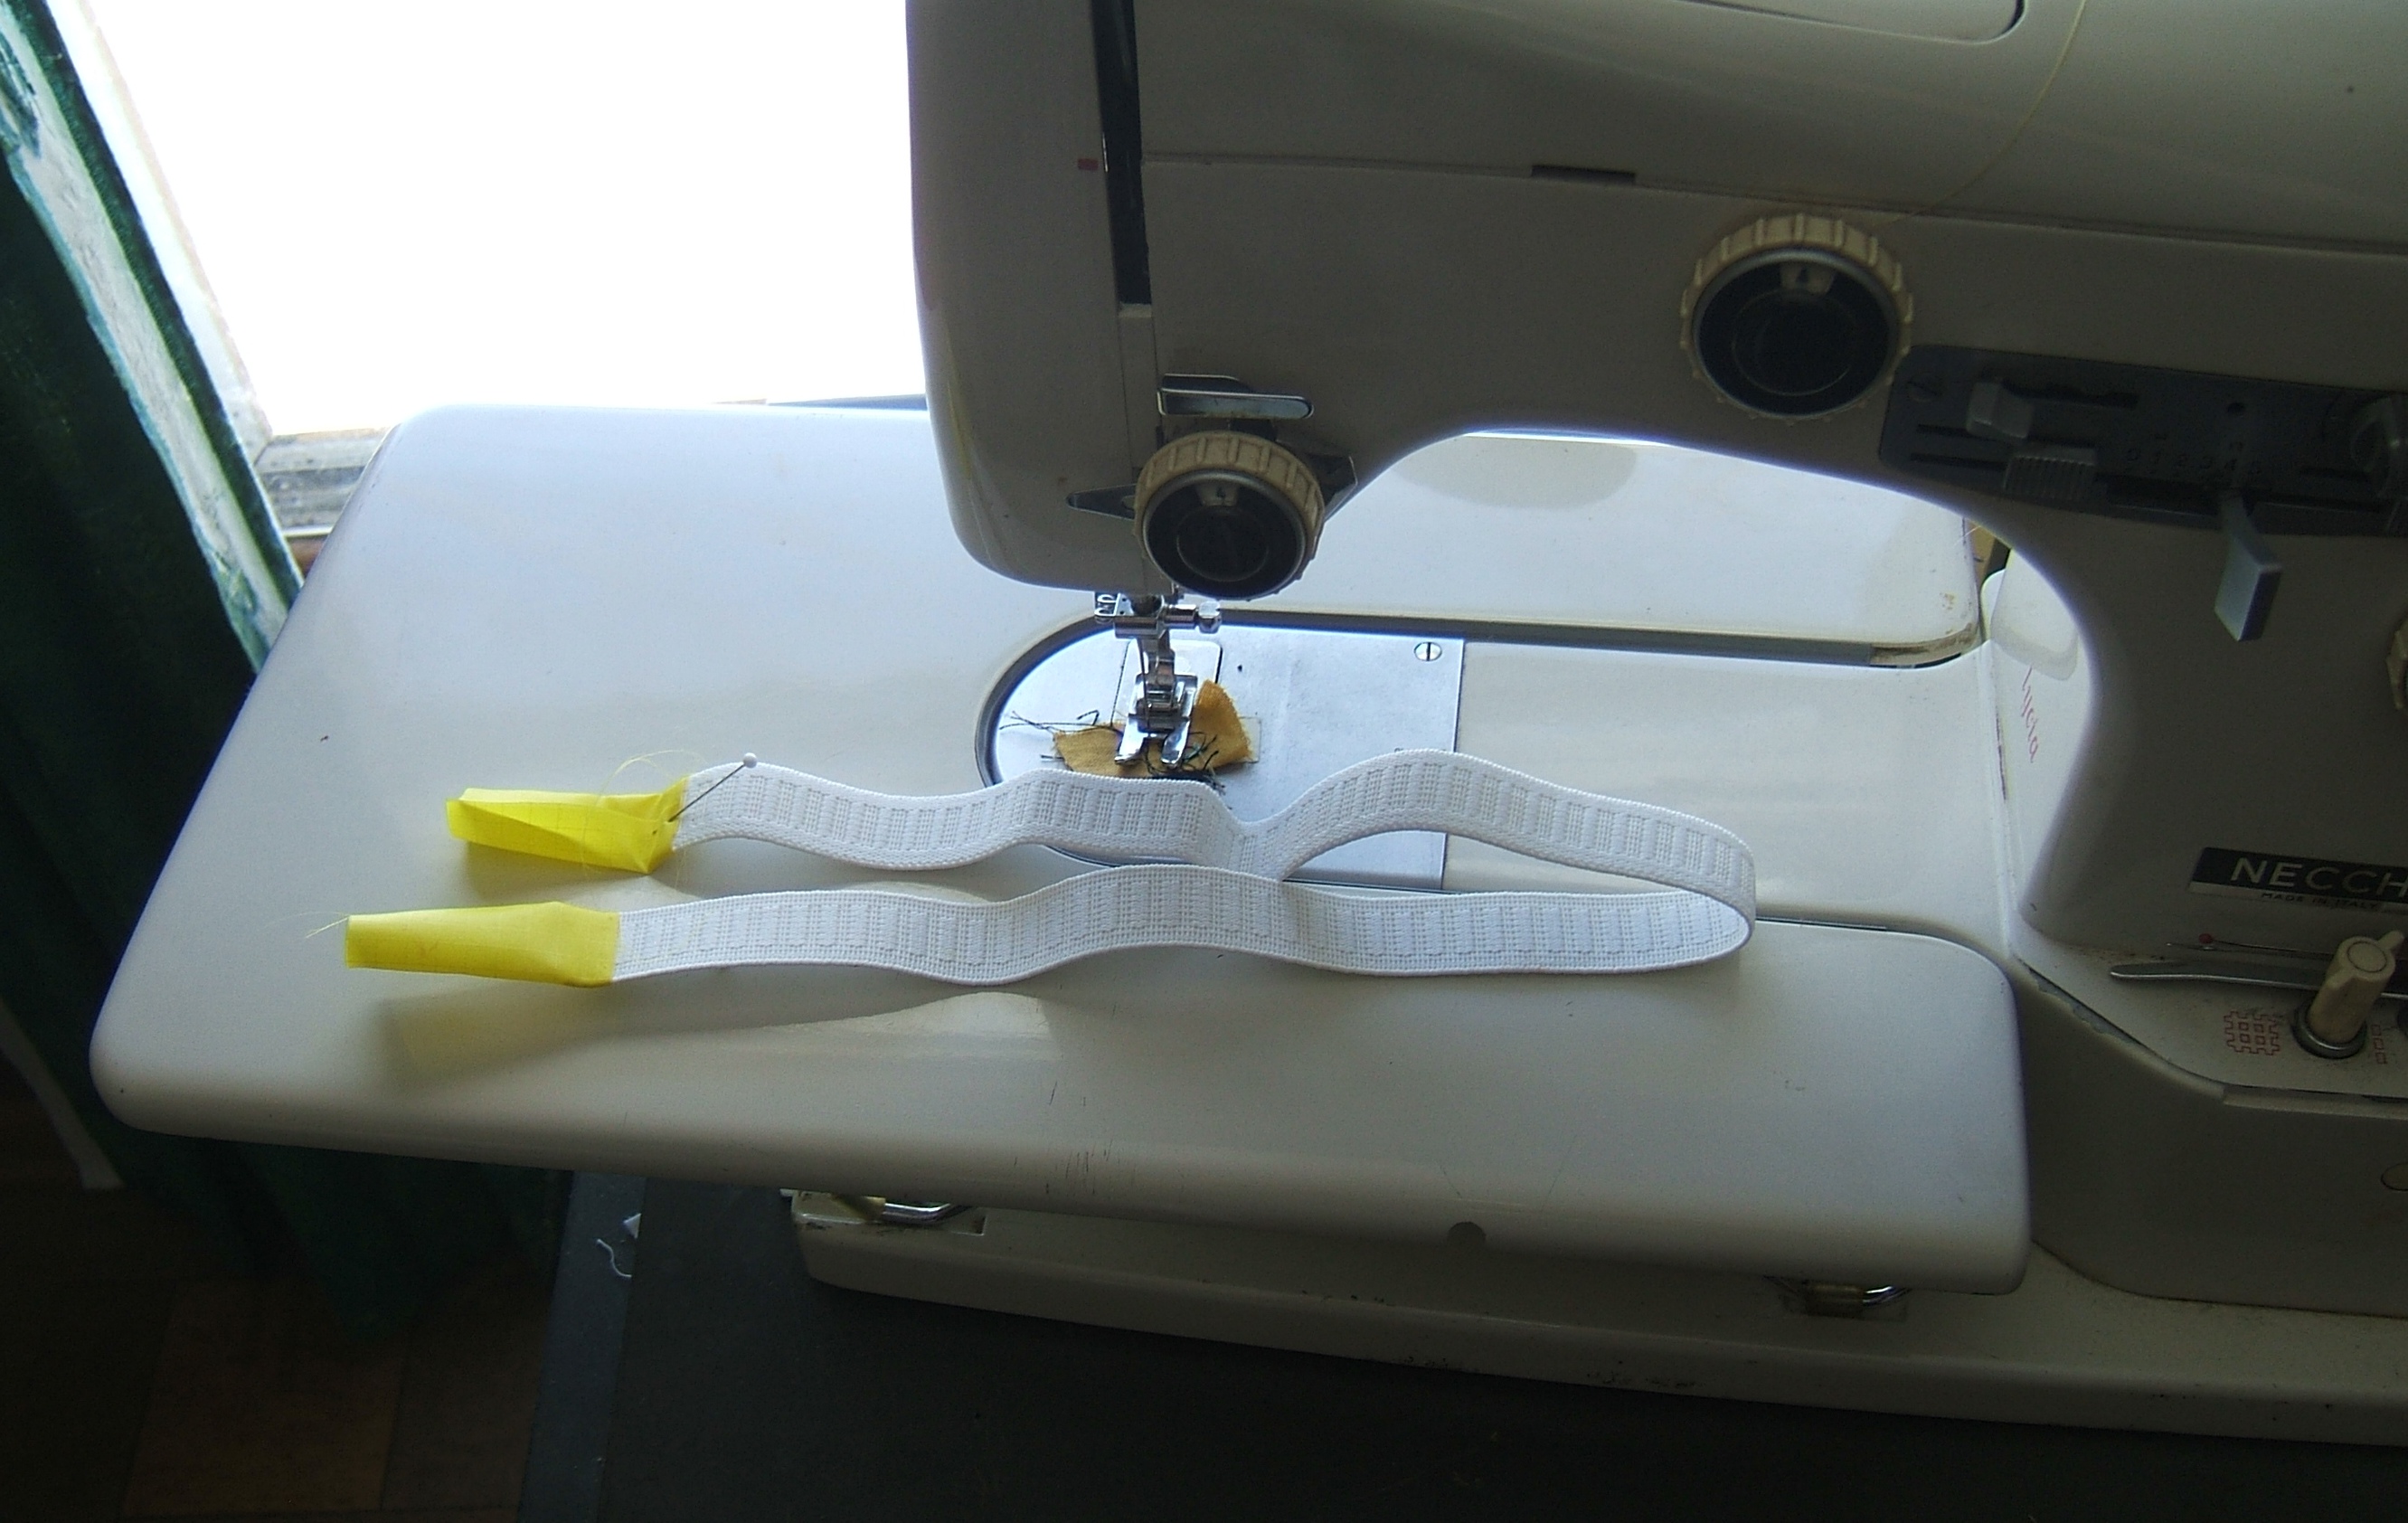
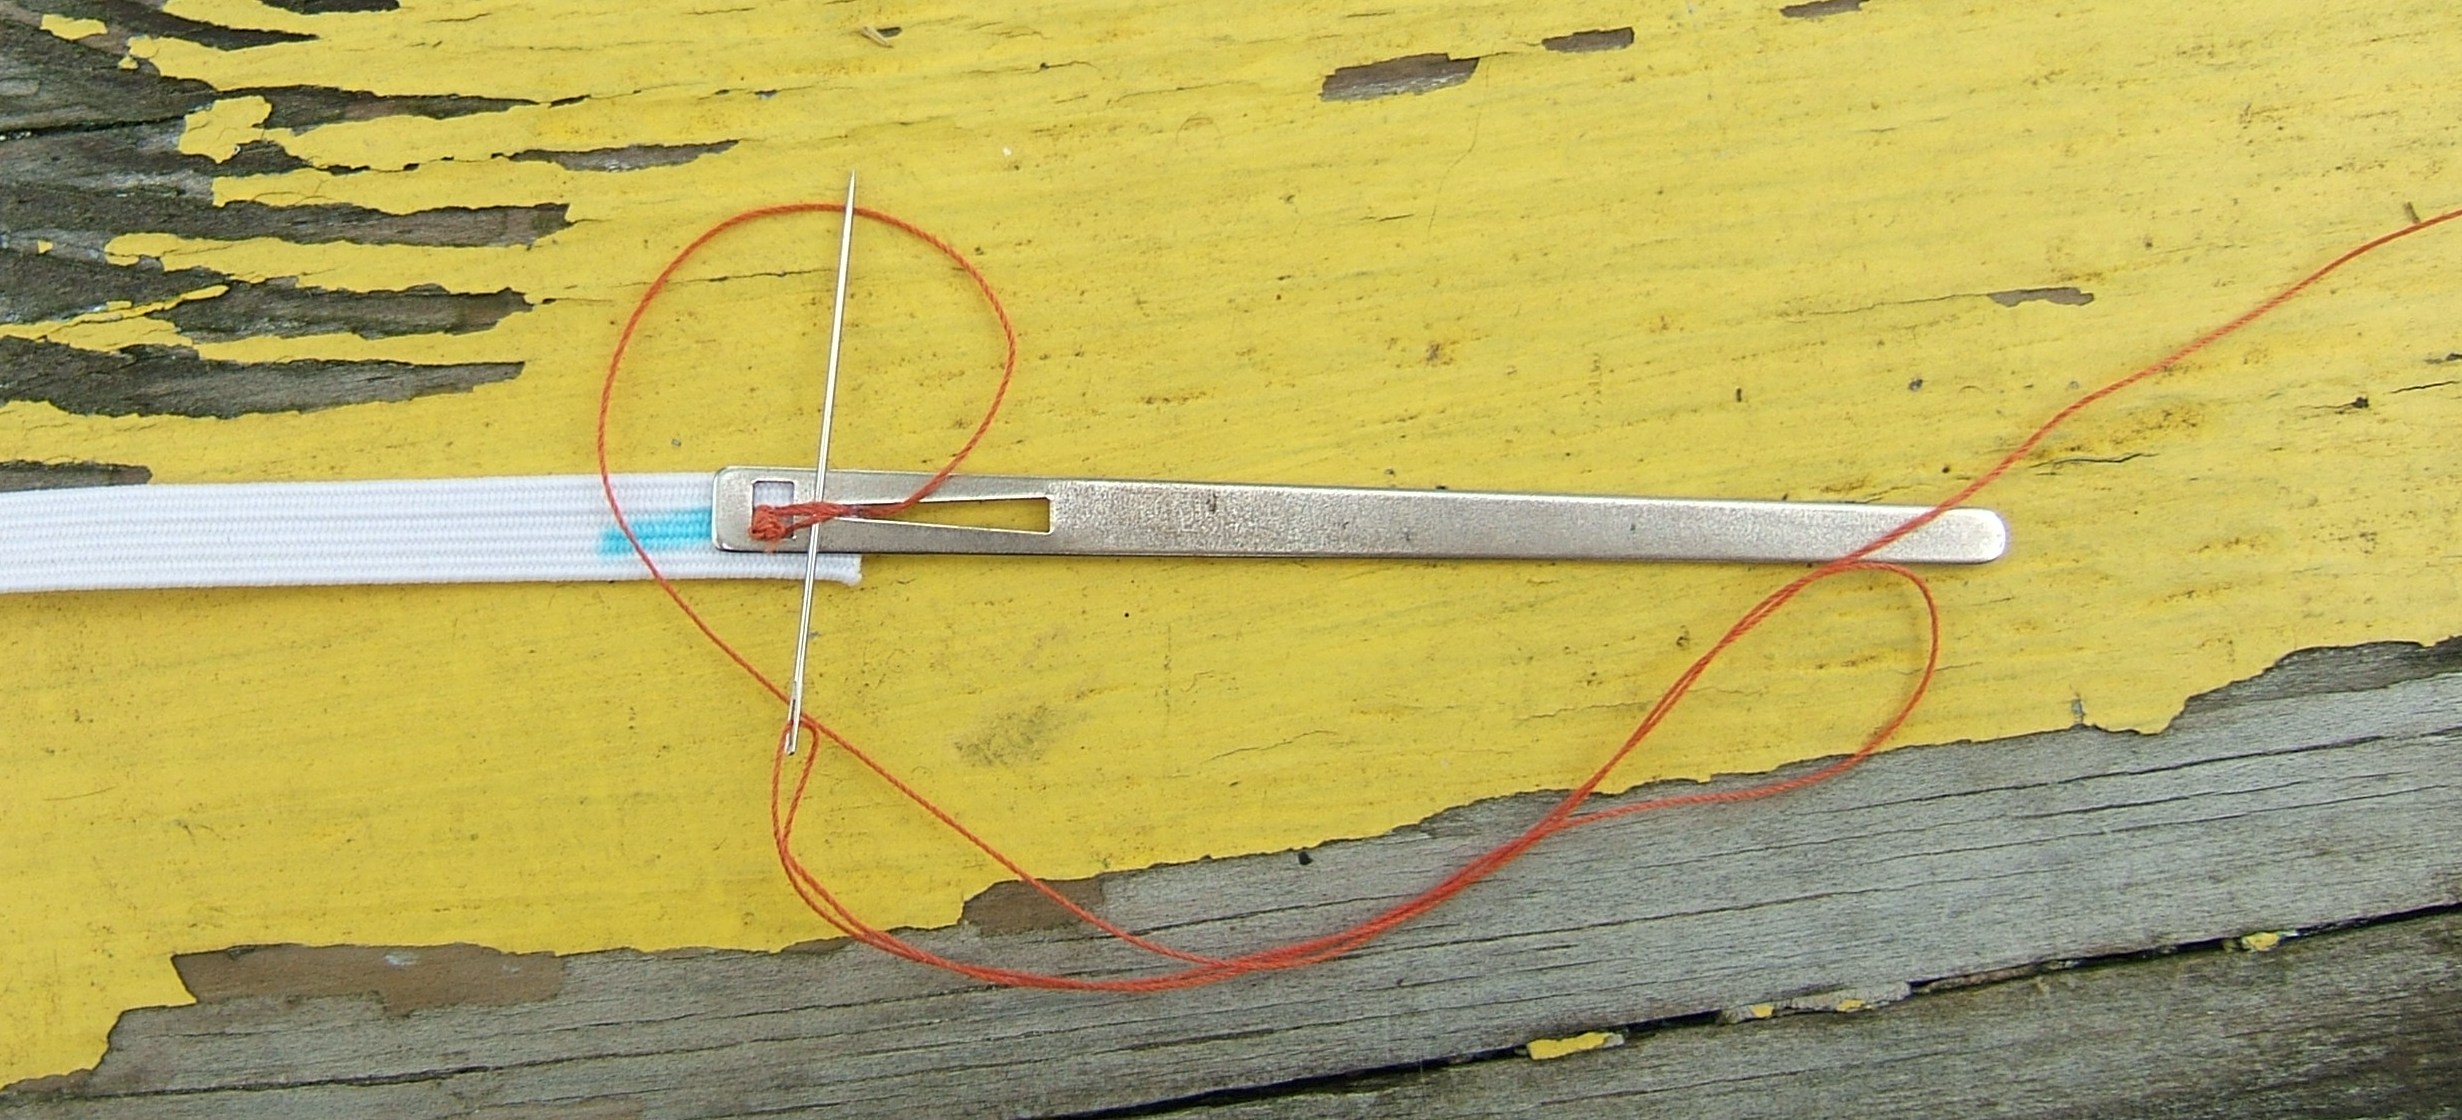
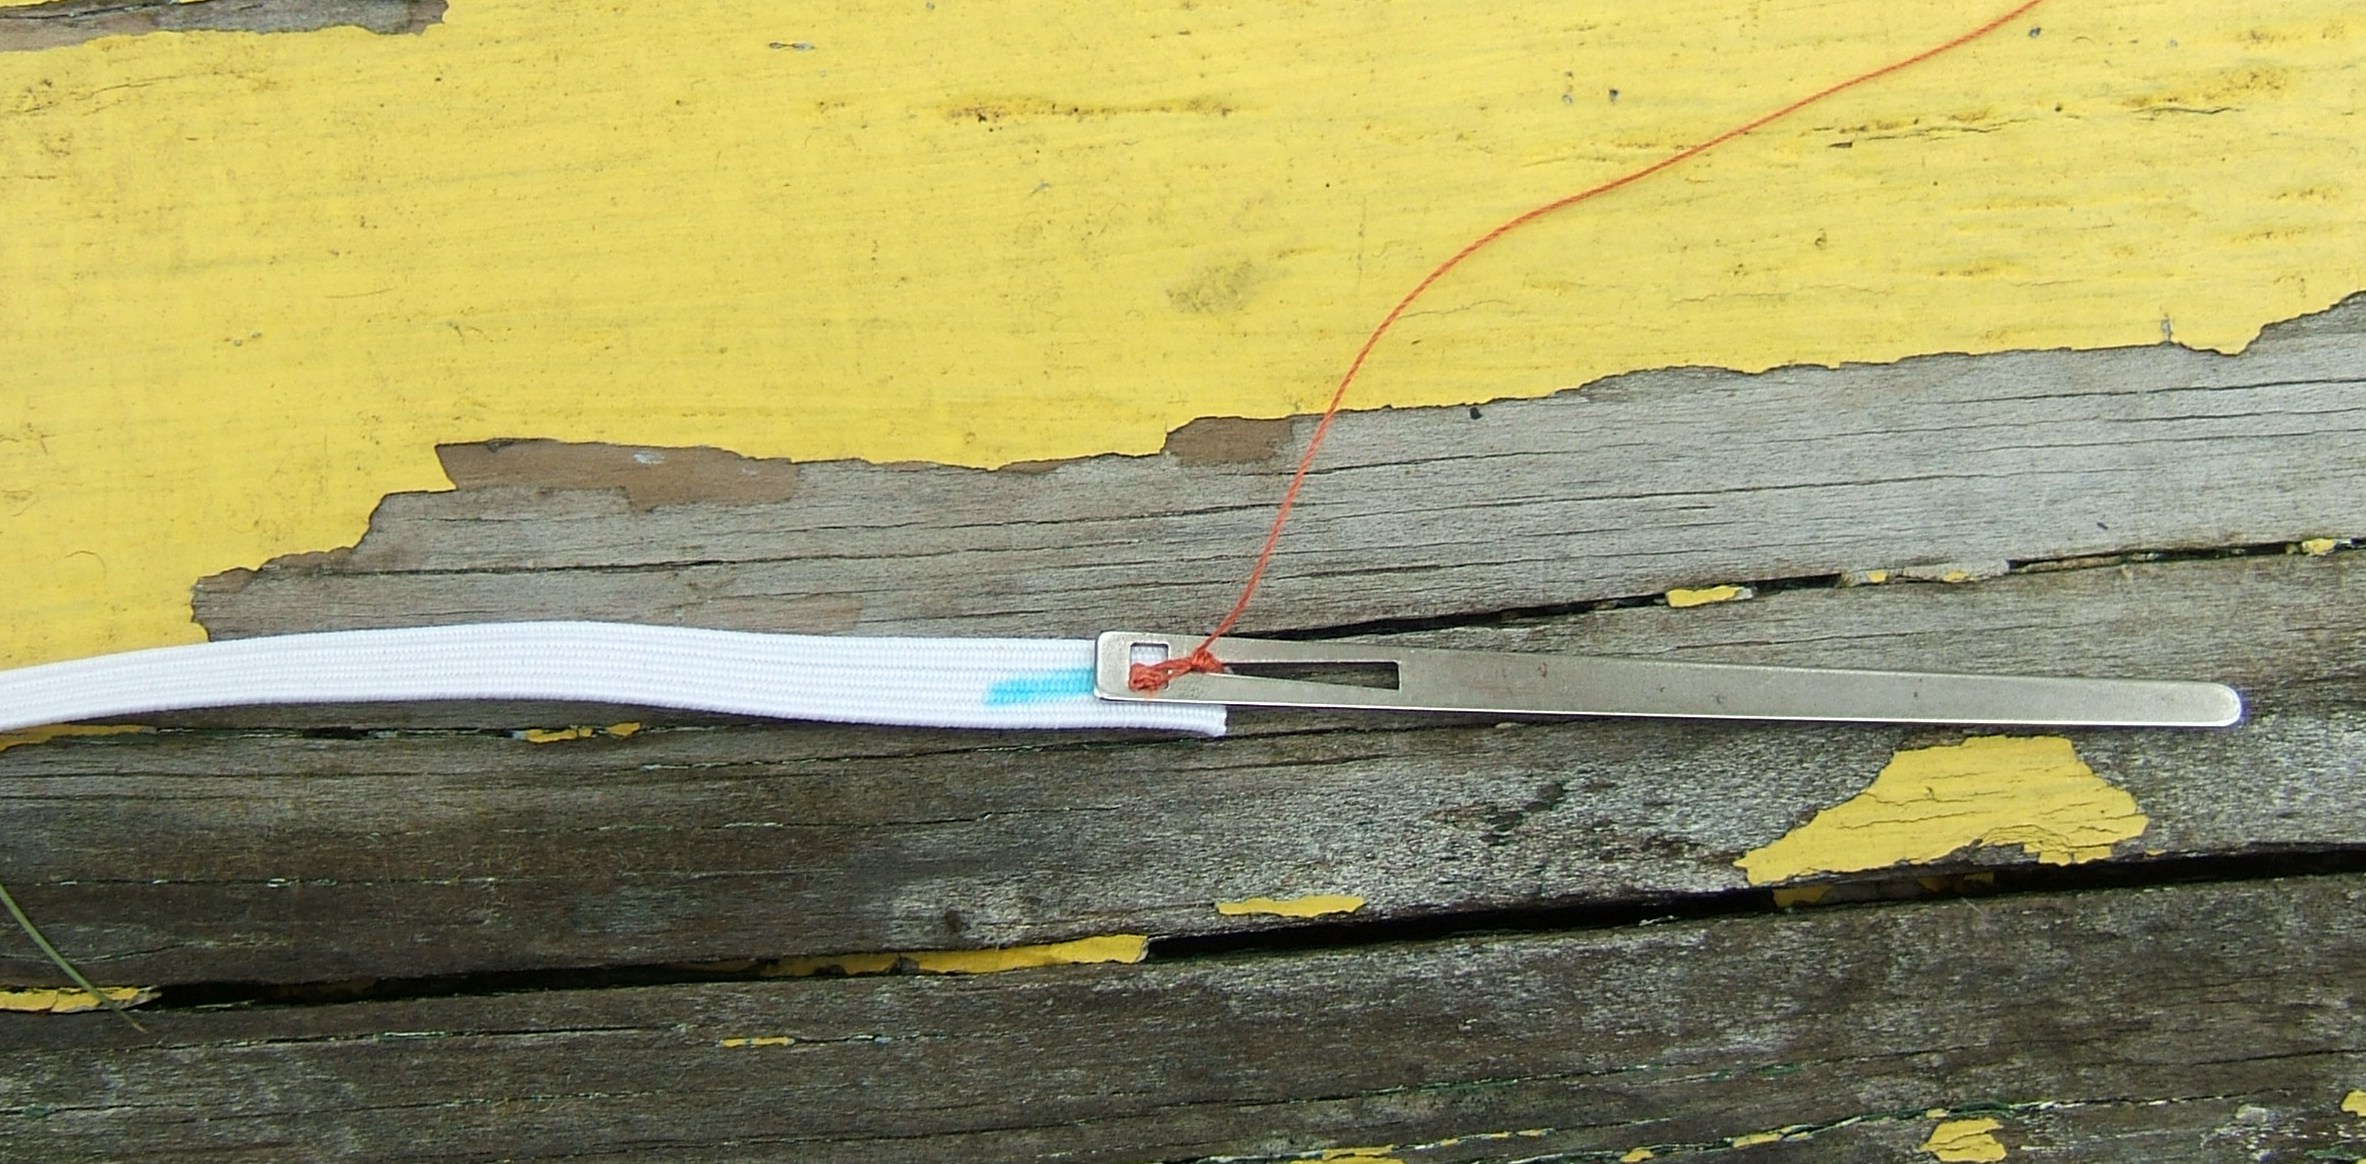
I cut on one side of the join, then sewed the join to a bodkin, and cut the other side after threading the elastic: look, ma, no needle holes in the end of the elastic!
Tried them on, they fit perfectly, the waist is high enough now that there is elastic in it, and the leg holes just barely need the baby elastic I'm going to put in them. I can use this pattern as-is to make a scarlet pair to go with my new red bras, if I ever get around to taking the red ramie to the church and bias-lining it. I *think* that it's too wide to do on the picnic table.
[off to fetch my six-foot folding ruler] Didn't need the ruler; having just looked at the ramie on the to-do hook, I could see that the table was only half as wide. But I measured them anyway: table, thirty inches; ramie, fifty-three.
I've added "ten yards of quarter-inch elastic" to my shopping list. My roll of elastic had only enough to cut two thirty-inch pieces. But one of the odd pieces was a little more than thirty inches. It also had needle marks showing that I'd unpicked a join — when was I that daft? — so I marked it for the top row.
⁂
I changed my mind and put the doubtful elastic on the bottom row, after realizing that the row closest to the breasts did the most work. The unimportance of the bottom row was confirmed when I tried the bra on after inserting the second round of elastic and found that it fit just fine — something to remember if I ever make a bra-topped slip.
That would be useful if I ever make that travelling wardrobe that's so far down in priority it isn't even on the list. Maybe. I wouldn't *ever* wear it without a blouse over it. Perhaps as the top half of a swimming suit — linen, even the artificial tow called "cottonized linen" that is all one can buy today — isn't nasty when wet.
Never mind that I gave up swimming decades ago — I might want to wade.
Thinking that I might want to write a tutorial someday, I took some pictures:
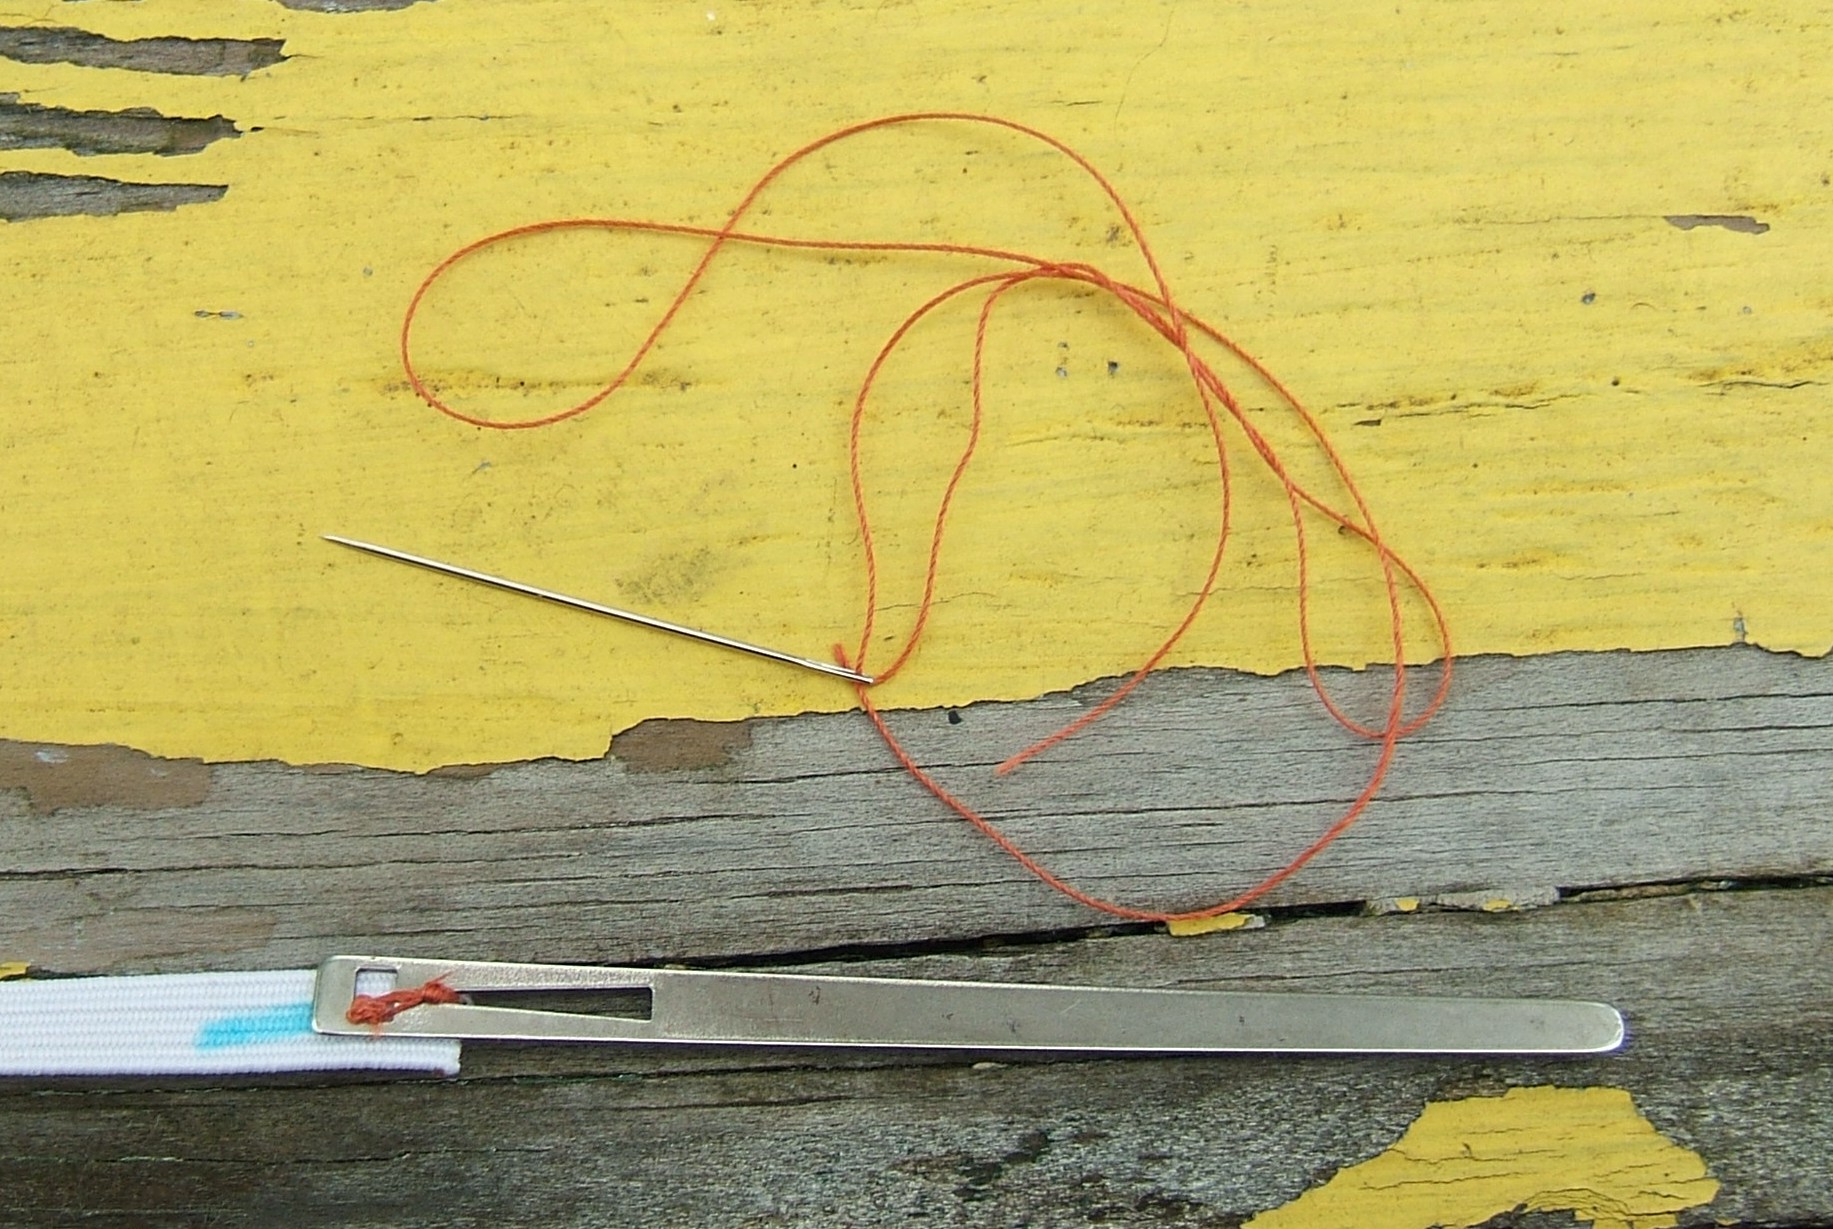
May 13
BRARAW31.JPG+ 1482787   5-13-15   4:59p bodkin sewn to elastic, lying beside the bra on the picnic table
BRARAW32.JPG+ 1520428   5-13-15   5:00p bodkin going into casing eye first, elastic on top
BRARAW33.JPG+ 1592327   5-13-15   5:01p bodkin pushed well in, ready to be pushed back.  I put a wrinkle at the eye of the bodkin.
BRARAW34.JPG+ 1590583   5-13-15   6:49p bodkin emerging from casing on top of elastic
BRARAW35.JPG+ 1513892   5-13-15   6:50p bodkin all the way out of the casing
BRARAW36.JPG+ 1561575   5-13-15   7:18p needle stuck into wrong end of elastic
BRARAW37.JPG+ 1602271   5-13-15   7:20p needle stuck into correct end of elastic
BRARAW38.JPG+ 1557657   5-13-15   7:23p beginning to sew ends together
BRARAW39.JPG+ 1717267   5-13-15   7:27p overcasting down the first side
BRARAW40.JPG- 1558095   5-13-15   7:35p out of focus
BRARAW41.JPG- 1510118   5-13-15   7:36p out of focus
BRARAW42.JPG+ 1515072   5-13-15   7:37p still out of focus, but one can sort of see the overcasting on the other end
Oh, man, it's hard to take a picture of one's own fingers! BRARAW42 was as close as I could come to photographing the overcasting of the second end. Didn't help that holding the camera in only one hand tended to put my index finger on the power button, so that when I got everything lined up just so — I'd turn off the camera.
Inserted the last row of elastic and hung the bra in the closet. Just in time: the hole in the curry bra gets bigger every day.
I wanted to take this one last chance to improve on BRARAW42. (Spoiler: not very much.)
But first I documented the attaching of the thread to the bodkin — starting with the tying off:
Inserted the elastic, secured the thread, overcast one side,
Since they are on the inside, I haven't bothered to rub off the water-erasable blue marks.
Just checked my supply of white baby elastic. There will be some left after I finish the briefs, but far from enough to do another pair. I'm running out of space on my shopping list.
I bought swimsuit elastic instead of white quarter-inch elastic, thinking it would hold up better. I hope that wasn't a mistake. At any rate, I didn't get a full ten yards because there were only 7.75 yards left on the spool. Did get ten yards of baby elastic, but I think there is more than enough left of the old batch to make another pair of briefs. Didn't measure it.
I did measure the second piece after putting the first of two matched pieces into the leg of my briefs and deeming it too long: twenty-four and a half inches is too much even though I used up at least an inch tying the knot.
Mended two pairs of briefs that aren't worth mending this morning. Re-tying a knot hardly counts as mending even though I had to pull the elastic out of the waist and thread it back in again. And the Necchi was already set up with black cotton thread and set for zig-zag, so I re-stitched some hems that had come undone on the other pair. I think I caught the elastic in some of the stitches, but I'll be throwing them out pretty soon.
Been thinking that with both card tables available today, I should cut out something. Perhaps a bunch of new briefs? When the shabby ones are gone, I'll still have enough, but just barely. Or, perhaps, the wool overjersey.
And the fleece slippers have the same deadline as the wool jersey; perhaps I should get them out of the way.
Next project selected when I hung an ill-fitting cotton jersey of deprecated design on my to-do hook: I have some all-cotton jersey or interlock (I need the ladder to check) of an excellent shade of yellow; looks like worlds aplenty. Since I can't make a linen jersey (I did do a search for yellow linen today), I'm going to be wearing the cotton jersey more often than I did last year, and its state of wear has gone from "embarrassing" to "dangerous" — hence the decision to re-stitch the popped seams and undone hems on the deprecated jersey.
I need a new cotton jersey.
shorten bike knickers
When I hung the deprecated jersey on the to-do hook, I noticed my gray bike knickers and reflected that we've already had an eighty-degree day and the gray knickers are more appropriate for early summer than the older black knickers.
So I tried them on, decided that I should put'em back the way they was, put in a one-inch hem, threaded two loops of cord elastic that were on a near-by hanger through the hems, tried them on again, mended the gaps, put a particularly-nice spectacle-cleaning rag into the left pocket, and hung them on a hook near the sweat pants I wore on my last ride.
<dancing> That was, by the way, a training ride, NOT a rehab ride! </dancing>
But I did shorten them; I'm pretty sure the original hem was half an inch. I vaguely recall thinking that two inches or more should come out. Examining the pants suggested that I started the job late last summer, took out the old casing — I remember pinning up a cuff to see how much to take out, and resolving not to cut anything until I'd basted in a casing and ridden in them. Then I realized that I'd iron in dirt if I didn't wash them first, basted the turn-unders to prevent fraying, washed them, clothespinned them to two wire hangers, aired them for a couple of days, moved them to the to-do hook, and started wearing my winter clothing. I should check last year's sewing diary, but I'm not that curious.
New item added to to-do list: patch old jeans. They aren't worth it, but I don't have another pair of shabby ol' wore-out jeans to slop around in.
Perhaps I should move the gardening pants ("linen-cotton shirting pedal pushers) up on my priority list.
"linen briefs" remains on my list even though I made a pair out of the scraps of my new bra, because I plan to make a pair from the red ramie too.
I doubt that "more pillowcases" will ever get off the list, no matter how many I make. I'm making some progress in using up those in the rag bin. I tore up one to make three sweat rags and a few skillet wipes just today. One of the sweat rags will come out of its first wash as skillet wipes, and one of the rags I washed today is now skillet wipes, so I should be tearing up another old pillowcase soon.
Read the to-do list on the other monitor, grumped "where are the scraps I want to use to make pockets for my Sunday dress", turned around — and there they are, centered in the wall of shelves, on top of a stack of books, practically slapping me in the face.
And it looks as though there are enough of them to make a shirt.
Turned out I could pull the yellow fabric down without fetching a ladder. But it's jersey, and almost sheer. I swept the picnic table and carried it out intending to starch it. It covers the table completely, four rumpled layers thick. Must be six or eight yards of it. Before filling the starch sprayer, I stopped to think that starched left-overs would yellow and might rot or draw bugs if stored for a long time.
So I must first assemble the pattern and cut off just enough for one shirt. That will require a ladder. Or, at the least, the ammo box.
⁂
The kitchen step-stool did the trick. Much pattern-sorting later, I carried the chosen pieces out to the picnic table (which had been covered with (I think) male catkins from the cottonwood trees), started to lay them out, brought the collection of rocks into reach, chased down the back and front, laid out the pattern.
Humm … I'd better re-check the lay before I cut.
⁂
Yes, the back and the front can be laid side-by-side with room to spare. I could cut the front pockets beside them, if I weren't planning to cut both in one piece (to be separated by a pencil pocket), and I might well be able to take them from there anyhow — but I'd need to line them up with the armhole.
Back to the narrative: I made a mark a generous space beyond the patterns, brought in the patterns, shook the botanic waste off the cloth, and brought it in — losing track of my bright blue, two-inch mark in the process. It was surprisingly difficult to find it again.
Now for the vexed problem of cutting jersey more-or-less on grain. Skipping over much puzzlement, I draped the fabric over both card tables and tried to arrange it square, with each edge a uniform distance from the edge of the table. Then I pulled it until my mark was exactly at the edge of the table, pulled and patted again, and made another mark on the other edge, right at the edge of the table.
Then I fetched my handy-dandy laser level, and bless whoever it was who brought one to a meeting of the banner committee. I don't use it often, but when I do, it makes an impossible task easy and accurate.
The curl of the fabric stood up the mark on the far edge for easy aiming. Even after I put the level on a book, there was a gap in the line because the north table is tilted a little. I decided to mark to the gap before putting another book under the level, but found that my usual habit of watching the sparkles on the pen, rather than the sparkles on the fabric, enabled me to precisely hit a line that I couldn't see.
So the level was back in the drawer only a minute or five after I took it out.
Now it's cutting time, but I think I'll lunch and nap first; the blue dots won't fade, and I prefer to be awake when using sharp objects.
⁂
The marks didn't fade, but clouds covered the sun and made them hard to see; there is no overhead light in the parlor. But they were plain when I was close enough to cut.
I nose-measured the left-over fabric as four yards. The piece cut off is less than two.
I folded it in half and basted the freshly-cut edge to itself to prevent curling, then sprayed it with starch diluted with a little more than its volume of water. I made very little effort to make it lie flat. Later I turned it over and sprayed the other side.
After supper, I copied the front-pocket pattern onto spreadsheet paper which was, conveniently, exactly as wide as the pattern, in order to add a fold to the bottom.
The nose knows! Last night, I left the yellow jersey laid out on two card tables to dry. This morning I pulled the basting thread out, then unfolded my six-foot carpenter's rule and measured it: sixty-two inches.
Well, I'd thought it lacked more than ten inches of being two yards. But I wasn't far off.
⁂
Once the jersey was pressed — dry, so I hope I haven't ironed in any stretch — and laid out on the card tables, I got my folding rule out again: sixty-four inches: discount an inch on each side where they messed up the fabric opening the tube, and this piece is square.
If it weren't for respecting the grain, I could lay a sleeve out beside the front and back. The pockets-piece fit beside the hems, but I moved it up to the armhole to give the edge more clearance.
Oops, I almost forgot the straps that support the pockets. Good thing "Measured the casings on my two linen jerseys" is where I could glimpse it as I was closing the file. (Non-knit jerseys use drawstrings instead of straps to support the pockets.) The cuffs of the sleeves also don't have a pattern; I'll measure the cuffs on the old cotton jersey to get the width, and measure the fabric around my arm to get the length.
⁂
And I'm going to need a neckband! I do have a pattern for that — I should have torn it longer; I've written on all of the front and half of the back. (One end is torn to indicate specific width, length according to stretch of fabric.)
The front is cut, marked and on the ironing board.


Turns out that the pattern has a lot of writing on it because I've been using it for both neckbands and sleeve bands, and I've been writing on it when I cut sleeve cuffs by measurements. I have added "YELLOW JERSEY MAY 2015/neck 19" cut/sleeve 6" x 12" cut"
"cut" means that those measurements include seam allowance.
The scanner trimmed the torn edge straight. The torn edge is at the end with a hole punched in one corner.
Before fiddling with the fabric to find out how long to cut the sleeve bands and neckband, I took a strip off one lengthwise edge by drawing along both sides of a yardstick twice. The yardstick is a little more than the one inch I wanted for the support straps, but a slightly-wider strap is all to the good. I cut both straps off in one piece, folded the strip in half, basted around the cut edges, and saturated it with somewhat-diluted starch. I'm hoping that if there's enough starch in it, I can overcast the raw edges together by machine; it's tedious to bring two edges exactly together with hand stitching.
Speaking of which: I'm not going to get around to ironing it and cutting it along the crease today; why not give it another coat of starch?
I wonder whether I've got a flat stick narrow enough to slip inside the tube while I flatten the seam? I could slide my stainless-steel pocket ruler along like a bodkin, ask DH to cut me a strip of wood, or it just might flatten nicely while empty. Especially if I lay it on a flat surface.
Well, there's a job that got off the to-do list before it got on. When I was hanging up the wash, I noticed that a pillowcase — one made from an old sheet — had torn at the bottom seam. I tore the rest of the seam off and hung the case up to dry. When I brought the wash in, I realized that the White was already set up with white 100/6 cotton, dragged my secretary chair into the bedroom, and re-sewed the seam I'd torn off.
There's a row of needle holes a tad more than a seam allowance from the torn edge; I'm having trouble imagining from what part of the sheet I made this case. I could have torn off a narrow hem along the weak place at the crease, I suppose.
It took longer to write this report than to do the job.
Didn't touch my new jersey. I'm going to wear the old one tomorrow. I washed it today because I sweat a lot last Thursday.
It was a very successful ride. Pity there's nothing to go back for. There's not even a place to buy a snack. (The near-by Marathon station had some packaged snacks, but none were as edible as my emergency bars.)
Today I pressed the piece I cut to make straps, ironed it through a damp cloth, dried it well, took out the basting and pressed it open, then cut along the crease.
I folded each strap in half, carefully matching the edges and using a right-angle pins four or five inches apart to keep it folded.
Then I threaded the machine with basting thread, set it for maximum zig-zag width (that's labeled "4" on the lever, and I think it means millimeters), four-millimeter stitch length (also the maximum), and zero tension. I ran each strip through with the raw edges halfway between the toes of the foot, which made a two-(sometimes one-)millimeter seam allowance.
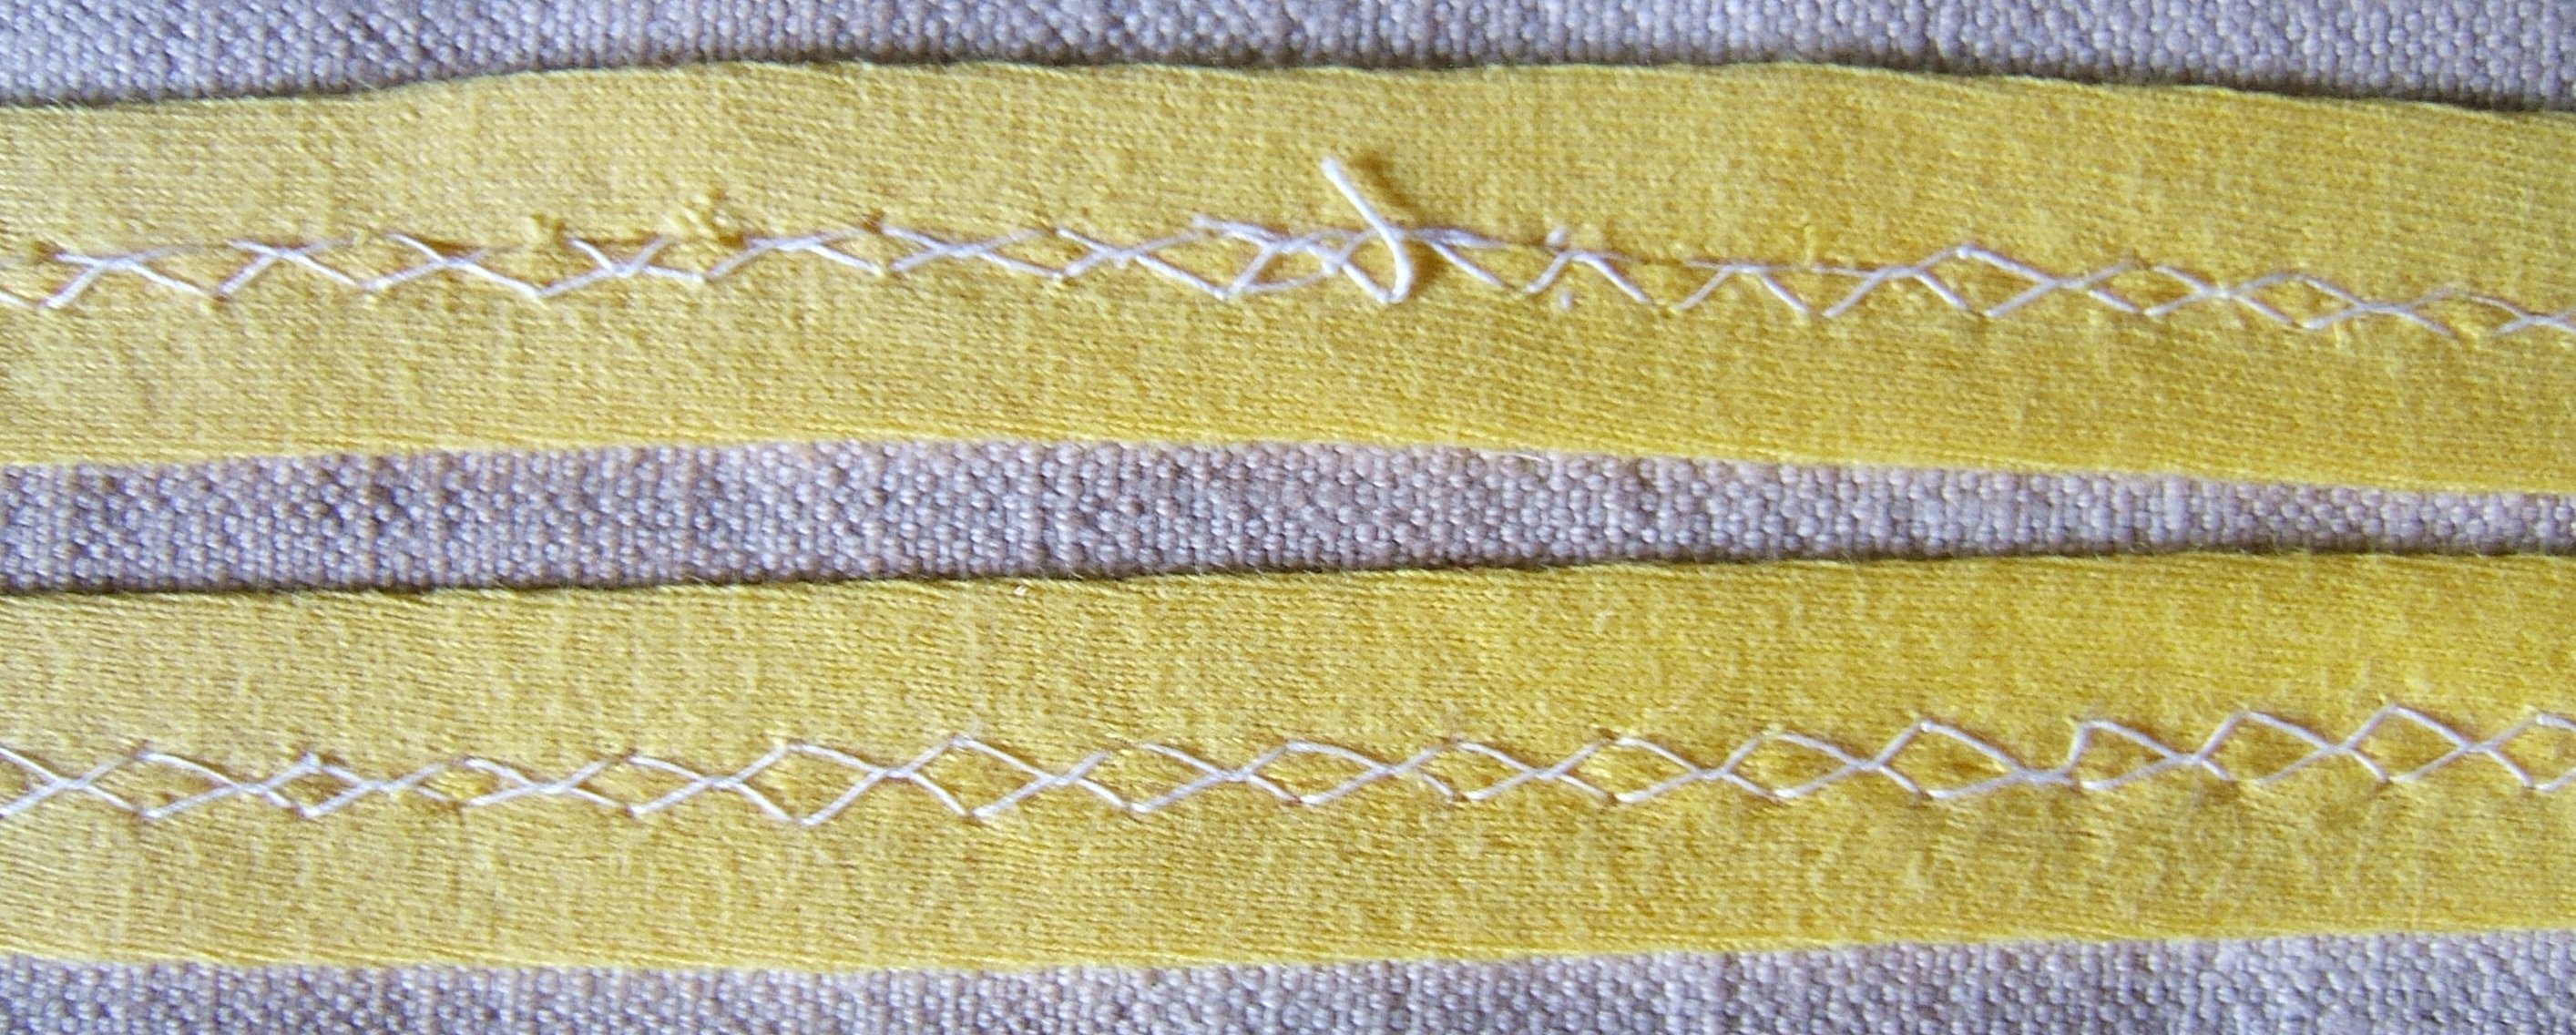
Well, that's the way the second strap went; I've forgotten what-all I muddled around with on the first.
I took the clip off my six-inch stainless-steel pocket ruler and dropped the ruler into the tube. Attempting to bodkin it through tended to tear the fragile seam, but the fit was loose enough that it slipped down when I held the strap vertically and shook it a little.
Stroking the seam with the back edge of my thumbnail flattened it right out, provided the stroke started in a part of the seam that was already flat. When pressed, the zig-zag stitches became a rather attractive string of diamonds.
After pressing the strips with a dry iron, I pressed them through a dry cloth, then sprayed the cloth with water and ironed it dry, then dry-ironed the naked straps again. They are airing on the ironing board now, and it's nap time.
Between steps in pressing the still-basted straps, I ironed a T-shirt and a dress that have been hanging around for some time. Then I took down a silk underdress that had been hanging around even longer, intending to put it away for the summer un-ironed, but as I was shoving it into the closet, I realized that the hanger was poking out where a bar tack had broken, and put it back on the drying rod, there being no space on the to-do hook.
Having been hanging in the window for ten or fifteen years, the basting thread broke a few times while I was setting up and sewing the first strap, but minimizing the thickness of thread inside the straps was worth the trouble.
⁂
I didn't starch the jersey nearly enough. It is going to be difficult to cut the remaining pieces.
⁂
I did cut out the sleeves this evening. It was slightly traumatic because I had only a wild guess as to the grain. I used the straight edge where I cut off the straps as a guide even though the straps are definitely off grain.
Got the rest cut out this morning. Trauma reduced by simply not caring:

I didn't notice that the scanner was set for grayscale the first time, whereupon I learned that wash-out blue is also non-reproducing blue.
I marked the lines beside the center line by measuring the pencil pocket on my old jersey with my Japanese centering ruler. [&& take picture of ruler, add to Tools, make link here.] According to my American ruler, they are 3/4" outside edge to outside edge. I plan to zig-zag down their centers.
⁂
Next step is to appliqué the straps to the back; instead of ending them inside the pockets, I intend to let them come out the other side and continue around the hem as a fashion statement. Hope I don't regret that.
Turns out that the stitching lines to divide the back pockets hadn't been marked on either the pocket pattern or the back pattern. Measuring this was harder than measuring the pencil pocket because of the elastic at the top of the pocket, and stretching from putting heavy stuff into the pockets. At this point I began to wonder whether I'd documented the making of the old jersey, and put a table of contents on this file. When that was done, I thought of looking at the pattern to see when it had been used for lime-yellow cotton: 2004, and the documents started in 2012. I can index the old diaries at my leisure.
Meanwhile, I've got the lines marked on the back and on both patterns (5 1/4" from the center line), and it's time to pin the straps in place and put a new stretch needle on the Necchi.
⁂
Then I looked very closely and realized that I'd marked the purl side of the fabric, and I've selected the knit side to be the right side. I briefly considered re-measuring the lines, then dot-dot-dotted with my wash-out pen, holding it a moment at each dot so the ink would bleed through to the other side.
After pinning the straps to the back, I turned the work over and checked the alignment — since the fabric is nearly sheer, I could easily see where the straps were in relation to the lines drawn on the wrong side.
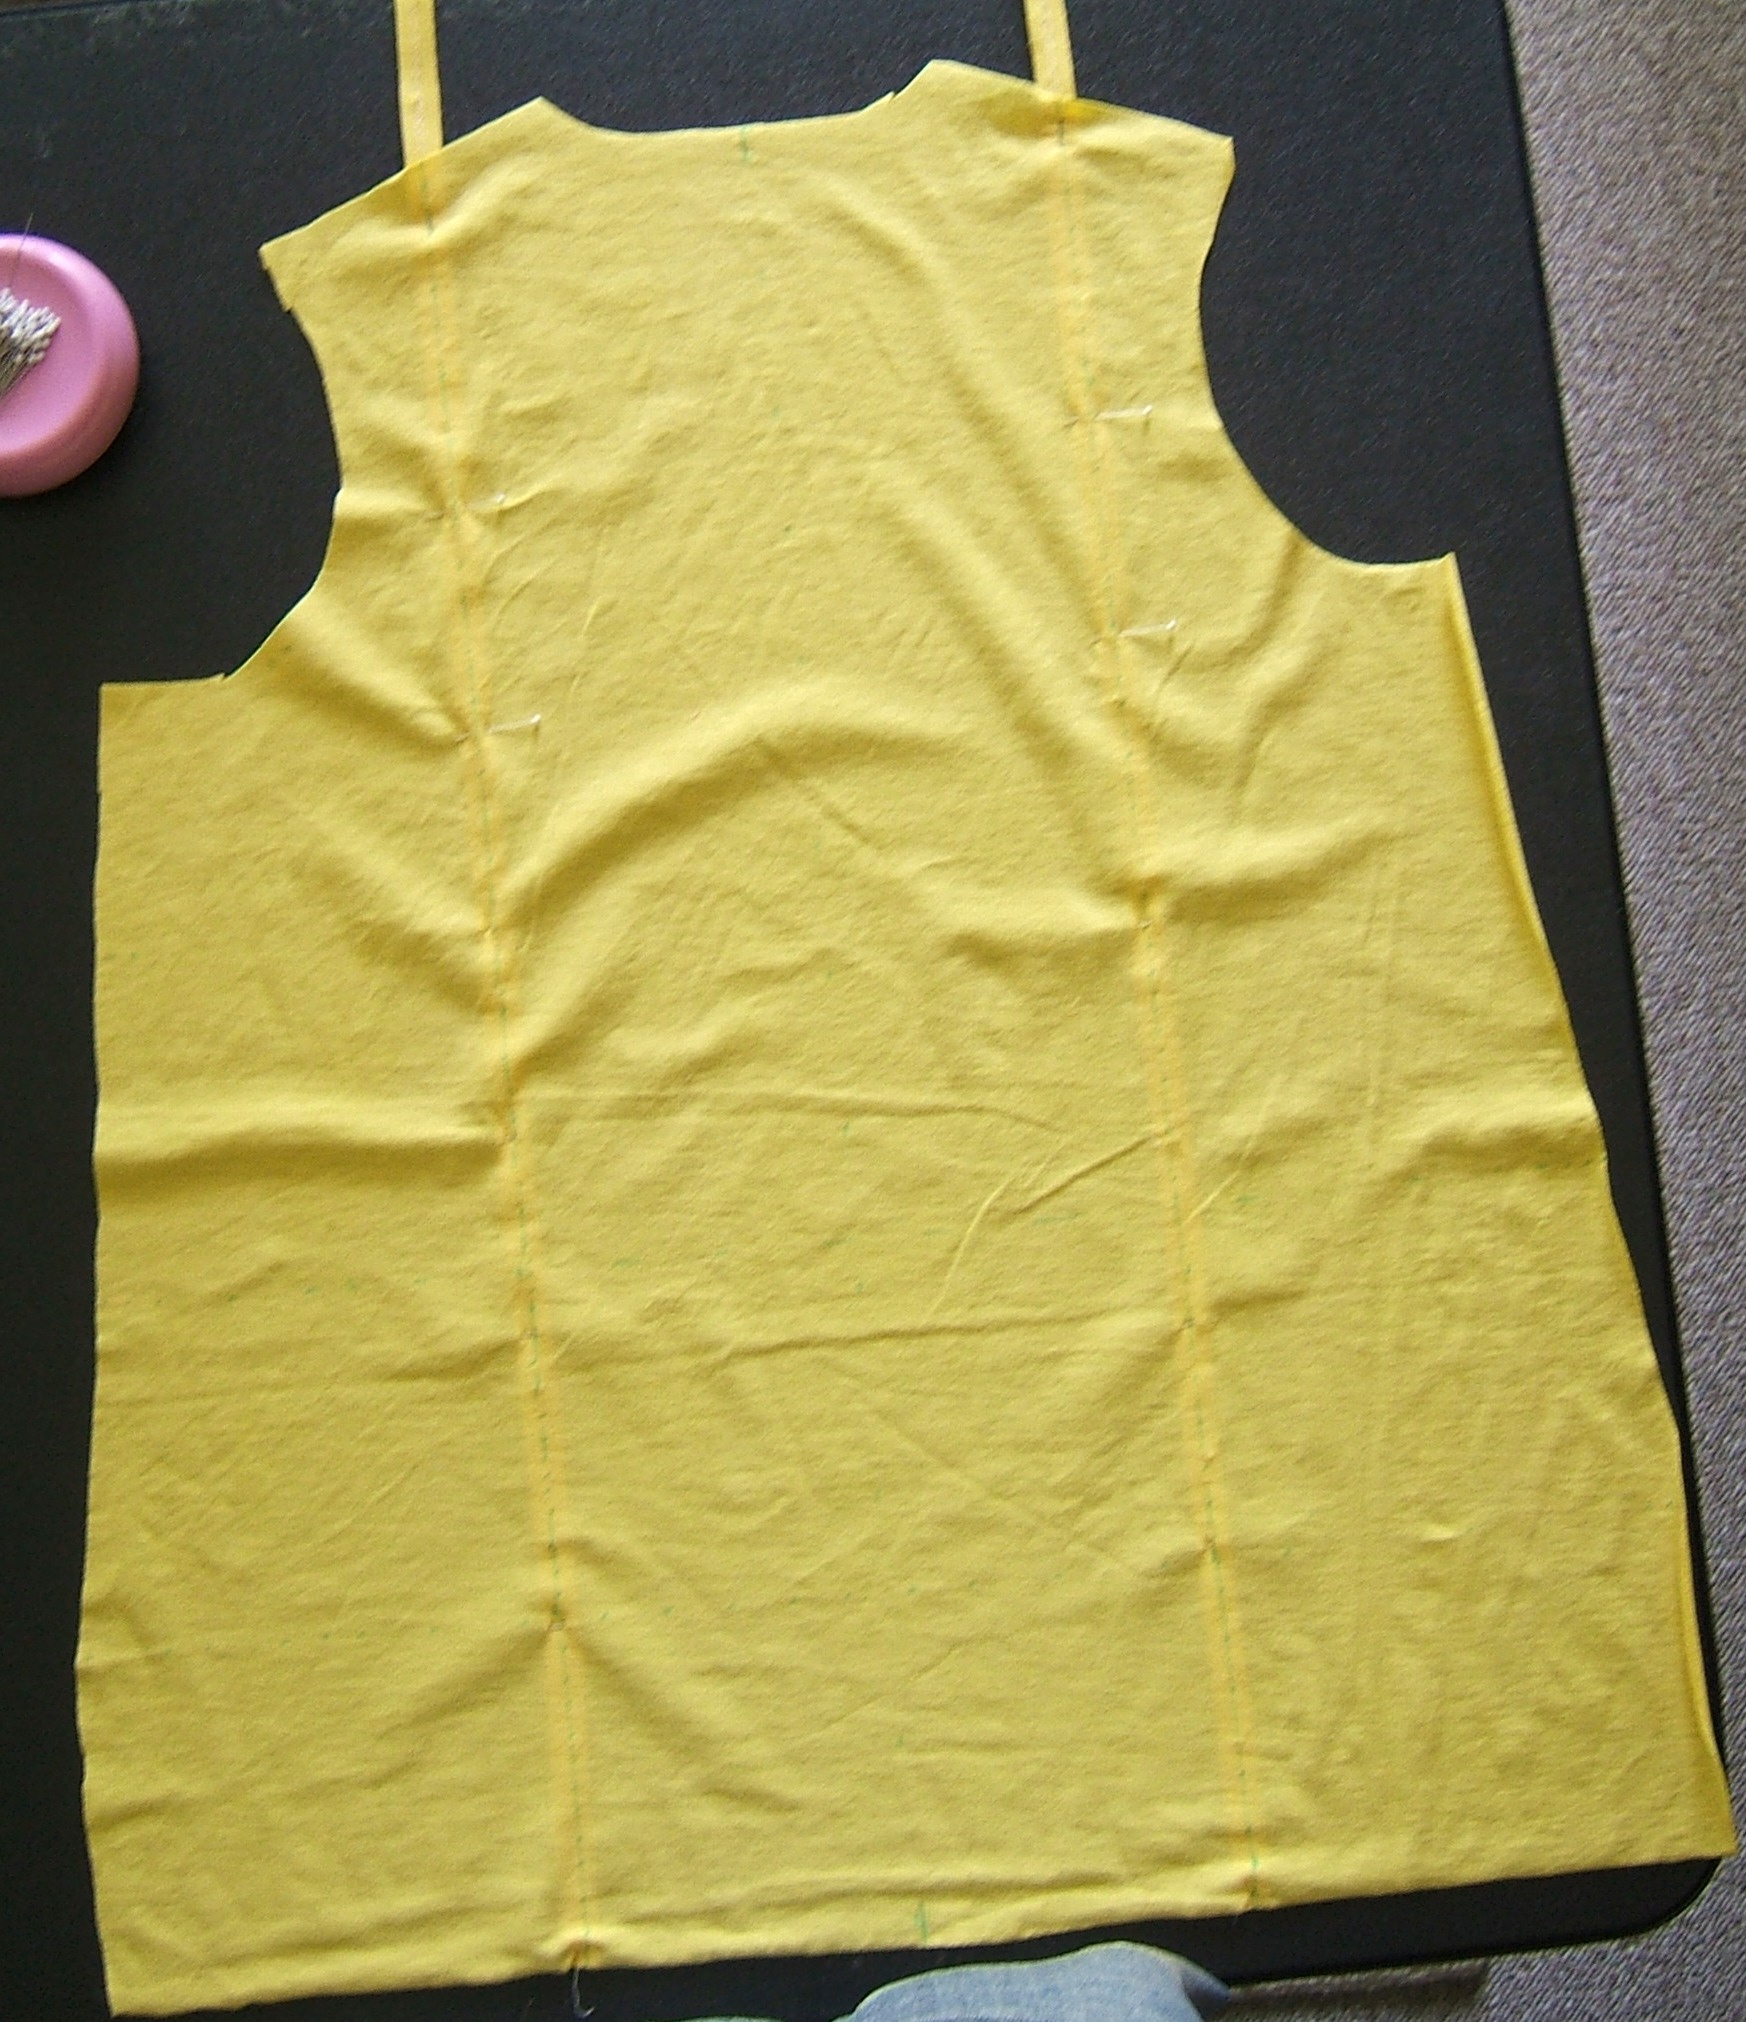
Whoosh, that shade of blue doesn't show up very well in full color, either.
I also expected it to be a little plainer that I'd unpinned a couple of spots that weren't quite right and re-pinned them from the wrong side.
I planned to turn the work over again and replace all the right-angle pins with center-line pins, but realized that it would be easier to baste from this side
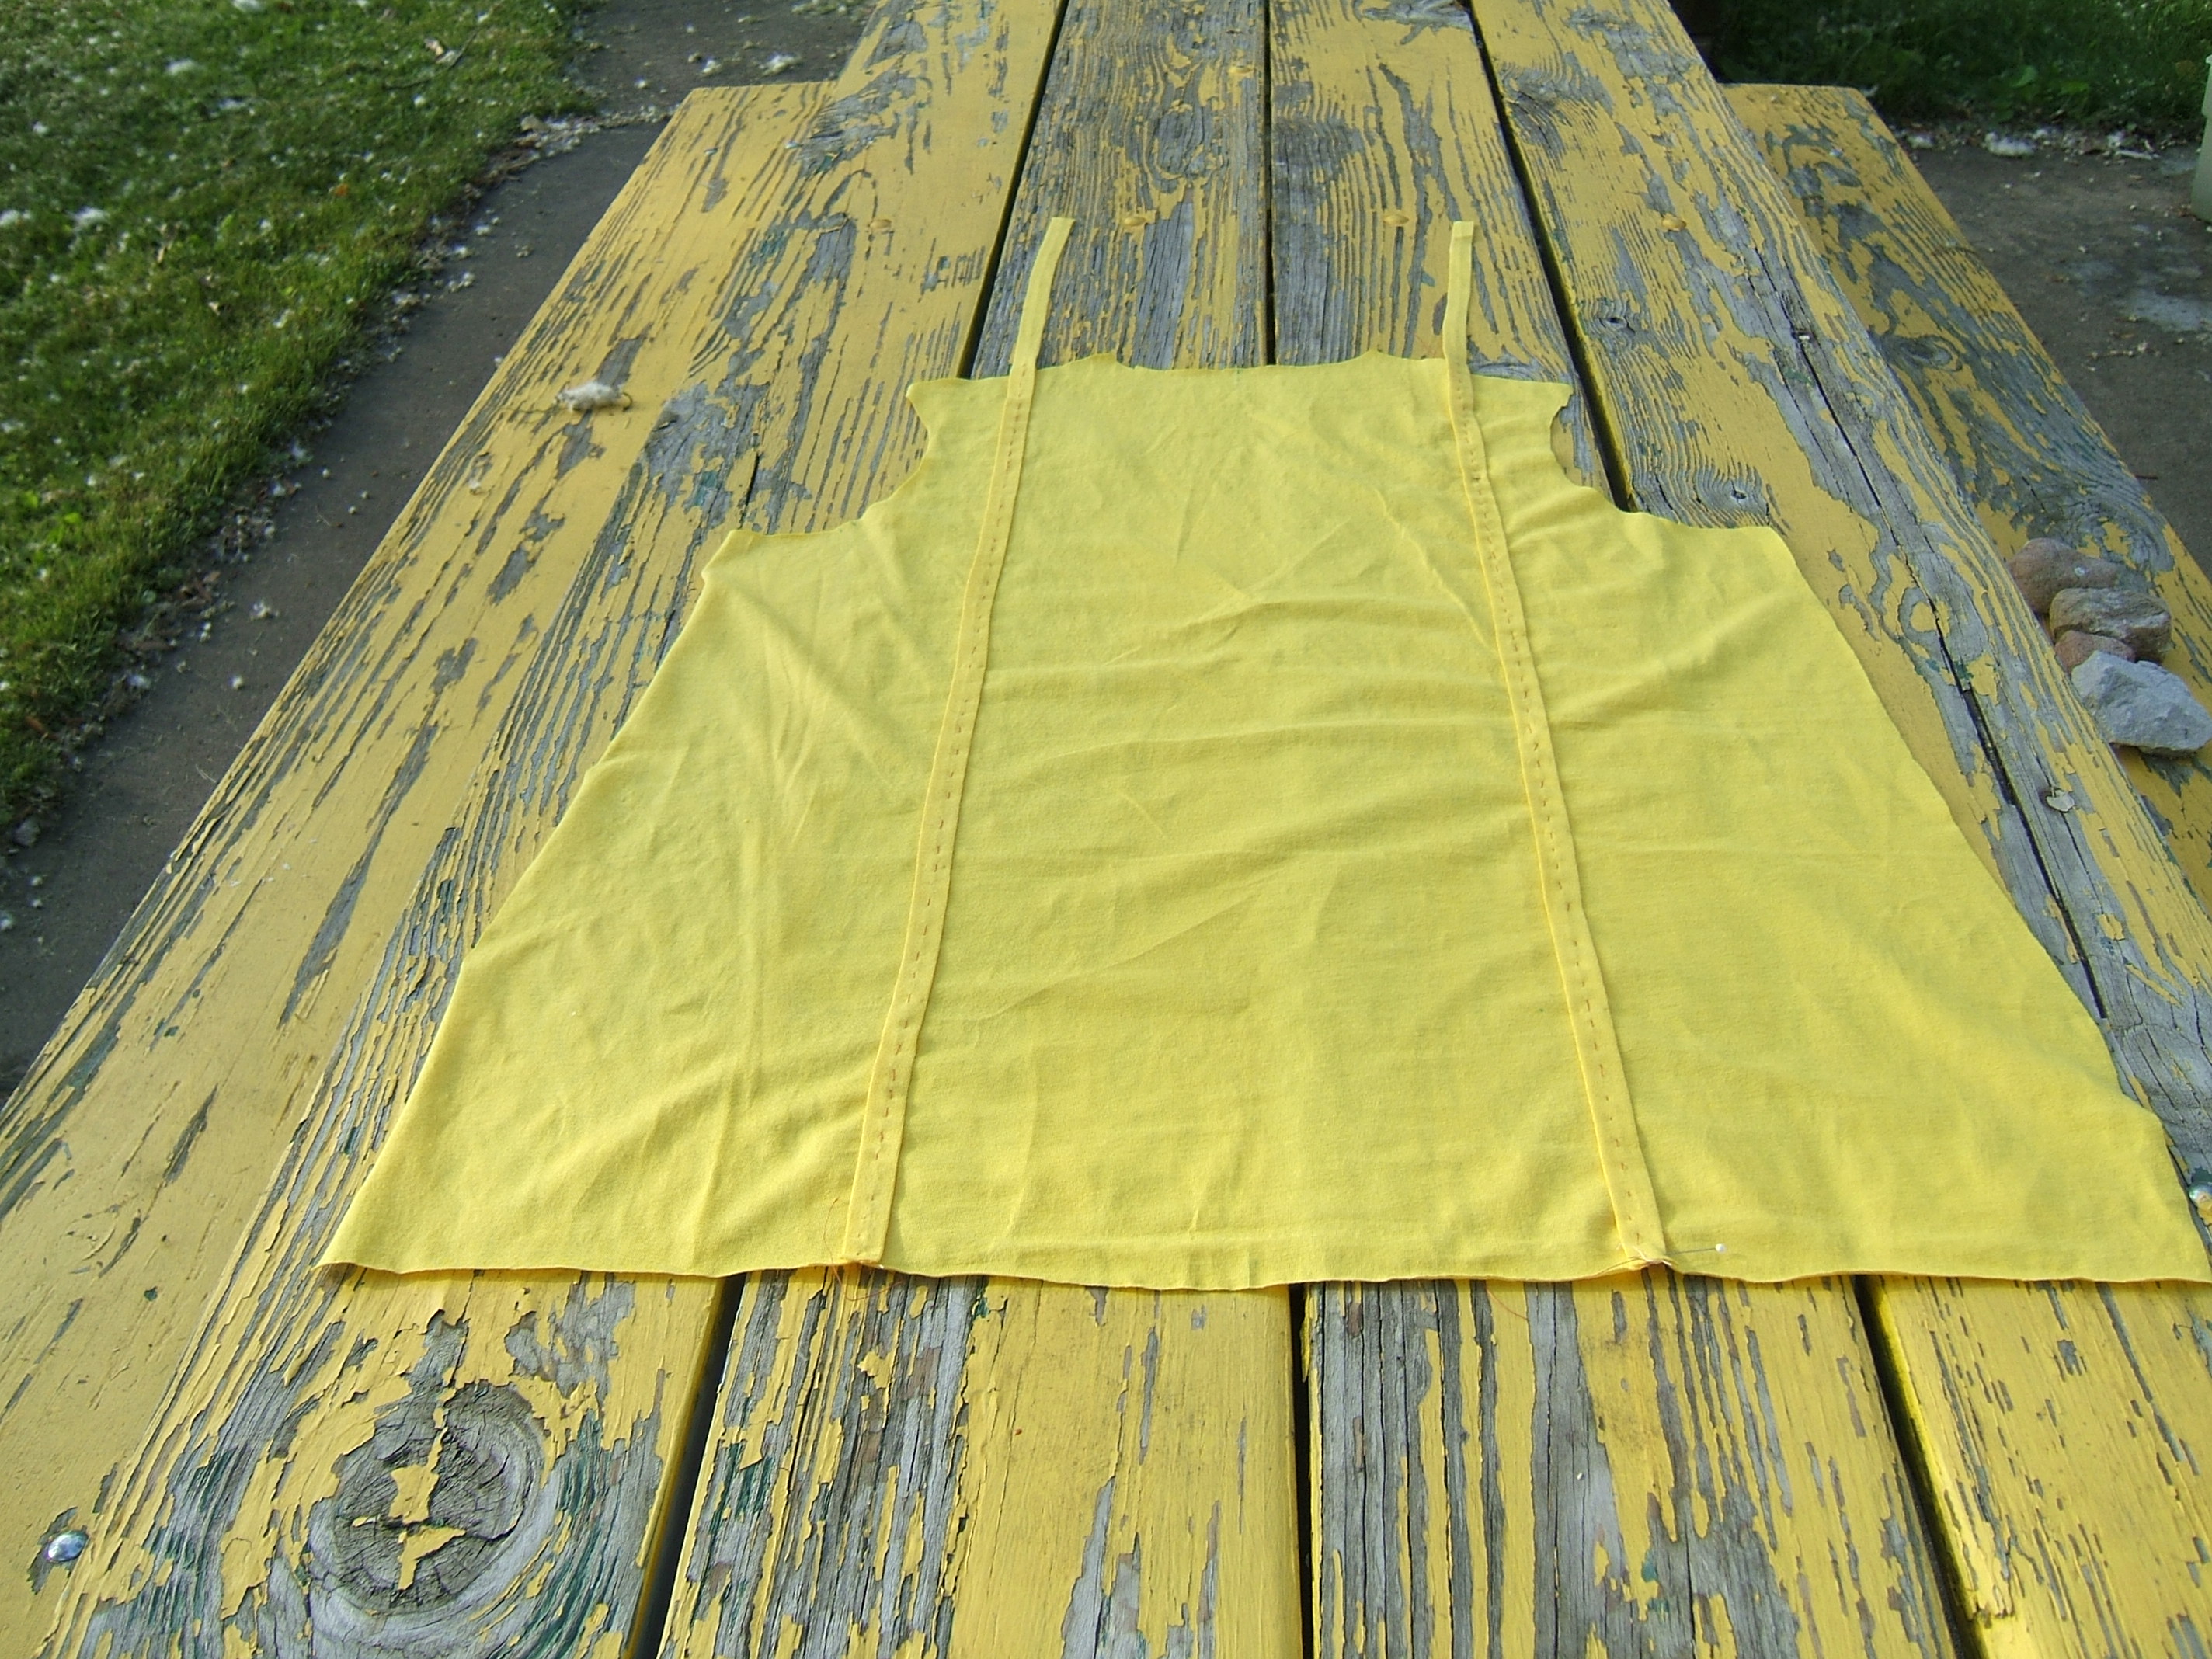
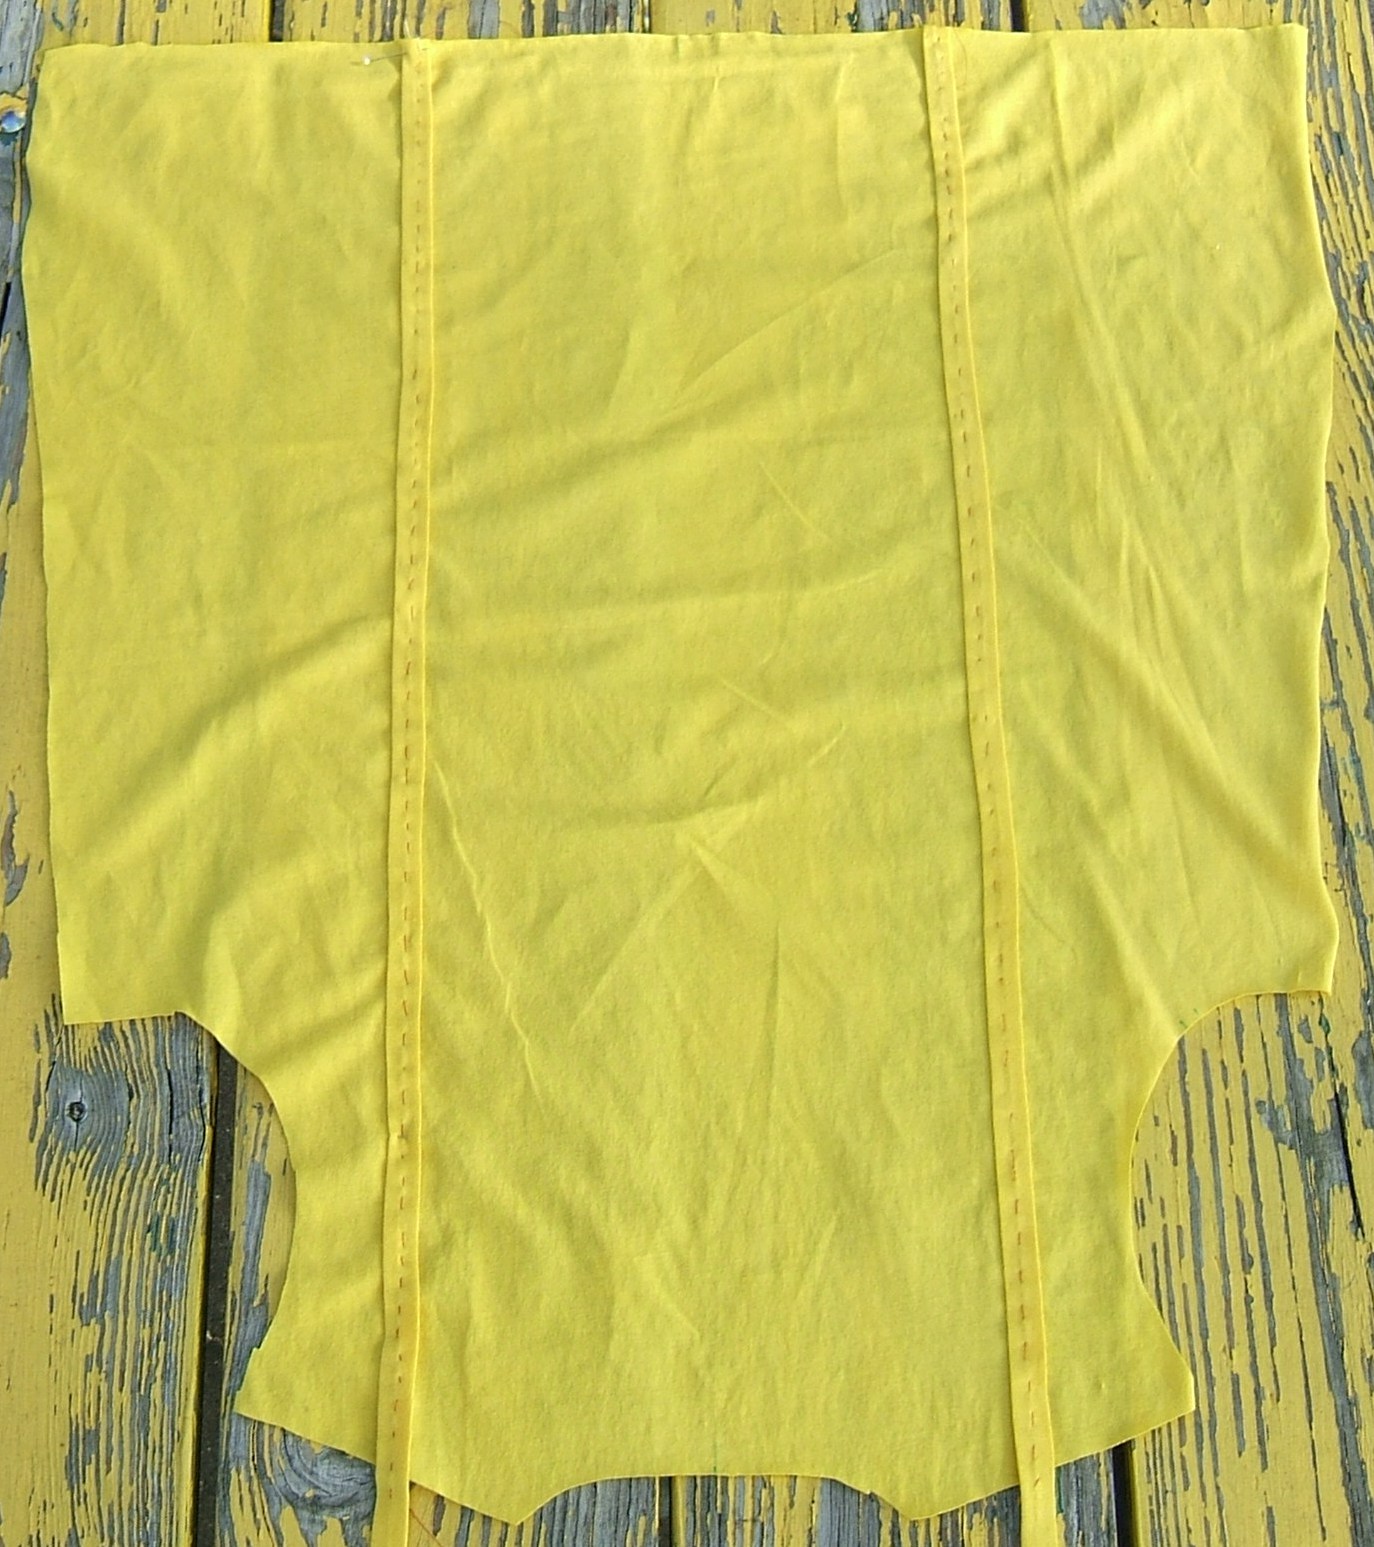
The basting isn't perfectly centered, but it's close enough.
Oh, yeah, I need to cut some teeny patches and appliqué them to the inside where the bar tacks at the tops of the pocket divisions will go. Self fabric, or a hard-woven twill tape, set bias? Do I have hard-woven tape? Stay tuned.
Didn't have to get the scraps down; there was a dangling string about two inches wide, and I snipped off half a foot. I marked two inch-and-a-quarter squares on it, with more respect for the grain than for more-important pieces (it was possible for a change), cut them out, drew X's corner to corner, and folded each corner a little past the center.
The first one, I folded opposite corners, basting each corner with a separate thread.
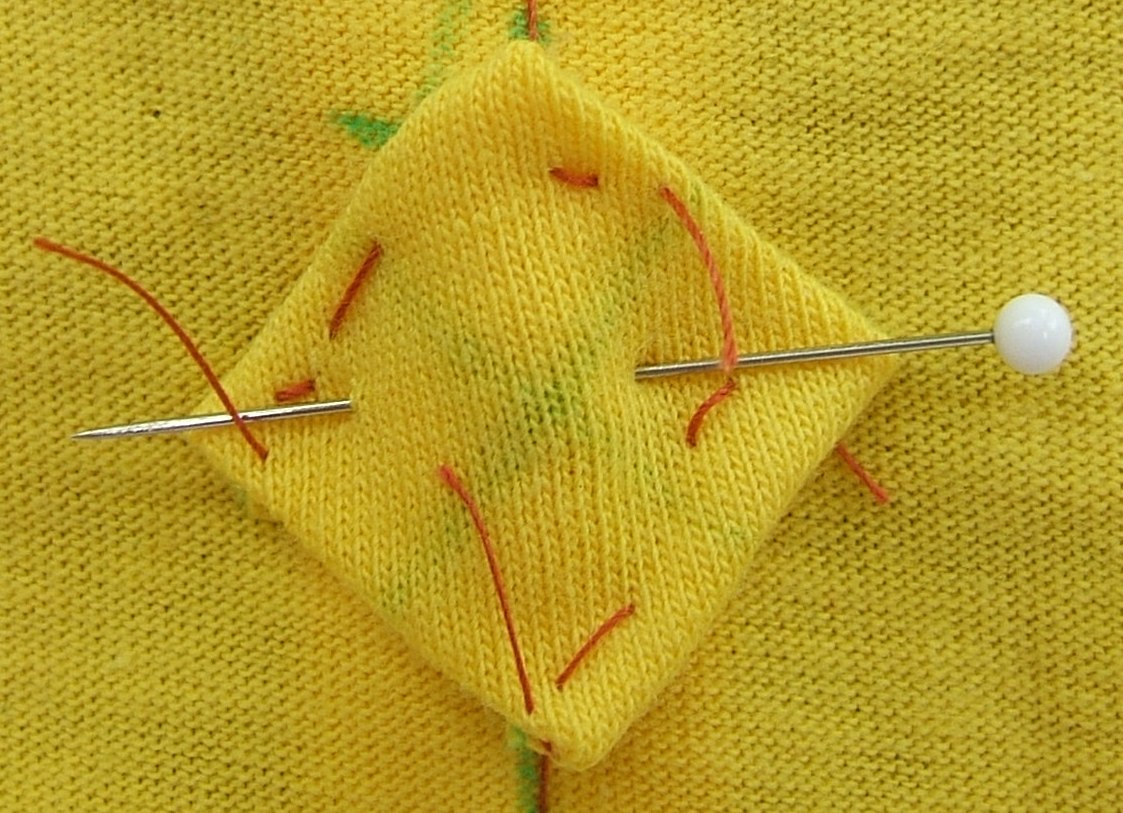
Bit of a shock to see it highly magnified. I'll shift that patch a bit before I sew it down.
For the second patch, the one that's already sewn in this picture:
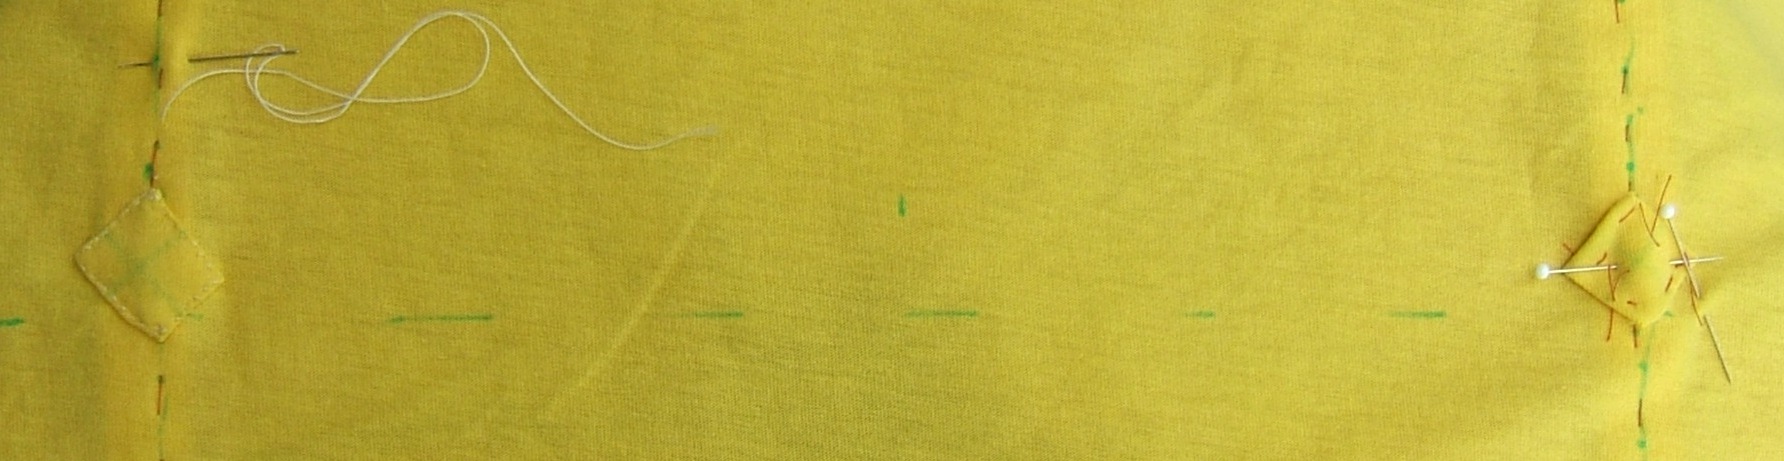
I folded the corners in rotation. This seemed to be going more neatly until I got to the last corner and it was all whopperjawed, impossible to fold neatly. I picked out all the basting threads and started over, this time paying more attention to the blue X and using one continuous thread to baste all four sides.
Then I pinned the patches to the wrong side of the back, with their corners just a little above the line marking where the tops of the pockets would be. Since the patches are a full inch corner-to-corner, I'm sure the bar tacks will hit them. Probably about where the corners pile up in the middle.
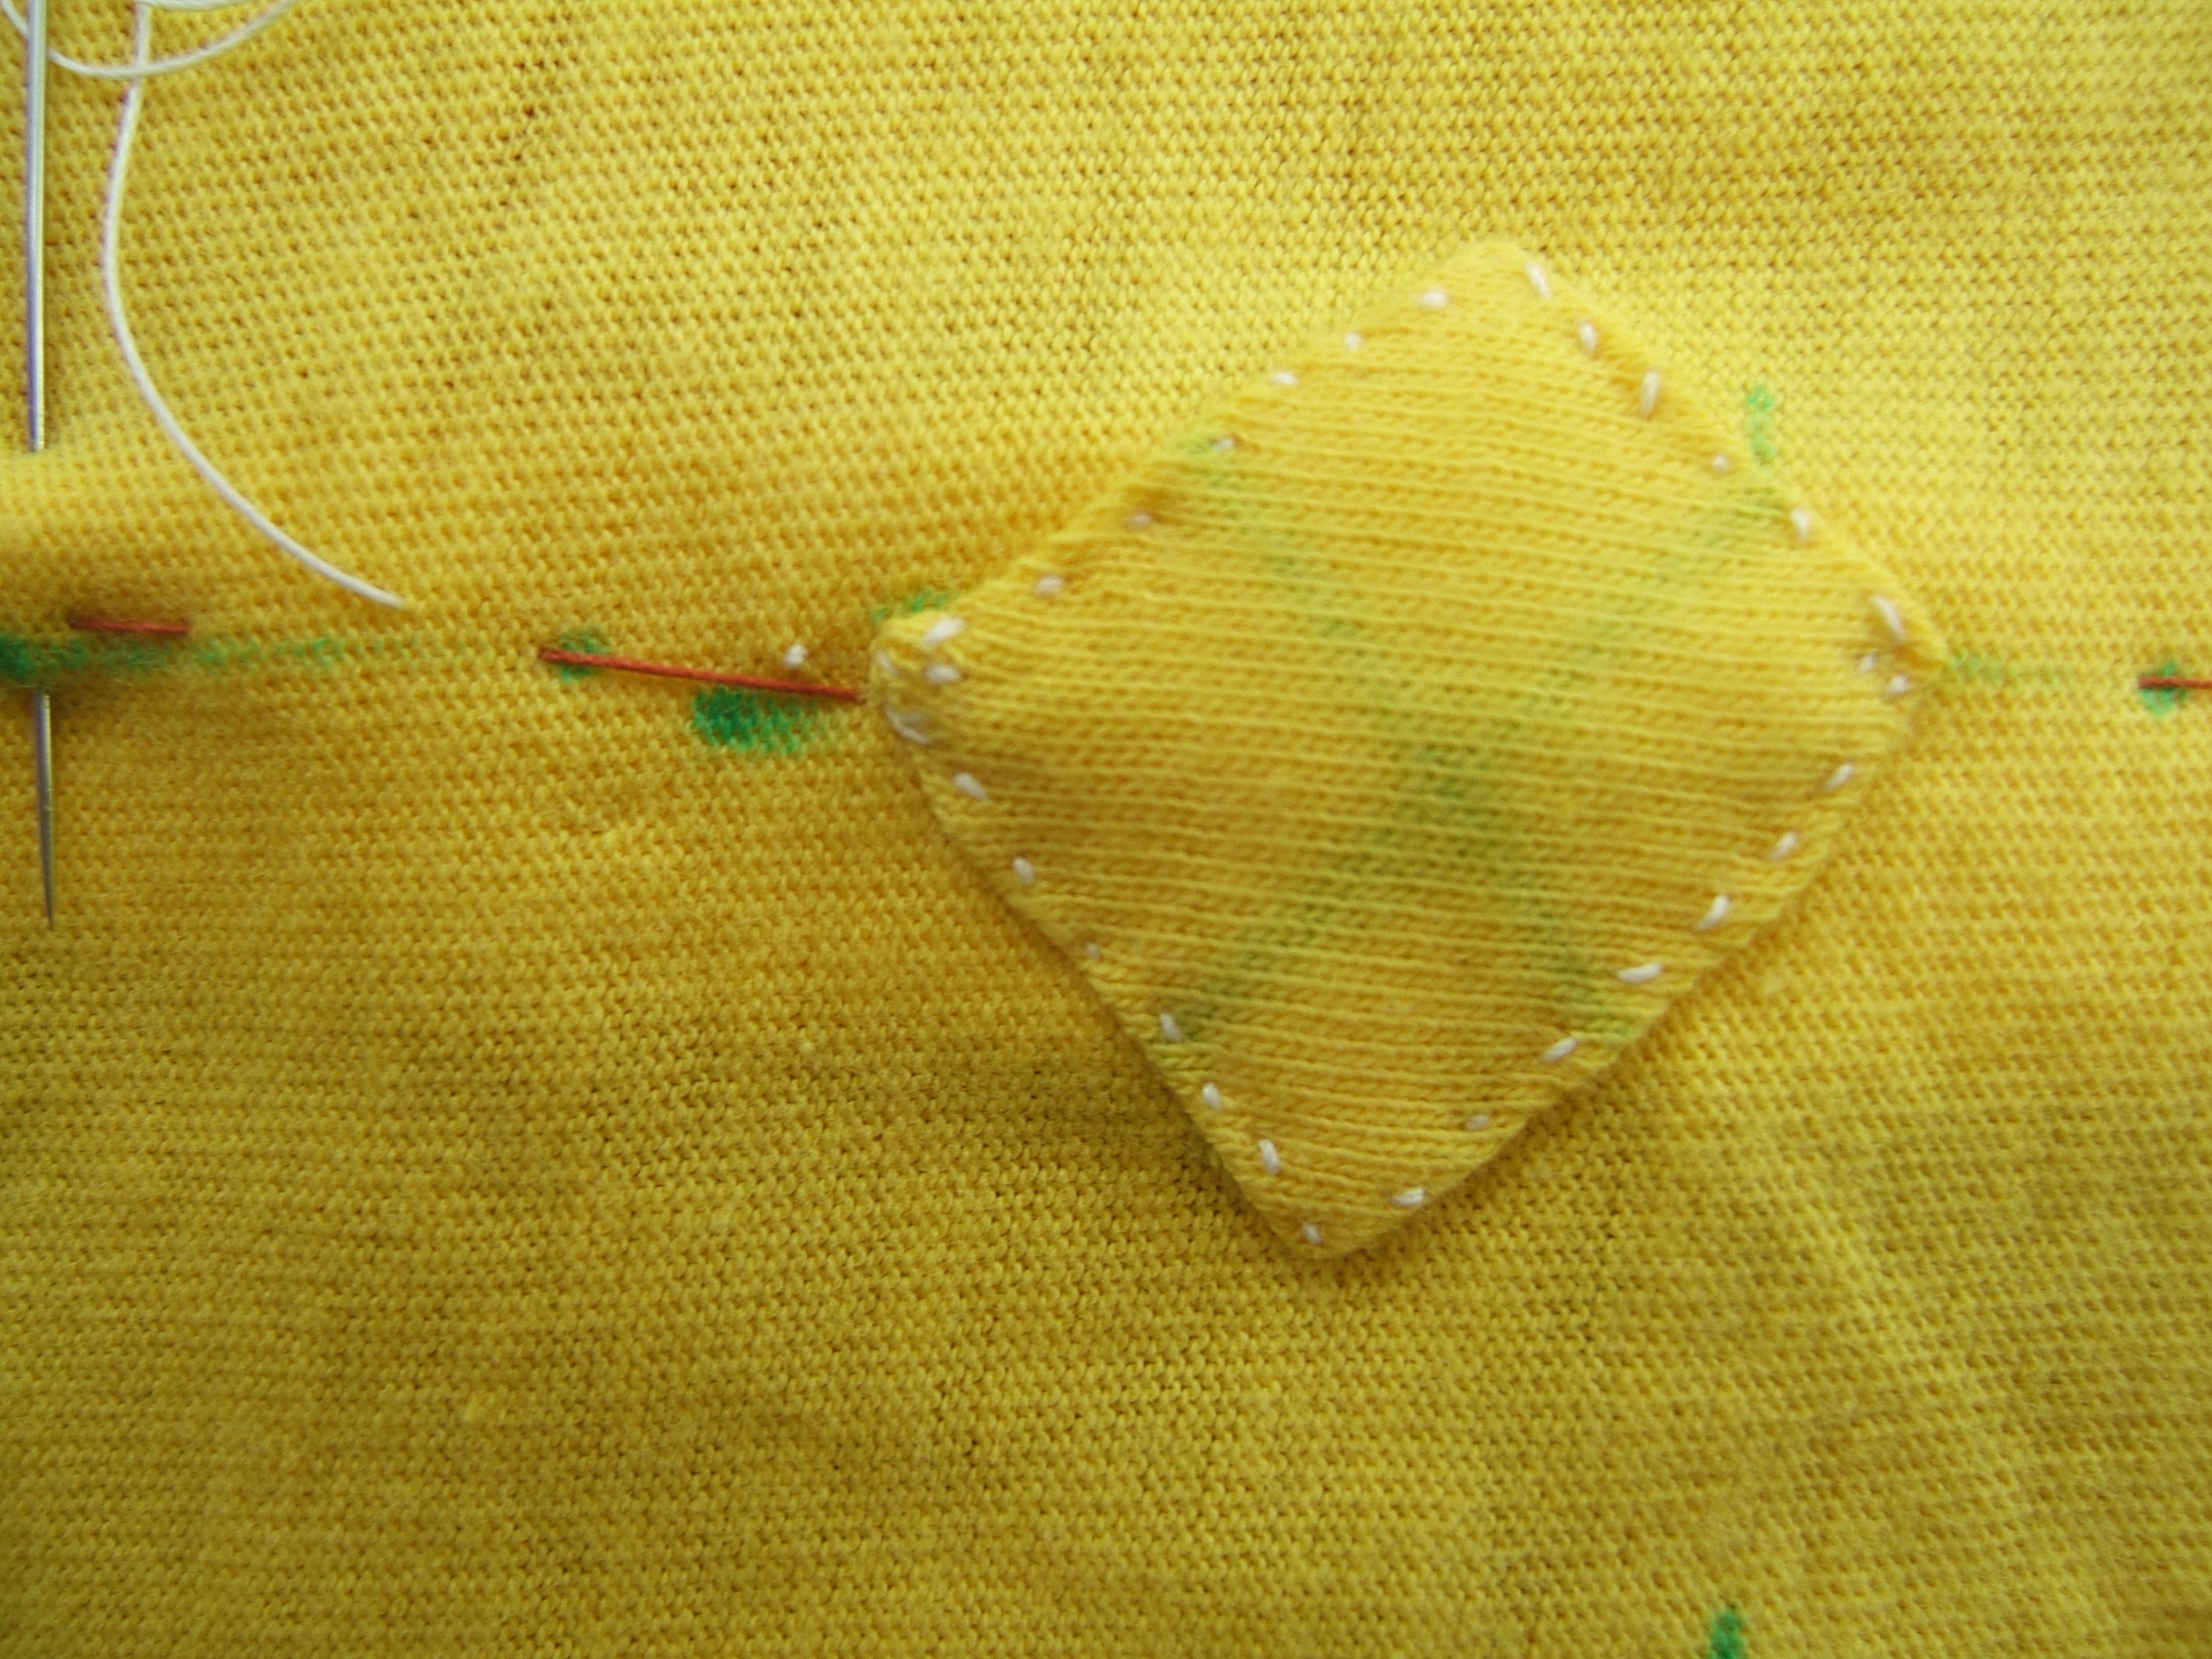
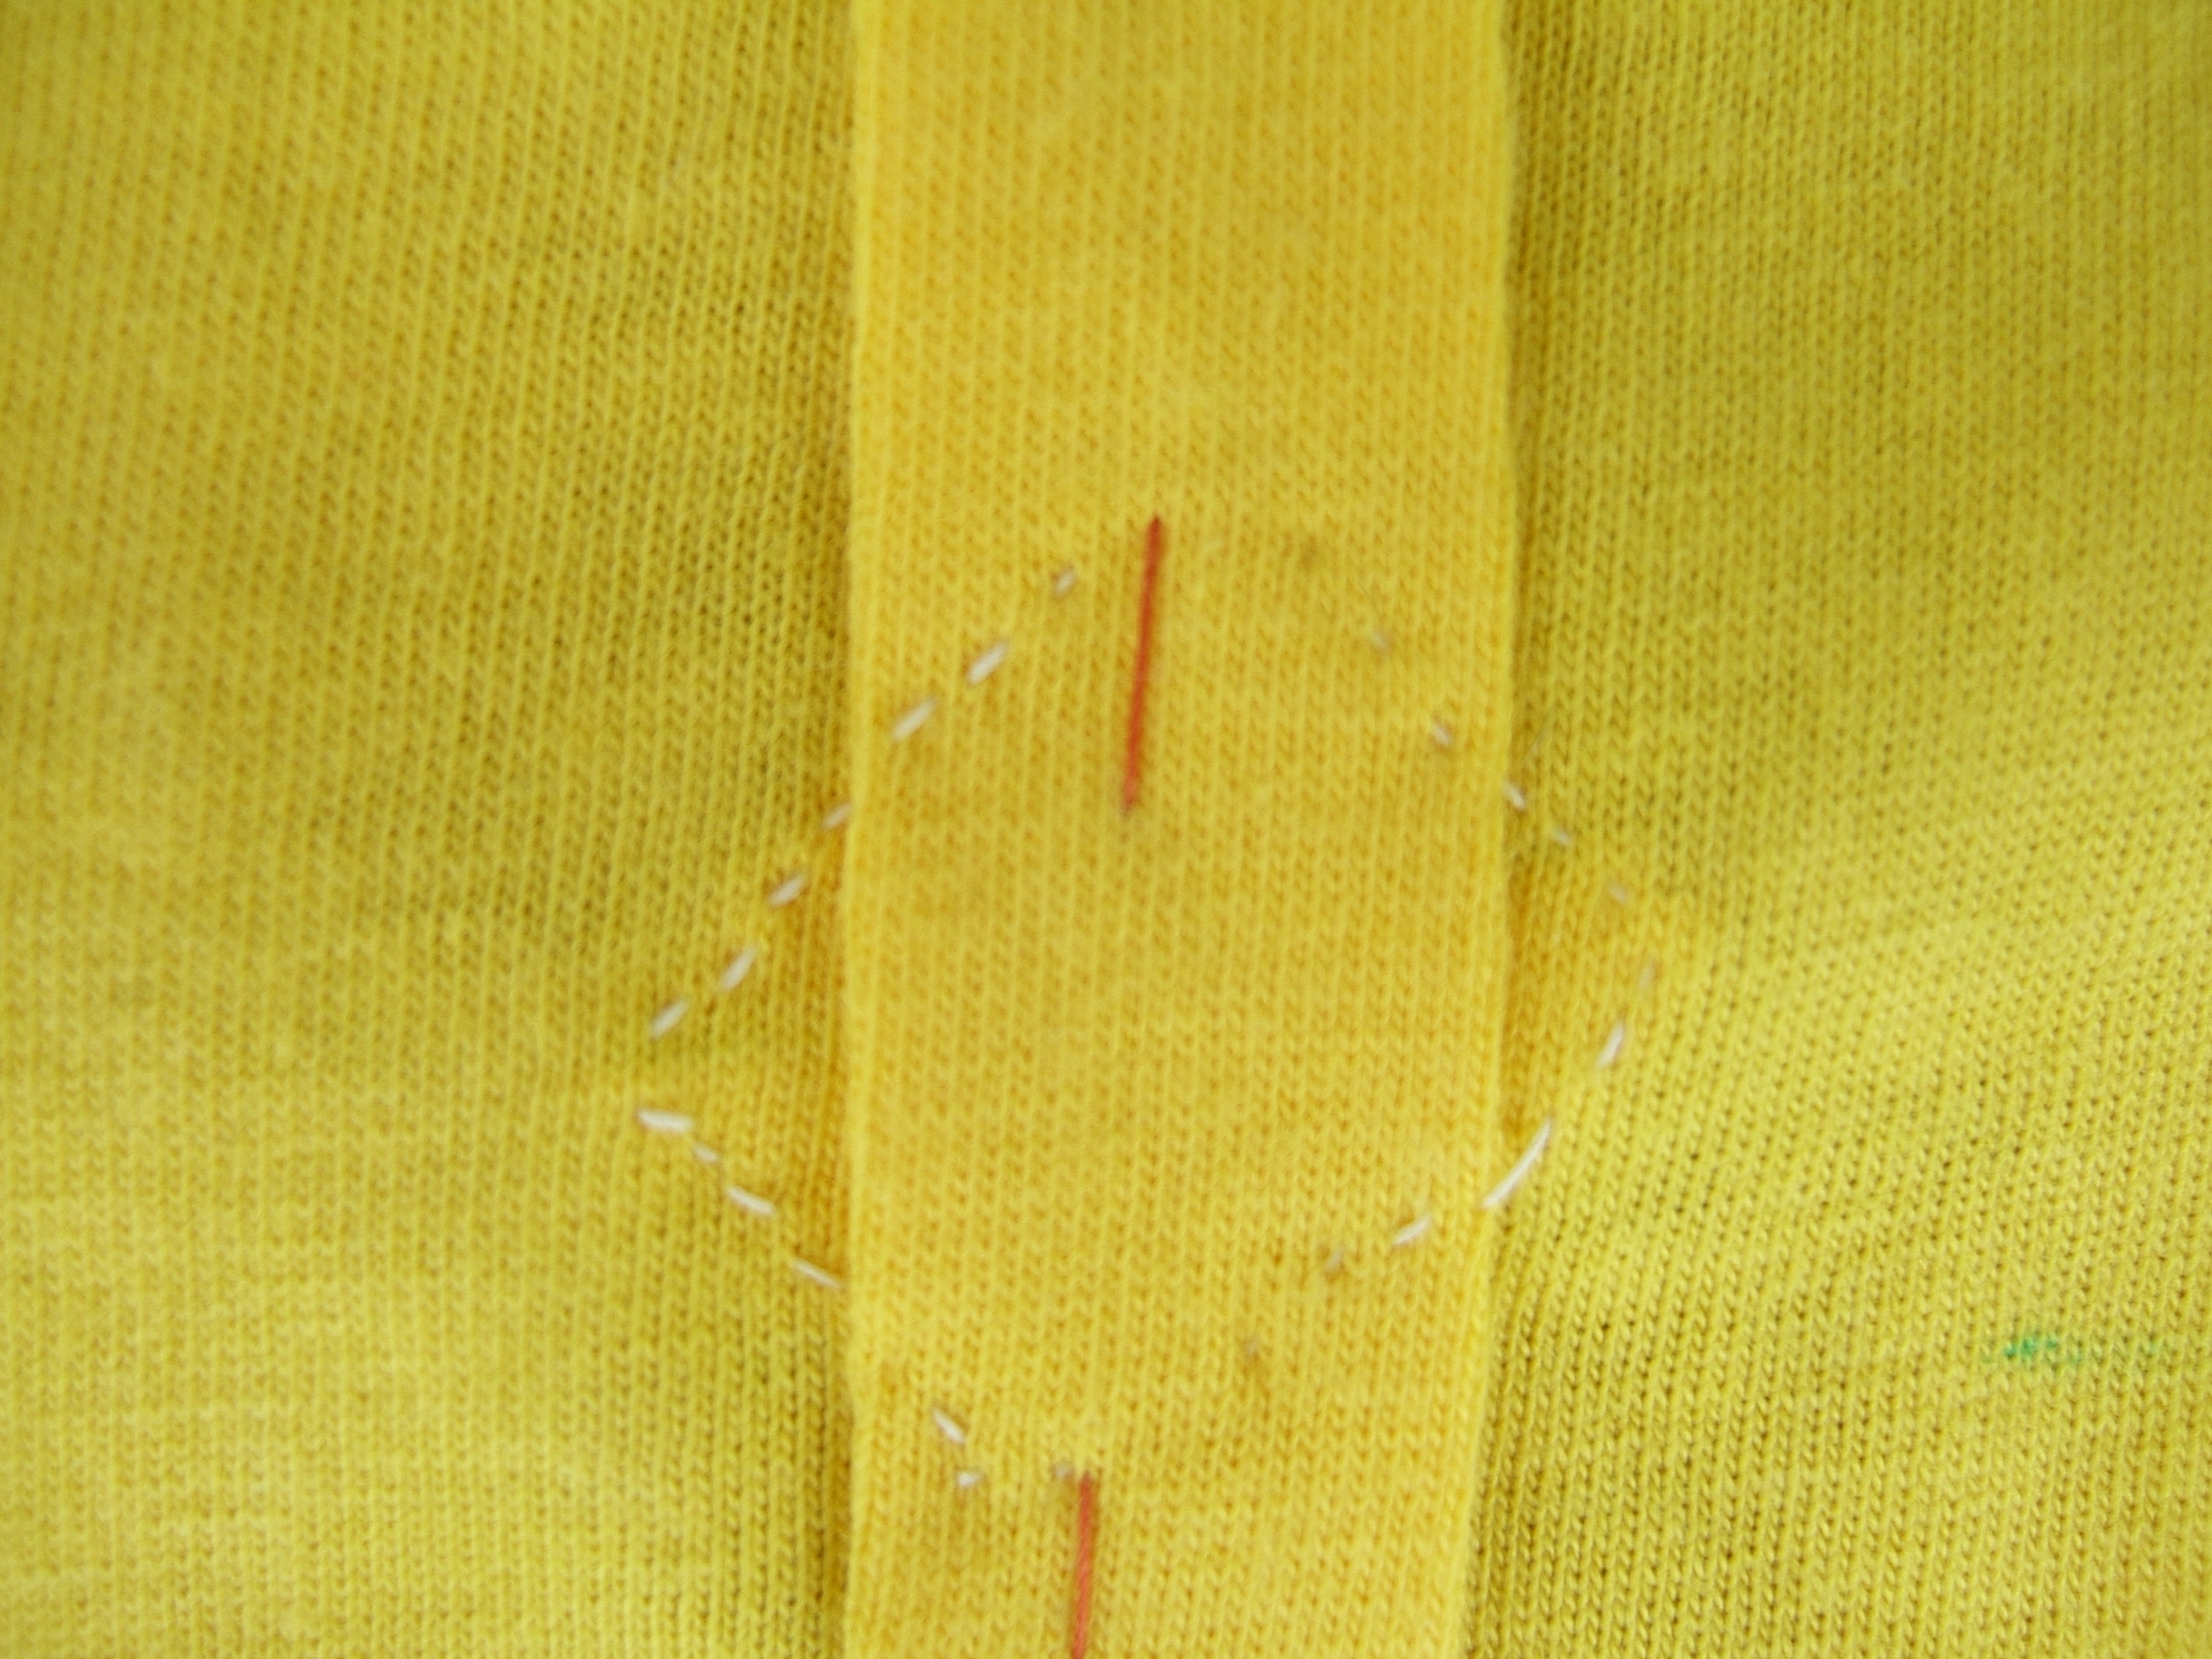
⁂
The old jersey was sewn entirely with straight stitch, except for hems and the front pocket, and it shows no signs of seam popping, so I will sew the new one the same way. But I think I will sew it entirely on the Necchi, since I do want some zig-zag and I don't want to set up both machines.
JRSRAW63.JPG+ 1524491 6-05-15 11:54a one patch sewn, on round table
I woke up early this morning, but not too bright. Fortunately, I had some handwork to do between loads of wash.
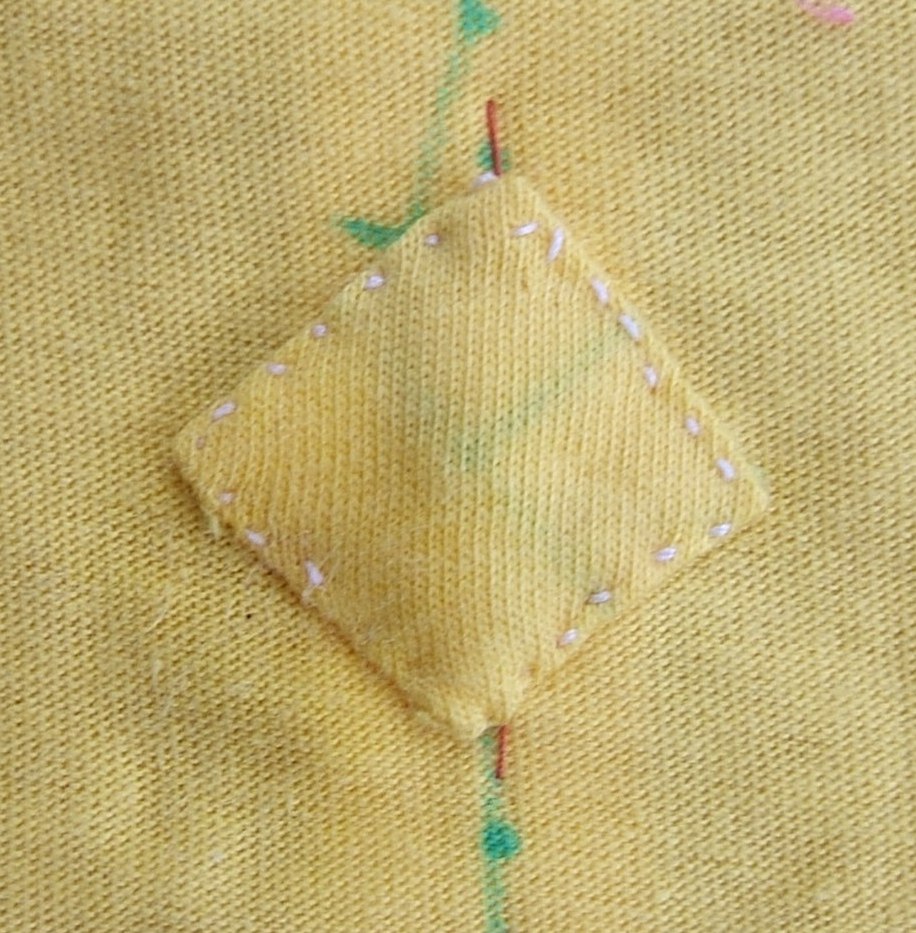
Then I rubbed the stain with a wet spot on a towel, then blotted with the dry part of the towel. It came out completely, to my relief. This is on the wrong side, but one likes something new to be clean.
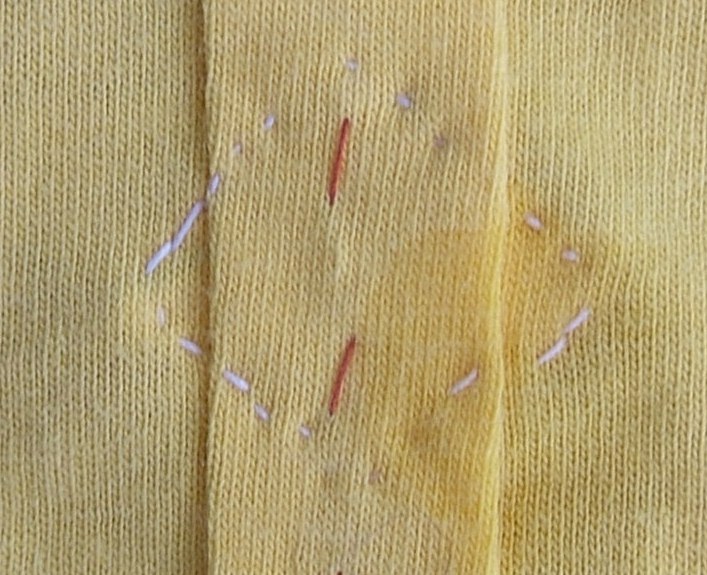
Oops! I didn't write the length of the pocket elastic on the pocket pattern the last time I used it. Measured the old jersey, wrote down eighteen and a half inches, plus an inch of twill tape at each end. I plan to cut inch-and-a-half pieces and overlap half an inch.
Checked the diary for the woven jersey, and found that I'd used three-eighths of a yard. In the process, I noticed a note that I'd forgotten to attach the name tag, and while checking the old cotton jersey to see where I'd put its tag — it appears that it doesn't have one — I noticed that the holes in the pocket where I keep my key ring are the only signs of wear. Perhaps I should underline that end of the pocket in the new one. If so, it must be done before sewing the casing that I just pinned.
With the help of the little blue thing; it's quite a handy gadget. Pity it was free, which is another way to spell unavailable.
Harrumph. I was sure that I had a picture of the blue gadget in RUFFTEXT\TOOLS. Must correct that, but not until after DH gets *his* pictures out of the camera, or I want a picture bad enough to be careful not to delete his while deleting mine. Be easiest, I think, to copy instead of moving, and delete the pictures from the camera after I can delete everything promiscuously.
⁂
Urk. Just as I was thinking that there might be enough fabric in the scraps of what I cut off to make a pair of briefs, I go to make a pattern for the pocket underlining and discover that the back-pocket pattern I used was not designed from the back pattern that I used. So I'm going to have to cut a whole new pocket. I guess it's good that I didn't sew the casing before my nap.
So why was the placement of the pocket marked on the back? One mark was the waist; I suppose that the other was a similar co-incidence.
I think I'll mark the position of the nametag on the new pocket pattern.
In the process of drafting the corrected pocket pattern, I held the old pattern against the back pattern: What the? It fits!
But not at the bottom. So that is what "1/2" added to copy" near the hem means. And that, in turn, means that the only thing wrong with the old pattern is that the seam allowance is skimped or missing on the bottom four inches of the side seam. I'm using pre-graded flat-fell seams with the front on top, so that means the raw edge will be overlapped by a quarter inch. I can use the already-cut piece and say I did it to save bulk in the seam.
I created the corrected pattern (and made a note that it exists on the old pattern), but did not piece it to allow not cutting on the fold.
The desk calendar I used for paper wasn't quite wide enough; before using the pattern, I'll have to attach a strip of spreadsheet paper, but I see no reason to finish it right now; if I find decent linen to make a woven jersey, it may be years before I use the jersey jersey pattern again,
Both the old pattern and the corrected pattern now have a reminder to sew on the nametag.
Before starting on the jersey, I cut the moleskin I bought yesterday into corn-protectors. As I was fetching the tools, I grumped about the way one-inch squares fall out of a bag meant for 4 5/8" by 3 3/8" sheets, then had an epiphany and fetched one of the zipper bags I bought for organizing thread.
I used my Japanese centering ruler to draw a line dividing the four-inch sides in half, and again to divide the halves in half. Cutting the other sides into thirds was more difficult. After a bit of fumbling, I measured the moleskin with the Japanese ruler: twenty-three units. So I drew a line about a third of a unit less than eight units from one edge, then used the centering mark to divide the remainder in half.
Then I cut along the lines with my rotary cutter. Note to self: the squares can be cut in the fewest steps by cutting the long lines before the short ones.
And now I have thirty-six moleskin squares in a zipper bag in the drawer, and one pair left in the previous bag. Should last a while.
Hemmed the piece that will be the front pockets, and stuck a pin into one of the darts on the front. When the lights went out just before supper, I thought I'd have to set up the White after all, but the lights came back on soon after our romantic candle-light hot dogs. The stove, luckily, is gas — and I'd gotten the condiments out before the electricity failed.
⁂
Feeling guilty because of my remarks on how I could have continued sewing with the lights out, I sewed the darts. It's been so long since I put the straight-stitch foot on the Necchi that I didn't remember where I keep it. The straps would have been much easier if I'd remembered that I have that option!
Then I spent a while marking up the front and attaching the front pocket to it. I need to make three more little diamond patches before I fold up the pocket and sew it in place.
I took some pictures.
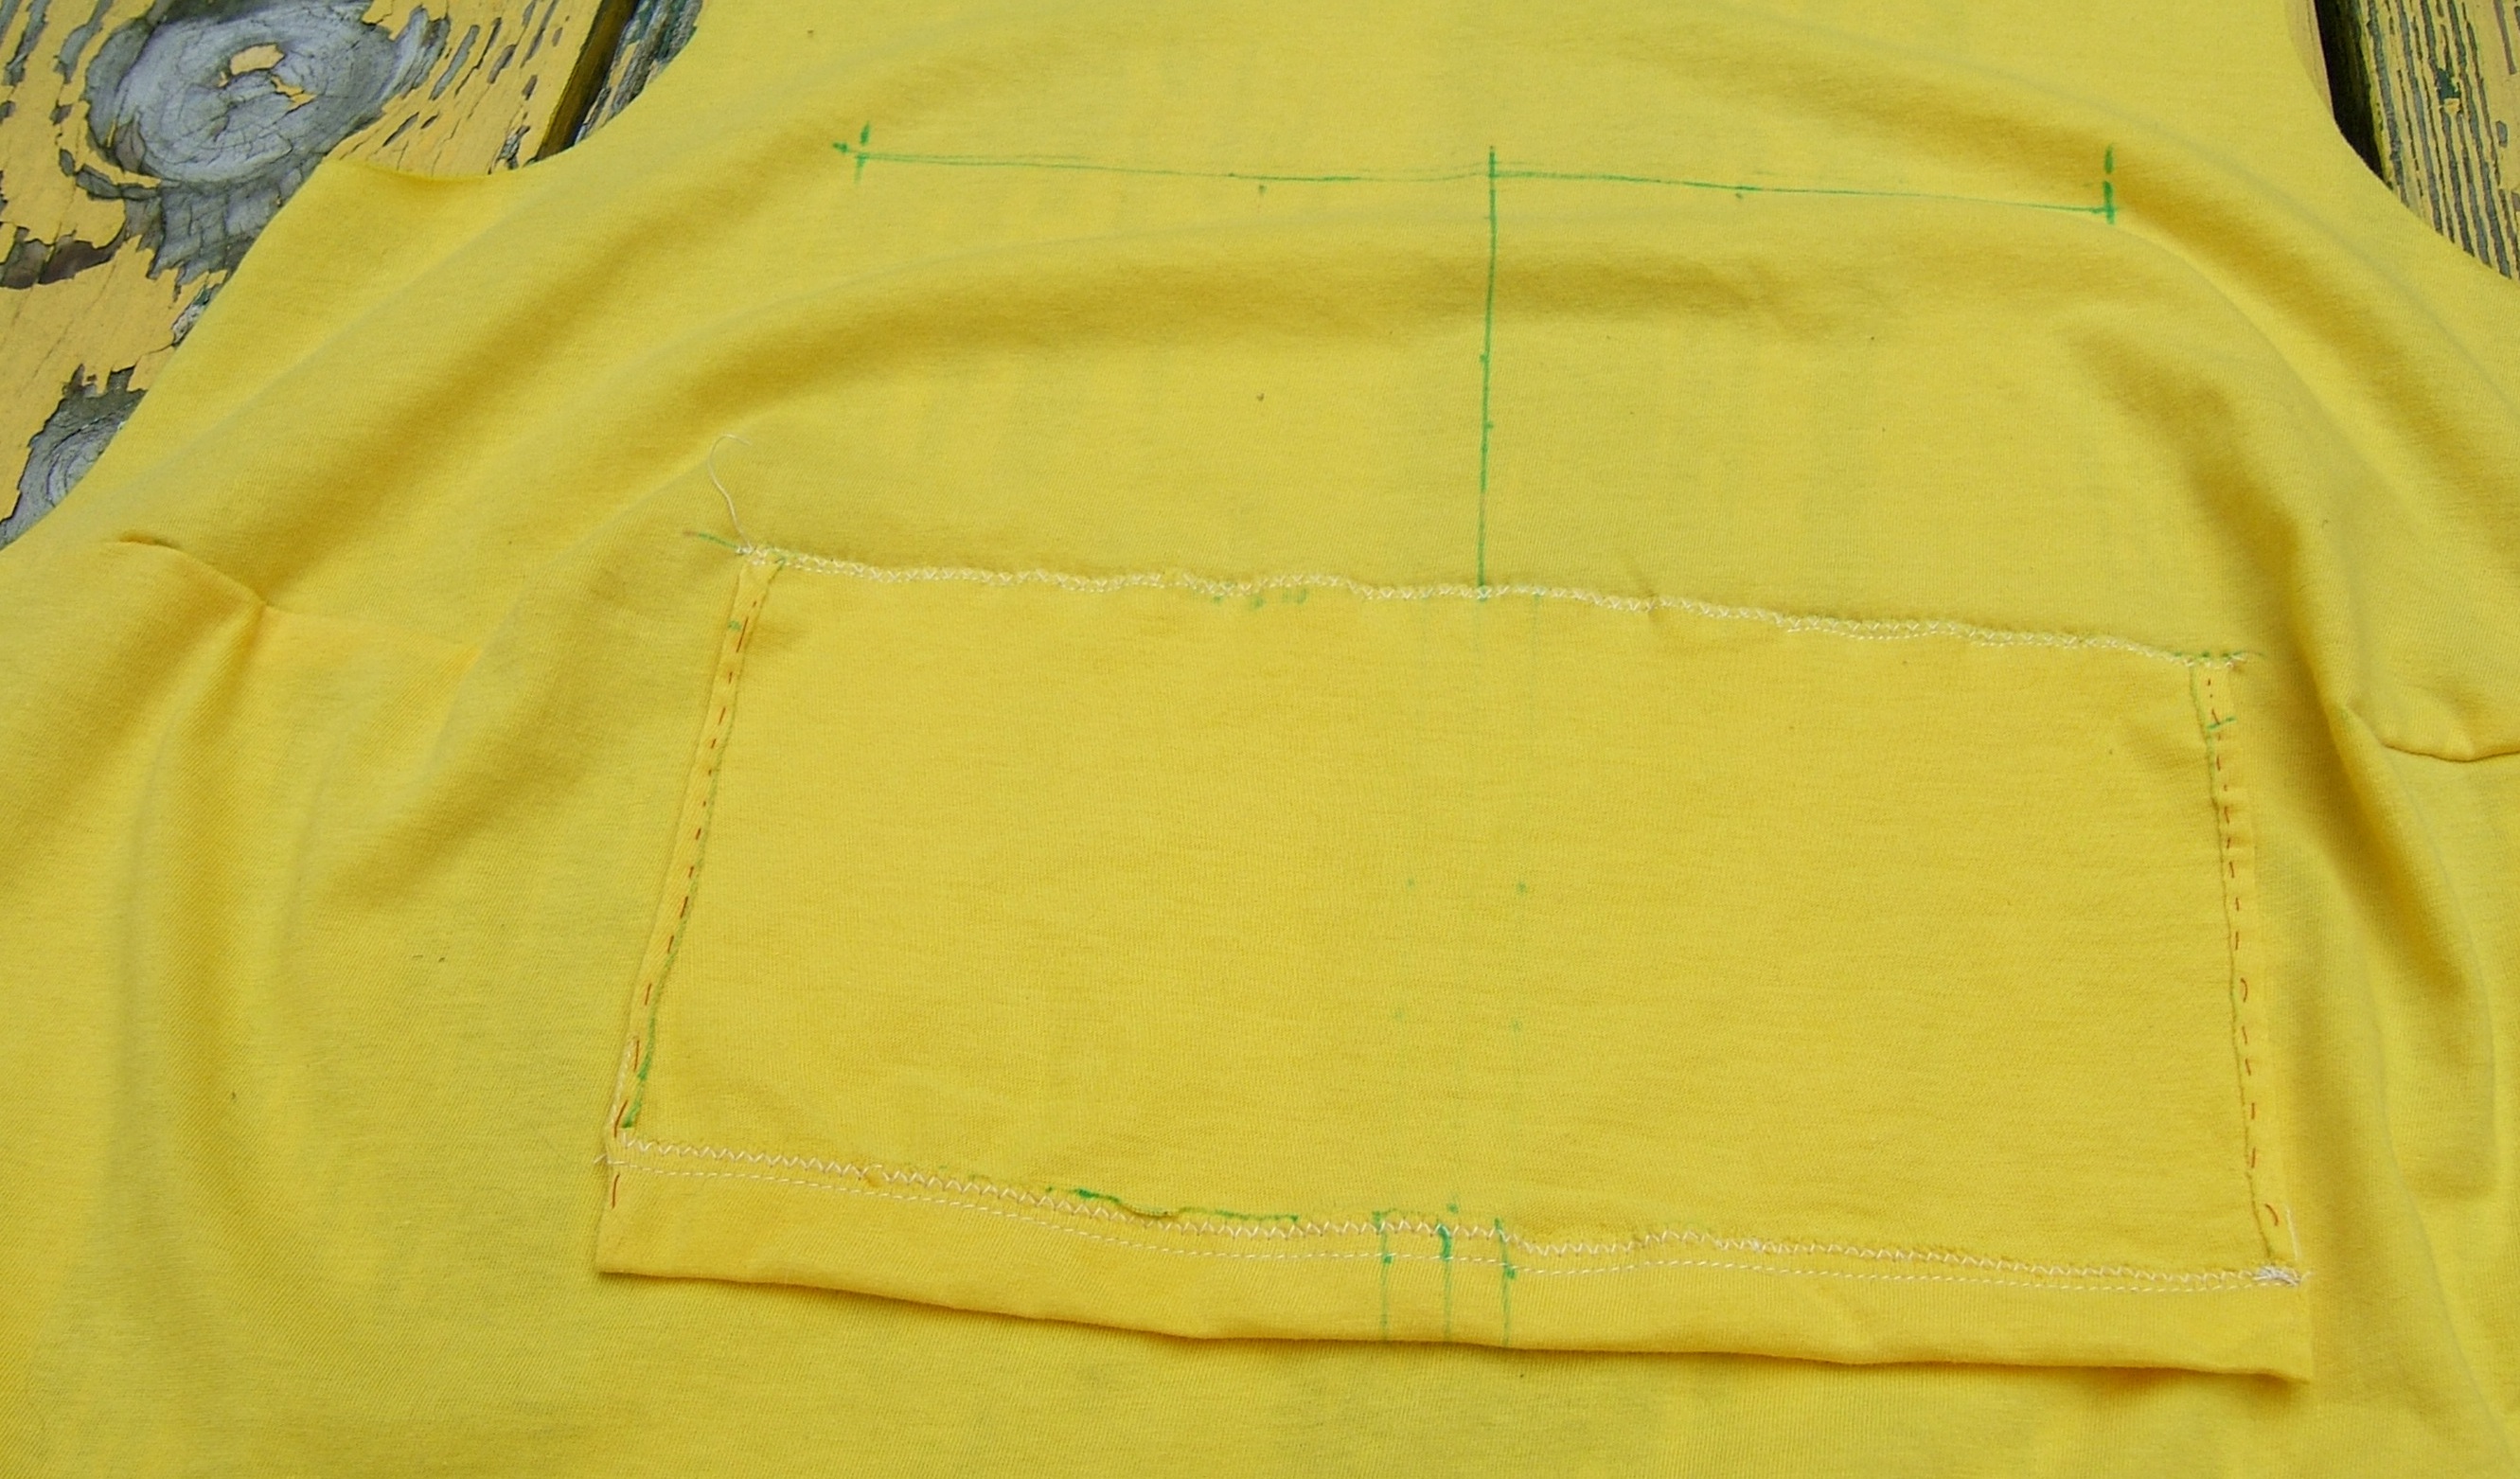
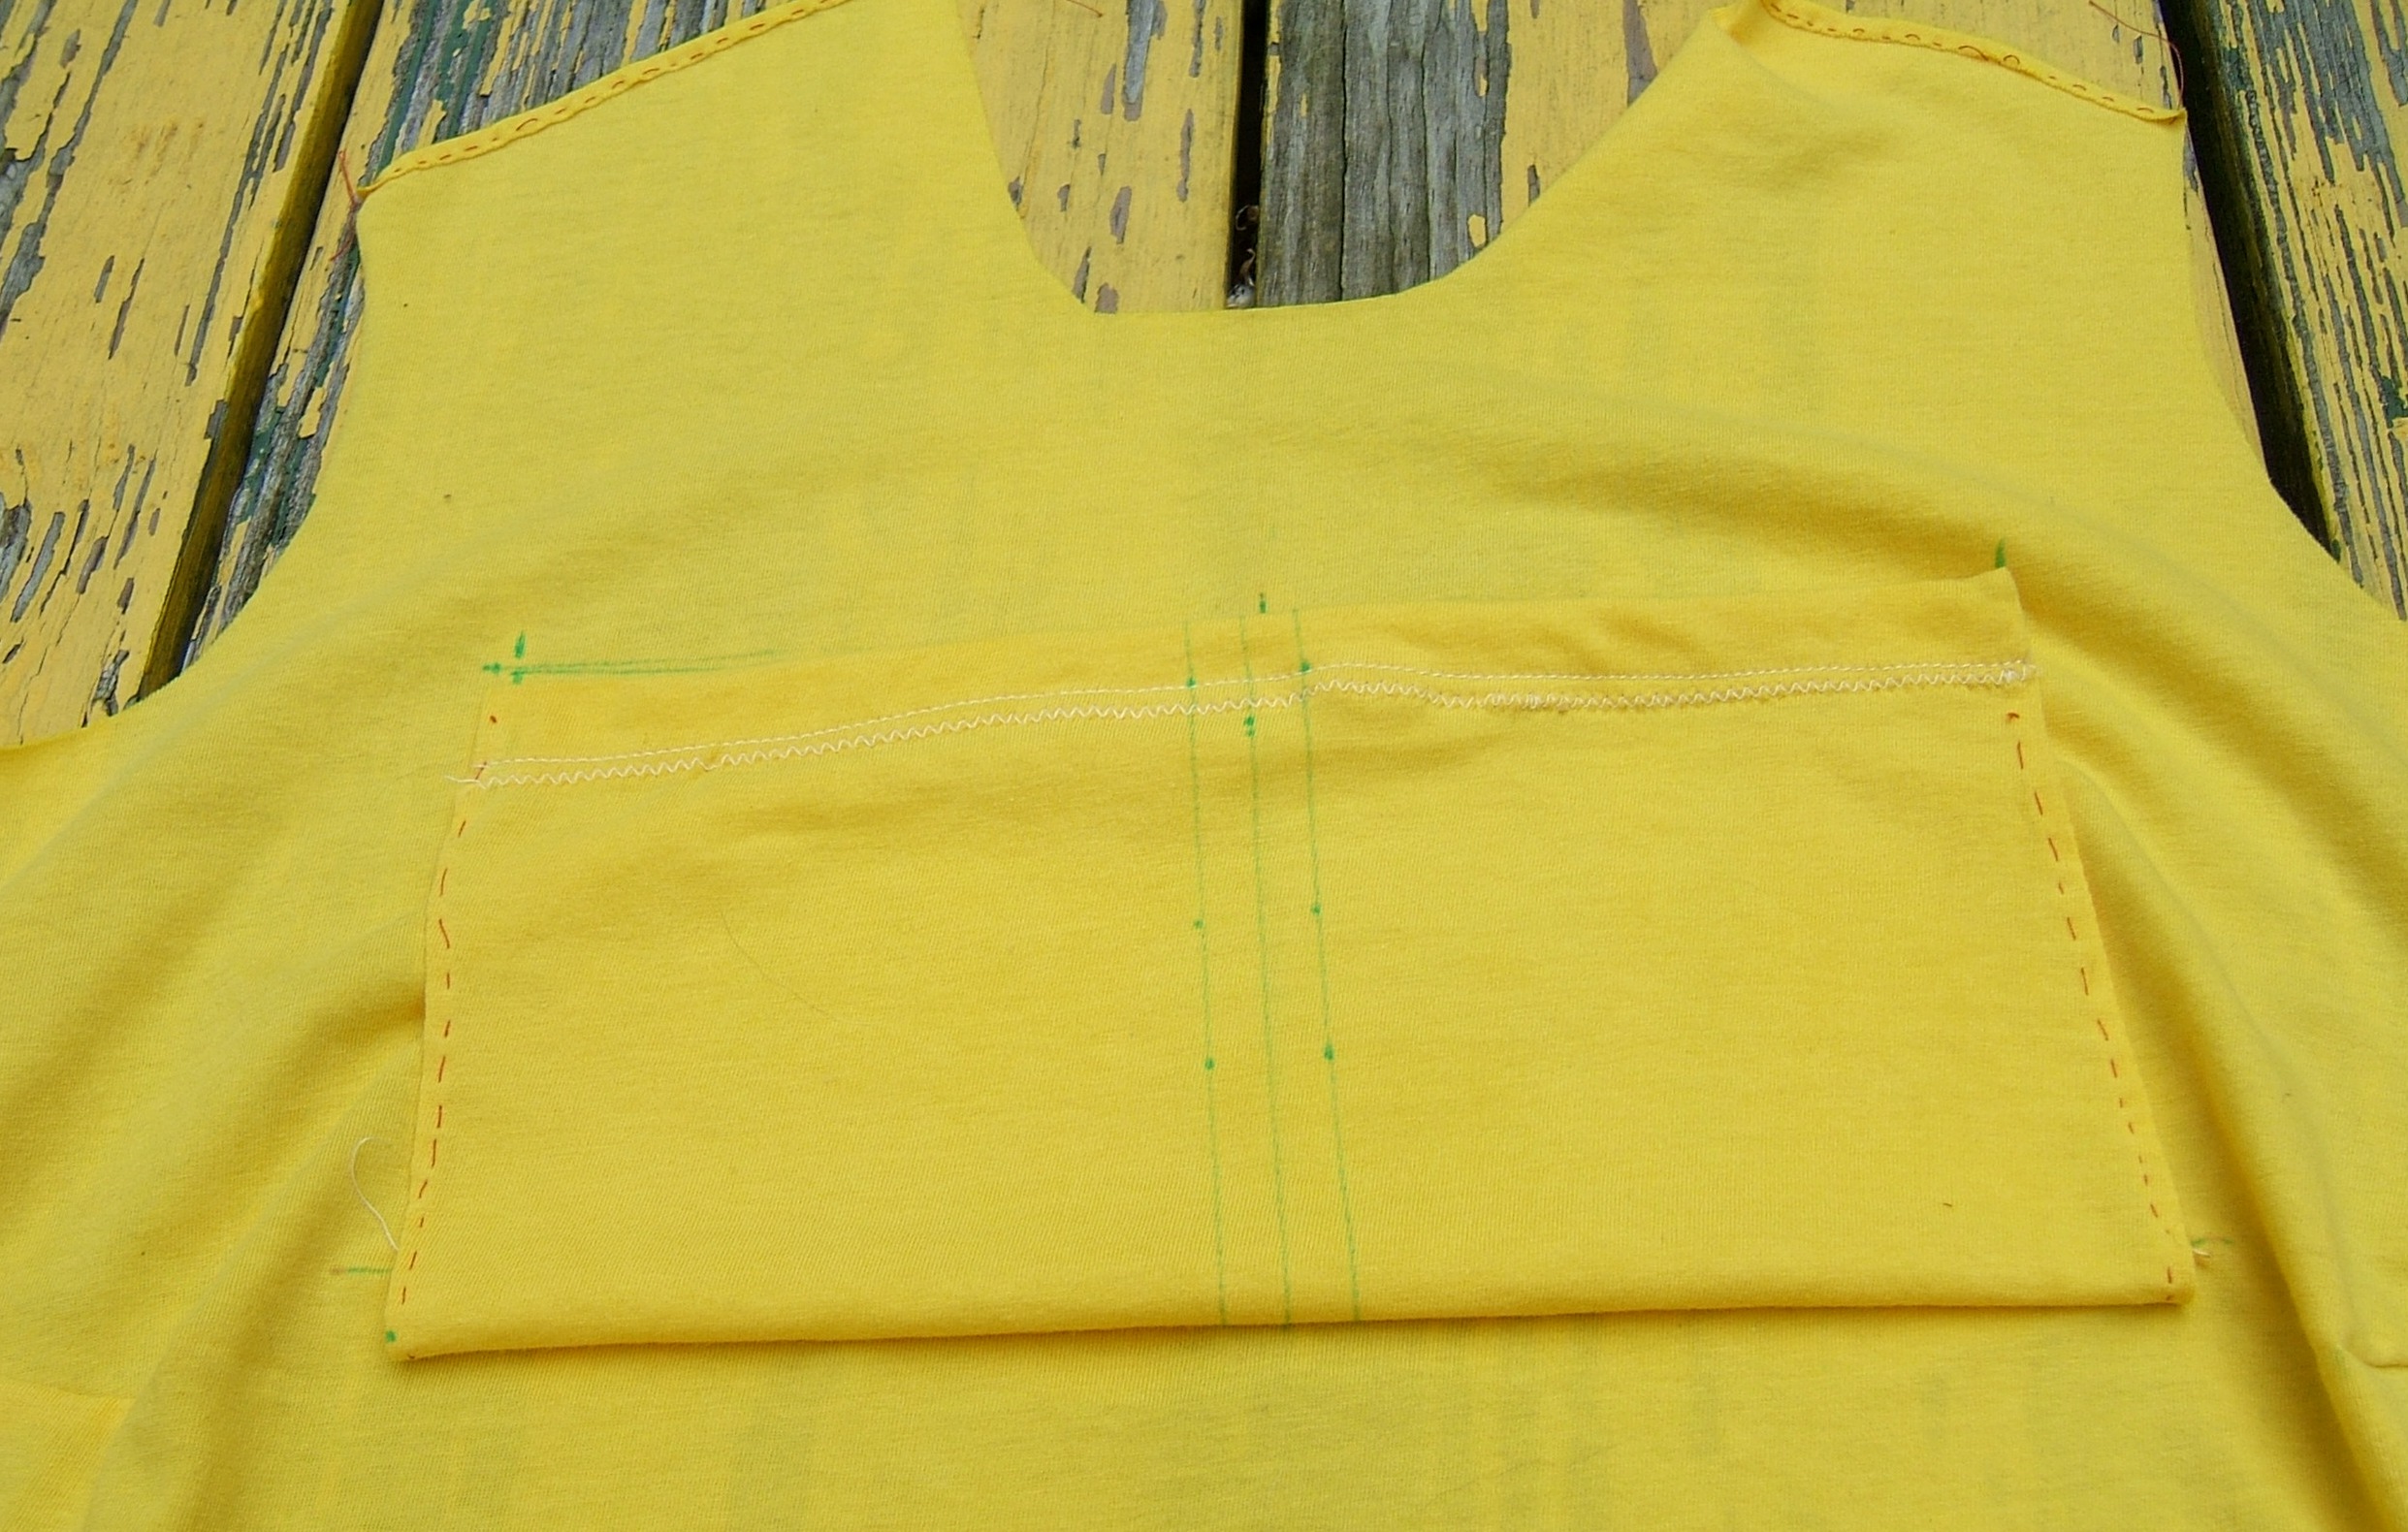
<strike>re-repair re-make
rocking-chair cushion</strike>
While putting the room back to rights after clearing out for the Roomba, I realized that I'm never going to get around to making a new cover for that cushion, and put it on the closet floor for the cat to sleep on.
While clearing out, I got the scraps down so I can cut patches for the front pockets and an interlining for the back pocket. Then while putting back, I dug out the briefs pattern, and if it fits on the scrap, I'll cut out a pair.
I'm not at all sure when I'd wear bright yellow underpants!
The old jersey has bits of quarter-inch twill tape behind the bartacks on the front pocket, and it has held up fine, but I'm still inclined to make self-fabric diamonds by turning in the corners of a square. For the corners; the pencil pocket is too narrow to use separate diamonds, and too wide to make one reasonable-size diamond serve for both sides.
On the other hand, the fabric is worn through at the top of the pencil pocket — I should also cover the space between the stitching lines. After thinking about cutting a rectangle and folding it into a hexagon, I think I'll go with a wide piece of tape, set vertically like the tapes on the old jersey. I thought of basting the tape in place, leaving it held only by the pocket-division stitching when the basting is pulled out, but the tapes in the old jersey are hand-sewn into place, and I do think that I want the edges to be held down. Perhaps I can work the stitching from the right side: I can feel the patches as I stitch, and probably will be able to see them through this thin cloth.
This time I drew the Xs on the fabric before cutting — absent-mindedly marking the *right* side because that was up when I dropped the scrap on the card table. And the blue marks show on the wrong side only where I held the marker for a while.
And the bits of tape on the old jersey are three eighths inch. One of the middle tapes measures five sixteenths; I'm pretty sure that I've never had tape of that width. It doesn't look squished.
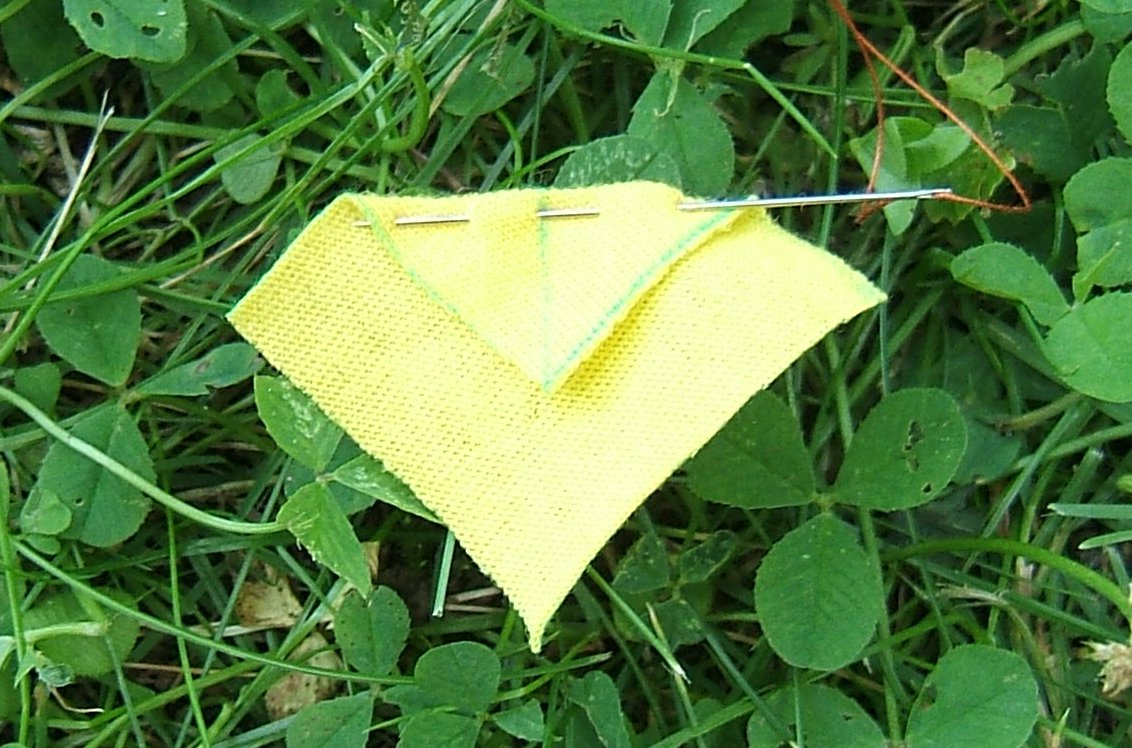
If I don't resume work soon, the needle I left stuck into the second patch is going to rust.
Speaking of rust, I used a bit of denim as a shim to keep the bobbin holder from falling out of the hole in my current spool of basting thread, a little of it stuck out from under the bobbin holder, and I've been sticking idle needles into it.
So I replaced the scrap of denim with a scrap of wool, and left a tag sticking out on purpose. Now I will store the #10 crewel needle and the no-provenance thin needle that's longer but harder to thread on the spool.
This afternoon, I found some cotton twill tape that is wide enough — just barely — to put under both sides of the pencil pocket, cut off a piece that will be about square when I've folded the ends in, and pinned it to the square I mean to fold into the second patch with the needle I mentioned in the first paragraph. I plan to hand-baste the ends of the tape together with two-ply thread to minimize bulk. I think I'll use baseball stitch, a.k.a. antique seam.
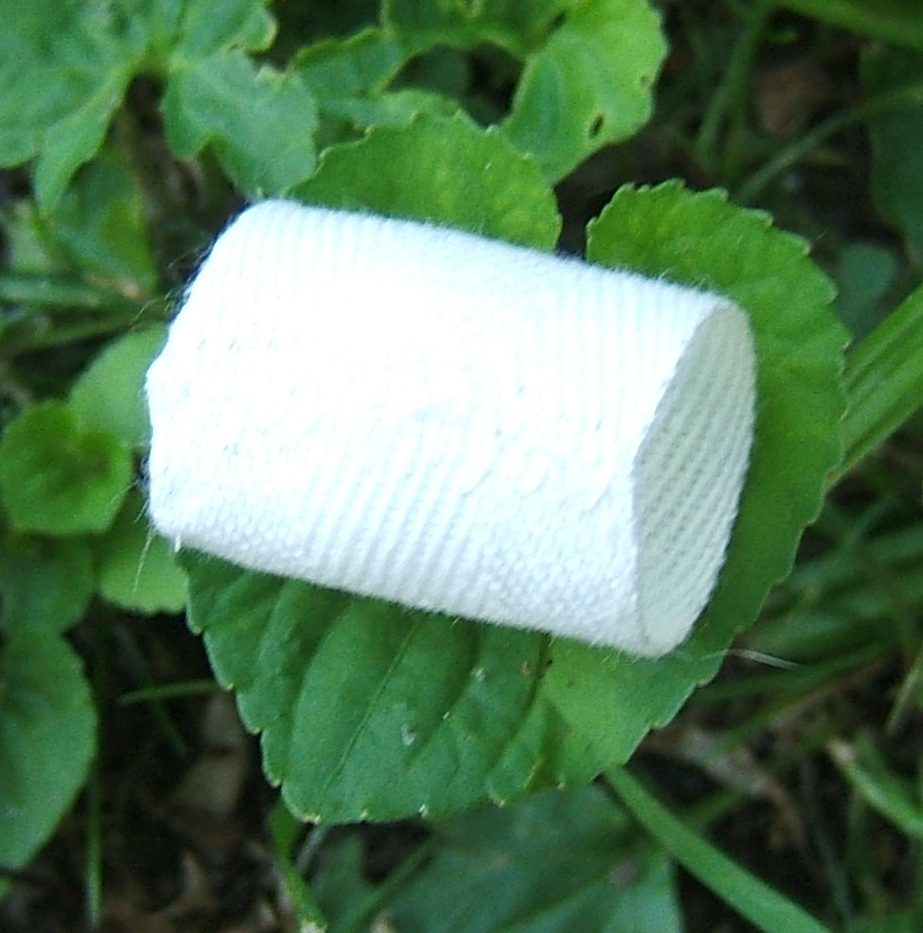
Caption: of course the depth of field fuzzed out precisely at the part I wanted to show. … my stitches are so neat that you can't see them! That's it!
It is baseball stitch. It's not terribly regular, but it does the job.
Which I did later that evening, and sewed it to the shirt. Also folded the remaining self-fabric patch. I'd better get on with sewing the self-fabric patches to the shirt before they get brushed off the copy of Analog on the sewing machine and I don't see them again unless I clean Roomba.
Oops, I just realized that I sewed the twill tape on with white thread, and I'm using ecru for this project. At least it's centered!


Sewed the patches on the front this morning.
Yesterday I noticed that my old jersey has stretched out so much that my wallet catches on my saddle. Perhaps I should have used something a bit less stretchy than self-fabric for the supporting straps on the new one. I did try to stretch them a little while sewing them on.
Roomba Day: I carried a box out of the sewing room with a vow not to carry it back, and spent the morning sorting. Some stuff I put away, some I threw away, and some I piled on another box.
Well, the other box was too narrow for the pile that was left when I got tired, so I put the pile back into the first box, then emptied the smaller box on top, but there is one box fewer on the sewing room floor.
Then I went out to the recycling bin, measured the box, brought it back in, and labeled it "Banners".
Cut out the pocket underlining and basted it to the pocket. Pinned the name tag to it so I won't forget to sew it on.
Now I'm wondering whether I should re-open the hem, which I haven't stitched yet, and zig-zag the edge of the underlining inside the casing. I think not; elastic doesn't drag back and forth the way a drawstring does, and there will be a very short run between the stitchings.
I've decided to end the stitching that divides the pockets into three at the top of the fold-bottom. That *might* allow my magnifying glasses to migrate into the next pocket, but my wallet fills that pocket, so I don't think it will be a problem.
Urm … that means I must zig-zag that part of the edge of the underlining. How lucky that I paused at this point!
There is plenty of scrap to make a pair of yellow briefs. I think I'll reserve them for bicycle riding — just in case I need to change pants in public. I've had to take off an undershirt outdoors, but I don't recall ever changing the number of pairs of pants during a ride.
⁂
After my nap, I zig-zagged around the edges of the underlining that won't be inside seams, sewed twill tape to the ends of the elastic, re-pinned and sewed the elastic casing, and appliquéd a name tape to the pocket. First time in a long time I've remembered the name tape in time to sew it on by machine.
Then I was too hungry to mark the back for sewing on the pocket, and it was only fifteen minutes before time to start cooking anyway.
I marked the inside of the back when I cut it out, and the marks didn't bleed through; I think I'll run a line of basting across, then pull it out after pinning the pocket.
I'm having a terrible time getting a good straight stitch; my bobbin tension is way too tight — which in wovens, I've been compensating by a very tight top tension, but that gathers a knit. I've loosened the bobbin tension by a frightening amount, and the bobbin thread still lies straight across the back. I'm beginning to think that bobbin screws are left handed!
Looked it up in the manual, which involved removing two boxes of thread from the typewriter-stand drawer, and the screw is not left handed. I achieved a balanced stitch by cranking the top tension up to four, which is at least better than the five I was using before.
Then I sewed the back pocket on and started to zig-zag the raw edge down. The zig-zagging on the casing is dreadful, and this was promising to be even worse; there was just no way I could stop the bar between the toes from folding the edge into pleats. But a few stitches in, I remembered that I have a plastic embroidery foot that is cut out underneath for just such a situation. Like the straight-stitch foot, it wasn't in the box of attachments; this time I was a little quicker to realize that I'd stashed it in the drawer for easy access.
Next step: put elastic in casing, pin it to the ironing board stretched, permanent-baste bar tacks at the pocket divisions.
I did get the elastic into the casing, but after my nap I felt too stupid to work on the shirt, so I cut out a pair of briefs. There was, indeed, ample scrap to do that.
With the shirt parts on the ironing board, I put one of the two card tables in the parlor away.
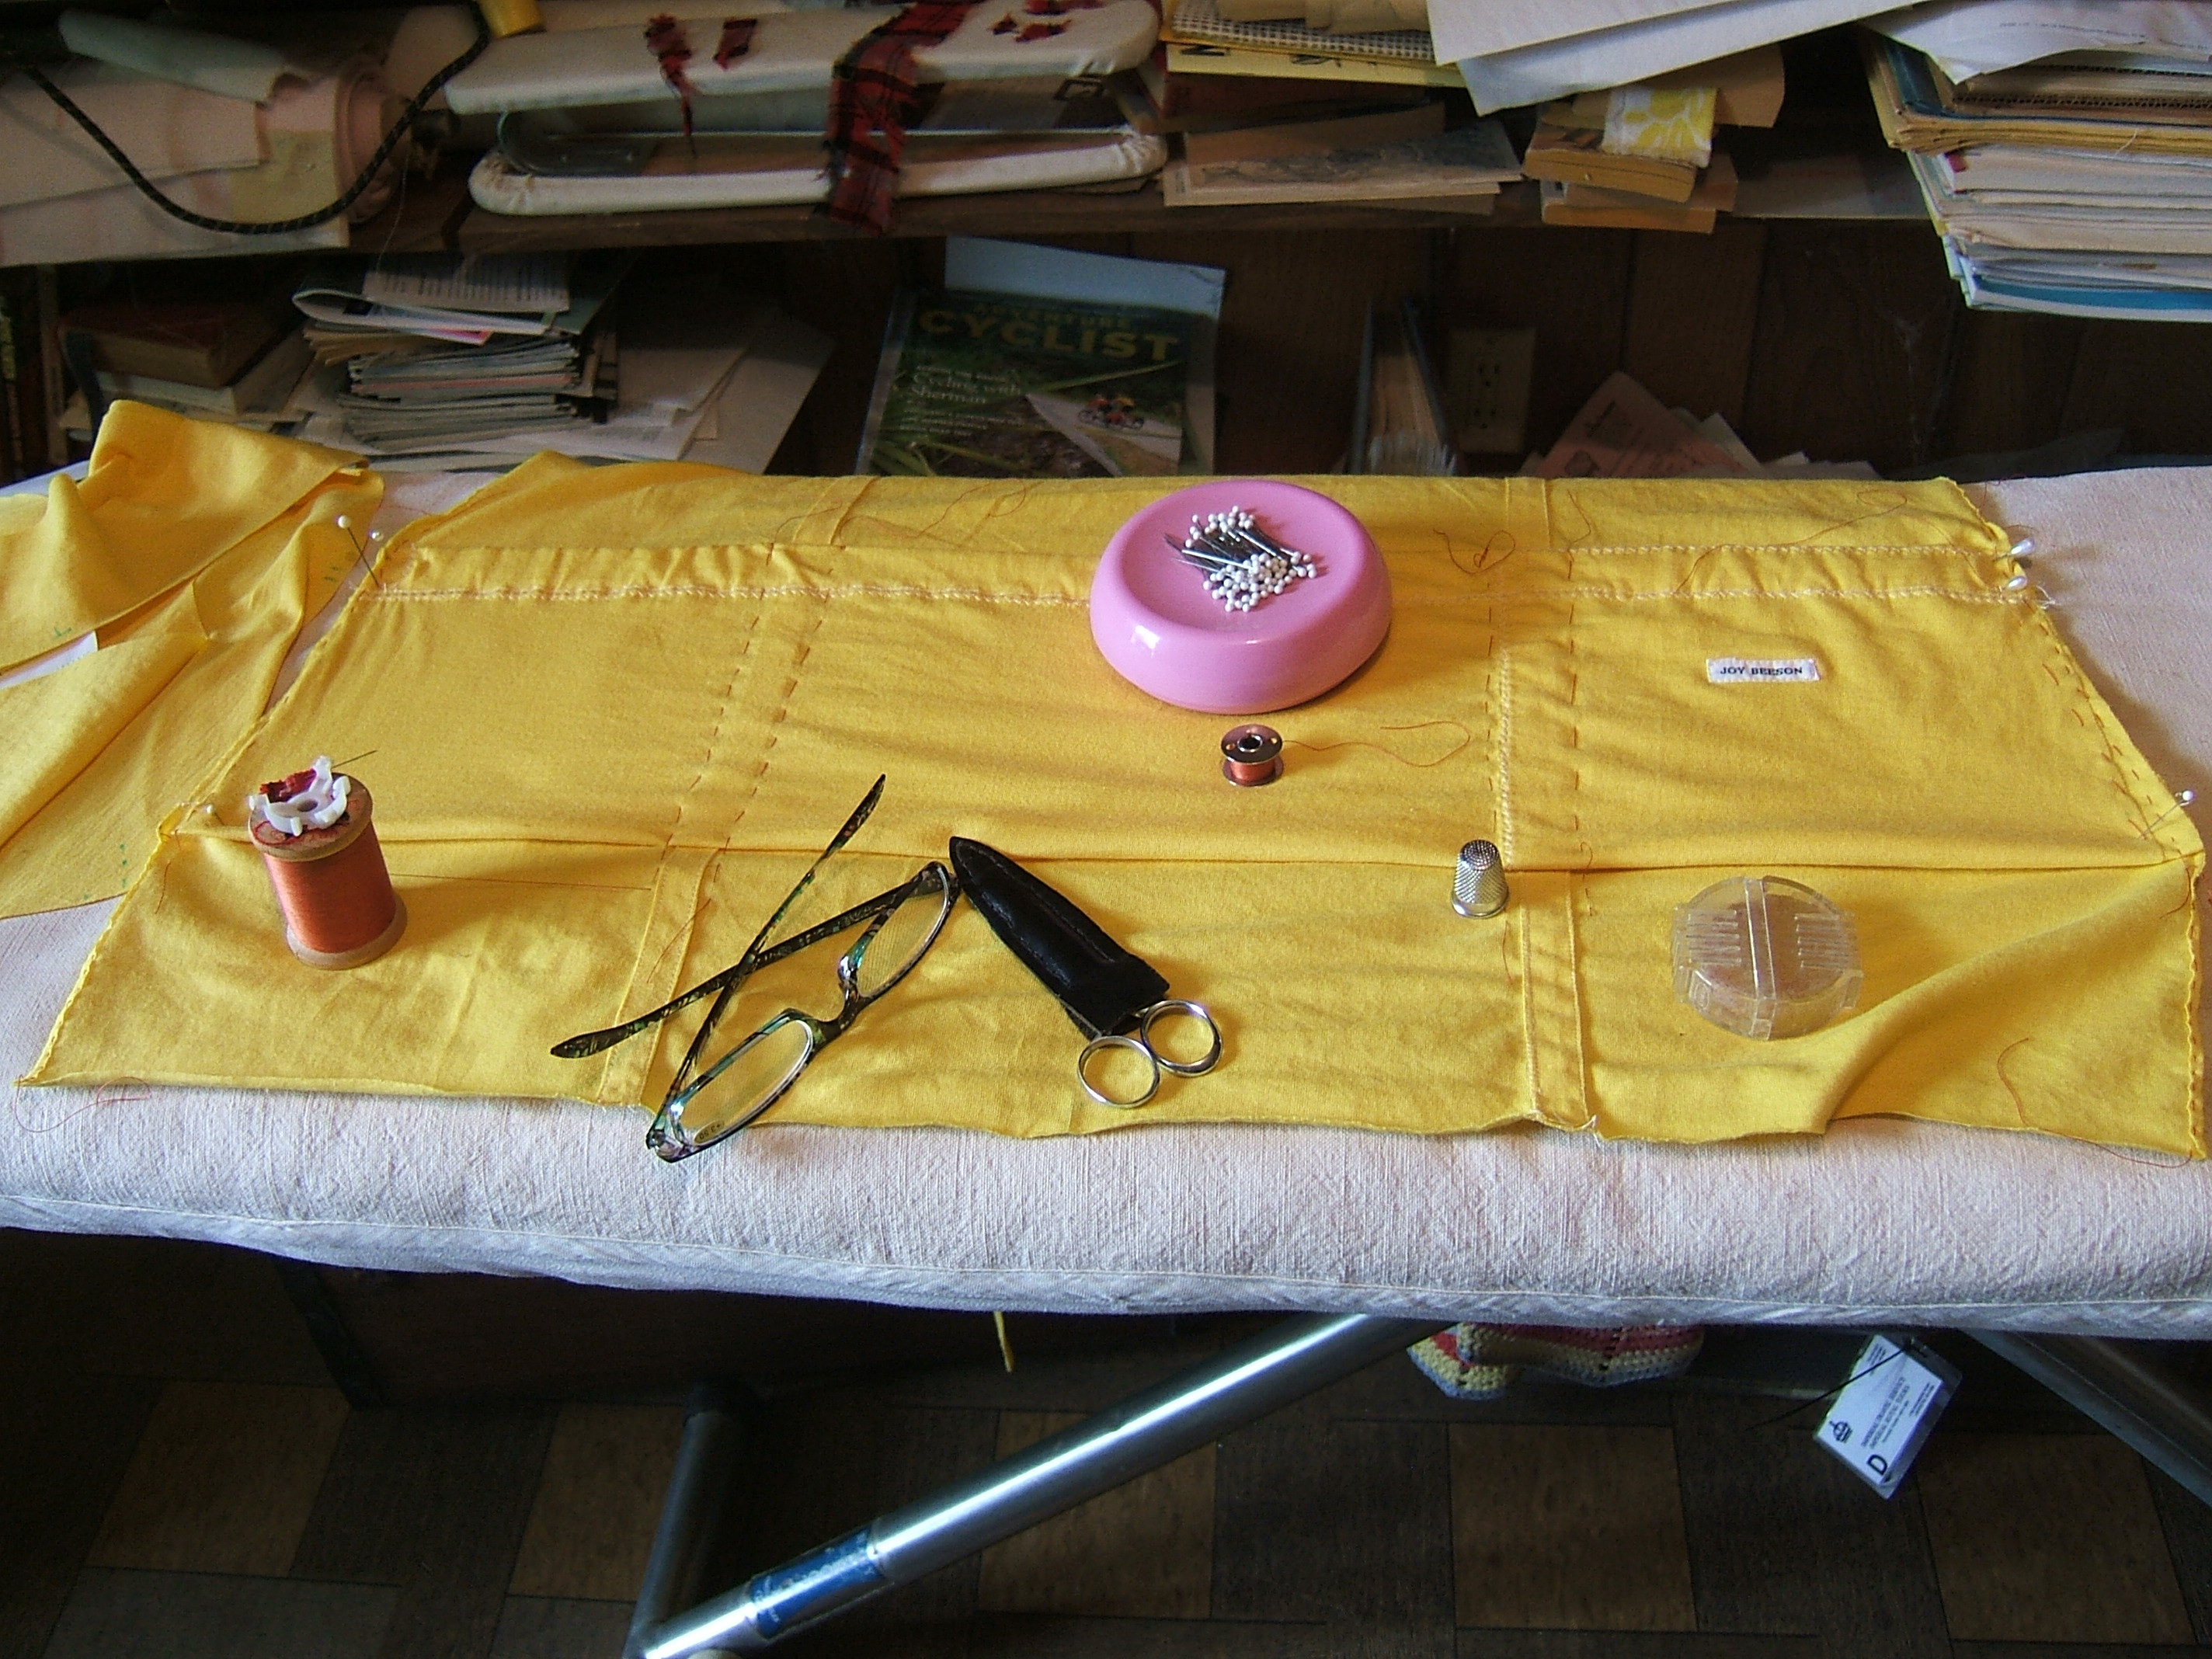
I sewed the divisions on the back pockets today.
First I pinned the elastic to the ironing board and made an unsecured hand bar tack through the casing over each strap to keep the elastic evenly divided among the pockets during subsequent steps. This was basting, but I hid the ends of the threads and won't bother to take it out. Seems to me I was glad I hadn't removed that basting while repairing or modifying some previous jersey.
Next, to pin for stitching … How do I mark the front so I can center the stitches on the straps underneath? Perhaps I can pin, turn it over, move the pins, and stitch from the back … Aha! It will be much easier to baste just outside each edge of the strap, then turn it over and sew from the back.
Having the spool of basting thread in hand — those side seams will be much easier to sew if I baste the edges of the pockets in place, and that will also stop the curling the left side of the pocket is getting into.
Now to baste the divisions. It was almost impossible to catch all three layers at the bottom of the pocket, because the point of the needle caught in the rough fabric of the ironing-board cover.
But we bought some Clementines (mandarine oranges/tiny tangerines) in a wooden box a few years back, and I saved all the bits of extra-thin plywood. I never made templates, as I'd thought I might, but they have come in handy many times. A slat of pasteboard-thin plywood under the seam made stitching easy. It was impossible to take short stitches where I sewed through the elastic — the shirt was still nailed to the ironing board, so I couldn't stab stitch — so I worked a bar tack over the edge. I had to cut this tack when I took the basting out.
After some fiddling and test stitching, I set the zig-zag on 3 and the needle in the middle.
I started the stitching a few stitches before the stitching securing the bottom of the pocket, and later picked out stitches until it was just before the seam, tied the threads together, and trimmed them to a quarter inch.
At the top, I worked bar tacks by setting the zig-zag on maximum and pushing down the feed-drop button. Then I re-set on 3, and held the reverse button in while I turned the handwheel through three stitches. In cutting off, I left the needle thread long enough that I could get hold of it, and trimmed the bobbin thread as close to the fabric as I could. Pulling on the needle thread undid a couple of stitches and pulled the bobbin thread inside. Then I trimmed the needle thread close.
⁂
I ironed a patch inside the old pocket. Opened the box of facings and iron-ons, selected a scrap of super crisp as the least unsuitable, cut the excess off, and rounded the corners. It turned out to be a good choice, because I could feel it through the fabric to get it into the right place — but it shifted during the complications of getting it ironed on, and left the lowest holes uncovered. Perhaps, now that I've figured out how to iron on inside a pocket, I'll iron the bit I trimmed off the scrap over them. The Clementine box again proved handy; When the patch wouldn't stick, I found a shorter and wider piece of extra-thin plywood to put inside the pocket and provide a firm ironing surface. Then I laid a wet rag over the pocket and ironed it until it was not just dry, but slightly scorched, because this interfacing is designed to be put on with a professional press, and it takes a lot of heat, pressure, and steam to melt the glue.
And it's the end of June, so I'm starting a new file in mid-project. High time, too; this file is so big that it takes a long time to open even when I'm "downloading" it off my own computer.
Continue to Part Two of 2015
Back to 2014
Back to Table of Contents
Back to cover page, which has a list of my
other sites
Back to Comcast cover page