The old way to finish the bottom of a hanging pocket (as in the side seam of pants) was to sew a french seam. The modern way is to serge/overlock the bottom of the pocket together. The flattest way is to sew the bottom shut with a straight stitch about a quarter-inch from the edge, then zig-zag between the straight stitch and the raw edge to stop ravelling before it reaches the straight stitch. If the pocket is of heavy material to take heavy wear, make two rows of straight stitch a sixteenth of an inch apart, let one edge of the zig-zag fall between the rows of straight stitch, then ravel a fringe back to the zig-zag — or until it becomes difficult to remove threads. This thins the edge and makes it less inclined to wear a line in the outer fabric.
If the fabric is really heavy, such as bull denim, use three rows of straight stitching instead of one straight and one zig-zag. Leave between a sixteenth and an eighth of an inch between the rows, and between three-eighths and one-half between the outer row and the raw edge. Ravel about halfway to the stitching.
Consider using a thinner fabric for the pocket, and piece or face it with the heavy fabric where it shows.
When ready-to-wear makers simulate rough sewing, patch pockets are square. This is to provide a "crude" look, and not for any practical purpose.
A practical patch pocket should have obtuse angles at the bottom corners. Square corners are hard to sew, they collect lint, and they concentrate the overlapping allowances into big lumps. (Unless you miter them as you would miter a hem.)
For pockets in work aprons and the like, cut the corners off along the bias. Depending on taste and intended use, the bias edges can be anywhere from short enough to regard as a miter to as long as the straight part that you leave between them.
(For a miter, fold the corner on the bias instead of cutting it off. For a very short bias edge, fold the corner and trim excess after pressing all folds. It's easier to fold on the true bias if you press over a business card or a thin stainless-steel ruler.)
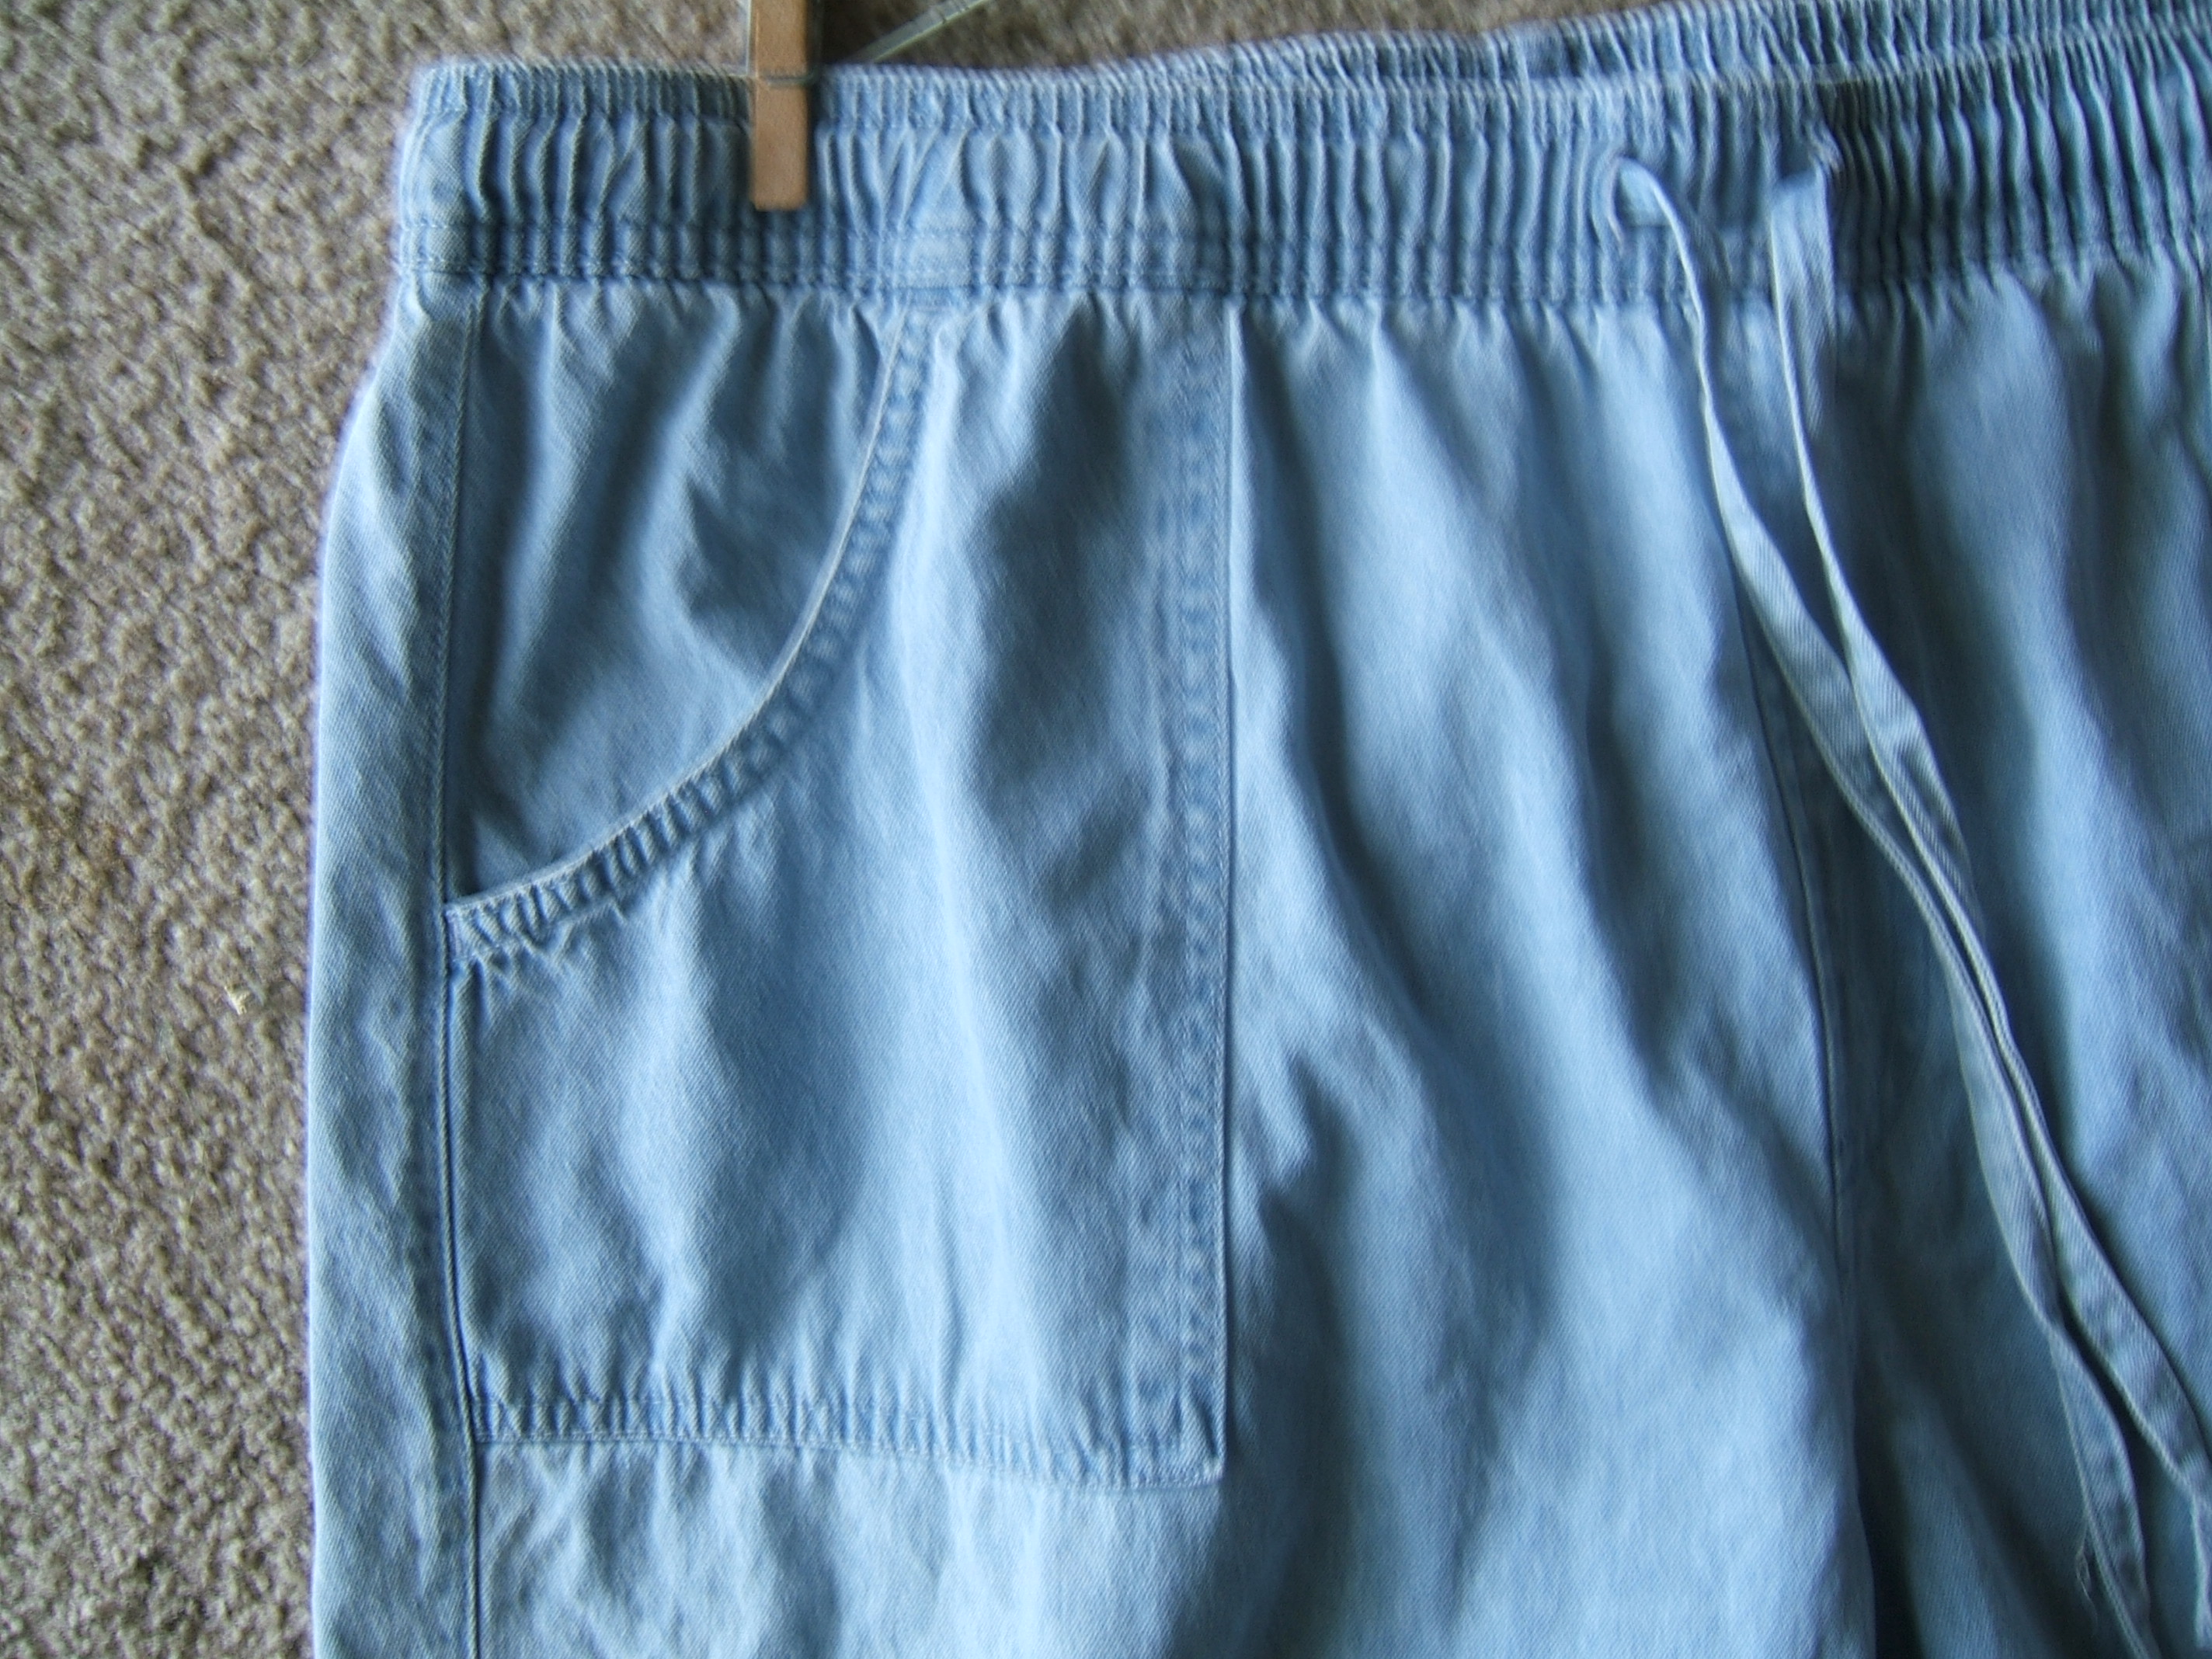
Shirt pockets and the back pockets on work pants are usually pentagons, with the hem on the cross grain, the two sides on the vertical grain, and the bottom made of two slanting lines that meet in an obtuse angle. This slight dip doesn't make the corners much larger than a right angle, but it's enough to make it easy to make them lie flat without any bits of raw edge peeking out.
Sometimes the decorative pockets on designer jeans will exaggerate this shape by making the sides flare out, so that the pocket is wider at the top than at the bottom. This, of course, makes the top corners acute. The resulting lumps are often disguised by driving rivets through them, or by working bar tacks over them. This shape makes objects placed in the pocket work their way to the top and fall out, which causes the wearer to refrain from making ugly lumps in the open-topped appliqué by using it as a pocket.
When a patch pocket is made of heavy fabric, turn the hem only once, and cover the raw edge with twill tape. This prevents the lump which would be created by a second fold, and prevents the cross-grain from stretching when heavy objects are put into the heavy pocket. (You can also line the pocket, or bind the edges.)
When fine shirts have pockets, the pockets are made round on the bottom. This eliminates places for lint to hide and, more important, demonstrates the skill of the seamster, for a smooth, flawless curve is difficult to achieve. This takes off some of the taint of being forced to apply pockets to a garment which a true gentleman regards as underwear, and always keeps under his coat.
Psst . . . don't tell, but round-bottom pockets and rounded corners are dead easy if you press the turn-under over a template. (You can also use a template to force a straight line when your fabric is being difficult.) Cut a piece of stiff paper or light card to the exact finished shape of the pocket, or buy a ready-made metal template.
A ready-made pocket template is a small square with each corner rounded to a different radius. I usually use my home-made templates on one corner at a time, like the ready-made templates, but one also has the option of cutting the entire pocket shape into your template. In either case, take advantage of the template to press as much as you can of the straight sides while pressing the curves.
Unless you are rounding the corners because the scrap you are cutting from is rounded, cut the corners square to begin with — the extra fabric gives you a handle to control the fabric while you are pressing. Don't attempt to make the allowance flat in the first press, but concentrate on marking the fabric with a crease where it will fold. Then hand-baste the crease, making your stitches shorter and closer to the fold when you get to the curve. Trim away excess fabric, then press again.
I've recently read of a neat way to make sure a pair of pockets are identical: Cut the pockets out, place them right sides together, baste on the fold lines, turn right-side out, press, remove basting, find pockets pressed into perfect mirror images.
I don't think I'd use this for pockets with straight edges, which are easy to make alike without the trouble of removing the basting — not to mention that the seam allowances in the corners would be all scrunkled and you might spoil the perfection when you straighten them out.
But it should work a treat with rounded corners, and removing basting may be less trouble than using a template four times.
My source said to baste with water-soluble thread, then remove it with a blast of steam or a damp pressing cloth.
I doubt that I'll ever use self-removing basting — "steam" and "damp cloth" are what sets creases in the first place, which means that the basting might come out before I am 100% certain that the creases are exactly right. And does the label say "steam soluble" as well as "water soluble"? Even if steam does dissolve all the thread, it doesn't remove it, just spreads it around. (Leaving the thread in isn't a serious problem in rough sewing, though — the garment will pretty soon be washed thoroughly, and that should get it out.)
But mostly, water-soluble thread is a royal pain to store. I'd need more use for it than the very rare round-bottom pocket to give it house room. And proper basting stitches aren't all that hard to pull out.
For an experienced view of the method, go to Pat Erny's Fast and easy "twin" pockets". And look for other patch-pocket tutorials on her shirtmaking blog, Off-the-Cuff Style.
Blogspot is a poor interface for information of permanent value, but Pat Erny's essays are so good that they would be worth going after even if the interface were beating you off with a stick.
Fold the hem to the right side. Use your hem gauge, but do *not* use your iron. Stick a pin in the middle of the hem, at right angles to the raw or turned-under edge. This pin is just to make sticking the next two pins easier. Fold one end of the hem over your hem gauge, and skew it so an eighth of an inch of the hem allowance sticks out past the raw edge of the pocket. (More for heavy fabric and wide hems, less if the fabric is particularly fine and the hem is narrow.)
Mis-matching the edges makes the hem slightly shorter than the pocket, so that the seam will roll to the inside where it doesn't show. Another plan sometimes employed is to trim away a sliver of seam allowance at an angle, and then make the allowances match — but you don't *want* the allowances to match; if they are staggered, they make a smaller lump.
Sew the ends of the hem, letting the edge of the little toe on the presser foot run along the edge of the pocket, not the edge of the hem. If sewing along an edge you can't see bugs you, sew one end toward the fold and the other away from the fold, so that the pocket is always on top. Otherwise, begin both seams on the turn-under allowance of the pocket and continue it to and off the fold. Stitching off the fold twists the threads into a neat cord.
Several stitches should be in the pocket only. That is, start stitching a little way from the hem when stitching toward the fold, and continue the stitching past the bottom of the hem when stitching away from the fold.
Trim the ends of thread protruding from the fold to about half an inch; trim the ends on the allowance moderately close, popping both ends to the wrong side. (Trim on the right side first, pull on the end on the wrong side, trim that end. Make the ends short enough to stay inside the fold, but not so short that they will pop back to the right side.)
Turn the hem right-side out, using a corsage pin or a point turner to make the corners flat. Press the hem and all allowances — use starch if the allowances spring up, baste the folds if the fabric insists.
If the edge of the hem is raw, appliqué a piece of tape over it. Make the tape short enough that the raw ends will lie between the two rows of stitching that hold the pocket to the garment. (If you want only one row of stitching to show on the outside, sew the tape to the edge before stitching the ends of the hem. Make the tape short enough that it's not at risk of being caught in the end stitching, but just barely.)
If the edge is a fold, stitch along it. If you have to stitch by hand for some reason, baste at the extreme edge of the fold, then turn to the right side and back-stitch just inside the row of basting. Spaced back stitch shows less and, for this purpose, is just as firm as closed back stitch. Or embroider ad libatum.
If the fabric isn't too heavy, you may running-stitch along the fold from the wrong side. Make the stitches that show on the right side as short as possible, and the stitches on the wrong side not much longer.
Pin the pocket in place and sew by machine along the folded edge. When you get to the top of the pocket, turn the flywheel by hand, turning the fabric after every stitch to make a smooth U turn, then stitch around again the width of the presser-foot toe away from the first stitching. Make another smooth U turn, and stitch an inch or two on top of the beginning of the stitching. Cut the needle thread, then break the bobbin thread. (This pulls the needle thread to the wrong side.)
It is very important that the U turns be smooth, because an angle here will collect stress and tear the cloth. Sometimes I make a slightly bulbous end to the stitching, which presents a gentler curve to the stress, and makes the mouth of the pocket slightly narrower than the body to help keep things in. Don't overdo, or forcing things though the narrow mouth will accelerate wear. If the pocket will meet heavy strain, glue-baste a patch to the back of the fabric under each top corner before sewing the pocket on. Make the patch from a stiff fabric that doesn't ravel.
When sewing a patch pocket by hand, one line of stitching is enough. I backstitch near the folded edge, and make loops about a quarter inch across to begin and end the line of stitching. These taper back into the main line of stitching at a longer angle than ascii art will allow, but the U turn is fairly accurate:
   __
 /    \
|      |
|      |
|     /
|   /
| /
|
|
|
|
|
|
Use closed backstitch, or space backstitches by less than their length. If the pocket won't endure heavy strain, you can use horizontal bar tacks to end the stitching instead of backstitched loops.
Prepare the pocket as above, but instead of taping the edge of the pocket-hem or turning it under, sew the hem with a row of zig-zag stitching that covers the raw edge. Pin the pocket in place, as above, then zig-zag around the pocket a shade under an eighth of an inch from the fold. This should plant one leg of the zig-zag firmly inside the seam allowance, and the other just off the raw edge of the turn-under, so that no raw fabric shows inside the pocket. Begin and end the stitching by taking a few stitches in the same place to make a bar tack. (In practice, I hit the "sew backward" button a few times; this is easier than changing the stitch length, and makes a little square instead of a lump.)
Patch pockets may be any shape that appeals to you, and the opening can be on the side instead of at the top.
I have seen patch pockets in which the opening is on an upper corner called "cargo pockets", presumably because the shape suggests the side-seam pocket of old-fashioned blue jeans. The name is more-appropriately applied to pockets with gussets or pleats to allow large objects to be carried, but partly-closing the top does provide more support for weight in the pocket.
A large patch pocket with openings in both upper corners is called a "kangaroo pocket". This is one way to keep a very large pocket from gaping open; more often it's put into sweat shirts to provide a place to keep your hands warm.
One common variation is to substitute a patch pocket for a side-seam pocket; you can catch one side of the pocket in the side seam, and the top of the pocket can be caught in the waistband.
In another variation, the top of the side-seam patch pocket serves as a belt loop. This is a good way to support heavy objects in the pocket.
You can put patch pockets on patch pockets, and inside other pockets.
Pencil pockets are usually made by stitching five-eighths of an inch from one side of a patch pocket.
Once I stopped the stitching a little below the top of the pocket so that the bar tack securing the end could be in a thick part of the hem. I found that the resulting funnel shape of the top of the pencil pocket made it much easier to feel for the opening with a pencil.
It's also a good idea to stop the stitching an inch or more above the bottom of the pocket, so that lint won't accumulate in it, and so that small objects dropped in by mistake are easier to get out again. I don't bar-tack this end, for fear of tearing the fabric. There is no strain on the end in normal use, so just tying the threads together on the back holds well.
When a pencil pocket is made in the middle of a wide pocket,
Carhart&&&&
Appliqué a patch to the wrong side of the garment, under an opening. One way to do this is described in "Side-seam pockets in gowns", below.
Broadfall pockets are part of the main garment, and are discussed under "Pants" and "Desiging and Assembling Broadfall Pants".
Same as pants, except that in dresses you catch the top of the pocket in a waistline seam instead of a waistband.
The broadfall pocket is particularly suitable for skirts, because it allows up to four full inches of adjustment. I can't think of a way to put broadfall pockets into the skirt of a dress, unfortunately, but it should be possible to design a jumper to be adjustable at the waist.
Essentially, this style of pocket is a bulge in the side seam. It is usually cut separately and sewn to the side seam, because the side seam often curves or slants. Even when the side seams are straight and on the vertical grain, cutting the pocket all in one with the gown makes a wasteful layout.
Cutting the pocket as a separate piece is essential to the method of setting a pocket into a french seam detailed below.
If the dress has a waist seam, allow the top of the pocket to be caught in the waist seam, to support the weight of stuff in the pocket, and to keep the pocket from flopping around.
Allowing the bag part to be caught in the side seam also provides support, and simplifies construction — think of it as the skirt and pocket sharing a seam allowance: stitch up to the bottom of the opening, make a smooth U-turn onto the stitching line of the pocket, stitch around the pocket, smoothly curve back onto the side-seam stitching line. It helps a great deal to draw the stitching lines with chalk or wash-out marker, particularly in the "smooth curve" parts. Or set pins nose-to-tail to mark the line.
Commercial patterns frequently make side-seam pockets too small. It is usually easy to re-draft the pocket with a deeper bag.
Only the part below the opening of a side-seam pocket is a bag to put things in. It is quite possible to make a side-seam pocket that looks huge, but has no capacity at all. For this reason, you should check whether the pocket is big enough for your purposes by looking at the pattern with the part above the bottom of the pocket opening covered.
It is easy to draft your own side-seam pocket. Draw the desired shape of the finished pocket on your pattern for the front, and, if necessary, mark the top and bottom of the pocket opening. Then copy this shape and all marks onto another paper and add a seam allowance. Copy any marks on the side-seam line to the pattern for the back.
Cut on the same grain as the main body, just as you would if making a patch pocket. Cut two for each pocket wanted: usually four pieces total, since you'll balance the gown by putting a pocket on each side.
This pattern will do equally well for making an underpatch pocket: cut one piece for each pocket wanted, and turn the part of the seam allowance that isn't shared with the dress to the right side. Hem or face the side seam of the front of the dress in the part reserved for the pocket opening. (Make sure you use a little more than the full width of the seam allowance, so it won't get caught in the seam sewn later.) Appliqué the pocket to the wrong side of the front, thereby repairing the gap in the seam allowance caused by the hem or facing.
This pocket is described from pockets set into a gown pleated onto a yoke, using the full width of the fabric. The top and bottom of the pocket cross the side seam at a right angle. If your seams are curved or slanted, you will have to reduce the seam allowance on the pocket instead of simply letting the pocket be a trifle wider.
I have learned that if I make a french seam by using the little toe on my presser foot as a guide for the first stitching, and guide the fold on a certain spot on the feed dogs for the second stitching, the seam will use up exactly half an inch of seam allowances. These are the distances that I call "a little less than a quarter inch" and "a little more than a quarter inch". Adjust for the proportions of the way you make french seams.
The seams in the model are half an inch wide; the commercial-pattern 5/8" allows a little more clearance between the various parts of this seam, but also comes out a little coarser.
The pockets are teardrop-shaped pieces of cloth, with one straight edge, cut on the lengthwise grain, and one curved edge which follows the cross grain where it meets the straight edge at the top and bottom.
Begin by pressing or basting a little less than a quarter inch to the right side of each pocket piece, for one inch of the curved edge at the top and bottom where it meets the side seam. This represents the allowance of the first stage of the french seam to be sewn later. I usually find basting easier than pressing for this purpose.
Now sew the pocket pieces to the front and back with flat-fell seams. Let the second stage of the flat-fell seam continue the first stage of the french seam to be sewn later, and make the flat fell as narrow as possible, so that it will be entirely hidden when the pocket is folded in along the seam line of the front.
One way: pin the pocket with its raw edge a quarter inch from the raw edge of the piece you are attaching it to, and sew one-eighth inch from the edge of the pocket. Since the edges are straight, exact seam allowance doesn't matter as long as it's the same on both halves of the pocket.
Begin several stitches before the pocket and stop several stitches past it, to keep it from coming unsewn at the ends when handled. Leave the threads otherwise unsecured. Turn under a little less than a quarter inch of the garment allowance, and top stitch, again extending the stitching beyond the ends of the pockets. Usually one row of topstitching is enough, but in sturdy fabric, you'll want to top stitch on both sides by machine. In very delicate fabrics, you may want to top-stitch both sides, doing the row that shows more by hand. Hand-sewing the crease is both more secure than pressing, and easier on the fabric.
When it is time to sew the side seams — which may be several stages after you attach the pockets — put the *wrong* sides together, sew a little less than a quarter inch from the raw edge, skipping the corners of the pocket. Sew as far as is convenient into the creases you made earlier, but don't be fanatical about it.
Press, fold the seam with the right sides together, and sew a little more than a quarter inch from the first seam. This seam is continuous — up from the hem to the bottom of the pocket opening, a U turn onto the pocket's seam line, around the pocket, a smooth turn onto the side seam — draw this in advance to make sure you cover all the raw edges — and up to the armpit — or to the wrist of the sleeve, depending on your pattern. Even in shirt-type sleeves, it's sometimes a good idea to leave an inch or two of each end of the armscye seam un-sewn, to be finished after the side seam, so that you can switch to a flat-fell seam in the sleeve. In a sleeve, a flat-felled seam is more comfortable than a french seam. If you hem it by hand, it will be more elegant as well.
Close the gaps in the first stage of the french seam by top-stitching near the fold to make a mock-french seam in the corners of the pocket. (If the fabric is very expensive, slip-stitch by hand so that the gown will look as elegant inside as out.)
Press the seam and pocket to the front. It may be a good idea to hand-stitch the crease where the front folds into the pocket, to make it hang neatly. If you do this, stitch the crease all the way to the bottom of the pocket, stitching through all layers above and below the pocket opening.
It is easy to adapt this method to set a pocket into a flat-fell seam. Proceed as described above but sew the first stage of the french seam around the pocket only. Press, turn the garment right sides together. Trim the turned-under allowance on the front for an inch or so above and below the pocket. Sew the first stage of the flat-fell seam exactly the way you would have sewn the second stage of a french seam — it will *be* the second stage of a french seam where it goes around the pocket. Drawing the stitching lines on the fabric where you go past the places where you pre-trimmed the allowancesIt will help. When you sew the second stage of the flat fell, make a smooth U turn to end the stitching above and below the pocket opening. If you make two rows of top stitching, let them overlap; if only one, let the stitching loop back into itself.
If you want to set a side-seam pocket into a pre-graded flat-fell seam, you're on your own. I suggest sewing rectangles of fabric to the garment, and trimming them to pocket shape after the flat-fell seam is finished. You can pull the pocket out through the opening to make the middle of the first stage of the french seam — use lots of notch-marks to make sure you match properly! Make the ends of the seam mock-french. You will probably have to sew the ends of both stages of the seam by hand.
It might be easier to make the entire seam mock-french, but turning the edges in on a curve is a pain.
I've been reading about welt pockets, and have concluded that they are frightening, rather than difficult. A welt pocket is, after all, nothing but a bag sewn to a bound buttonhole, and bound buttonholes are easy — if somewhat tedious when you want more than one.
On the other hand, welt pockets do require you to cut a hole in your fabric. If you goof attaching a patch pocket or a side-seam pocket, you can rip it out and start over. Correcting an error in making a welt pocket is harder.
Also, welt pockets are suitable for garments made of expensive fabric. This tends to produce the phenomenon that gamblers sum up in the adage "Never bet scared money", meaning that if you can't afford to lose what you have bet, you will tense up and play badly.
Fear can be handled by practicing welt pockets before cutting into one's expensive wool. I'm tempted to put welt pockets into my next pair of denims, serene in the confidence that if I goof, I can pretend that I wanted a yoke in the back all along.
Trouble is, I don't like welt pockets. And they are wildly unsuitable for denim anyway.
Now what can I put a welt pocket into that I won't have to *wear*? And will I ever again be far enough ahead of what I need to make something just to be fooling around?
See a book on tailoring for a discussion of welt pockets from someone who has actually made one.
The original pocket was a purse worn under a skirt, reached through a slit in the outer garment. The idea of sewing the pocket to the hole, instead of supporting it on a separate belt, was slow to develop — perhaps because fabric was very expensive, and sewn-in pockets make it harder to re-use worn, outgrown, or inherited clothing.
If you always carry the same things in your pockets, the idea of pockets that you can transfer from one outfit to another still has appeal — but nowadays, we usually buckle the pocketed belt on over the outer garment.
"Money belts" may be worn under the outer clothing, or they may be disguised as regular belts. An easy and quick money belt: put your passport into a plastic bag to protect it from sweat, fold a bandanna around it, tie the bandanna around your waist. Be sure to pick a bandanna large enough to tie easily — a knot in the extreme corner is apt to jam.
One can also pin handkerchief-wrapped valuables inside various garments — preferably garments that one is not apt to remove and absent-mindedly leave behind. For ladies, the bra is traditional for this purpose.
Work aprons often feature lots of pockets and some — the carpenter's apron, for example — are nothing but tie-on pockets. Sometimes an apron serves as one enormous pocket — one holds the hem in one hand, and gathers up fallen fruit or scattered toys with the other.
See "Cobbler Aprons", "Carpenter aprons", and "Bags".
"3-Dimensional Pockets" are patch pockets which have darts, pleats, or gathers to make them stand out, box-like, on the garment. These are primarily for decoration; if anything heavy were put into the capacious pocket, it would distort it sadly. Therefore, 3-D pockets are left to your researches into fashion sewing.
Found on bike jerseys and in other places, this is a patch pocket that is sewn only on the bottom, and the sides are caught in the adjacent seams.
There are many variations. For example, a pocket narrower than the full distance from seam to seam might be caught in only one seam. The passport pocket in broadfall pants is a patch pocket at the top and sides, and the bottom is caught in the stitching that closes the bottom of the broadfall pocket. A similar pocket could be caught in the seam of a yoke. A pocket might be caught in seams on all three sides, though a suitable spot is more likely to be found in a bag or wallet than in a garment.
If the bottom of a seam-to-seam pocket is straight, you can sew it to the garment right sides together, and then fold it up into place. A seam is more graceful under pressure than a top-stitched fold.
An even better plan is to allow a full inch for seam allowance, and draw a line across the garment one inch above the desired bottom of the pocket. Right sides together, match the bottom edge of the pocket to the drawn line, and stitch a quarter inch from the raw edge. If the fabric is heavy, stitch again an eighth of an inch lower. Zig-zag over the raw edge, making it flat and smooth so as not to collect lint or catch on objects in the pocket. Now the weight of stuff in the pocket will rest on the fold, and be transferred to the stitching indirectly, so that the stitches are much less likely to break. This also eliminates the visible strain that sometimes makes pockets ugly when occupied, and it makes more room for thick objects.
I asked for a small pocket in my cycling shorts, so that I'd have a place to clip my Halt when not wearing a jersey. I expected a patch pocket top-stitched on as an afterthought, but the heavy wool would have made a lumpy patch pocket that would have worn out quickly.
Instead, the tailor cut a pocket the full width of one of the narrow panels, serged the bottom edge to the panel, and caught the sides of the pocket in the seams that joined this panel to the others. (Elastic fabric doesn't take kindly to darts, so bike shorts are made of vertical strips called "panels".) This construction is easier than making a patch pocket, and the resulting pocket is almost imperceptible when it is not in use. Since nothing bigger than a set of keys will ever be carried in the pocket, the serged bottom edge is plenty strong, and more durable than a folded edge would have been.
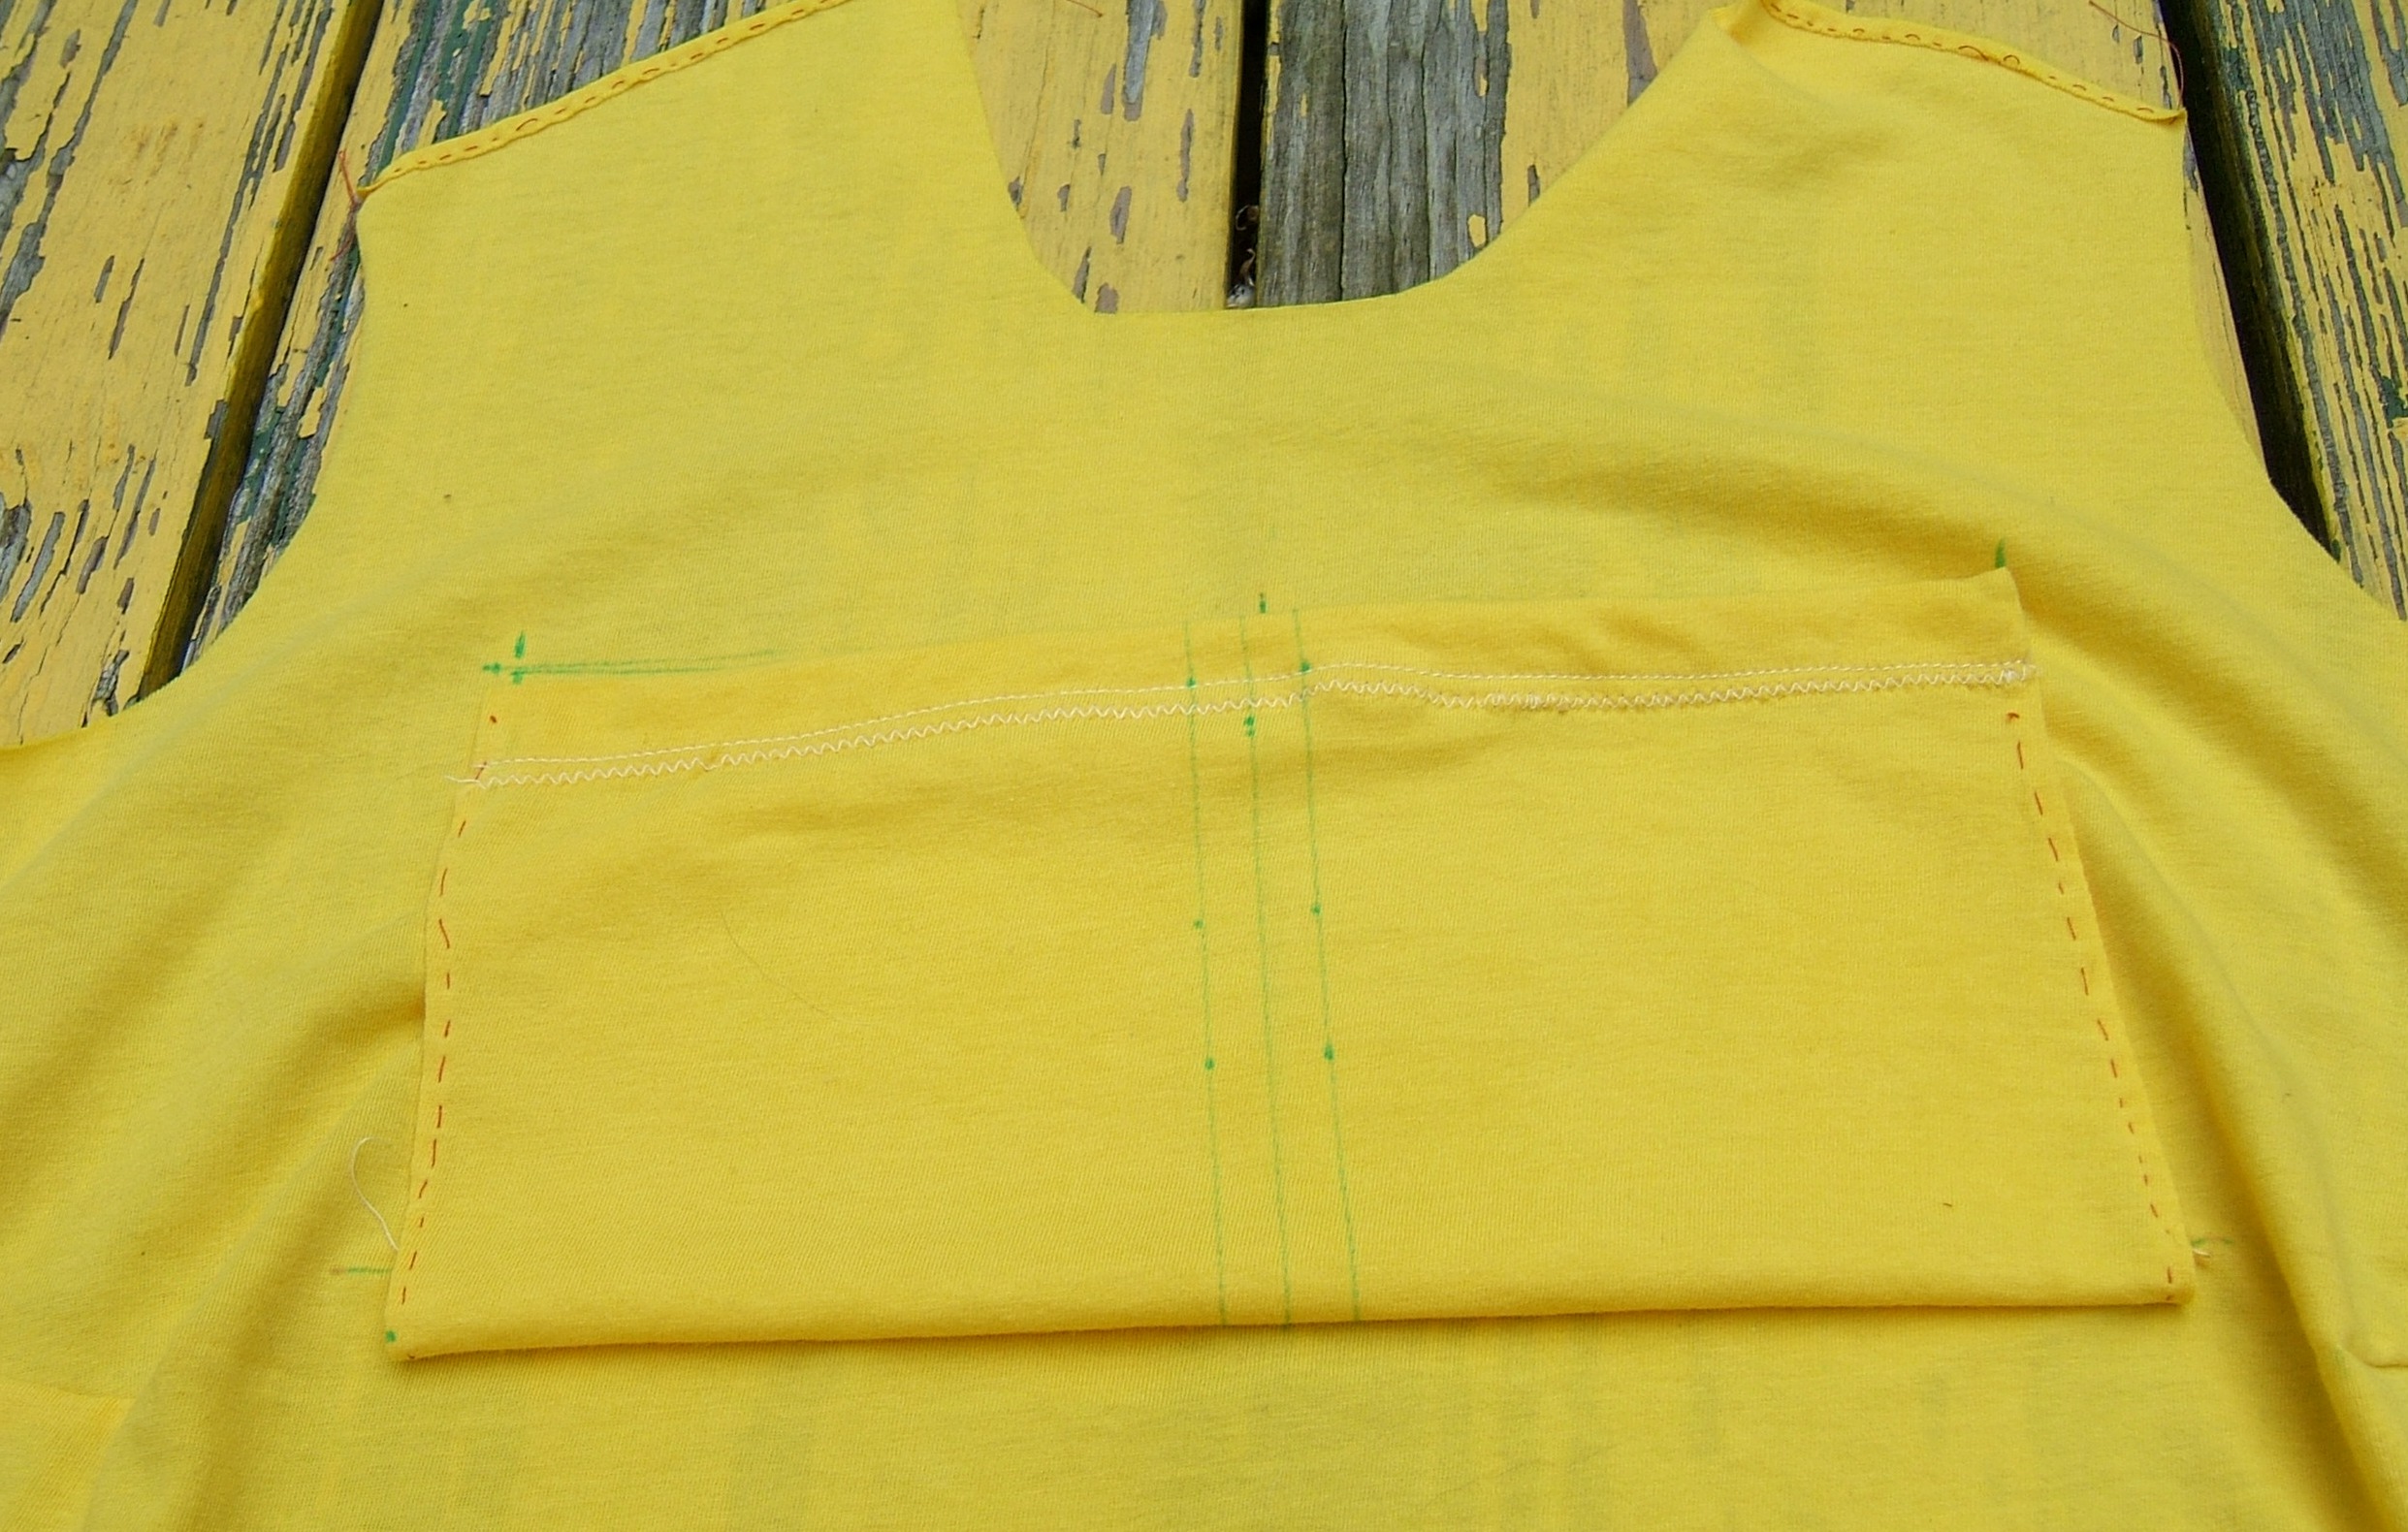
A seam-to-seam pocket is often wider than its height, and must be divided into two or more pockets by vertical rows of stitching. It is much easier to divide the pocket before the sides are caught in seams.
Before stitching, it is a good idea to glue-baste a patch of cotton felt, twill tape, or some-such to the wrong side of the fabric, where the top end of each row of stitching will be, to help keep the weight in the pockets from pulling the stitches through the fabric. Heavy-duty non-woven interfacing might do. A square of tape might need to be hemmed on permanently instead of glued temporarily.
If the fabric is knit, as for a bike jersey, it is quite possible to chew up the fabric with the feed dogs while trying to make the smooth loop at the top of the stitching. If the fabric is delicate, stretchy, or hard to handle, leave the top end of the machine stitching raw, and secure it later by working a bar tack by hand. (Hand-finishing also makes it easier to put the reinforcement on the back in the right spot. If the patch is to be cut on all edges, you can sew it on first, and trim it to shape afterward, which makes it much easier to center the bar tack!)
If the weight in the pocket will be particularly heavy, as on a canvas bag, you can work a bar tack through the holes in two small, flat buttons, one on each side. In mass production, rivets are used for this purpose, but buttons hold up better, and can fail without destroying the fabric.
Sometimes you need elastic in the top of a wide pocket. You can run it through a casing. You can appliqué it to the wrong side and then turn it down, hiding it inside the hem. You can sew it to the edge and turn it to the wrong side, or sew it to the edge and leave it hanging out.
In all cases but the last, piecing the elastic in a seam-to-seam pocket will make the work more durable. Choose twill tape the same width as the elastic. Sew an inch or so to each end of the elastic, so that only the tape is caught in the seam. This makes the seam less lumpy and less likely to give way.
The weight in my bike jersey pockets tends to stretch the jersey and make the pockets ride too low. I find that appliquéing a strip cut on the straight of grain of the main fabric along each of the lines where the dividing stitches will go, from a shade above the bottom of the pocket to the shoulder seam, corrects this problem. And looks rather neat.
29 September 2016: The straps should be starched while under heavy tension before being appliquéd to the back, so that they don't stretch. (A drawstring around the waist works even better.)
Back to Rough Sewing
Back
to the writing page
Back to
the links page